Love this? Save it for later!
Share the inspiration with your friends
Introduction
“I never thought a last-minute dash to the corner cafe would change my entire graduation cake game,” I told my friend as we sat sipping coffee last Saturday. Honestly, it was pure coincidence. I’d promised to bring something special for my niece’s graduation party but realized two hours before the event that store-bought just wouldn’t cut it. So, I grabbed a bag of espresso beans and some mascarpone, thinking, “Let me at least try to make a tiramisu.”
The cafe’s barista chatted while grinding fresh espresso, handing me a tiny sliver of edible gold leaf from a display case. “This makes every celebration feel a bit more magical,” she winked. I was skeptical but took it home anyway. The result? The Perfect Tiramisu Graduation Cake with Gold Leaf and Espresso Mascarpone—rich, creamy, and gloriously festive.
You know that feeling when something simple turns into a showstopper? That’s exactly what happened. I made a mess on the kitchen counter (because of course I did), but the sweet, boozy layers soaked with espresso and the delicate shimmer of gold leaf made everyone at the party pause and smile. This cake isn’t just a dessert; it’s a celebration centerpiece that’s surprisingly easy to prepare.
Maybe you’ve been there, scrambling to create something impressive without hours to spare. Well, let me share how this recipe became my go-to graduation cake and why it might just be perfect for your next celebration too.
Why You’ll Love This Recipe
- Quick & Easy: Comes together in under 1.5 hours, perfect for last-minute celebrations and busy schedules.
- Simple Ingredients: Uses everyday pantry staples with a few luxurious touches like espresso and gold leaf for wow factor.
- Perfect for Graduation Parties: Elegant enough for the big day, yet approachable for home bakers.
- Crowd-Pleaser: Combines creamy mascarpone and bold espresso flavors that both kids and adults rave about.
- Unbelievably Delicious: The texture of the espresso-soaked ladyfingers layered with smooth mascarpone is next-level comfort food.
This isn’t just another tiramisu recipe. The espresso mascarpone filling offers a deeper coffee flavor without bitterness, thanks to a little whipped cream folded in for lightness. The gold leaf adds a subtle shimmer that makes every slice feel like a celebration. I tested this recipe through several parties and, honestly, it never fails to impress. Whether you want a dessert that says “classy and fun” or simply crave a luscious treat, this tiramisu cake is the answer.
What Ingredients You Will Need
This recipe relies on a handful of quality ingredients that come together to create bold, authentic flavor and a luscious, creamy texture. Most are pantry staples or easy to find at your local market.
- Ladyfingers (Savoiardi): About 24 pieces – I recommend a crisp, firm brand for the best soak.
- Espresso: 1 cup (240 ml), freshly brewed and cooled – use strong, dark roast for rich coffee flavor.
- Mascarpone Cheese: 16 oz (450 g), room temperature – look for full-fat for the creamiest texture.
- Heavy Cream: 1 cup (240 ml), cold – this lightens the mascarpone filling beautifully.
- Granulated Sugar: 3/4 cup (150 g), to sweeten the mascarpone mixture just right.
- Egg Yolks: 4 large, room temperature – essential for that classic custard richness.
- Vanilla Extract: 1 teaspoon – adds subtle warmth and depth.
- Coffee Liqueur (optional): 2 tablespoons – I like Kahlúa for a little boozy kick, but you can skip it.
- Edible Gold Leaf Sheets: A few small sheets for decoration – available at specialty stores or online.
- Cocoa Powder: Unsweetened, for dusting the finished cake.
For substitutions, you can swap heavy cream with coconut cream for a dairy-free option, and almond flour ladyfingers work if you want gluten-free. Just make sure to keep the espresso bold; that’s key to this tiramisu’s signature flavor.
Equipment Needed

- Mixing Bowls: Several sizes, preferably glass or stainless steel for easy cleaning.
- Electric Mixer or Whisk: To whip the cream and mix the mascarpone filling smoothly.
- 9-inch (23 cm) Springform Pan: Ideal for layering and easy cake removal. If you don’t have one, a deep round cake pan lined with parchment will work.
- Fine Mesh Sieve: For dusting cocoa powder evenly over the top.
- Spatula: For folding ingredients gently without deflating the mascarpone mixture.
- Brush (optional): For applying the edible gold leaf carefully.
If you’re on a budget, hand-whisking the cream is doable but takes some elbow grease. I’ve found that a springform pan is worth the investment for layered desserts like this. Clean-up is straightforward since the mascarpone filling doesn’t stick much—just wipe the bowls immediately after use.
Preparation Method
- Brew the Espresso: Start by brewing 1 cup (240 ml) of strong espresso. Let it cool to room temperature. If using coffee liqueur, mix it into the espresso now. (About 5 minutes)
- Prepare the Mascarpone Mixture: In a medium bowl, whisk the 4 egg yolks with 3/4 cup (150 g) granulated sugar until pale and creamy. This usually takes 3-4 minutes with an electric mixer.
- Add Mascarpone and Vanilla: Gently fold the 16 oz (450 g) mascarpone cheese into the egg yolk mixture until smooth. Add 1 teaspoon vanilla extract for warmth.
- Whip the Heavy Cream: In a separate bowl, whip 1 cup (240 ml) cold heavy cream until stiff peaks form. Be careful not to overwhip — you want a light, billowy texture. (About 3-5 minutes)
- Fold Whipped Cream into Mascarpone: Using a spatula, gently fold the whipped cream into the mascarpone mixture. This keeps the filling airy and luscious. (Avoid over-mixing to keep fluffiness)
- Assemble the Cake: Quickly dip each ladyfinger into the cooled espresso (1-2 seconds per side — no soggy mess!) and arrange a single layer in the bottom of your 9-inch (23 cm) springform pan.
- Layer the Filling: Spread about half of the mascarpone mixture evenly over the ladyfingers. Repeat the dipping and layering with the remaining ladyfingers and mascarpone mixture.
- Chill: Cover the cake with plastic wrap and refrigerate for at least 4 hours, ideally overnight. This resting time allows the flavors to meld and the ladyfingers to soften perfectly.
- Finish and Decorate: Just before serving, dust the top with unsweetened cocoa powder using a fine mesh sieve. Carefully apply the edible gold leaf sheets on top for that celebratory sparkle. (Use a dry, clean brush or fingertip.)
If you accidentally soak the ladyfingers too long, the cake can get a bit soggy—so keep an eye on that step. The mascarpone filling should be smooth, not runny, and the espresso flavor should pop without overpowering.
Cooking Tips & Techniques
A few tricks from my kitchen adventures that really make this tiramisu cake sing:
- Egg Safety: I use fresh, high-quality eggs and keep the cake refrigerated to mitigate any risk. If you prefer, you can use pasteurized eggs or egg substitutes.
- Espresso Strength: Don’t skimp on the coffee flavor—it’s the soul of this cake. If espresso isn’t available, strong brewed coffee with a bit of instant coffee powder works.
- Folding Technique: When folding whipped cream into mascarpone, use a gentle motion from the bottom up to keep the air in. I once deflated the whole batch by stirring too hard—lesson learned!
- Ladyfinger Dipping: Quick dips are key. You want the edges soaked but the center still intact to avoid a mushy base.
- Chilling Time: Resist the urge to serve immediately. The resting period is crucial for texture and flavor melding.
- Gold Leaf Application: Handle with dry tools or fingers; it’s fragile and sticks easily to moisture or oils.
Multitasking tip: Brew your espresso first, then prepare the mascarpone while it cools to save time. It’s all about working smart in the kitchen!
Variations & Adaptations
This tiramisu graduation cake is pretty adaptable, so feel free to tweak:
- Alcohol-Free Version: Skip the coffee liqueur and add a splash of vanilla or almond extract for depth.
- Fruit Twist: Add a layer of fresh raspberries or sliced strawberries between mascarpone layers for a bright, seasonal note.
- Chocolate Lover’s: Mix a tablespoon of cocoa powder into the mascarpone filling or sprinkle shaved dark chocolate on top.
- Gluten-Free: Use gluten-free ladyfingers or substitute with thin almond flour cookies.
- Dairy-Free: Swap mascarpone with a blended mixture of soaked cashews and coconut cream, and use dairy-free whipped topping.
Personally, I once made a smaller batch in ramekins for an intimate dinner party, swapping the espresso for chai tea for a cozy spice twist. It was a hit—even with skeptics who thought tiramisu meant coffee only.
Serving & Storage Suggestions
Serve this tiramisu cake chilled, ideally straight from the refrigerator. Its creamy layers hold best at cool temperatures, and the espresso flavor really shines cold.
For presentation, the gold leaf creates a stunning centerpiece, so keep that in mind when plating. Pair with a glass of sweet dessert wine or a robust espresso for a perfect match.
Store leftover cake covered tightly in the fridge for up to 3 days. You can also freeze slices wrapped in plastic wrap and foil for up to 2 months. To thaw, place in the fridge overnight and dust with fresh cocoa before serving.
Flavors actually develop and mellow over time, so sometimes the next day’s slice tastes even better. Just don’t wait too long, or the ladyfingers can get overly soggy.
Nutritional Information & Benefits
Estimated per serving (based on 12 slices):
| Calories | 360 kcal |
|---|---|
| Fat | 25 g |
| Carbohydrates | 28 g |
| Protein | 6 g |
Mascarpone provides a rich source of calcium and vitamin A, while espresso offers a small caffeine boost. This recipe contains gluten and dairy, so adjust accordingly for allergies. The moderate sugar content balances sweetness without overpowering the coffee notes.
From a wellness perspective, this cake is a treat to savor mindfully—perfect for celebrating milestones with indulgence and joy.
Conclusion
The Perfect Tiramisu Graduation Cake with Gold Leaf and Espresso Mascarpone is one of those recipes that feels fancy but isn’t complicated. It combines familiar flavors with a touch of sparkle, making your celebration memorable without the stress. You can tweak it to suit your taste or dietary needs, which is why I keep coming back to it for all the big moments.
Give it a try for your next milestone, and I bet it’ll become a favorite in your dessert rotation too. I’d love to hear how you customize it—drop your thoughts or questions below. Remember, the best cakes are the ones made with a little love and a lot of personality. Happy baking!
FAQs
Can I make this tiramisu cake ahead of time?
Absolutely! In fact, chilling it overnight enhances the flavor and texture. Just cover tightly and refrigerate.
Is it safe to use raw egg yolks in the mascarpone mixture?
Using fresh, high-quality eggs and keeping the cake refrigerated minimizes risk. You can also use pasteurized eggs if preferred.
What can I use if I don’t have edible gold leaf?
You can skip it or substitute with chocolate shavings or cocoa powder for a beautiful finish without the shimmer.
How do I prevent the ladyfingers from getting soggy?
Dip them quickly in espresso—about 1-2 seconds per side—so they absorb flavor but stay firm.
Can I make this dessert in individual servings?
Yes! Layer in small glasses or ramekins for elegant single portions, perfect for dinner parties.
By the way, if you enjoy the coffee and mascarpone combo, you might want to try my espresso chocolate mousse or the decadent classic Italian panna cotta for other Italian-inspired treats.
Pin This Recipe!
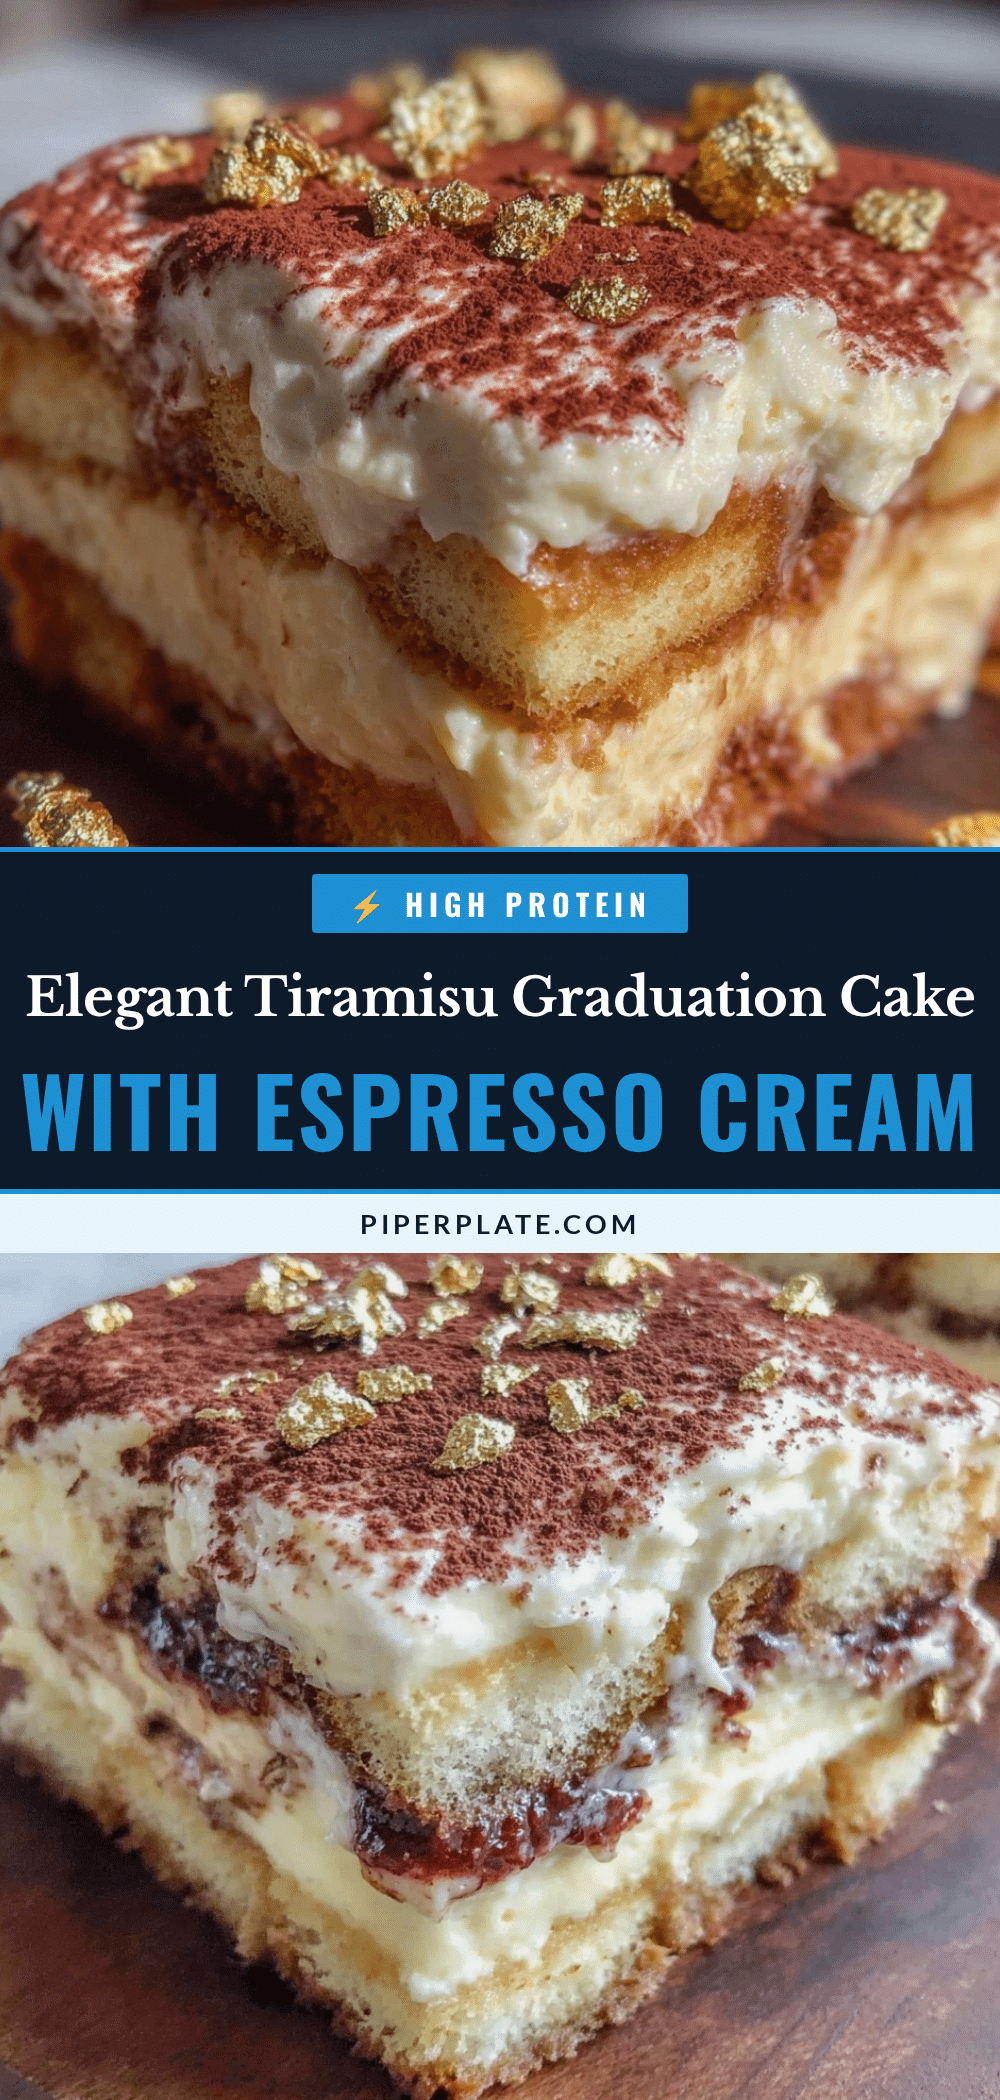
Perfect Tiramisu Graduation Cake Recipe with Gold Leaf and Espresso Mascarpone for Easy Celebration
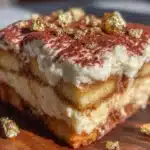
A rich, creamy tiramisu cake layered with espresso-soaked ladyfingers and mascarpone filling, decorated with edible gold leaf for a festive celebration dessert that’s quick and easy to prepare.
- Prep Time: 20 minutes
- Cook Time: 0 minutes
- Total Time: 4 hours 20 minutes
- Yield: 12 servings 1x
- Category: Dessert
- Cuisine: Italian
Ingredients
- About 24 ladyfingers (Savoiardi), crisp and firm
- 1 cup (240 ml) freshly brewed strong espresso, cooled
- 16 oz (450 g) mascarpone cheese, room temperature, full-fat
- 1 cup (240 ml) cold heavy cream
- 3/4 cup (150 g) granulated sugar
- 4 large egg yolks, room temperature
- 1 teaspoon vanilla extract
- 2 tablespoons coffee liqueur (optional, e.g., Kahlúa)
- A few small sheets edible gold leaf for decoration
- Unsweetened cocoa powder for dusting
Instructions
- Brew 1 cup (240 ml) of strong espresso and let it cool to room temperature. If using coffee liqueur, mix it into the espresso now.
- In a medium bowl, whisk 4 egg yolks with 3/4 cup (150 g) granulated sugar until pale and creamy, about 3-4 minutes with an electric mixer.
- Gently fold 16 oz (450 g) mascarpone cheese into the egg yolk mixture until smooth. Add 1 teaspoon vanilla extract.
- In a separate bowl, whip 1 cup (240 ml) cold heavy cream until stiff peaks form, about 3-5 minutes. Avoid overwhipping.
- Gently fold the whipped cream into the mascarpone mixture using a spatula to keep the filling airy.
- Quickly dip each ladyfinger into the cooled espresso for 1-2 seconds per side and arrange a single layer in the bottom of a 9-inch (23 cm) springform pan.
- Spread about half of the mascarpone mixture evenly over the ladyfingers.
- Repeat dipping and layering with the remaining ladyfingers and mascarpone mixture.
- Cover the cake with plastic wrap and refrigerate for at least 4 hours, ideally overnight.
- Before serving, dust the top with unsweetened cocoa powder using a fine mesh sieve.
- Carefully apply edible gold leaf sheets on top using a dry, clean brush or fingertip.
Notes
Use quick dips (1-2 seconds) for ladyfingers to avoid sogginess. Use fresh, high-quality eggs or pasteurized eggs for safety. Fold whipped cream gently to keep airiness. Chill at least 4 hours or overnight for best flavor and texture. Handle gold leaf with dry tools or fingers to avoid tearing.
Nutrition
- Serving Size: 1 slice (1/12th of c
- Calories: 360
- Fat: 25
- Carbohydrates: 28
- Protein: 6
Keywords: tiramisu, graduation cake, espresso mascarpone, gold leaf, celebration dessert, easy tiramisu, layered cake, Italian dessert