Love this? Save it for later!
Share the inspiration with your friends
“I wasn’t really planning on making a big deal out of the Fourth of July this year,” I confessed to my neighbor as we chatted over the cracked fence one sunny morning. “But then my son asked if we could have an American flag cake, you know, the one with all the stars and stripes.”
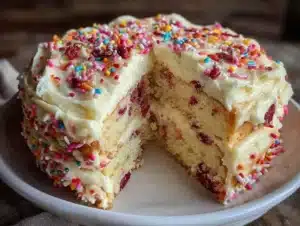
That request sent me scrambling to the kitchen with a bit of panic and a lot of curiosity. I’d never attempted an American flag sheet cake before, and honestly, the thought of making those perfect stripes and stars felt a bit intimidating. But here’s the thing—sometimes, the best recipes come from those last-minute, slightly chaotic moments. This cake ended up being not just visually stunning but incredibly tasty, with a whipped cream cheese frosting that was light yet had that tangy richness you want on such a festive dessert.
Maybe you’ve been there, staring at your pantry wondering how to turn simple ingredients into something special. That’s exactly why this Perfect Classic American Flag Sheet Cake with Whipped Cream Cheese Frosting is such a winner. It’s straightforward, fun, and a total crowd-pleaser, whether you’re hosting a backyard barbecue, a school picnic, or just craving a slice of something nostalgic and patriotic. I can tell you, that first bite, with the creamy frosting melting into the moist cake, made me realize this wasn’t just a holiday dessert—it was a new tradition in the making.
Why You’ll Love This Recipe
After testing this recipe countless times (including a few accidental tweaks because I forgot the baking powder once!), I’m confident this cake hits all the right notes. Here’s why it might just become your go-to for red, white, and blue celebrations:
- Quick & Easy: The whole cake comes together in under an hour, which means no stress even if you start late in the day.
- Simple Ingredients: No fancy or hard-to-find stuff here—just basics you probably have in your pantry and fridge.
- Perfect for Patriotic Occasions: Whether it’s Independence Day, Memorial Day, or a fun summer party, this cake steals the show.
- Crowd-Pleaser: Kids love the bright colors, and adults appreciate the classic flavors with a smooth cream cheese twist.
- Unbelievably Delicious: The whipped cream cheese frosting balances sweetness with just the right tang, complementing the tender cake layers.
This isn’t just another flag cake—what sets it apart is the whipped cream cheese frosting, which I’ve found is easier to spread and less heavy than traditional cream cheese frostings, but still full of that satisfying richness. The cake itself stays moist for days, meaning you can make it a day ahead and still impress your guests. Honestly, there’s something about the homemade red and blue layers that makes the whole experience feel special and festive.
What Ingredients You Will Need
This recipe uses simple, wholesome ingredients to deliver bold flavor and satisfying texture without the fuss. The components come together with pantry staples, and you can easily swap a few items if needed.
For the Cake Batter:
- 2 ½ cups (312g) all-purpose flour (for best texture, I like King Arthur brand)
- 2 ½ teaspoons baking powder
- ½ teaspoon salt
- 1 cup (226g) unsalted butter, softened (room temperature is key here)
- 1 ¾ cups (350g) granulated sugar
- 4 large eggs, room temperature
- 1 tablespoon vanilla extract
- 1 cup (240ml) whole milk (can substitute with almond or oat milk for dairy-free)
- Red and blue gel food coloring (gel works better than liquid for vibrant colors without thinning the batter)
For the Whipped Cream Cheese Frosting:
- 8 oz (226g) cream cheese, softened (I recommend Philadelphia brand for consistency)
- ½ cup (113g) unsalted butter, softened
- 3 cups (360g) powdered sugar, sifted
- 1 teaspoon vanilla extract
- 2 tablespoons heavy cream or milk (adds lightness to the frosting)
If you want to make it vegan or dairy-free, swap cream cheese and butter with vegan alternatives, and use plant-based milk in the frosting. For a gluten-free version, you can substitute the all-purpose flour with a 1:1 gluten-free baking flour blend.
Equipment Needed
- 9×13-inch (23×33 cm) rectangular baking pan – essential for that classic sheet cake shape. You can use glass or metal; metal tends to brown edges faster.
- Mixing bowls – at least two, since you’ll be dividing and coloring the batter.
- Electric mixer or stand mixer – this helps cream the butter and sugar properly and whips the frosting to smooth perfection. A hand mixer works fine too.
- Measuring cups and spoons – precise measurements matter, especially in baking!
- Spatula – for folding ingredients and spreading frosting.
- Toothpicks or cake tester – to check doneness without poking too many holes.
If you don’t have a stand mixer, no worries—I’ve whipped this up with just a hand mixer and it still turned out great. For spreading the frosting, an offset spatula makes life easier, but a butter knife or regular spatula will do just fine. Just be gentle with the cake layers so they don’t crumble.
Preparation Method
- Preheat and Prep: Heat your oven to 350°F (175°C). Grease your 9×13-inch pan with butter or non-stick spray, and lightly flour it to keep the cake from sticking. I usually line mine with parchment paper for easy removal.
- Mix Dry Ingredients: In a medium bowl, whisk together 2 ½ cups (312g) flour, 2 ½ teaspoons baking powder, and ½ teaspoon salt. Set aside.
- Cream Butter and Sugar: Using your mixer, beat 1 cup (226g) softened butter and 1 ¾ cups (350g) sugar on medium speed until light and fluffy, about 4-5 minutes. This step is crucial for a tender crumb.
- Add Eggs and Vanilla: Beat in 4 large eggs one at a time, making sure each egg is fully incorporated before adding the next. Stir in 1 tablespoon vanilla extract.
- Alternate Adding Dry Ingredients and Milk: With the mixer on low, add the dry ingredients in three additions, alternating with 1 cup (240ml) milk, starting and ending with the dry mix. Don’t overmix—stop when just combined.
- Divide and Color Batter: Carefully divide the batter into three bowls: one for the white (no coloring), one to color red, and one to color blue. Use gel food coloring and mix until the colors are vibrant but keep an eye on the batter’s consistency.
- Layer the Cake: Pour the white batter evenly into the prepared pan. Gently spoon the red batter in stripes on top of the white, followed by blue batter for the stars area (usually the top left corner). Use a toothpick or skewer to swirl slightly if you want a more blended look, but for the classic flag look, keep colors distinct.
- Bake: Bake for 35-40 minutes. Start checking at 35 minutes by inserting a toothpick in the center—if it comes out clean or with a few crumbs, it’s done. Avoid overbaking to keep it moist.
- Cool Completely: Let the cake cool in the pan for 15 minutes, then transfer to a wire rack or leave in the pan if you prefer frosting in the pan. Cooling fully before frosting is key to prevent melting.
- Prepare Frosting: Beat 8 oz (226g) softened cream cheese and ½ cup (113g) butter together until smooth. Gradually add 3 cups (360g) powdered sugar and 1 teaspoon vanilla extract. Add 2 tablespoons heavy cream or milk to reach a spreadable consistency. Whip well to get a light, fluffy texture.
- Frost the Cake: Spread the whipped cream cheese frosting evenly over the cooled cake. For a neat look, use an offset spatula or butter knife. You can add additional red and blue sprinkles or fresh berries if you want.
Cooking Tips & Techniques
One thing I learned the hard way: don’t rush the creaming stage. That butter and sugar need to be pale and fluffy for a soft cake. I once skipped this and the cake turned out dense—lesson learned!
Gel food coloring is your best friend here. Liquid colors can thin the batter, making it harder to get those sharp flag stripes. I keep a small set of gel colors handy just for occasions like this.
When layering the batter, don’t overmix the colors — the flag’s charm is in its crisp, clean stripes and star section. If you swirl too much, it becomes a messy red-white-blue swirl, which is tasty but not quite as patriotic.
Timing is everything: bake soon after mixing to get the best rise. And when frosting, make sure the cake is completely cool—warm cake + cream cheese frosting equals a melty mess.
Sometimes I multitask by whipping the frosting while the cake bakes. It saves time and lets the frosting get a little fluffy before spreading.
Variations & Adaptations
- Gluten-Free Option: Swap the all-purpose flour for a 1:1 gluten-free baking flour blend. The texture changes slightly but it still tastes fantastic.
- Vegan Version: Use vegan butter and cream cheese alternatives, plus plant-based milk. Replace eggs with flax eggs (1 tablespoon flaxseed meal + 3 tablespoons water per egg).
- Flavor Boost: Add a teaspoon of lemon zest to the batter or frosting for a fresh tang that pairs nicely with the cream cheese.
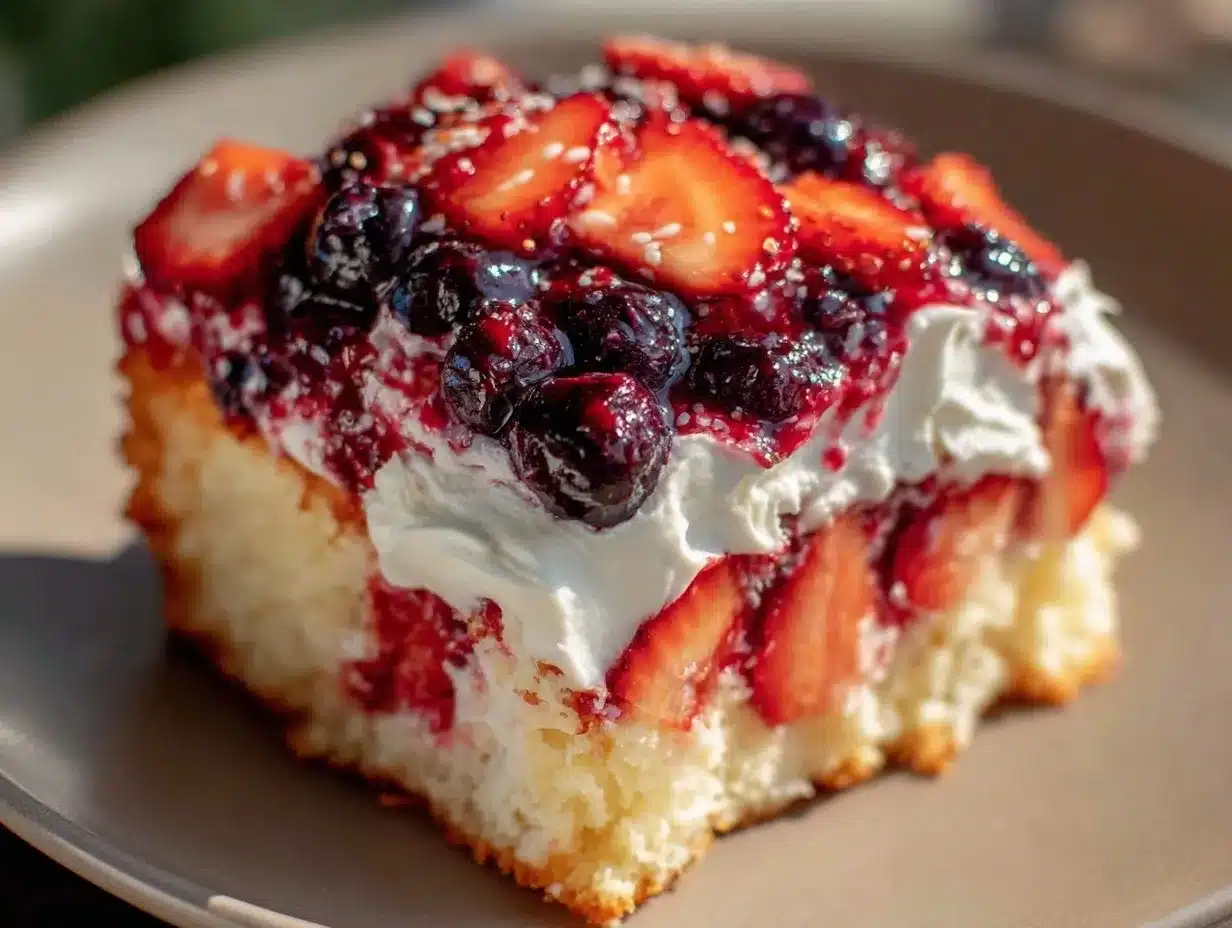
- Seasonal Twist: Try fresh blueberries and strawberries arranged on top instead of colored batter for a no-fuss flag design.
- Personal Favorite: I sometimes add a tablespoon of espresso powder to the batter. It sounds odd, but it deepens the chocolate undertones and makes the red and blue colors “pop” visually and flavor-wise.
Serving & Storage Suggestions
This cake is best served chilled or at room temperature. The whipped cream cheese frosting tastes amazing slightly cool but not too cold, so I usually take the cake out of the fridge 30 minutes before serving.
It pairs beautifully with a cold glass of lemonade, iced tea, or even a scoop of vanilla bean ice cream on the side for extra indulgence.
Store leftovers covered tightly in the refrigerator for up to 4 days. The cake keeps moist, and flavors meld nicely over time. You can freeze the unfrosted cake layers wrapped well in plastic wrap and foil for up to 2 months; thaw overnight in the fridge before frosting.
To reheat a slice, let it come to room temperature or warm gently in the microwave for 10-15 seconds. Avoid heating too long or the frosting will melt.
Nutritional Information & Benefits
One generous slice (about 1/12th of the cake) contains approximately 350-400 calories, depending on portion size and frosting amount. It provides a moderate amount of protein from eggs and cream cheese.
Key ingredients like cream cheese offer calcium, while the butter and sugar make it more of an occasional treat than everyday fare.
For those watching carbs, you can reduce sugar or try alternative sweeteners, though that may affect texture and flavor.
Gluten-free and vegan adaptations make this recipe accessible to many dietary needs without sacrificing taste.
From a wellness perspective, I like to think of this cake as a joyful treat that brings people together—sometimes, that’s just as important as the nutrition.
Conclusion
This Perfect Classic American Flag Sheet Cake with Whipped Cream Cheese Frosting is more than just a dessert—it’s a celebration on a plate. Whether you’re new to baking or an experienced home cook, this recipe delivers that nostalgic look and comforting flavor with minimal fuss.
Feel free to tweak the colors, try out the variations, or add your own creative spin. I’ve found that every time I make this cake, it brings out smiles and sparks conversations, and honestly, isn’t that what good food is all about?
If you try this recipe, I’d love to hear how it turned out or any fun twists you added. Share your thoughts and photos—I’m always excited to see your takes on this classic!
Here’s to sweet celebrations and delicious memories!
FAQs
Can I make the cake a day ahead?
Absolutely! Bake the cake and cool completely, then wrap tightly or store in an airtight container. Frost it just before serving for the best texture.
What if I don’t have gel food coloring?
You can use liquid food coloring, but add it sparingly to avoid thinning the batter. The colors may be less vibrant.
How do I prevent the cream cheese frosting from being too soft?
Make sure the cream cheese and butter are well chilled before mixing, and refrigerate the frosting for 15-20 minutes if it feels too soft before spreading.
Can I use a box cake mix instead of making from scratch?
Yes, but homemade batter offers better texture and flavor. If using box mix, add extra vanilla and consider adding a bit of sour cream or yogurt for moisture.
How should I decorate the cake if I’m short on time?
Simply frost the whole cake white and arrange fresh blueberries and sliced strawberries in a flag pattern on top—quick, easy, and just as festive.
Pin This Recipe!
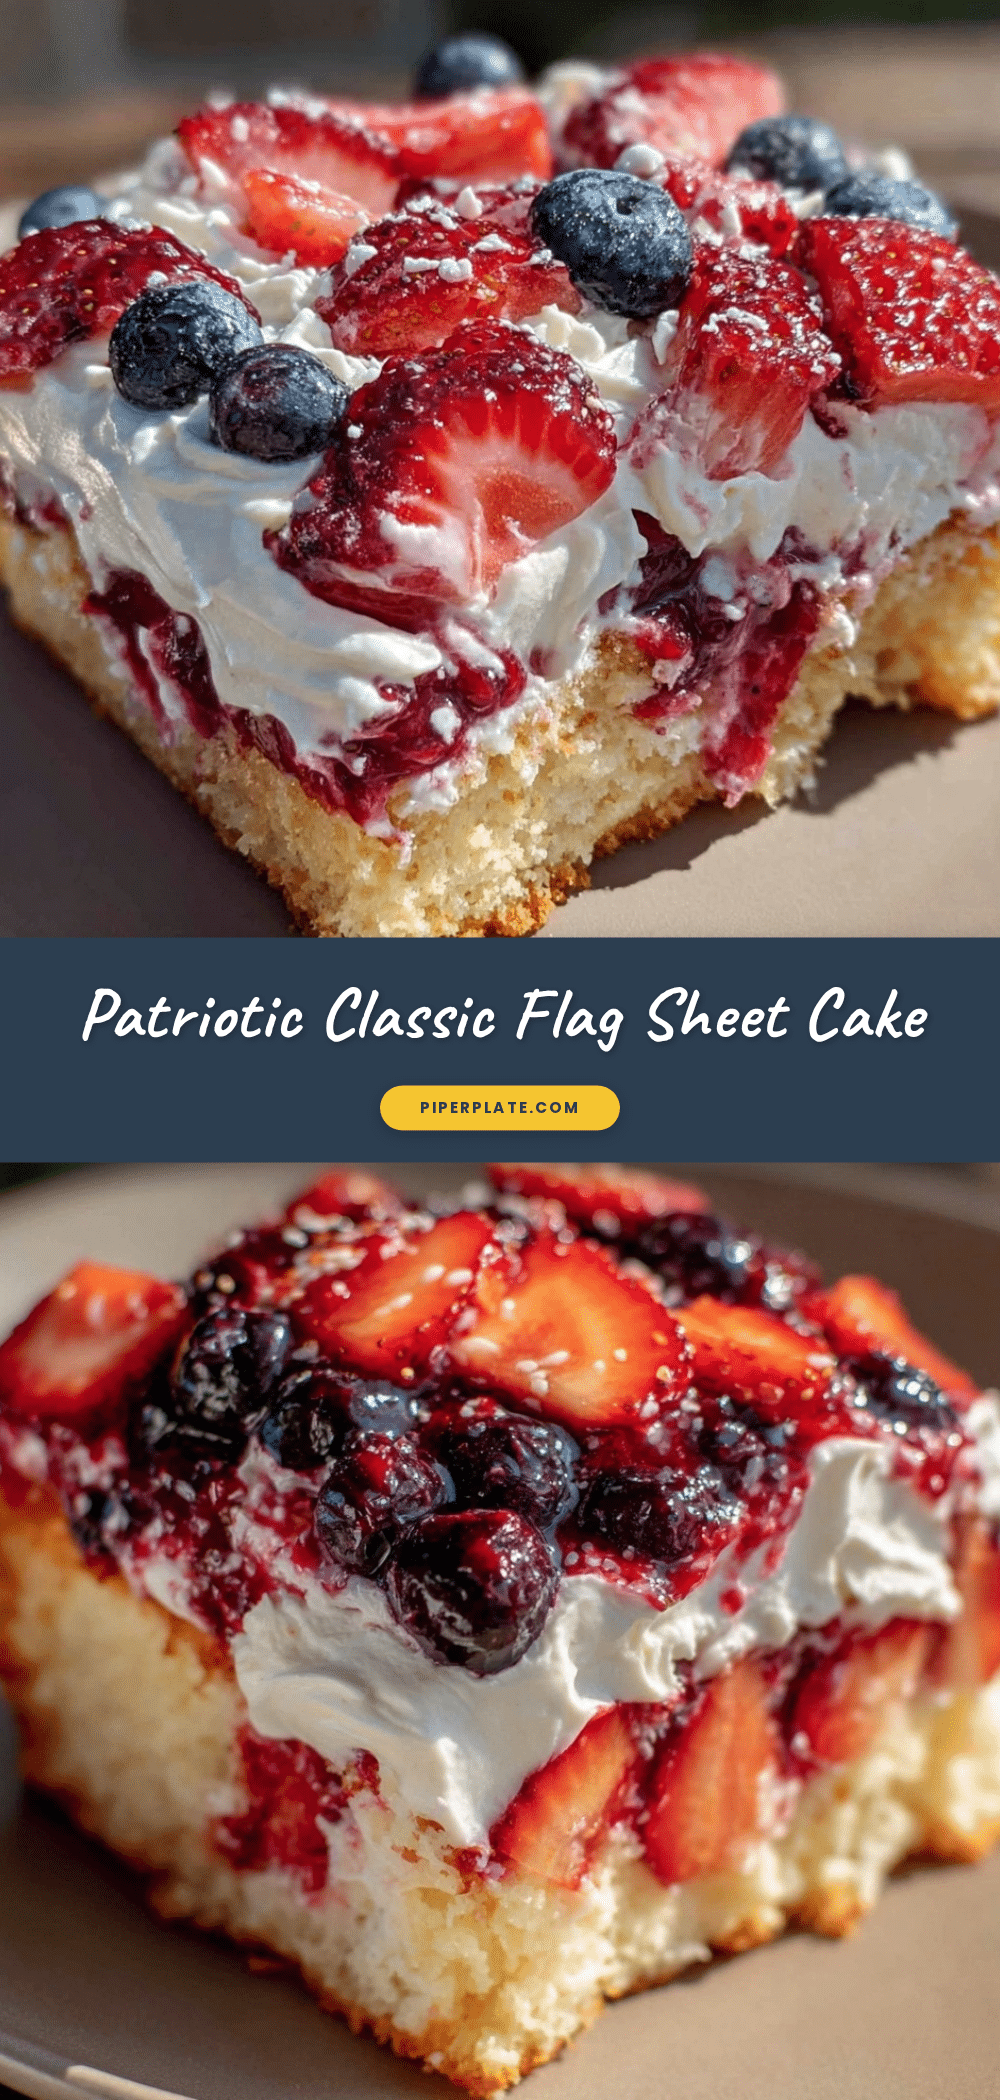
Perfect Classic American Flag Sheet Cake Recipe with Easy Whipped Cream Cheese Frosting

A visually stunning and delicious American flag sheet cake with light, tangy whipped cream cheese frosting, perfect for patriotic celebrations like the Fourth of July.
- Prep Time: 20 minutes
- Cook Time: 35-40 minutes
- Total Time: 55-60 minutes
- Yield: 12 servings 1x
- Category: Dessert
- Cuisine: American
Ingredients
- 2 ½ cups (312g) all-purpose flour
- 2 ½ teaspoons baking powder
- ½ teaspoon salt
- 1 cup (226g) unsalted butter, softened
- 1 ¾ cups (350g) granulated sugar
- 4 large eggs, room temperature
- 1 tablespoon vanilla extract
- 1 cup (240ml) whole milk (can substitute with almond or oat milk for dairy-free)
- Red and blue gel food coloring
- 8 oz (226g) cream cheese, softened
- ½ cup (113g) unsalted butter, softened
- 3 cups (360g) powdered sugar, sifted
- 1 teaspoon vanilla extract
- 2 tablespoons heavy cream or milk
Instructions
- Preheat oven to 350°F (175°C). Grease a 9×13-inch pan with butter or non-stick spray and lightly flour it or line with parchment paper.
- In a medium bowl, whisk together flour, baking powder, and salt. Set aside.
- Using a mixer, beat softened butter and sugar on medium speed until light and fluffy, about 4-5 minutes.
- Beat in eggs one at a time, fully incorporating each before adding the next. Stir in vanilla extract.
- With mixer on low, add dry ingredients in three additions, alternating with milk, starting and ending with dry ingredients. Mix until just combined.
- Divide batter into three bowls: one plain (white), one colored red, and one colored blue using gel food coloring.
- Pour white batter evenly into prepared pan. Spoon red batter in stripes on top of white, then blue batter in the top left corner for stars. Use a toothpick to swirl slightly if desired.
- Bake for 35-40 minutes. Check doneness at 35 minutes with a toothpick; it should come out clean or with a few crumbs.
- Cool cake in pan for 15 minutes, then transfer to wire rack or leave in pan to cool completely before frosting.
- For frosting, beat cream cheese and butter until smooth. Gradually add powdered sugar and vanilla extract. Add heavy cream or milk to reach spreadable consistency and whip until light and fluffy.
- Spread whipped cream cheese frosting evenly over cooled cake. Optionally decorate with red and blue sprinkles or fresh berries.
Notes
Use gel food coloring for vibrant colors without thinning the batter. Do not overmix colored batters to keep distinct stripes. Cool cake completely before frosting to prevent melting. Frosting can be chilled if too soft before spreading. Cake can be made a day ahead and stored covered in the refrigerator.
Nutrition
- Serving Size: 1 slice (1/12th of c
- Calories: 375
- Sugar: 35
- Sodium: 250
- Fat: 18
- Saturated Fat: 10
- Carbohydrates: 50
- Fiber: 1
- Protein: 5
Keywords: American flag cake, Fourth of July dessert, patriotic cake, sheet cake, whipped cream cheese frosting, easy cake recipe, red white and blue cake