Love this? Save it for later!
Share the inspiration with your friends
Introduction
“You know that moment when you’re scrambling to put together a dessert table for a last-minute graduation party, and the oven decides it’s on vacation? Yeah, I was right there last Saturday afternoon.”
My neighbor, Jenna, stopped by just as I realized I forgot to bake anything for her son’s big day. The fridge was half-empty, and honestly, I was already running late to help set up. She pulled out a small stack of recipes from her bag—scribbled notes from her cousin who swears by no-bake treats. Among them was this easy no-bake graduation dessert bars recipe featuring Oreo truffles and cake pops. It sounded like a dream: no oven required, simple ingredients, and a fun twist with those nostalgic Oreo truffles and cake pops that always steal the show.
Let me tell you, the way those creamy, crunchy bars came together in under an hour—and the smiles when guests dug in—made me a believer. I mean, maybe you’ve been there too, needing something quick that still looks like you put in effort. Honestly, this recipe has stuck with me since that hectic day. It’s perfect for anyone who loves classic sweets but doesn’t want to fuss with heat or complicated steps. Plus, the Oreo truffles add a touch of elegance without the stress.
So, if you’re hunting for a graduation dessert that feels special but stays chill (literally), this one might just be your new best friend.
Why You’ll Love This Recipe
After making these easy no-bake graduation dessert bars several times, I’ve come to appreciate what makes them a total winner—beyond just convenience.
- Quick & Easy: Everything comes together in about 45 minutes, perfect for those busy graduation days or last-minute gatherings.
- Simple Ingredients: No fancy shopping trips here. Most items like Oreos, cream cheese, and cake mix are pantry staples or easily found at any grocery store.
- Perfect for Celebrations: Whether it’s a graduation, birthday, or just a sweet treat to share, these bars with Oreo truffles and cake pops add a festive flair.
- Crowd-Pleaser: Kids, teens, adults—everyone can’t get enough. The Oreo truffles bring that familiar, irresistible cookie flavor, while the cake pops add fun and whimsy.
- Unbelievably Delicious: The texture is spot-on—creamy, crunchy, and just sweet enough. The no-bake nature keeps the Oreo truffles soft and luscious, which I’ve found makes them better than many baked desserts.
This isn’t just another no-bake bar recipe. The trick is folding in the Oreo truffles and cake pops, which turned out to be a game-changer. I love how the cream cheese base holds everything together without being too heavy. Plus, you can tweak flavors or colors to match your grad’s school spirit easily.
Honestly, after the first bite, you might find yourself sneaking a second piece before anyone else gets to the table. It’s comfort food, celebration-ready, and stress-free all at once.
What Ingredients You Will Need
This recipe uses simple, wholesome ingredients to deliver bold flavor and satisfying texture without the fuss. Most are pantry staples, and you can swap a few for dietary needs or personal preferences.
- For the Base & Bars:
- 18 Oreo cookies (regular or golden), crushed (I prefer the classic Oreos for that iconic taste)
- 8 oz (225g) cream cheese, softened (room temperature helps with mixing smoothly)
- 1 cup (240ml) heavy cream or whipping cream (use dairy-free coconut cream for a vegan option)
- 1/2 cup (115g) unsalted butter, melted (I use Land O’Lakes for consistent creaminess)
- 1 1/2 cups (180g) powdered sugar, sifted (for smooth sweetness)
- 1 tsp vanilla extract (real vanilla makes a noticeable difference)
- For the Oreo Truffles:
- 15 Oreo cookies, finely crushed
- 4 oz (115g) cream cheese, softened
- 8 oz (225g) semi-sweet chocolate or candy melts for coating (Wilton brand works well)
- For the Cake Pops:
- 1 box of cake mix (any flavor—chocolate or vanilla works best)
- 1/2 cup (120ml) water, vegetable oil, and eggs as called for on cake mix box
- 8 oz (225g) frosting (store-bought or homemade, vanilla or chocolate)
- 8 oz (225g) candy melts or chocolate for dipping
- Sprinkles or edible decorations (optional, for graduation theme)
For a fun twist, I sometimes replace the cake mix with a gluten-free option or swap the frosting for dairy-free cream cheese frosting. If you’re after more color matching your grad’s school, food coloring in the candy melts or frosting is a simple hack.
Equipment Needed
- Mixing bowls – a medium and a large one work perfectly
- Electric mixer or stand mixer (helps get that cream cheese and heavy cream smooth and fluffy)
- 8×8-inch (20×20 cm) square baking pan for the bars
- Food processor or zip-top bag and rolling pin to crush Oreos
- Baking sheet lined with parchment paper or silicone mat for truffles and cake pops
- Cake pop sticks or lollipop sticks (these make serving easier and look festive)
- Microwave-safe bowls for melting chocolate or candy melts
- Optional: cooling rack to set dipped truffles and pops
I’ve used a hand mixer when in a pinch, but honestly, the stand mixer speeds things up and gives better texture. For melting chocolate, a double boiler works too, but the microwave method is quick and safe if you watch it carefully. If you don’t have cake pop sticks, small wooden skewers can work as a substitute.
Preparation Method
- Prepare the Oreo Truffles: Crush 15 Oreos finely in a food processor or in a sealed bag using a rolling pin. Mix crushed Oreos with 4 oz (115g) softened cream cheese until combined. Roll mixture into 1-inch (2.5 cm) balls and place on a parchment-lined baking sheet. Chill in the fridge for 30 minutes.
- Make the Base for Dessert Bars: In a large bowl, beat 8 oz (225g) softened cream cheese with 1/2 cup (115g) melted butter until smooth. Add 1 1/2 cups (180g) powdered sugar and 1 tsp vanilla extract. Mix until creamy.
- Whip the Heavy Cream: In a separate bowl, use an electric mixer to whip 1 cup (240ml) heavy cream until stiff peaks form. Gently fold the whipped cream into the cream cheese mixture until fully combined. This keeps the bars light and fluffy.
- Add Crushed Oreos: Fold in the crushed 18 Oreos to the creamy batter, mixing just enough to distribute evenly without crushing the chunks completely.
- Assemble the Bars: Pour the mixture into an 8×8-inch (20×20 cm) pan lined with parchment paper. Smooth the top with a spatula. Place chilled Oreo truffles evenly spaced on top, gently pressing them slightly into the batter.
- Chill: Refrigerate the bars for at least 3 hours or overnight until firm. This step is crucial for no-bake bars to set properly.
- Prepare Cake Pops: Bake cake according to box instructions (about 25-30 minutes at 350°F / 175°C). Let cool completely. Crumble cake into a large bowl and mix with 8 oz (225g) frosting until the mixture holds shape but is not too sticky.
- Form Cake Pops: Shape cake mixture into 1 1/2-inch (4 cm) balls. Insert sticks into each ball and chill for 30 minutes to firm up.
- Dip Cake Pops and Truffles: Melt 8 oz (225g) chocolate or candy melts in microwave-safe bowl in 30-second intervals, stirring between each. Dip each cake pop and Oreo truffle into melted chocolate, tapping off excess. Decorate with sprinkles if desired.
- Set: Place dipped pops and truffles on parchment paper to set. Chill briefly if needed to harden the coating.
- Serve: Slice bars into squares, including one Oreo truffle per serving, and arrange cake pops on a stand or platter for a festive graduation spread.
Cooking Tips & Techniques
When making these no-bake dessert bars, timing and texture are everything. Here are some tricks I’ve learned:
- Softened Cream Cheese Is Key: If your cream cheese is too cold, you’ll get lumps. I usually leave it out for 30 minutes or microwave it for 10 seconds (careful not to melt!) before mixing.
- Don’t Overmix the Whipped Cream: Fold gently to keep the airy texture. Overmixing will deflate your batter and make the bars dense.
- Crush Oreos Just Right: Leave some chunks for texture but crush enough so they blend well. I use a zip-top bag and a rolling pin—easy cleanup and control.
- Chill Truffles and Cake Pops Properly: If they’re not firm, they’ll fall apart when dipped. Patience here pays off.
- Melting Chocolate: Heat in short bursts, stirring often to prevent burning. If chocolate seizes, adding a tiny bit of vegetable oil can help smooth it out.
- Make Ahead: These bars and truffles can be made a day ahead, which is great for busy graduation days. Just keep them refrigerated until serving.
One time, I forgot to chill the bars long enough and the truffles sank slightly, but honestly, it still tasted great—just a little less neat. So don’t stress too much if things aren’t picture-perfect!
Variations & Adaptations
You can easily switch up this recipe to suit your taste or dietary needs:
- Flavor Variations: Try using golden Oreos instead of classic for a vanilla twist. Or add a swirl of peanut butter or Nutella into the cream cheese mix for a richer flavor.
- Dietary Adjustments: Swap regular Oreos for gluten-free versions. Use coconut cream and dairy-free cream cheese to make it vegan-friendly.
- Seasonal Themes: Change the cake pop coating colors and sprinkles to match any holiday or school colors. For summer graduations, fresh berry puree in the cream cheese mix adds a fruity note.
- Alternative Bases: Instead of Oreos, crushed graham crackers or digestive biscuits work well for a different texture.
- Personal Twist: I once added finely chopped toasted nuts into the bars for a little crunch surprise—totally worth the extra step!
Serving & Storage Suggestions
Serve these dessert bars chilled for the best texture and flavor. The cool cream cheese base feels refreshing, especially alongside the slightly crunchy Oreo truffles. Arrange the cake pops upright on a stand or in a decorated vase for a fun, eye-catching display.
Pair these treats with a cold glass of milk, iced coffee, or sparkling lemonade to balance the sweetness. For a more festive touch, a light fruit salad on the side can be a nice contrast.
Store leftovers covered tightly in the refrigerator for up to 4 days. Cake pops and truffles keep well in airtight containers, too. If you want to freeze them, wrap individually in plastic wrap and place in a freezer-safe container for up to 2 months. Thaw in the fridge before serving.
Flavors actually deepen after a day in the fridge, so if you can wait, they taste even better the next day!
Nutritional Information & Benefits
Each serving of these easy no-bake graduation dessert bars provides a satisfying treat with estimated values around 300 calories, 18g fat, 35g carbohydrates, and 4g protein. While they’re definitely a sweet indulgence, the cream cheese adds a bit of calcium and protein, and using real vanilla and quality ingredients makes a difference in flavor and quality.
For those mindful of allergens, note this recipe contains dairy, gluten (unless using gluten-free Oreos and cake), and eggs (in cake). Substitutions can address most intolerances.
Honestly, these bars and treats are perfect for celebrating without overthinking nutrition—sometimes a special occasion calls for a little sweet joy.
Conclusion
This easy no-bake graduation dessert bars recipe with Oreo truffles and cake pops is a lifesaver for anyone needing a quick, delicious, and crowd-pleasing treat. The combination of creamy, crunchy, and sweet hits all the right notes without heating up your kitchen or demanding hours of prep.
Feel free to play with the flavors and decorations to make it uniquely yours. I love how this recipe brings a smile to every celebration, and I hope it becomes a staple for your special moments too.
Give it a try, leave a comment with your favorite twist, or share your success story. After all, good food is meant to be shared and enjoyed!
FAQs
How long do the no-bake bars need to chill?
They need at least 3 hours in the refrigerator to set properly, but overnight chilling is best for firm bars.
Can I make the Oreo truffles and cake pops ahead of time?
Yes! Both can be made a day or two in advance and stored in airtight containers in the fridge.
What if I don’t have a food processor to crush Oreos?
No worries—place the Oreos in a zip-top bag and crush them with a rolling pin or the bottom of a heavy pan.
Can I use a different cookie instead of Oreos?
Absolutely! Graham crackers, digestive biscuits, or any crunchy cookie work well as alternatives.
Is there a way to make this recipe vegan or dairy-free?
Yes, swap cream cheese and heavy cream for dairy-free versions, use vegan butter, and choose vegan cake mix and frosting to adapt the recipe.
For a similar crowd-pleasing treat with chocolatey goodness, you might enjoy the crispy garlic chicken recipe I shared recently, which also comes together easily for parties. And if you’re keen on no-bake sweets, the classic Oreo cheesecake is another hit that pairs well with these bars for dessert spreads.
Pin This Recipe!
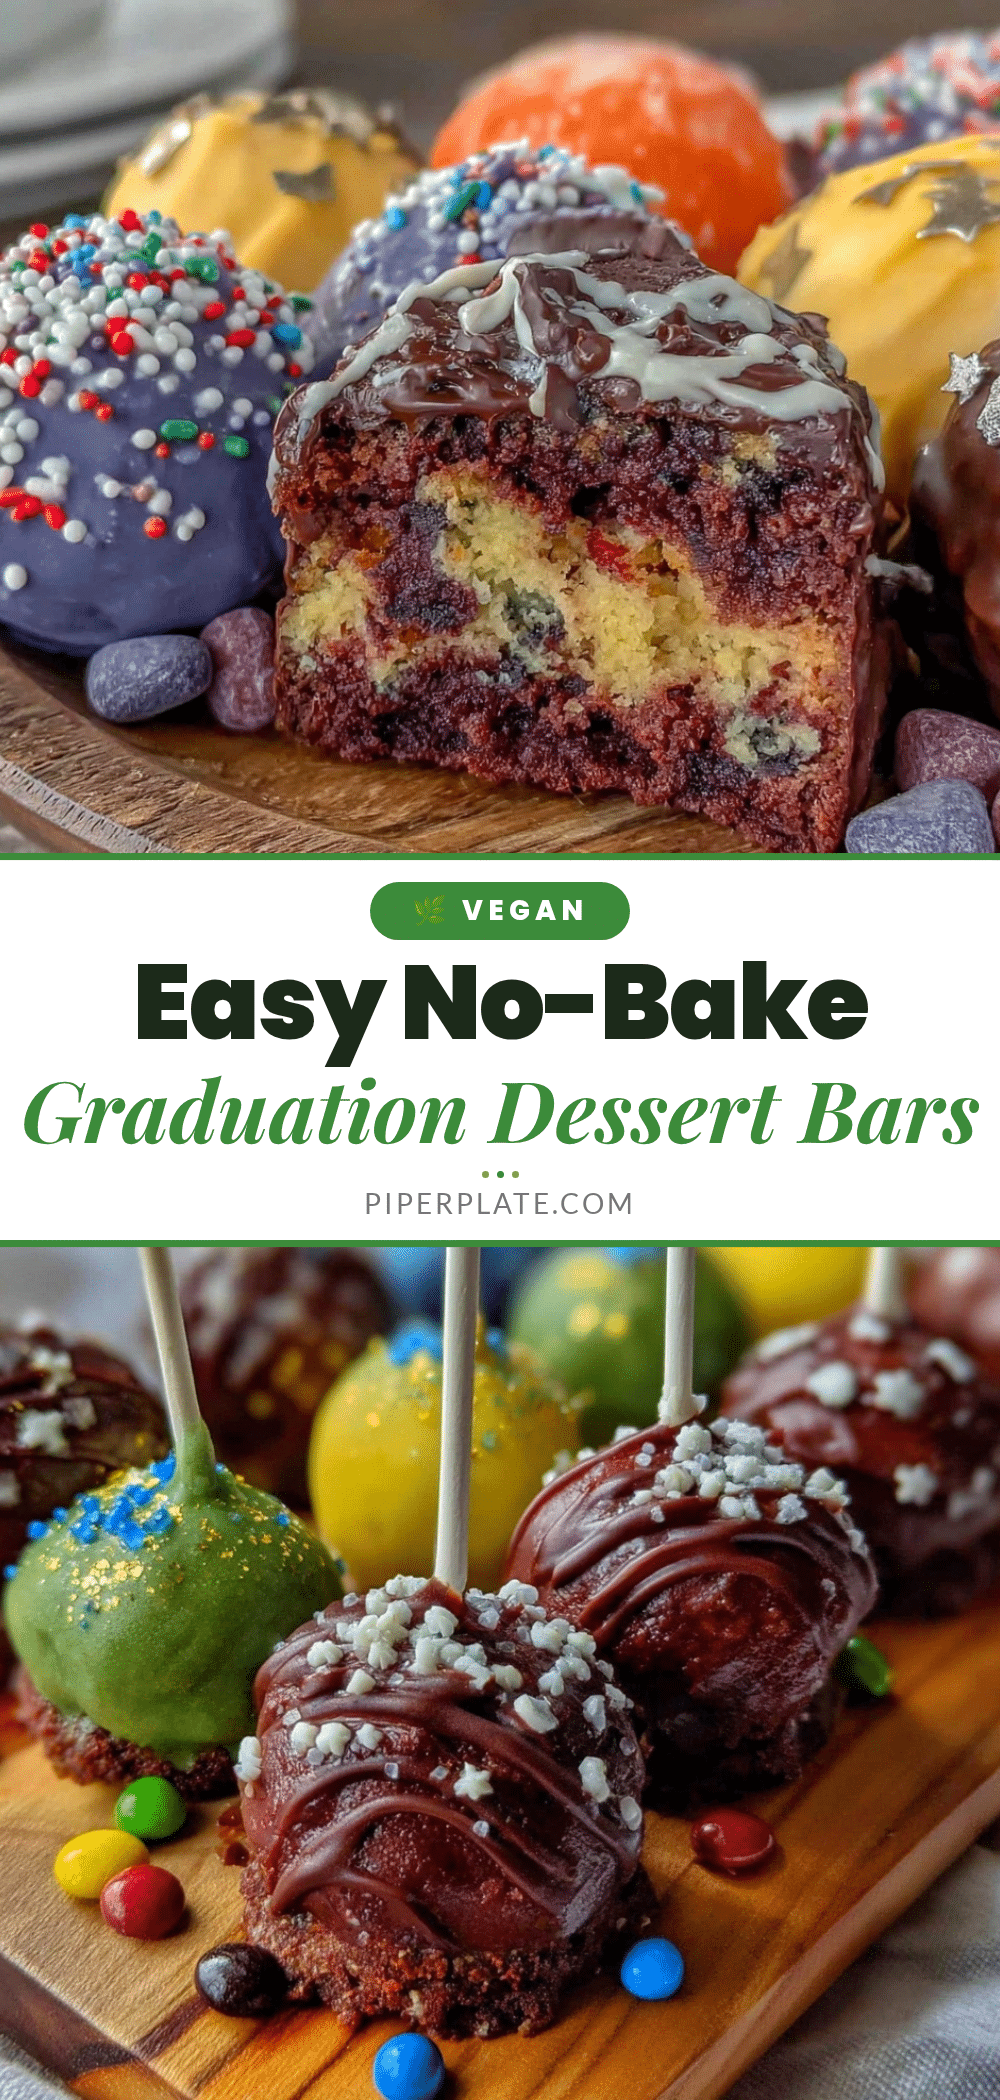
Easy No-Bake Graduation Dessert Bars Recipe with Oreo Truffles and Cake Pops

A quick and easy no-bake dessert perfect for graduation parties featuring creamy, crunchy bars with Oreo truffles and festive cake pops. No oven needed and ready in under an hour.
- Prep Time: 30 minutes
- Cook Time: 30 minutes
- Total Time: 1 hour
- Yield: 12 servings 1x
- Category: Dessert
- Cuisine: American
Ingredients
- 18 Oreo cookies (regular or golden), crushed
- 8 oz cream cheese, softened
- 1 cup heavy cream or whipping cream (use dairy-free coconut cream for vegan option)
- 1/2 cup unsalted butter, melted
- 1 1/2 cups powdered sugar, sifted
- 1 tsp vanilla extract
- 15 Oreo cookies, finely crushed (for truffles)
- 4 oz cream cheese, softened (for truffles)
- 8 oz semi-sweet chocolate or candy melts for coating (for truffles)
- 1 box cake mix (any flavor)
- 1/2 cup water (or as called for on cake mix box)
- 1/2 cup vegetable oil (or as called for on cake mix box)
- Eggs as called for on cake mix box
- 8 oz frosting (vanilla or chocolate)
- 8 oz candy melts or chocolate for dipping
- Sprinkles or edible decorations (optional)
Instructions
- Prepare the Oreo Truffles: Crush 15 Oreos finely. Mix with 4 oz softened cream cheese. Roll into 1-inch balls and chill for 30 minutes.
- Make the Base for Dessert Bars: Beat 8 oz softened cream cheese with 1/2 cup melted butter until smooth. Add 1 1/2 cups powdered sugar and 1 tsp vanilla extract; mix until creamy.
- Whip the Heavy Cream: Whip 1 cup heavy cream until stiff peaks form. Fold gently into cream cheese mixture.
- Add Crushed Oreos: Fold in 18 crushed Oreos, mixing gently to distribute.
- Assemble the Bars: Pour mixture into an 8×8-inch pan lined with parchment paper. Smooth top. Place chilled Oreo truffles evenly spaced on top, pressing slightly into batter.
- Chill: Refrigerate bars for at least 3 hours or overnight until firm.
- Prepare Cake Pops: Bake cake according to box instructions (about 25-30 minutes at 350°F). Cool completely. Crumble cake and mix with 8 oz frosting until mixture holds shape.
- Form Cake Pops: Shape mixture into 1 1/2-inch balls. Insert sticks and chill for 30 minutes.
- Dip Cake Pops and Truffles: Melt 8 oz chocolate or candy melts. Dip each cake pop and truffle, tap off excess, decorate with sprinkles if desired.
- Set: Place dipped items on parchment paper to set. Chill briefly if needed.
- Serve: Slice bars into squares including one Oreo truffle per serving. Arrange cake pops on a stand or platter.
Notes
[‘Use softened cream cheese to avoid lumps.’, ‘Fold whipped cream gently to keep airy texture.’, ‘Leave some Oreo chunks for texture.’, ‘Chill truffles and cake pops properly to prevent falling apart when dipped.’, ‘Melt chocolate in short bursts, stirring often to prevent burning.’, ‘Make bars and truffles a day ahead for best results.’, ‘Substitute gluten-free Oreos and dairy-free ingredients for vegan or gluten-free versions.’, ‘Use food coloring in candy melts or frosting to match school colors.’, ‘Small wooden skewers can substitute cake pop sticks.’]
Nutrition
- Serving Size: 1 bar square with 1
- Calories: 300
- Sugar: 25
- Sodium: 150
- Fat: 18
- Saturated Fat: 10
- Carbohydrates: 35
- Fiber: 1
- Protein: 4
Keywords: no-bake dessert, graduation dessert, Oreo truffles, cake pops, easy dessert bars, no oven dessert, party dessert