Love this? Save it for later!
Share the inspiration with your friends
“The hot July sun was beating down on the pavement last Saturday when the faint scent of fresh strawberries hit me — and suddenly I was eight years old, sitting cross-legged on the red picnic blanket at Mrs. Thompson’s block party. Her hands were busy assembling something colorful and sweet, and honestly, I was half-distracted by the buzz of kids running around and the distant hum of a lawnmower.
She had this cracked ceramic tart dish, chipped at the edges, but it held magic. The way she layered blueberries and strawberries atop that creamy, white filling was mesmerizing — like a flag made edible, a bright burst of summer on a plate. I remember thinking how cool it was that something so simple could look so stunning and taste even better.
Years later, I tried recreating that Easy No-Bake Patriotic Cheesecake Flag Tart, chasing that sensory memory I could almost touch but never quite catch. It’s funny how food ties to moments like that — not just the flavors, but the textures, the colors, and the slight mess the cream made on my fingers when I sneaked a taste before anyone noticed.
Maybe you’ve been there too — a random whiff of a familiar smell or a glimpse of something red, white, and blue making you pause. This recipe isn’t just a dessert; it’s a little time capsule of those summers, of childhood wonder, and a reminder that sometimes the best meals don’t need a stove or an oven. This tart stays with me because it’s easy, festive, and, honestly, a perfect way to make any 4th of July gathering feel a bit more special.
Why You’ll Love This Easy No-Bake Patriotic Cheesecake Flag Tart Recipe
After countless trials in my kitchen, I can say this recipe nails that elusive balance between simplicity and wow factor. It’s a dessert that looks like you spent hours fussing over it but comes together in under 30 minutes—no oven required!
- Quick & Easy : Ready in just about 25 minutes, perfect for busy holiday prep or last-minute dessert needs.
- Simple Ingredients : Uses ingredients you likely have on hand—cream cheese, whipped topping, fresh berries, and a ready-made crust.
- Perfect for 4th of July : That vibrant red, white, and blue presentation fits right into patriotic celebrations or summer BBQs.
- Crowd-Pleaser : Kids and adults alike always ask for seconds—there’s just something about the creamy texture paired with fresh fruit.
- Unbelievably Delicious : The no-bake filling is silky smooth with just the right tang from cream cheese, balancing the sweetness of the berries.
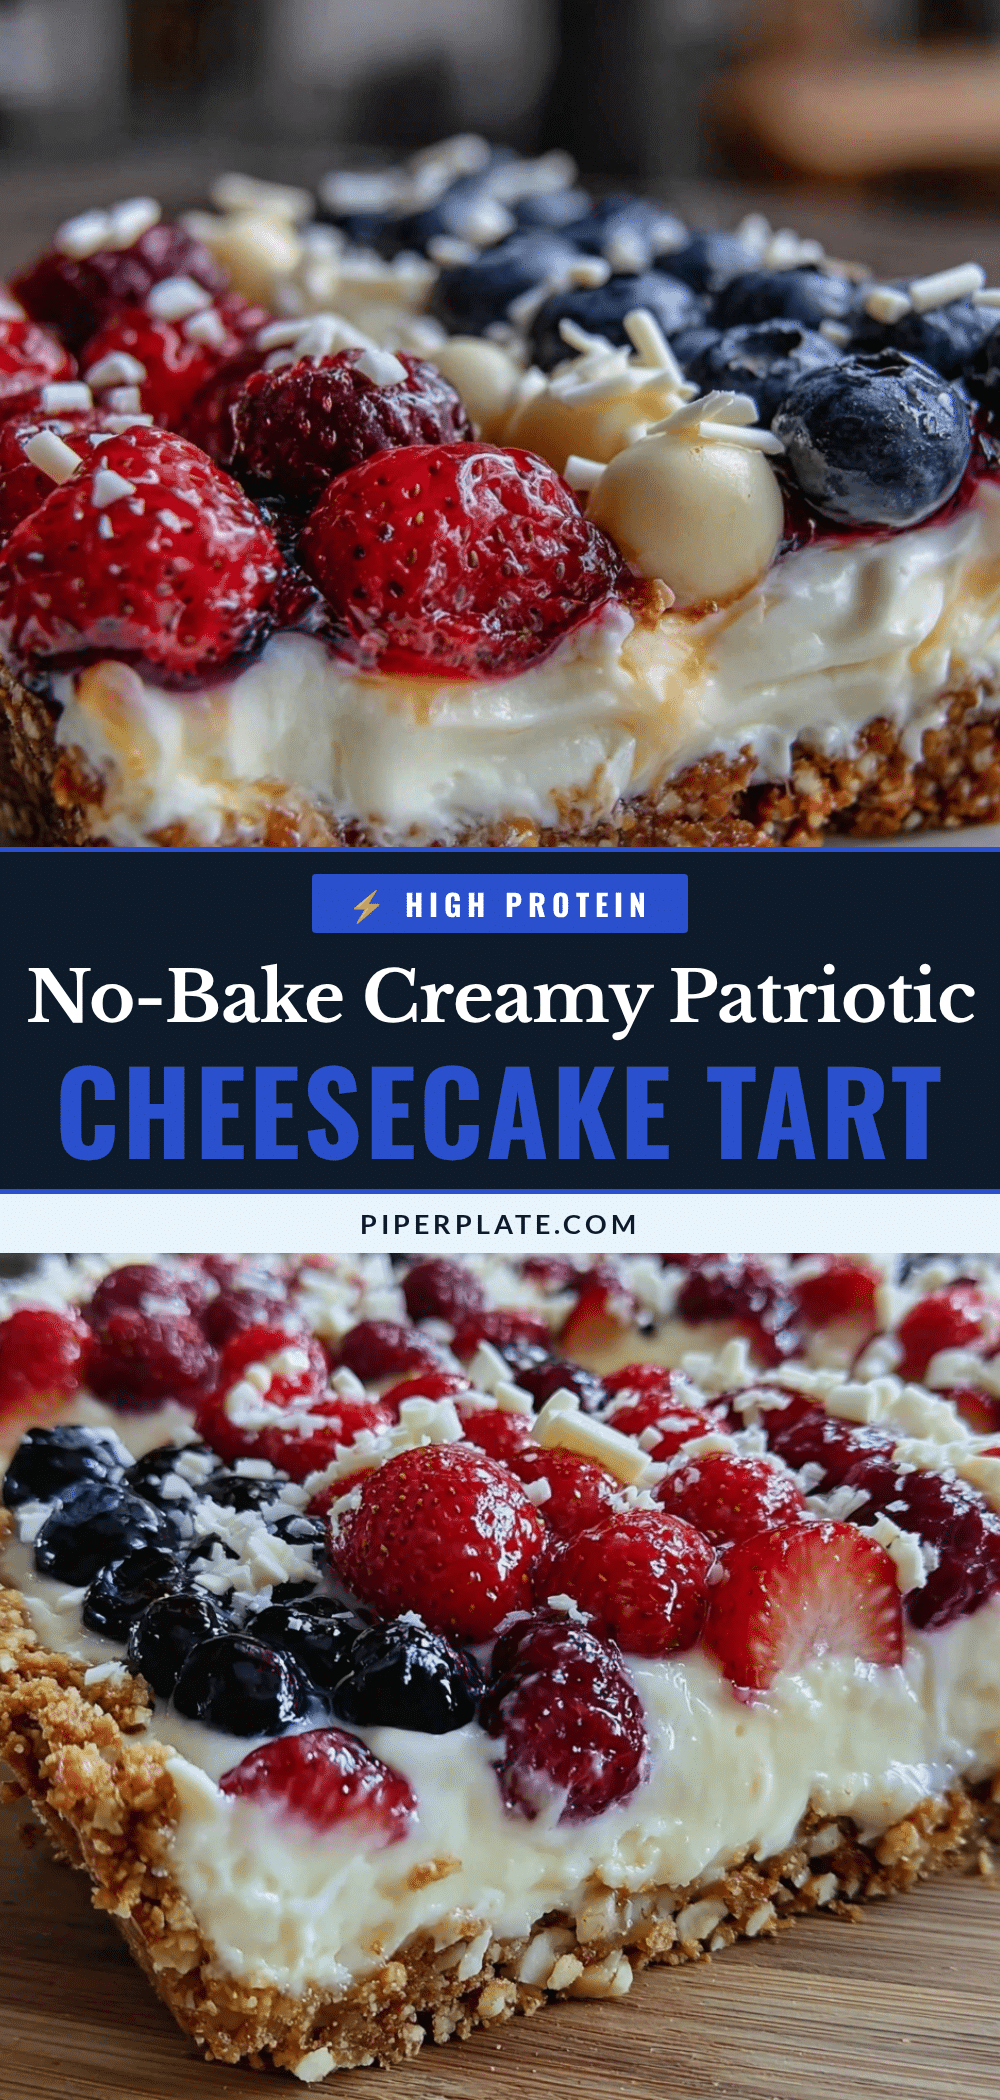
What sets this tart apart is the no-bake cheesecake filling that’s whipped to fluffy perfection, not dense or heavy like some versions. The fresh strawberries and blueberries aren’t just decoration—they add brightness and a juicy contrast to the creamy base. And the buttery graham cracker crust? It’s exactly the crunch you want without being overpowering.
Honestly, this isn’t just another patriotic dessert—it’s the one I go back to year after year, the recipe that makes me close my eyes and remember those warm neighborhood summers. It’s a dessert with soul, without the stress.
What Ingredients You Will Need for the Easy No-Bake Patriotic Cheesecake Flag Tart
This recipe is all about straightforward, fresh ingredients that come together to create that flag-inspired masterpiece. You won’t need anything fancy, just some pantry staples and fresh fruit to get that perfect summer vibe.
- For the crust:
- 1 ½ cups graham cracker crumbs (about 10 full sheets; I recommend Nabisco for the best texture)
- 5 tablespoons unsalted butter, melted (adds richness and binds the crust)
- 2 tablespoons granulated sugar (balances the buttery crust)
- For the cheesecake filling:
- 16 ounces (450g) cream cheese, softened (full-fat for creaminess, but light cream cheese works too)
- 1 cup (240ml) heavy whipping cream (cold, for best whipping results)
- ¾ cup (90g) powdered sugar (sifted to avoid lumps)
- 1 teaspoon vanilla extract (pure vanilla makes a difference)
- For the topping/flag design:
- 1 ½ cups fresh strawberries, hulled and sliced (seasonal berries work great; in summer, swap in fresh raspberries for a twist)
- 1 cup fresh blueberries (pick firm, plump berries for best presentation)
If you’re looking to make this gluten-free, just swap the graham crackers for gluten-free alternatives or crushed gluten-free cookies. For a lighter version, I’ve tried swapping heavy cream with coconut cream, which adds a subtle tropical note while keeping it dairy-free.
Equipment Needed
- 9 to 10-inch tart pan with removable bottom (makes serving easier; I personally swear by a non-stick one from Wilton)
- Mixing bowls (one large for the filling, one medium for the crust mixture)
- Electric hand mixer or stand mixer (for whipping cream and cream cheese smooth)
- Rubber spatula (perfect for folding and scraping sides clean)
- Measuring cups and spoons (for accuracy—trust me, baking loves precision)
- Food processor (optional, but makes crushing graham crackers a breeze; if you don’t have one, just place crackers in a sealed bag and crush with a rolling pin)
If you don’t own a tart pan, a regular pie dish will work fine; you just might lose the neat edges. I’ve also found that chilling the mixing bowl and beaters for the cream whip step makes a big difference in getting stiff peaks faster—something I only learned after a few frustrating attempts!
Preparation Method
- Prepare the crust (10 minutes): In a medium bowl, combine the graham cracker crumbs, melted butter, and sugar. Mix until the crumbs are evenly coated and hold together when pressed. Press the mixture firmly into the bottom and up the sides of your tart pan, creating an even layer. Refrigerate the crust while preparing the filling to set properly.
- Make the cheesecake filling (15 minutes): Using a stand or hand mixer, beat the softened cream cheese until smooth and creamy (about 2 minutes). In a separate chilled bowl, whip the heavy cream until medium to stiff peaks form. Gradually add powdered sugar and vanilla extract to the cream cheese, blending thoroughly. Gently fold the whipped cream into the cream cheese mixture with a spatula, being careful not to deflate the airiness. The filling should be light, fluffy, and spreadable.
- Assemble the tart (5 minutes): Remove the crust from the fridge and carefully spread the cheesecake filling evenly over it. Use an offset spatula or back of a spoon for a smooth finish.
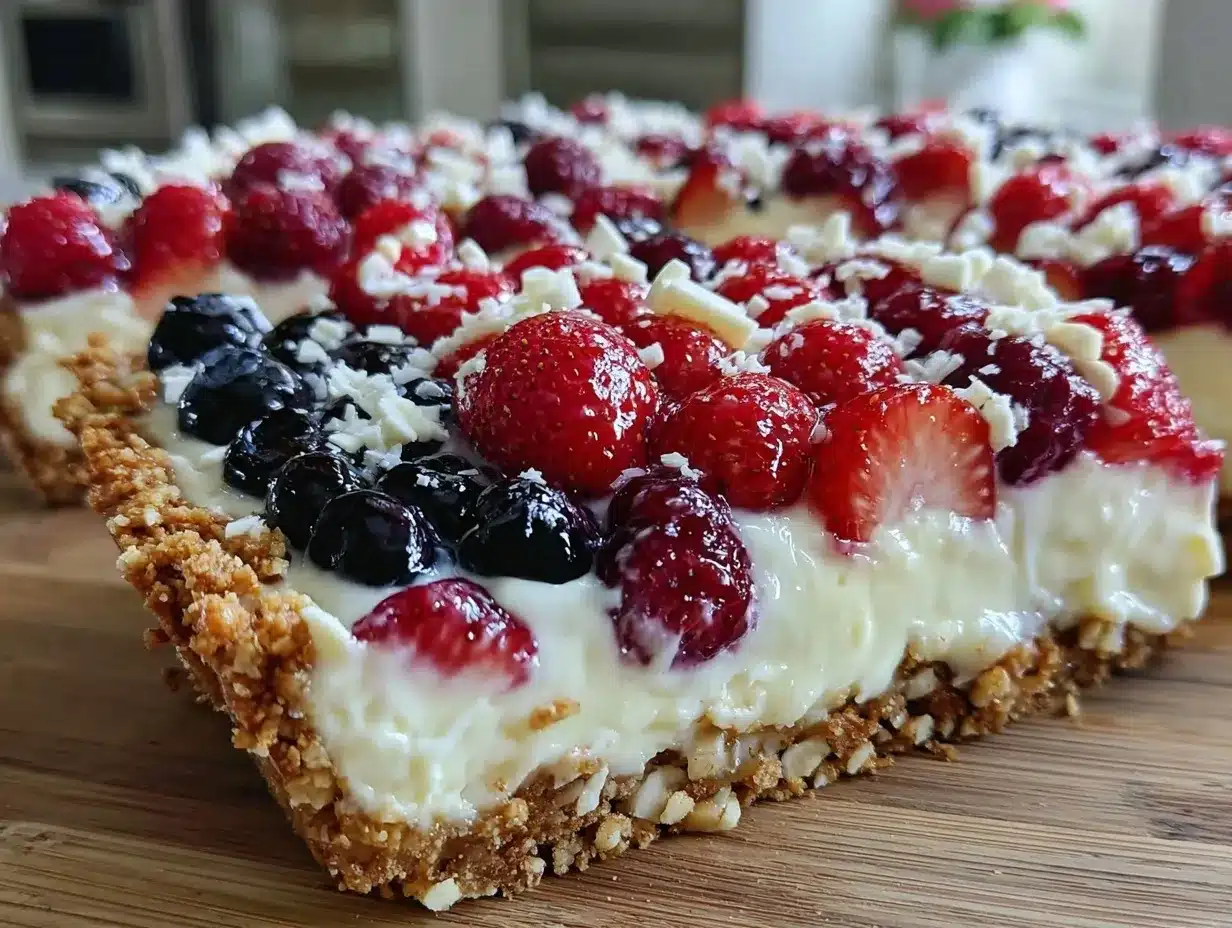
- Create the flag design (10 minutes): Arrange the blueberries in the top-left corner to form the stars section of the flag. Then, create alternating stripes with sliced strawberries and remaining blueberries across the tart. Don’t worry if the design isn’t perfect; the rustic charm adds to the experience.
- Chill and set (at least 2 hours): Refrigerate the tart uncovered for a couple of hours or until the filling firms up. This step is key for slicing clean pieces later.
Pro tip: If your cream cheese isn’t fully softened, it can cause lumps—so plan ahead and leave it out at room temperature for 30 minutes. Also, when folding whipped cream into cream cheese, gentle motions save the fluffiness, making the tart feel light rather than dense.
Cooking Tips & Techniques
Let me share a couple things I’ve learned the hard way with no-bake cheesecakes and fruit tarts like this. You want that silky filling but don’t want it to collapse or become watery.
- Softening cream cheese: Never skip this step. Cold cream cheese will clump, leaving you with an uneven filling.
- Whipping cream consistency: Whip to medium or stiff peaks — too soft means the filling won’t hold, too stiff can make it grainy.
- Folding technique: Use a spatula to fold the whipped cream into the cream cheese gently. Quick mixing kills air and makes the filling dense.
- Fruit freshness: Choose firm berries to avoid sogginess. Rinse and dry thoroughly before decorating.
- Chilling time: Don’t rush the chill. The filling needs time to set firmly for clean slices.
Also, if you’re prepping for a party, you can make the crust and filling a day ahead—just add the fruit on serving day so it stays fresh and vibrant. I’ve found multitasking with chilling times helps me breeze through prepping without feeling rushed.
Variations & Adaptations
This tart is a great base to make your own, depending on dietary needs or available ingredients.
- Vegan Version: Swap cream cheese and heavy cream for vegan cream cheese and coconut cream. Use a gluten-free crust option if needed.
- Seasonal Fruits: Instead of strawberries and blueberries, use kiwi and mango for a tropical twist that still delivers color contrast.
- Mini Tartlets: Make individual-sized tarts in a muffin tin for easy portioning at picnics or potlucks.
- Chocolate Swirl: Add melted dark chocolate into half of the cheesecake filling for a marbled effect before topping with fruit.
Personally, I tried a version with raspberries and blackberries last year—it was delicious but less patriotic looking, so I save that for other summer occasions. For a lighter texture, you can fold in some Greek yogurt to the filling, just reduce sugar slightly to keep it balanced.
Serving & Storage Suggestions
Serve this Easy No-Bake Patriotic Cheesecake Flag Tart chilled, right from the fridge. It looks stunning on a simple white platter or a rustic wooden board, making the colors pop beautifully.
This dessert pairs wonderfully with a sparkling lemonade or iced tea to keep things light and refreshing. If you’re hosting a barbecue, it’s a perfect sweet note after smoky grilled flavors.
To store, cover the tart loosely with plastic wrap and refrigerate for up to 3 days. If you plan to store longer, remove the fresh fruit and freeze the plain cheesecake tart covered tightly; add fresh fruit after thawing.
When reheating, just let it sit out for about 10 minutes to take the chill off before slicing. The flavors tend to meld and deepen after a day, so sometimes I make it a day ahead for best taste.
Nutritional Information & Benefits
Each serving of this tart (about one-eighth of the pan) has approximately 320 calories, with 20g fat, 30g carbohydrates, and 5g protein. The fresh berries provide antioxidants and vitamin C, boosting the dessert’s nutritional profile.
The cream cheese offers calcium and some protein, while the graham cracker crust adds a bit of fiber if you choose whole-grain options. This dessert is gluten-free adaptable and can be made dairy-free with substitutions.
From a wellness standpoint, it’s a treat that balances indulgence with fresh fruit goodness, making it a feel-good choice for celebrations where you want something both festive and satisfying.
Conclusion
So, if you’re looking for a no-fuss, visually striking dessert for your 4th of July or summer parties, this Easy No-Bake Patriotic Cheesecake Flag Tart is a solid bet. It’s a recipe that’s as much about the memories and moments as it is about the taste.
Feel free to swap fruits or adapt the crust to your liking — I love hearing how you make it yours. Honestly, this tart holds a special spot in my recipe box because it brings back those sunny neighborhood afternoons, that perfect mix of sweet and fresh, and the joy of sharing something simple yet beautiful.
Give it a try, and if you do, don’t hesitate to share your tweaks or stories in the comments below. I’m always curious how this little flag tart finds its way to your table!
Frequently Asked Questions About the Easy No-Bake Patriotic Cheesecake Flag Tart
- Can I make this tart ahead of time? Yes! Prepare the crust and filling up to 24 hours in advance, but add fresh fruit just before serving for the best look and taste.
- What if I don’t have a tart pan? A regular 9-inch pie dish works fine; just expect a less defined edge.
- Can I use frozen berries? You can, but thaw and drain them well to avoid excess moisture making the tart soggy.
- How do I soften cream cheese quickly? Cut it into small cubes and let it sit at room temperature for about 30 minutes or microwave in short 10-second bursts, stirring in between.
- Is this recipe gluten-free? It can be by using gluten-free graham crackers or cookie crumbs for the crust.
By the way, if you enjoy festive desserts, you might appreciate the crispy garlic chicken that’s also perfect for summer gatherings, or the summer berry pie that showcases fresh fruit in a classic style.
Pin This Recipe!
Easy No-Bake Patriotic Cheesecake Flag Tart

A quick and festive no-bake cheesecake tart featuring a creamy filling and fresh strawberries and blueberries arranged like a patriotic flag, perfect for 4th of July celebrations.
- Prep Time: 25 minutes
- Cook Time: 0 minutes
- Total Time: 2 hours 25 minutes
- Yield: 8 servings 1x
- Category: Dessert
- Cuisine: American
Ingredients
- 1 ½ cups graham cracker crumbs (about 10 full sheets)
- 5 tablespoons unsalted butter, melted
- 2 tablespoons granulated sugar
- 16 ounces (450g) cream cheese, softened
- 1 cup (240ml) heavy whipping cream, cold
- ¾ cup (90g) powdered sugar, sifted
- 1 teaspoon vanilla extract
- 1 ½ cups fresh strawberries, hulled and sliced
- 1 cup fresh blueberries
Instructions
- Prepare the crust (10 minutes): In a medium bowl, combine the graham cracker crumbs, melted butter, and sugar. Mix until the crumbs are evenly coated and hold together when pressed. Press the mixture firmly into the bottom and up the sides of your tart pan, creating an even layer. Refrigerate the crust while preparing the filling to set properly.
- Make the cheesecake filling (15 minutes): Using a stand or hand mixer, beat the softened cream cheese until smooth and creamy (about 2 minutes). In a separate chilled bowl, whip the heavy cream until medium to stiff peaks form. Gradually add powdered sugar and vanilla extract to the cream cheese, blending thoroughly. Gently fold the whipped cream into the cream cheese mixture with a spatula, being careful not to deflate the airiness. The filling should be light, fluffy, and spreadable.
- Assemble the tart (5 minutes): Remove the crust from the fridge and carefully spread the cheesecake filling evenly over it. Use an offset spatula or back of a spoon for a smooth finish.
- Create the flag design (10 minutes): Arrange the blueberries in the top-left corner to form the stars section of the flag. Then, create alternating stripes with sliced strawberries and remaining blueberries across the tart. Don’t worry if the design isn’t perfect; the rustic charm adds to the experience.
- Chill and set (at least 2 hours): Refrigerate the tart uncovered for a couple of hours or until the filling firms up. This step is key for slicing clean pieces later.
Notes
Softening cream cheese before mixing is essential to avoid lumps. Whip cream to medium or stiff peaks for best texture. Fold whipped cream gently into cream cheese to keep filling light and fluffy. Use fresh, firm berries and dry them well before decorating. Chill tart for at least 2 hours for clean slicing. Prepare crust and filling up to 24 hours ahead; add fruit just before serving. For gluten-free, use gluten-free graham crackers. For dairy-free or vegan, substitute cream cheese and heavy cream with vegan alternatives.
Nutrition
- Serving Size: One-eighth of the ta
- Calories: 320
- Fat: 20
- Carbohydrates: 30
- Protein: 5
Keywords: no-bake cheesecake, patriotic dessert, 4th of July dessert, cheesecake tart, berry tart, easy dessert, summer dessert