Love this? Save it for later!
Share the inspiration with your friends
I wasn’t expecting baking advice from my plumber, but there I was, standing in my kitchen with a leaky faucet, listening to Carlos explain exactly how to make zucchini banana bread. He was supposed to be fixing the pipe under my sink, but instead he was telling me about this bread his grandmother used to make—the one that got him through his first year as an apprentice. “You gotta use the really ripe bananas,” he said, wiping his hands on his coveralls. “And don’t squeeze all the water out of the zucchini. That moisture is what makes it soft.” I mean, honestly, I’d been overcomplicating quick breads for years. Too many pans, too much batter, too many dishes to wash. Carlos made it sound so simple. Maybe you’ve been there too—standing in your kitchen, realizing the best cooking advice comes from the most unexpected people.
That conversation stuck with me. I went out and bought a single zucchini and two spotty bananas, determined to make a version that served exactly one loaf. No leftovers languishing in the freezer. No massive batch that takes a week to finish. Just one perfect, small loaf of zucchini banana bread. I tweaked Carlos’s method a bit—added a touch of cinnamon, swapped in some whole wheat flour—but the soul of it stayed the same. This bread is moist, tender, and just sweet enough without being heavy. It’s the kind of recipe you’ll make on a Tuesday afternoon when you’re craving something warm and homemade but don’t want to commit to a full production. And honestly? That first bite still reminds me of a plumber who cared more about my baking than my pipes.
Why You’ll Love This Recipe
This small-batch zucchini banana bread checks every box you’d want in a quick bread. It’s not just another recipe—it’s the one you’ll actually make on a regular Tuesday.
- Quick & Easy: From bowl to oven in under 15 minutes. No stand mixer needed, no complicated techniques. Just a bowl, a whisk, and a spatula.
- Simple Ingredients: You probably already have everything in your kitchen. Bananas, zucchini, flour, eggs, oil—all pantry staples that don’t require a special trip to the store.
- Perfect for Small Households: This recipe makes exactly one 8×4-inch loaf. No massive batch that goes stale before you finish it. Ideal for couples, singles, or anyone who doesn’t need a dozen muffins taking over their counter.
- Crowd-Pleaser: Even people who swear they don’t like zucchini bread love this version. The banana flavor shines through, and the zucchini just adds moisture without any vegetable taste.
- Unbelievably Moist: The combination of ripe bananas and shredded zucchini creates a texture that’s almost pudding-like in its tenderness. It stays soft for days—if it lasts that long.
What makes this recipe different from the rest? It’s the ratio, honestly. Most zucchini bread recipes use way too much flour, which dries out the crumb. This version uses less flour and lets the natural moisture from the zucchini and bananas do the work. The result is a bread that’s tender without being gummy, sweet without being cloying. It’s comfort food at its simplest—no fuss, no stress, just a warm slice of something good.
What Ingredients You Will Need
This recipe uses simple, wholesome ingredients to deliver bold flavor and satisfying texture without the fuss. Everything here is easy to find and probably already in your pantry.
For the Bread
- 1 cup all-purpose flour (120 grams) – Spoon and level for accuracy. You can substitute whole wheat pastry flour for a heartier texture.
- ½ teaspoon baking soda – Make sure it’s fresh. Old baking soda won’t give your bread the lift it needs.
- ¼ teaspoon baking powder – Adds a little extra rise for a lighter crumb.
- ½ teaspoon ground cinnamon – I prefer Saigon cinnamon for its warm, slightly spicy flavor.
- ¼ teaspoon salt – Fine sea salt works best. It balances the sweetness.
- 1 large egg – Room temperature. Cold eggs can seize the batter.
- ⅓ cup granulated sugar (65 grams) – You can reduce this to ¼ cup if your bananas are very ripe and sweet.
- ¼ cup neutral oil (60 ml) – Avocado oil or grapeseed oil. Avoid olive oil—it’s too strong here.
- 1 teaspoon vanilla extract – Pure vanilla, not imitation. It makes a difference.
- ½ cup mashed ripe banana (about 1 large banana) – The riper the better. Brown spots are your friend.
- ½ cup shredded zucchini (about 1 small zucchini) – Don’t peel it. The green flecks look pretty in the finished bread.
Optional Add-Ins
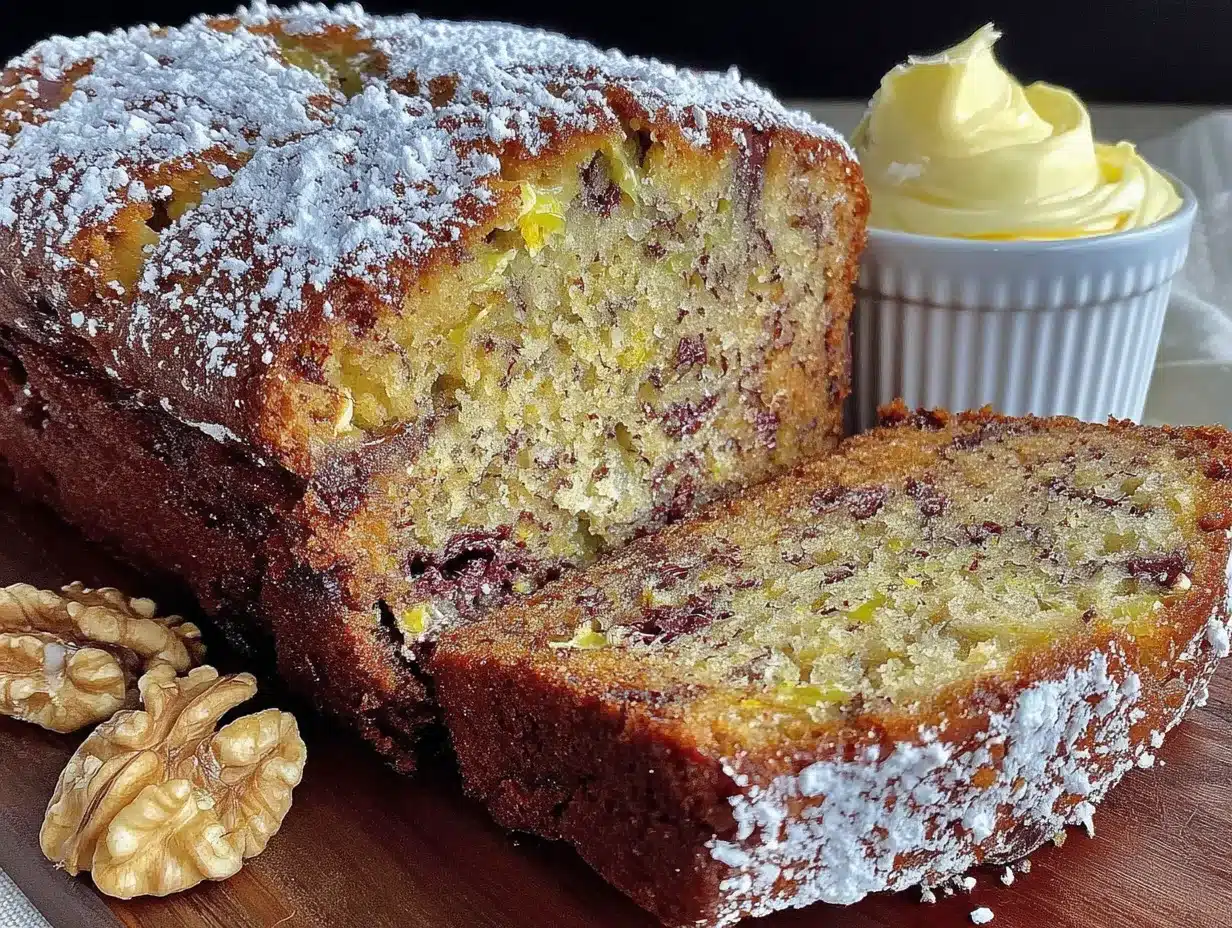
- ¼ cup chopped walnuts or pecans – Toast them first for deeper flavor.
- ¼ cup chocolate chips – Semi-sweet or dark. Mini chips distribute more evenly.
- 1 tablespoon flaxseed meal – Adds fiber and a subtle nutty taste.
A quick note on zucchini: look for firm, small zucchini with shiny skin. Larger zucchini tend to be watery and seedy. If you only have a big one, scoop out the seeds before shredding. And please don’t squeeze the moisture out of the shredded zucchini—that liquid is what keeps this bread so tender. Trust the process.
Equipment Needed
You don’t need a fancy kitchen to make this bread. Here’s what you’ll actually use:
- 8×4-inch loaf pan – This is the perfect size for a small batch. A 9×5-inch pan will work, but your bread will be shorter and bake faster.
- Mixing bowls – One large, one medium. I use glass bowls because they don’t hold onto odors.
- Whisk and spatula – A silicone spatula is ideal for scraping every bit of batter into the pan.
- Box grater or food processor – A box grater with medium holes works perfectly. If you use a food processor, pulse gently—you don’t want zucchini puree.
- Measuring cups and spoons – For accuracy, especially with flour. A kitchen scale is even better.
- Cooling rack – Essential for even cooling. If you don’t have one, use the grates from your oven.
- Parchment paper – Not strictly necessary, but it makes lifting the bread out of the pan effortless.
I’ve made this bread with a $5 thrift store loaf pan and a cheap whisk, and it turned out just as good as when I use my fancy equipment. Don’t let missing tools stop you. A fork works as a whisk. A butter knife works as a spatula. You’ll be fine.
Preparation Method
This method is straightforward, but a few details make all the difference. Follow these steps, and you’ll get a perfect loaf every time.
- Preheat your oven to 350°F (175°C). Position the rack in the center. While it heats, grease your 8×4-inch loaf pan with butter or non-stick spray. For extra insurance, line it with parchment paper, leaving a 2-inch overhang on the long sides. This makes lifting the bread out so much easier.
- Shred the zucchini. Wash one small zucchini and trim off the stem end. Using a box grater, shred it on the medium holes. You need ½ cup of loosely packed shreds. Set it aside—don’t press or squeeze it. The moisture is your friend.
- Mash the banana. In a medium bowl, mash one very ripe banana with a fork until mostly smooth. A few small lumps are fine. You should have about ½ cup of mashed banana. If your banana is huge, use only ½ cup and eat the rest.
- Whisk the dry ingredients. In a large bowl, whisk together 1 cup all-purpose flour, ½ teaspoon baking soda, ¼ teaspoon baking powder, ½ teaspoon cinnamon, and ¼ teaspoon salt. Whisk for about 10 seconds to aerate and distribute everything evenly. This step matters—don’t skip it.
- Mix the wet ingredients. In the bowl with the mashed banana, add 1 large egg, ⅓ cup granulated sugar, ¼ cup neutral oil, and 1 teaspoon vanilla extract. Whisk until smooth and well combined. The mixture should look pale and slightly thickened.
- Add the zucchini. Fold the ½ cup of shredded zucchini into the wet mixture. Don’t overmix—just stir until the zucchini is evenly distributed. You’ll see green flecks throughout the batter, which is exactly what you want.
- Combine wet and dry. Pour the wet mixture into the dry ingredients. Use a spatula to fold gently, scraping the bottom and sides of the bowl. Stop as soon as you no longer see streaks of flour. A few lumps are okay. Overmixing will make the bread tough.
- Fold in any add-ins. If you’re using nuts or chocolate chips, fold them in now with a few gentle strokes. Reserve a handful to sprinkle on top for a prettier finish.
- Transfer to the pan. Scrape the batter into your prepared loaf pan. Spread it evenly with the spatula. Sprinkle any reserved nuts or chips on top, pressing them in slightly so they stick.
- Bake for 45-50 minutes. Place the pan on the center rack. Bake until the top is golden brown and a toothpick inserted into the center comes out clean or with a few moist crumbs. If the top is browning too quickly after 35 minutes, tent loosely with foil.
- Cool properly. Let the bread cool in the pan for 10 minutes. Then lift it out using the parchment overhang and transfer to a wire rack. Cool completely before slicing—at least 1 hour. I know it’s hard to wait, but slicing too early will make the bread crumble.
A personal tip: I always set a timer for 40 minutes and check with a toothpick. Every oven is different, and the last few minutes matter. If the toothpick comes out wet with batter, give it 5 more minutes. If it comes out clean, it’s done. Simple as that.
Cooking Tips & Techniques
After making this bread probably two dozen times, I’ve learned a few things the hard way. Here’s what I wish someone had told me from the start.
Don’t overmix the batter. This is the most common mistake. When you combine wet and dry ingredients, gluten develops. The more you mix, the tougher the bread gets. Mix until you can’t see dry flour anymore, then stop. A few streaks are fine. I once kept mixing because I wanted a perfectly smooth batter, and the bread came out dense and rubbery. Learn from my failure.
Use a kitchen scale for flour. If you have one, use it. Scooping flour directly from the bag can add up to 25% more flour than the recipe calls for. That extra flour will dry out your bread. Spoon the flour into your measuring cup and level it off with a knife. Or just weigh it—120 grams for 1 cup. Easy.
Check your baking soda’s freshness. Baking soda loses potency over time. To test it, drop a pinch into a small bowl of vinegar. If it fizzes vigorously, it’s good. If it barely bubbles, buy a new box. Old baking soda is the number one reason quick breads turn out flat and dense.
Room temperature ingredients matter. Cold eggs and cold oil can make the batter seize up, leading to uneven baking. Let your egg sit on the counter for 30 minutes before you start. If you forgot, place it in a bowl of warm water for 5 minutes. It’s a small step that makes a real difference.
Let it cool completely. I know it smells amazing. I know you want a slice right now. But cutting into warm bread releases steam, and that steam is moisture you’re losing. The bread will continue to set as it cools. Wait the full hour. Your patience will be rewarded with clean slices and a perfect texture.
Variations & Adaptations
This recipe is forgiving. Here are some ways to make it your own.
Gluten-Free Version: Substitute the all-purpose flour with a 1:1 gluten-free baking blend that contains xanthan gum. I’ve had great results with King Arthur Measure for Measure. The texture will be slightly more tender, but the flavor is spot on. Add an extra tablespoon of flour if the batter seems too loose.
Vegan Adaptation: Replace the egg with a flax egg (1 tablespoon ground flaxseed mixed with 3 tablespoons water, let sit for 5 minutes). Use coconut oil or a vegan butter substitute instead of regular oil. The bread will be a bit denser but still delicious. Add an extra ¼ teaspoon of baking powder for lift.
Lower Sugar Option: Reduce the sugar to ¼ cup (50 grams). The bananas provide plenty of sweetness, especially if they’re very ripe. You can also substitute coconut sugar for a deeper, caramel-like flavor. The texture will be slightly less tender, but it’s still wonderful.
Seasonal Twist: In fall, add ¼ teaspoon of nutmeg and ⅛ teaspoon of cloves along with the cinnamon. Swap the zucchini for grated apple or pear. In summer, fold in ¼ cup of fresh blueberries or raspberries. Toss them in a tablespoon of flour first to prevent sinking.
Chocolate Lover’s Version: Reduce the flour to ¾ cup and add ¼ cup of unsweetened cocoa powder. Increase the sugar to ½ cup. Fold in ¼ cup of chocolate chips. This version is dangerously good—like dessert masquerading as breakfast.
I once made a version with shredded carrot instead of zucchini, added a handful of raisins, and called it “morning glory bread.” It was a happy accident that turned into a regular rotation. Don’t be afraid to experiment.
Serving & Storage Suggestions
This bread is versatile. Here’s how to enjoy it at its best.
Serving Temperature: Serve at room temperature for the best texture. If you want a warm slice, pop it in the toaster or microwave for 10 seconds. A thin spread of salted butter or cream cheese takes it to another level. For a treat, drizzle with honey or maple syrup.
Presentation Ideas: Slice the bread into thick pieces, about 1 inch each. Arrange on a wooden board with fresh fruit and a small dish of honey butter. It makes a lovely brunch centerpiece. For gifting, wrap the whole loaf in parchment paper, tie with kitchen twine, and attach a handwritten tag with reheating instructions.
Complementary Dishes: Pair a slice with a cup of coffee or chai tea for a cozy afternoon snack. Serve alongside a simple green salad for a light lunch. It also works beautifully as part of a breakfast spread with scrambled eggs and fresh fruit.
Storage Instructions: Store leftover bread in an airtight container at room temperature for up to 3 days. The moisture from the zucchini keeps it soft longer than most quick breads. If your kitchen is very warm, refrigerate it—but bring slices to room temperature before serving for the best texture.
Freezer Instructions: This bread freezes beautifully. Wrap the cooled loaf tightly in plastic wrap, then in a layer of aluminum foil. Freeze for up to 3 months. To thaw, leave it on the counter for 2 hours, or unwrap and microwave individual slices for 20 seconds. I often bake two loaves and freeze one for later—it’s like finding a gift in your freezer on a busy morning.
Flavor Development: Here’s a secret: this bread actually tastes better on day two. The flavors meld together overnight, and the texture becomes even more moist. If you can resist it on day one, wrap it tightly and wait. You’ll be rewarded with an even more delicious loaf.
Nutritional Information & Benefits
This bread is a treat, but it also offers some nutritional perks. Here’s what you’re getting in each slice (based on 8 slices per loaf).
| Nutrient | Amount Per Slice |
|---|---|
| Calories | 185 |
| Total Fat | 8g |
| Saturated Fat | 1g |
| Carbohydrates | 26g |
| Fiber | 1.5g |
| Sugar | 12g |
| Protein | 3.5g |
Health Benefits: Zucchini is packed with vitamin C and antioxidants. Bananas provide potassium and vitamin B6. Using oil instead of butter keeps the saturated fat low. The moderate sugar content means this bread works as a snack or a light breakfast without sending your blood sugar on a roller coaster.
Dietary Considerations: This recipe is vegetarian and nut-free if you skip the walnuts. For a gluten-free option, use a 1:1 gluten-free flour blend. For a lower-carb version, substitute almond flour—but note that the texture will be denser and the bake time shorter. Always check your ingredients for potential allergens if you’re serving others.
Frequently Asked Questions
Can I use frozen zucchini? Yes, but thaw it first and drain off any excess liquid. You want ½ cup of shredded zucchini after draining. Frozen zucchini tends to be more watery, so you might need to add an extra tablespoon of flour to compensate.
Why did my bread sink in the middle? This usually happens when the batter is overmixed or the oven temperature is too low. Make sure your oven is fully preheated to 350°F before baking. Also, check that your baking soda is fresh. A sunken middle can also mean the bread wasn’t baked long enough—use the toothpick test to be sure.
Can I double this recipe? Absolutely. Double all ingredients and bake in a 9×5-inch loaf pan for 55-65 minutes. You may need to tent the top with foil after 40 minutes to prevent over-browning. The larger loaf will need more time to bake through, so be patient and check with a toothpick.
How do I know when my bananas are ripe enough? Look for bananas with brown spots on the peel. They should be soft to the touch and smell sweet. If your bananas are still yellow, place them in a paper bag with an apple overnight to speed up ripening. Green bananas won’t give you the sweetness or moisture you need.
Can I make this into muffins? Yes! Divide the batter into a greased 6-cup muffin tin. Bake at 350°F for 18-22 minutes, or until a toothpick comes out clean. Muffins will bake faster than a loaf, so start checking at 15 minutes. This is a great option if you want portion-controlled servings or need something grab-and-go.
Conclusion
This small-batch zucchini banana bread is the kind of recipe that earns a permanent spot in your rotation. It’s simple enough for a weekday afternoon, special enough to share with friends, and forgiving enough to adapt to whatever you have on hand. The combination of ripe bananas and tender zucchini creates a loaf that’s moist, flavorful, and just sweet enough—without any fuss or complicated techniques.
I still think about Carlos every time I make this bread. He showed up to fix a leak and ended up sharing something far more valuable. That’s the thing about cooking—you never know where the best recipes will come from. Maybe yours will come from a neighbor, a stranger, or a happy accident in your own kitchen. However you find it, I hope this bread becomes one of those recipes for you. The one you make without thinking. The one that feels like home.
Give it a try and let me know how it turns out. Did you add chocolate chips? Swap in apples for the zucchini? Forget to set a timer and bake it a little too long? I want to hear about it all. Drop a comment below or tag me in your photos—I love seeing your kitchen creations. Happy baking, friend.
Pin This Recipe!
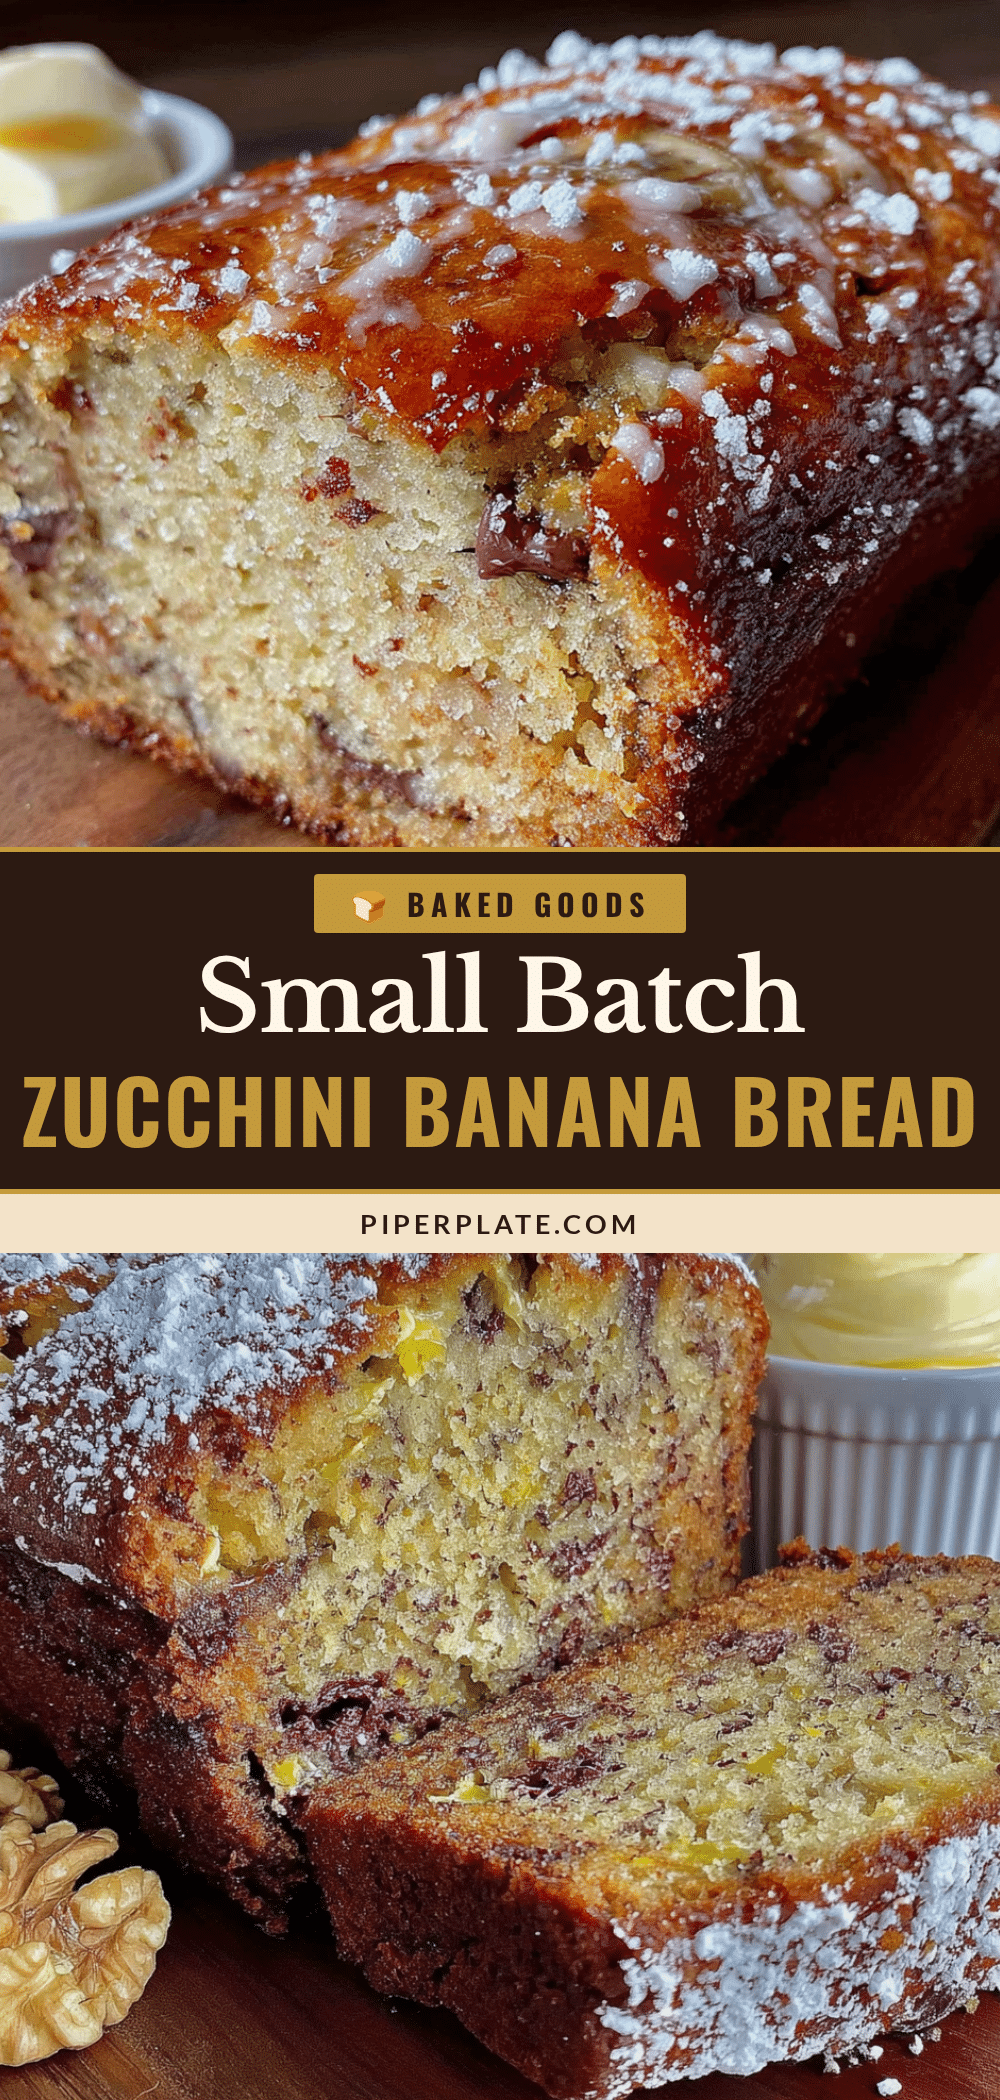
Easy Small-Batch Zucchini Banana Bread Recipe
This small-batch zucchini banana bread is moist, tender, and just sweet enough without being heavy. Made with ripe bananas and shredded zucchini, it’s the perfect single loaf for small households—no leftovers, no fuss.
- Prep Time: 15 minutes
- Cook Time: 45-50 minutes
- Total Time: 1 hour 5 minutes
- Yield: 8 servings 1x
- Category: Bread
- Cuisine: American
Ingredients
- 1 cup all-purpose flour (120 grams)
- ½ teaspoon baking soda
- ¼ teaspoon baking powder
- ½ teaspoon ground cinnamon
- ¼ teaspoon salt
- 1 large egg, room temperature
- ⅓ cup granulated sugar (65 grams)
- ¼ cup neutral oil (60 ml), such as avocado or grapeseed
- 1 teaspoon vanilla extract
- ½ cup mashed ripe banana (about 1 large banana)
- ½ cup shredded zucchini (about 1 small zucchini)
- Optional: ¼ cup chopped walnuts or pecans
- Optional: ¼ cup chocolate chips
- Optional: 1 tablespoon flaxseed meal
Instructions
- Preheat your oven to 350°F (175°C). Grease an 8×4-inch loaf pan with butter or non-stick spray. For easy removal, line with parchment paper, leaving a 2-inch overhang on the long sides.
- Shred the zucchini: Wash one small zucchini, trim the stem, and shred on the medium holes of a box grater to get ½ cup loosely packed shreds. Do not squeeze out the moisture.
- Mash the banana: In a medium bowl, mash one very ripe banana with a fork until mostly smooth. You should have about ½ cup.
- Whisk dry ingredients: In a large bowl, whisk together 1 cup flour, ½ teaspoon baking soda, ¼ teaspoon baking powder, ½ teaspoon cinnamon, and ¼ teaspoon salt for about 10 seconds.
- Mix wet ingredients: In the bowl with the mashed banana, add 1 egg, ⅓ cup sugar, ¼ cup oil, and 1 teaspoon vanilla. Whisk until smooth and slightly thickened.
- Add zucchini: Fold the ½ cup shredded zucchini into the wet mixture until evenly distributed.
- Combine wet and dry: Pour the wet mixture into the dry ingredients. Fold gently with a spatula until just combined—do not overmix. A few lumps are okay.
- Fold in add-ins (optional): If using nuts or chocolate chips, fold them in with a few gentle strokes. Reserve a handful to sprinkle on top.
- Transfer to pan: Scrape the batter into the prepared loaf pan and spread evenly. Sprinkle reserved nuts or chips on top, pressing them in slightly.
- Bake for 45-50 minutes, until the top is golden brown and a toothpick inserted into the center comes out clean or with a few moist crumbs. If browning too quickly after 35 minutes, tent loosely with foil.
- Cool in the pan for 10 minutes, then lift out using the parchment overhang and transfer to a wire rack. Cool completely before slicing—at least 1 hour.
Notes
Don’t squeeze the moisture out of the shredded zucchini—it keeps the bread tender. Use very ripe bananas with brown spots for best sweetness. Let the bread cool completely before slicing to avoid crumbling. This bread tastes even better on day two.
Nutrition
- Serving Size: 1 slice (1/8 of loaf
- Calories: 185
- Sugar: 12
- Sodium: 150
- Fat: 8
- Saturated Fat: 1
- Carbohydrates: 26
- Fiber: 1.5
- Protein: 3.5
Keywords: zucchini banana bread, small batch, quick bread, moist banana bread, easy zucchini bread, single loaf


