Love this? Save it for later!
Share the inspiration with your friends
I wasn’t expecting canning advice from my accountant, but there I was, sorting through a pile of receipts in his cramped office, listening to him describe exactly how to make roasted tomato sauce. His name was Gary, and for twenty years, he’d been the quietest person at every holiday gathering. Turns out, the man had a secret life as a backyard tomato whisperer. He leaned back in his squeaky chair, licked his finger to flip a page, and said, “You know, the trick to a good sauce isn’t in the pot. It’s in the oven first.” I nearly dropped my W-2. Here I was, thinking I knew everything about putting up summer produce, and my tax guy was about to blow my mind.
That conversation happened three summers ago, and honestly, I haven’t made sauce any other way since. I mean, I used to spend hours standing over a bubbling pot, stirring until my arm ached, adding sugar to cut the acidity. Gary’s method—roasting the tomatoes first—changed everything. The oven does the hard work for you, concentrating the sweetness and deepening the flavor until it tastes like it simmered all day, even if you started it after lunch. Let me tell you, the first time I pulled that roasting pan out of the oven, the smell was something else. It filled my entire kitchen with this rich, almost smoky aroma that made my neighbors text me asking what I was cooking.
This Homemade Roasted Tomato Sauce for Canning is now my summer staple. It’s the recipe I turn to when the farmer’s market has those boxes of seconds for five bucks. It’s the one I give as gifts in little jars, tied with twine, because it makes people think you spent way more effort than you actually did. And maybe you’ve been there—staring down a mountain of tomatoes in August, wondering how you’re going to use them all before they turn. This is your answer. It’s simple, it’s forgiving, and it makes your pantry look like you run a small Italian restaurant. I keep making it because it tastes like summer, even in the dead of January.
Why You’ll Love This Recipe
This isn’t just another tomato sauce recipe. After testing this method with dozens of different tomato varieties—from Romas to Brandywines to those random cherry tomatoes you forgot to pick—I can tell you with confidence that roasting is the secret to a sauce that tastes like it simmered for hours. As a recipe developer who has burned more pots than I care to admit, I’ve learned that the oven is your best friend for hands-off cooking. This sauce has been tested by my picky family, approved by my local canning club, and it passes the “I don’t even need to add sugar” test every time.
- Quick & Easy: The oven does most of the work. You spend about 20 minutes prepping, then let the heat do its magic. No standing over a hot stove for hours.
- Simple Ingredients: Just tomatoes, garlic, onions, olive oil, and herbs. You probably have most of these in your kitchen right now.
- Perfect for Preserving: This is specifically designed for water bath canning, so you can stock your pantry for the whole year.
- Crowd-Pleaser: I’ve yet to meet anyone who doesn’t love this sauce. It’s rich, savory, and perfectly balanced.
- Unbelievably Delicious: The roasting process caramelizes the natural sugars in the tomatoes, creating a depth of flavor that’s hard to achieve with stovetop methods.
What makes this different from every other tomato sauce recipe out there? It’s the technique. By roasting the tomatoes, you’re not just cooking them; you’re transforming them. The high heat drives off excess water, concentrating the flavor into something almost jammy. You won’t need to add a pinch of sugar because the tomatoes become sweet all on their own. It’s comfort food that’s been reimagined—healthier because you control the salt and oil, faster because the oven does the stirring, and with the same soul-soothing satisfaction as the sauce your grandmother used to make. This is the kind of recipe that makes you close your eyes after the first bite, just to savor it.
What Ingredients You Will Need
This recipe uses simple, wholesome ingredients to deliver bold flavor and satisfying texture without the fuss. Most of these are pantry staples, especially during tomato season. The key is to use the best quality tomatoes you can find, as they are the star of the show.
- Tomatoes (10 pounds, preferably Roma or paste tomatoes): These are meaty and have fewer seeds and less water, which means a thicker sauce. I prefer Romas for canning, but any ripe tomato will work. If you use larger, juicier varieties like Beefsteak, you may need to simmer the sauce a bit longer to thicken it.
- Garlic (1 whole head, cloves separated and peeled): Roasting the garlic alongside the tomatoes mellows its sharpness, turning it sweet and buttery. Don’t skip this—it’s a game-changer.
- Yellow Onions (2 large, quartered): They add a savory backbone to the sauce. Red onions can be used for a slightly different flavor, but yellow is my go-to for its sweetness.
- Extra-Virgin Olive Oil (1/4 cup, plus more for drizzling): Use a good quality oil here. It helps the vegetables roast evenly and adds richness to the final sauce. I recommend California Olive Ranch for a reliable, everyday oil.
- Fresh Basil (1 cup, loosely packed leaves): Adds that classic, sweet, peppery flavor. You can also use 2 tablespoons of dried basil if fresh isn’t available.
- Fresh Oregano (2 tablespoons, chopped): Or 1 teaspoon of dried oregano. It adds an earthy, slightly floral note that pairs beautifully with tomatoes.
- Kosher Salt (2 tablespoons, or to taste): I use Diamond Crystal kosher salt. It’s less salty by volume than table salt, so if you use table salt, start with half the amount and adjust.
- Black Pepper (1 teaspoon, freshly ground): A little goes a long way to add warmth and depth.
- Balsamic Vinegar (2 tablespoons): This is my secret ingredient. It enhances the natural sweetness of the tomatoes and adds a subtle complexity. Don’t worry—the sauce won’t taste like vinegar.
- Lemon Juice, Bottled (2 tablespoons per pint jar, for canning safety): This is non-negotiable for water bath canning. It ensures the sauce has a safe acidity level. Do not use fresh lemon juice, as its acidity can vary.
Ingredient Selection Tip: When buying tomatoes for canning, look for ones that are heavy for their size and have a deep, rich color. Avoid any that are bruised or have soft spots. If you’re growing your own, let them fully ripen on the vine for the best flavor. For the garlic, choose firm, plump heads without any green sprouts.
Equipment Needed
You don’t need a professional kitchen to make this sauce, but having the right tools makes the process smoother and safer, especially when canning. I’ve learned the hard way that a cheap canning pot can warp, so invest in a good one.
- Large Roasting Pans (2 half-sheet pans or 1 large roasting pan): You need enough surface area to spread the tomatoes in a single layer. If they’re crowded, they’ll steam instead of roast.
- Food Mill or Food Processor: A food mill is my preferred tool because it separates the skins and seeds, leaving you with a smooth sauce. A food processor works, but you’ll have to strain out the skins and seeds afterward. I use an Oxo food mill—it’s sturdy and easy to clean.
- Large Stockpot (at least 8-quart): For simmering the sauce. A heavy-bottomed pot prevents scorching.
- Immersion Blender (optional): If you want a smoother sauce without transferring it to a blender, this is a lifesaver.
- Water Bath Canner with Rack: This is essential for safe canning. You can buy a set that includes the pot and rack for around $30.
- Canning Jars, Lids, and Bands (pint or half-pint): Make sure they are free of cracks or nicks. I reuse my Ball jars year after year, but always buy new lids for a secure seal.
- Jar Lifter and Canning Funnel: These are worth their weight in gold. A jar lifter prevents burns, and a funnel keeps the rims clean for a good seal.
- Clean Kitchen Towels: For drying jars and handling hot lids.
- Magnetic Lid Wand: A cheap tool that makes picking up hot lids from simmering water much safer.
Preparation Method
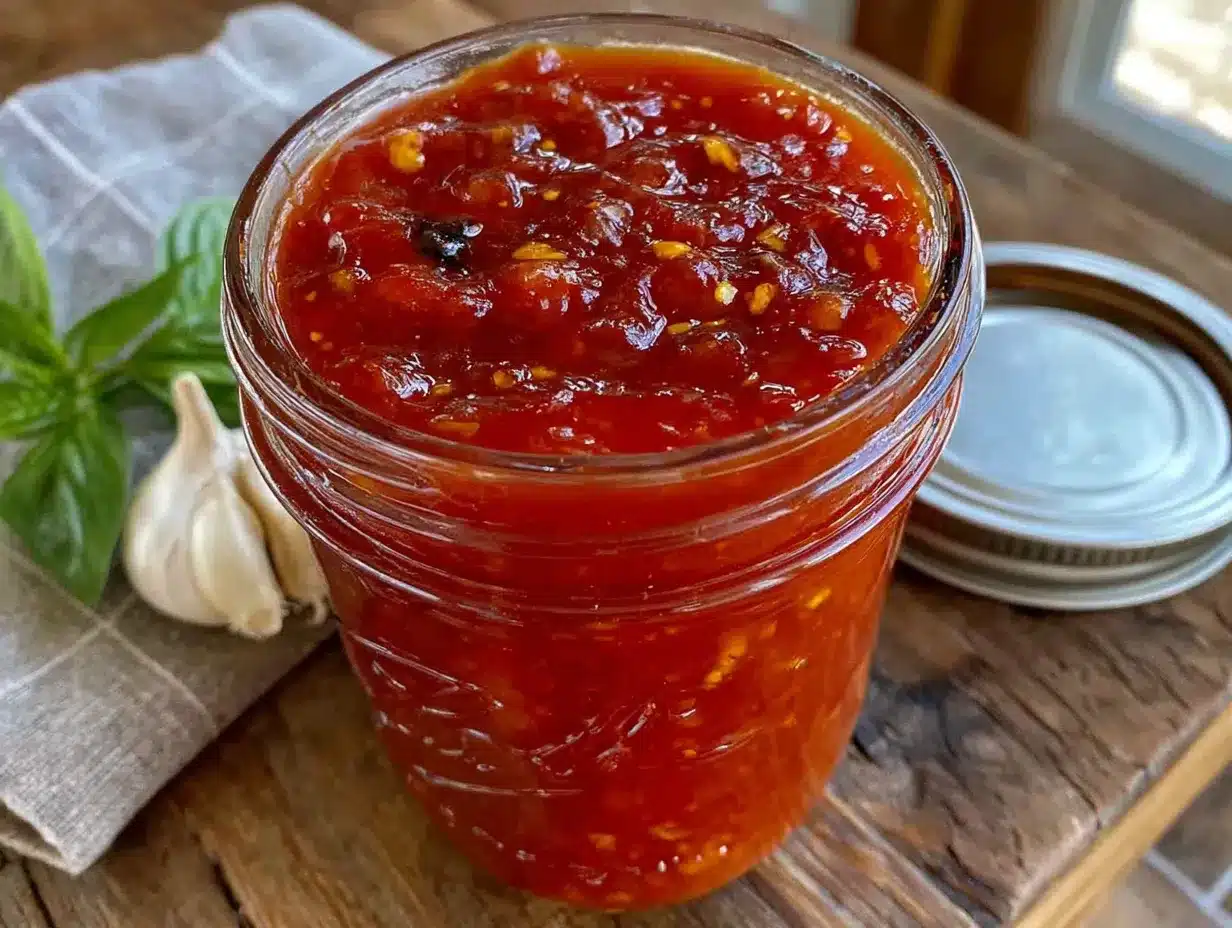
This method is broken down into two main parts: roasting the tomatoes and then processing the sauce for canning. Take your time with the roasting step—it’s where all the magic happens.
- Preheat your oven to 400°F (200°C). While it’s heating, wash your tomatoes and remove the stems. Cut any large tomatoes in half (or quarters if they’re huge). Cherry or grape tomatoes can be left whole. The goal is to have pieces that are roughly the same size so they roast evenly.
- Prepare your roasting pans. Toss the halved tomatoes, quartered onions, and peeled garlic cloves with the 1/4 cup of olive oil, 1 tablespoon of kosher salt, and the black pepper. Spread everything out in a single layer on your pans. Don’t overcrowd them—use two pans if you need to. Drizzle a little extra olive oil over the top.
- Roast the vegetables for 45-60 minutes. You’re looking for the tomatoes to be wrinkly, slightly browned on the edges, and the onions to be soft and caramelized. The garlic should be golden and soft enough to squish with a fork. Halfway through, give the pans a gentle shake to redistribute everything. The smell at this point is incredible—your whole house will smell like a pizzeria.
- Let the roasted vegetables cool slightly. This makes them safer to handle and easier to process. Once they’re cool enough to touch, transfer them in batches to your food mill set over a large bowl. Process until you have a smooth sauce, leaving the skins and seeds behind in the mill. If you’re using a food processor, pulse until smooth, then press the puree through a fine-mesh strainer to remove the skins and seeds. I prefer the food mill method because it’s faster and less messy.
- Pour the pureed sauce into your large stockpot. Add the fresh basil, fresh oregano, and balsamic vinegar. Stir to combine. Bring the sauce to a gentle simmer over medium heat, then reduce the heat to low. Let it simmer for 20-30 minutes, stirring occasionally, to allow the flavors to meld and the sauce to thicken slightly. Taste and adjust the salt and pepper as needed. This is where you decide if it needs more of anything.
- While the sauce simmers, prepare your canning equipment. Wash your jars, lids, and bands in hot, soapy water. Rinse well. Place the jars in your water bath canner, fill the canner with enough water to cover the jars by at least 1 inch, and bring it to a simmer (180°F). Keep the jars hot. Place the lids in a small saucepan of simmering water to soften the sealing compound.
- Add the bottled lemon juice to your hot jars. Use the canning funnel to add 2 tablespoons of bottled lemon juice to each pint jar. (Use 1 tablespoon for half-pints.) This is a critical safety step for canning, so don’t skip it.
- Ladle the hot sauce into the jars. Leave 1/2 inch of headspace at the top of each jar. Use a non-metallic spatula to remove any air bubbles by sliding it gently between the jar and the sauce. Wipe the rims of the jars with a clean, damp towel to remove any residue. Center a lid on each jar and screw on the band until it’s fingertip-tight—don’t overtighten.
- Process the jars in the water bath canner. Using your jar lifter, carefully place the filled jars into the canner rack. Make sure the jars are covered by at least 1 inch of water. Bring the water to a full rolling boil. Process pint jars for 35 minutes (adjust for altitude if necessary—see note below). Start the timer only after the water has reached a full boil.
- Remove the jars and let them cool. After the processing time is up, turn off the heat and let the jars sit in the canner for 5 minutes. Then, using your jar lifter, remove them to a clean kitchen towel on the counter. Leave at least 1 inch of space between the jars. Do not tighten the bands or disturb them. Let them cool completely for 12-24 hours. You’ll hear the satisfying “ping” sound as the lids seal.
- Check the seals. After cooling, press the center of each lid. It should be concave and not move. If a lid pops up and down, the jar didn’t seal. Store that jar in the refrigerator and use it within a week. Label your sealed jars with the date and store them in a cool, dark place for up to a year.
Altitude Adjustment Note: If you live above 1,000 feet in elevation, you need to increase your processing time. For 1,001-3,000 feet, add 5 minutes. For 3,001-6,000 feet, add 10 minutes. For 6,001-8,000 feet, add 15 minutes. For 8,001-10,000 feet, add 20 minutes.
Cooking Tips & Techniques
I’ve made this sauce more times than I can count, and I’ve definitely made my share of mistakes along the way. Here are the lessons I learned the hard way so you don’t have to.
Don’t skip the roasting step. I know it’s tempting to just dump everything in a pot and boil it, but roasting is the secret to that deep, caramelized flavor. The first time I tried to shortcut this, I ended up with a sauce that was fine, but it was missing that “wow” factor. The oven concentrates the sugars and adds a subtle smokiness that you just can’t get on the stovetop. Trust me, the extra 45 minutes is worth it.
Watch your garlic. Garlic can burn quickly in a hot oven. If your cloves are small, check them after 30 minutes. Burnt garlic turns bitter and can ruin the whole batch. If you see them getting too dark, just remove them from the pan and set them aside. They’ll still be soft enough to process with the tomatoes.
Use a food mill, not just a blender. I made this mistake once. I pureed everything in my blender, and the sauce was beautiful and smooth. But it also had all the seeds and tough skins blended into it, which gave it a slightly gritty texture and a bitter aftertaste. A food mill removes those bits while letting all the flavorful pulp through. It’s a small investment that makes a huge difference in the final texture.
Don’t overcrowd the roasting pans. This is a big one. If you pile the tomatoes on top of each other, they’ll steam and release their water, and you’ll end up with a watery sauce instead of a concentrated one. Spread them out in a single layer. If you have a lot of tomatoes, it’s better to roast them in batches or use two ovens. The caramelization happens when the tomatoes are in direct contact with the hot pan.
Timing is everything for canning. I once tried to multitask and started canning while my sauce was still simmering on the stove. I got distracted, the sauce reduced too much, and I didn’t have enough to fill all my jars. Plan your day so you have a solid block of time for the canning process. It’s not hard, but it requires your full attention for about an hour.
Test your jar seals before storing. I learned this one the hard way too. I put a jar of sauce in my pantry without checking the seal, and three months later, I opened it to find mold on top. Now, I always check the seals after 24 hours. If the lid flexes up and down, it’s not sealed. Refrigerate it and use it within a week. It’s a simple check that saves you from wasting a whole batch.
Variations & Adaptations
This recipe is a fantastic base, and I love playing around with it depending on what I have in the garden or what I’m craving. Here are a few of my favorite variations that I’ve tried over the years.
Spicy Arrabbiata Sauce
If you like a little heat, add 2-3 dried red chili peppers (like arbol or cayenne) to the roasting pan with the tomatoes. The heat will infuse into the oil and sauce. You can also add 1 teaspoon of red pepper flakes when you simmer the sauce. This version is amazing on pasta with a sprinkle of pecorino cheese. I made this for a game day party once, and it was gone in 20 minutes.
Smoky Chipotle Tomato Sauce
For a deeper, smoky flavor, replace the fresh oregano with 1-2 chipotle peppers in adobo sauce (minced). Add them when you simmer the sauce. The smokiness pairs beautifully with the roasted tomatoes. This is my go-to for enchiladas or as a base for a smoky chili. Just be careful—chipotle peppers can be spicy, so start with one and taste as you go.
Herb-Infused Garden Sauce
In the summer, my garden overflows with herbs, so I like to customize the herb blend. Try adding fresh thyme, rosemary, or even a few sage leaves to the roasting pan. You can also tie a bundle of fresh herbs (a bouquet garni) with kitchen twine and let it simmer in the sauce. This version is incredibly aromatic and tastes like a walk through a Mediterranean garden.
Dietary Adaptations
This recipe is naturally vegan and gluten-free. For a lower-sodium version, reduce the salt to 1 tablespoon and rely more on the herbs and balsamic vinegar for flavor. If you need to avoid nightshades, unfortunately, this recipe isn’t for you, but you can try the same roasting technique with roasted red peppers and carrots for a different kind of sauce.
Serving & Storage Suggestions
This sauce is incredibly versatile. I use it for everything from a simple weeknight pasta to a fancy lasagna. Here’s how I like to serve and store it.
Serving: Serve the sauce warm over your favorite pasta—spaghetti, rigatoni, or pappardelle all work beautifully. I also love it on pizza, as a dipping sauce for crusty bread, or spooned over creamy polenta. For a quick and satisfying meal, I’ll sauté some Italian sausage, then add a jar of this sauce and simmer for 15 minutes. Serve it over pasta with a sprinkle of fresh Parmesan. The sauce is best served at a gentle simmer, not boiling, to preserve its rich flavor.
Storage (Refrigerator): If you’re not canning the sauce, you can store it in an airtight container in the refrigerator for up to 5 days. The flavors actually deepen and meld together overnight, so it’s even better the next day.
Storage (Freezer): This sauce freezes beautifully. Let it cool completely, then pour it into freezer-safe bags or containers. Lay the bags flat to freeze, which saves space. The sauce will keep for up to 3 months. To thaw, place the bag in the refrigerator overnight, or run it under warm water.
Storage (Canned): As detailed in the method, properly canned jars will keep in a cool, dark pantry for up to 12 months. Once you open a jar, store it in the refrigerator and use it within a week. The flavor of the sauce actually improves over the first few months in the jar, as the herbs and spices meld together.
Reheating: Simply pour the sauce into a saucepan and warm it over medium-low heat, stirring occasionally. If the sauce seems too thick after storing, add a splash of water or pasta cooking water to loosen it up. I find that the sauce thickens as it sits, so a little liquid helps bring it back to the perfect consistency.
Nutritional Information & Benefits
This Homemade Roasted Tomato Sauce is not only delicious but also packed with nutrition. When you make it yourself, you control exactly what goes in, which is a huge win for your health.
Estimated Nutritional Values (per 1/2 cup serving):
- Calories: 60-80
- Fat: 4-5g (mostly from healthy olive oil)
- Sodium: 300-400mg (can be reduced with less salt)
- Carbohydrates: 8-10g
- Fiber: 2-3g
- Sugar: 5-7g (natural from tomatoes)
- Protein: 1-2g
- Vitamin C: 20% of the Daily Value (DV)
- Vitamin A: 15% of the DV
- Lycopene: A powerful antioxidant, especially bioavailable when cooked with oil.
Health Benefits: Tomatoes are a fantastic source of lycopene, an antioxidant linked to reduced risk of heart disease and certain cancers. Cooking tomatoes with olive oil actually increases the absorption of lycopene in your body. The garlic and onions in this recipe are prebiotics, which feed the good bacteria in your gut. Plus, by canning your own sauce, you avoid the added sugars, preservatives, and high sodium levels often found in store-bought jars. It’s a win for your pantry and your waistline.
Dietary Considerations: This sauce is naturally vegan, vegetarian, gluten-free, dairy-free, and nut-free. It is low in saturated fat and can be made low-sodium by reducing the salt. As always, check your specific dietary needs, but this is a very inclusive recipe.
Conclusion
Honestly, I think this is the best tomato sauce I’ve ever made, and I’m not just saying that because it’s my recipe. The roasting method is a game-changer. It takes something simple and transforms it into something deeply flavorful and satisfying. Whether you’re a seasoned canner or a complete beginner, I promise you can make this. It’s forgiving, it’s delicious, and the feeling of seeing those jars lined up on your shelf is unbeatable.
I encourage you to make this recipe your own. Play with the herbs, adjust the garlic, or add a pinch of chili flakes. The beauty of homemade sauce is that it reflects your taste. I’d love to hear how it turns out for you. Did you try a fun variation? Did your jars seal perfectly? Let me know in the comments below—I read every single one. And if you share a photo on Pinterest, tag me! I love seeing your kitchen adventures.
So, grab those tomatoes, preheat your oven, and get ready to fill your pantry with the taste of summer. You’ve got this. Happy canning!
Frequently Asked Questions
Can I use this recipe for canning if I don’t have a food mill?
Yes, you can! If you don’t have a food mill, you can use a food processor to puree the roasted vegetables. However, you will need to press the puree through a fine-mesh strainer to remove the skins and seeds. It takes a bit more elbow grease, but it works perfectly. Alternatively, you can peel the tomatoes before roasting, which eliminates the skins entirely. To peel them, score an “X” on the bottom of each tomato, blanch them in boiling water for 30-60 seconds, then plunge them into an ice bath. The skins will slip right off.
Do I really need to add bottled lemon juice for canning?
Yes, this is a critical safety step. Tomatoes are borderline in terms of acidity for safe water bath canning. Bottled lemon juice has a standardized acidity level that ensures your sauce is safe from botulism. Fresh lemon juice can vary in acidity, so it’s not a reliable substitute. Do not skip this step, and do not substitute with vinegar or citric acid unless you are following a tested recipe that specifies those alternatives.
My sauce seems too thin after roasting. What should I do?
This can happen if you used very juicy tomatoes or if they weren’t roasted long enough. If your sauce is too thin, simply simmer it on the stovetop for an additional 15-30 minutes after pureeing. The liquid will evaporate, and the sauce will thicken. Stir it occasionally to prevent it from sticking to the bottom of the pot. You can also add a tablespoon of tomato paste to help thicken it and boost the tomato flavor.
How long will the canned sauce last?
If processed correctly in a water bath canner and stored in a cool, dark place (like a pantry or basement), your canned sauce will maintain its best quality for 12 to 18 months. It will still be safe to eat after that, but the color and flavor may start to fade. I usually try to use mine within a year, and I label each jar with the date so I know which ones to use first.
Can I double this recipe?
Absolutely! This recipe scales up very well. If you’re doubling it, you’ll likely need to roast the tomatoes in batches or use two ovens if you have them. Make sure your stockpot is large enough to hold the doubled volume of sauce—an 8-quart pot can handle a single batch, but you might need a 12-quart or larger pot for a double batch. The canning process will also take longer, as you’ll have more jars to fill and process. Just plan for a full afternoon in the kitchen.
Pin This Recipe!
Homemade Roasted Tomato Sauce for Canning: Easy Best Recipe

This Homemade Roasted Tomato Sauce for Canning is a summer staple, using a roasting method that concentrates sweetness and deepens flavor. It’s simple, forgiving, and perfect for stocking your pantry with the taste of summer.
- Prep Time: 20 minutes
- Cook Time: 1 hour 30 minutes
- Total Time: 2 hours 30 minutes
- Yield: 8 servings 1x
- Category: Main Course
- Cuisine: Italian
Ingredients
- 10 pounds Roma or paste tomatoes
- 1 whole head garlic, cloves separated and peeled
- 2 large yellow onions, quartered
- 1/4 cup extra-virgin olive oil, plus more for drizzling
- 1 cup loosely packed fresh basil leaves
- 2 tablespoons chopped fresh oregano
- 2 tablespoons kosher salt (or to taste)
- 1 teaspoon freshly ground black pepper
- 2 tablespoons balsamic vinegar
- 2 tablespoons bottled lemon juice per pint jar (for canning safety)
Instructions
- Preheat your oven to 400°F (200°C). Wash tomatoes and remove stems. Cut large tomatoes in half (or quarters if huge); cherry or grape tomatoes can be left whole.
- Toss halved tomatoes, quartered onions, and peeled garlic cloves with 1/4 cup olive oil, 1 tablespoon kosher salt, and black pepper. Spread in a single layer on two half-sheet pans or one large roasting pan. Drizzle with extra olive oil.
- Roast for 45-60 minutes until tomatoes are wrinkly and slightly browned, onions are soft and caramelized, and garlic is golden and soft. Halfway through, gently shake pans.
- Let roasted vegetables cool slightly. Transfer in batches to a food mill set over a large bowl and process until smooth, leaving skins and seeds behind. Alternatively, puree in a food processor and press through a fine-mesh strainer.
- Pour pureed sauce into a large stockpot. Add fresh basil, fresh oregano, and balsamic vinegar. Bring to a gentle simmer over medium heat, then reduce to low. Simmer for 20-30 minutes, stirring occasionally. Adjust salt and pepper to taste.
- While sauce simmers, prepare canning equipment: wash jars, lids, and bands in hot soapy water. Place jars in a water bath canner with enough water to cover by 1 inch and bring to a simmer (180°F). Keep jars hot. Place lids in a small saucepan of simmering water.
- Add 2 tablespoons bottled lemon juice to each hot pint jar (1 tablespoon for half-pints) using a canning funnel.
- Ladle hot sauce into jars, leaving 1/2 inch headspace. Remove air bubbles with a non-metallic spatula. Wipe rims clean, center lids, and screw on bands fingertip-tight.
- Place filled jars in canner rack, ensuring they are covered by at least 1 inch of water. Bring to a full rolling boil. Process pint jars for 35 minutes (adjust for altitude if necessary). Start timer after water reaches a full boil.
- After processing, turn off heat and let jars sit in canner for 5 minutes. Remove jars to a clean kitchen towel on the counter, leaving 1 inch space between them. Do not tighten bands. Let cool completely for 12-24 hours.
- Check seals: press center of each lid; it should be concave and not move. If a lid pops up and down, refrigerate that jar and use within a week. Label sealed jars with date and store in a cool, dark place for up to a year.
Notes
Altitude adjustment: For 1,001-3,000 feet, add 5 minutes processing time; for 3,001-6,000 feet, add 10 minutes; for 6,001-8,000 feet, add 15 minutes; for 8,001-10,000 feet, add 20 minutes. Do not skip the roasting step for best flavor. Watch garlic to prevent burning. Use a food mill for best texture. Do not overcrowd roasting pans. Test jar seals before storing.
Nutrition
- Serving Size: 1/2 cup
- Calories: 70
- Sugar: 6
- Sodium: 350
- Fat: 4.5
- Saturated Fat: 0.5
- Carbohydrates: 9
- Fiber: 2.5
- Protein: 1.5
Keywords: roasted tomato sauce, canning, homemade sauce, tomato sauce recipe, preserving, summer recipe


