Love this? Save it for later!
Share the inspiration with your friends
I used to think Halloween food was just about the candy—store-bought bags of fun-size bars, maybe some candy corn if you’re feeling brave. Then my sister showed up at our family Halloween get-together with a platter of these little hot dogs wrapped in crescent dough, and I laughed. I mean, honestly, I snickered. They looked like tiny mummies with little mustard eyes staring up at me, and I thought, “Really? This is what we’re doing now?”
But let me tell you, I ate three of them before anyone else even sat down. Three. I couldn’t stop. There’s something about the combination of salty, snappy hot dog wrapped in buttery, flaky dough that just hits different when it looks like a little bandaged guy. My sister caught me reaching for a fourth and just raised an eyebrow. I didn’t even care. That was three Halloweens ago, and I’ve made these every year since.
Maybe you’ve been there—rolling your eyes at cutesy themed snacks, only to find yourself sneaking bites when nobody’s watching. Or maybe you’re the one who brings the impressive spread and needs something that looks like you tried way harder than you actually did. Either way, these easy mummy hot dogs are about to become your October MVP. They’re ridiculous, they’re delicious, and they’re the kind of thing that makes adults and kids alike forget about the candy bowl for a solid five minutes. That’s real power, if you ask me.
Why You’ll Love This Recipe
Let’s be real for a second. Halloween party planning is stressful enough without worrying about complicated recipes. You’ve got costumes to figure out, decorations to hang, and probably a pumpkin that needs carving. The last thing you need is a snack that takes an hour of prep and leaves you with a sink full of dishes. These mummy dogs solve all of that.
- So easy a kid could help: We’re talking about wrapping pre-made dough around hot dogs. That’s it. My nephew made his own last year and they looked like they’d been through a battle, but he was so proud. And honestly, the wonky ones taste just as good.
- Just three main ingredients: Hot dogs, crescent dough, and mustard or candy eyes. You probably already have two of those in your kitchen right now. No special trips to three different stores.
- Ready in under 25 minutes: From fridge to table in about the time it takes to watch a single episode of a sitcom. Perfect for when guests show up early or hangry kids are circling the kitchen.
- Always the first thing to disappear: I’ve brought these to potlucks, Halloween parties, and even a casual October movie night. Every single time, the platter comes back empty. People cannot resist a tiny mummy.
- Customizable for picky eaters: Use your favorite hot dog brand, swap in turkey dogs, or go with plant-based options. The dough covers a multitude of sins.
What makes this version different from all the other mummy dog recipes out there? It’s the little things I’ve learned from making these more times than I care to admit. Like how rolling the dough slightly thinner gives you a better mummy look. Or how baking them on a parchment-lined sheet makes cleanup basically nonexistent. I’ve tested this with different dough brands, different hot dog sizes, and different eye placements. This is the version that works every single time, no fuss, no stress.
There’s something genuinely joyful about watching someone’s face light up when they see a platter of these goofy little guys. It’s comfort food dressed up in a costume, and isn’t that what Halloween is all about? Being something silly for a night, eating things that make you smile, and not taking yourself too seriously. These mummy dogs deliver that feeling on a plate.
What Ingredients You Will Need
This recipe keeps things beautifully simple. You don’t need a long grocery list or any obscure ingredients. Here’s what you’ll need to make about 8 mummy hot dogs, which serves about 4 to 6 people as a party snack.
For the Mummies:
- 8 hot dogs (standard size works best—I prefer beef hot dogs for flavor, but any brand works. Look for ones that are about 4 to 5 inches long)
- 1 can (8 ounces) refrigerated crescent roll dough (Pillsbury is my go-to, but store brands work fine. The key is getting the kind that comes in the perforated triangle sheets, not the seamless sheet dough)
- Mustard or candy eyes for decorating (yellow mustard gives that classic mummy look, but you can use ketchup, sriracha, or even dot-shaped candy sprinkles. For candy eyes, Wilton makes little edible eyes that are perfect)
Optional but Helpful:
- 1 tablespoon melted butter (brushing this on before baking gives a gorgeous golden-brown finish. I skip it when I’m feeling lazy and they still turn out great)
- Everything bagel seasoning or sesame seeds (sprinkle on top for extra texture and visual appeal. Not traditional, but honestly, it’s delicious)
- Non-stick cooking spray or parchment paper (for lining your baking sheet. Parchment is my preference because nothing sticks and cleanup is a breeze)
Ingredient Selection Tips: When choosing hot dogs, look for ones that are uniform in size so they bake evenly. I’ve tried this with jumbo hot dogs and they take longer to cook through, plus the dough-to-dog ratio gets thrown off. Stick with standard size. For the crescent dough, check the expiration date at the store—fresher dough puffs up better. If you’re using a store brand, I’ve found they work just as well, though they might have slightly fewer perforations to press together.
Substitution Guidance: Need a gluten-free option? Look for gluten-free crescent dough (it exists, though it’s a bit more delicate to work with) or use gluten-free puff pastry sheets cut into strips. For a lower-fat version, turkey or chicken hot dogs work beautifully. Plant-based hot dogs? Yes, absolutely—just check that they’re firm enough to hold their shape during baking. Some vegan dogs get a bit soft, so look for ones labeled as “hearty” or “firm.”
Equipment Needed
You don’t need a fancy kitchen to pull these off. Here’s what you’ll actually use:
- Baking sheet (a standard half-sheet pan works great. I use an old one that’s seen better days, and it still does the job)
- Parchment paper or silicone baking mat (parchment is cheaper and disposable; silicone mats are reusable and eco-friendly. I use both depending on what’s clean)
- Sharp knife or pizza cutter (for cutting the dough into strips. A pizza cutter makes this faster, but a knife works fine. I’ve even used kitchen scissors in a pinch)
- Pastry brush (for applying butter, if you’re using it. A silicone brush is easiest to clean, but a cheap bristle brush works too)
- Small bowl (for melted butter if using)
- Toothpicks (optional—if you’re adding candy eyes, a dab of mustard on a toothpick helps stick them on)
Budget-Friendly Alternatives: Don’t have a pizza cutter? A butter knife works. No pastry brush? Just drizzle the melted butter with a spoon. No baking sheet? A cast iron skillet can work in a pinch, though you’ll need to watch the bottoms closely so they don’t burn. I once made these at a friend’s cabin using a toaster oven and a piece of foil. They weren’t pretty, but they were delicious. The point is, don’t let missing equipment stop you.
Preparation Method

Alright, let’s get these little guys wrapped up. This whole process takes about 10 minutes of active prep and 12 to 15 minutes of baking. Set a timer so you don’t forget about them like I did that one time. Burnt mummies are not cute.
Step 1: Preheat and Prep
Preheat your oven to 375°F (190°C). Line your baking sheet with parchment paper or a silicone mat. If you don’t have either, lightly spray the sheet with non-stick cooking spray. I’ve forgotten to line the sheet before and spent 20 minutes scrubbing—learn from my mistake.
Step 2: Prepare the Dough
Open the can of crescent dough. I know that sound makes you jump every time—it still gets me. Unroll the dough and separate it along the perforated lines into 8 triangles. Press the seams together on each triangle to create a solid piece of dough. You should have 8 rectangles of dough now.
Step 3: Cut the Dough into Strips
Using a sharp knife or pizza cutter, cut each rectangle lengthwise into 3 to 4 thin strips. The strips should be about a quarter-inch wide. Don’t stress about making them perfectly even—mummies are supposed to look a little messy. I’ve made strips that were all different widths and they looked charmingly homemade.
Step 4: Wrap the Hot Dogs
Take one hot dog and start wrapping a dough strip around it at a slight angle, leaving a small gap near the top for the mummy’s face. Overlap the strips slightly as you go, just like wrapping a bandage. Use 2 to 3 strips per hot dog, depending on how thick you cut them. Press the ends gently to seal. Place the wrapped hot dog on your prepared baking sheet, seam side down. Repeat with the remaining hot dogs and dough strips.
Pro tip: Leave about an inch of the hot dog exposed at the top for the face. If you wrap all the way up, you won’t have room for the eyes, and then it’s just a hot dog in a dough blanket—still tasty, but not a mummy.
Step 5: Brush with Butter (Optional)
If you’re using melted butter, brush a thin layer over the dough on each mummy. This step gives you that gorgeous golden-brown color that makes them look bakery-fresh. I skip this when I’m short on time and they still come out fine, but the butter makes a noticeable difference in appearance.
Step 6: Bake
Place the baking sheet in the preheated oven and bake for 12 to 15 minutes, or until the dough is golden brown and cooked through. The hot dogs should be heated through and slightly plump. Keep an eye on them after the 12-minute mark—ovens vary, and you don’t want burnt edges. I once got distracted by a phone call and let them go 17 minutes. They were edible but crispy in a way that felt more like a mistake than a feature.
Step 7: Add the Eyes
Remove the baking sheet from the oven and let the mummy dogs cool for about 2 minutes on the sheet. They’ll be hot, so give them a minute. Using a toothpick or the tip of a knife, dab small dots of mustard onto the exposed hot dog section to create eyes. If you’re using candy eyes, press them gently into small dabs of mustard to help them stick. You can also use ketchup, sriracha, or even black sesame seeds for a different look. I’ve made googly-eyed mummies with candy eyes and they’re ridiculously cute.
Step 8: Serve Immediately
Transfer the mummy dogs to a serving platter and serve while warm. They’re best fresh out of the oven when the dough is flaky and the hot dog is juicy. Arrange them on a platter with some extra mustard or ketchup for dipping. Watch them disappear.
Cooking Tips & Techniques
I’ve made these mummy dogs more times than I care to count, and I’ve learned a few things the hard way. Let me save you some trouble.
Don’t overwork the dough. Crescent dough gets tough if you handle it too much. When you’re pressing the seams together, be gentle. When you’re cutting strips, use a sharp tool so you’re not dragging and stretching the dough. Stretched dough shrinks back while baking, and you’ll end up with uneven wraps.
Space them out on the baking sheet. These guys puff up as they bake. If you crowd them together, they’ll stick to each other and you’ll have a mummy pile instead of individual mummies. Leave at least an inch between each one. I learned this when I tried to fit 12 on one sheet and ended up with a blob of dough that looked like a failed science experiment.
Watch the baking time closely. The difference between perfect and overdone is about 2 minutes. Start checking at the 12-minute mark. The dough should be golden brown, not dark brown. If the edges of the dough strips are browning faster than the centers, you can tent the sheet loosely with foil for the last few minutes.
Make ahead tip: You can assemble these up to 4 hours ahead of time. Arrange the wrapped mummy dogs on the baking sheet, cover with plastic wrap, and refrigerate. When you’re ready to bake, just pop them in the oven straight from the fridge—add an extra 2 minutes to the baking time. I’ve done this for parties and it’s a lifesaver.
My biggest failure: The first time I made these, I used low-fat crescent dough because I was trying to be healthy. It was a disaster. The dough was dry, it cracked when I tried to wrap it, and the final result looked like a mummy that had been through a tornado. Use the regular dough. Trust me on this one.
Variations & Adaptations
One of the best things about this recipe is how easy it is to change up. Here are some variations I’ve tried and loved:
Spicy Mummy Dogs: Use spicy Italian sausages or chorizo-style hot dogs instead of regular ones. Brush the dough with a mixture of melted butter and hot sauce before baking. Add a tiny dot of sriracha for the eyes. These are my personal favorite for adult parties.
Cheesy Mummy Dogs: Before wrapping, slice the hot dog lengthwise about three-quarters of the way through (don’t cut all the way) and stuff a thin strip of cheddar or mozzarella cheese inside. Wrap as usual. The cheese melts out slightly during baking and looks like mummy guts. Gross and delicious.
Vegetarian Version: Use plant-based hot dogs or even vegetarian sausages. I’ve tried this with MorningStar Farms veggie dogs and they worked great. Just check the cooking time—some plant-based options heat through faster than meat hot dogs.
Puff Pastry Mummies: Instead of crescent dough, use frozen puff pastry sheets. Thaw them according to package directions, cut into strips, and wrap the same way. Puff pastry gives a flakier, more buttery result. Bake at 400°F (200°C) for about 15 minutes. This version looks fancier but takes a bit more effort.
Breakfast Mummies: Use breakfast sausage links instead of hot dogs, and wrap with refrigerated biscuit dough cut into strips. Serve with maple syrup for dipping. I made these for a Halloween morning breakfast and the kids lost their minds.
Gluten-Free Adaptation: As mentioned, gluten-free crescent dough works, but it’s more fragile. Work with it while it’s cold, and be gentle when wrapping. You can also use gluten-free puff pastry sheets cut into strips.
Serving & Storage Suggestions
These mummy dogs are best served warm, right out of the oven. The contrast between the hot, juicy hot dog and the flaky, buttery dough is what makes them special. But I get it—sometimes you need to prep ahead or deal with leftovers.
Serving Temperature: Serve them warm, not piping hot. Let them cool for about 2 to 3 minutes after baking so nobody burns their mouth. They’re still delicious at room temperature for about an hour, so they’re perfect for buffet-style parties.
Presentation Ideas: Arrange them on a black or orange platter for Halloween vibes. Add a small bowl of mustard and ketchup for dipping. You can even label them with a little sign that says “Mummy Dogs” or “Mummy Wraps.” For a fun touch, arrange them in a circle around a bowl of dipping sauce so it looks like they’re guarding the treasure.
What to Serve With Them: These pair well with other finger foods. I like to serve them alongside a veggie platter with ranch dip, some popcorn balls, and maybe a bowl of Halloween-themed punch. They also work great as a main dish for a casual Halloween dinner—just serve with a simple side salad or some apple slices.
Storage Instructions: Leftover mummy dogs can be stored in an airtight container in the refrigerator for up to 3 days. The dough will lose some of its crispness, but they’ll still taste good. To reheat, place them on a baking sheet in a 350°F (175°C) oven for about 5 to 7 minutes, or until heated through. The microwave works in a pinch, but the dough gets soft and chewy. I don’t recommend freezing them—the texture of the hot dog changes when thawed and the dough gets weird.
Flavor Development: Honestly, these are best fresh. The dough doesn’t improve with time. But if you have leftovers, they make a great lunch the next day. My kid loves them cold straight from the fridge, which I think is weird, but hey—less work for me.
Nutritional Information & Benefits
Let’s be honest—these are a treat, not a health food. But here’s what you’re looking at per mummy dog (based on standard ingredients, no butter brush):
- Calories: Approximately 180-220 per mummy dog
- Protein: 7-9 grams
- Carbohydrates: 14-18 grams
- Fat: 11-14 grams
- Sodium: 500-650 mg
Health Considerations: If you’re watching your sodium, look for low-sodium hot dogs. Turkey or chicken dogs have less fat than beef. The crescent dough is the main source of carbs and fat, so you could use low-fat crescent dough if you want, though I warned you about the texture issue.
Potential Allergens: This recipe contains wheat (gluten) from the crescent dough and milk from the butter (if used). Hot dogs may contain soy or other allergens depending on the brand. Check labels if you’re cooking for someone with food allergies.
My Take: Look, Halloween comes once a year. I’m not here to tell you to eat these every day. But for a party snack, they’re a fun, satisfying treat that brings people together. Balance them out with some veggie sticks and fruit, and you’re golden. Life is about moderation, not deprivation. Enjoy your mummy dogs.
Conclusion
These easy mummy-wrapped Halloween hot dogs are the kind of recipe that makes you look like a kitchen hero without actually having to work that hard. They’re fun, they’re delicious, and they bring a smile to everyone’s face. I’ve made them for Halloween parties, classroom celebrations, and casual movie nights, and they never fail to impress.
The beauty of this recipe is how customizable it is. Use your favorite hot dogs, experiment with different doughs, get creative with the eyes. Make them spicy, make them cheesy, make them silly. There’s no wrong way to do this. The only rule is to have fun with it.
I’d love to hear how yours turn out. Did you use candy eyes or mustard dots? Did your kids help wrap them? Did you come up with a variation I haven’t tried? Drop a comment below and let me know. And if you share a photo on social media, tag me—I want to see your mummy creations. Happy Halloween, and happy snacking!
Frequently Asked Questions
Can I make these mummy dogs in an air fryer?
Yes! Air fry at 350°F (175°C) for 8 to 10 minutes, flipping halfway through. The dough gets extra crispy in the air fryer, which is actually really nice. Just don’t overcrowd the basket—work in batches if needed.
How do I keep the dough from unraveling while baking?
Make sure you’re pressing the ends of the dough strips gently against the hot dog to seal them. Placing the mummy dog seam-side down on the baking sheet also helps hold everything together. If you’re really worried, you can use a tiny dab of water to stick the ends down.
Can I use homemade dough instead of canned crescent rolls?
Absolutely. Any basic pizza dough or biscuit dough works. Roll it out thin, cut into strips, and wrap the same way. Homemade dough will give a different texture—chewier and more bread-like—but it’s still delicious. Just adjust the baking time since homemade dough might take a few minutes longer.
What’s the best way to add eyes if I don’t have candy eyes or mustard?
Get creative! You can use ketchup dots, hot sauce dots, black or white sesame seeds, tiny pieces of olive, or even small dots of cream cheese. I once used dots of sriracha and they looked like angry mummies, which was hilarious.
How far in advance can I make these for a party?
You can assemble them up to 4 hours ahead and keep them in the refrigerator. Bake them right before serving for the best texture. If you need to prep even further ahead, you can bake them earlier in the day and reheat in a 350°F oven for 5 minutes before serving. They won’t be quite as good as fresh, but they’ll still be a hit.
Pin This Recipe!

Easy Mummy Hot Dogs: Best Halloween Party Snack
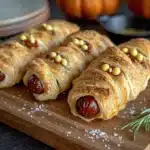
These easy mummy hot dogs are a fun and delicious Halloween party snack made with just three main ingredients: hot dogs, crescent dough, and mustard or candy eyes. Ready in under 25 minutes, they’re always the first thing to disappear at any gathering.
- Prep Time: 10 minutes
- Cook Time: 12-15 minutes
- Total Time: 22-25 minutes
- Yield: 8 mummy hot dogs (serves 4-6 as a party snack) 1x
- Category: Appetizer
- Cuisine: American
Ingredients
- 8 hot dogs (standard size, about 4–5 inches long)
- 1 can (8 ounces) refrigerated crescent roll dough
- Mustard or candy eyes for decorating
- 1 tablespoon melted butter (optional, for brushing)
- Everything bagel seasoning or sesame seeds (optional, for sprinkling)
- Non-stick cooking spray or parchment paper (for lining baking sheet)
Instructions
- Preheat your oven to 375°F (190°C). Line a baking sheet with parchment paper or a silicone mat, or lightly spray with non-stick cooking spray.
- Open the can of crescent dough, unroll it, and separate along the perforated lines into 8 triangles. Press the seams together on each triangle to form 8 rectangles.
- Using a sharp knife or pizza cutter, cut each rectangle lengthwise into 3 to 4 thin strips, about 1/4-inch wide.
- Take one hot dog and start wrapping a dough strip around it at a slight angle, leaving a small gap near the top for the face. Overlap the strips slightly, using 2 to 3 strips per hot dog. Press the ends gently to seal. Place seam-side down on the prepared baking sheet. Repeat with remaining hot dogs and dough strips.
- If using, brush a thin layer of melted butter over the dough on each mummy.
- Bake for 12 to 15 minutes, or until the dough is golden brown and cooked through. Start checking at 12 minutes.
- Remove from the oven and let cool for about 2 minutes. Using a toothpick or knife tip, dab small dots of mustard onto the exposed hot dog section to create eyes. If using candy eyes, press them gently into small dabs of mustard to help them stick.
- Serve immediately while warm.
Notes
Don’t overwork the dough; handle gently. Space mummy dogs at least 1 inch apart on the baking sheet. Watch baking time closely—start checking at 12 minutes. Can be assembled up to 4 hours ahead and refrigerated; add 2 minutes to baking time if baking from cold. For best texture, serve fresh. Leftovers can be stored in an airtight container in the refrigerator for up to 3 days; reheat in a 350°F oven for 5-7 minutes.
Nutrition
- Serving Size: 1 mummy hot dog
- Calories: 200
- Sugar: 3
- Sodium: 575
- Fat: 12.5
- Saturated Fat: 4
- Carbohydrates: 16
- Protein: 8
Keywords: Halloween, mummy hot dogs, party snack, easy appetizer, crescent dough, hot dog wraps, Halloween food, kid-friendly


