Love this? Save it for later!
Share the inspiration with your friends
I was at my local hardware store last October, of all places, buying a new furnace filter when the cashier—a woman named Carol who looked like she’d rather be anywhere else—started telling me about dessert bars. “You need to try making these pumpkin cheesecake bars,” she said, not even asking if I liked pumpkin or cheesecake or bars. She just assumed I did, and she was right. She scribbled the recipe on the back of a receipt while the line behind me grew restless. I stuffed it in my pocket, convinced I’d lose it before I got home.
But I didn’t lose it. I actually stuck it to my fridge with a magnet shaped like a tomato, and there it sat for two weeks while I overthought it. Would the crust get soggy? Would the pumpkin layer overpower the cheesecake? Honestly, I was being ridiculous. The first time I made these Creamy Pumpkin Pie Cheesecake Bars, I burned the crust a little because I got distracted folding laundry. And you know what? They were still incredible. That slightly toasted graham cracker edge ended up being my favorite part—a happy accident I now do on purpose.
These bars are the fall dessert you didn’t know you needed. They have that silky pumpkin pie filling we all crave, but they sit on a buttery graham cracker crust and get a thick, tangy cheesecake layer that keeps everything from being too sweet. The whole thing comes together in a 9×13 pan, which means more bars per batch and less fuss than a traditional pie. Maybe you’ve been through the stress of a cracked pumpkin pie or a crust that sticks to the pan. These bars solve all that. No water bath, no blind baking drama, just layers of creamy, spiced perfection. I’ve made them four times since that hardware store encounter, and each batch disappears faster than I can say “pass the whipped cream.”
Why You’ll Love This Recipe
Let me tell you why these Creamy Pumpkin Pie Cheesecake Bars have earned a permanent spot in my fall baking rotation. I’ve tested this recipe six times now—yes, six—tweaking the spice ratio, adjusting the bake time, and even trying different cream cheese brands. I’m not a professional chef, but I’ve spent enough time in my tiny kitchen to know when something is just right. These bars are it.
- Quick & Easy: From start to finish, you’re looking at about an hour of active time. The oven does most of the work, and you don’t need a stand mixer or any fancy gadgets. A bowl and a whisk will get you there.
- Simple Ingredients: You probably have most of this stuff already. Butter, sugar, eggs, cream cheese, pumpkin puree. The only thing you might need to buy is a can of pumpkin and some graham crackers, but that’s a quick trip to the store.
- Perfect for Fall Gatherings: Thanksgiving, Friendsgiving, potlucks, or just a Tuesday night when you need something cozy. These bars travel well, slice cleanly, and don’t require a pie server or special plates.
- Crowd-Pleaser: Last week, I brought a pan to my book club, and three people asked for the recipe before I even sat down. Kids love them, adults love them, and people who say they don’t like pumpkin pie have been converted.
- Unbelievably Delicious: The texture is what gets me every time. The cheesecake layer is dense and creamy, the pumpkin layer is light and spiced, and the crust stays crunchy even after a day in the fridge. It’s the kind of dessert that makes you close your eyes after the first bite.
What makes this recipe different from the dozens of pumpkin cheesecake bars out there? It’s the balance. I use a touch more cinnamon than usual and a pinch of black pepper—trust me on this—to deepen the flavor without making it spicy. The cheesecake layer uses a full two blocks of cream cheese for that rich, tangy bite that stands up to the pumpkin. And the crust? I press it firmly into the pan and pre-bake it for exactly eight minutes, which keeps it from getting soggy when you add the wet layers. This isn’t just another version of pumpkin bars. This is the version you’ll come back to every single fall.
What Ingredients You Will Need
This recipe uses simple, wholesome ingredients that come together to create something truly special. Most of these are pantry staples, especially if you do any fall baking. Let me walk you through each one and why it matters.
For the Graham Cracker Crust
- 2 cups graham cracker crumbs (about 14-15 full sheets, crushed finely) – I recommend using a food processor for the most consistent texture, but a zip-top bag and a rolling pin work fine too. Honey graham crackers give the best flavor, but cinnamon ones work in a pinch.
- ½ cup unsalted butter, melted – Use real butter here, not margarine. It makes the crust richer and helps it hold together. I like Kerrygold for its creaminess, but any unsalted brand works.
- ¼ cup granulated sugar – Just enough to sweeten the crust without making it candy-like. You can reduce this to 2 tablespoons if you prefer a less sweet base.
- ¼ teaspoon salt – A tiny pinch balances the sweetness and enhances the buttery flavor. Don’t skip it, even if your butter is salted—you want that contrast.
For the Cheesecake Layer
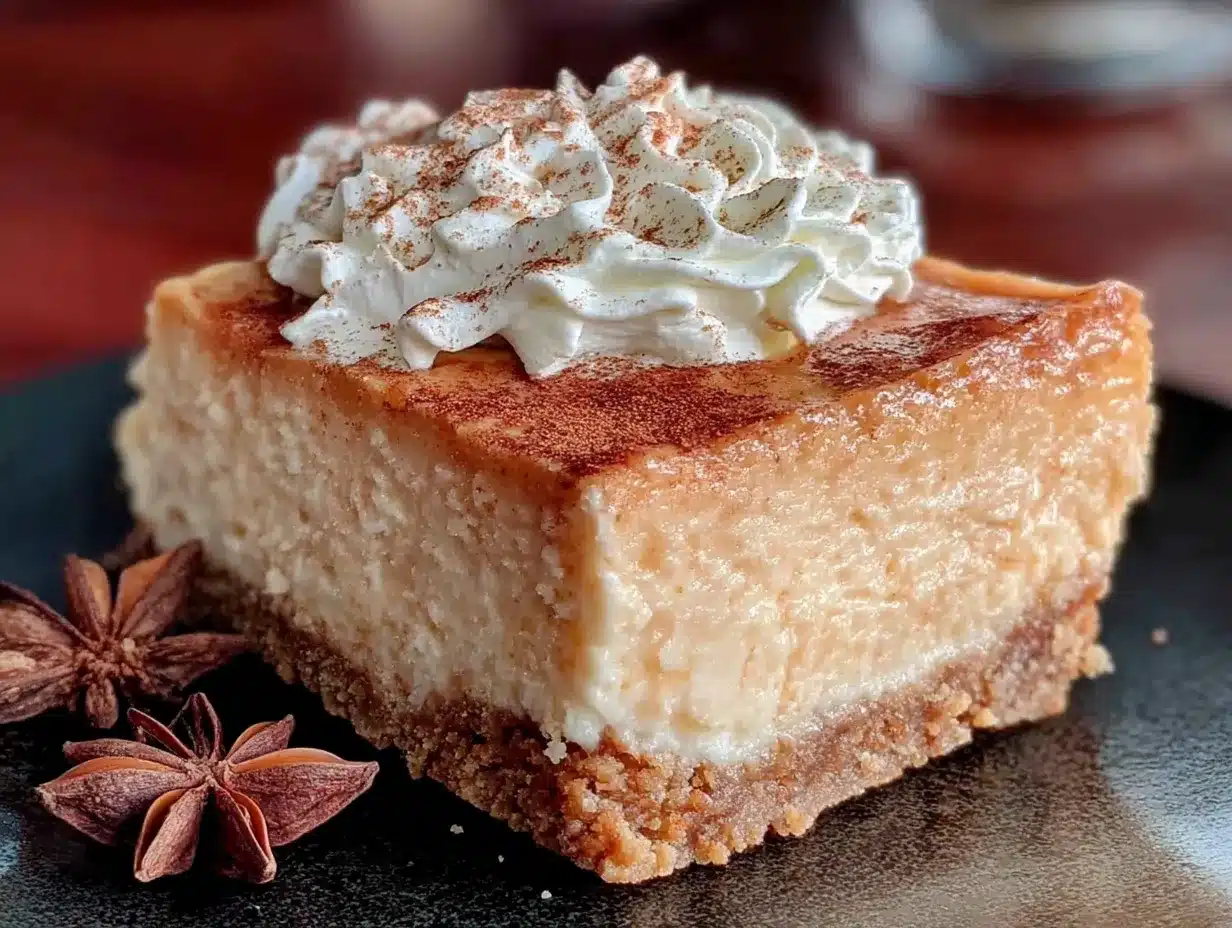
- 16 ounces full-fat cream cheese, softened – Two standard blocks. Full-fat is non-negotiable here for that silky texture. Low-fat cream cheese contains more water and can make the layer grainy or runny. Set it out on the counter for at least an hour before you start.
- ½ cup granulated sugar – Sweetens the cheesecake without making it cloying. The pumpkin layer has its own sweetness, so this layer stays balanced.
- 2 large eggs, room temperature – Room temperature eggs blend into the cream cheese more smoothly, preventing lumps. If you forgot to take them out early, place them in a bowl of warm water for 5 minutes.
- 1 teaspoon vanilla extract – Pure vanilla extract, not imitation. It adds warmth and depth. I use Nielsen-Massey, but any pure vanilla works.
- 1 tablespoon all-purpose flour – This stabilizes the cheesecake layer and prevents cracking. It’s a small amount, but it makes a big difference in texture.
For the Pumpkin Layer
- 1 can (15 ounces) pumpkin puree – Not pumpkin pie filling. Make sure the label says “100% pure pumpkin.” Libby’s is my go-to because it’s consistently thick and not watery. If you use homemade pumpkin puree, you may need to drain it on paper towels first to remove excess moisture.
- ½ cup granulated sugar – Adds sweetness to balance the earthy pumpkin flavor.
- ¼ cup packed light brown sugar – Brown sugar adds molasses notes that complement the pumpkin and spices. Dark brown sugar works too, but it will give a deeper, more caramel-like flavor.
- 2 large eggs, room temperature – Same as the cheesecake layer. Room temperature is important for a smooth, cohesive batter.
- ½ cup heavy cream – This makes the pumpkin layer extra creamy and luxurious. You can substitute half-and-half if that’s what you have, but the texture won’t be as rich. Do not use milk—it will make the filling too thin.
- 1 teaspoon vanilla extract – Again, pure vanilla. It rounds out the spices beautifully.
- 2 teaspoons ground cinnamon – The star spice of fall. I use Saigon cinnamon for its bold, slightly sweet flavor, but regular cinnamon works perfectly.
- 1 teaspoon pumpkin pie spice – A shortcut blend of cinnamon, nutmeg, ginger, and allspice. If you don’t have it, mix ½ teaspoon cinnamon, ¼ teaspoon nutmeg, ¼ teaspoon ginger, and a pinch of cloves.
- ¼ teaspoon salt – Enhances all the flavors and prevents the dessert from tasting flat.
- Pinch of black pepper – This is my secret ingredient. It adds a subtle warmth that you won’t even notice as “pepper.” It just makes the pumpkin taste more like itself. Trust me on this one.
Equipment Needed
You don’t need a professional kitchen to make these Creamy Pumpkin Pie Cheesecake Bars. Here’s what you’ll need, along with some tips from my own trials.
- 9×13-inch baking pan – Glass, ceramic, or metal all work. I prefer a light-colored metal pan because it conducts heat evenly and gives the crust a consistent golden color. If you use glass, reduce the oven temperature by 25°F to prevent over-browning.
- Food processor or zip-top bag and rolling pin – For crushing the graham crackers. A food processor gives the most uniform crumbs, but a bag and rolling pin work just fine. I’ve done both, and honestly, the bag method is oddly satisfying.
- Electric hand mixer or stand mixer – For beating the cream cheese until smooth. A hand mixer is easier for this recipe since you’re working with two separate batters. A stand mixer works too, but you’ll have to scrape the bowl more often.
- Large mixing bowls – You’ll need at least two: one for the cheesecake layer and one for the pumpkin layer. I use glass bowls because they don’t retain odors.
- Rubber spatula – For scraping every bit of batter into the pan. A silicone spatula is heat-resistant and won’t scratch your bakeware.
- Measuring cups and spoons – For accuracy. Baking is a science, and eyeballing ingredients can lead to a dry crust or a runny filling.
- Parchment paper – Line your pan with parchment paper, leaving an overhang on two sides. This makes it easy to lift the entire slab of bars out for clean slicing. Don’t skip this step—I learned the hard way when my first batch stuck to the pan.
- Sharp knife – For slicing clean bars. Wipe the knife between cuts with a damp paper towel for the neatest edges.
Budget-friendly tip: If you don’t have a food processor, place the graham crackers in a zip-top bag, press out the air, and crush them with a rolling pin or even a heavy skillet. It takes a few extra minutes, but it works perfectly.
Preparation Method
Let’s make these Creamy Pumpkin Pie Cheesecake Bars step by step. I’ll walk you through each stage with the exact timings and sensory cues so you know exactly what you’re looking for.
Step 1: Preheat and Prep the Pan
Preheat your oven to 350°F (175°C). Line your 9×13-inch baking pan with parchment paper, leaving about 2 inches of overhang on the two long sides. Lightly spray the parchment with nonstick cooking spray, just to be safe. Set the pan aside.
Step 2: Make the Crust
In a medium bowl, combine 2 cups graham cracker crumbs, ¼ cup granulated sugar, and ¼ teaspoon salt. Pour in ½ cup melted unsalted butter and stir with a fork until the mixture looks like wet sand and holds together when you squeeze it. Press the mixture firmly into the bottom of your prepared pan. I use the bottom of a flat measuring cup to really pack it down—this prevents the crust from crumbling when you slice the bars later. Bake the crust for 8 minutes at 350°F. It should look slightly golden around the edges and smell toasty. Remove from the oven and let it cool while you make the fillings. Leave the oven on.
Step 3: Make the Cheesecake Layer
In a large bowl, beat 16 ounces softened cream cheese with ½ cup granulated sugar using an electric mixer on medium speed until smooth and creamy, about 2 minutes. Scrape down the sides of the bowl with a rubber spatula. Add 2 room-temperature eggs, one at a time, beating on low after each addition just until combined. Over-mixing at this stage can incorporate too much air, which leads to cracks. Add 1 teaspoon vanilla extract and 1 tablespoon all-purpose flour, and mix on low until just combined. The batter should be smooth, thick, and free of lumps. Set it aside.
Step 4: Make the Pumpkin Layer
In a separate large bowl, whisk together 1 can pumpkin puree, ½ cup granulated sugar, and ¼ cup packed light brown sugar until smooth. Add 2 room-temperature eggs, ½ cup heavy cream, and 1 teaspoon vanilla extract, and whisk until fully combined. Add 2 teaspoons ground cinnamon, 1 teaspoon pumpkin pie spice, ¼ teaspoon salt, and a pinch of black pepper. Whisk until the spices are evenly distributed. The mixture should be smooth, slightly thick, and a beautiful deep orange color. Taste a tiny bit—it should be sweet, spiced, and unmistakably pumpkin.
Step 5: Layer the Fillings
Pour the cheesecake batter over the pre-baked crust and spread it evenly with a spatula. It should cover the entire crust in a smooth, even layer. Next, gently spoon the pumpkin batter over the cheesecake layer, starting at the edges and working your way to the center. Use the back of a spoon to spread it evenly without disturbing the cheesecake layer too much. Don’t worry if a little bit of cheesecake peeks through—that’s part of the charm.
Step 6: Bake
Place the pan in the preheated oven and bake at 350°F for 35 to 40 minutes. The edges should look set and slightly puffed, but the center will still jiggle slightly when you gently shake the pan. That slight jiggle is exactly what you want—it means the bars will be creamy, not dry. If you insert a toothpick into the center, it should come out with a few moist crumbs, not wet batter. Over-baking is the most common mistake here, so keep an eye on it after the 30-minute mark.
Step 7: Cool and Chill
Remove the pan from the oven and place it on a wire rack. Let the bars cool completely at room temperature, about 1 to 2 hours. Once cool, cover the pan tightly with plastic wrap or aluminum foil and refrigerate for at least 4 hours, but preferably overnight. This chilling step is crucial—it allows the layers to set completely, making the bars slice cleanly and taste their best. I know it’s hard to wait, but trust me, overnight is worth it.
Step 8: Slice and Serve
When you’re ready to serve, lift the entire slab of bars out of the pan using the parchment overhang. Place it on a cutting board. Use a sharp knife to slice into 12 to 16 bars, wiping the knife clean between cuts for neat edges. Serve cold or at room temperature, with a dollop of whipped cream if you’re feeling fancy.
Cooking Tips & Techniques
I’ve made my share of mistakes with this recipe so you don’t have to. Here are the most important tips I’ve learned along the way.
Don’t over-mix the cheesecake batter. This is probably the biggest mistake people make. When you beat cream cheese too aggressively, you incorporate air bubbles that expand during baking and then collapse, leaving cracks on the surface. Mix on low speed once the eggs are in, and stop as soon as everything looks combined. A few tiny lumps are fine—they’ll smooth out during baking.
Use room temperature ingredients. Cold cream cheese creates lumps that are nearly impossible to smooth out. Cold eggs can seize the batter and make it grainy. Set everything on the counter for at least an hour before you start. If you’re in a hurry, cut the cream cheese into cubes and microwave it in 10-second bursts until it’s soft but not melted.
Press the crust firmly. A loose crust will crumble when you try to slice the bars. Use the bottom of a measuring cup or a flat glass to really pack the crumbs down. The more compact the crust, the cleaner your slices will be.
Watch the bake time carefully. Every oven runs a little differently. My old oven baked these in exactly 37 minutes, but my current one needs 40. Start checking at the 30-minute mark. The edges should be set, and the center should have a slight jiggle—like firm Jell-O, not like soup. If the center is still very wobbly, give it 5 more minutes and check again.
Let them chill overnight. I know it’s tempting to dig in after a few hours, but the texture improves dramatically with a full overnight chill. The flavors meld, the layers set firmly, and the bars slice like a dream. I once served them after only 3 hours of chilling, and while they tasted good, the slices were messy and the layers slid apart. Patience pays off here.
Use a water bath? No need. Traditional cheesecakes often require a water bath to prevent cracking, but these bars are thick enough and forgiving enough that you don’t need one. The flour in the cheesecake layer also helps stabilize it. Just don’t over-bake, and you’ll be fine.
Variations & Adaptations
One of the best things about this recipe is how adaptable it is. Here are some variations I’ve tried and loved.
Gluten-Free Option: Use gluten-free graham crackers or crushed gluten-free shortbread cookies for the crust. The rest of the ingredients are naturally gluten-free, but double-check your pumpkin puree and spices for any hidden gluten. I’ve tested this with Schär graham crackers, and the texture was nearly identical.
Dairy-Free Adaptation: Substitute the cream cheese with a high-quality dairy-free cream cheese, like Kite Hill or Miyoko’s. Use a vegan butter stick (not margarine from a tub) for the crust, and replace the heavy cream with full-fat coconut cream. The texture will be slightly less dense, but still delicious. I made this version for a friend with a dairy allergy, and she said it was the best dessert she’d had in years.
Spice It Up: If you love bold flavors, add ½ teaspoon of ground ginger and ¼ teaspoon of ground cloves to the pumpkin layer. You can also swap the graham cracker crust for a gingersnap crust for an extra kick. I tried this last Thanksgiving, and it was a huge hit with the adults.
Make It a Swirl: Instead of layering the fillings, drop spoonfuls of the pumpkin batter over the cheesecake layer, then use a knife to swirl them together. This creates a marbled effect that looks beautiful and tastes just as good. I prefer the layered version for cleaner slices, but the swirl is fun for a more rustic presentation.
Add a Topping: Sprinkle ½ cup of chopped pecans or walnuts over the top before baking for a crunchy contrast. Or, after the bars have chilled, drizzle them with caramel sauce and a sprinkle of flaky sea salt. I did this for a dinner party once, and people practically licked their plates.
Mini Versions: Press the crust into a 12-cup muffin tin lined with paper liners, and divide the fillings evenly among the cups. Reduce the baking time to about 20 minutes. These mini bars are perfect for parties or portion control. I made them for a bake sale, and they sold out in 10 minutes.
Serving & Storage Suggestions
These Creamy Pumpkin Pie Cheesecake Bars are versatile when it comes to serving. Here’s how to make the most of them.
Serving Temperature: I prefer these bars cold, straight from the fridge. The layers are firmer, and the flavors taste more pronounced. But they’re also delicious at room temperature—just let them sit out for about 15 minutes before serving. If you want to serve them warm, pop an individual bar in the microwave for 10 seconds, but be careful not to melt the cheesecake layer.
Presentation Ideas: For a simple presentation, place the bars on a white platter and dust them lightly with cinnamon or powdered sugar. For something more decadent, add a dollop of whipped cream, a drizzle of caramel sauce, and a sprinkle of toasted pecans. I like to serve them on a wooden board with a few cinnamon sticks and star anise for a cozy fall vibe.
Complementary Dishes: These bars pair beautifully with a hot cup of coffee, spiced chai, or apple cider. If you’re serving them as part of a dessert spread, they go well with apple crisp, pecan pie, or a simple vanilla panna cotta. For a full fall menu, serve them after a hearty meal of roasted turkey or butternut squash soup.
Storage Instructions: Store the bars in an airtight container in the refrigerator for up to 5 days. Place a sheet of parchment paper between layers if you’re stacking them to prevent sticking. The flavors actually deepen after a day or two, so don’t be afraid to make them ahead of time.
Freezing Instructions: These bars freeze beautifully. Once they’re fully chilled and set, slice them into individual bars, wrap each one tightly in plastic wrap, and place them in a freezer-safe bag or container. They’ll keep for up to 3 months. To thaw, transfer a bar to the refrigerator overnight or let it sit at room temperature for about 30 minutes. I always keep a stash in my freezer for unexpected guests or late-night cravings.
Reheating Tips: If you prefer the bars slightly warm, microwave an individual bar for 10 to 15 seconds. The crust will soften a bit, but the filling will become extra creamy. For a larger portion, place the bars in a 300°F oven for 5 to 7 minutes, but watch them closely—you don’t want the cheesecake to overheat.
Nutritional Information & Benefits
I’m not a nutritionist, but I can give you a rough idea of what’s in these bars. Keep in mind that the exact values depend on your specific ingredients and serving size. One bar (based on 16 servings) contains approximately:
- Calories: 320
- Total Fat: 20g
- Saturated Fat: 12g
- Cholesterol: 95mg
- Sodium: 260mg
- Total Carbohydrates: 32g
- Dietary Fiber: 1g
- Sugars: 24g
- Protein: 5g
These bars are a treat, so I don’t pretend they’re health food. But there are a few bright spots. Pumpkin is packed with vitamin A, which supports eye health and immune function. It’s also a good source of fiber and antioxidants. The cream cheese provides calcium and protein, and the eggs add a dose of choline, which is important for brain health. If you use whole wheat graham crackers, you’ll get a little extra fiber in the crust.
For dietary considerations, this recipe is vegetarian. It contains gluten, dairy, and eggs, so it’s not suitable for those with allergies to those ingredients. I’ve included gluten-free and dairy-free variations in the section above if you need them. As always, check your specific ingredient labels to be sure.
From a wellness perspective, I believe in balance. These bars are a celebration of fall flavors, and I enjoy them without guilt. I pair them with a walk in the crisp autumn air and a cup of herbal tea, and I savor every bite. Life is too short to skip dessert, especially when it’s this good.
Conclusion
These Creamy Pumpkin Pie Cheesecake Bars are everything I want in a fall dessert. They’re rich without being heavy, sweet without being cloying, and impressive without requiring hours of work. The buttery graham cracker crust, the velvety cheesecake layer, the spiced pumpkin filling—each bite is a little celebration of the season. I’ve made them for Thanksgiving, for casual dinners, and for no reason at all, and they’ve never let me down.
What I love most about this recipe is how forgiving it is. You don’t need to be a pastry chef to pull it off. You just need a little patience for the chilling step and a willingness to trust the process. And once you taste that first bite—the way the creamy layers melt together with the crunchy crust—you’ll understand why I keep coming back to it year after year.
I hope you give these bars a try. Customize them to your heart’s content—add more spice, swap the crust, top them with caramel. Make them your own. And when you do, I’d love to hear about it. Leave a comment below and tell me how they turned out, or share a photo with your own twist. There’s nothing I love more than hearing how a recipe comes to life in someone else’s kitchen. Happy baking, friends!
Frequently Asked Questions
Can I use pumpkin pie filling instead of pumpkin puree?
No, I don’t recommend it. Pumpkin pie filling is already sweetened and spiced, which would throw off the balance of the recipe. You need plain 100% pumpkin puree to control the sweetness and spice levels yourself. If you only have pumpkin pie filling on hand, you can try it, but reduce the sugar and spices in the pumpkin layer by about half.
Why did my cheesecake layer crack?
Cracks usually happen from over-mixing the batter or over-baking. When you beat the cream cheese too vigorously, you incorporate air that expands and then collapses, leaving cracks. Stick to low speed once the eggs are in, and stop mixing as soon as everything is combined. Also, pull the bars out of the oven when the center still has a slight jiggle—over-baking dries out the cheesecake and causes cracking.
Can I make these bars ahead of time?
Absolutely. In fact, I recommend it. These bars taste even better after a day or two in the fridge because the flavors have time to meld. You can make them up to 3 days in advance and store them in an airtight container in the refrigerator. They also freeze beautifully for up to 3 months, so you can prep them well ahead of a holiday gathering.
Do I have to use a water bath?
No, you don’t need a water bath for these bars. The cheesecake layer is thin enough that it bakes evenly without one, and the flour in the batter helps stabilize it. I’ve never used a water bath for this recipe, and I’ve never had a problem with cracking or uneven baking. Just make sure you don’t over-bake, and you’ll be fine.
Can I use a different crust?
Yes, feel free to experiment. A gingersnap crust adds a lovely spicy kick that pairs beautifully with the pumpkin. Shortbread cookies or vanilla wafers also work well. If you’re gluten-free, use gluten-free graham crackers or crushed gluten-free cookies. Just keep the proportions the same—2 cups crumbs, ½ cup melted butter, ¼ cup sugar, and ¼ teaspoon salt—and pre-bake for 8 minutes.
Pin This Recipe!
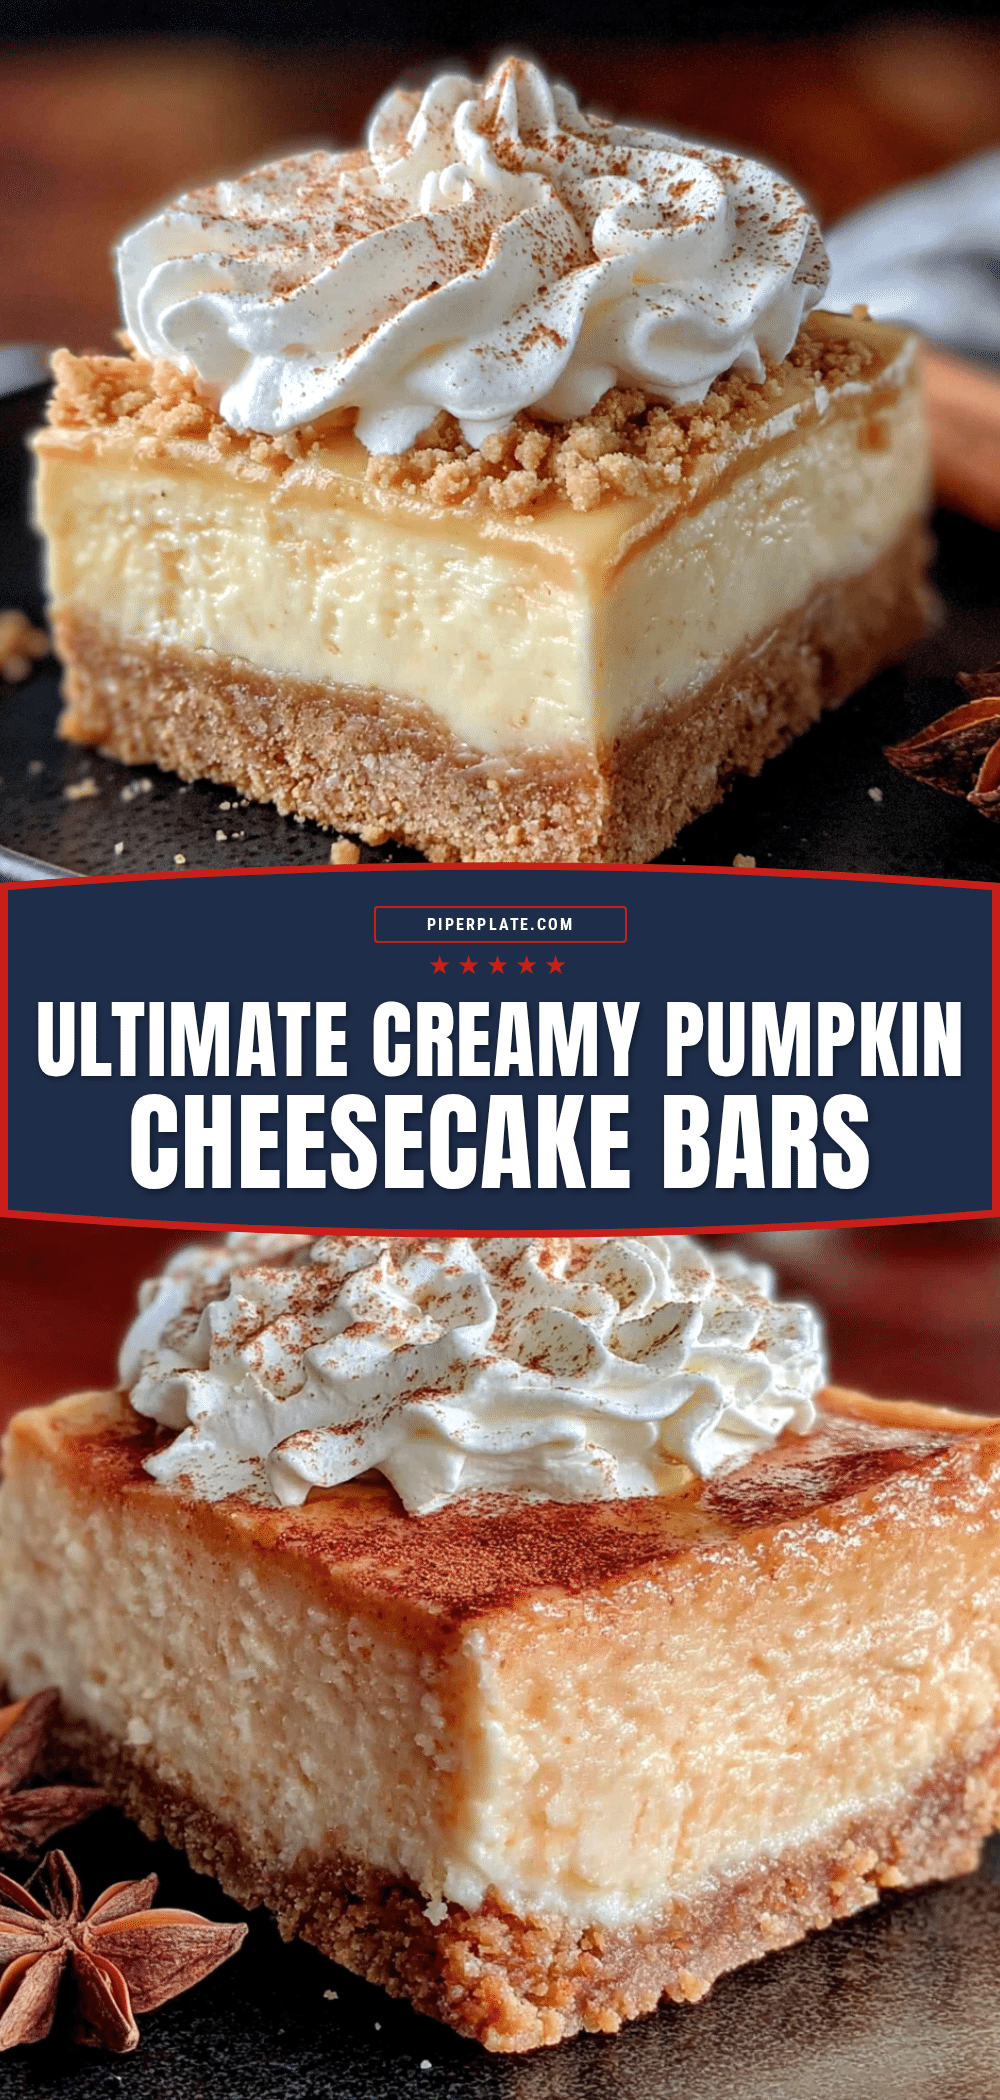
Creamy Pumpkin Pie Cheesecake Bars – Easy Fall Dessert Recipe
These Creamy Pumpkin Pie Cheesecake Bars feature a buttery graham cracker crust, a rich and tangy cheesecake layer, and a spiced pumpkin filling. They’re the perfect easy fall dessert that comes together in a 9×13 pan without a water bath or blind baking.
- Prep Time: 1 hour
- Cook Time: 40 minutes
- Total Time: 5 hours 40 minutes (includes chilling time)
- Yield: 16 servings 1x
- Category: Dessert
- Cuisine: American
Ingredients
- 2 cups graham cracker crumbs (about 14–15 full sheets, crushed finely)
- ½ cup unsalted butter, melted
- ¼ cup granulated sugar
- ¼ teaspoon salt
- 16 ounces full-fat cream cheese, softened
- ½ cup granulated sugar
- 2 large eggs, room temperature
- 1 teaspoon vanilla extract
- 1 tablespoon all-purpose flour
- 1 can (15 ounces) pumpkin puree (not pumpkin pie filling)
- ½ cup granulated sugar
- ¼ cup packed light brown sugar
- 2 large eggs, room temperature
- ½ cup heavy cream
- 1 teaspoon vanilla extract
- 2 teaspoons ground cinnamon
- 1 teaspoon pumpkin pie spice
- ¼ teaspoon salt
- Pinch of black pepper
Instructions
- Preheat your oven to 350°F (175°C). Line a 9×13-inch baking pan with parchment paper, leaving about 2 inches of overhang on the two long sides. Lightly spray the parchment with nonstick cooking spray.
- In a medium bowl, combine 2 cups graham cracker crumbs, ¼ cup granulated sugar, and ¼ teaspoon salt. Pour in ½ cup melted unsalted butter and stir with a fork until the mixture looks like wet sand and holds together when squeezed. Press the mixture firmly into the bottom of the prepared pan. Bake for 8 minutes. Remove from the oven and let cool while you make the fillings. Leave the oven on.
- In a large bowl, beat 16 ounces softened cream cheese with ½ cup granulated sugar using an electric mixer on medium speed until smooth and creamy, about 2 minutes. Scrape down the sides. Add 2 room-temperature eggs, one at a time, beating on low after each addition just until combined. Add 1 teaspoon vanilla extract and 1 tablespoon all-purpose flour, and mix on low until just combined. Set aside.
- In a separate large bowl, whisk together 1 can pumpkin puree, ½ cup granulated sugar, and ¼ cup packed light brown sugar until smooth. Add 2 room-temperature eggs, ½ cup heavy cream, and 1 teaspoon vanilla extract, and whisk until fully combined. Add 2 teaspoons ground cinnamon, 1 teaspoon pumpkin pie spice, ¼ teaspoon salt, and a pinch of black pepper. Whisk until evenly distributed.
- Pour the cheesecake batter over the pre-baked crust and spread it evenly. Gently spoon the pumpkin batter over the cheesecake layer, starting at the edges and working to the center. Use the back of a spoon to spread it evenly.
- Bake at 350°F for 35 to 40 minutes. The edges should look set and slightly puffed, but the center will still jiggle slightly when gently shaken.
- Remove from the oven and place on a wire rack. Let cool completely at room temperature, about 1 to 2 hours. Once cool, cover tightly with plastic wrap or aluminum foil and refrigerate for at least 4 hours, preferably overnight.
- When ready to serve, lift the entire slab of bars out of the pan using the parchment overhang. Place on a cutting board. Use a sharp knife to slice into 12 to 16 bars, wiping the knife clean between cuts. Serve cold or at room temperature.
Notes
Don’t over-mix the cheesecake batter to prevent cracks. Use room temperature ingredients for best results. Press the crust firmly for clean slices. Watch the bake time carefully; the center should have a slight jiggle. Chill overnight for best texture. No water bath needed.
Nutrition
- Serving Size: 1 bar
- Calories: 320
- Sugar: 24
- Sodium: 260
- Fat: 20
- Saturated Fat: 12
- Carbohydrates: 32
- Fiber: 1
- Protein: 5
Keywords: pumpkin cheesecake bars, fall dessert, pumpkin bars, cheesecake bars, easy dessert, Thanksgiving dessert


