Love this? Save it for later!
Share the inspiration with your friends
I wasn’t expecting dessert advice from a man holding a power drill, but there I was, standing in the middle of a hardware store aisle trying to find the right screw size, when the guy next to me—covered in drywall dust—started describing the most beautiful Fourth of July dessert I’d ever heard of. He was picking up anchors for a shelf, and somehow we got talking about summer parties. “My wife makes this thing with berries and pudding,” he said, wiping his forehead. “It’s a trifle. Looks fancy, but honestly? It’s the easiest thing she makes all year.” I grabbed my screws and left, but I couldn’t stop thinking about those layers of red, white, and blue. That chance conversation at the hardware store completely changed how I approach holiday desserts. I mean, who expects a recipe epiphany between power tools and paint samples? Let me tell you—this Easy Red White and Blue Berry Trifle is now my go-to for every summer celebration, and it all started with a stranger in aisle seven.
Why You’ll Love This Recipe
This isn’t just another pretty dessert for your holiday table. After testing this recipe at least six times (and yes, I ate every single version), I can honestly say this trifle hits that perfect sweet spot between impressive and effortless.
- Quick & Easy: Comes together in under 20 minutes with zero baking required. Perfect for those last-minute cookout invites or when you realize the party starts in an hour.
- Simple Ingredients: You’ll find everything at your regular grocery store. No specialty baking supplies or hard-to-find items needed.
- Perfect for Patriotic Holidays: The red, white, and blue layers make it ideal for Memorial Day, Fourth of July, or Labor Day celebrations.
- Crowd-Pleaser: I’ve brought this to three different gatherings now, and every single time someone asks for the recipe before they’ve even finished their first serving.
- Unbelievably Delicious: The combination of creamy vanilla pudding, fresh berries, and light angel food cake creates this amazing texture that keeps you coming back for more.
What makes this recipe different from all the other trifles out there? It’s the technique of layering the pudding while it’s still slightly warm. That little trick helps it soak into the cake just enough to create that melt-in-your-mouth texture without turning everything into mush. I learned this after my first attempt came out soupy—trust me, this version is perfection.
This recipe is the kind that makes you close your eyes after the first bite. It’s comfort food reimagined for summer—lighter, faster, but with the same soul-soothing satisfaction. Perfect for impressing guests without stress, or turning a simple barbecue into something memorable.
What Ingredients You Will Need
This recipe uses simple, wholesome ingredients that work together to create something truly special. Most of these are pantry staples or easy summer finds.
For the Trifle Layers
- Angel food cake – 1 store-bought loaf (about 10-12 ounces), cut into 1-inch cubes. I prefer the Sara Lee brand for its light, fluffy texture that absorbs the pudding perfectly.
- Fresh strawberries – 2 cups, hulled and sliced. Look for bright red berries with green tops—they’ll be the sweetest and most flavorful.
- Fresh blueberries – 2 cups, washed and dried. Try to pick ones that are firm and plump, not wrinkled or soft.
- Instant vanilla pudding mix – 2 boxes (3.4 ounces each). The instant kind works best here because it sets up quickly and doesn’t require cooking.
- Cold milk – 3 cups (whole milk gives the creamiest texture, but 2% works fine too)
- Cool Whip or whipped topping – 1 container (8 ounces), thawed. You can use homemade whipped cream if you prefer, but the stabilized version holds up better for leftovers.
- White sugar – 2 tablespoons, for macerating the strawberries (this draws out their natural juices and makes them extra sweet)
- Lemon juice – 1 tablespoon, fresh squeezed. This brightens up the berries and balances the sweetness of the pudding.
Optional Garnishes
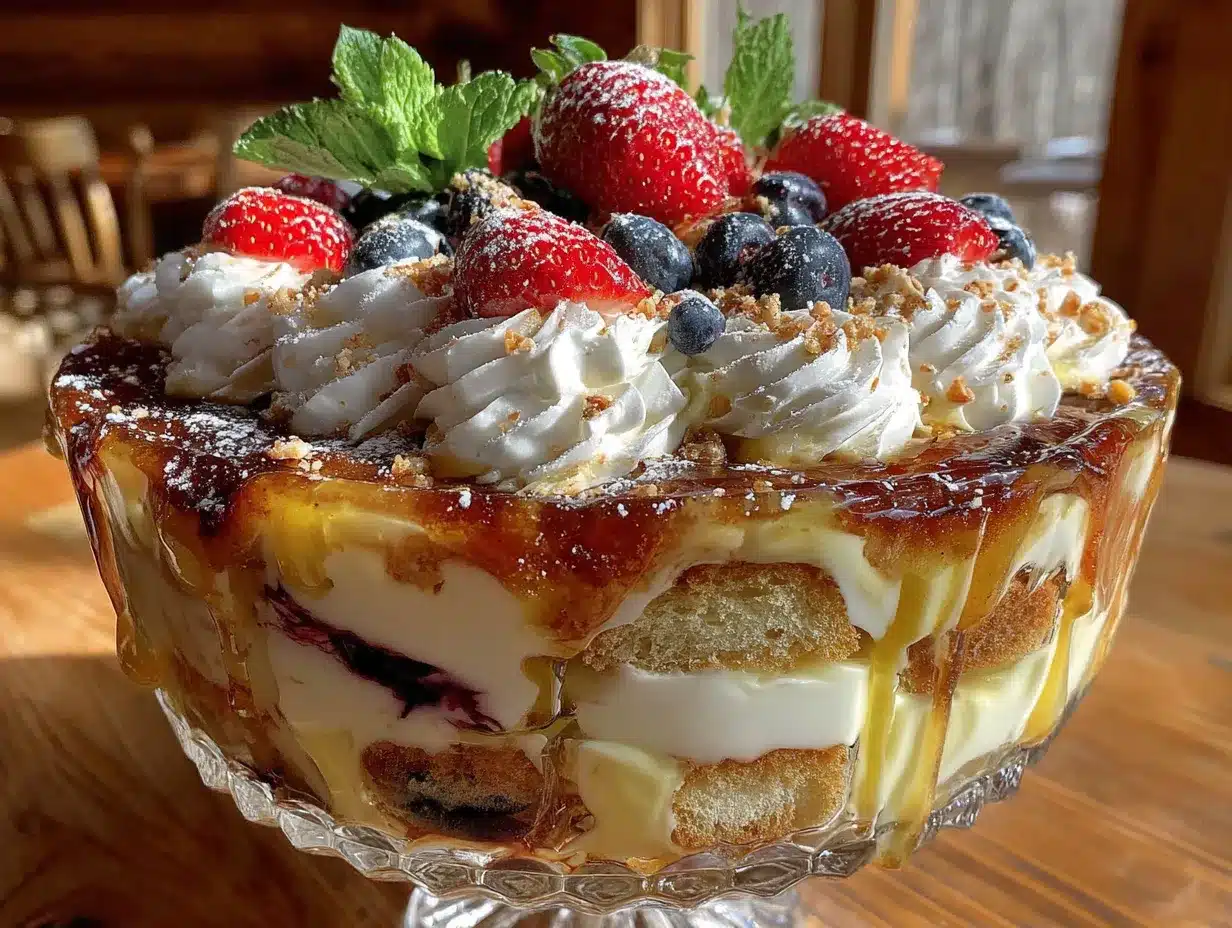
- Fresh mint leaves – for a pop of green color
- Extra berries – for topping the final layer
- White chocolate shavings – adds a nice decorative touch (use a vegetable peeler on a white chocolate bar)
One thing I’ve learned from making this multiple times—don’t skip macerating the strawberries. That little step of tossing them with sugar and lemon juice transforms them from ordinary berries into something that tastes like summer in a bowl. And if strawberries aren’t in season, frozen berries work surprisingly well; just thaw and drain them first so you don’t end up with watery layers.
Equipment Needed
You don’t need any fancy equipment for this recipe, which is part of why I love it so much.
- Large trifle bowl or glass serving dish – A clear glass bowl (about 4-quart capacity) really shows off those beautiful layers. I found mine at a thrift store for five dollars, and it works perfectly. Any large glass bowl will do.
- Medium mixing bowls – You’ll need at least two for preparing the pudding and macerating the berries.
- Whisk – For mixing the pudding. A balloon whisk works best to prevent lumps.
- Sharp knife and cutting board – For slicing strawberries and cubing the angel food cake.
- Measuring cups and spoons – Accuracy matters here, especially for the milk and sugar.
- Rubber spatula – For spreading the whipped topping evenly. The flexible edge makes all the difference.
- Colander – For washing your berries.
If you don’t have a trifle dish, don’t worry. A large glass mixing bowl or even a wide-mouth mason jar for individual servings works beautifully. I’ve made this in a clear plastic punch bowl before, and it looked just as impressive.
Preparation Method
Let me walk you through this step by step. I promise it’s simpler than it looks.
- Prepare your strawberries (5 minutes)
Start by washing and hulling your strawberries. Slice them into even pieces—about quarter-inch thick works best. Place them in a medium bowl, add the 2 tablespoons of sugar and 1 tablespoon of lemon juice, and gently toss everything together. Set this aside for at least 10 minutes while you work on the other layers. You’ll notice the berries start releasing their beautiful red juice, which adds amazing flavor to the trifle. - Make the vanilla pudding (5 minutes)
In a large bowl, whisk together both boxes of instant vanilla pudding mix with 3 cups of cold milk. Whisk vigorously for about 2 minutes until the mixture thickens. It will look a bit thin at first—don’t panic, that’s normal. Let it sit for 5 minutes to fully set up. Pro tip: use the coldest milk you have; it helps the pudding set faster and creamier. - Cube the angel food cake (3 minutes)
While the pudding sets, cut your angel food cake into 1-inch cubes. A serrated knife works best here because angel food cake is so delicate and tends to squish under a regular blade. Don’t worry about making perfect cubes—rustic pieces look more natural in the trifle anyway. - Layer the bottom (2 minutes)
Start building your trifle by placing a single layer of cake cubes at the bottom of your serving dish. You want them to cover the bottom completely but not be stacked more than one layer deep. This first layer sets the foundation for everything else. - Add the pudding layer (2 minutes)
Spoon about one-third of the prepared vanilla pudding over the cake cubes. Use your spatula to spread it evenly, making sure it reaches the edges of the dish. The pudding will start seeping into the cake—this is exactly what you want. That slight soak creates the perfect texture. - Layer the berries (3 minutes)
Now add your macerated strawberries (including any juice that’s collected in the bowl) and fresh blueberries. Spread them evenly over the pudding layer. I like to alternate red and blue as I go for maximum visual impact. Use about half of your total berries for this first round. - Add the whipped topping (2 minutes)
Spread about one-third of your thawed whipped topping over the berry layer. Use gentle, sweeping motions with your spatula so you don’t disturb the berries underneath. Don’t press down—just let it float on top. - Repeat the layers (5 minutes)
Now you’ll do it all again. Add another layer of cake cubes, followed by another third of the pudding, then the remaining berries, and another third of whipped topping. For the final layer, add the last of the cake cubes, the remaining pudding, and finish with a thick, beautiful layer of whipped topping. - Garnish and chill (2 minutes + 2 hours chilling)
Top your trifle with any reserved berries and fresh mint leaves if you’re using them. Cover the dish loosely with plastic wrap and refrigerate for at least 2 hours before serving. This resting time is crucial—it lets all the flavors meld together and the cake absorb just enough of that creamy pudding.
I remember the first time I made this, I got impatient and served it after only 30 minutes. The layers were still separate, and the cake was dry in spots. Honestly, it was still good, but after letting it chill for the full 2 hours the next time, I understood why patience pays off. The texture transforms completely.
Cooking Tips & Techniques
After making this trifle more times than I care to count, I’ve picked up a few tricks that make a real difference.
Don’t overmix the pudding. I learned this the hard way when I whisked too enthusiastically and ended up with pudding that was almost too thick to spread. Two minutes of whisking is plenty—any more and you risk breaking down the starches.
Dry your berries thoroughly. Wet berries create watery pockets in your trifle that mess with the texture. After washing, spread them on a clean kitchen towel and pat them dry. This little step makes a huge difference in how clean your layers look.
Use a piping bag for the whipped topping. If you want those picture-perfect layers, pipe the whipped topping instead of spreading it with a spatula. Just fill a zip-top bag with the topping, snip off a corner, and pipe it in a spiral pattern. It gives you more control and keeps the layers distinct.
Let the trifle rest at room temperature before serving. Take it out of the fridge about 15 minutes before you’re ready to serve. The flavors open up more when it’s not ice-cold, and the texture becomes softer and more luxurious.
Make extra pudding. I always make a little more than I think I’ll need. The cake absorbs more than you expect, and having extra ensures your trifle stays creamy rather than dry. If you have leftover pudding, it’s delicious eaten with a spoon straight from the bowl—not that I would know anything about that.
Variations & Adaptations
One of the best things about this recipe is how easily it adapts to different tastes and dietary needs.
Dairy-Free Version: Use almond milk or oat milk in the pudding mix and a dairy-free whipped topping like CocoWhip. I tested this with oat milk last summer, and honestly, I couldn’t tell the difference. The texture was just as creamy and delicious.
Gluten-Free Option: Angel food cake is naturally low in gluten, but if you need it completely gluten-free, look for a certified gluten-free angel food cake at the store. Most major brands now offer this option. You can also substitute with gluten-free pound cake or vanilla cake cubes.
Seasonal Berry Swap: While this recipe is designed for red and blue berries, feel free to mix it up based on what’s available. Try raspberries and blackberries for a different color combination, or use sliced peaches and blueberries for a summer twist. I made a version with diced mango and blueberries for a tropical-themed party, and it disappeared in minutes.
Chocolate Lover’s Version: Swap the vanilla pudding for chocolate instant pudding and add a layer of chocolate shavings between each layer. The chocolate-berry combination is absolutely divine and feels more decadent for special occasions.
Individual Servings: For parties where you want to control portions, layer everything in small mason jars or clear plastic cups. This makes serving so much easier, and guests love having their own personal trifle. Plus, they look adorable lined up on a table.
Serving & Storage Suggestions
This trifle is best served chilled, straight from the refrigerator. The cold temperature keeps the layers firm and the berries bright and fresh. I like to present it on a cake stand or elevated platter so everyone can admire those beautiful red, white, and blue stripes before digging in.
What to serve alongside: This trifle pairs beautifully with grilled meats and summer sides. I usually serve it after burgers, hot dogs, or barbecue chicken. A glass of sparkling lemonade or iced tea complements the sweetness perfectly. For adults, a crisp Sauvignon Blanc or a fruity Rosé is a lovely match.
Storage instructions: Cover your trifle tightly with plastic wrap or a lid and store it in the refrigerator for up to 3 days. The flavors actually get better on day two as everything melds together. However, the cake will continue to soften over time, so it’s best enjoyed within the first 48 hours.
Freezing: I don’t recommend freezing this trifle. The texture of the pudding and cake changes too much when thawed, and the berries become watery and mushy. If you have leftovers you can’t finish, share them with neighbors or coworkers—trust me, they’ll be thrilled.
Reheating: This is a cold dessert, so no reheating needed. Just pull it from the fridge about 15 minutes before serving to take the chill off and let the flavors shine.
One thing I love about this recipe is how the flavors develop overnight. The cake absorbs just enough of the pudding to become almost custard-like, while the berries release their juices into the surrounding layers. It’s like the trifle gets better while you sleep.
Nutritional Information & Benefits
While this is definitely a treat, there are some bright spots in the nutritional profile.
Estimated per serving (based on 12 servings):
- Calories: 285
- Total Fat: 8g
- Saturated Fat: 5g
- Cholesterol: 15mg
- Sodium: 320mg
- Total Carbohydrates: 48g
- Dietary Fiber: 2g
- Sugars: 34g
- Protein: 4g
Health benefits of key ingredients: Strawberries and blueberries are packed with antioxidants, vitamin C, and fiber. They’re some of the healthiest fruits you can eat, which makes this dessert feel a little less indulgent. Angel food cake is lower in fat than traditional cake, and using reduced-fat milk in the pudding can cut calories without sacrificing flavor.
Dietary considerations: This recipe is nut-free and egg-free (angel food cake contains eggs, but the recipe itself doesn’t add any). For a lower-sugar version, use sugar-free pudding mix and skip the added sugar for the strawberries. The berries are sweet enough on their own during peak season.
Potential allergens: Contains dairy (milk, whipped topping) and gluten (angel food cake). See the variations section for substitutions.
I love that I can serve this dessert knowing it has real fruit in every bite. It feels like a win-win—everyone gets a treat, and there’s actual nutritional value hidden in those pretty layers.
Conclusion
This Easy Red White and Blue Berry Trifle has become my signature summer dessert, and I can’t recommend it enough. It’s the kind of recipe that makes you look like a kitchen superstar without any of the stress or complicated techniques. The layers are beautiful, the flavors are bright and refreshing, and it comes together in less time than it takes to grill a batch of burgers.
I love that this recipe gives you room to play. Swap in your favorite berries, try different pudding flavors, or make it your own with the variations I shared. The best recipes are the ones that adapt to what you have and what you love.
So go ahead—give this trifle a try for your next summer gathering. I promise you’ll get more compliments than you know what to do with. And when someone asks where you found the recipe, you can tell them it came from a hardware store conversation with a stranger. That story alone is worth making it for.
Have you tried this recipe? I’d love to hear how it turned out! Drop a comment below and let me know what variations you tried or how it went over at your party. Don’t forget to share this recipe with a friend who needs an easy, impressive dessert for their next celebration.
Frequently Asked Questions
Can I make this trifle the day before?
Absolutely! In fact, I recommend it. Making this trifle a day ahead gives the flavors time to meld together beautifully. The cake absorbs the pudding just enough to become soft and custard-like without turning mushy. Just wait to add any fresh garnishes until right before serving so they stay bright and fresh.
Can I use homemade whipped cream instead of Cool Whip?
Yes, you can definitely use homemade whipped cream. However, keep in mind that homemade whipped cream isn’t as stable and may start to break down after a day or two in the fridge. If you’re serving the trifle within a few hours, homemade works great. For longer storage, the stabilized Cool Whip holds up better.
How do I keep the cake from getting too soggy?
The key is not to let the trifle sit too long before serving. While some absorption is desirable, letting it sit for more than 24 hours can make the cake overly soft. Also, make sure your berries are thoroughly dried before adding them to the layers, and don’t over-soak the cake with extra liquid from the macerated strawberries.
Can I use frozen berries instead of fresh?
Yes, frozen berries work fine in a pinch. Thaw them completely and drain off any excess liquid before using. Keep in mind that frozen berries tend to be softer and may bleed more color into the surrounding layers, which can affect the visual appeal of your trifle. Fresh berries give the best texture and appearance.
What size dish do I need for this recipe?
A 4-quart trifle dish or glass bowl works perfectly for this recipe. If you don’t have a dish that size, you can split the recipe between two smaller bowls or make individual servings in mason jars or clear cups. The key is having a dish that’s deep enough to show off those beautiful layers.
Pin This Recipe!
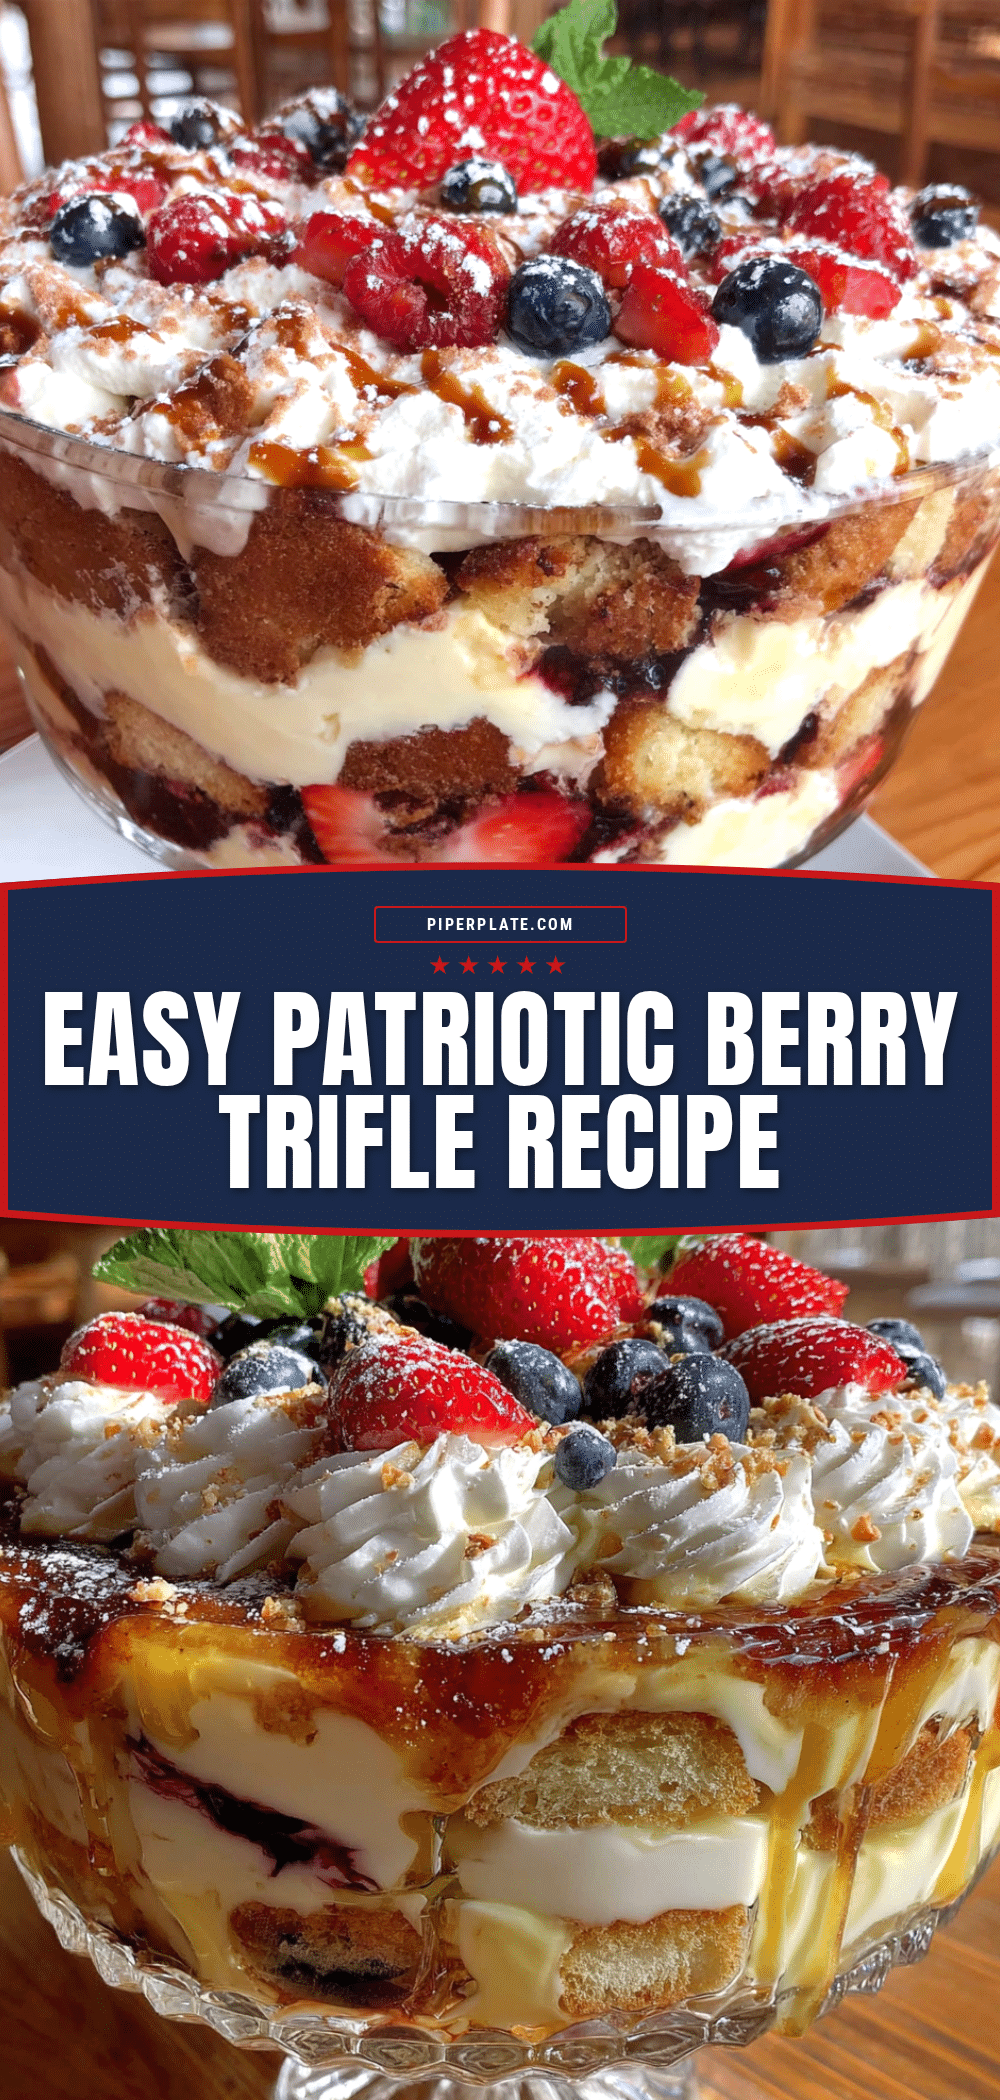
Best Easy Red White and Blue Berry Trifle Recipe

This Easy Red White and Blue Berry Trifle is a no-bake dessert that comes together in under 20 minutes with simple ingredients. Layers of angel food cake, creamy vanilla pudding, fresh strawberries, and blueberries create a stunning patriotic dessert perfect for summer celebrations.
- Prep Time: 20 minutes
- Cook Time: 0 minutes
- Total Time: 2 hours 20 minutes (includes chilling time)
- Yield: 12 servings 1x
- Category: Dessert
- Cuisine: American
Ingredients
- 1 store-bought angel food cake loaf (10–12 ounces), cut into 1-inch cubes
- 2 cups fresh strawberries, hulled and sliced
- 2 cups fresh blueberries, washed and dried
- 2 boxes (3.4 ounces each) instant vanilla pudding mix
- 3 cups cold milk (whole milk preferred, 2% works)
- 1 container (8 ounces) Cool Whip or whipped topping, thawed
- 2 tablespoons white sugar
- 1 tablespoon fresh lemon juice
- Fresh mint leaves for garnish (optional)
- Extra berries for topping (optional)
- White chocolate shavings for garnish (optional)
Instructions
- Prepare your strawberries: Wash and hull strawberries, slice into quarter-inch thick pieces. Place in a medium bowl, add 2 tablespoons sugar and 1 tablespoon lemon juice, toss gently. Set aside for at least 10 minutes.
- Make the vanilla pudding: In a large bowl, whisk together both boxes of instant vanilla pudding mix with 3 cups of cold milk. Whisk vigorously for about 2 minutes until thickened. Let sit for 5 minutes to fully set.
- Cube the angel food cake: Cut angel food cake into 1-inch cubes using a serrated knife.
- Layer the bottom: Place a single layer of cake cubes at the bottom of your serving dish, covering completely.
- Add the pudding layer: Spoon about one-third of the prepared vanilla pudding over the cake cubes and spread evenly.
- Layer the berries: Add macerated strawberries (including juice) and fresh blueberries evenly over the pudding layer. Use about half of total berries.
- Add the whipped topping: Spread about one-third of thawed whipped topping over the berry layer using gentle motions.
- Repeat the layers: Add another layer of cake cubes, another third of pudding, remaining berries, and another third of whipped topping. For final layer, add remaining cake cubes, remaining pudding, and finish with a thick layer of whipped topping.
- Garnish and chill: Top with reserved berries and fresh mint leaves if using. Cover loosely with plastic wrap and refrigerate for at least 2 hours before serving.
Notes
Don’t skip macerating the strawberries – it transforms them. Use the coldest milk for pudding to help it set faster. Let trifle rest at room temperature for 15 minutes before serving for best flavor. Make extra pudding as the cake absorbs more than expected. For best texture, chill for full 2 hours before serving.
Nutrition
- Serving Size: 1 serving
- Calories: 285
- Sugar: 34
- Sodium: 320
- Fat: 8
- Saturated Fat: 5
- Carbohydrates: 48
- Fiber: 2
- Protein: 4
Keywords: berry trifle, red white and blue dessert, Fourth of July dessert, no-bake dessert, summer dessert, patriotic dessert, easy trifle recipe


