Love this? Save it for later!
Share the inspiration with your friends
I was standing in the spice aisle of my local grocery store last November when a woman walked past me with a cart full of oranges, and the scent hit me—that bright, sharp, almost medicinal citrus smell—and suddenly I was seven years old in my Aunt Lena’s tiny farmhouse kitchen. She was pressing a warm spoonful of something dark and syrupy into my hand, telling me it would keep the “winter nasties” away. I had forgotten that moment completely until that exact second in the spice aisle. Honestly, I almost dropped my basket.
That woman with the oranges was long gone, but I stood there frozen, trying to hold onto the memory. Aunt Lena passed when I was fifteen, and I never thought to ask her for her recipe. I mean, who thinks about homemade medicine when you’re a kid? You just take the spoonful, make a face, and run outside to play. But that taste—sweet, a little tart, with a warmth that settled right in your chest—stayed buried somewhere in my brain for over two decades.
So I went home and started experimenting. I called my cousin, I dug through old recipe boxes at family gatherings, and I made a lot of terrible batches. Too watery. Too sweet. Too bitter. But eventually, I got it right. This homemade elderberry syrup with honey is the closest I’ve come to that memory, and maybe you’ve been there—chasing a taste from your past that you can’t quite describe but you know when you’ve found it. This is that recipe for me, and I keep making it because every batch feels like a small visit with Aunt Lena.
Why You’ll Love This Recipe
Let me tell you why this homemade elderberry syrup with honey has become a non-negotiable staple in my kitchen every single fall and winter. I’ve tested this recipe at least a dozen times, tweaked the simmering time, adjusted the honey ratio, and even convinced my skeptical neighbor to try it on her kids. It passed the ultimate test—she came back asking for the recipe.
- Quick & Easy : Comes together in under an hour, most of which is hands-off simmering time. Perfect for a Sunday afternoon when you’re already puttering around the kitchen.
- Simple Ingredients : You only need four things—dried elderberries, raw honey, water, and a few spices you probably already have in your pantry. No fancy health food store runs required.
- Perfect for Cold & Flu Season : This is the kind of thing you want in your fridge when the first sniffle hits. It’s become my go-to for immune support during the winter months.
- Crowd-Pleaser : Even picky kids will take this willingly. The honey balances out the tartness of the elderberries beautifully, and the cinnamon and ginger make it taste like a warm hug.
- Unbelievably Delicious : I wasn’t expecting to actually enjoy the taste, to be honest. But this syrup is genuinely pleasant—sweet, spicy, and comforting. You’ll look forward to your daily spoonful.
What makes this recipe different from the dozens of others out there? It’s the ratio. I spent way too long figuring out the perfect balance of berries to water to honey so you don’t end up with something that’s either too thin or cloyingly sweet. The addition of whole spices during the simmering process infuses the syrup with warmth without making it taste like a chai latte. This isn’t just another version—it’s the one I’d serve to my own grandmother.
This recipe is the kind that makes you feel like you’re actually doing something good for yourself. It’s comfort and care in a jar, and honestly, that feeling is half the medicine.
What Ingredients You Will Need
This recipe uses simple, wholesome ingredients that work together to create a potent and delicious syrup. Most of these are pantry staples or easy to find at your local grocery store or online.
- Dried Elderberries : 1 cup (about 140 grams). Make sure you’re getting Sambucus nigra or Sambucus canadensis—these are the varieties used for culinary and medicinal purposes. I prefer the organic dried berries from Starwest Botanicals or Frontier Co-op for consistent quality. Don’t use fresh or raw elderberries, as they can be toxic if not cooked properly.
- Raw Honey : 1 cup (about 340 grams). This is crucial—do not substitute with pasteurized honey. Raw honey retains its natural enzymes and beneficial properties, plus it adds incredible flavor complexity. I like using a local wildflower honey or a mild orange blossom honey. If you’re vegan or avoiding honey for infants under one year, you can use maple syrup instead (though the flavor will be different).
- Filtered Water : 4 cups (about 950 ml). Tap water with chlorine or strong minerals can affect the taste, so stick with filtered or spring water if you can.
- Cinnamon Sticks : 2 whole sticks. They add warmth and a subtle sweetness. I recommend Ceylon cinnamon if you can find it—it’s milder and more aromatic than the standard Cassia variety.
- Fresh Ginger : 1 thumb-sized piece (about 2 inches), sliced into thin rounds. No need to peel it first—just give it a good scrub. The ginger adds a gentle heat and helps with digestion.
- Whole Cloves : 1 teaspoon. They add a deep, almost floral spice note. Be careful not to overdo it—cloves can easily overpower the syrup.
- Optional Add-Ins : A strip of dried orange peel for brightness, or a star anise pod for a licorice-like undertone. I sometimes add a pinch of dried rose hips for extra vitamin C.
For ingredient selection, look for elderberries that are deep purple-black and smell slightly fruity, not musty. If your dried elderberries are more than a year old, they may have lost some potency. And a quick tip—if you’re buying in bulk, store them in an airtight jar in a cool, dark place to keep them fresh longer.
Equipment Needed
You don’t need much fancy equipment for this recipe, which is one of the reasons I love it. Here’s what you’ll need:
- Medium Saucepan : A 2-3 quart saucepan with a heavy bottom works perfectly. I use my old stainless steel one—it heats evenly and doesn’t react with the acidic berries.
- Fine-Mesh Strainer : This is essential for straining out the berries and spices. A nut milk bag or cheesecloth also works if you want an even clearer syrup.
- Glass Measuring Cup : For measuring liquids. A 4-cup Pyrex measuring cup makes pouring into jars much easier.
- Wooden Spoon : For stirring. Metal can sometimes react with acidic ingredients, so I stick with wood or silicone.
- Glass Jars or Bottles : Two 8-ounce or one 16-ounce Mason jar with tight-fitting lids. Make sure they’re sterilized—I just run them through the dishwasher or boil them for 10 minutes.
- Funnel : A small canning funnel makes transferring the syrup into jars mess-free. If you don’t have one, a steady hand and a measuring cup with a spout will do.
I once tried making this with a cheap strainer that had holes too large, and I ended up with berry bits floating in my syrup. Not the end of the world, but it wasn’t as pretty. A fine-mesh strainer is worth the investment if you plan on making this regularly. And honestly, a good set of glass jars makes you feel like an apothecary—which is half the fun.
Preparation Method
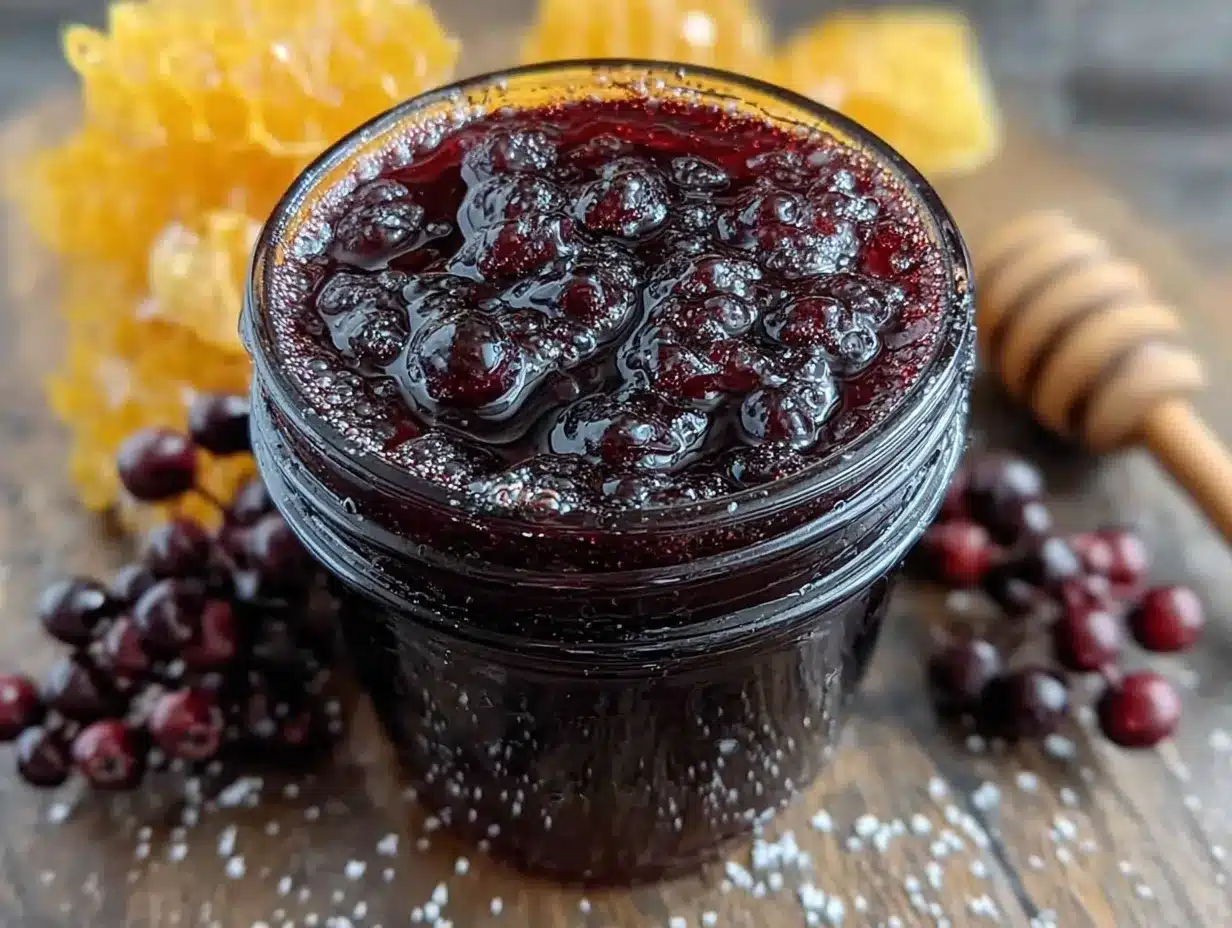
Making this homemade elderberry syrup with honey is straightforward, but there are a few key moments where paying attention makes all the difference. Let me walk you through it.
- Combine the berries and water. Place 1 cup of dried elderberries and 4 cups of filtered water in your medium saucepan. Add the 2 cinnamon sticks, the sliced ginger, and 1 teaspoon of whole cloves. Give everything a quick stir. Don’t add the honey yet—we’ll do that after the syrup is strained and cooled.
- Bring to a boil, then simmer. Turn the heat to high and bring the mixture to a boil. As soon as it reaches a rolling boil, reduce the heat to low and let it simmer gently. You want small bubbles, not a vigorous boil. Set a timer for 45 minutes. During this time, the liquid will reduce by about half and turn a deep, almost blackish-purple color. The kitchen will smell incredible—like a winter spice market.
- Check the consistency. After 45 minutes, the liquid should be slightly syrupy and have reduced to about 2 cups. If it looks too thin, let it simmer for another 10-15 minutes. If it looks too thick, add a splash of water. You’re aiming for a consistency similar to maple syrup—thin enough to pour but with a little body.
- Strain the mixture. Place your fine-mesh strainer over a large glass measuring cup or bowl. Carefully pour the hot liquid through the strainer. Use the back of a wooden spoon to gently press down on the berries and spices to extract every last drop of goodness. Don’t rush this step—take your time pressing. Discard the solids (they’ve given you all their flavor).
- Cool the liquid. Let the strained liquid cool completely at room temperature. This usually takes about 30-45 minutes. Do not skip this step—adding honey to hot liquid will destroy its beneficial enzymes and raw properties. The liquid should be lukewarm or cool to the touch before moving on.
- Stir in the honey. Once the liquid is completely cool, add 1 cup of raw honey. Whisk gently until the honey is fully dissolved. You’ll notice the mixture becomes slightly thicker and more opaque. Taste it here—if you want it sweeter, you can add a little more honey, but I find this ratio is just right.
- Bottle and store. Using your funnel, pour the syrup into sterilized glass jars. Leave about 1/2 inch of headspace at the top. Seal tightly with the lids. Wipe the jars clean and label them with the date. That’s it—you’ve just made your own immune-supporting syrup.
A quick note on timing: the active prep time is maybe 10 minutes. The rest is just waiting and simmering. I usually make this while I’m cleaning the kitchen or folding laundry—it’s the kind of recipe that fits into your day without demanding all your attention.
One thing I learned the hard way—don’t be tempted to crank up the heat to speed up the reduction. High heat can make the syrup bitter and destroy some of the beneficial compounds in the elderberries. Low and slow is the way to go here.
Cooking Tips & Techniques
After making this recipe more times than I can count, I’ve picked up a few tricks that make the process smoother and the final product better. Let me share them with you.
Don’t crush the berries. I know it’s tempting to mash them up to “release more flavor,” but trust me on this—whole berries are better. Crushing them releases more sediment and makes the syrup cloudy. Plus, whole berries are easier to strain. Just let them simmer and they’ll release plenty of goodness on their own.
Watch your simmer. The biggest mistake I made my first few times was letting the mixture boil too vigorously. You want a gentle simmer—just a few lazy bubbles breaking the surface. If you see the liquid reducing too quickly, your heat is too high. Low and slow extracts more flavor and nutrients without making the syrup bitter.
Test for doneness. After about 40 minutes, dip a spoon into the liquid and let it cool for a few seconds. Run your finger across the back of the spoon—if the liquid leaves a clear path and doesn’t immediately run back together, you’re close. If it’s still watery, give it another 10 minutes.
Patience with cooling. I ruined my first batch by adding honey while the liquid was still warm. I was in a hurry and thought “warm is close enough.” It wasn’t. The honey thinned out and the syrup never thickened properly. Let it cool completely—I promise it’s worth the wait.
Sterilize your jars. This isn’t just about safety—it’s about shelf life. Even a tiny bit of bacteria can cause your syrup to ferment or spoil. I boil my jars and lids for 10 minutes, then let them air dry on a clean towel. If you’re using a dishwasher, run them through the sanitize cycle.
Double the batch. Honestly, this syrup disappears faster than you’d think. I always make a double batch now and keep one jar in the fridge and one in the freezer. It saves time and ensures I never run out mid-winter.
Variations & Adaptations
One of the best things about this recipe is how flexible it is. Here are a few variations I’ve tried and loved.
Spiced Apple Elderberry Syrup. Replace 1 cup of water with unsweetened apple cider. The apple flavor pairs beautifully with the elderberries and spices. This version tastes almost like a warm mulled cider and is especially good for kids who might find the straight elderberry flavor a little too tart.
Ginger-Turmeric Boost. Add a 2-inch piece of fresh turmeric (sliced) along with the ginger. Turmeric is a powerhouse anti-inflammatory, and it adds a beautiful golden hue to the syrup. Just be warned—it will stain your fingers and your strainer, so wear gloves if you care about that sort of thing.
Low-Sugar Version. If you’re watching your sugar intake, you can reduce the honey to 1/2 cup or replace it with a sugar-free sweetener like monk fruit or stevia. Keep in mind that honey acts as a natural preservative, so a low-sugar version will need to be refrigerated and used within 2-3 weeks.
Alcohol-Based Tincture. For a longer shelf life, you can make an alcohol-based version by replacing the water with vodka or brandy. This isn’t really a syrup anymore—it’s a tincture—and you’d take it by the dropperful rather than the spoonful. I keep a small bottle of this in my pantry for emergencies.
Dairy-Free Creamer Addition. This is a weird one, but hear me out—add a tablespoon of this syrup to your morning coffee or tea with a splash of oat milk. It turns into the most comforting winter latte. My sister swears by this and calls it her “immune latte.”
I’ve also tried adding a vanilla bean to the simmering liquid once, and while it was lovely, it masked the elderberry flavor a bit too much for my taste. If you want a milder syrup, go for it. But I prefer the bold, tart-sweet balance of the original.
Serving & Storage Suggestions
This homemade elderberry syrup with honey is incredibly versatile. Here’s how I use and store it.
How to take it. For general immune support, I take 1 tablespoon daily during cold and flu season. If I feel a tickle in my throat or know I’ve been exposed to someone who’s sick, I bump it up to 1 tablespoon twice a day. For kids ages 1-6, give 1 teaspoon daily; for older kids, 1-2 teaspoons daily. Always consult your pediatrician before giving any herbal remedy to children.
Ways to use it. You can take it straight off the spoon (it’s genuinely tasty), stir it into warm tea or hot water with lemon, drizzle it over pancakes or yogurt, or even mix it into salad dressings for a sweet-tart kick. I’ve also been known to add a splash to sparkling water for a homemade soda—it’s surprisingly good.
Storage instructions. Store your syrup in a sealed glass jar in the refrigerator. Because this recipe uses raw honey and no preservatives, it will keep for about 2-3 months in the fridge. You’ll know it’s still good if it smells fine and has no visible mold. If it develops a fizzy or fermented smell, it’s time to toss it and make a fresh batch.
Freezing option. This syrup freezes beautifully. Pour it into ice cube trays and freeze until solid, then pop the cubes into a freezer-safe bag. Each cube is roughly 1 tablespoon. Thaw a cube in the fridge overnight or drop it directly into hot tea. Frozen syrup will keep for up to 6 months.
Flavor development. I’ve noticed that the flavors actually meld and deepen after about a week in the fridge. The spices become more integrated, and the honey’s sweetness rounds out. So if it tastes good on day one, just wait until day seven.
Nutritional Information & Benefits
While I’m not a doctor or a nutritionist, I can share what the research says about the ingredients in this syrup. Elderberries are packed with antioxidants, particularly anthocyanins, which give them their deep purple color. These compounds help support a healthy immune system by protecting your cells from oxidative stress.
Raw honey is a natural source of enzymes, vitamins, and minerals. It also has antimicrobial properties, which is why it’s been used for centuries to soothe sore throats and coughs. Ginger and cinnamon are both anti-inflammatory and can help with digestion and circulation.
Here’s a rough estimate per 1-tablespoon serving (15 ml):
- Calories: 45
- Total Carbohydrates: 12g
- Sugars: 11g (from honey, no added refined sugar)
- Vitamin C: 2% DV (from elderberries)
- Antioxidants: High (from elderberries, cinnamon, and cloves)
Dietary Considerations:
- Gluten-free
- Dairy-free
- Nut-free
- Vegetarian and vegan-friendly (if using maple syrup instead of honey)
- Allergen Note: Not suitable for infants under 1 year due to the risk of botulism from raw honey
I personally love that this syrup lets me feel proactive about my health without relying on processed supplements. It’s a small, daily ritual that makes me feel like I’m taking care of myself—and that mental boost is just as important as the physical one.
Conclusion
This homemade elderberry syrup with honey has become more than just a recipe in my kitchen—it’s a winter tradition. Every batch I make reminds me of that day in the spice aisle and the memory of my Aunt Lena’s farmhouse kitchen. It’s the kind of recipe that connects you to something bigger than yourself, whether that’s family history or just the simple act of taking care of the people you love.
I hope you give this recipe a try. Don’t be afraid to adjust the spices to your liking, or experiment with different add-ins. The beauty of homemade remedies is that they’re yours to customize. And if you make a batch, I’d love to hear about it. Drop a comment below and let me know how it turned out—did you add anything special? Did your kids actually take it willingly? I want all the details.
Here’s to a healthy, cozy winter, one spoonful at a time. You’ve got this.
Frequently Asked Questions
Can I use fresh elderberries instead of dried?
No, you should not use fresh elderberries for this recipe. Raw elderberries contain a compound that can cause nausea and digestive upset. Dried elderberries have been processed to remove these compounds and are safe to use. If you have access to fresh elderberries, you must cook them thoroughly before using, but dried are much easier and safer for this recipe.
How long does homemade elderberry syrup last?
When stored in a sealed glass jar in the refrigerator, this syrup will last for 2-3 months. Because it uses raw honey as a natural preservative, it has a decent shelf life. You can extend it by freezing the syrup in ice cube trays for up to 6 months. Always check for signs of spoilage like mold, off smells, or fermentation before using.
Can I give this syrup to my toddler?
Yes, but with caution. This syrup is safe for children over 1 year old. For children ages 1-6, give 1 teaspoon daily. For children 7 and up, 1-2 teaspoons daily is fine. However, raw honey is not safe for infants under 12 months due to the risk of infant botulism. Always consult your pediatrician before giving any herbal remedy to young children.
Can I make this without honey?
Absolutely. If you’re vegan or avoiding honey for any reason, you can substitute it with an equal amount of maple syrup or agave nectar. Keep in mind that maple syrup will give the syrup a slightly different flavor profile—more woodsy and caramel-like. The shelf life may also be slightly shorter without honey’s natural preservative properties, so plan to use it within 4-6 weeks.
How do I know if my elderberry syrup has gone bad?
Trust your senses. If the syrup develops a fizzy or alcoholic smell, if you see any mold growing on the surface, or if the texture becomes slimy or separated in an unusual way, it’s time to toss it. A small amount of separation is normal—just give the jar a good shake before using. But if something smells or looks off, don’t risk it. Make a fresh batch instead.
Pin This Recipe!
Best Homemade Elderberry Syrup with Honey for Immune Support
This homemade elderberry syrup with honey is a comforting and immune-supporting recipe that comes together in under an hour. Made with dried elderberries, raw honey, and warm spices, it’s a delicious way to stay healthy during cold and flu season.
- Prep Time: 10 minutes
- Cook Time: 45 minutes
- Total Time: 55 minutes
- Yield: 2 cups (about 32 servings of 1 tablespoon each) 1x
- Category: Condiment
- Cuisine: American
Ingredients
- 1 cup (140 g) dried elderberries (Sambucus nigra or Sambucus canadensis)
- 1 cup (340 g) raw honey
- 4 cups (950 ml) filtered water
- 2 whole cinnamon sticks (preferably Ceylon)
- 1 thumb-sized piece (2 inches) fresh ginger, sliced into thin rounds
- 1 teaspoon whole cloves
- Optional: dried orange peel, star anise pod, dried rose hips
Instructions
- Combine the berries and water. Place 1 cup of dried elderberries and 4 cups of filtered water in a medium saucepan. Add the 2 cinnamon sticks, the sliced ginger, and 1 teaspoon of whole cloves. Stir. Do not add honey yet.
- Bring to a boil, then simmer. Turn heat to high and bring to a rolling boil. Reduce heat to low and simmer gently for 45 minutes. The liquid should reduce by about half and turn deep purple.
- Check the consistency. After 45 minutes, the liquid should be slightly syrupy and reduced to about 2 cups. If too thin, simmer 10-15 minutes more. If too thick, add a splash of water. Aim for a consistency similar to maple syrup.
- Strain the mixture. Place a fine-mesh strainer over a large glass measuring cup or bowl. Pour the hot liquid through the strainer. Use the back of a wooden spoon to press down on the berries and spices to extract all liquid. Discard solids.
- Cool the liquid. Let the strained liquid cool completely at room temperature, about 30-45 minutes. Do not add honey to hot liquid.
- Stir in the honey. Once the liquid is completely cool, add 1 cup of raw honey. Whisk gently until fully dissolved. Taste and adjust sweetness if desired.
- Bottle and store. Using a funnel, pour the syrup into sterilized glass jars, leaving 1/2 inch headspace. Seal tightly, label with the date, and refrigerate.
Notes
Do not use fresh elderberries; they can be toxic if not cooked properly. Raw honey is crucial for enzyme benefits; do not substitute with pasteurized honey. For infants under 1 year, replace honey with maple syrup. The syrup can be frozen in ice cube trays for up to 6 months. Flavors deepen after a week in the fridge.
Nutrition
- Serving Size: 1 tablespoon (15 ml)
- Calories: 45
- Sugar: 11
- Carbohydrates: 12
Keywords: elderberry syrup, homemade elderberry syrup, immune support, elderberry recipe, honey syrup, cold and flu remedy, elderberry with honey


