Love this? Save it for later!
Share the inspiration with your friends
My sister asked why I couldn’t just throw a whole wheel of brie on a board and call it a day. I was in the middle of explaining the careful balance of textures, the visual flow, the way a proper charcuterie board needs highs and lows—then I stopped. She was right. I was overcomplicating it.
That conversation happened last October, right before our annual family harvest dinner. I had spent two days planning a fall charcuterie board with pumpkin and pears, complete with hand-rolled prosciutto roses and individually placed pomegranate seeds. My sister walked in, grabbed a wedge of brie, plopped it down next to a jar of honey, and said, “See? Done.” I wanted to be annoyed. Honestly, I was a little impressed.
But here’s the thing—she inspired me to loosen up. That night, I built my Perfect Fall Harvest Charcuterie Board with Pumpkin and Pears not as a rigid formula, but as a joyful pile of everything good about autumn. I added roasted pumpkin wedges because I had them, sliced pears because they were getting soft, and that whole wheel of brie because why not? It was the most beautiful board I’d ever made. Not because it was perfect, but because it felt like fall on a wooden slab.
Maybe you’ve been there—spending too much time trying to make food look like a magazine spread when all anyone wants is something delicious to grab and eat. This board is for those moments. It’s the recipe that taught me to trust my instincts, even when they tell me to break the rules. I keep making it because every time I do, someone asks for the recipe. And now I get to share it with you.
Why You’ll Love This Recipe
After years of testing boards for everything from casual Netflix nights to holiday parties, I can tell you this one stands out. It’s not just another cheese platter—it’s a full harvest experience that practically builds itself. Here’s why it works:
- Ready in 20 Minutes : No cooking required (except toasting a few nuts or roasting pumpkin if you want). Just arrange and serve—perfect for last-minute hosting or when you’d rather sip cider than slave over a stove.
- Simple Ingredients : Everything comes from a standard grocery store. No specialty cheese shops or fancy imports needed. You probably already have honey, nuts, and crackers in your pantry.
- Perfect for Fall Gatherings : Whether it’s a Friendsgiving, tailgate, Halloween party, or quiet Sunday with a football game on, this board fits right in. It’s impressive enough for guests but easy enough for a Tuesday.
- Crowd-Pleaser : The combo of sweet pears, savory prosciutto, creamy brie, and roasted pumpkin hits every craving. I’ve watched picky eaters and food snobs alike go back for thirds.
- Unbelievably Delicious : There’s something about the way salty cured meat wraps around a slice of honey-drizzled pear that just works. The pumpkin adds this earthy, slightly sweet element that ties everything together.
What makes this board different from the rest? It’s the roasted pumpkin. Most fall boards stick to apples and figs, but pumpkin brings a warmth and heartiness that changes the whole experience. Plus, the texture contrast—soft cheese, crunchy nuts, tender pumpkin, crisp pear—keeps every bite interesting. This isn’t just another version of a charcuterie board. It’s your best version.
I made this board for my book club last month, and one friend literally hugged me after her first bite. That’s the kind of response this recipe gets. It’s comfort food reimagined—faster, simpler, but with the same soul-soothing satisfaction as a warm slice of pumpkin pie.
What Ingredients You Will Need
This recipe uses simple, seasonal ingredients that work together to create a board that tastes as good as it looks. Most of these are pantry staples or easy fall finds, so you won’t need to hunt down anything obscure.
For the Cheese
- Brie (8 oz wheel) — Go for a double or triple cream brie for extra richness. I like Président or Ile de France for consistent quality. Leave it at room temperature for 30 minutes before serving so it gets that luscious, spreadable texture.
- Aged Cheddar (6 oz) — Choose a sharp, crumbly cheddar that can stand up to the sweet fruit. Cabot Seriously Sharp is my go-to. Slice it into thin wedges or small cubes.
- Goat Cheese Log (4 oz) — The tangy, creamy element that cuts through all the richness. Look for a log that’s firm but not dry. Laura Chenel is a solid choice.
For the Meats
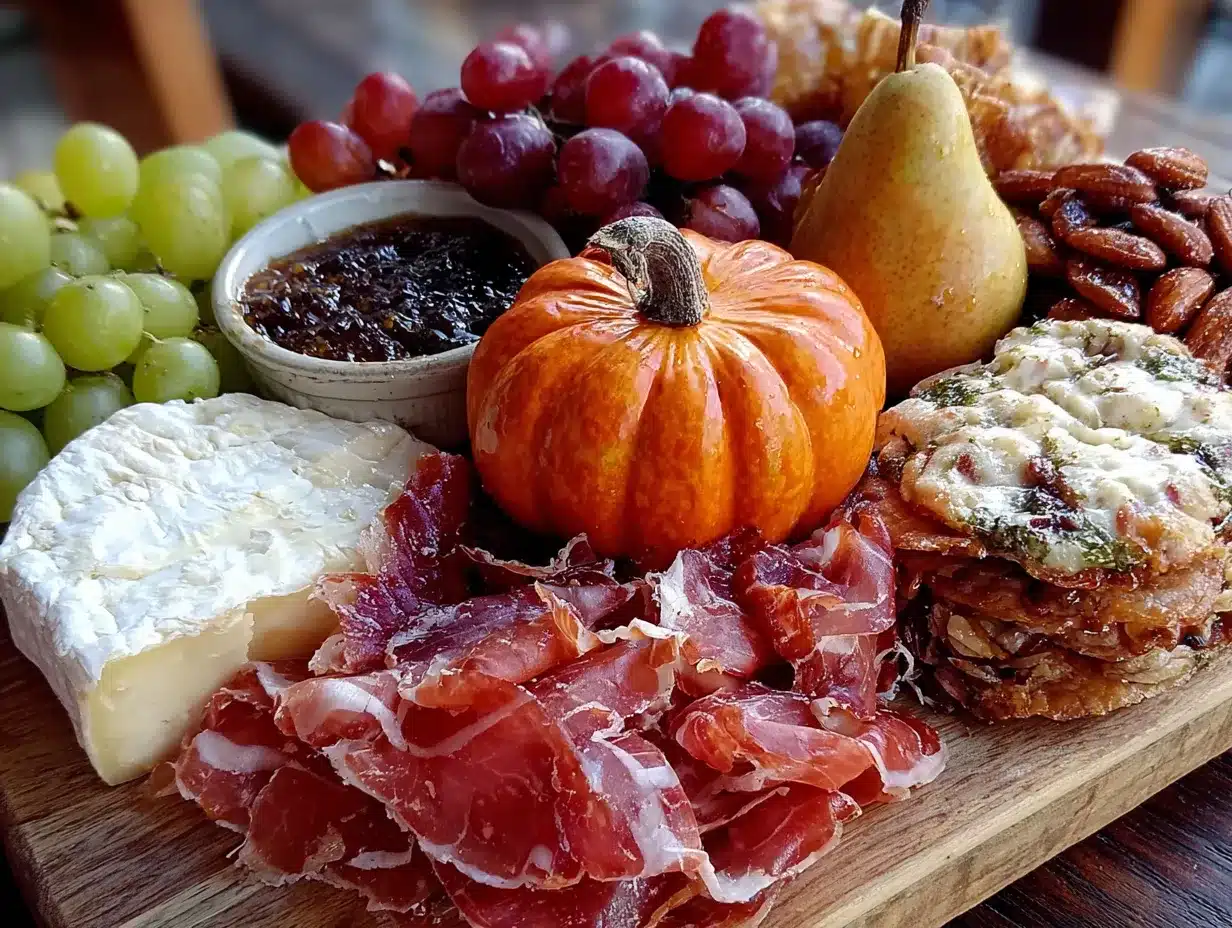
- Prosciutto (4 oz, thinly sliced) — Salty, silky, and essential. I buy it from the deli counter sliced fresh. If you can’t find prosciutto, Serrano ham works beautifully.
- Sopressata (4 oz) — This dry Italian salami adds a spicy, chewy contrast. Look for one with visible peppercorns. Ask the deli to slice it thick—about 1/8 inch.
- Genoa Salami (3 oz) — Milder than sopressata but still bold. Good for folding into ribbons or rolling into little spirals.
For the Fruits & Vegetables
- Pears (2 medium, ripe but firm) — Bosc or Anjou pears hold up best on a board. They’re sweet, juicy, and don’t turn brown too quickly. Slice them right before serving and give them a quick squeeze of lemon juice if you’re worried about browning.
- Roasted Pumpkin Wedges (1 cup) — Use a sugar pumpkin or butternut squash. Cut into 2-inch wedges, toss with olive oil and salt, roast at 400°F for 20 minutes until tender. Let them cool completely before adding to the board. (adds warmth and heartiness)
- Dried Figs (1/2 cup) — Chewy, sweet, and perfect for stuffing with goat cheese. Look for Turkish or Calimyrna figs.
- Red Grapes (1 cup, small clusters) — They add color, texture, and a pop of freshness. Leave them on the stem for easy grabbing.
For the Crunchy Elements
- Toasted Walnuts (1/2 cup) — Toast them in a dry skillet over medium heat for 3-4 minutes until fragrant. Watch them closely—they burn fast.
- Pumpkin Seeds (1/4 cup) — Also called pepitas. Roasted and salted are best. They add a little crunch and reinforce the fall theme.
- Crackers & Bread — Go for a mix: water crackers (for neutral crunch), rosemary flatbread (for flavor), and sliced baguette (for heartiness). About 12-16 ounces total.
For the Finishing Touches
- Honey (for drizzling) — Local honey is best, but any good-quality honey works. Warm it slightly so it drizzles easily.
- Fresh Rosemary Sprigs — Not just for garnish! The piney aroma complements the pumpkin and pear beautifully.
- Flaky Sea Salt — A pinch on the brie or roasted pumpkin makes all the flavors pop. Maldon is my favorite.
Equipment Needed
You don’t need anything fancy to build this board, but the right tools make the process smoother. Here’s what I use:
- Large Wooden Board or Slate Platter (at least 16×12 inches) — A rimless cutting board, cheese board, or even a baking sheet lined with parchment works. I found my favorite acacia wood board at HomeGoods for $15. Don’t stress if you don’t have a fancy board—a clean countertop with parchment paper is totally fine.
- Small Bowls (2-3) — For honey, olives, or nuts. Ramekins or small prep bowls work perfectly.
- Cheese Knives (at least 2) — One for soft cheese (like brie) and one for hard cheese (like cheddar). If you don’t have cheese knives, a butter knife and a paring knife will do the job.
- Tongs or Small Spoons — For serving honey and olives.
- Paring Knife — For slicing pears and trimming cheese. Keep it sharp for clean cuts.
- Baking Sheet — Only if you’re roasting pumpkin. Line it with parchment for easy cleanup.
I’ll be honest—I spent years building boards with just a butter knife and a cutting board. It’s not about the tools. It’s about how you arrange everything. But a good cheese knife does make slicing brie feel a little fancier.
Preparation Method
Building a charcuterie board is more about assembly than cooking. But there’s an art to arranging everything so it looks effortless and inviting. Here’s my step-by-step method, tested through countless boards and hungry crowds.
- Prep Your Ingredients (10 minutes)
Start by taking the brie and goat cheese out of the fridge. Let them sit at room temperature while you prep everything else—this is crucial for that creamy, spreadable texture. Slice the cheddar into thin wedges or small cubes. Slice the pears just before you’re ready to arrange, and toss them with a squeeze of lemon juice to prevent browning. If you’re roasting pumpkin, do this ahead of time and let it cool completely. - Arrange the Cheese First (2 minutes)
Place the brie whole (or halved) on the board. Position it off-center—this creates visual interest. Place the goat cheese log nearby, either whole or cut into rounds. Arrange the cheddar wedges in a cluster opposite the soft cheeses. Think of cheese as your anchor points. Everything else fills in around them. - Add the Meats (3 minutes)
Fold prosciutto slices into loose ribbons or roll them into small roses. Place them near the brie—they’re natural partners. Fold sopressata slices into quarters and pile them near the cheddar. Arrange Genoa salami in small overlapping stacks. Don’t spread the meats too thin. Cluster them so they feel abundant. - Fill in with Fruits and Vegetables (3 minutes)
Scatter the roasted pumpkin wedges around the board, tucking them between cheese and meat clusters. Place the pear slices in a fan shape near the center. Add small bunches of grapes in any empty spaces. Tuck dried figs into gaps—they add sweetness and color contrast. - Add Crunchy Elements (2 minutes)
Pour toasted walnuts and pumpkin seeds into small bowls or scatter them directly on the board. If using bowls, place them in spots that need height or visual weight. Sprinkle a few loose nuts and seeds around for a casual, abundant look. - Add Crackers and Bread (2 minutes)
Fan out crackers and baguette slices around the edges of the board. Don’t stack them too neatly—overlap them slightly so they look inviting. Place a few crackers on the board and keep the rest nearby for refilling. - Finish with Drizzles and Garnishes (2 minutes)
Drizzle honey over the brie and goat cheese. Sprinkle flaky sea salt over the brie and pumpkin wedges. Tuck fresh rosemary sprigs here and there—they add color and a lovely aroma. A final sprinkle of pumpkin seeds over the whole board ties everything together.
Here’s a tip I learned the hard way: step back and look at the board from every angle before serving. If something feels empty, add a few more crackers or nuts. If it feels crowded, that’s actually perfect—abundance is the goal. The board should look like you couldn’t help yourself, like you just kept adding delicious things until you ran out of space.
Cooking Tips & Techniques
I’ve made about a hundred boards at this point, and I’ve definitely made my share of mistakes. Here’s what I’ve learned so you don’t have to repeat my errors.
Don’t overcrowd the board. I know I just said abundance is the goal, but there’s a fine line between abundant and messy. Leave small gaps of empty board so people can actually pick things up without knocking over a pile of walnuts. Think of it as negative space—it makes the board look intentional and elegant.
Always serve cheese at room temperature. This is the number one mistake I see. Cold brie tastes like rubber. Cold cheddar loses its flavor. Take everything out of the fridge at least 30 minutes before serving. I set a timer on my phone so I don’t forget—because I have definitely forgotten, and serving a board with cold cheese is a tragedy no one warns you about.
Slice pears right before serving. They oxidize quickly and turn brown, which isn’t the prettiest look. If you need to prep ahead, toss the slices in a little lemon juice or apple cider vinegar. It won’t change the flavor much, but it keeps them looking fresh for hours.
Toast your nuts. This is a small step that makes a huge difference. Raw nuts are fine, but toasted nuts have this deep, warm flavor that screams fall. Toast them in a dry skillet over medium heat for 3-4 minutes, shaking the pan frequently. The moment you smell them, they’re done.
Build in layers. Don’t just dump everything on the board at once. Start with the biggest items (cheese, bowls), then add medium items (meats, fruits), then fill gaps with small items (nuts, seeds, crackers). This creates a board that looks professionally styled without any real effort.
Have backup ingredients ready. Boards get picked over fast. Keep extra crackers, nuts, and sliced fruit in the kitchen so you can refresh the board halfway through the party. Nothing kills a vibe like a sad, picked-over board with one sad grape rolling around.
Variations & Adaptations
One of the best things about this board is how flexible it is. I’ve made versions for friends with dietary restrictions, seasonal swaps, and just random cravings. Here are some of my favorites:
Vegetarian Version : Skip the prosciutto, sopressata, and salami. Add more cheese—maybe a smoked gouda or a creamy blue cheese. Roasted chickpeas or marinated artichoke hearts add that savory, umami element you’d miss from the meat.
Gluten-Free Version : Replace crackers and baguette slices with gluten-free crackers (I like Simple Mills almond flour crackers), rice crackers, or sliced cucumber and bell pepper strips for a low-carb option. Everything else on this board is naturally gluten-free.
Vegan Version : Use vegan cheese alternatives (Miyoko’s makes an incredible vegan brie) and skip the honey—use maple syrup or agave instead. Add more roasted vegetables, like butternut squash cubes or roasted beets. Marinated olives and pickled vegetables add the tangy, briny notes that cheese usually provides.
Summer Version : Swap roasted pumpkin for grilled peaches or nectarines. Replace pears with fresh figs or sliced apples. Use fresh basil instead of rosemary. The structure stays the same, but the flavors shift to something lighter and brighter.
Spicy Version : Add a drizzle of hot honey over the brie. Swap the sopressata for spicy capicola or nduja (a spreadable spicy salami). Add pickled jalapeños or pepperoncini for heat and acidity. This one is my husband’s favorite—he says it wakes up the whole board.
I once made a version with candied bacon crumbled over the brie, and honestly, it was life-changing. Sometimes the best adaptations come from staring into your fridge and just going with your gut.
Serving & Storage Suggestions
This board is best served at room temperature, so let it sit out for about 20 minutes after assembling before you unleash your guests. The cheese softens, the honey flows, and everything just tastes better.
What to serve alongside: A crisp apple cider or a dry Riesling pairs beautifully with the sweet and savory flavors. For a non-alcoholic option, sparkling water with a splash of pomegranate juice feels festive and fall-appropriate. If you’re feeling extra, a warm mug of mulled cider on the side is never a bad idea.
How to store leftovers: Charcuterie boards don’t store perfectly, but you can salvage the components. Wrap cheese tightly in wax paper or cheese paper (plastic wrap makes cheese sweat and get weird). Store meats in an airtight container in the fridge. Keep crackers in a sealed bag or container so they stay crisp. Roasted pumpkin will keep for 2-3 days in the fridge, but it gets softer the longer it sits.
Reheating tips: If you have leftover roasted pumpkin, reheat it in a 350°F oven for 5-7 minutes to crisp it up slightly. Don’t microwave it—it’ll turn to mush. The brie can be reheated whole in the oven for a warm, gooey dip situation, which is honestly a great way to use up leftovers.
Flavor development: Here’s something interesting—the flavors actually improve after an hour or two at room temperature. The cheese softens, the honey soaks into the brie slightly, and everything melds together. So if you’re making this for a party, assemble it an hour ahead and let it sit. Your taste buds will thank you.
Nutritional Information & Benefits
Let’s be real—this is an indulgent board. But it also has some surprising nutritional perks. Here’s a rough estimate per serving (assuming 8 servings total):
- Calories: Approximately 350-400 per serving (depending on how much cheese and meat you eat)
- Protein: 15-18g from cheese and meats
- Fat: 25-30g (mostly from cheese and nuts—the good kind of fat)
- Carbohydrates: 20-25g (from fruit, crackers, and honey)
- Fiber: 4-5g from pears, pumpkin, and nuts
Health highlights: Pumpkin is packed with vitamin A and fiber. Pears are a great source of vitamin C and copper. Walnuts are loaded with omega-3 fatty acids, which are great for brain health. Cheese provides calcium and protein. So while this isn’t a health food, it’s not junk food either. It’s real food, eaten in reasonable amounts.
Dietary considerations: This board contains dairy, gluten (from crackers), and nuts. For a dairy-free version, use vegan cheese alternatives. For a nut-free version, skip the walnuts and pumpkin seeds and add more fruit or olives instead. The recipe is naturally low-carb if you skip the crackers and bread.
I personally love that this board lets people eat intuitively. You can load up on fruit and nuts if you want something lighter, or go hard on the cheese and meat if you’re feeling indulgent. It’s flexible, just like the recipe itself.
Conclusion
This Perfect Fall Harvest Charcuterie Board with Pumpkin and Pears is more than just a recipe—it’s permission to stop overthinking and start enjoying. It taught me that the best food doesn’t come from following rules. It comes from trusting your instincts, using what you have, and making space for a little imperfection.
I want you to take this recipe and make it your own. Swap the cheddar for gouda if that’s what you have. Use apples instead of pears. Drizzle balsamic glaze instead of honey. The structure is just a starting point. What matters is that you build something that feels good to you and the people you’re feeding.
I’d love to hear how your board turns out. Drop a comment below and tell me what variations you tried, or tag me in your photos if you share them online. There’s something special about seeing how other people interpret a recipe—it reminds me that food is always a conversation, not a lecture.
Now go build your board. Grab a glass of cider, put on a cozy sweater, and enjoy every single bite. You’ve got this.
Frequently Asked Questions
Can I make this board ahead of time?
Yes, but with a few caveats. You can roast the pumpkin and toast the nuts up to two days ahead. Slice the cheese and arrange the meats the night before, then cover everything tightly with plastic wrap and refrigerate. Add the pears, grapes, crackers, and honey drizzle right before serving to keep everything fresh and crisp.
What if I can’t find a sugar pumpkin?
No problem at all. Butternut squash, acorn squash, or even sweet potatoes work beautifully in place of pumpkin. Just cut them into similar-sized wedges, toss with olive oil and salt, and roast at 400°F until tender. The flavor will be slightly different but just as delicious.
How many people does this board serve?
This recipe serves 6-8 people as an appetizer or snack. If you’re serving it as a main course for a light dinner, it serves 4-5. I usually double the recipe for holiday parties because people go back for seconds (and thirds).
Can I use pre-sliced cheese from the grocery store?
You absolutely can. Pre-sliced cheddar or gouda works in a pinch, and it saves time. Just fan the slices out on the board instead of cutting them yourself. For the brie and goat cheese, I do recommend buying whole wheels or logs—they look more impressive and stay fresher longer.
How do I keep the pears from turning brown?
Slice the pears right before serving and toss them with a little lemon juice or apple cider vinegar. You can also brush them with honey, which adds sweetness and creates a protective barrier. If they do start to brown, just flip them over or replace them with fresh slices—it happens to everyone.
Pin This Recipe!
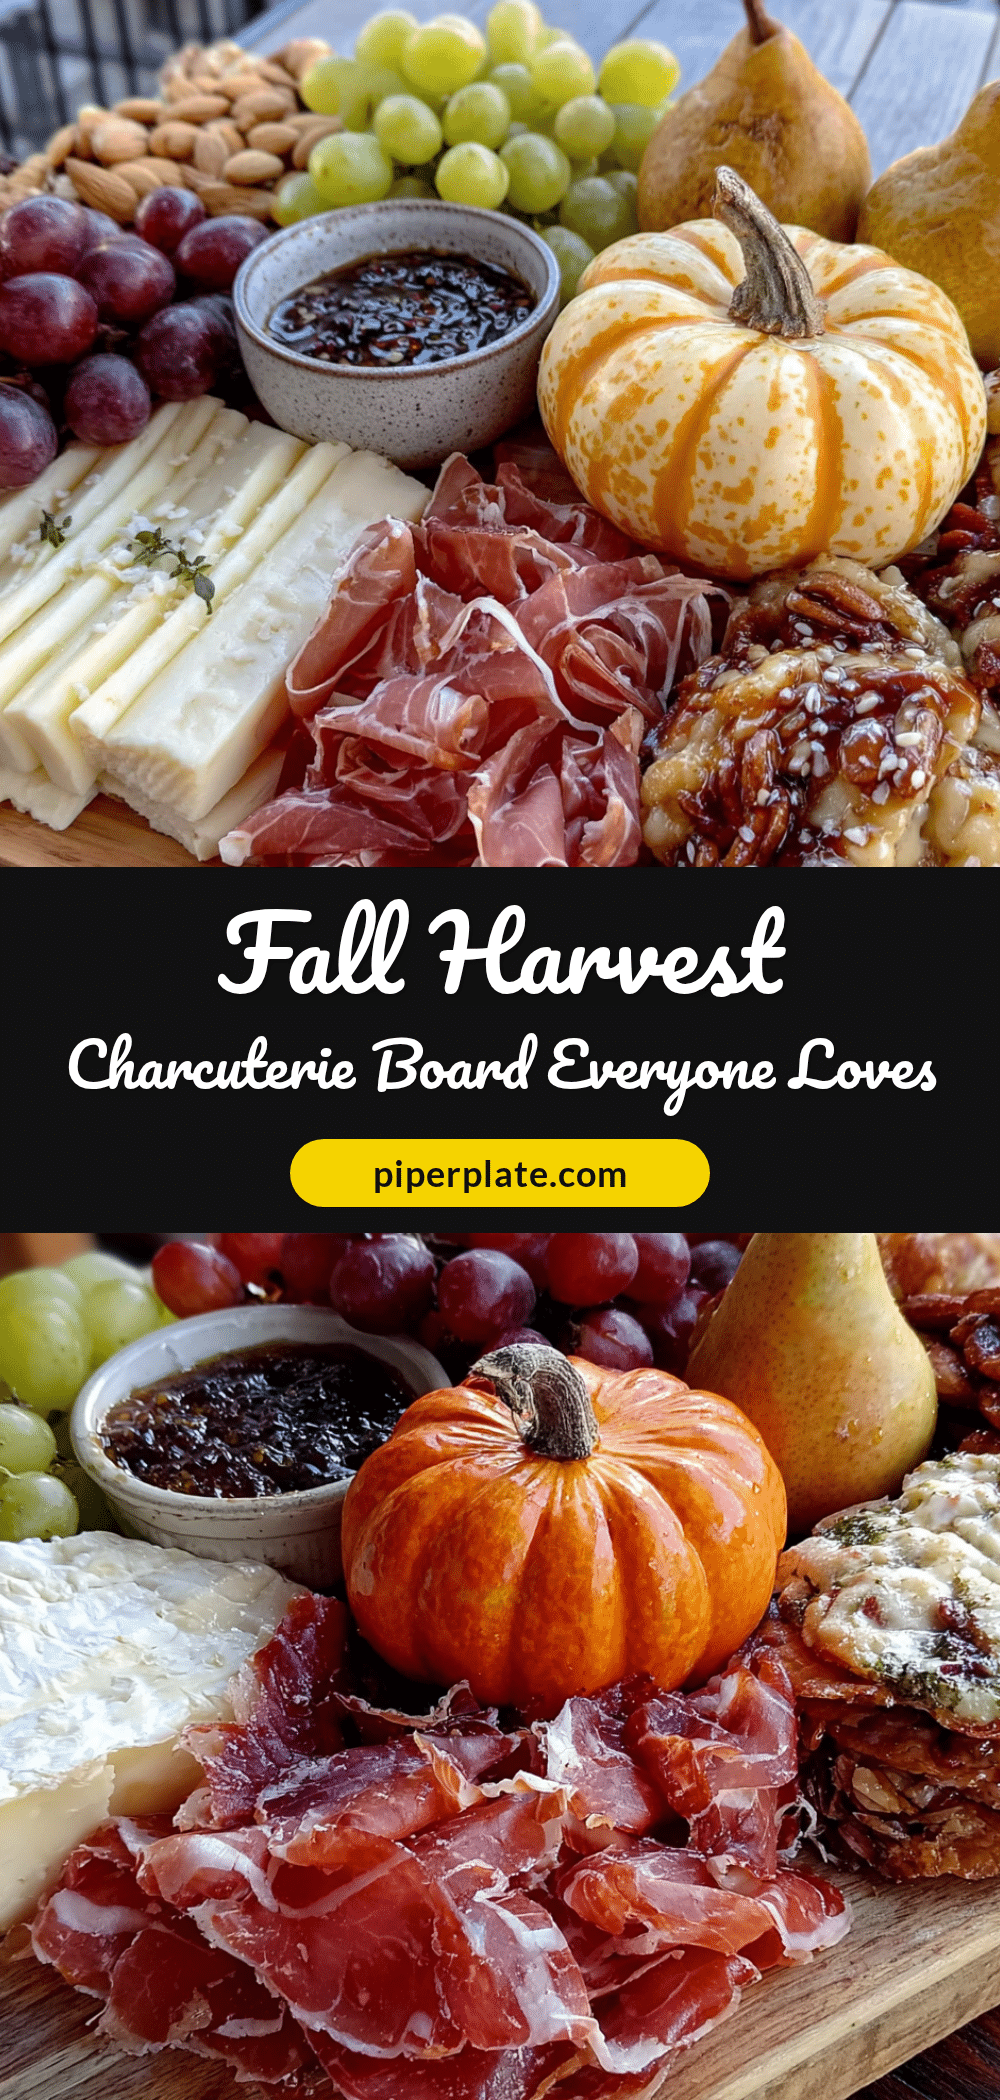
Perfect Fall Charcuterie Board with Pumpkin and Pears
A joyful harvest board featuring roasted pumpkin, ripe pears, creamy brie, and savory cured meats. Ready in 20 minutes, this crowd-pleasing recipe is perfect for fall gatherings and lets you trust your instincts over rigid rules.
- Prep Time: 20 minutes
- Cook Time: 20 minutes (if roasting pumpkin)
- Total Time: 40 minutes
- Yield: 6-8 servings 1x
- Category: Appetizer
- Cuisine: American
Ingredients
- 8 oz Brie (double or triple cream)
- 6 oz Aged Cheddar (sharp, crumbly)
- 4 oz Goat Cheese Log
- 4 oz Prosciutto (thinly sliced)
- 4 oz Sopressata (dry Italian salami, sliced 1/8 inch thick)
- 3 oz Genoa Salami
- 2 medium Pears (Bosc or Anjou, ripe but firm)
- 1 cup Roasted Pumpkin Wedges (from sugar pumpkin or butternut squash)
- 1/2 cup Dried Figs (Turkish or Calimyrna)
- 1 cup Red Grapes (small clusters)
- 1/2 cup Toasted Walnuts
- 1/4 cup Pumpkin Seeds (pepitas, roasted and salted)
- 12–16 oz Crackers and Bread (water crackers, rosemary flatbread, sliced baguette)
- Honey (for drizzling)
- Fresh Rosemary Sprigs
- Flaky Sea Salt (e.g., Maldon)
- Olive oil (for roasting pumpkin)
- Salt (for roasting pumpkin)
- Lemon juice (for pears, optional)
Instructions
- Prep Your Ingredients (10 minutes): Take brie and goat cheese out of fridge to come to room temperature. Slice cheddar into thin wedges or small cubes. Slice pears just before arranging and toss with lemon juice to prevent browning. If roasting pumpkin, do ahead and let cool completely.
- Arrange the Cheese First (2 minutes): Place brie whole or halved off-center on board. Place goat cheese log nearby, whole or cut into rounds. Arrange cheddar wedges in a cluster opposite soft cheeses.
- Add the Meats (3 minutes): Fold prosciutto into loose ribbons or small roses near brie. Fold sopressata into quarters and pile near cheddar. Arrange Genoa salami in small overlapping stacks. Cluster meats for abundance.
- Fill in with Fruits and Vegetables (3 minutes): Scatter roasted pumpkin wedges around board, tucking between cheese and meat. Place pear slices in a fan shape near center. Add small bunches of grapes in empty spaces. Tuck dried figs into gaps.
- Add Crunchy Elements (2 minutes): Pour toasted walnuts and pumpkin seeds into small bowls or scatter directly on board. Place bowls in spots needing height. Sprinkle loose nuts and seeds around for casual look.
- Add Crackers and Bread (2 minutes): Fan out crackers and baguette slices around edges of board, overlapping slightly. Place some on board and keep rest nearby for refilling.
- Finish with Drizzles and Garnishes (2 minutes): Drizzle honey over brie and goat cheese. Sprinkle flaky sea salt over brie and pumpkin wedges. Tuck fresh rosemary sprigs around board. Final sprinkle of pumpkin seeds over whole board.
Notes
Serve cheese at room temperature for best flavor. Slice pears right before serving to prevent browning. Toast nuts for deeper flavor. Build in layers: start with largest items, then medium, then small. Have backup ingredients ready to refresh the board. The board is best served at room temperature; assemble up to an hour ahead for flavor development. Leftovers: wrap cheese in wax paper, store meats in airtight container, keep crackers sealed. Roasted pumpkin keeps 2-3 days in fridge.
Nutrition
- Serving Size: 1 serving (based on
- Calories: 350400
- Fat: 2530
- Carbohydrates: 2025
- Fiber: 45
- Protein: 1518
Keywords: fall charcuterie board, pumpkin charcuterie board, harvest board, fall appetizer, cheese board, pear and brie board, easy charcuterie, holiday appetizer


