Love this? Save it for later!
Share the inspiration with your friends
I wasn’t expecting lunch-packing advice from my accountant, but there I was, shuffling receipts in his cramped office, listening to him describe exactly how he assembles bento boxes for his kids every single morning. He noticed me eyeing the sad, soggy sandwich I’d brought and just started talking. “Turkey and cheese,” he said, like it was a secret code. “But you gotta think about it like a puzzle, not a sandwich.” Honestly, it was the last place I’d expect a culinary breakthrough—a fluorescent-lit room smelling of coffee and tax forms. But that conversation completely changed how I approach weekday lunches.
For months, I’d been stuck in a rut of either buying overpriced pre-made lunches or slapping together a sandwich that would be a mushy mess by noon. Then, this accountant—let’s call him Dave—spilled his whole system. It wasn’t about fancy ingredients or Japanese snack imports. It was about using a simple container and building a lunch that stays fresh, looks appealing, and comes together in under ten minutes. I went home that night, dug out a compartmentalized container, and made my first Easy Turkey and Cheese Bento Box Lunch. The next day, I actually looked forward to my lunch break. The turkey was still perfect, the cheese was firm, and the crunch of the veggies was a game-changer.
This isn’t just about packing a lunch; it’s about reclaiming your midday meal from the dreaded sad desk lunch. Maybe you’ve been there, staring at a limp sandwich and wondering where you went wrong. This recipe is the answer. It’s the kind of simple, smart solution that makes you wonder why you didn’t think of it yourself. I’ve been making these boxes for months now, and they never get old. Let me show you how to build the perfect, no-fuss lunch.
Why You’ll Love This Easy Turkey and Cheese Bento Box Lunch
After testing this method for months—and packing lunches for friends who swore they’d never meal prep—I can tell you exactly why this works. It’s not just a recipe; it’s a system for a better lunch hour.
- Quick & Easy: This comes together in less than 10 minutes. Seriously. It’s faster than waiting in line at a deli, and you don’t have to decide what to order. Perfect for those chaotic Monday mornings or when you just want five more minutes in bed.
- Simple Ingredients: You probably have everything you need right now. No fancy grocery store trips for wasabi peas or dried seaweed. We’re using deli turkey, your favorite cheese, and whatever crunchy veggies and fruit are hanging out in your fridge.
- Perfect for Busy Weekdays: Whether it’s for work, school, a road trip, or a picnic in the park, this bento box is portable, mess-free, and doesn’t need to be reheated. It’s the ultimate grab-and-go meal.
- Crowd-Pleaser: This isn’t just for adults. My friend’s picky seven-year-old devours these. The fun, snack-like format makes it appealing for kids and adults alike. It’s a lunch that actually gets eaten.
- Unbelievably Delicious: The magic is in the assembly. By keeping ingredients separate until you eat them, the turkey stays tender, the cheese keeps its texture, and the crackers (if you add them) stay perfectly crunchy. It’s a fresh, satisfying meal every single time.
What makes this different from every other lunch idea? It’s the focus on texture and freshness. We’re not just throwing food in a box. We’re building a balanced meal that feels like a treat. It’s the lunch that makes your coworkers jealous, without any stress on your part. It’s comfort food reimagined—faster, fresher, and with the same satisfying feeling of a great meal.
What Ingredients You Will Need
This recipe is all about flexibility, but a great bento box starts with a solid foundation. Here are the ingredients I use for my go-to version. Think of this as a blueprint you can customize.
- For the Protein:
- 4-6 slices (about 4 oz or 115g) of deli turkey breast: I prefer oven-roasted or smoked turkey from the deli counter. Look for a brand that doesn’t have a ton of added water or fillers. Boar’s Head or Applegate are solid choices. You can also use leftover roast turkey!
- 1-2 slices (about 1 oz or 28g) of your favorite cheese: Cheddar, provolone, Swiss, or Gouda all work beautifully. I love a sharp white cheddar for its tang. Cut the cheese into cubes or fun shapes using a small cookie cutter.
- For the Crunch:
- 1/2 cup (about 60g) of crunchy vegetables: Think cucumber slices, bell pepper strips, baby carrots, snap peas, or celery sticks. This is where you can use up leftover veggie scraps.
- A small handful of crackers or pretzels: About 1 oz (28g). Whole-wheat crackers, rice crackers, or pretzel thins add a great salty crunch. I’m partial to the mini pretzel twists.
- For the Sweet & Tangy:
- 1/2 cup (about 75g) of fresh fruit: Grapes, apple slices, berries, or a clementine. The sweetness balances the savory flavors perfectly. I love a handful of red grapes.
- 1-2 tablespoons of a fun dip or spread: Hummus, ranch dressing, mustard, or a little container of apple sauce. This adds a creamy element and makes it feel extra special.
Ingredient Selection Tips: When buying deli meat, ask for a thick-cut slice. It holds up better and doesn’t get slimy. For the cheese, a block you cut yourself is almost always better than pre-sliced. If you are packing this for a picnic, choose firmer fruits like apples or grapes that won’t get mushy. For a low-carb option, swap the crackers for cheese crisps or extra veggies.
Equipment Needed
You don’t need a lot of fancy gear for this. The most important tool is a good container.
- A Bento Box or Divided Container: This is the star of the show. Look for one with 3-4 compartments. I use a simple, leak-proof plastic one from a brand called Bentgo, but any divided meal prep container will work. A standard lunch container with silicone muffin cups to separate items is a great budget-friendly alternative.
- A Sharp Knife and Cutting Board: You’ll need these for slicing the turkey, cheese, and veggies. A sharp knife makes all the difference for clean cuts and safe prep.
- Small Silicone Cups or Paper Muffin Liners: These are optional but fantastic for keeping dips, sauces, or small items like berries from rolling around. They make the box look neat and organized.
- A Vegetable Peeler: Great for making ribbon-like cucumber strips or peeling carrots into fun shapes.
- Cookie Cutters (Optional but Fun!): If you’re packing for kids (or just want a smile), small star or heart-shaped cutters can turn cheese and turkey slices into something special. I have a set of mini metal cutters that I use just for lunches.
My Personal Tip: I used to struggle with leaky containers. Investing in one with a good silicone seal was a game-changer. It means my crackers stay crunchy and my fruit juice doesn’t soak the turkey. You can find great options for under $15 at most home goods stores.
Preparation Method
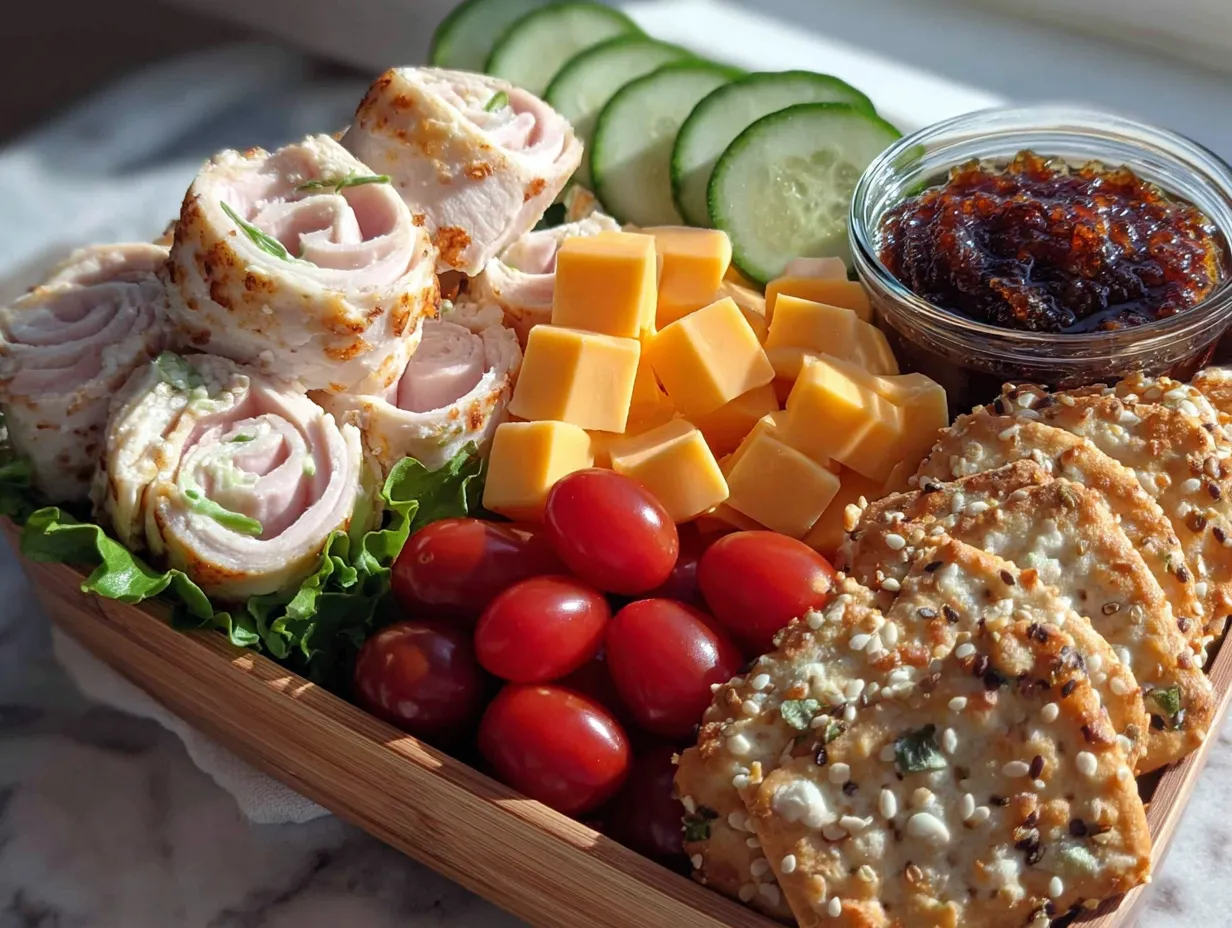
This is where the magic happens. Follow these steps, and you’ll have a beautiful, delicious lunch in no time. The key is to work in an assembly line.
- Prep Your Protein: Take your 4-6 slices of deli turkey. You can leave them flat, roll them up into neat little pinwheels, or fold them into quarters. I prefer rolling them—it makes them easier to grab and eat. If using a cookie cutter, press it into the rolled turkey to create fun shapes. Place the turkey in one of the large compartments of your bento box.
- Prep Your Cheese: Cut your 1-2 slices of cheese into bite-sized cubes, about 1/2 inch (1.25 cm) each. If you’re using a cookie cutter, cut the shapes from the cheese slices. Place the cheese cubes in the same compartment as the turkey, or in a separate one if you have room. I like to keep them separated so the cheese doesn’t get warm and sticky.
- Wash and Cut Your Veggies: Wash your 1/2 cup of crunchy vegetables. Cut cucumbers into rounds or half-moons. Slice bell peppers into thin strips. If using baby carrots, you can leave them whole or cut them in half lengthwise. Place them in a second large compartment. The goal is to have pieces that are easy to pick up and dip.
- Add Your Fruit: Wash your 1/2 cup of fruit. If using grapes, leave them on the stem for a fun, easy grab. If using apples, slice them and give them a quick squeeze of lemon juice to prevent browning. Place the fruit in a third compartment. This is your sweet finish.
- Portion Your Crunch and Dip: Place your small handful of crackers or pretzels in a dry compartment, or nestle them in a silicone cup. For your dip, spoon 1-2 tablespoons of hummus, ranch, or mustard into a small, leak-proof silicone cup. Place the cup in an empty spot. This is the “secret sauce” that ties everything together.
- Assemble and Secure: Take a moment to look at your bento box. Arrange the items so the colors are balanced. A little red bell pepper next to green cucumbers and yellow cheese looks so much more appetizing. Close the lid tightly. If your container isn’t leak-proof, wrap the dip cup in a small piece of plastic wrap just in case.
- Store or Pack: Place the assembled bento box in the refrigerator if you’re making it the night before. If you’re packing it for the day, grab it from the fridge and pop it in your lunch bag with an ice pack. That’s it! You’re done in under 10 minutes.
My Pro Tip: Don’t overfill the box. A crowded box leads to crushed crackers and messy dips. Leave a tiny bit of breathing room. Also, if you are using a dip like hummus, put a small drop in the bottom of the silicone cup to “glue” it to the container and stop it from sliding around.
Cooking Tips & Techniques
I’ve made plenty of mistakes with packed lunches. Let me save you from the soggy disasters I’ve endured. Here are my best tips for bento box success.
- The Dryness is Key: The number one enemy of a good bento box is moisture. Make sure your veggies and fruit are completely dry after washing. Use a salad spinner or pat them dry with a paper towel. Wet ingredients make everything else sad and limp.
- Don’t Skip the Ice Pack: Turkey and cheese need to stay cold. An ice pack is non-negotiable if you aren’t eating the lunch within two hours. It keeps the cheese firm and the turkey fresh. I use a thin, reusable gel pack that fits right on top of my container.
- Build for Balance: A great lunch has protein, fat, carbs, and produce. This box naturally covers all those bases. The turkey provides lean protein, the cheese adds fat, the crackers are your carbs, and the fruits and veggies are your fiber and vitamins. It’s a complete meal.
- The “No-Soggy” Sandwich Trick: If you are a sandwich lover, you can still use this bento box method! Pack the bread or wrap separately from the fillings. Assemble it at lunchtime. This is the ultimate hack for a perfect, non-soggy sandwich. I do this all the time with leftover crispy garlic chicken for a killer lunch the next day.
- Multitasking is Your Friend: While the water is running to wash your produce, pull the turkey and cheese from the fridge. While you are slicing the cheese, let the crackers sit on the counter. This flow will get your assembly time down to five minutes once you get the hang of it.
Variations & Adaptations
Once you master the basic formula, the possibilities are endless. Here are a few of my favorite twists to keep things interesting.
- The Italian Sub Bento: Swap the turkey for salami and provolone cheese. Add a few pepperoncini and a small container of Italian dressing for dipping. Use breadsticks or grissini instead of crackers. It’s a deconstructed sub sandwich that’s far less messy.
- The Vegetarian Caprese Box: Skip the turkey and use fresh mozzarella balls (bocconcini) and cherry tomatoes. Add a small container of balsamic glaze for dipping. Include fresh basil leaves (wrap them in a damp paper towel). This is a fresh, summer-perfect lunch.
- The Low-Carb/Keto Box: Replace the crackers with cheese crisps or celery sticks. Use full-fat cheese and a fattier meat like roast beef. Add a hard-boiled egg for extra protein. For the fruit, swap grapes for a few berries or an avocado half (squeeze with lime juice).
- The “Everything But the Kitchen Sink” Box: This is my go-to for using up leftovers. Add a few slices of leftover meatloaf, roasted sweet potatoes, a spoonful of creamy mac and cheese, and some pickles. The bento box format is perfect for a “smorgasbord” style lunch.
- The Sweet & Savory Box: Add a small container of peanut butter or almond butter for dipping your apple slices or celery. A few dark chocolate chips or a small piece of dark chocolate makes for a perfect, not-too-sweet treat at the end of the meal.
Serving & Storage Suggestions
This lunch is designed to be eaten cold or at room temperature. Here’s how to serve it perfectly and store it for the week.
- Serving Temperature: This bento box is best enjoyed cold, straight from the fridge, or after sitting at room temperature for about 15-20 minutes. This takes the chill off the cheese and fruit, making the flavors more pronounced. Don’t leave it out for more than two hours.
- Presentation: The beauty of a bento box is the visual appeal. Open the lid and arrange the items on a plate if you want to feel fancy. Or, just eat straight from the box—that’s the whole point! I love the contrast of the green cucumbers, red peppers, and yellow cheese.
- Complementary Dishes: This lunch is a complete meal on its own. But if you want to add something, a small cup of soup or a side of simple roasted vegetables from last night’s dinner would be perfect. A cold brew tea or sparkling water is my favorite drink pairing.
- Storage Instructions: You can assemble these boxes up to 3 days in advance. Store them in the refrigerator. Keep the lid on tight to prevent the ingredients from drying out. Do not freeze this lunch—the texture of the turkey and veggies will suffer.
- Reheating Tips: Do not microwave this bento box! The crackers will get soggy, and the cheese will melt into a mess. This is a cold lunch by design. If you want a hot element, pack a separate thermos with soup or leftovers.
- How Flavors Develop: Unlike a stew, the flavors don’t really meld here, and that’s the point. The ingredients stay distinct and fresh. The only thing that changes over time is the crackers might lose a tiny bit of crunch after a day or two. For the best experience, eat them within 24 hours of assembly.
Nutritional Information & Benefits
This bento box is a nutrition powerhouse disguised as a fun snack lunch. It’s balanced, satisfying, and good for you.
- Estimated Nutritional Values (per box):
- Calories: 450-550
- Protein: 30-35g (from turkey and cheese)
- Carbohydrates: 35-45g (from fruit, crackers, and veggies)
- Fat: 18-25g (from cheese and dip)
- Fiber: 5-8g (from veggies and fruit)
- Health Benefits of Key Ingredients: Turkey is a fantastic source of lean protein, which keeps you full and focused. The cheese provides calcium and healthy fats. The colorful veggies are packed with vitamins and antioxidants. The fruit gives you a natural energy boost without a sugar crash.
- Dietary Considerations: This recipe is naturally nut-free (depending on your crackers) and can be made gluten-free by using gluten-free crackers. It’s also easy to make vegetarian or vegan (use plant-based turkey and cheese).
- Potential Allergens: Contains dairy (cheese) and gluten (crackers). Check your labels for any other allergens.
- My Personal Wellness Perspective: I love this lunch because it doesn’t feel like “diet food.” It feels like a treat. But it’s packed with real, whole foods that give me steady energy all afternoon. No 3 PM slump. It’s proof that eating well doesn’t have to be boring or complicated. It’s simply smart.
Conclusion
Honestly, this Easy Turkey and Cheese Bento Box Lunch has been a genuine game-changer in my kitchen. It turned my least favorite part of the day—the dreaded lunch packing—into something I actually enjoy. It’s quick, it’s flexible, and it makes me feel like I have my life together, even on the most chaotic mornings.
I really encourage you to try this method and make it your own. Swap the turkey for ham, the cheddar for gouda, the grapes for apple slices. The formula is the same, but the possibilities are endless. Don’t be afraid to get creative and use up whatever you have in your fridge. That’s the real secret to a great bento box.
I’d love to hear how your bento box turns out! What’s your favorite combination? Did you discover a new dip that works perfectly? Drop a comment below and share your creation. And if you found this helpful, please share it with a friend who could use a little lunch inspiration. Happy packing, and enjoy every crunchy, fresh, delicious bite!
Frequently Asked Questions
Can I use leftover cooked turkey instead of deli meat?
Absolutely! Leftover roast turkey is fantastic in this box. It’s often more flavorful and has a better texture than deli meat. Just slice or shred it and use it the same way you would the deli turkey.
How do I keep my crackers from getting soggy?
The key is to keep them in a completely dry compartment, away from any wet ingredients like fruit or dip. Using a silicone cup or a small paper bag within the box creates a perfect moisture barrier.
Can I prepare these boxes for the whole week on Sunday?
Yes, you can! These boxes will stay fresh in the refrigerator for up to 3 days. For best results, keep the crackers and any crunchy elements separate and add them on the morning you plan to eat the lunch to maintain maximum crunch.
What if I don’t have a bento box with compartments?
No problem at all! You can use a standard lunch container. Just use silicone muffin cups or small reusable containers to keep the different items separated. This prevents the flavors from mixing and keeps everything organized.
Is this lunch safe for school lunches?
Yes, it is a great option for school lunches. Just make sure to pack it with an ice pack to keep the turkey and cheese at a safe temperature. You can also omit any potential allergens like nuts and check the school’s specific food policy.
Pin This Recipe!
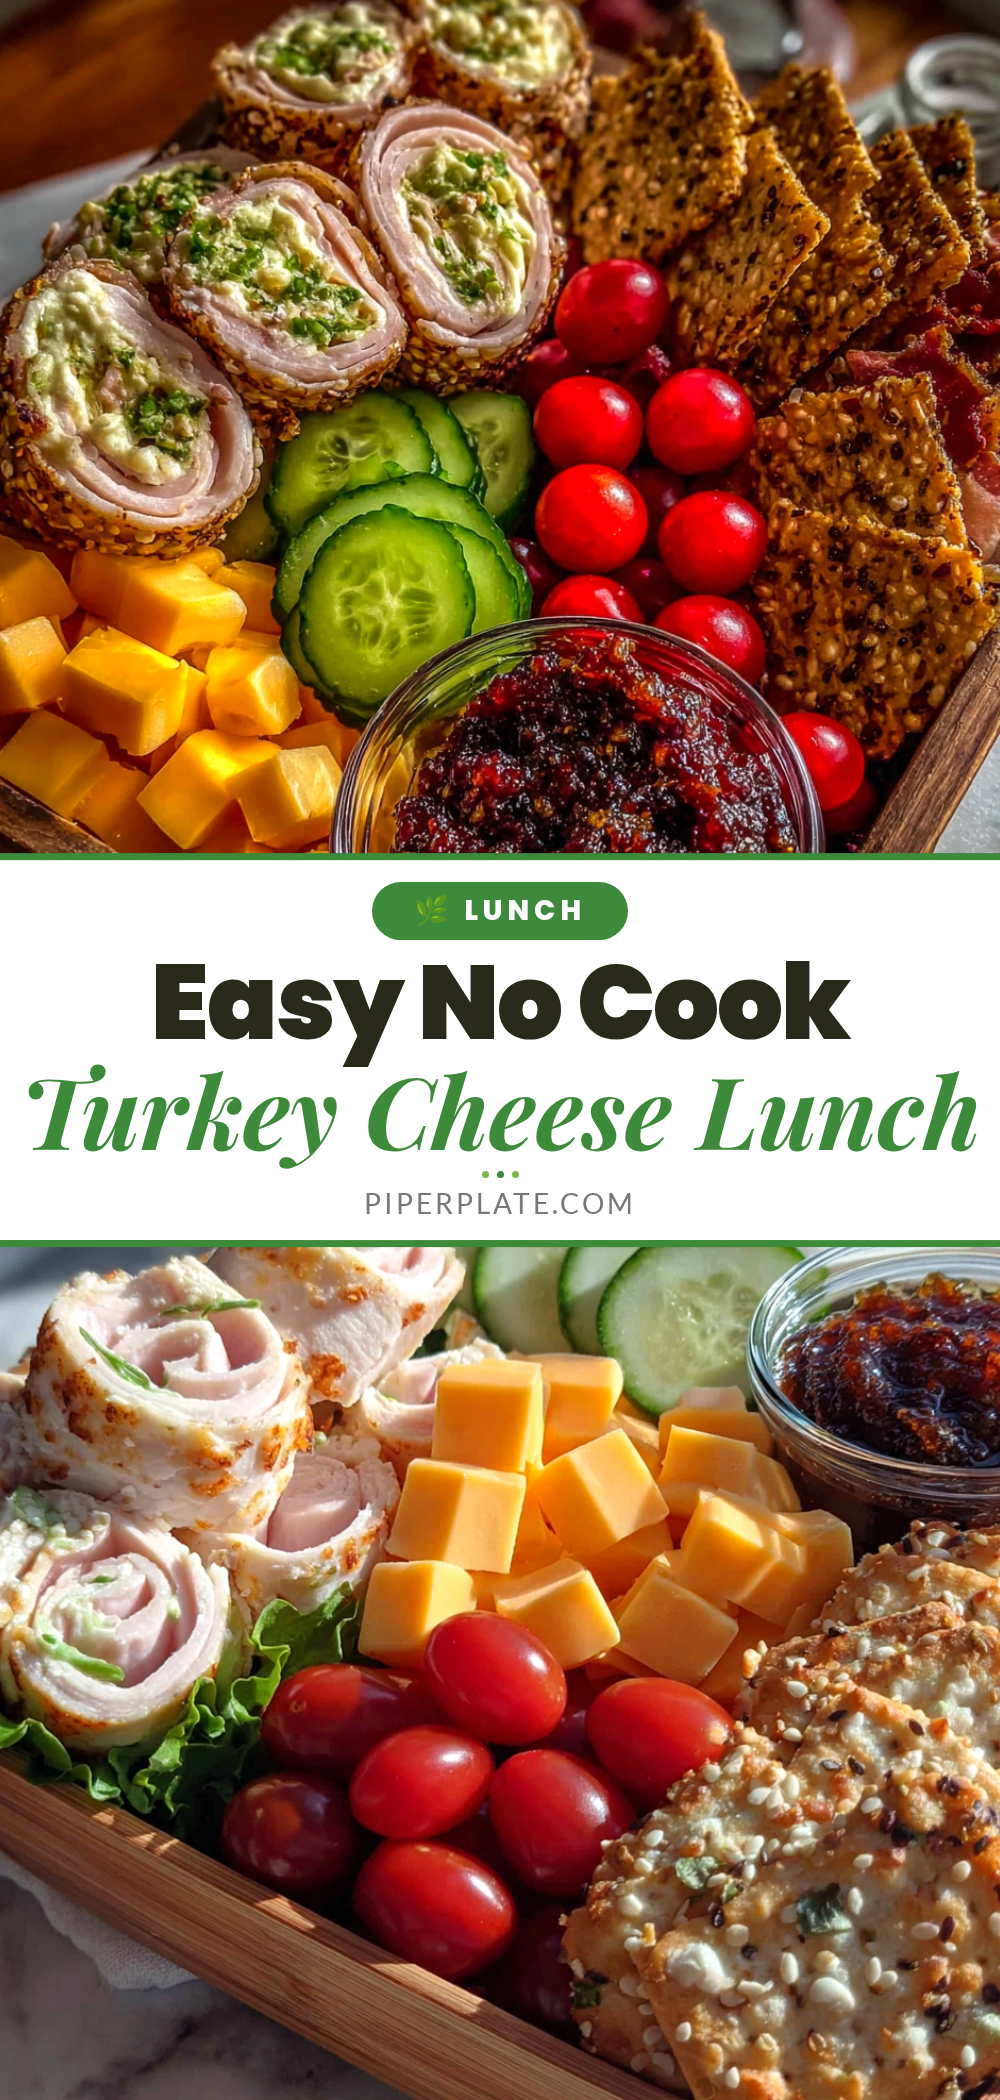
Easy Turkey and Cheese Bento Box Lunch

A quick and easy bento box lunch with turkey, cheese, crunchy vegetables, fruit, and crackers. Perfect for busy weekdays, this no-cook meal comes together in under 10 minutes and stays fresh until lunchtime.
- Prep Time: 10 minutes
- Cook Time: 0 minutes
- Total Time: 10 minutes
- Yield: 1 serving 1x
- Category: Lunch
- Cuisine: American
Ingredients
- 4–6 slices (about 4 oz or 115g) deli turkey breast
- 1–2 slices (about 1 oz or 28g) cheese (cheddar, provolone, Swiss, or Gouda)
- 1/2 cup (about 60g) crunchy vegetables (cucumber slices, bell pepper strips, baby carrots, snap peas, or celery sticks)
- 1 oz (28g) crackers or pretzels
- 1/2 cup (about 75g) fresh fruit (grapes, apple slices, berries, or clementine)
- 1–2 tablespoons dip or spread (hummus, ranch dressing, mustard, or applesauce)
Instructions
- Prep your protein: Take 4-6 slices of deli turkey. Leave them flat, roll into pinwheels, or fold into quarters. Place in one large compartment of your bento box.
- Prep your cheese: Cut 1-2 slices of cheese into bite-sized cubes (about 1/2 inch each). Place in the same compartment as the turkey or a separate one.
- Wash and cut your veggies: Wash 1/2 cup of crunchy vegetables. Cut cucumbers into rounds or half-moons, bell peppers into thin strips. Place in a second large compartment.
- Add your fruit: Wash 1/2 cup of fruit. Leave grapes on the stem, slice apples and toss with lemon juice to prevent browning. Place in a third compartment.
- Portion your crunch and dip: Place crackers or pretzels in a dry compartment or silicone cup. Spoon 1-2 tablespoons of dip into a small leak-proof silicone cup and place in an empty spot.
- Assemble and secure: Arrange items so colors are balanced. Close the lid tightly. If not leak-proof, wrap the dip cup in plastic wrap.
- Store or pack: Refrigerate if making ahead. Pack in a lunch bag with an ice pack.
Notes
Keep ingredients dry to avoid sogginess. Use an ice pack to keep turkey and cheese cold. For best results, eat within 24 hours of assembly. Can be assembled up to 3 days in advance.
Nutrition
- Serving Size: 1 bento box
- Calories: 450550
- Sugar: 1520
- Sodium: 8001000
- Fat: 1825
- Saturated Fat: 812
- Carbohydrates: 3545
- Fiber: 58
- Protein: 3035
Keywords: bento box, turkey and cheese, easy lunch, no-cook lunch, meal prep, kid-friendly lunch, healthy lunch


