Love this? Save it for later!
Share the inspiration with your friends
This was supposed to be a proper bento box. I had the little silicone cups, the nori punch, the tiny sauce containers—the whole nine yards. I was going to make these adorable onigiri shaped like bears, with little seaweed faces and everything. But then Tuesday happened. The kids were cranky, I’d forgotten to defrost the chicken for dinner, and somewhere between the third “Mom, where’s my library book?” and the fourth, I grabbed the wrong package from the fridge. Instead of the cooked shrimp I’d planned for the bento, I pulled out a pack of salami. And honestly? I just stood there holding it, feeling the weight of the week already pressing down on my shoulders. The rice wasn’t cooked, the nori was stale, and I was this close to just handing everyone a granola bar and calling it a day.
But then I looked at that salami, and I looked at the box of crackers in the pantry, and a little lightbulb went off. Not a bright one, mind you—more like a flickering, “maybe this isn’t a total disaster” kind of glow. I grabbed a block of cheddar, a handful of baby carrots, and started arranging everything on a plate. My four-year-old watched me, suspicious at first, like I was trying to pull a fast one on her. But when she saw the salami roses—okay, they were more like salami blobs, but I was trying—she actually smiled. And when she sat down and started building her own little cracker-salami stacks, I knew I’d stumbled onto something. It wasn’t the beautiful, Pinterest-worthy bento I’d imagined. It was better. It was real. It was the kind of lunch that doesn’t make you want to cry by 2 p.m.
This quick homemade lunchable with salami and crackers has now become my secret weapon. It’s what I make when I’m too tired to cook but too stubborn to give up on a proper meal. It’s what I pack for myself on days when I know I’ll be eating hunched over my laptop, because it feels just a little bit special. And it’s what I make for the kids when they need something they can control themselves—because let me tell you, there is something deeply satisfying about building your own little cracker tower. Maybe you’ve been there, standing in your kitchen, holding an ingredient you didn’t plan for, wondering if you can still pull off a win. This recipe is for those days. It’s proof that sometimes the best meals come from the moments when you almost gave up.
Why You’ll Love This Recipe
Let me tell you why this quick homemade lunchable with salami and crackers has completely changed my lunch game. I mean it—I make this at least twice a week now, and I’m not even a little bit embarrassed about it. Here’s what makes it so great:
- Ready in Under 5 Minutes: No cooking. No chopping (well, maybe a little cheese slicing). Just grab, arrange, and go. Perfect for those days when you have approximately 47 seconds to eat.
- Simple Ingredients: You probably have everything in your fridge and pantry right now. Salami, crackers, cheese, maybe a few veggies if you’re feeling fancy. No specialty grocery trips required.
- Perfect for Busy Days: This is my go-to for desk lunches, road trips, picnic lunches, and after-school snacks. It travels beautifully and doesn’t need reheating.
- Kid-Approved and Adult-Friendly: My kids love building their own cracker stacks, and I love that it feels like a grown-up charcuterie board without the effort. Everyone wins.
- Endlessly Customizable: Use whatever cheese you have, swap the crackers, add some fruit—it’s more of a template than a recipe, and that’s the beauty of it.
What makes this different from just throwing some salami on a plate? It’s the little touches. I like to cut the cheese into fun shapes with cookie cutters—stars, hearts, whatever I have on hand. I arrange everything in a way that feels intentional, not rushed. And I always add one little surprise, like a few raspberries or a pickle spear, something that makes opening the container feel like a tiny event. This isn’t just lunch—it’s a moment of calm in a chaotic day. It’s comfort food reimagined as something quick and easy, but with the same soul-soothing satisfaction as a full meal. Perfect for impressing your kids without stress, or turning a simple Tuesday lunch into something memorable.
What Ingredients You Will Need
This quick homemade lunchable with salami and crackers uses the simplest ingredients, but each one plays a role in making it feel like a real meal rather than just a snack plate. Here’s what you’ll need:
The Main Components
- Salami: About 4-6 slices per serving. I prefer Genoa salami for its buttery texture and mild flavor, but any hard salami works beautifully. Look for pre-sliced at the deli counter for convenience, or buy a whole stick and slice it yourself for thicker pieces. My favorite brand is Columbus—it has that perfect balance of fat and spice.
- Crackers: About 8-10 crackers per serving. Use whatever you have on hand—Ritz, Club crackers, whole wheat rounds, or even gluten-free options. I personally love the buttery, flaky texture of Club crackers for this, but saltines work in a pinch too.
- Cheese: 2-3 ounces per serving. Cheddar is classic, but feel free to use provolone, mozzarella sticks (cut into rounds), gouda, or even cream cheese for a spreadable option. I recommend block cheese that you slice yourself—it tastes better and you can control the thickness. If you’re using pre-sliced, just cut the slices into quarters for easy stacking.
Optional Add-Ins

- Fresh Fruit: A handful of grapes, apple slices, or berries add a sweet contrast to the salty salami. Grapes are my go-to because they don’t brown and they’re easy to pack.
- Vegetables: Baby carrots, cucumber rounds, cherry tomatoes, or bell pepper strips add crunch and color. I like to include something crunchy to balance the soft cheese and crackers.
- Pickles or Olives: A few cornichons, pickle slices, or olives add a briny pop that cuts through the richness of the salami and cheese. This is my secret weapon for making it feel fancy.
- Spread: A small container of mustard, honey, or fig jam takes this to another level. My kids love honey mustard, but I’m partial to a dollop of whole grain mustard on the side.
- Nuts or Seeds: A small handful of almonds, cashews, or pumpkin seeds adds protein and crunch. Great for keeping you full longer.
Ingredient Selection Tips
For the best flavor, use salami that’s been brought to room temperature—cold salami loses some of its richness. Same goes for the cheese; let it sit out for about 10 minutes before assembling. If you’re packing this for later, keep the components separate until you’re ready to eat to prevent soggy crackers. And here’s a little trick I learned: if you’re using a soft cheese like brie or goat cheese, pack it in a small container so it doesn’t squish everything else.
Substitution Guidance
Need to make this dairy-free? Use vegan cheese or skip the cheese altogether and add extra veggies and hummus. For a gluten-free version, use gluten-free crackers or rice cakes. And if you don’t have salami, any cured meat works—pepperoni, prosciutto, even leftover roasted chicken. This quick homemade lunchable with salami and crackers is more of a concept than a strict recipe, so feel free to experiment based on what you have.
Equipment Needed
You don’t need much to put together this quick homemade lunchable with salami and crackers, which is honestly my favorite part. Here’s what I use:
- A Cutting Board: Any size works. I use a small bamboo board for quick assembly, but plastic is fine too.
- A Sharp Knife: For slicing cheese and any fruit or veggies. A paring knife or small chef’s knife is perfect.
- Cookie Cutters (Optional but Fun): I have a set of mini star and heart cutters that I use to cut the cheese into shapes. It takes an extra 30 seconds and makes everything feel more special. My kids actually eat more when the cheese is star-shaped—it’s weird but true.
- A Lunch Container: A bento box with compartments is ideal, but a simple plate or a container with dividers works too. I love my PlanetBox for this because everything stays separate and nothing gets soggy.
- Small Cups or Silicone Muffin Liners: For holding dips, spreads, or small items like olives and berries. Keeps everything organized and prevents mess.
If you don’t have a bento box, don’t worry—I’ve used everything from a dinner plate to a mason jar (layered, like a salad jar) to a simple ziplock bag with compartments made from folded parchment paper. The key is just keeping things separated until you’re ready to eat. And honestly, sometimes the best presentation is just piling everything on a plate and calling it a “snack board.” That’s what I do when I’m eating alone and don’t have to impress anyone.
Preparation Method
Making this quick homemade lunchable with salami and crackers is almost too easy, but I’ll walk you through my exact process so you can see how I do it. The whole thing takes about 5 minutes, maybe 7 if you’re cutting shapes.
- Prepare Your Ingredients (2 minutes): Start by taking your salami and cheese out of the fridge. If you have time, let them sit for 5-10 minutes to come to room temperature—it makes a big difference in flavor. While they’re resting, wash any fruit or vegetables you’re using. I like to rinse my grapes and pat them dry so they don’t make everything wet.
- Slice the Cheese (1 minute): Cut your block cheese into thin slices, about 1/4 inch thick. If you’re using cookie cutters, press them firmly into the cheese slices and pop out the shapes. Don’t stress if they’re not perfect—my stars usually end up looking more like blobs, but they still taste the same. If you’re using pre-sliced cheese, just cut each slice into quarters or use a small round cutter to make them uniform.
- Arrange the Salami (1 minute): Lay your salami slices flat on the cutting board. If you want to get fancy, you can fold them into little tents or roll them into salami roses—just roll one slice tightly and then wrap another slice around it, fanning out the edges. I only do this when I’m trying to impress someone. Most days, I just lay them flat.
- Set Up the Crackers (30 seconds): Count out your crackers and arrange them in a single layer in your container or on your plate. If you’re packing for later, keep the crackers separate from the salami and cheese to prevent sogginess. I like to put them in a small ziplock bag inside the container.
- Add the Extras (1 minute): Fill in the gaps with your fruit, vegetables, pickles, or any other add-ins. I arrange everything by color because it looks prettier, but honestly, just toss it in however you want. If you’re including a spread like mustard or honey, spoon it into a small cup or container and place it in the center.
- Assemble and Enjoy (30 seconds): When you’re ready to eat, start building your cracker stacks. I like to put a slice of salami on a cracker, top it with a piece of cheese, and then add a small dab of mustard or a slice of pickle. My kids prefer to eat everything separately, which is fine too. There’s no wrong way to eat this.
Pro Tip: If you’re making these for a lunchbox, assemble everything the night before and store it in the fridge. Just keep the crackers in a separate baggie and add them right before serving. This saves you precious morning minutes—and let’s be honest, we all need those.
Cooking Tips & Techniques
I’ve made this quick homemade lunchable with salami and crackers dozens of times now, and I’ve learned a few things along the way. Here are my best tips:
Don’t Overthink the Salami: Salami is already cured and ready to eat, so there’s no cooking involved. But here’s something I learned the hard way—if you leave the salami out for too long, it can get a little greasy on the surface. Just pat it dry with a paper towel before serving if that happens. Also, if you’re buying a whole salami stick, slice it on a slight diagonal for larger, more elegant pieces. It takes an extra second but looks so much better.
The Cheese Matters More Than You Think: I used to just grab whatever cheese I had, but I’ve found that the texture makes a big difference. Hard cheeses like cheddar or gouda hold up better for stacking. Soft cheeses like brie or goat cheese are better as a spread. And if you’re using pre-shredded cheese, stop—it doesn’t melt or stack well. Take the extra 30 seconds to slice your own.
Keep Things Dry: The enemy of a good lunchable is soggy crackers. If you’re including wet ingredients like tomatoes or pickles, keep them in a separate compartment or wrap them in a paper towel to absorb excess moisture. I learned this after opening my lunch to find a pile of sad, damp crackers. Never again.
Temperature Is Everything: Cold salami and cheese lose a lot of their flavor. If you’re eating at home, let everything sit out for 10-15 minutes before serving. If you’re packing for lunch, take the container out of your bag as soon as you arrive and let it come to room temperature while you settle in. The difference is night and day.
Make It a Game: For picky eaters, turn assembly into a game. I challenge my kids to make the tallest cracker tower or to create a pattern with their ingredients. It sounds silly, but it works. They eat more when they’re having fun, and I get to feel like a creative parent instead of just someone who threw food on a plate.
Variations & Adaptations
One of the best things about this quick homemade lunchable with salami and crackers is how easy it is to change up. Here are some of my favorite variations:
Italian-Inspired Version
Swap the cheddar for fresh mozzarella balls (bocconcini), add a few slices of tomato, and include a small container of balsamic glaze for dipping. Use rosemary crackers or breadsticks instead of regular crackers. This version feels like a mini antipasto plate and is perfect for a grown-up lunch.
Kid-Friendly Fun Version
Use cookie cutters to cut the salami and cheese into fun shapes—stars, dinosaurs, flowers. Add a small treat like a few chocolate chips or a mini cookie to make it feel special. My kids go crazy for this version, and I love that they’re eating protein and cheese without complaining.
Low-Carb / Keto Version
Skip the crackers and use cucumber rounds or bell pepper strips as your base. Add extra cheese and a handful of almonds or macadamia nuts. This version is surprisingly satisfying and keeps me full for hours. I make this when I’m trying to cut back on carbs but still want something fun to eat.
Breakfast Lunchable
Use breakfast sausage slices instead of salami, add cheese cubes, and include a small container of yogurt or apple slices. Pair with mini pancakes or waffle squares if you want a carb element. This is my go-to for road trips—it feels like a treat but is actually pretty balanced.
Veggie-Packed Version
Add extra vegetables like snap peas, bell pepper strips, cherry tomatoes, and cucumber rounds. Use a hummus or ranch dip as the spread. This version is great for when you want something light but still satisfying. I’ve even made this for myself as a work lunch and felt incredibly virtuous.
Serving & Storage Suggestions
This quick homemade lunchable with salami and crackers is best served at room temperature, so if you’re eating it straight from the fridge, let it sit for about 10 minutes first. I like to arrange everything on a small wooden board or in a compartmentalized container so each ingredient has its own space. It just looks more appetizing that way.
For drinks, this pairs beautifully with sparkling water with a lemon wedge, iced tea, or even a crisp white wine if you’re making it for an adult snack board. My kids love it with apple juice or milk. For a complete meal, I’ll add a small cup of soup or a simple side salad—nothing heavy, just something to round it out.
Storage Instructions: If you’re making this ahead, store the components separately. Keep the salami and cheese in an airtight container in the fridge for up to 3 days. Crackers should stay in their original packaging or a sealed bag to maintain crispness. Fruit and vegetables should be washed and dried before storing. When you’re ready to eat, just assemble everything fresh. I don’t recommend freezing this—the texture of the salami and cheese will suffer, and nobody wants thawed crackers.
Reheating: There’s no reheating needed for this recipe, which is part of its charm. But if you want to get a little fancy, you can warm the salami slices in a dry skillet for about 30 seconds per side. It brings out the fat and makes them slightly crispy around the edges. I do this sometimes when I’m making it for myself and want something a little different. Just don’t do it if you’re packing for later—warm salami gets greasy as it cools.
One more thing: the flavors actually develop a bit over time. If you let the assembled ingredients sit for about 15 minutes at room temperature, the salami and cheese soften slightly and the flavors meld together. It’s subtle, but it makes a difference. Not that you’ll have any leftovers to test this theory—this thing disappears fast.
Nutritional Information & Benefits
Here’s the approximate nutritional breakdown for one serving of this quick homemade lunchable with salami and crackers (based on 4 slices salami, 8 crackers, 2 ounces cheddar cheese, and a handful of grapes):
| Nutrient | Amount |
|---|---|
| Calories | 380-420 |
| Protein | 18-22g |
| Fat | 24-28g |
| Carbohydrates | 22-26g |
| Fiber | 2-3g |
| Calcium | 15-20% DV |
| Iron | 8-10% DV |
This meal provides a good balance of protein, fat, and carbohydrates to keep you energized through the afternoon. The salami offers a decent amount of iron and B vitamins, while the cheese provides calcium for bone health. If you add vegetables and fruit, you’ll also get a boost of fiber, vitamins, and antioxidants.
Dietary Considerations: This recipe is naturally low-carb if you skip the crackers and use vegetable slices instead. It’s also gluten-free if you use gluten-free crackers or veggie slices. The main allergens to watch for are dairy (cheese) and gluten (crackers), but both are easy to substitute. As always, check your salami labels for any added fillers or preservatives if you’re sensitive to those.
I personally love that this meal feels indulgent but is actually pretty balanced. It’s not a health food by any means, but it’s real food—protein, fat, carbs, all in one satisfying package. And honestly, sometimes that’s exactly what you need.
Conclusion
This quick homemade lunchable with salami and crackers has become a staple in my kitchen for one simple reason: it works. It works when I’m too tired to cook, when the kids are hangry, when I need a lunch that feels special without any effort. It’s the recipe I turn to on those days when everything feels overwhelming, because it reminds me that feeding myself and my family doesn’t have to be complicated. Sometimes the best meals are the ones you almost didn’t make.
I hope you give this a try and make it your own. Add your favorite cheese, swap in different crackers, throw in whatever fruit or veggies you have on hand. The beauty of this recipe is that there’s no wrong way to do it. And if you come up with a combination you love, I’d honestly love to hear about it. Drop a comment below and tell me what you used—I’m always looking for new ideas. Or tag me in your photos if you share them online. There’s something so satisfying about seeing someone else enjoy a recipe you love.
So go ahead. Grab that salami, those crackers, that lonely block of cheese in the back of your fridge. Give yourself five minutes to put something together that feels like a little gift to your future self. You deserve it. And honestly? You’re going to love it.
Frequently Asked Questions
Can I make this lunchable ahead of time for the week?
Absolutely! I often prep 3-4 servings at once on Sunday. Just keep the crackers separate in a baggie and add them right before eating. The salami and cheese will stay fresh in an airtight container in the fridge for up to 3 days.
What if I don’t have salami? What other meats work?
Any cured meat works great here. Pepperoni, prosciutto, ham, turkey slices, or even leftover roasted chicken are all excellent substitutes. Just make sure whatever you use is fully cooked or cured so you don’t need to heat it up.
How do I keep the crackers from getting soggy?
Moisture is the enemy. Keep crackers in a separate bag or compartment until you’re ready to eat. If you’re adding wet ingredients like tomatoes or pickles, put them in a small container with a paper towel to absorb excess liquid. And never wash your crackers—I know that sounds obvious, but you’d be surprised.
Is this recipe suitable for a school lunch?
Yes, with a few adjustments. Check your school’s policy on nuts and common allergens first. Pack everything in a compartmentalized container to keep things separate, and include an ice pack if you’re adding cheese or yogurt. I’ve sent this in my kids’ lunches dozens of times and it always comes back empty.
Can I make this vegetarian?
Definitely! Skip the salami and add extra cheese, hummus, hard-boiled eggs, or plant-based protein like veggie slices or marinated tofu. You can also add more vegetables and nuts to make it more filling. The template works no matter what you put in it.
Pin This Recipe!
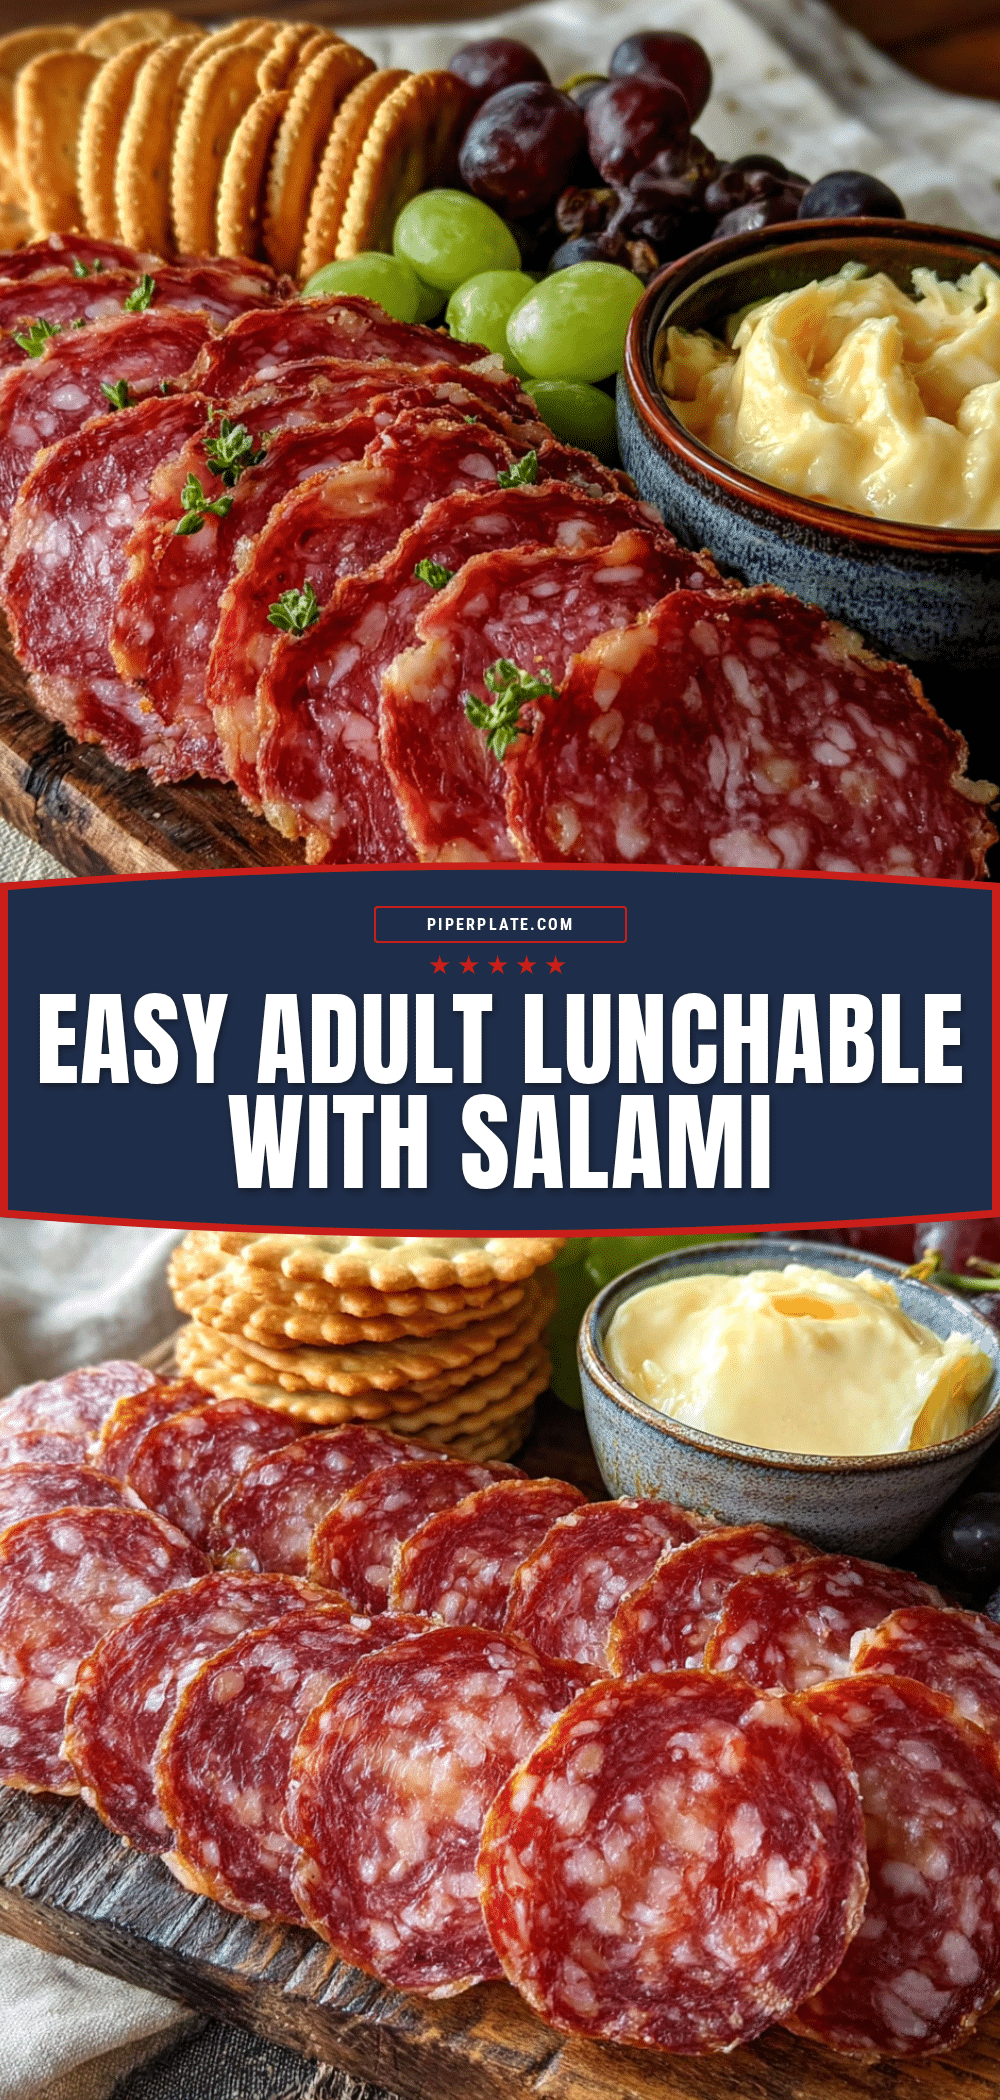
Easy Homemade Lunchable with Salami and Crackers

A quick and easy homemade lunchable featuring salami, crackers, and cheese, perfect for busy days when you need a satisfying meal in under 5 minutes. Customize with your favorite add-ins for a fun, kid-friendly lunch or snack.
- Prep Time: 5 minutes
- Cook Time: 0 minutes
- Total Time: 5 minutes
- Yield: 1 serving 1x
- Category: Lunch
- Cuisine: American
Ingredients
- 4–6 slices salami (preferably Genoa)
- 8–10 crackers (e.g., Ritz, Club, or gluten-free)
- 2–3 ounces cheddar cheese (block, sliced)
- Handful of grapes (optional)
- Baby carrots (optional)
- Cucumber rounds (optional)
- Cherry tomatoes (optional)
- Bell pepper strips (optional)
- Pickles or olives (optional)
- Mustard, honey, or fig jam (optional)
- Almonds or pumpkin seeds (optional)
Instructions
- Take salami and cheese out of fridge; let sit 5-10 minutes to come to room temperature. Wash and dry any fruit or vegetables.
- Slice block cheese into 1/4-inch thick slices. Use cookie cutters to cut into shapes if desired.
- Lay salami slices flat on cutting board. Optionally fold into tents or roll into roses.
- Count out crackers and arrange in a single layer in container or on plate. If packing for later, keep crackers separate to prevent sogginess.
- Fill gaps with fruit, vegetables, pickles, or other add-ins. Spoon spreads into small cups.
- When ready to eat, build cracker stacks: place salami on cracker, top with cheese, and add mustard or pickle if desired. Serve at room temperature.
Notes
For best flavor, let salami and cheese come to room temperature before serving. Keep crackers separate until eating to avoid sogginess. This recipe is highly customizable—use any cured meat, cheese, crackers, and add-ins you have on hand.
Nutrition
- Serving Size: 1 serving
- Calories: 400
- Sugar: 8
- Sodium: 800
- Fat: 26
- Saturated Fat: 12
- Carbohydrates: 24
- Fiber: 2
- Protein: 20
Keywords: homemade lunchable, salami and crackers, easy lunch, kid-friendly lunch, no-cook lunch, quick snack, charcuterie board


