Love this? Save it for later!
Share the inspiration with your friends
I was standing in the snack aisle of our local grocery store last October, staring at a bag of tortilla chips, when the weirdest thing happened. A kid ran past me, and the air shifted just enough that I caught a whiff of something—chili powder, cumin, a hint of garlic—and suddenly I was twenty years younger, sitting cross-legged on my aunt Carol’s shag carpet. She wasn’t really my aunt, you know. She was my mom’s best friend from college, the kind of person who let you stay up late and never asked if you’d washed your hands. Every Halloween, she’d set out this enormous platter of dip that looked like something out of a monster movie, complete with a web pattern drawn in sour cream across the top. I remember thinking it was magic. How did she get those lines so perfect? I mean, I tried to recreate it once as a teenager and ended up with what looked like a sad, melted snowflake. Honestly, I forgot about that dip for years. But standing there in the grocery store, surrounded by candy displays and fake cobwebs, that memory hit me like a wave. I grabbed the chips, the beans, the cheese, and I drove home determined to crack the code. Maybe you’ve been there—chasing a taste from your past, hoping you can get it right this time. This Spooky Spiderweb Taco Dip is my victory lap. It’s the dip I remember, only better, and it takes five minutes to throw together. Let me tell you, it’s worth every single scoop.
Why You’ll Love This Recipe
This isn’t just another taco dip. This Spooky Spiderweb Taco Dip is the one that disappears first at every party, and I’ve got the empty bowls to prove it.
- Quick & Easy: Comes together in under 5 minutes. No oven, no stove, no stress. You can literally make it while answering the door for trick-or-treaters.
- Simple Ingredients: You probably already have most of these in your pantry. No fancy grocery trips needed—just classic taco dip staples.
- Perfect for Halloween: The sour cream lattice creates a spiderweb effect that looks way more impressive than it is. It’s spooky without being complicated.
- Crowd-Pleaser: Kids love the fun design, adults love the flavor. It’s the rare dish that gets rave reviews from everyone.
- Unbelievably Delicious: The creamy layers, the crunch of fresh veggies, the kick of taco seasoning—it’s comfort food at its finest.
What makes this recipe different from the rest? It’s the technique. I spent years getting that spiderweb pattern just right, and I’m sharing all my secrets. No fancy tools, no piping bags—just a squeeze bottle and a little patience. This is the version I wish I’d had back in my aunt Carol’s living room. It’s the kind of dip that makes you close your eyes after the first bite. Perfect for Halloween parties, game day, or any night you want to turn a simple snack into something memorable.
What Ingredients You Will Need
This recipe uses simple, pantry-friendly ingredients to deliver bold taco flavor and that show-stopping spiderweb effect. Here’s everything you’ll need:
- For the base layer:
- 16 oz refried beans (I prefer Rosarita for the smoothest texture)
- 1 packet taco seasoning (or 2 tablespoons homemade blend)
- 1/2 cup water
- For the creamy layer:
- 8 oz cream cheese, softened (full-fat works best for stability)
- 1 cup sour cream (divided—1/2 cup for the mix, 1/2 cup for the web)
- 1 cup shredded cheddar cheese (or Mexican blend)
- For the toppings:
- 1 cup shredded lettuce (iceberg or romaine, finely chopped)
- 1 medium tomato, diced and drained of excess juice
- 1/2 cup black olives, sliced
- 1/4 cup green onions, sliced
- 1/4 cup pickled jalapeños (optional, for heat)
- For the spiderweb effect:
- 1/2 cup sour cream (reserved from above)
- 1-2 tablespoons milk (to thin the sour cream for drizzling)
- For serving:
- Tortilla chips (I like Tostitos Scoops for maximum dip-to-chip ratio)
Ingredient tips: For the smoothest refried beans, warm them slightly before mixing with the taco seasoning. If you’re using homemade taco seasoning, make sure it has a good balance of chili powder, cumin, and garlic powder. For a spicier kick, add a dash of cayenne to the bean layer. And here’s a pro tip: drain your diced tomatoes on a paper towel for a few minutes. Nobody wants a watery dip.
Equipment Needed
You don’t need a professional kitchen to pull off this spiderweb. Here’s what you’ll need:
- Large serving platter or shallow dish: A round platter works best for the spiderweb effect, but any shape will do. I use a 12-inch round ceramic platter I found at a thrift store.
- Small bowl: For mixing the cream cheese and sour cream base.
- Squeeze bottle or piping bag: This is the key to perfect spiderweb lines. A squeeze bottle from a craft store works great, or you can use a zip-top bag with a tiny corner snipped off.
- Spatula: For spreading the layers evenly.
- Measuring spoons and cups: For accuracy, though I often eyeball it now.
- Knife and cutting board: For chopping veggies.
Budget-friendly tip: If you don’t have a squeeze bottle, a clean ketchup bottle works in a pinch. I’ve also used a plastic sandwich bag with the tiniest hole possible—just be careful not to squeeze too hard or you’ll get a blob instead of a line. Trust me, I learned that the hard way.
Preparation Method
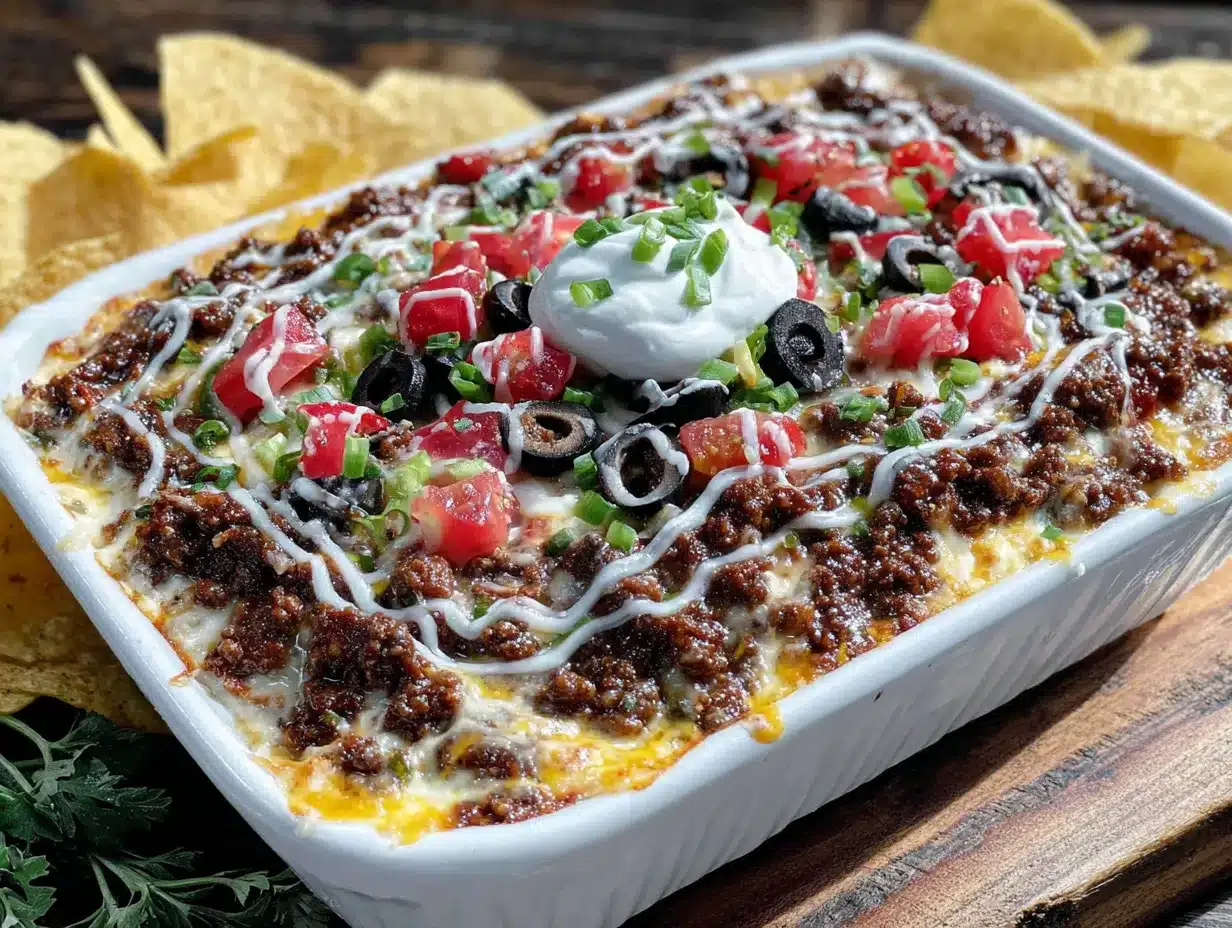
- Prepare the bean layer (2 minutes): In a small bowl, mix the refried beans with the taco seasoning and water. Stir until smooth and well combined. The water helps thin the beans so they spread easily. Spread this mixture evenly across your serving platter, leaving about an inch of space around the edge.
- Make the cream cheese layer (3 minutes): In a separate bowl, beat the softened cream cheese with 1/2 cup sour cream until smooth and fluffy. Fold in the shredded cheddar cheese. Spread this mixture carefully over the bean layer. Use a spatula to smooth it out evenly. The key here is to be gentle so you don’t mix the layers together.
- Add the toppings (2 minutes): Sprinkle the shredded lettuce evenly over the cream cheese layer. Follow with the diced tomatoes, black olives, green onions, and jalapeños if using. Try to distribute them evenly—nobody wants a bite with only olives.
- Create the spiderweb (3 minutes): In a small bowl, mix the remaining 1/2 cup sour cream with 1-2 tablespoons of milk until it reaches a drizzling consistency. It should be thin enough to flow easily but thick enough to hold its shape. Transfer this to your squeeze bottle or piping bag. Starting from the center of the dip, create a small circle of sour cream. Then, working outward, create concentric circles about 1-2 inches apart. You should have 4-5 circles total. Take a toothpick or the tip of a knife and drag it from the center outward through all the circles, creating the web effect. Space these lines about an inch apart. Then drag lines from the outside inward, offset between the first set of lines. You’ll see the web pattern emerge immediately.
- Chill and serve (optional, but recommended): Refrigerate the dip for at least 15 minutes before serving. This helps the layers set and makes the web pattern more stable. Serve with tortilla chips and watch it disappear.
Sensory cues: The bean mixture should be thick but spreadable, like thick peanut butter. The cream cheese layer should be fluffy and light, almost like a mousse. When you drag the toothpick through the sour cream circles, you’ll feel a slight resistance—that’s how you know the sour cream is the right consistency.
Cooking Tips & Techniques
Let me save you from the mistakes I made. The first time I tried this spiderweb dip, I used sour cream straight from the fridge. It was too thick, and my lines came out looking like blobs. The second time, I thinned it too much, and the web just melted into a white puddle. The sweet spot is adding milk one tablespoon at a time until the sour cream flows like heavy cream.
Another common mistake is overmixing the cream cheese layer. You want it smooth, but if you beat it too long, it can become thin and runny. Just mix until the ingredients are combined and fluffy—about 30 seconds with a hand mixer or a minute by hand.
For the cleanest spiderweb lines, chill the dip for 10 minutes before adding the sour cream circles. This firms up the toppings and gives you a stable surface to work on. And here’s a trick I learned from a pastry chef friend: if your squeeze bottle tip clogs, dip it in warm water for a few seconds. Works every time.
Timing is everything. I usually make the bean and cream cheese layers the night before, then add the toppings and spiderweb right before serving. This way, the dip is perfectly chilled and the veggies stay crisp. If you’re making it for a party, set out the chips and dip about 15 minutes before guests arrive. That way, it’s at the perfect temperature.
Variations & Adaptations
This recipe is endlessly adaptable. Here are some of my favorite twists:
- Spicy Southwest version: Add a can of drained diced green chiles to the cream cheese layer, and use pepper jack cheese instead of cheddar. Top with fresh cilantro and a squeeze of lime.
- Guacamole layer: Spread a layer of guacamole between the beans and cream cheese. It adds a creamy, fresh element that balances the richness. Just make sure the guac is thick enough to hold up—I recommend using extra avocados and less lime juice.
- Meat lover’s version: Brown 1/2 pound of ground beef or turkey with taco seasoning, let it cool, and sprinkle it over the cream cheese layer before adding the veggies. It makes the dip heartier and more meal-like.
- Vegetarian/Vegan adaptation: Use vegan cream cheese, vegan sour cream, and a plant-based cheddar shreds. The refried beans are already vegetarian, so you’re halfway there. I’ve tested this with Kite Hill cream cheese and it works beautifully.
- Low-carb option: Serve with celery sticks, cucumber rounds, or pork rinds instead of tortilla chips. The dip itself is relatively low in carbs if you skip the beans and use a cauliflower-based alternative.
Personal variation: I once added a layer of roasted corn and black bean salsa under the cream cheese. It added a sweet, smoky flavor that was absolutely killer. Just make sure to drain the salsa well so it doesn’t make the dip watery.
Serving & Storage Suggestions
This dip is best served cold, straight from the fridge. I like to set it out about 10 minutes before serving so it’s not ice-cold, but still firm enough to hold the spiderweb pattern. For presentation, surround the platter with an assortment of tortilla chips in different colors—yellow, blue, and red—for a festive look.
What to serve with it: Besides chips, this dip pairs beautifully with fresh veggie sticks (carrots, celery, bell peppers), mini tostadas, or even warm flour tortillas cut into wedges. For a full Halloween spread, serve it alongside crispy spiced chicken wings and a bowl of roasted pumpkin soup.
Storage: Leftover dip can be stored in an airtight container in the refrigerator for up to 3 days. The toppings will soften, so it’s best to add those fresh if you’re planning to have leftovers. The bean and cream cheese layers actually get better after a day in the fridge—the flavors meld together beautifully.
Reheating: This is a cold dip, so no reheating needed. If you’ve stored it without toppings, you can bring it to room temperature for about 20 minutes before serving again. The spiderweb pattern will likely fade, but you can always add a fresh one on top.
Flavor development: Honestly, the dip tastes even better the next day. The taco seasoning has time to infuse the beans, and the cream cheese layer becomes more flavorful. Just don’t add the lettuce and tomatoes until you’re ready to serve, or they’ll get soggy.
Nutritional Information & Benefits
Here’s the approximate nutritional breakdown per serving (based on 12 servings):
- Calories: 245
- Total Fat: 18g
- Saturated Fat: 9g
- Cholesterol: 45mg
- Sodium: 520mg
- Total Carbohydrates: 14g
- Dietary Fiber: 3g
- Sugar: 3g
- Protein: 8g
Health benefits: The refried beans are a great source of plant-based protein and fiber, which helps keep you full. The tomatoes provide lycopene, an antioxidant linked to heart health. And the black olives offer healthy monounsaturated fats. If you’re watching your sodium, use low-sodium taco seasoning and beans, or make your own seasoning blend at home.
Dietary considerations: This recipe is vegetarian as written. For gluten-free, check your taco seasoning label—most are gluten-free, but some brands add wheat flour. For dairy-free, use the vegan adaptations mentioned above. This dip is not suitable for low-FODMAP diets due to the beans and onion content.
I’m not a nutritionist, but I believe in balance. This dip is a treat, and it’s meant to be enjoyed. Pair it with fresh veggies if you want to lighten it up, or go all-in with the chips. Life’s too short for boring snacks.
Conclusion
This Spooky Spiderweb Taco Dip is more than just a recipe—it’s a memory I finally got right. After years of failed attempts and melted snowflake disasters, I’ve cracked the code. The perfect spiderweb, the creamy layers, the crunch of fresh toppings—it’s everything I remembered and more. I love how this dip brings people together. There’s something magical about watching someone’s face light up when they see that web pattern. It’s simple enough for a weeknight snack but impressive enough for a Halloween party. So go ahead, give it a try. Customize it with your favorite toppings, make it as spicy or as mild as you like, and don’t stress about perfection. The first web might not be perfect, but it will still taste amazing.
I’d love to hear how yours turns out! Drop a comment below and tell me about your spiderweb adventures. Did you add a secret ingredient? Did your kids help with the web pattern? Share your photos and tag me—I can’t wait to see your creations. Happy Halloween, and happy dipping!
Frequently Asked Questions
Can I make this dip ahead of time?
Yes! You can prepare the bean and cream cheese layers up to 24 hours in advance. Just cover and refrigerate. Add the fresh toppings and spiderweb pattern right before serving for the best texture and appearance.
My sour cream won’t drizzle properly. What am I doing wrong?
The sour cream is probably too thick. Add milk one tablespoon at a time until it reaches a consistency similar to heavy cream. If it’s too thin, add a little more sour cream to thicken it back up.
Can I use low-fat or fat-free ingredients?
You can, but the texture will be different. Low-fat cream cheese tends to be softer and may not hold the layers as well. Full-fat versions give the best stability and flavor. If you’re watching calories, use smaller portions rather than swapping ingredients.
How do I get the spiderweb pattern to look perfect?
Practice makes perfect, but here’s the secret: work quickly and confidently. Start with a small circle in the center, then work outward. Use a toothpick to drag from the center out, then from the outside in, alternating between the two. The lines don’t need to be perfectly straight—a little wobble adds character.
Can I freeze this dip?
I don’t recommend freezing this dip. The cream cheese and sour cream will separate when thawed, and the fresh toppings will become watery. It’s best enjoyed fresh or within 3 days of refrigeration.
Pin This Recipe!

Spooky Spiderweb Taco Dip: Easy 5-Minute Crowd-Pleaser

This Spooky Spiderweb Taco Dip is a quick and easy 5-minute appetizer perfect for Halloween parties. It features creamy layers of refried beans, cream cheese, and sour cream, topped with fresh veggies and a spiderweb pattern that will impress your guests.
- Prep Time: 5 minutes
- Cook Time: 0 minutes
- Total Time: 5 minutes
- Yield: 12 servings 1x
- Category: Appetizer
- Cuisine: Mexican-American
Ingredients
- 16 oz refried beans (preferably Rosarita)
- 1 packet taco seasoning (or 2 tablespoons homemade blend)
- 1/2 cup water
- 8 oz cream cheese, softened
- 1 cup sour cream (divided: 1/2 cup for mix, 1/2 cup for web)
- 1 cup shredded cheddar cheese (or Mexican blend)
- 1 cup shredded lettuce (iceberg or romaine, finely chopped)
- 1 medium tomato, diced and drained
- 1/2 cup black olives, sliced
- 1/4 cup green onions, sliced
- 1/4 cup pickled jalapeños (optional)
- 1–2 tablespoons milk (to thin sour cream for drizzling)
- Tortilla chips (for serving)
Instructions
- Prepare the bean layer: In a small bowl, mix refried beans with taco seasoning and water until smooth. Spread evenly on a serving platter, leaving about an inch of space around the edge.
- Make the cream cheese layer: In a separate bowl, beat softened cream cheese with 1/2 cup sour cream until smooth and fluffy. Fold in shredded cheddar cheese. Spread carefully over the bean layer.
- Add the toppings: Sprinkle shredded lettuce evenly over the cream cheese layer. Follow with diced tomatoes, black olives, green onions, and jalapeños (if using).
- Create the spiderweb: In a small bowl, mix remaining 1/2 cup sour cream with 1-2 tablespoons milk until drizzling consistency. Transfer to a squeeze bottle or piping bag. Starting from the center, create a small circle of sour cream, then concentric circles about 1-2 inches apart (4-5 circles total). Using a toothpick or knife tip, drag from the center outward through all circles, spacing lines about an inch apart. Then drag lines from the outside inward, offset between the first set of lines.
- Chill and serve: Refrigerate for at least 15 minutes before serving. Serve with tortilla chips.
Notes
For best results, chill the dip for 10 minutes before adding the spiderweb pattern to firm up the toppings. If the squeeze bottle tip clogs, dip it in warm water for a few seconds. The dip can be made ahead: prepare bean and cream cheese layers up to 24 hours in advance, then add toppings and spiderweb just before serving.
Nutrition
- Serving Size: 1 serving (based on
- Calories: 245
- Sugar: 3
- Sodium: 520
- Fat: 18
- Saturated Fat: 9
- Carbohydrates: 14
- Fiber: 3
- Protein: 8
Keywords: Halloween dip, taco dip, spiderweb dip, easy appetizer, party dip, 5-minute recipe


