Love this? Save it for later!
Share the inspiration with your friends
My neighbor Jen wasn’t trying to impress anyone. I’d stopped by to grab a book she’d borrowed, and the smell hit me before I even got through the door. It wasn’t fancy or complicated—just this warm, toasty scent that made my stomach growl immediately. She was standing at her kitchen counter, rolling up tortillas like it was the most casual thing in the world, while her kids were running around getting ready for school.
“Oh, these? They’re just lunch stuff,” she said when I asked what she was making. She shrugged like it was nothing, like she wasn’t creating these perfect little spirals of turkey and cheese that would make any kid (or adult, honestly) excited about lunch. I stood there watching her slice them into pinwheels, and I think I said something dumb like “that’s it?” because it looked too simple to be that good.
She handed me one to try, and let me tell you—I was hooked. The cream cheese spread was just right, the turkey was piled generously, and the whole thing held together perfectly. I asked her for the recipe, and she literally wrote it on a napkin. That napkin is still taped inside my kitchen cabinet. Maybe you’ve been there—discovering something so simple you can’t believe you hadn’t thought of it yourself, but so good it becomes a weekly staple.
These Quick Turkey and Cheese Pinwheel Lunchbox Wraps have saved my sanity more times than I can count. They’re the kind of recipe you make on a Sunday night when you’re already tired, or on a Tuesday morning when you realize you have nothing packed for lunch. And honestly? They taste like you tried way harder than you did.
Why You’ll Love This Recipe
I’ve tested these pinwheels about a dozen times to get them just right. Too much cream cheese and they get soggy. Not enough and they fall apart. But this version? It’s the sweet spot. Here’s why this recipe works so well for busy weeknights and rushed mornings:
- Ready in 10 Minutes: No joke—from start to finish, you can have these wrapped and sliced in under ten minutes. That’s faster than deciding what to order for takeout.
- Pantry-Friendly Ingredients: You probably already have tortillas, cream cheese, and lunch meat in your fridge right now. No special trips to the store needed.
- Perfect for Lunchboxes: These hold up beautifully in lunch bags, bento boxes, or even just wrapped in foil for a quick work lunch. No reheating required.
- Kid-Approved (and Adult-Secretly-Loves-Them): My picky nephew devours these, and I’ve caught my husband sneaking them from the fridge more than once.
- Endlessly Customizable: Swap the turkey for ham, add some veggies, change up the cheese—this recipe is a template, not a rulebook.
What makes these different from other wrap recipes is the technique. Most people spread the cream cheese too thick or roll them too loose. I’ll show you exactly how to get that tight spiral that stays together in a lunchbox without getting mushy. Trust me, the first time you open a lunch container and see those perfect little circles, you’ll feel like a rockstar parent or partner.
What Ingredients You Will Need
This recipe uses simple, everyday ingredients to create something surprisingly satisfying. No fancy gourmet items here—just good, honest food that comes together fast.
- Flour tortillas (8-inch): Look for soft, pliable tortillas that won’t crack when you roll them. I prefer Mission or Guerrero brands for their flexibility. Burrito-sized works too, but you’ll get fewer pinwheels per roll.
- Cream cheese (8 ounces), softened: Full-fat works best for flavor and texture, but reduced-fat is fine too. Just make sure it’s at room temperature so it spreads easily without tearing the tortilla.
- Sliced turkey breast (about 6-8 slices): Deli-sliced turkey works perfectly. I like oven-roasted or honey-roasted for a touch of sweetness. Avoid extra-thick slices—they make rolling harder and the pinwheels less tidy.
- Sliced cheddar or provolone cheese (4-6 slices): Cheddar gives a sharp kick, provolone is milder and melts beautifully in the mouth. Swiss or mozzarella also work great here.
- Lettuce leaves (optional): Crisp romaine or butter lettuce adds a nice crunch. Pat them completely dry before using, or they’ll make the wrap soggy by lunchtime.
- Salt and pepper (to taste): A tiny sprinkle on the cream cheese layer wakes up all the flavors. Don’t skip it—it makes a difference.
- Optional add-ins: Thinly sliced cucumber, bell pepper strips, or a smear of pesto or ranch dressing for extra flavor.
I always recommend using block-style cream cheese rather than the whipped kind in a tub. The block spreads more evenly and holds its shape better inside the roll. And if you’re using flavored cream cheese like chive and onion, reduce or skip the extra salt since those already have seasoning.
Equipment Needed
You don’t need much to make these pinwheels, which is part of the beauty. Here’s what you’ll want to have handy:
- A butter knife or offset spatula: For spreading the cream cheese evenly. An offset spatula makes this incredibly easy, but a regular butter knife works just fine.
- A cutting board: Any size works. I prefer a plastic one for easy cleanup, but wood is fine too.
- A sharp chef’s knife: A serrated knife can work, but a straight-edged sharp knife gives cleaner cuts without squishing the pinwheels. I learned this the hard way after crushing my first batch with a dull blade.
- Plastic wrap or parchment paper: For wrapping the rolls tightly before slicing. This step keeps everything compact and prevents the pinwheels from unrolling.
- Toothpicks (optional): If you’re packing these for a lunchbox, a toothpick through each pinwheel keeps them from shifting around.
If you don’t have plastic wrap, you can use a damp paper towel to hold the roll together while it rests. Not ideal, but it works in a pinch. And honestly, I’ve made these with just a butter knife and a cutting board more times than I can count—specialized equipment is nice but absolutely not required.
Preparation Method
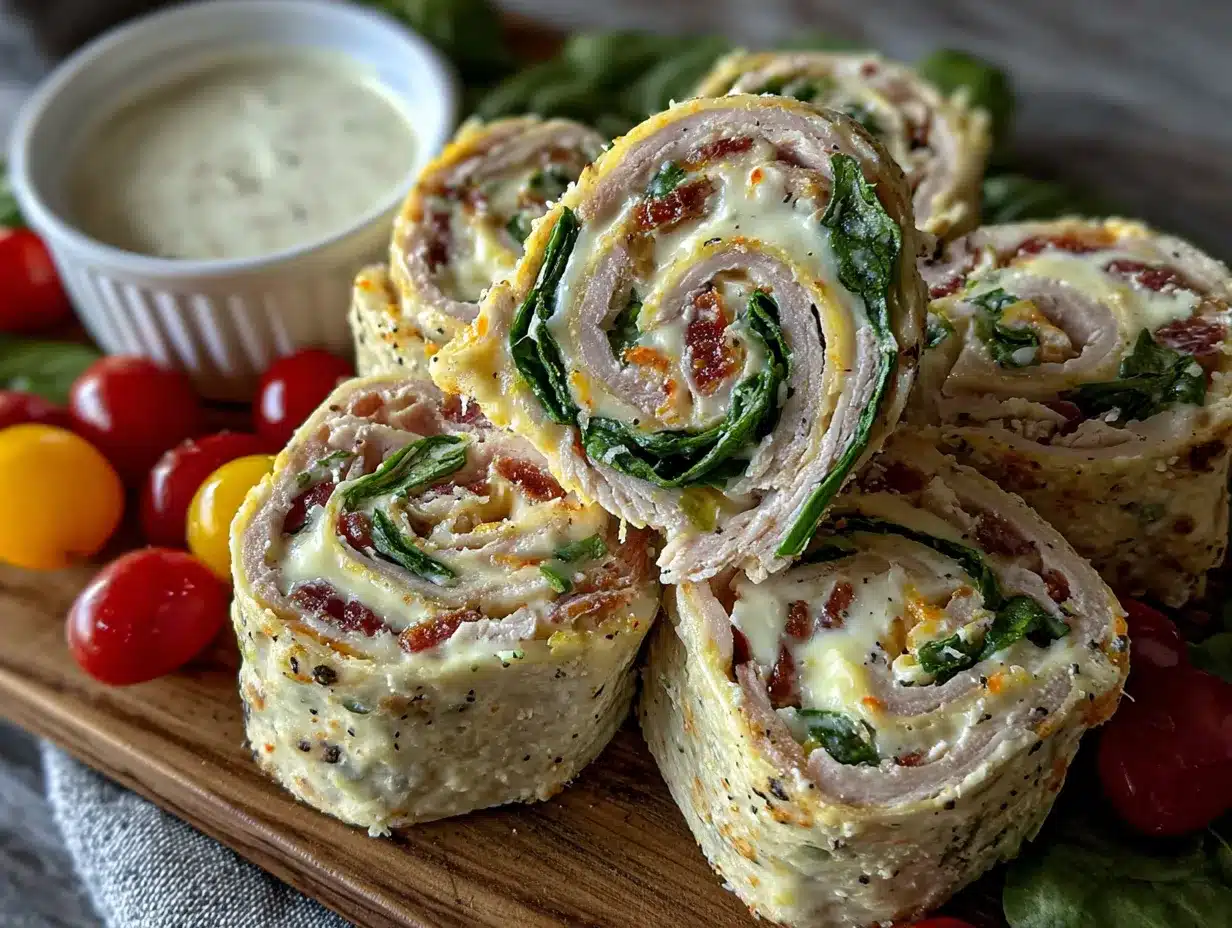
- Soften the cream cheese: Take the cream cheese out of the fridge about 20 minutes before you start. If you forgot (I forget all the time), microwave it for 10-15 seconds on low power. You want it spreadable, not melted. Trust me on this—cold cream cheese will tear your tortilla every single time.
- Lay out your tortilla: Place one flour tortilla flat on your cutting board. Make sure it’s at room temperature too—cold tortillas crack when you roll them. If yours just came from the fridge, warm it in the microwave for 10 seconds to make it pliable.
- Spread the cream cheese: Using your butter knife or spatula, spread a thin, even layer of cream cheese over the entire surface of the tortilla. Leave about a half-inch border around the edges. Don’t go too thick here—you want just enough to hold everything together, not so much that it oozes out when you slice. Think of it like buttering toast, not frosting a cake.
- Season the cream cheese: Sprinkle a tiny pinch of salt and a few grinds of black pepper over the cream cheese layer. This little step makes a big difference. If you’re using flavored cream cheese, you can skip this.
- Layer the turkey: Place 2-3 slices of turkey evenly over the cream cheese, overlapping slightly. Don’t pile them too thick or the roll will be hard to cut. You want a single, even layer of meat across the whole tortilla.
- Add the cheese: Lay 1-2 slices of cheese over the turkey. If the slices are large, you can tear them to fit. The cheese should cover most of the turkey but doesn’t need to be perfect.
- Add any extras: If you’re using lettuce, cucumber, or other veggies, place them in a single layer now. Keep them away from the very edges—about an inch from each side—so they don’t fall out when you roll.
- Roll it tightly: Starting from one edge, roll the tortilla as tightly as you can without tearing it. Use your fingers to keep the filling tucked in as you go. Think of it like rolling a sleeping bag—firm and even pressure. When you reach the end, place the seam side down.
- Wrap and chill: Wrap the rolled tortilla tightly in plastic wrap or parchment paper. Twist the ends like a candy wrapper to keep it snug. Pop it in the fridge for at least 15-20 minutes. This is the hardest part—waiting—but it’s crucial for clean slices. The cream cheese needs to firm up again so the pinwheels hold their shape.
- Slice into pinwheels: Unwrap the chilled roll and place it on your cutting board. Using a sharp knife, slice the roll into 1-inch thick rounds. Use a gentle sawing motion rather than pressing straight down—this keeps the pinwheels round instead of squished. You should get about 6-8 pinwheels per tortilla.
- Arrange and serve: Place the pinwheels on a plate or pack them directly into lunchboxes. If you’re serving them as a snack, you can fan them out on a platter for a pretty presentation.
A quick note: if your pinwheels are coming out misshapen, your knife might be too dull. I ruined an entire batch once because I was too lazy to sharpen my knife. The difference was night and day after I did.
Cooking Tips & Techniques
After making these pinwheels more times than I can count, I’ve picked up a few tricks that make the process smoother and the results better.
Don’t overfill your tortillas. I know it’s tempting to pile on the turkey and cheese, but less is more here. Too much filling makes the roll bulky and hard to slice cleanly. The filling should be about a quarter-inch thick total. If you can’t close your hand around the roll comfortably, you’ve gone too far.
The chilling step is non-negotiable. I learned this the hard way when I tried to skip it one morning because I was running late. The pinwheels fell apart, the cream cheese squished out, and I ended up with a sad pile of deconstructed wrap pieces. Even 10 minutes in the fridge makes a noticeable difference. If you’re really in a rush, pop the rolled tortilla in the freezer for 5 minutes instead.
Use a damp paper towel under your cutting board. This keeps the board from sliding around while you’re slicing. It’s a small thing, but it makes the cutting process much safer and more precise. I started doing this after nearly slicing my finger open on a runaway board.
Cut on a slight diagonal. Instead of cutting straight across, angle your knife slightly. This gives you oval-shaped pinwheels that look more elegant and professional. It’s a tiny visual trick that makes a big impression, especially if you’re serving these for a party or playdate.
Make them the night before. These pinwheels actually taste better after a few hours in the fridge. The flavors meld together, and the cream cheese sets up perfectly. I often make a batch on Sunday evening and portion them out for the week. Just keep them wrapped tightly until you’re ready to serve.
Variations & Adaptations
One of the best things about this recipe is how flexible it is. Here are some variations I’ve tried and loved:
Ham and Swiss Pinwheels: Swap the turkey for deli ham and the cheddar for Swiss cheese. Add a thin layer of honey mustard or Dijon on top of the cream cheese for extra tang. This is my husband’s favorite version—he says it tastes like a fancy deli sandwich.
Veggie Ranch Pinwheels: Skip the meat entirely and load up on thinly sliced cucumber, bell pepper, shredded carrot, and spinach leaves. Mix a tablespoon of ranch seasoning into the cream cheese before spreading. These are perfect for meatless Mondays or for picky eaters who prefer their veggies hidden in something tasty.
Spicy Southwest Pinwheels: Use pepper jack cheese instead of cheddar, add a layer of black beans (mashed slightly), and include some thinly sliced jalapeños if you like heat. A sprinkle of cumin or chili powder in the cream cheese takes this version over the top. I made these for a game day party and they disappeared in minutes.
Gluten-Free Option: Use gluten-free tortillas or large lettuce leaves instead of flour tortillas. Lettuce wraps are lighter and lower in carbs, though they don’t hold up as well in a lunchbox. If you’re packing them for later, wrap each pinwheel individually in plastic wrap to keep them from drying out.
Breakfast Pinwheels: Swap the turkey for cooked breakfast sausage or bacon crumbles, use scrambled eggs instead of cheese slices, and add a thin layer of cream cheese mixed with maple syrup. These are amazing for brunch or a grab-and-go breakfast.
Serving & Storage Suggestions
These pinwheels are incredibly versatile when it comes to serving. Here’s how to get the most out of them:
Serving temperature: They’re best served cold or at room temperature. If you’ve chilled them overnight, let them sit on the counter for 5-10 minutes before serving to take the chill off. The flavors are more pronounced when they’re not ice-cold.
Presentation ideas: For lunchboxes, arrange the pinwheels in a single layer with a small container of ranch dressing or hummus for dipping. For parties, fan them out on a platter with some grapes or cherry tomatoes in the center. The spiral pattern is naturally eye-catching, so they look impressive with minimal effort.
What to serve with them: These pair beautifully with a simple side salad, fresh fruit, veggie sticks, or a cup of soup. For a complete lunchbox, add some apple slices, baby carrots, and a small treat. They’re also great alongside a bowl of tomato soup for a cozy lunch at home.
Storage instructions: Keep leftover pinwheels in an airtight container in the refrigerator for up to 3 days. Layer them with parchment paper between layers to prevent sticking. I don’t recommend freezing them—the cream cheese gets grainy and the tortillas become soggy when thawed.
Reheating: These are meant to be eaten cold, but if you prefer them warm, you can microwave them for 10-15 seconds. Just know that the tortilla will soften and the pinwheels won’t hold their shape as well. Honestly, I think they’re better cold—the textures are more distinct and satisfying.
Flavor development: The flavors actually improve after a few hours in the fridge. The cream cheese absorbs the seasonings, and the turkey and cheese meld together beautifully. If you’re making these for a party, I recommend making them the day before for the best flavor.
Nutritional Information & Benefits
While I’m not a nutritionist, I can share some general information about what’s in these pinwheels. Per serving (about 4 pinwheels, using standard ingredients):
- Calories: Approximately 280-320
- Protein: 18-22 grams
- Carbohydrates: 22-26 grams
- Fat: 14-18 grams
- Fiber: 1-2 grams
The turkey provides lean protein that keeps you full and satisfied without weighing you down. Cream cheese adds calcium and a small amount of vitamin A, while the tortilla gives you energy from carbohydrates. If you add lettuce or veggies, you’ll get extra fiber and vitamins with almost no calories.
For a lower-carb option, use low-carb tortillas or large lettuce leaves instead of flour tortillas. For reduced fat, use reduced-fat cream cheese and turkey breast without added oils. You can also add more veggies to bulk up the volume without adding many calories.
These pinwheels are naturally nut-free and egg-free, making them a safe option for school lunchboxes with allergy restrictions. Just double-check your specific brands if you have concerns about cross-contamination.
Conclusion
These Quick Turkey and Cheese Pinwheel Lunchbox Wraps have become a staple in my kitchen for good reason. They’re fast, they’re forgiving, and they make me look like I have my life together even on chaotic mornings. Jen’s napkin recipe is still taped in my cabinet, and I smile every time I see it because it reminds me that the best recipes don’t come from fancy cookbooks or celebrity chefs—they come from real people making real food for the people they love.
I hope you’ll try these and make them your own. Maybe you’ll add a smear of pesto or swap in your favorite cheese. Maybe you’ll double the batch and share them with a friend who needs a win on a busy week. Whatever you do, don’t overthink them. That’s the whole point—simple ingredients, simple technique, and a result that feels way more special than it should.
I’d love to hear how yours turn out! Drop a comment below and let me know what variations you tried or if you found a new favorite combination. And if you’re looking for more quick lunch ideas, don’t miss our easy chicken salad recipe that also comes together in minutes. Happy rolling!
Frequently Asked Questions
Can I make these pinwheels ahead of time?
Absolutely! In fact, they taste better after a few hours in the fridge. Make them up to 24 hours in advance, keep them wrapped tightly in plastic wrap, and slice just before serving for the freshest look.
How do I keep the pinwheels from getting soggy in a lunchbox?
The key is patting any wet ingredients (like lettuce or cucumber) completely dry before adding them. Also, don’t overdo the cream cheese—a thin layer is all you need. If you’re packing for later, keep the pinwheels separate from any juicy fruits or dipping sauces.
Can I use whole wheat or spinach tortillas?
Yes, absolutely! Whole wheat tortillas add more fiber and a nutty flavor. Spinach or sun-dried tomato tortillas add color and a subtle flavor boost. Just make sure they’re soft and pliable at room temperature before rolling.
What’s the best way to cut clean pinwheels without squishing them?
Use a very sharp knife and use a gentle sawing motion rather than pressing straight down. Chilling the rolled tortilla for at least 15-20 minutes before slicing makes a huge difference. A serrated knife can also work, but a straight-edged chef’s knife gives the cleanest cuts.
Can I freeze these pinwheels for later?
I don’t recommend freezing them. The cream cheese can become grainy when thawed, and the tortillas tend to get soggy. They’re best made fresh or up to 3 days ahead and stored in the refrigerator. If you need a freezer option, consider freezing the individual components (turkey, cheese, tortillas) and assembling fresh when needed.
Pin This Recipe!
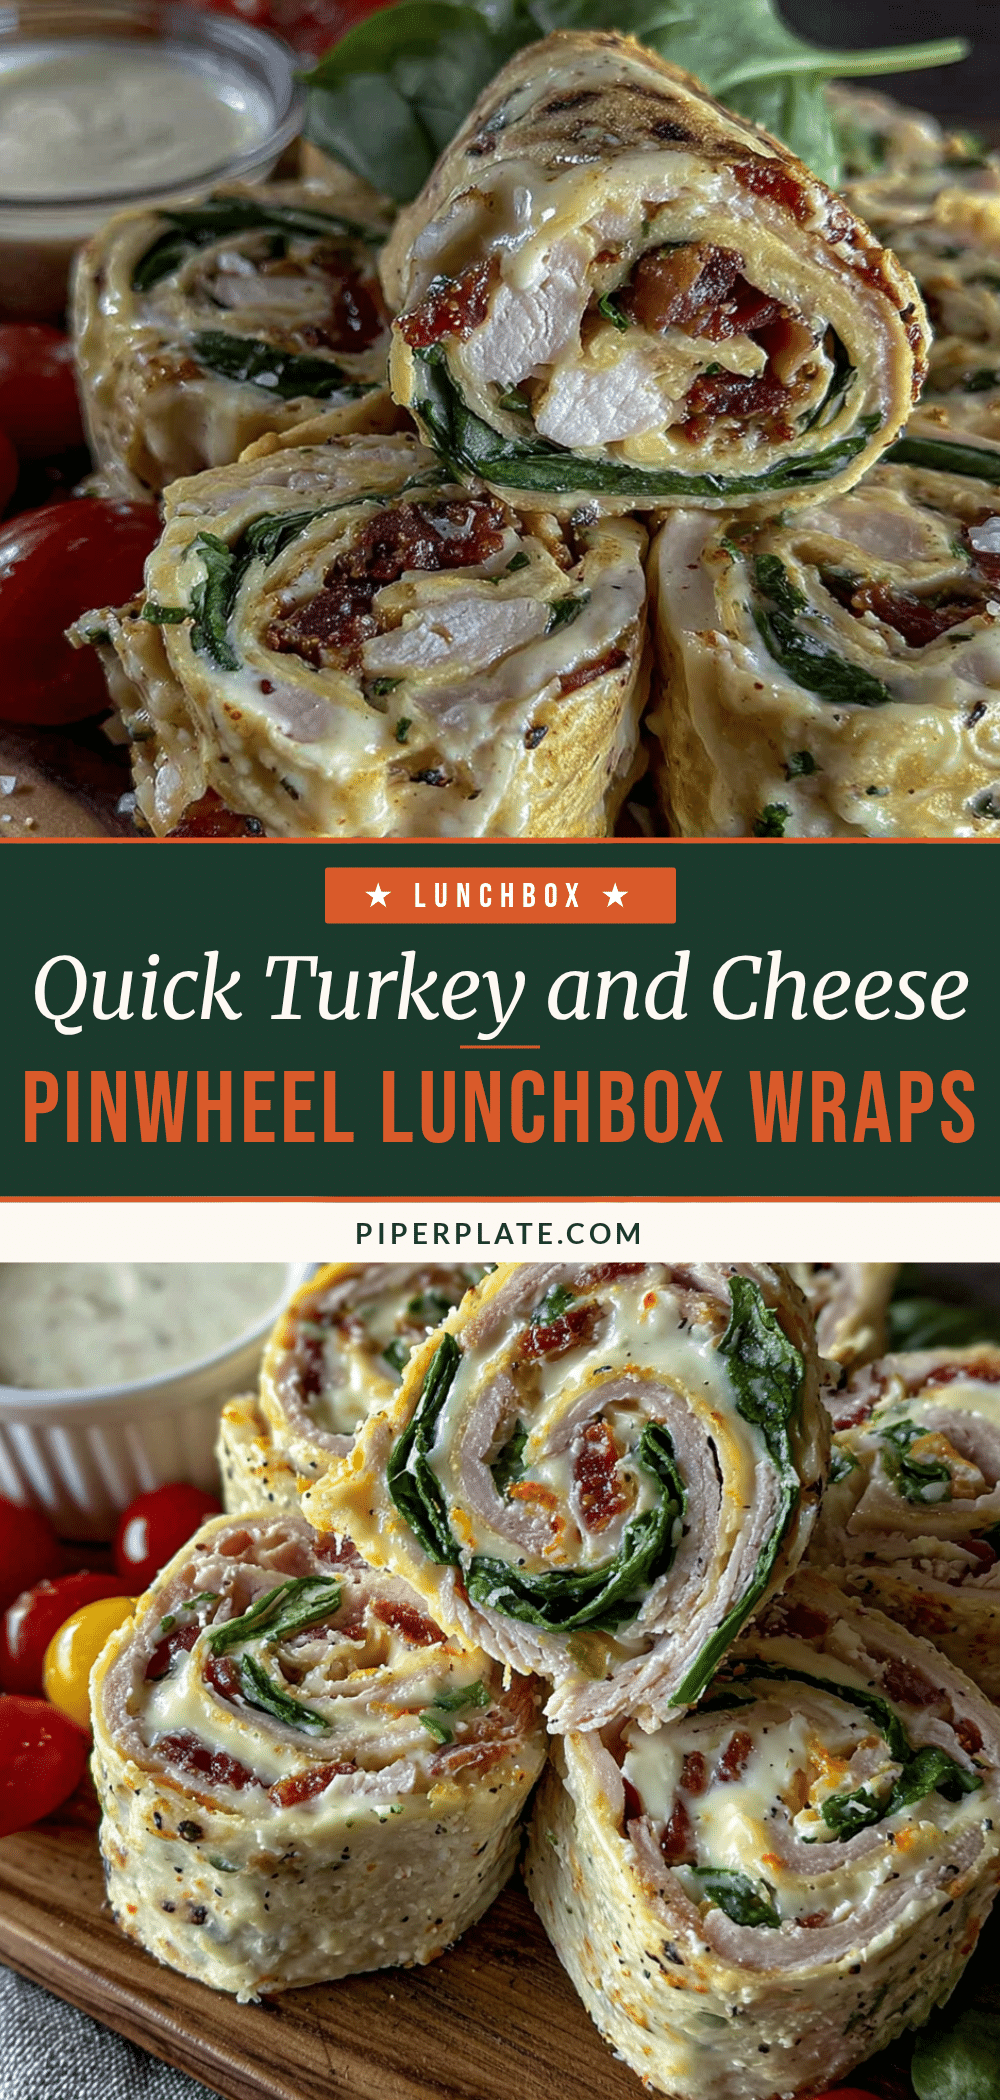
Quick Turkey and Cheese Pinwheel Lunchbox Wraps

These Quick Turkey and Cheese Pinwheel Lunchbox Wraps are a simple, 10-minute recipe perfect for busy mornings or weeknight lunches. With cream cheese, turkey, and cheese rolled in a flour tortilla and sliced into perfect spirals, they’re kid-approved and endlessly customizable.
- Prep Time: 10 minutes
- Cook Time: 0 minutes
- Total Time: 30 minutes (includes chilling)
- Yield: 4 servings 1x
- Category: Lunch
- Cuisine: American
Ingredients
- 4 (8-inch) flour tortillas
- 8 ounces cream cheese, softened
- 6–8 slices deli turkey breast
- 4–6 slices cheddar or provolone cheese
- 4 lettuce leaves (optional), patted dry
- Salt and pepper to taste
- Optional: thinly sliced cucumber, bell pepper strips, pesto or ranch dressing
Instructions
- Soften the cream cheese: Remove from fridge 20 minutes before starting, or microwave for 10-15 seconds on low power until spreadable but not melted.
- Lay out a tortilla on a cutting board. If cold, warm in microwave for 10 seconds to make pliable.
- Spread a thin, even layer of cream cheese over the entire tortilla, leaving a half-inch border around the edges.
- Sprinkle a tiny pinch of salt and a few grinds of black pepper over the cream cheese.
- Place 2-3 slices of turkey evenly over the cream cheese, overlapping slightly.
- Lay 1-2 slices of cheese over the turkey, tearing to fit if needed.
- If using lettuce or other veggies, place them in a single layer, keeping them about an inch from the edges.
- Starting from one edge, roll the tortilla tightly, using fingers to keep filling tucked in. Place seam side down.
- Wrap the rolled tortilla tightly in plastic wrap or parchment paper, twisting the ends like a candy wrapper. Refrigerate for at least 15-20 minutes (or freeze for 5 minutes if in a rush).
- Unwrap the chilled roll and slice into 1-inch thick rounds using a sharp knife with a gentle sawing motion.
- Arrange on a plate or pack into lunchboxes. Serve cold or at room temperature.
Notes
For best results, use block-style cream cheese (not whipped) and ensure it’s at room temperature. Chilling the rolled tortilla is crucial for clean slices. Pat any wet ingredients like lettuce completely dry to prevent sogginess. These pinwheels taste even better after a few hours in the fridge as flavors meld.
Nutrition
- Serving Size: 4 pinwheels
- Calories: 300
- Sugar: 2
- Sodium: 650
- Fat: 16
- Saturated Fat: 8
- Carbohydrates: 24
- Fiber: 1.5
- Protein: 20
Keywords: turkey pinwheels, lunchbox wraps, easy lunch, kid-friendly, no-cook, make-ahead


