Love this? Save it for later!
Share the inspiration with your friends
The PTA Halloween party was in six hours and I’d completely forgotten. Everyone else would be bringing elaborate ghost cupcakes with piped buttercream, graveyard dirt cakes with gummy worms crawling out, and those fancy caramel apples that look like they belong on a magazine cover. I had half a bag of white chocolate chips, a bag of candy corn I’d bought for decoration purposes, and absolutely no time. My kitchen looked like a tiny candy store had exploded in it, and I was standing there in my yoga pants wondering how I’d managed to volunteer for the dessert table again.
Honestly, I almost gave up and grabbed a bag of store-bought cookies. But then my eye caught the orange and yellow of that candy corn bag, and something clicked. I mean, I’d seen those three-ingredient bark recipes floating around Pinterest for years, but I always thought they looked too simple to actually be good. Let me tell you, I was wrong. So wrong. The microwave beeped, I dumped the white chocolate on a baking sheet, and within twenty minutes I had this gorgeous, striped Halloween bark that looked like I’d spent hours on it.
The funny thing is, I walked into that party feeling like a fraud. My neighbor Karen had brought these elaborate witch-hat cupcakes that took her two days. And then people started tasting my candy corn bark. You know that feeling when you watch someone take a bite and their eyes go wide? That happened five times in the first ten minutes. By the end of the night, three people asked for the recipe, and Karen admitted she wished she’d made something simpler. That’s when I realized that sometimes the easiest thing is the one everyone actually wants. Maybe you’ve been there too, staring at your pantry and thinking you have nothing to bring. Trust me, you have everything you need.
Why You’ll Love This Recipe
Let me be straight with you — I’ve tested this candy corn bark recipe more times than I care to admit. The first batch seized up on me because I rushed the melting process. The second batch was too thin. But the third batch? That was the one. And now I’m sharing my perfected version so you can skip all those trial-and-error moments.
- Quick & Easy: This comes together in under 20 minutes, including cooling time. I’m serious — you can make this during a commercial break of your favorite Halloween movie.
- Simple Ingredients: Three ingredients. That’s it. You probably already have white chocolate chips in your pantry from your last baking project, and candy corn is everywhere this time of year.
- Perfect for Halloween: This is the ultimate last-minute Halloween treat. Classroom parties, office potlucks, trunk-or-treat events — it works for all of them.
- Crowd-Pleaser: I’ve watched kids and adults alike polish off an entire tray in minutes. Something about that sweet, creamy white chocolate with the chewy candy corn just hits different.
- Unbelievably Delicious: The texture contrast is what gets me — that smooth, melt-in-your-mouth white chocolate with little bursts of chewy, sweet candy corn. It’s addictive, honestly.
What makes this candy corn bark different from the dozens of other recipes out there? It’s the technique. I learned the hard way that melting white chocolate requires patience and a gentle hand. Too hot and it seizes into a grainy mess. I’ll show you exactly how to get that silky-smooth consistency every time. Plus, I’ve figured out the perfect ratio of candy corn to chocolate so every bite has that satisfying crunch without being overwhelming. This isn’t just another bark recipe — it’s the one you’ll come back to year after year.
This recipe is the kind that makes you feel like a kitchen hero without actually doing much work. It’s perfect for those moments when you need to bring something to a Halloween gathering but life has gotten in the way. And honestly, that feeling of watching people enjoy something you made with just three ingredients? It never gets old.
What Ingredients You Will Need
This candy corn bark recipe uses just three simple ingredients, but each one plays a crucial role in creating that perfect texture and flavor. I’ve tested different brands and variations, so let me share what works best.
- White Chocolate Chips (12 ounces or 340g): This is the foundation of your bark. I recommend Ghirardelli or Guittard white chocolate chips for the smoothest melt and creamiest texture. Stay away from generic store brands that contain vegetable oils instead of cocoa butter — they don’t melt as smoothly and can leave a waxy finish. If you can find white chocolate bars or melting wafers, those work beautifully too. Just chop them into small, even pieces before melting. Pro tip: never use white chocolate chips that have been sitting in your pantry for over a year. They can develop a weird texture and won’t melt properly.
- Candy Corn (1 cup or about 150g): The star of the show! Brach’s is the classic choice and what I use most often, but feel free to experiment with seasonal variations like candy pumpkins or autumn mix. For this recipe, you’ll want the traditional tri-color candy corn — the orange, yellow, and white stripes create that beautiful Halloween look. If you’re feeling fancy, you can also use the harvest mix that includes little candy corns in different fall colors. One thing I’ve learned: don’t use stale candy corn. It gets hard and chewy in a bad way. Fresh candy corn should be soft and slightly chewy.
- Orange Candy Melts or Orange Food Coloring (optional, 1/2 cup or about 85g): This is where you can get creative. I love using orange candy melts to create that gorgeous marbled effect on top of the bark. Wilton makes great orange candy melts that are easy to find at craft stores or online. If you can’t find them, you can use 1/4 cup of additional white chocolate chips mixed with 3-4 drops of orange gel food coloring. Just be careful with liquid food coloring — it can cause the chocolate to seize. Gel coloring is much more reliable. I’ve also used orange-colored white chocolate bars from specialty baking shops, and they work beautifully.
The beauty of this recipe is its simplicity. You don’t need fancy ingredients or specialty items. Everything is available at your regular grocery store, especially during the Halloween season. I’ve made this recipe with whatever white chocolate I had on hand, and it always turns out delicious. But if you want that picture-perfect look with the orange swirls, the candy melts are worth the extra effort.
Equipment Needed
You don’t need a professional kitchen to make this candy corn bark. Here’s what you’ll need, along with some alternatives I’ve tested over the years.
- Baking Sheet: A standard 13×18 inch baking sheet works perfectly. Line it with parchment paper or a silicone baking mat for easy removal. I’ve used both, and honestly, parchment paper is easier for cleanup. If you don’t have a baking sheet, a large cutting board covered in wax paper will work in a pinch.
- Microwave-Safe Bowl: You’ll need a medium-sized bowl for melting the white chocolate. Glass or ceramic works best. I ruined my first batch by using a plastic bowl that wasn’t microwave-safe — the chocolate melted unevenly and burned in spots. Learn from my mistake!
- Spatula: A rubber or silicone spatula is essential for spreading the melted chocolate evenly. Offset spatulas work great too, but a regular spatula does the job just fine.
- Piping Bag or Ziploc Bag: For drizzling the orange candy melts on top. You can use a piping bag with a small round tip, but a simple Ziploc bag with the corner snipped off works just as well. I’ve done both, and the Ziploc bag is actually easier to control.
- Refrigerator: You’ll need space in your fridge to set the bark. It takes about 15-20 minutes to firm up completely.
That’s it! Five basic tools that you probably already have in your kitchen. No expensive equipment or specialty gadgets required. This is truly a beginner-friendly recipe that anyone can make.
Preparation Method
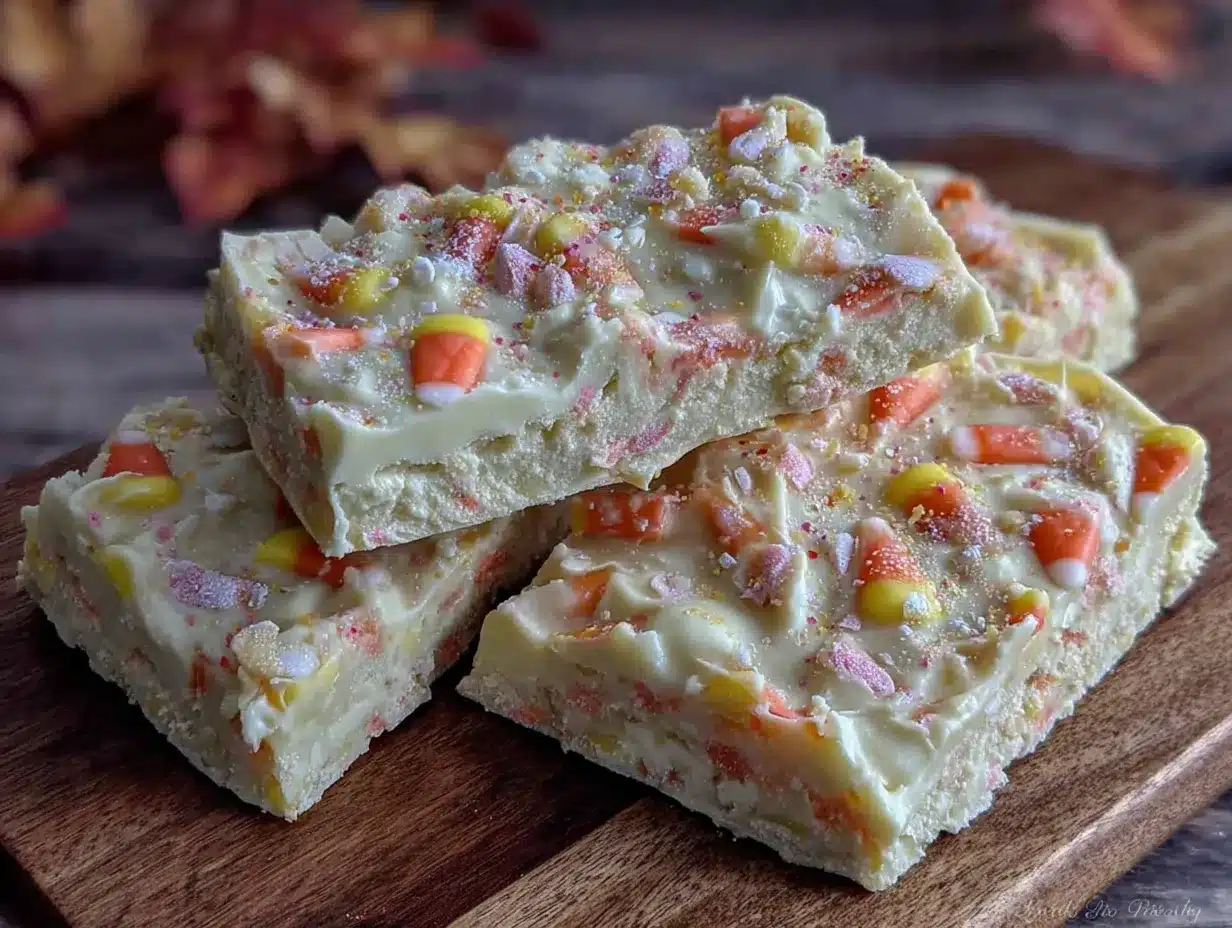
Let me walk you through this step by step. I’ve made this candy corn bark at least twenty times now, so I know exactly where things can go wrong and how to fix them.
- Prepare your baking sheet (2 minutes): Line your baking sheet with parchment paper or a silicone mat. Make sure the paper extends slightly over the edges — this gives you handles to lift the bark out later. I learned this trick after struggling to remove my first batch. Trust me, those parchment handles are a lifesaver.
- Melt the white chocolate (3-4 minutes): Pour your white chocolate chips into a microwave-safe bowl. Microwave in 30-second intervals at 50% power, stirring thoroughly between each interval. This is crucial — white chocolate burns easily and seizes up if overheated. I usually do three 30-second bursts, stirring for a full 30 seconds between each one. The chocolate should be mostly melted with a few small lumps remaining. Keep stirring until those lumps disappear from the residual heat. If you see any scorched spots, stop immediately and transfer the chocolate to a clean bowl.
- Spread the chocolate (1 minute): Pour the melted white chocolate onto your prepared baking sheet. Use your spatula to spread it into an even layer about 1/4 inch thick. Don’t worry about making it perfect — the rustic look is part of the charm. I’ve found that a slightly uneven surface creates nice texture variations in the final bark.
- Add the candy corn (2 minutes): While the chocolate is still wet, sprinkle your candy corn evenly over the surface. Press them down gently with your fingers or the back of a spoon so they stick. I like to arrange mine in a random pattern rather than rows — it looks more natural and homemade. If you want a more structured look, you can create stripes or a checkerboard pattern.
- Melt the orange candy melts (2 minutes): If you’re using orange candy melts, melt them in a separate bowl using the same 30-second interval method. Transfer the melted orange chocolate to a piping bag or Ziploc bag with a tiny corner snipped off. Drizzle it back and forth over the white chocolate and candy corn in a zigzag pattern. Don’t overdo it — a little goes a long way.
- Create the marbled effect (1 minute): Use a toothpick or the tip of a knife to gently swirl the orange chocolate into the white chocolate. Just a few quick strokes — you want distinct ribbons of orange, not a fully mixed color. This is where the magic happens. I love watching the colors blend together.
- Chill the bark (15-20 minutes): Place the baking sheet in the refrigerator and let the bark set until completely firm. This usually takes about 15 minutes, but I always check by touching the surface — it should feel hard and not leave a fingerprint. Don’t rush this step. If the bark isn’t fully set, it will break apart when you try to cut it.
- Break into pieces (2 minutes): Once the bark is completely firm, lift it out using the parchment handles. Place it on a cutting board and break it into irregular pieces with your hands. Or use a sharp knife to cut clean squares if you prefer a more uniform look. I like the rustic, broken-edge look for Halloween — it feels more festive and casual.
And there you have it! Eight simple steps to beautiful, delicious candy corn bark. The whole process takes about 25 minutes from start to finish, including chilling time. That’s faster than a trip to the store!
Cooking Tips & Techniques
After making this candy corn bark more times than I can count, I’ve collected a few tricks that make a real difference. Let me share what I’ve learned the hard way.
The Melting Mistake That Almost Ruined Everything: My first attempt at this recipe was a disaster. I microwaved the white chocolate on high for a full minute, thinking I was saving time. Big mistake. The chocolate seized up into a grainy, clumpy mess that I had to throw away. White chocolate is delicate — it has a lower melting point than dark or milk chocolate because of the milk solids and cocoa butter. Always use 50% power and short intervals. Patience is your friend here.
The Humidity Problem: I once tried making this on a rainy October afternoon, and the white chocolate refused to set properly. It stayed sticky and soft even after an hour in the fridge. Turns out, humidity is the enemy of chocolate. If it’s a damp day, run your air conditioner or dehumidifier for a while before you start. Or better yet, save this recipe for a crisp, dry fall day.
Timing and Multitasking: Here’s my strategy for efficiency: while the white chocolate is melting in 30-second intervals, I prepare my baking sheet and measure out the candy corn. By the time the chocolate is ready, everything else is ready to go. This way, I can work quickly while the chocolate is still warm and fluid.
The Perfect Candy Corn Distribution: I’ve found that pressing the candy corn gently into the chocolate ensures they stay put. If you just sprinkle them on top without pressing, they’ll fall off when you break the bark into pieces. Also, don’t overcrowd the surface — leave some space between pieces so each bite has a good balance of chocolate and candy corn.
Consistency is Key: For the best results, make sure your white chocolate is smooth and glossy before you spread it. If it looks thick or grainy, it might be overheating. You can rescue it by stirring in a teaspoon of coconut oil or vegetable shortening — this helps smooth out the texture. I’ve done this several times and it works like a charm.
Variations & Adaptations
One of the best things about this candy corn bark recipe is how easy it is to customize. Here are some variations I’ve tried and loved.
Chocolate Lover’s Version: Swap the white chocolate for milk or dark chocolate. The contrast between dark chocolate and sweet candy corn is surprisingly good. I made this for a friend who doesn’t like white chocolate, and she ate half the batch before I could stop her. Use the same melting technique — dark chocolate is a bit more forgiving than white, but it still benefits from gentle heating.
Halloween Mix Variation: Instead of plain candy corn, use the autumn mix that includes little pumpkins, acorns, and leaves. This creates a more colorful and festive bark that’s perfect for Halloween parties. I found a bag at Target last year and it made the most beautiful bark I’ve ever made. The different shapes and colors really pop against the white chocolate.
Nutty Crunch Version: Add 1/2 cup of chopped pecans or almonds along with the candy corn. The nutty crunch adds another layer of texture and flavor. I tried this for a Thanksgiving gathering, and it was a hit. The nuts also help balance out the sweetness of the candy corn.
Dairy-Free Adaptation: Use dairy-free white chocolate chips and candy corn that doesn’t contain gelatin (most brands are naturally dairy-free and gelatin-free). I’ve tested this with Enjoy Life brand white chocolate chips, and they melt beautifully. The texture is slightly different — a bit softer — but the taste is still fantastic.
Spiced Fall Version: Sprinkle a pinch of pumpkin pie spice or cinnamon over the melted chocolate before adding the candy corn. This adds a warm, autumnal flavor that pairs perfectly with the sweetness. I did this on a whim one year, and now it’s my go-to version for cozy fall nights.
Serving & Storage Suggestions
This candy corn bark is best served at room temperature, which allows the white chocolate to soften slightly and the candy corn to maintain its chewy texture. I like to arrange the pieces on a festive Halloween platter or in a clear glass jar tied with an orange ribbon.
How to Store: Store your bark in an airtight container at room temperature for up to one week. If your kitchen is warm, you can keep it in the refrigerator, but let it sit at room temperature for 10 minutes before serving so the chocolate softens. I’ve found that the bark actually tastes better on day two — the flavors seem to meld together somehow.
Freezing Instructions: You can freeze this bark for up to three months. Layer the pieces between sheets of parchment paper in an airtight container. Thaw at room temperature for about 15 minutes before serving. I’ve done this for holiday prep, and it works perfectly. Just make sure the container is completely airtight to prevent freezer burn.
How Flavors Develop: Freshly made bark has a bright, clean sweetness. After a day or two, the candy corn softens slightly and the white chocolate develops a creamier texture. I honestly prefer it on day two or three — the flavors just seem more integrated. If you’re making this for a party, consider making it a day ahead.
Perfect Pairings: Serve this bark alongside hot apple cider, pumpkin spice lattes, or a glass of cold milk. It also makes a great addition to a Halloween candy buffet or dessert table. I’ve even crumbled it over vanilla ice cream for an extra-special sundae.
Nutritional Information & Benefits
Let’s be real — this is a treat, not a health food. But here’s what you should know about the nutritional profile of this candy corn bark.
| Nutrient | Per Serving (approx. 2 oz) |
|---|---|
| Calories | 220 |
| Total Fat | 12g |
| Saturated Fat | 7g |
| Carbohydrates | 28g |
| Sugar | 24g |
| Protein | 2g |
| Sodium | 40mg |
The main ingredients — white chocolate and candy corn — are primarily sugar and fat, so this is definitely an occasional indulgence. However, white chocolate does contain some calcium from the milk solids, and candy corn is gluten-free and fat-free. If you’re watching your sugar intake, consider using sugar-free white chocolate chips and portioning the bark into small pieces.
For those with dietary restrictions, this recipe is naturally gluten-free and nut-free (unless you add nuts). It does contain dairy from the white chocolate, so it’s not suitable for vegans unless you use dairy-free alternatives. Always check the labels on your candy corn and chocolate to ensure they meet your dietary needs.
My personal philosophy? Life is too short to skip dessert. This candy corn bark is a fun, festive treat that brings joy to Halloween celebrations. Enjoy it in moderation and savor every bite.
Conclusion
Honestly, this candy corn bark has become my secret weapon for Halloween. It’s the recipe I turn to when I need something impressive but have zero time or energy. Three ingredients, twenty minutes, and you’ve got a treat that looks like it came from a fancy bakery.
What I love most about this recipe is how forgiving it is. You can customize it a hundred different ways — add nuts, swap the chocolate, change up the candy — and it always turns out delicious. It’s the kind of recipe that makes you feel like a kitchen genius without actually doing much work. And isn’t that the best kind of recipe?
I’d love to hear how your candy corn bark turns out! Did you add any fun variations? Did your kids help you make it? Drop a comment below and share your Halloween baking adventures. And if you’re looking for more quick and easy holiday treats, check out my pumpkin spice cookies or no-bake chocolate oat bars for more last-minute dessert ideas.
Happy Halloween, and happy baking! Remember — sometimes the simplest things are the ones everyone remembers.
Frequently Asked Questions
Can I use milk chocolate instead of white chocolate?
Absolutely! Milk chocolate or even dark chocolate works beautifully in this recipe. The flavor will be different — richer and less sweet — but it’s a delicious variation. Just use the same gentle melting technique to avoid burning the chocolate.
How long does candy corn bark last?
Stored in an airtight container at room temperature, this bark stays fresh for up to one week. You can also freeze it for up to three months. Just make sure to layer the pieces between parchment paper so they don’t stick together.
Why did my white chocolate seize up?
White chocolate seizes when it gets too hot or when even a tiny drop of water gets into the bowl. Always use 50% power in the microwave and stir frequently. Make sure your bowl and spatula are completely dry before you start. If your chocolate does seize, you can try stirring in a teaspoon of coconut oil to smooth it out.
Can I make this recipe vegan?
Yes! Use dairy-free white chocolate chips and check that your candy corn is vegan-friendly (most brands are). Enjoy Life and Pascha both make excellent dairy-free white chocolate options that melt beautifully.
How do I get clean cuts instead of broken pieces?
For clean, uniform squares, let the bark set completely in the fridge, then use a sharp chef’s knife to cut it while it’s still cold. Wipe the knife clean between cuts for the neatest edges. If you prefer the rustic look, just break it into pieces with your hands — that’s my preferred method for Halloween!
Pin This Recipe!
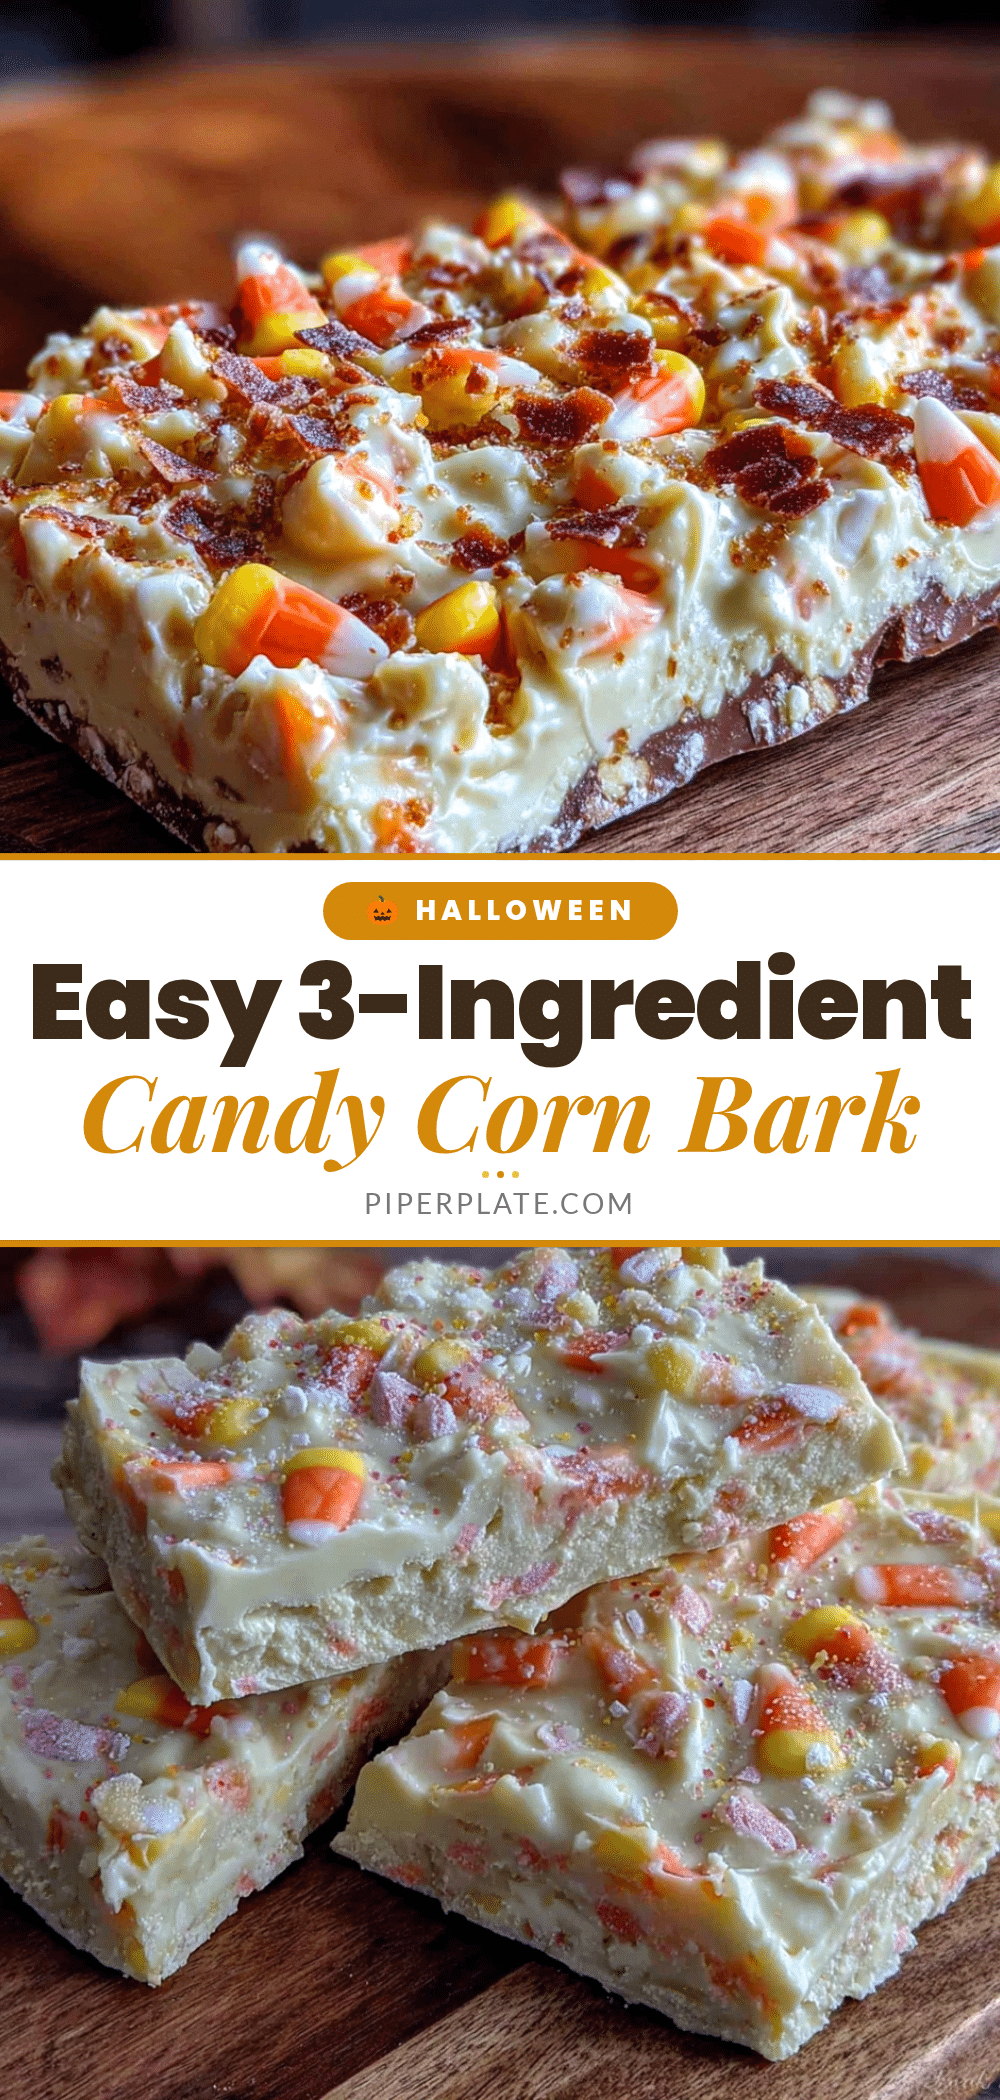
Easy 3-Ingredient Candy Corn Bark: Best Halloween Treat

This quick and easy candy corn bark comes together in under 20 minutes with just three ingredients. Perfect for last-minute Halloween parties, it’s a crowd-pleaser that looks impressive with minimal effort.
- Prep Time: 10 minutes
- Cook Time: 5 minutes
- Total Time: 25 minutes
- Yield: 12 servings 1x
- Category: Dessert
- Cuisine: American
Ingredients
- 12 ounces (340g) white chocolate chips
- 1 cup (about 150g) candy corn
- 1/2 cup (about 85g) orange candy melts (optional, or 1/4 cup white chocolate chips mixed with 3–4 drops orange gel food coloring)
Instructions
- Line a baking sheet with parchment paper, letting it extend over the edges for easy removal.
- Melt white chocolate chips in a microwave-safe bowl in 30-second intervals at 50% power, stirring thoroughly between each interval, until smooth and glossy.
- Pour melted white chocolate onto the prepared baking sheet and spread into an even layer about 1/4 inch thick.
- While chocolate is still wet, sprinkle candy corn evenly over the surface and press gently to adhere.
- If using orange candy melts, melt them in a separate bowl using the same 30-second interval method. Transfer to a piping bag or Ziploc bag with a tiny corner snipped off and drizzle in a zigzag pattern over the white chocolate and candy corn.
- Use a toothpick or knife tip to gently swirl the orange chocolate into the white chocolate for a marbled effect.
- Refrigerate the baking sheet for 15-20 minutes until the bark is completely firm.
- Lift the bark out using the parchment handles, place on a cutting board, and break into irregular pieces or cut into clean squares.
Notes
White chocolate is delicate; always melt at 50% power in short intervals to prevent seizing. Humidity can affect setting; avoid making on damp days. For best results, press candy corn gently into the chocolate so they stick. Bark can be stored in an airtight container at room temperature for up to one week or frozen for up to three months.
Nutrition
- Serving Size: 2 oz (about 1/12 of
- Calories: 220
- Sugar: 24
- Sodium: 40
- Fat: 12
- Saturated Fat: 7
- Carbohydrates: 28
- Protein: 2
Keywords: candy corn bark, Halloween treat, 3-ingredient recipe, white chocolate bark, easy dessert, last-minute Halloween, no-bake dessert


