Love this? Save it for later!
Share the inspiration with your friends
My neighbor Dave swore he hated meringue for thirty-seven years. Thirty-seven years! He’d make this face—like someone had just described eating a cloud made of feet—every time the subject came up. Then last October, I found him standing in my kitchen at 11 p.m., picking chocolate chips off a cookie sheet, caught red-handed with a mouthful of ghost-shaped meringue.
“These don’t count,” he said, crumbs flying. “They’re ghosts. Different food group.”
Honestly, I almost believed him. Because these Quick Ghost Meringue Cookies with Chocolate Chip Eyes aren’t your typical meringue. They’re crisp on the outside, chewy on the inside, and somehow—I don’t know how—they don’t have that weird egg-white smell that turns people off. Maybe you’ve been there, staring at a bag of powdered sugar, wondering if you have the patience for French meringue on a Tuesday night.
I get it. I really do. The first time I tried making meringue ghosts, I was rushing between soccer pickup and a work call, and I forgot to wipe the bowl with lemon juice. My ghosts came out flat and weepy—sad little puddles of sugar water staring up at me with melted chocolate eyes. My kid asked if they were ghosts that had “melted from sadness.” Brutal.
But I kept at it because something about these cookies stuck with me. Maybe it was how simple they are—egg whites, sugar, a splash of vanilla, and chocolate chips. Maybe it was watching my daughter’s face light up when she piped her first ghost shape. Or maybe it was Dave, the meringue-hater, texting me at midnight: “Send recipe. Don’t tell anyone.”
Why You’ll Love This Recipe
Let’s be real for a second—most Halloween treats are a sugar-fueled nightmare of food coloring and fondant. These Quick Ghost Meringue Cookies with Chocolate Chip Eyes are different. They’re the kind of recipe that makes you look like a kitchen wizard without actually having to be one.
- Ready in under an hour : From bowl to oven in 15 minutes, then just 40 minutes of hands-off baking. You can make these while helping with homework or catching up on emails.
- Five ingredients, all pantry staples : Eggs, sugar, vanilla, cream of tartar, and chocolate chips. No special grocery run required—I’ve made these with eggs that were two weeks past their carton date and they turned out perfect.
- Perfect for last-minute Halloween parties : Your kid announces at 8 p.m. that tomorrow’s class party needs treats? You’ve got this. These come together faster than a trip to the store.
- Actually foolproof once you know the trick : The secret is room-temperature egg whites and a completely clean bowl. I learned this the hard way—my first batch had a speck of yolk and they wouldn’t whip to save their lives.
- Kids can help with every step : My daughter pipes the ghosts herself now. They look slightly lopsided and absolutely perfect. The chocolate chip eyes are her job—she’s very serious about it.
What makes these different from every other meringue recipe out there? It’s the ratio. I spent three batches getting this right—too much sugar and they’re sticky, too little and they collapse. This version gives you that perfect crisp exterior with a marshmallowy center that doesn’t get stuck in your teeth. Plus, the chocolate chips stay put instead of sinking to the bottom, which was driving me crazy until I figured out the trick (spoiler: it’s folding them in at the very end).
These cookies aren’t just good for Halloween—they’re the kind that makes you close your eyes after the first bite. The kind where you hear yourself say “oh wow” out loud and then pretend you didn’t. Comfort food reimagined as something cute and spooky, faster than you’d ever expect.
What Ingredients You Will Need
This recipe uses simple, wholesome ingredients to deliver that perfect meringue texture without any fuss. Everything here is probably already in your kitchen, which is exactly how weeknight baking should be.
For the Meringue Base
- 4 large egg whites, room temperature (cold eggs won’t whip properly—set them out 30 minutes ahead, or place them in warm water for 5 minutes)
- 1 cup (200g) granulated sugar (I prefer C&H or Domino for consistent results—superfine sugar works even better if you have it)
- 1/2 teaspoon cream of tartar (this stabilizes the meringue; you can substitute 1 teaspoon lemon juice or white vinegar in a pinch)
- 1 teaspoon vanilla extract (use pure vanilla if you have it—imitation works fine, but pure gives a warmer flavor)
- 1/4 teaspoon salt (just a pinch to balance the sweetness)
For the Ghost Faces
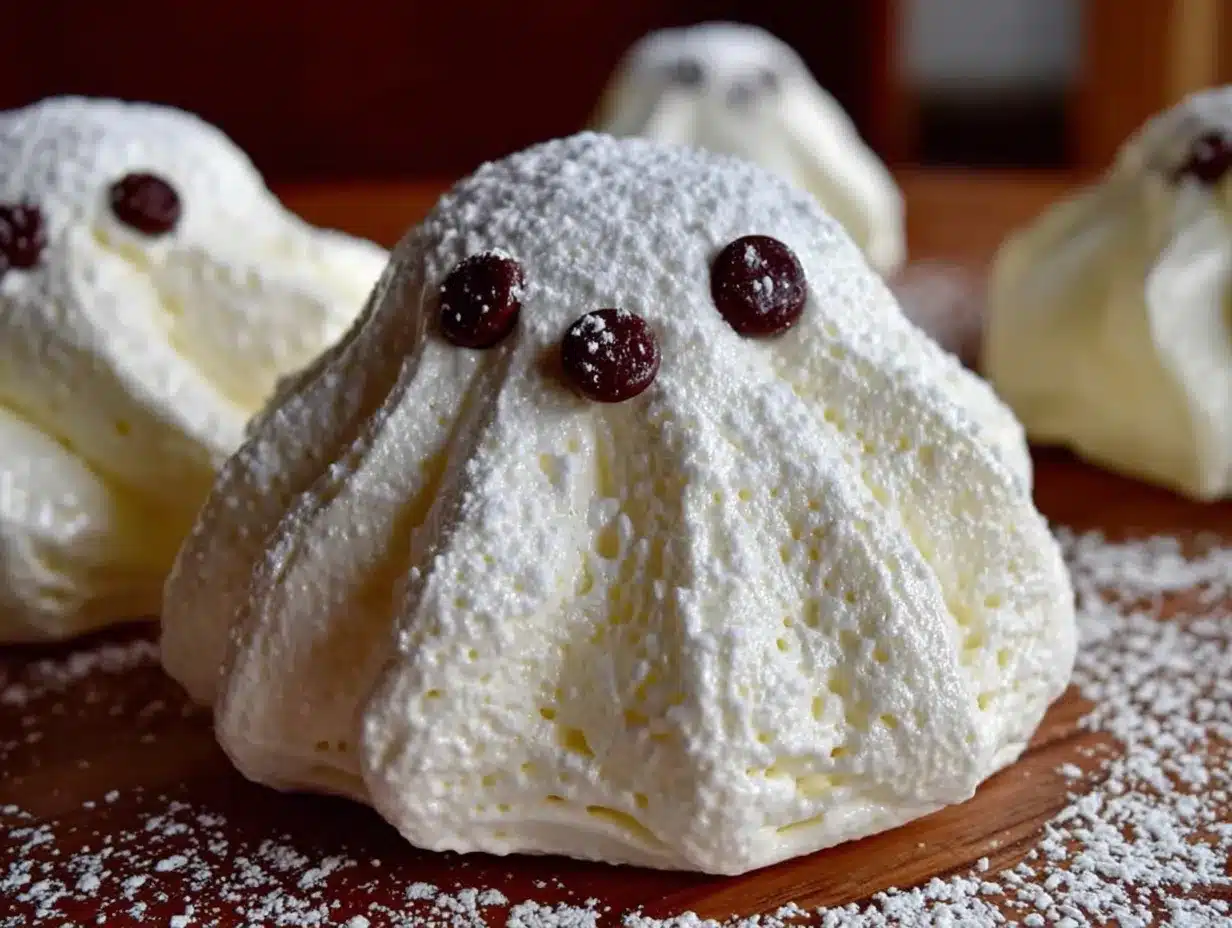
- 1/4 cup mini chocolate chips (regular chocolate chips are too heavy and will sink; mini chips stick better and look cuter)
- Optional: 1 tablespoon cocoa powder (for dusting—gives them a “just rose from the grave” look that kids love)
Ingredient Selection Tips: Look for eggs that are at least a week old—fresh eggs have tighter proteins that don’t whip as well. I know it sounds backwards, but older eggs actually make better meringue. If you’re using farm-fresh eggs, let them sit in the fridge for a week before making these.
Brand Recommendation: For the chocolate chips, I’ve tested this with Ghirardelli mini chips and they hold their shape perfectly during baking. Store-brand mini chips tend to melt into puddles—still tasty, but your ghosts will look like they’ve been crying. Which, okay, is also kind of Halloween-y.
Substitution Guidance: Need these to be gluten-free? They already are! Meringue is naturally gluten-free. For a dairy-free version, just make sure your chocolate chips are dairy-free (Enjoy Life makes great mini chips). You can swap the vanilla for almond extract or peppermint extract for a different flavor—just use half the amount since extracts are stronger.
Equipment Needed
You don’t need fancy equipment for these Quick Ghost Meringue Cookies with Chocolate Chip Eyes, but having the right tools makes a huge difference. I’ve made these with a hand mixer, a stand mixer, and even a whisk (don’t recommend that last one unless you’re looking for an arm workout).
- Electric mixer (stand mixer or hand mixer both work—I use my KitchenAid for the hands-free convenience, but a hand mixer actually gives you more control over over-whipping)
- Large glass or metal mixing bowl (plastic bowls can hold onto grease, which kills meringue—I learned this the hard way with my favorite plastic bowl)
- Piping bag with round tip (a Wilton #12 tip works great, or just snip the corner off a zip-top bag—honestly, the zip-top bag method is easier for kids)
- Baking sheet lined with parchment paper (silicone mats work too, but parchment gives better browning on the bottom)
- Rubber spatula (for folding in the chocolate chips gently)
- Kitchen scale (optional but helpful—weighing your egg whites ensures consistency; 4 large egg whites should be about 120-130 grams)
Budget-Friendly Tip: Don’t run out and buy a fancy piping tip. A gallon-sized zip-top bag with one corner snipped off works exactly the same. I actually prefer it because there’s less cleanup—just throw the bag away when you’re done. My first set of ghost cookies was piped with a baggie and they looked adorable, so don’t let equipment hold you back.
Preparation Method
Let me walk you through this step by step. I’ve made these Quick Ghost Meringue Cookies with Chocolate Chip Eyes more times than I can count, and I’ve made every mistake possible so you don’t have to.
- Preheat your oven to 200°F (93°C) and line two baking sheets with parchment paper. Yes, 200°F—we’re drying these cookies out, not baking them. This low temperature is what gives you that perfect crisp texture without any browning.
- Wipe your mixing bowl and whisk attachment with lemon juice or white vinegar. This removes any trace of grease that could prevent your egg whites from whipping. I use a paper towel with a splash of vinegar and wipe everything down—bowl, whisk, even the spatula I’ll use later. Sounds fussy, but it’s the difference between stiff peaks and sad puddles.
- Separate your eggs while they’re cold. Cold eggs separate more cleanly, and you absolutely cannot have any yolk in your whites. If even a speck of yolk gets in there, start over. I separate each egg into a small bowl first, then add the white to the main bowl—that way one broken yolk doesn’t ruin the whole batch.
- Let the egg whites come to room temperature. This takes about 30 minutes on the counter. Room temperature whites whip higher and hold their shape better. If you’re in a hurry, place the bowl in a warm water bath for 5 minutes, stirring gently.
- Add the cream of tartar and salt to the egg whites. Start beating on medium speed until the mixture becomes foamy and opaque—about 1 minute. You’ll see bubbles forming and the mixture will look like soapy water.
- Gradually add the sugar, one tablespoon at a time. This is the most important step. With the mixer running on medium-high, add the sugar slowly—about 10 seconds between each addition. If you dump it all in at once, your meringue will be grainy and won’t hold its shape. I count to eight between each spoonful. It takes patience, but the texture is worth it.
- Keep beating until stiff peaks form. This takes about 5-7 minutes with a stand mixer, longer with a hand mixer. You’ll know it’s ready when the meringue is glossy and holds a stiff peak when you lift the whisk—the tip should stand straight up without drooping. Rub a little between your fingers—if it feels smooth and not grainy, the sugar has dissolved properly.
- Add the vanilla extract and beat for another 30 seconds until combined. The meringue should look like marshmallow fluff at this point—thick, glossy, and white.
- Fold in the mini chocolate chips gently. Use a rubber spatula and make slow, sweeping motions from the bottom up. Overmixing will deflate your meringue. You want the chips distributed evenly, but stop as soon as they’re incorporated—about 5-6 folds.
- Transfer the meringue to your piping bag. If using a zip-top bag, snip about 1/2 inch off one corner. Twist the top of the bag to push the meringue toward the tip. Pipe ghost shapes onto the parchment-lined sheets—start with a round base, then pull upward to create a head shape, and finish with a little tail at the top. Make them about 2 inches tall and leave an inch between each ghost.
- Add the chocolate chip eyes. Before the meringue starts to dry, gently press two mini chocolate chips into each ghost for eyes. Don’t push them in too deep or they’ll disappear—just enough to stick. My daughter presses them in until they’re “watching” her.
- Bake for 40 minutes at 200°F (93°C). Don’t open the oven door during baking—the steam will ruin your meringues. After 40 minutes, turn the oven off but leave the cookies inside for another 30 minutes to dry out completely. They should peel easily off the parchment when they’re done.
Cooking Tips & Techniques
I’ve ruined more meringues than I care to admit, so let me save you from my mistakes. These Quick Ghost Meringue Cookies with Chocolate Chip Eyes are forgiving, but they have their quirks.
The biggest mistake people make is over-whipping. I did this my third time making these—I walked away to answer a text and came back to grainy, curdled-looking meringue. Once you see the mixture start to separate and look watery, you’ve gone too far. Stop at stiff peaks that still look glossy and smooth. If you see beads of liquid forming on the surface, you’ve over-whipped. Start over—it’s cheaper than a trip to the store.
Humidity is your enemy. Meringue is basically sugar and egg whites, which means it absorbs moisture from the air. Don’t make these on a rainy day—I learned this when I made them during a thunderstorm and they came out sticky and chewy instead of crisp. If you’re in a humid climate, add an extra 10 minutes to the drying time in the oven.
Multitasking strategy: While your egg whites are coming to room temperature, line your baking sheets and measure your ingredients. The actual active time for these cookies is only about 15 minutes—the rest is waiting for the oven. I usually make the meringue mixture while my kids are finishing homework, then we pipe them together as a quick after-dinner activity.
For consistent shapes, practice piping a few test ghosts on a separate piece of parchment. Hold the bag straight up and down, squeeze from the top, and release pressure as you pull upward. The first ghost always looks weird—that’s fine, just scrape it back into the bag and try again. My ghosts looked like blobs for the first dozen tries, and honestly, blob ghosts are still cute.
Variations & Adaptations
Once you’ve mastered the basic Quick Ghost Meringue Cookies with Chocolate Chip Eyes, here are some fun ways to change them up. I’ve tried all of these and they each have their own charm.
Pumpkin Spice Ghosts: Add 1 teaspoon pumpkin pie spice and 1/4 teaspoon cinnamon to the sugar before whipping. These smell incredible while baking and taste like autumn. I made these for a fall potluck and they disappeared faster than the actual pumpkin pie.
Peppermint Bark Ghosts: Substitute the vanilla with 1/2 teaspoon peppermint extract and use dark chocolate mini chips. Crush a candy cane and sprinkle the pieces on top before baking. These are dangerously addictive—I couldn’t stop eating them last December.
Vegan Version: Use aquafaba (the liquid from a can of chickpeas) instead of egg whites. One can of chickpeas yields about 1/2 cup of aquafaba, which replaces 4 egg whites. Whip it the same way—it takes a little longer to reach stiff peaks, but it works surprisingly well. The taste is slightly different, but the texture is spot-on.
Colorful Ghosts: Add a few drops of gel food coloring after the stiff peaks form. Gel coloring is better than liquid because it doesn’t add extra moisture. Pastel colors work best—neon ghosts look more like aliens. My daughter insisted on purple ghosts last year and they turned out beautifully.
No-Piping Method: If you don’t have a piping bag, drop spoonfuls of meringue onto the baking sheet and shape them into ghost forms with the back of a spoon. They won’t be as uniform, but they’ll still be delicious. I actually prefer this method when I’m in a hurry because there’s less cleanup.
Serving & Storage Suggestions
These Quick Ghost Meringue Cookies with Chocolate Chip Eyes are best served at room temperature, straight off the parchment paper. They have a satisfying crunch that gives way to a soft, marshmallowy center—the texture contrast is what makes them so good.
Presentation Ideas: Arrange them on a black platter or dark plate to make the white ghosts pop. I like to dust them with a little cocoa powder through a fine-mesh strainer—it gives them a “just crawled out of the graveyard” look that kids find hilarious. For Halloween parties, I set them up on a tray with some fake spiderwebs and plastic spiders. The contrast between the cute ghosts and the creepy decorations always gets a laugh.
Complementary Dishes: These pair beautifully with hot chocolate, coffee, or a warm apple cider. They’re also great alongside a pumpkin pie or on a Halloween dessert board with caramel apples and popcorn balls. For a grown-up twist, serve them with a glass of dessert wine or a dark stout beer—the sweetness balances the bitterness perfectly.
Storage Instructions: Store these in an airtight container at room temperature for up to 5 days. Do not refrigerate—the moisture in the fridge will make them sticky. If you live in a humid area, add a food-safe silica gel packet to the container to absorb excess moisture. I learned this trick from a baker friend and it’s a game-changer.
Freezer Instructions: These freeze beautifully for up to 3 months. Place them in a single layer in a freezer-safe container with parchment paper between layers. Thaw at room temperature for 15 minutes before serving. They’ll lose a bit of their crunch but still taste amazing.
Flavor Development: Interestingly, these cookies actually taste better the day after baking. The flavors meld together and the texture evens out. If you can resist eating them all on day one, you’re in for a treat on day two.
Nutritional Information & Benefits
Per serving (2 ghosts): approximately 85 calories, 1g fat, 18g carbohydrates, 2g protein, 16g sugar. These are a treat, not a health food, but they’re surprisingly light compared to most Halloween cookies.
Health Highlights: Meringue is naturally fat-free and cholesterol-free if you use only the egg whites. The protein in egg whites provides about 4 grams per serving, which is decent for a cookie. The chocolate chips add antioxidants and a little magnesium. Compared to a typical sugar cookie with butter and flour, these are significantly lower in calories and fat.
Dietary Considerations: These cookies are naturally gluten-free, dairy-free (if using dairy-free chocolate chips), and nut-free. They’re also low in sodium. The main concern is the sugar content, so enjoy them in moderation—but honestly, Halloween is one day a year, and these are worth the splurge.
Allergen Note: Contains eggs. If you’re using the vegan aquafaba version, they’re completely egg-free and allergen-friendly. Always check your chocolate chip labels for potential cross-contamination if you’re serving to someone with severe allergies.
Frequently Asked Questions
Why did my meringue ghosts turn out flat?
Flat ghosts usually mean the egg whites weren’t whipped enough, or there was grease in the bowl. Make sure your bowl is completely clean and you’ve reached stiff peaks before piping. Also, don’t let the piped ghosts sit too long before baking—they can start to deflate after 10-15 minutes.
Can I make these without cream of tartar?
Yes! Substitute with 1 teaspoon of lemon juice or white vinegar. The acid stabilizes the egg whites and helps them hold their shape. I’ve also used a pinch of baking powder in a pinch—it’s not as effective, but it works in a emergency.
How do I know when the meringues are done?
They should peel easily off the parchment paper without sticking. The outside should be dry and crisp, and the inside should be soft but not sticky. If they’re still sticking to the paper, turn the oven off and let them sit inside for another 15-20 minutes.
Can I use a different type of chocolate?
Absolutely! White chocolate chips make cute “glowing” eyes, and dark chocolate chips give a more dramatic look. Just avoid using large chocolate chunks—they’re too heavy and will sink to the bottom. Mini chips are really the sweet spot for these ghosts.
Why are my meringues weeping or sweating?
This happens when there’s too much moisture in the air or the meringue wasn’t baked long enough. Make sure you’re baking on a dry day and that the oven temperature is accurate. You can also try adding an extra 1/2 teaspoon of cream of tartar to help stabilize the mixture.
Conclusion
These Quick Ghost Meringue Cookies with Chocolate Chip Eyes have become a Halloween tradition in my house, and I think they deserve a spot in yours too. They’re the kind of recipe that proves you don’t need complicated techniques or fancy ingredients to make something memorable—just a little patience, a clean bowl, and the willingness to laugh at your first few lopsided ghosts.
What I love most about this recipe is how it brings people together. My neighbor Dave, who spent thirty-seven years hating meringue, now texts me every October asking when I’m making “the ghost cookies.” My daughter, who used to think baking was boring, asks to make them year-round. Even my husband, who claims he “doesn’t do sweets,” ate six in one sitting last Halloween.
So go ahead—give these a try. Make them with your kids, make them for a party, or make them just because you want something cute and delicious on a Tuesday night. And when you do, I’d love to hear how they turned out. Drop a comment below with your ghost stories (pun intended), share your photos, and let me know if you tried any fun variations. Happy baking, and remember—even a slightly wonky ghost is still a ghost worth eating.
Pin This Recipe!
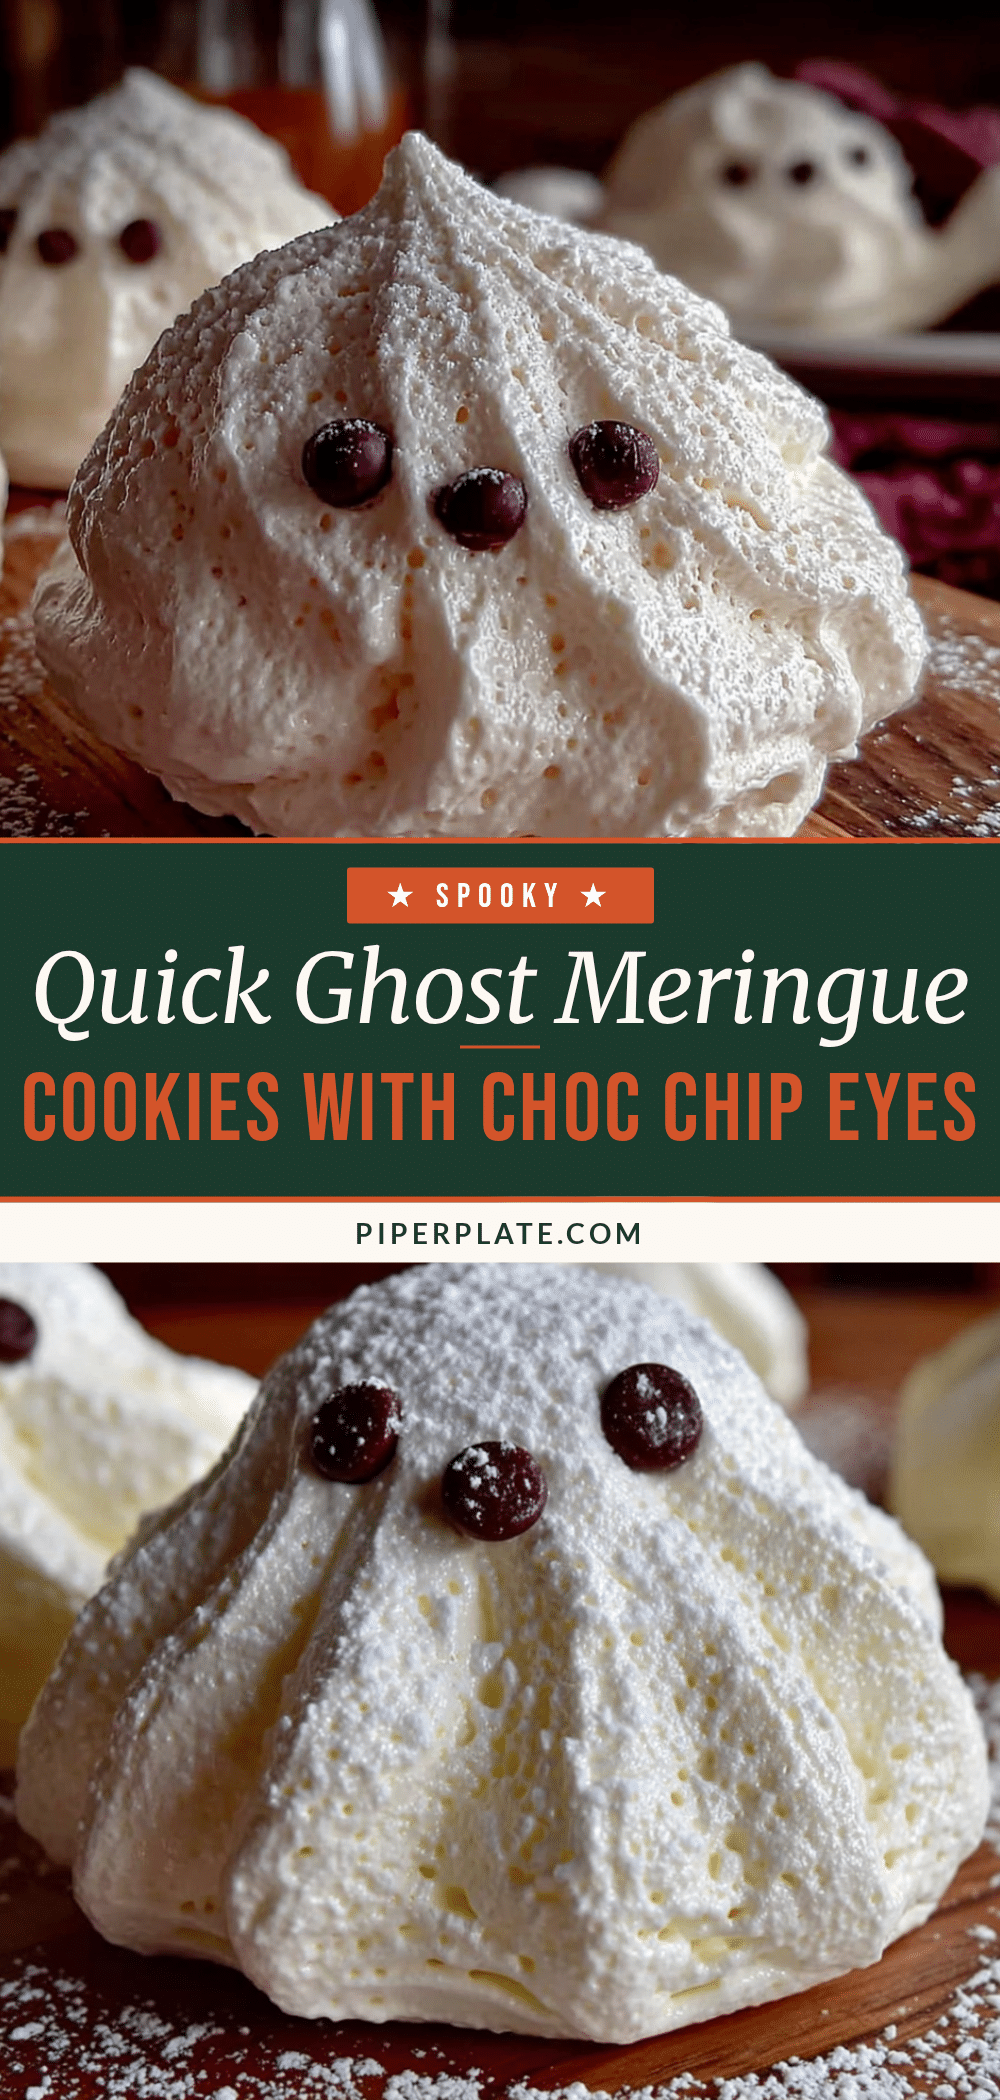
Quick Ghost Meringue Cookies: Easy Chocolate Chip Eyes
These Quick Ghost Meringue Cookies with Chocolate Chip Eyes are crisp on the outside, chewy on the inside, and made with just five simple ingredients. Perfect for last-minute Halloween parties, they come together in under an hour and are naturally gluten-free and dairy-free.
- Prep Time: 15 minutes
- Cook Time: 40 minutes
- Total Time: 55 minutes
- Yield: 24 servings 1x
- Category: Dessert
- Cuisine: American
Ingredients
- 4 large egg whites, room temperature
- 1 cup (200g) granulated sugar
- 1/2 teaspoon cream of tartar
- 1 teaspoon vanilla extract
- 1/4 teaspoon salt
- 1/4 cup mini chocolate chips
- Optional: 1 tablespoon cocoa powder for dusting
Instructions
- Preheat your oven to 200°F (93°C) and line two baking sheets with parchment paper.
- Wipe your mixing bowl and whisk attachment with lemon juice or white vinegar to remove any grease.
- Separate your eggs while they’re cold, ensuring no yolk gets into the whites.
- Let the egg whites come to room temperature (about 30 minutes).
- Add the cream of tartar and salt to the egg whites. Beat on medium speed until foamy and opaque, about 1 minute.
- Gradually add the sugar, one tablespoon at a time, with the mixer running on medium-high. Add each spoonful about 10 seconds apart.
- Continue beating until stiff peaks form, about 5-7 minutes. The meringue should be glossy and hold a stiff peak.
- Add the vanilla extract and beat for another 30 seconds until combined.
- Gently fold in the mini chocolate chips with a rubber spatula, using 5-6 folds.
- Transfer the meringue to a piping bag (or a zip-top bag with a corner snipped off). Pipe ghost shapes onto the parchment-lined sheets, about 2 inches tall and 1 inch apart.
- Before the meringue dries, gently press two mini chocolate chips into each ghost for eyes.
- Bake for 40 minutes at 200°F (93°C). Do not open the oven door during baking.
- After 40 minutes, turn the oven off and leave the cookies inside for another 30 minutes to dry out completely. They should peel easily off the parchment when done.
Notes
For best results, use room-temperature egg whites and a completely clean bowl. Avoid making these on humid days. The cookies taste even better the day after baking. Store in an airtight container at room temperature for up to 5 days. Freeze for up to 3 months.
Nutrition
- Serving Size: 2 ghosts
- Calories: 85
- Sugar: 16
- Sodium: 35
- Fat: 1
- Saturated Fat: 0.5
- Carbohydrates: 18
- Protein: 2
Keywords: ghost meringue cookies, Halloween cookies, meringue ghosts, chocolate chip meringue, easy Halloween treats, gluten-free cookies, dairy-free cookies


