Love this? Save it for later!
Share the inspiration with your friends
My nephew asked why I couldn’t just use crushed chocolate cookies instead of bothering with a food processor. I started to explain why that wouldn’t work — then stopped. Honestly, I had no good reason. I was about to launch into some speech about texture and consistency, the kind of thing you say when you’ve been doing something a certain way for so long you forget to question it. He was eight and just wanted to make Halloween dessert without waiting for me to dig out the heavy machinery. So I handed him a rolling pin and a zip-top bag, and we got to work.
That moment changed how I make this cozy Halloween dirt cup pudding entirely. The cookies crushed unevenly, sure — some bits were fine dust, others were satisfying little pebbles. And you know what? It was perfect. The texture had more personality, more crunch in some bites and smooth, dark crumble in others. I stood there, spatula in hand, watching him pour the pudding mixture over his hand-crushed cookies, and I realized I’d been overcomplicating something that was supposed to be simple and fun. That’s the thing about this recipe — it reminds you that sometimes the best approach is the most straightforward one.
This cozy Halloween dirt cup pudding with gummy worms has become our go-to for spooky season gatherings, movie nights, and those chilly October afternoons when you just need something sweet and silly. It’s the kind of dessert that makes everyone smile, from the youngest kid at the table to the adults who pretend they’re too grown-up for gummy worms. I mean, let’s be real — we all dig through the cup looking for that hidden worm.
Maybe you’ve been there, standing in the kitchen trying to make something special for Halloween but dreading the complicated steps and fancy equipment. This recipe is for you. It’s forgiving, it’s flexible, and it honestly tastes better when you let someone else help — even if that means surrendering control of the cookie crushing.
Why You’ll Love This Recipe
This cozy Halloween dirt cup pudding with gummy worms isn’t just another spooky dessert. It’s the one that disappears first at every party, the one people ask for year after year. Here’s why it works so well:
- Quick & Easy: From start to finish, you’re looking at about 20 minutes of active prep time. The hardest part is waiting for the pudding to chill, and let’s face it — that’s a good problem to have.
- Simple Ingredients: You probably already have most of what you need in your pantry. No weird extracts, no specialty baking mixes, nothing that requires a trip to three different stores.
- Perfect for Halloween: Whether you’re hosting a costume party, sending treats to school, or just want something fun for a cozy night in, these dirt cups fit the bill. They’re festive without being fussy.
- Crowd-Pleaser: I’ve watched grown adults argue over the last cup. Kids love the gummy worms, but the creamy chocolate pudding and crunchy cookie topping win over everyone.
- Unbelievably Delicious: This isn’t just about the presentation — though the worms poking out of “dirt” is undeniably fun. The combination of silky pudding, buttery cookies, and chewy candy is genuinely satisfying.
What makes this version different from the rest? It’s the texture balance. I spent months testing different cookie-to-pudding ratios, different chilling times, different ways to layer the gummy worms so they stay visible but don’t dry out. The result is a dirt cup that’s creamy, crunchy, and chewy in every single bite. Plus, I’ve figured out how to keep the gummy worms from getting rock-hard in the fridge — a problem I didn’t know existed until my first batch turned into candy rocks.
This is comfort food reimagined for the spooky season. It’s the dessert that brings people together, makes everyone laugh, and somehow feels both nostalgic and fresh. Honestly, it’s the kind of recipe that makes you close your eyes after the first bite — not because it’s fancy, but because it’s exactly what you needed.
What Ingredients You Will Need
This cozy Halloween dirt cup pudding with gummy worms uses simple, everyday ingredients to create something special. No hunting through specialty stores, no expensive imports — just good old-fashioned pantry staples that come together beautifully.
- Chocolate pudding mix (3.9 oz box) — instant works best here. I prefer Jell-O brand for its consistency, but any instant chocolate pudding will do. Make sure it’s the instant variety, not cook-and-serve, or your timing will be off.
- Whole milk (2 cups / 480 ml) — you can use 2% in a pinch, but whole milk gives the pudding that silky, luxurious texture that makes these cups feel indulgent. I’ve tested this with oat milk too, and it works, though the texture is slightly less creamy.
- Chocolate sandwich cookies (about 24 cookies) — Oreos are the classic choice, but store brands work perfectly too. You’ll need the whole cookie, filling and all. The filling adds a subtle sweetness that balances the dark cookie crumb.
- Gummy worms (about 2 cups / 200 grams) — get the colorful, sour-coated ones if you can find them. The tanginess cuts through the sweet pudding beautifully. I recommend Trolli or Black Forest brands for the best texture — they stay soft even after chilling.
- Whipped topping (1 cup / 240 ml) — Cool Whip or any frozen whipped topping works great. You can also make your own whipped cream if you prefer, but stabilize it with a little powdered sugar so it doesn’t deflate overnight.
- Cream cheese (4 oz / 113 grams) — softened to room temperature. This is my secret ingredient. It adds a tangy richness that makes the pudding taste homemade, even when you’re using a box mix.
- Butter (2 tablespoons / 28 grams) — unsalted, melted. This gets mixed into the cookie crumbs for a richer, more authentic “dirt” texture. Trust me on this one.
- Vanilla extract (1 teaspoon) — pure vanilla if you have it, imitation works fine. It rounds out the chocolate flavor and makes everything taste more complex.
- Green food coloring (optional) — a drop or two if you want to tint the whipped topping for a swampy, spooky look. Totally optional, but kids love it.
When shopping for gummy worms, look for packages that have a mix of colors — the bright pink, orange, and green worms look amazing poking out of the dark “dirt.” Avoid the sugar-coated sour worms if you’re serving young children; the sour coating can be a bit intense. Regular gummy worms are the safest bet.
Equipment Needed
You don’t need a professional kitchen to make this cozy Halloween dirt cup pudding with gummy worms. Most of these tools you already own, and the few specialty items have easy workarounds.
- Mixing bowls (2 medium-sized) — one for the pudding, one for the cookie crumbs. Glass or stainless steel works best because they don’t retain odors.
- Whisk — for combining the pudding mix and milk. A hand whisk is fine, but an electric mixer makes the cream cheese blending much easier.
- Rolling pin or food processor — for crushing the cookies. As my nephew proved, a rolling pin and a zip-top bag work perfectly. You can also use a meat mallet or even a heavy-bottomed skillet.
- Zip-top bags (quart-sized) — for the cookie crushing method. Use freezer bags if you have them; they’re stronger and less likely to split open.
- Small cups or glasses (6 to 8, depending on size) — clear plastic cups are traditional for dirt cups because you can see the layers. I use 8-ounce clear plastic cups from the party supply store. Glass ramekins or small mason jars work beautifully too.
- Spatula — for folding the whipped topping into the pudding mixture. A rubber spatula is ideal for scraping every last bit.
- Measuring cups and spoons — for accuracy, especially with the milk and cream cheese.
- Piping bag or zip-top bag — for layering the pudding neatly. A piping bag gives you more control, but snipping the corner off a zip-top bag works just as well.
If you’re making these with kids, skip the food processor and let them crush the cookies by hand. It’s messier, but it’s also more fun. And honestly, the uneven crumbs look more like real dirt anyway.
Preparation Method
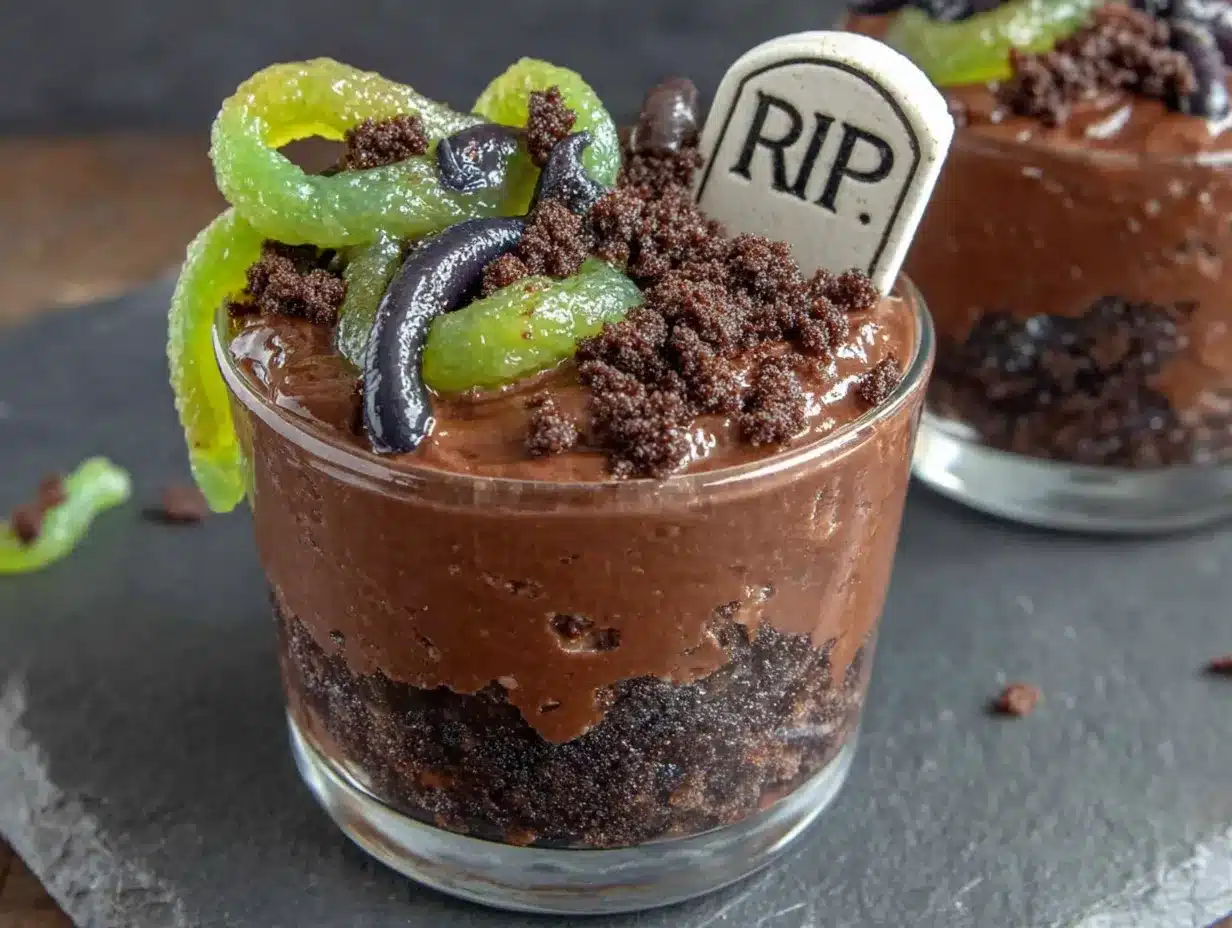
Making this cozy Halloween dirt cup pudding with gummy worms is straightforward, but following the right order makes everything come together smoothly. Here’s how I do it:
- Crush the cookies — Place 24 chocolate sandwich cookies in a large zip-top bag. Seal it, removing as much air as possible. Use a rolling pin to crush them into fine crumbs with some slightly larger pieces. You want about 2 cups of crumbs total. Set aside 1/4 cup for garnish. Stir the melted butter into the remaining crumbs until evenly moistened. This step takes about 5 minutes.
- Soften the cream cheese — Take the cream cheese out of the refrigerator 30 minutes before you start, or microwave it for 10-15 seconds until soft but not melted. It should be room temperature for smooth blending.
- Make the pudding base — In a medium bowl, beat the softened cream cheese with an electric mixer until smooth and fluffy, about 1 minute. Add 1 teaspoon vanilla extract and beat until combined. In a separate bowl, whisk the chocolate pudding mix with 2 cups of cold whole milk for 2 minutes until thickened. The pudding should be thick but still pourable.
- Combine and fold — Add the cream cheese mixture to the pudding and whisk until completely smooth. No lumps allowed. Gently fold in 1 cup of whipped topping using a rubber spatula. Fold until just combined — overmixing will deflate the air and make the filling dense. The mixture should be light, fluffy, and a shade lighter than the original pudding.
- Assemble the layers — Spoon about 2 tablespoons of the cookie crumbs into the bottom of each cup. Press down gently with the back of a spoon to create an even layer. Transfer the pudding mixture to a piping bag or a zip-top bag with the corner snipped off. Pipe a layer of pudding over the crumbs, filling the cup about halfway. Add 2-3 gummy worms, pressing them slightly into the pudding so they stay in place. Top with more pudding mixture, filling the cups to about 3/4 full. Leave some room for the final crumb layer.
- Add the dirt topping — Sprinkle the reserved cookie crumbs evenly over the top of each cup. You want a thick enough layer that no pudding shows through — about 1-2 tablespoons per cup. This is the “dirt” that makes the illusion work.
- Garnish with worms — Poke 2-3 gummy worms into the top of each cup, letting them dangle over the edge or wiggle out of the “dirt.” This is the fun part. Arrange them however you like — some crawling out, some half-buried.
- Chill thoroughly — Refrigerate the assembled cups for at least 2 hours, but 4 hours is better. The chilling time allows the pudding to set completely and the cookie crumbs to soften slightly, creating that perfect dirt-like texture. Don’t skip this step — warm dirt cups are just pudding with crumbled cookies on top.
Here’s a tip I learned the hard way: don’t add the gummy worms to the top garnish until after the cups have chilled. If you add them before, they can sink into the pudding and disappear. Add them right before serving for the best visual effect. The worms in the middle layer will stay put because the pudding is thick enough to hold them.
Cooking Tips & Techniques
Over the years of making this cozy Halloween dirt cup pudding with gummy worms, I’ve collected a few tricks that make the difference between good and great. Some of these I learned through failure, and I’m sharing them so you don’t have to make the same mistakes.
The cookie crumb texture matters — I used to pulse Oreos in the food processor until they were fine dust. The result was a dense, almost muddy texture that lacked any crunch. Now I leave some chunks. Aim for a mix of fine crumbs and pea-sized pieces. The larger bits provide texture contrast against the smooth pudding, and they look more like real soil with pebbles mixed in.
Don’t overmix the pudding — When you combine the cream cheese with the pudding mixture, stop as soon as it’s smooth. Overmixing incorporates too much air, which creates bubbles that rise to the surface and ruin the smooth top layer. If you see bubbles forming, tap the bowl on the counter a few times to release them before piping.
Keep the gummy worms soft — Gummy worms can turn rock-hard in the refrigerator if they’re exposed to air. To prevent this, make sure the worms in the middle layer are completely surrounded by pudding. For the garnish worms, add them no more than 30 minutes before serving. If you’re making these a day ahead, store the garnish worms separately and add them fresh.
Temperature matters for assembly — Work quickly when piping the pudding, especially if your kitchen is warm. The cream cheese mixture can soften the cookie crumbs if it sits too long, creating a soggy bottom layer. I keep my assembled cups in the refrigerator between batches to maintain structure.
The perfect consistency test — Before you start assembling, drop a spoonful of the pudding mixture onto a plate. It should hold its shape without spreading. If it’s too runny, whisk in an extra tablespoon of pudding mix. If it’s too thick, add a splash of milk. This simple test saves you from ending up with soupy dirt cups.
One of my biggest failures was the time I tried to rush the chilling process. I put the cups in the freezer for 30 minutes, thinking it would speed things up. The edges froze while the center stayed liquid, and the texture was completely off. Patience is not optional here — those two hours in the fridge are non-negotiable.
Variations & Adaptations
This cozy Halloween dirt cup pudding with gummy worms is endlessly adaptable. Here are some variations I’ve tried and loved:
Peanut Butter Cup Dirt — Add 1/2 cup of creamy peanut butter to the cream cheese before mixing. Beat until smooth before adding the pudding. The peanut butter adds a savory richness that pairs beautifully with the chocolate. Use peanut butter sandwich cookies instead of regular Oreos for double the peanut butter flavor. My husband says this version is his favorite, and he’s not even a peanut butter fanatic.
Vegan Halloween Cups — Use a vegan chocolate pudding mix (many brands are accidentally vegan) and coconut milk or almond milk. Replace the cream cheese with vegan cream cheese — Kite Hill works best. Use coconut whipped topping and vegan sandwich cookies. The texture is slightly different — a bit lighter — but the flavor is still rich and satisfying. I’ve served these at parties alongside the regular version, and nobody could tell the difference.
Spooky Swamp Cups — Add a few drops of green food coloring to the whipped topping before folding it into the pudding. The resulting mixture turns a murky green-brown that looks like swamp water. Use sour gummy worms for an extra tangy kick, and top with crushed graham crackers instead of chocolate cookies for a sandy, swampy texture. Kids go crazy for this version, and it’s perfect for a Halloween party where you want something a little different.
Gluten-Free Option — Use gluten-free chocolate sandwich cookies — brands like Glutino or Goodie Girl make excellent versions. Everything else in the recipe is naturally gluten-free, so this adaptation is surprisingly easy. I’ve tested this multiple times, and the only difference is that gluten-free cookies tend to be slightly more crumbly, so handle them gently when layering.
Pumpkin Spice Dirt Cups — Replace the chocolate pudding with vanilla or butterscotch pudding. Add 1/2 cup of pumpkin puree and 1 teaspoon of pumpkin pie spice to the cream cheese mixture. Use crushed ginger snap cookies instead of chocolate ones. This fall-inspired version is perfect for Thanksgiving or any cozy autumn gathering. The pumpkin flavor is subtle enough that even picky eaters enjoy it.
Serving & Storage Suggestions
These cozy Halloween dirt cup puddings with gummy worms are best served cold, straight from the refrigerator. The contrast between the chilled, creamy pudding and the slightly softened cookie crumbs is what makes them so satisfying. I recommend serving them within 24 hours of assembly for the best texture.
Presentation tips — Arrange the cups on a platter lined with fake spiderwebs or autumn leaves for a festive display. You can also nestle them in a bed of crushed chocolate cookies on a large serving tray — it looks like a mini graveyard. For extra drama, add plastic spiders or skeleton fingers to the platter. Just make sure guests know which decorations are edible and which aren’t.
What to serve alongside — These dirt cups are rich, so pair them with something light. A crisp apple cider, hot apple cider, or even a simple glass of cold milk balances the sweetness perfectly. For a full Halloween spread, serve them alongside caramel popcorn, roasted pumpkin seeds, or a cheese board with sharp cheddar and apple slices. The salty-savory flavors contrast beautifully with the sweet pudding.
Storage instructions — Cover each cup tightly with plastic wrap or a lid if your cups have them. Store in the refrigerator for up to 3 days. After 24 hours, the cookie crumbs will soften significantly, and the gummy worms may start to dissolve into the pudding. For best results, eat them within the first 2 days. Do not freeze — the pudding will separate and become watery upon thawing.
Reheating — Do not reheat these. They are meant to be served cold. If you prefer a warmer dessert, this isn’t the recipe for you. The whole point is the chilled, creamy texture against the crunchy cookies.
One thing I love about this recipe is how the flavors develop over time. The first day, the pudding is light and fluffy, the cookies are crunchy, and the gummy worms are chewy. By the second day, everything has melded together into a cohesive, almost truffle-like texture. Both versions are delicious — just different. I sometimes make a batch specifically to eat on day two because I love that softer, more unified texture.
Nutritional Information & Benefits
Let’s be honest — this cozy Halloween dirt cup pudding with gummy worms is a treat, not a health food. But that doesn’t mean it’s without some redeeming qualities. Here’s the estimated nutritional breakdown per serving (based on 8 servings):
- Calories: Approximately 380-420 per cup
- Protein: 6-7 grams (from the milk and cream cheese)
- Carbohydrates: 52-58 grams
- Fat: 18-22 grams
- Fiber: 1-2 grams (from the cookies)
- Sugar: 38-42 grams
Health benefits of key ingredients: The cream cheese adds calcium and protein, which helps slow down sugar absorption compared to eating pure sugar. The milk provides vitamin D and more calcium. Dark chocolate cookies contain small amounts of antioxidants called flavonoids, though let’s be real — you’re not eating these for the antioxidants. The gummy worms offer exactly zero nutritional value, but they provide immense joy, which counts for something.
Dietary considerations: This recipe contains dairy (milk, cream cheese, whipped topping) and gluten (cookies). It also contains soy (often in the cookies and pudding mix). For a dairy-free version, use the vegan adaptations listed above. For gluten-free, use certified gluten-free cookies. The gummy worms are typically gluten-free, but check the label to be sure — some brands use wheat starch.
Allergen warnings: Contains milk, wheat, and soy. May contain traces of peanuts and tree nuts depending on the brands used. Always check labels if serving to someone with allergies.
My personal take? Desserts like this are about celebration, connection, and joy. One dirt cup isn’t going to derail anyone’s health goals. It’s the everyday habits that matter, not the occasional treat. So go ahead, enjoy that gummy worm, and don’t feel guilty about it.
Conclusion
This cozy Halloween dirt cup pudding with gummy worms is more than just a dessert — it’s a tradition in the making. It’s the recipe I pull out every October, the one my nephew asks for by name, the one that makes even the grumpiest teenager crack a smile. It’s simple enough for a weeknight but special enough for a party, and it never fails to spark joy.
I hope you make this recipe your own. Add extra worms, use different cookie flavors, experiment with the variations — there’s no wrong way to do it. That’s the beauty of this dessert. It’s forgiving, it’s flexible, and it’s always, always delicious.
I’d love to hear how yours turn out. Did you try a fun variation? Did your kids help crush the cookies? Did you discover a new favorite combination? Drop a comment below and share your dirt cup creations. And if you’re looking for more cozy Halloween recipes, check out my spooky chocolate pumpkin bread or these caramel apple popsicles — both are perfect for your Halloween spread.
Until next time, happy cooking — and happy Halloween!
Frequently Asked Questions
Can I make these dirt cups ahead of time?
Yes, you can assemble them up to 24 hours in advance. Store them covered in the refrigerator. For best results, add the garnish gummy worms right before serving to keep them from getting soggy.
Can I use homemade pudding instead of box mix?
Absolutely. Use your favorite homemade chocolate pudding recipe, but make sure it’s fully cooled and thickened before layering. Homemade pudding may be slightly less stable than instant, so let it chill for at least 4 hours before assembling.
Why did my gummy worms get hard?
Gummy worms can harden when exposed to cold air in the refrigerator. To prevent this, make sure worms are fully surrounded by pudding in the middle layers. For garnish worms, add them no more than 30 minutes before serving. If they do get hard, let them sit at room temperature for 10-15 minutes to soften.
Can I use sugar-free pudding mix?
Yes, sugar-free pudding works fine. The texture may be slightly less creamy, and the sweetness level will be lower. You may want to add a tablespoon of sugar or honey to the cream cheese mixture to compensate.
How many cups does this recipe make?
This recipe makes 6 to 8 cups, depending on the size of your cups. Using 8-ounce cups, you’ll get 6 generous servings. Using 6-ounce cups, you’ll get 8 smaller servings, which are perfect for kids or party portions.
Pin This Recipe!
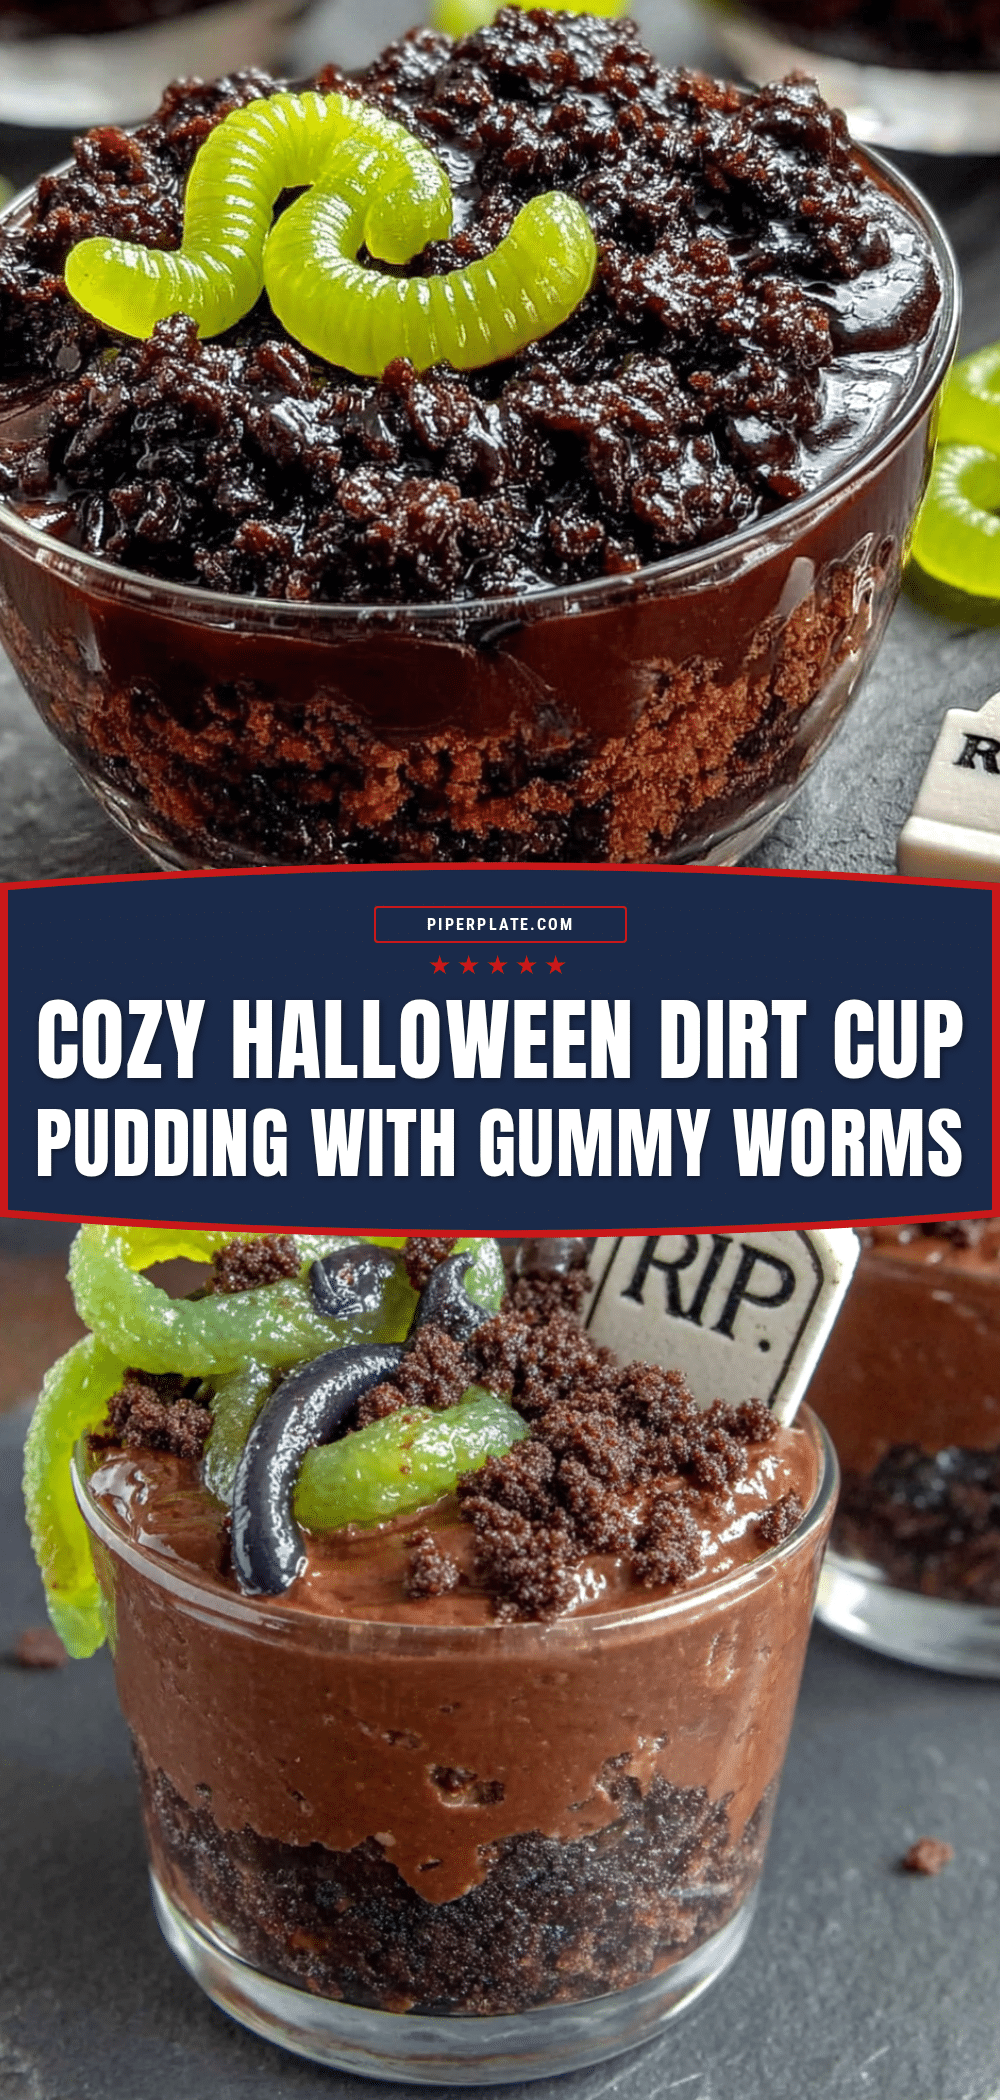
Cozy Halloween Dirt Cup Pudding with Gummy Worms
A fun and easy Halloween dessert featuring creamy chocolate pudding, crushed chocolate sandwich cookies, and gummy worms. Perfect for parties and cozy nights in.
- Prep Time: 20 minutes
- Cook Time: 0 minutes
- Total Time: 2 hours 20 minutes (includes chilling)
- Yield: 6-8 servings 1x
- Category: Dessert
- Cuisine: American
Ingredients
- 1 box (3.9 oz) instant chocolate pudding mix
- 2 cups (480 ml) whole milk
- 24 chocolate sandwich cookies (e.g., Oreos)
- 2 cups (200 g) gummy worms
- 1 cup (240 ml) frozen whipped topping (e.g., Cool Whip), thawed
- 4 oz (113 g) cream cheese, softened
- 2 tablespoons (28 g) unsalted butter, melted
- 1 teaspoon vanilla extract
- Green food coloring (optional)
Instructions
- Crush the cookies: Place 24 chocolate sandwich cookies in a large zip-top bag, seal, and crush with a rolling pin into fine crumbs with some larger pieces. You should have about 2 cups of crumbs. Set aside 1/4 cup for garnish. Stir the melted butter into the remaining crumbs until evenly moistened.
- Soften the cream cheese: Remove cream cheese from refrigerator 30 minutes before starting, or microwave for 10-15 seconds until soft but not melted.
- Make the pudding base: In a medium bowl, beat the softened cream cheese with an electric mixer until smooth and fluffy, about 1 minute. Add vanilla extract and beat until combined. In a separate bowl, whisk the chocolate pudding mix with 2 cups of cold whole milk for 2 minutes until thickened.
- Combine and fold: Add the cream cheese mixture to the pudding and whisk until completely smooth. Gently fold in 1 cup of whipped topping using a rubber spatula until just combined.
- Assemble the layers: Spoon about 2 tablespoons of the cookie crumbs into the bottom of each cup. Press down gently. Transfer the pudding mixture to a piping bag or zip-top bag with the corner snipped off. Pipe a layer of pudding over the crumbs, filling the cup about halfway. Add 2-3 gummy worms, pressing them slightly into the pudding. Top with more pudding mixture, filling cups to about 3/4 full.
- Add the dirt topping: Sprinkle the reserved cookie crumbs evenly over the top of each cup, about 1-2 tablespoons per cup, so no pudding shows through.
- Garnish with worms: Poke 2-3 gummy worms into the top of each cup, letting them dangle over the edge or wiggle out of the ‘dirt.’
- Chill thoroughly: Refrigerate the assembled cups for at least 2 hours, but 4 hours is better. For best results, add garnish worms right before serving.
Notes
For best results, add garnish gummy worms right before serving to prevent them from getting hard. The cookie crumbs can be crushed by hand for a more rustic texture. If using homemade pudding, ensure it is fully cooled before assembling.
Nutrition
- Serving Size: 1 cup (8 oz)
- Calories: 400
- Sugar: 40
- Sodium: 350
- Fat: 20
- Saturated Fat: 10
- Carbohydrates: 55
- Fiber: 1.5
- Protein: 6.5
Keywords: Halloween dessert, dirt cups, pudding, gummy worms, chocolate pudding, easy dessert, no-bake, kid-friendly


