Love this? Save it for later!
Share the inspiration with your friends
Jen wasn’t trying to be clever. I’d stopped by her place that Tuesday afternoon to drop off a book I’d borrowed, and the sight of it hit me before I even got through the doorway. There, on her kitchen counter, was this platter that looked like something out of a Halloween magazine—except it was made entirely of vegetables. Broccoli florets formed the outer ring, and a creamy dip swirled into a perfect spiderweb pattern right in the center. She was standing there in her faded concert t-shirt, casually arranging cherry tomatoes like she was just putting away groceries.
“Oh, that,” she said when she caught me staring. “It’s just for the kids’ class party tomorrow. Takes like ten minutes.”
Ten minutes. She said it like it was nothing. But honestly, I’d spent the last three Halloweens buying those overpriced pre-made veggie trays that taste like cardboard and cost a fortune. And here she was, making something that looked like a centerpiece without breaking a sweat. The casualness of it all—that’s what got me. She wasn’t trying to impress anyone. She was just putting veggies on a plate and somehow making magic.
I stood there for a solid minute just taking it in, and you know that feeling when something clicks and you think, why haven’t I been doing this my whole life? That was it. I asked her how she did it, and she literally shrugged and said, “Dip, bag, plate, swirl.” Four words. That’s all it took.
So here’s the thing—this isn’t a recipe that needs fancy skills or special trips to the store. It’s one of those ideas that makes you look like a hero with almost zero effort. And maybe you’ve been there, staring at a party sign-up sheet, dreading the “bring a veggie tray” slot because you know whatever you show up with will look sad next to the cupcakes. Well, this platter is your answer. It’s been my go-to for every Halloween gathering since that day, and I keep making it because it works every single time.
Why You’ll Love This Recipe
Let me tell you why this Quick Spiderweb Veggie Platter has become my secret weapon for Halloween season. I’ve tested it for four different parties now, and every time, it disappears before the candy bowl even gets touched. That’s not an exaggeration—kids actually reach for broccoli before chocolate when it’s arranged like this.
- Ready in 15 Minutes: No joke. From fridge to table in the time it takes to pick out a costume. Perfect for those last-minute Halloween gatherings or when you realize the school party is tomorrow and you promised to bring something.
- No Cooking Required: Zero heat, zero pots, zero cleanup. Just a cutting board, a knife, and a plate. You don’t even need to turn on the oven—which, let’s face it, is a blessing when you’re already juggling Halloween chaos.
- Actually Healthy: While everyone else is loading up on sugar, you’re bringing the one thing that makes parents breathe a sigh of relief. It’s the vegetable platter that doesn’t feel like a vegetable platter.
- Budget-Friendly: A few heads of broccoli, some dip, and whatever veggies you have in the fridge. Way cheaper than those pre-made trays, and honestly, way better looking.
- Kid-Approved Presentation: The spiderweb design is just fun enough to make veggies exciting without being intimidating. I’ve watched toddlers pick up broccoli florets just because they were part of the “web.”
What makes this different from every other veggie tray out there is the spiderweb technique. It sounds fancy, but it’s literally just a piping bag (or a zip-top bag with the corner snipped off) and a toothpick. That’s it. The visual impact, though? Huge. You get that “wow” factor without any of the stress. And honestly, there’s something satisfying about watching people’s faces when they realize the web is made of creamy dip, not something complicated.
This is the kind of recipe that makes you feel like you’ve got it together, even when you’re running on three hours of sleep and surviving on coffee. It’s Halloween entertaining for the rest of us—the ones who want to show up with something memorable but don’t have time to craft for hours.
What Ingredients You Will Need
This recipe uses simple, everyday ingredients that you probably already have in your kitchen. The magic isn’t in exotic items—it’s in how you arrange them. Here’s what you’ll need to create your own Quick Spiderweb Veggie Platter:
For the Veggie Base
- 2 heads of broccoli, cut into florets (about 4 cups) — look for crowns with tight, dark green clusters; they hold up better on the platter
- 1 large red bell pepper, sliced into thin strips — the bright red pops beautifully against the green
- 1 cup cherry tomatoes, halved if large — adds that burst of color and sweetness
- 1 cup baby carrots — no prep needed, just wash and dry
- 1 cup snap peas or snow peas — adds a nice crunch and a different shape for variety
- Optional: 1 cup cauliflower florets — if you want more white space to contrast with the dip
For the Spiderweb Dip
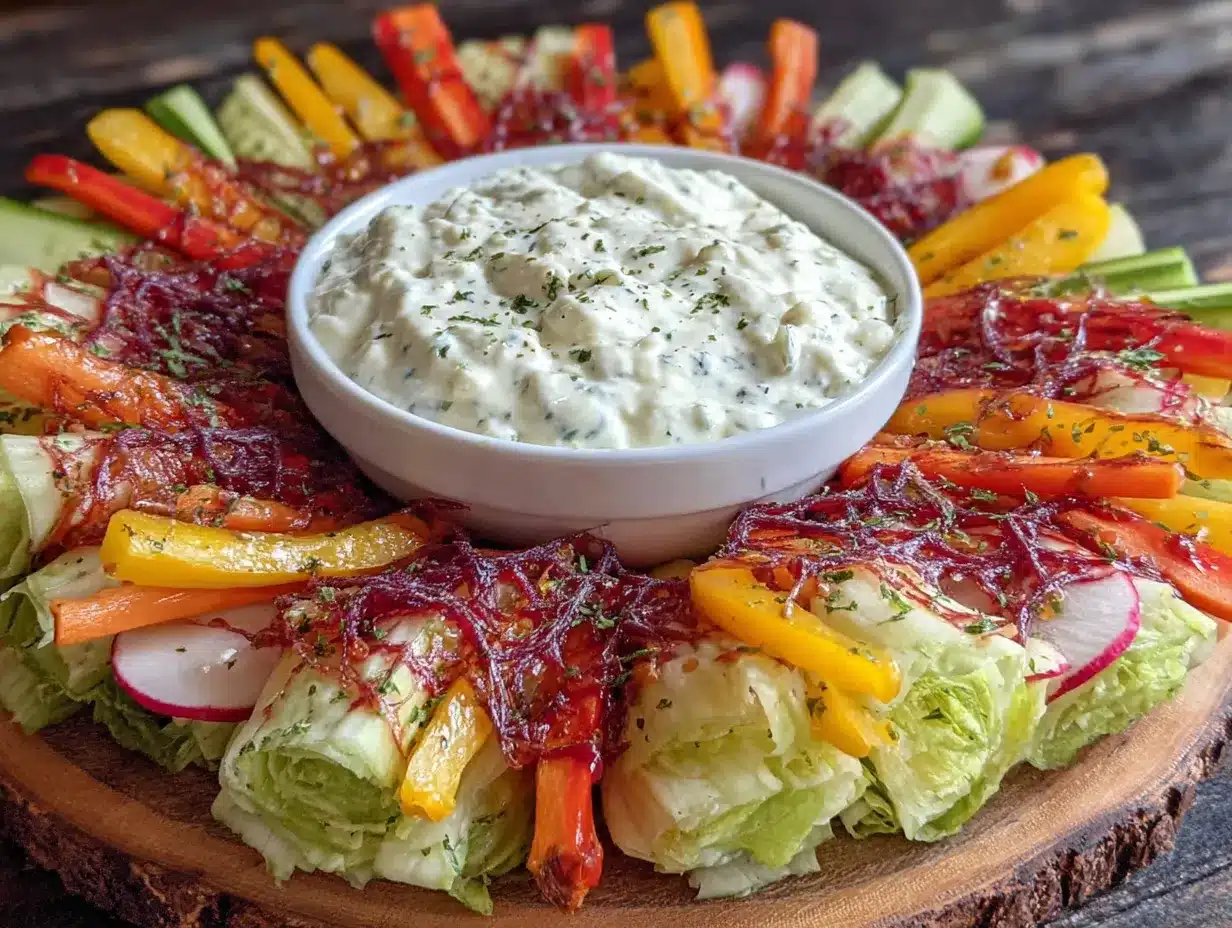
- 1 cup plain Greek yogurt (I prefer Fage for its thickness) — creates a sturdy base that holds the web pattern well
- 1/2 cup sour cream — adds richness and helps the dip pipe smoothly
- 1 packet ranch seasoning mix (or 2 tablespoons homemade ranch seasoning) — this is where all the flavor lives
- 1/4 cup mayonnaise — just a little for creaminess and stability
- 1 tablespoon lemon juice — brightens everything up and keeps the dip from tasting too heavy
For the Spider Decoration
- 1 large black olive — for the spider body
- 8 small black olive slices — for the spider legs (use the same olive, sliced thin)
Ingredient Notes: For the best texture, make sure your Greek yogurt is full-fat. The low-fat versions tend to be runnier and won’t hold the web pattern as cleanly. I’ve tried both, and honestly, the full-fat version pipes like a dream. If you’re dairy-free, you can use a thick plant-based yogurt and dairy-free sour cream—just check the consistency first. It needs to be thick enough to hold its shape when piped.
For the veggies, freshness matters here since there’s no cooking to hide behind. Look for broccoli with firm, dark green florets and stems that aren’t woody. If the broccoli looks a little tired, give it a quick soak in ice water for 10 minutes—it perks right back up. And don’t stress about getting every vegetable on the list. Use what you have. The spiderweb pattern is the star, and everything else is just supporting cast.
Equipment Needed
You don’t need much for this one, which is honestly my favorite part. Here’s what I use:
- Large round platter or serving plate (at least 12 inches across) — the round shape is key for the spiderweb effect; a white plate makes the colors pop best
- Piping bag or zip-top plastic bag — I’ve used both, and honestly, a quart-sized zip-top bag works perfectly and saves you from washing a piping bag
- Toothpick or skewer — this is your magic wand for creating the web pattern
- Sharp knife — for cutting the veggies and olives
- Cutting board — any standard one will do
- Small bowl — for mixing the dip
- Spatula or spoon — for scraping the dip into the bag
If you don’t have a piping bag, seriously, don’t buy one. A zip-top bag with the corner snipped off works exactly the same. I learned this the hard way after buying a box of piping bags that I’ve used maybe twice. The zip-top bag method is faster, cheaper, and you don’t have to deal with the dip leaking out of the top.
For the platter, a cake stand or any round dish works beautifully. I’ve even used a large dinner plate in a pinch—it just means the veggies are packed a little tighter. The important thing is that the surface is flat so the dip doesn’t run everywhere.
Preparation Method
Alright, let’s get into the actual making of this thing. I promise, it’s easier than it looks. Here’s how I do it step by step:
- Make the dip first. In a small bowl, combine the Greek yogurt, sour cream, mayonnaise, ranch seasoning, and lemon juice. Stir until smooth and well combined. Taste it—if you want it tangier, add another splash of lemon juice. If you want it more herby, add a little extra ranch seasoning. Set it aside while you prep the veggies. This gives the flavors time to meld, which honestly makes a difference.
- Prep all your vegetables. Wash and dry everything thoroughly—wet veggies will make the platter soggy. Cut the broccoli into bite-sized florets. Slice the bell pepper into thin strips about 2 inches long. Halve the cherry tomatoes if they’re large. Leave the baby carrots whole. Trim the ends off the snap peas. Pat everything dry with paper towels. This step takes the longest, but it goes fast if you do it assembly-line style.
- Fill your piping bag. Spoon the dip into a zip-top bag, pushing it down toward one corner. Snip off about 1/4 inch from that corner. You don’t need a huge opening—just enough for the dip to come out in a steady stream. If you cut too much off, the dip will come out too fast and make a mess. Trust me on this one—I learned after my first attempt looked like a blob monster instead of a spiderweb.
- Create the dip base on the platter. Place your platter in front of you. Starting from the center, pipe a small circle of dip about the size of a silver dollar. This is the center of your web. Then, working in a spiral motion, pipe concentric circles outward, leaving about an inch between each ring. You should end up with a circular dip area about 6-8 inches across, depending on your platter size. Don’t worry if the circles aren’t perfect—the toothpick step fixes everything.
- Make the spiderweb pattern. Here’s where the magic happens. Take your toothpick or skewer and start from the center. Gently drag the toothpick from the center outward through all the dip circles, like you’re drawing a line from the middle to the edge. Do this 8 times, spacing the lines evenly around the circle. Each drag creates a beautiful web-like pattern as the dip pulls into points. You’ll see the web form instantly—it’s honestly so satisfying. Wipe the toothpick clean between each drag for the cleanest lines.
- Arrange the vegetables around the web. Start with the broccoli florets, placing them around the outer edge of the dip circle. Pack them closely together so they form a full ring. Then layer the other vegetables around the broccoli, creating concentric rings or a scattered pattern—whatever looks good to you. I like to put the red bell pepper strips pointing outward like rays of a sun. The cherry tomatoes get tucked in between the broccoli. The carrots and snap peas fill in any gaps.
- Add the spider. Take your whole black olive and place it at the edge of the dip circle, like it’s crawling out of the web. Arrange the 8 thin olive slices around it as legs—4 on each side, slightly curved to look like spider legs. This little detail takes 30 seconds but makes the whole platter feel intentional and fun.
- Check your work. Step back and look at the platter from above. Are there any bare spots? Fill them in with extra veggies. Is the spiderweb still visible? If the veggies are covering too much of the dip, gently nudge them back. The web should be clearly visible in the center, with the veggies framing it like a wreath.
That’s it. Eight steps, and you’re done. The whole process takes about 15 minutes, and most of that is just cutting vegetables. Once you’ve done it once, you’ll be able to whip it out in under 10 minutes flat.
Cooking Tips & Techniques
I’ve made this platter enough times to learn what works and what doesn’t. Here are the things I wish someone had told me before my first attempt:
Dry your vegetables thoroughly. This is the number one mistake people make. Wet veggies release moisture that seeps into the dip and turns it into a watery mess. After washing, lay everything out on a clean kitchen towel and pat it dry. For broccoli, I even spin it in a salad spinner if I have one. The drier the veggies, the better the platter holds up.
Don’t overfill the piping bag. You only need about half a cup of dip for the web pattern. If you fill the whole bag, it’s harder to control and more likely to leak out the top. I learned this the messy way—dip all over my hands, all over the counter, all over everything. Start with less, and you can always refill if you need more.
Practice the toothpick drag on a plate first. Before you do it on the actual platter, try it on a clean plate with a tiny bit of dip. You’ll get a feel for how fast to pull and how much pressure to use. Slow and steady is the key—too fast and the lines get jagged; too slow and they blur together.
Timing is everything. Assemble this platter no more than 2 hours before serving. Any longer, and the veggies start to wilt and the dip can separate. If you need to prep ahead, cut all the vegetables and make the dip the night before, then assemble everything right before the party. Store the cut veggies in airtight containers with a damp paper towel on top to keep them crisp.
Keep it cold. If you’re serving this at a party, place the platter on a bed of ice or use a chilled serving dish. The dip stays thick and the veggies stay crunchy when they’re cold. I’ve made the mistake of leaving it out for an hour, and the dip gets runny and sad. Cold is your friend here.
Variations & Adaptations
One of the best things about this platter is how flexible it is. Here are some variations I’ve tried and loved:
Dairy-Free Version: Swap the Greek yogurt for a thick coconut or soy yogurt, use dairy-free sour cream, and replace the mayonnaise with vegan mayo. The ranch seasoning is usually dairy-free, but check the label to be sure. The texture will be slightly different, but the web pattern still works beautifully. I made this for a friend with a dairy allergy, and honestly, no one noticed the difference.
Spicy Southwest Twist: Add 1/4 cup salsa to the dip and swap the ranch seasoning for taco seasoning. Use black beans and corn as part of the veggie arrangement. The colors are amazing—green, red, yellow, and black beans. It gives the whole platter a Day of the Dead vibe that’s perfect for Halloween. I tried this one year, and it was gone in 20 minutes.
Seasonal Veggie Swap: In the fall, use roasted pumpkin seeds as a garnish and add sliced cucumber rounds. In the summer, use fresh corn kernels and zucchini ribbons. The spiderweb pattern works with any vegetables you have on hand. The key is variety in color and shape—you want the platter to look abundant and interesting.
Kid-Friendly Version: Use a sweeter dip like honey mustard or a yogurt-based fruit dip. Arrange the veggies in fun shapes—broccoli trees, carrot stars. Let the kids help with the toothpick web part (under supervision, of course). I did this with my niece last year, and she was so proud of her “spiderweb masterpiece” that she actually ate vegetables without being asked.
Spooky Color Theme: Go all in on orange and black. Use orange bell peppers, black olives, purple cauliflower, and dark leafy greens. The contrast is striking and very Halloween-appropriate. Add some edible googly eyes (available at craft stores) to the spider for extra fun.
Serving & Storage Suggestions
This platter is best served cold and fresh, but there are ways to work around its limitations.
Serving Temperature: Serve directly from the refrigerator. The dip should be cold and thick, the veggies crisp and refreshing. If the platter has been sitting out for more than 30 minutes, give it a quick refresh by adding a few ice cubes around the edges (not in the dip).
Presentation Tips: Place the platter on a cake stand or elevated surface so the spiderweb is at eye level. This makes a huge difference—people notice it immediately and can’t help but comment. Add a few fake spiders around the base for extra Halloween flair. I found a pack of plastic spiders at the dollar store, and they add so much personality for basically nothing.
What to Serve With It: This platter pairs perfectly with other Halloween party foods. It balances out the sweetness of cupcakes and candy with something fresh and crunchy. I like to serve it alongside a bowl of popcorn with nutritional yeast (looks like fake cheese) and some spooky-shaped cheese crackers. For drinks, apple cider or a simple punch works great.
Storage: If you have leftovers (unlikely, but possible), separate the veggies from the dip. Store the veggies in an airtight container with a paper towel to absorb moisture—they’ll keep for 2-3 days. The dip can be stored separately in a sealed container for up to 5 days. Do not store the assembled platter; the veggies will get soggy and the dip will break down.
Reheating: There’s no reheating involved here, but if the dip has been refrigerated and thickened too much, let it sit at room temperature for 10 minutes before serving. Give it a good stir to bring back the creamy texture.
Flavor Development: The dip actually gets better after a day in the fridge. The flavors meld together and become more rounded. If you’re making this for a party, prepare the dip the night before. Just don’t assemble the whole platter until you’re ready to serve.
Nutritional Information & Benefits
Let’s be real—this is a vegetable platter, so it’s pretty good for you. Here’s a rough breakdown per serving (about 1 cup of veggies with 2 tablespoons of dip):
| Nutrient | Amount Per Serving |
|---|---|
| Calories | 120-150 |
| Protein | 5-7g |
| Carbohydrates | 10-12g |
| Fiber | 3-4g |
| Fat | 7-9g |
Health Highlights: Broccoli is packed with vitamin C and fiber—one serving gives you about half your daily vitamin C needs. Greek yogurt adds probiotics for gut health and protein to keep you full. The colorful vegetables provide a range of antioxidants, including beta-carotene from the carrots and lycopene from the tomatoes.
Dietary Considerations: This recipe is naturally gluten-free and can be made dairy-free with simple substitutions. It’s vegetarian and can be made vegan by using plant-based yogurt and mayo. The main allergens to watch for are dairy (in the yogurt and sour cream) and eggs (in some mayonnaise brands—check the label).
Honestly, I love that this platter lets me feel good about what I’m serving at a party where everyone else is eating candy. It’s not about being preachy—it’s about having an option that makes you feel just a little bit better about the whole sugar overload situation.
Conclusion
So there it is—the Quick Spiderweb Veggie Platter that started with a casual Tuesday afternoon visit and has become my Halloween party staple. It’s proof that you don’t need fancy skills, expensive ingredients, or hours of time to create something that stops people in their tracks.
What I love most about this recipe is how it makes me feel when I bring it to a party. Instead of apologizing for the veggie tray, I get to watch people’s faces light up when they see the spiderweb. They take photos, they ask how I did it, and then they eat every last broccoli floret. It’s a small victory, but honestly, it’s one of my favorite Halloween traditions now.
I hope you give this a try for your next Halloween gathering. Don’t stress about making it perfect—the beauty of this platter is that even a slightly messy web looks intentional and cool. And if you come up with your own twist, I’d love to hear about it. Drop a comment below and tell me how your spiderweb turned out, or share a photo if you’re feeling brave. Happy Halloween, and happy snacking!
Frequently Asked Questions
Can I make this platter the night before?
I don’t recommend assembling the whole platter the night before, but you can definitely prep everything in advance. Cut the vegetables and store them in airtight containers with damp paper towels. Make the dip and refrigerate it in a sealed container. Then assemble everything about 30 minutes before serving. The vegetables will stay much crispier this way.
What if I don’t have a piping bag?
No problem at all! A zip-top plastic bag works perfectly. Just spoon the dip into one corner, seal the bag, and snip off a tiny piece of the corner. You can also use a plastic squeeze bottle if you have one, or even a spoon to carefully drizzle the dip in circles. The toothpick drag technique works regardless of how you apply the dip.
How do I keep the veggies from getting soggy?
The secret is drying them thoroughly before arranging. After washing, lay everything out on a clean kitchen towel and pat dry. For broccoli and cauliflower, a salad spinner works wonders. You can also place a layer of paper towels under the veggies on the platter to absorb any moisture that accumulates. And don’t assemble more than 2 hours before serving.
Can I use a different dip?
Absolutely! The ranch dip is classic, but you can use any thick, pipeable dip. Hummus works great (try a roasted red pepper hummus for extra color), as does spinach and artichoke dip, or even a thick cheese sauce. Just make sure the dip is thick enough to hold the web pattern—thin dips will just blur together when you drag the toothpick through.
How many people does this platter serve?
As a party appetizer, this platter serves about 8-10 people. If it’s the only vegetable option, it might go faster. For a kids’ class party, it serves about 12-15 children (they tend to take smaller portions). If you’re serving a crowd, you can easily double the recipe and make two platters—just use separate piping bags for the dip.
Pin This Recipe!
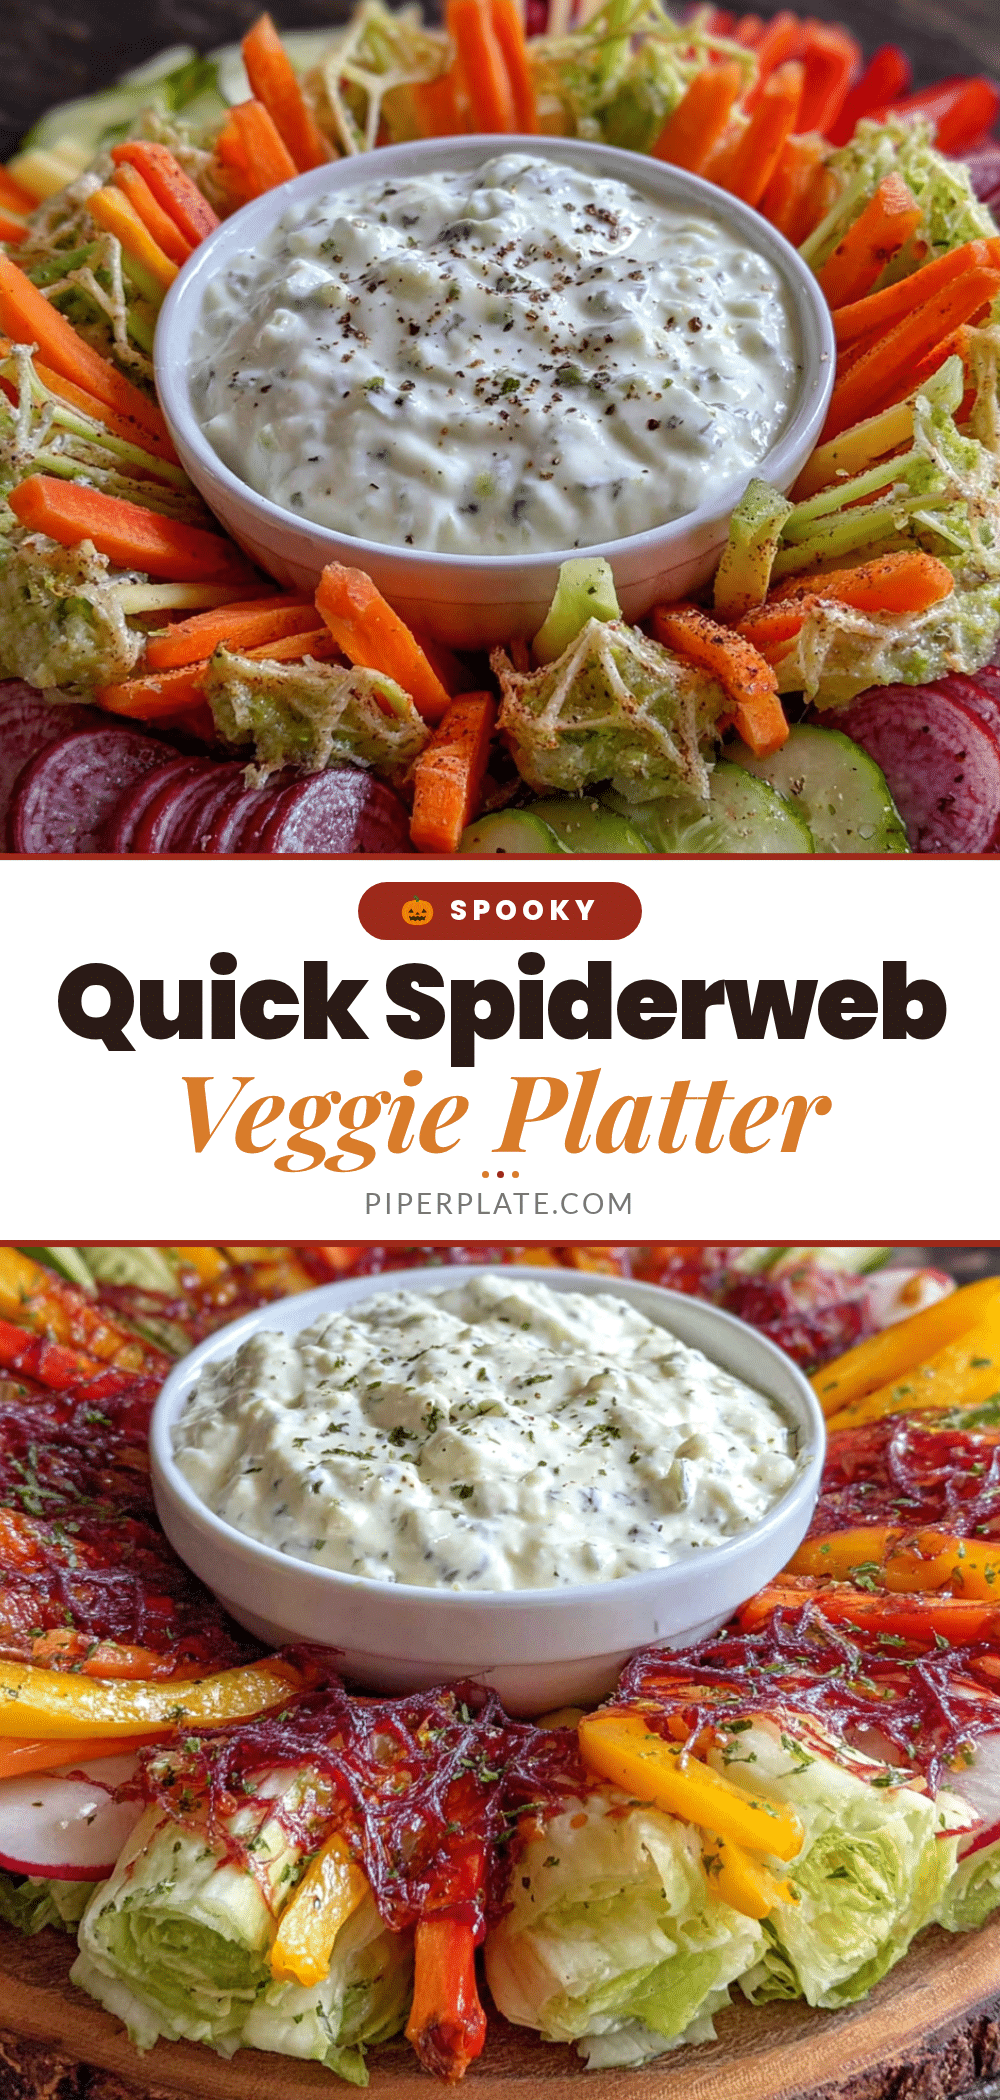
Quick Spiderweb Veggie Platter Easy Halloween Appetizer

A stunning Halloween vegetable platter featuring a creamy spiderweb dip surrounded by fresh, crunchy vegetables. Ready in just 15 minutes with no cooking required, this kid-approved appetizer is perfect for parties and school events.
- Prep Time: 15 minutes
- Cook Time: 0 minutes
- Total Time: 15 minutes
- Yield: 8-10 servings 1x
- Category: Appetizer
- Cuisine: American
Ingredients
- 2 heads broccoli, cut into florets (about 4 cups)
- 1 large red bell pepper, sliced into thin strips
- 1 cup cherry tomatoes, halved if large
- 1 cup baby carrots
- 1 cup snap peas or snow peas
- 1 cup cauliflower florets (optional)
- 1 cup plain Greek yogurt (full-fat recommended)
- 1/2 cup sour cream
- 1 packet ranch seasoning mix (or 2 tablespoons homemade ranch seasoning)
- 1/4 cup mayonnaise
- 1 tablespoon lemon juice
- 1 large black olive (for spider body)
- 8 small black olive slices (for spider legs)
Instructions
- Make the dip first. In a small bowl, combine the Greek yogurt, sour cream, mayonnaise, ranch seasoning, and lemon juice. Stir until smooth and well combined. Taste and adjust seasoning if desired. Set aside to let flavors meld.
- Prep all your vegetables. Wash and dry everything thoroughly. Cut broccoli into bite-sized florets. Slice bell pepper into thin strips about 2 inches long. Halve cherry tomatoes if large. Leave baby carrots whole. Trim ends off snap peas. Pat everything dry with paper towels.
- Fill your piping bag. Spoon the dip into a zip-top bag, pushing it down toward one corner. Snip off about 1/4 inch from that corner.
- Create the dip base on the platter. Place your platter in front of you. Starting from the center, pipe a small circle of dip about the size of a silver dollar. Then, working in a spiral motion, pipe concentric circles outward, leaving about an inch between each ring. You should end up with a circular dip area about 6-8 inches across.
- Make the spiderweb pattern. Take a toothpick or skewer and start from the center. Gently drag the toothpick from the center outward through all the dip circles, like drawing a line from the middle to the edge. Do this 8 times, spacing the lines evenly around the circle. Wipe the toothpick clean between each drag for the cleanest lines.
- Arrange the vegetables around the web. Start with broccoli florets around the outer edge of the dip circle, packing them closely together. Layer other vegetables around the broccoli, creating concentric rings or a scattered pattern. Place red bell pepper strips pointing outward like rays. Tuck cherry tomatoes between broccoli. Fill gaps with carrots and snap peas.
- Add the spider. Place the whole black olive at the edge of the dip circle. Arrange 8 thin olive slices around it as legs—4 on each side, slightly curved to look like spider legs.
- Check your work. Step back and look at the platter from above. Fill any bare spots with extra veggies. Ensure the spiderweb is clearly visible in the center with veggies framing it like a wreath.
Notes
Dry vegetables thoroughly to prevent soggy dip. Assemble no more than 2 hours before serving. For best results, use full-fat Greek yogurt for a thicker dip that holds the web pattern. The dip can be made a day ahead and refrigerated. Store cut veggies in airtight containers with damp paper towels overnight for easy assembly.
Nutrition
- Serving Size: 1 cup of veggies wit
- Calories: 120150
- Sugar: 45
- Sodium: 300400
- Fat: 79
- Saturated Fat: 34
- Carbohydrates: 1012
- Fiber: 34
- Protein: 57
Keywords: Halloween appetizer, spiderweb veggie platter, easy Halloween recipe, vegetable platter, healthy Halloween snack, no-cook appetizer, kid-friendly Halloween


