Love this? Save it for later!
Share the inspiration with your friends
I was halfway through a stack of tax paperwork at my kitchen table—a truly miserable way to spend a Saturday—when my accountant, Mr. Henderson, called to confirm a meeting. He’s a quiet man in his sixties who wears the same type of cardigan every time I see him and speaks mostly in numbers. I never expected him to pivot from deductions to dessert. But there he was, on speakerphone, wrapping up our conversation when he said, almost as an afterthought, “You know, my wife made those pecan bars for the office party last week. She used maple syrup instead of corn syrup and a little bourbon. Said it cut the sugar without cutting the taste.” I scribbled it on the corner of an envelope, half-listening, thinking I’d never actually try it. But the idea stuck. A few days later, with tax season still looming, I found myself pulling out that envelope and staring at his words. Honestly, I was skeptical. Pecan pie without the usual sugar bomb? It felt like a trick. But I had the ingredients, a restless curiosity, and a serious craving for something that felt like a hug. So I gave it a shot. And let me tell you, Mr. Henderson’s wife might just be a kitchen genius.
These Lighter Maple Bourbon Pecan Pie Bars are everything you want from the classic dessert—the gooey, nutty, buttery filling and that signature crunch—but they don’t leave you feeling like you need a nap afterward. The maple syrup adds a deep, almost woodsy sweetness that plays perfectly with the warm kick of bourbon. It’s not a boozy punch, just a whisper of complexity that makes you take a second bite to figure out what’s going on. And because we’re using a fraction of the sugar and a smarter crust, you get all the satisfaction without the guilt. Maybe you’ve been there—standing over a pan of pecan pie, loving every bite but hating how it sits in your stomach. This version solves that. It’s become my go-to for fall gatherings, holiday potlucks, or just a Tuesday when I need a little comfort. Every time I make them, I think of that phone call and the unlikely source of my new favorite recipe. It’s proof that good ideas can come from anywhere—even your accountant.
Why You’ll Love This Recipe
These bars aren’t just another dessert recipe. They’re the result of several rounds of testing, a few burnt edges, and one very happy kitchen. Here’s why they’ve earned a permanent spot in my rotation:
- Quick & Easy: From start to finish, these bars come together in about 45 minutes. No rolling dough, no chilling for hours—just mix, press, bake, and pour. Perfect for those moments when a pie craving hits and you need it now.
- Simple Ingredients: You probably have most of these in your pantry right now. Butter, flour, eggs, pecans. The only special items are maple syrup and bourbon, and both are easy to find and keep well.
- Perfect for Entertaining: These bars slice cleanly, travel well, and look impressive on a platter. They’re a hit at Thanksgiving, Christmas parties, or casual get-togethers where you want to offer something special without spending all day in the kitchen.
- Crowd-Pleaser: I’ve served these to kids, grandparents, and picky eaters. Everyone goes back for seconds. The maple-bourbon combo is approachable enough for all ages but sophisticated enough for adult palates.
- Unbelievably Delicious: The texture is spot-on—a buttery shortbread crust, a rich and sticky filling, and toasted pecans on top. It tastes indulgent, but it’s actually lighter than traditional pecan pie. That’s the magic of using maple syrup and cutting back on refined sugar.
What sets these bars apart is the balance. The crust isn’t too sweet, the filling isn’t cloying, and the bourbon adds a layer of warmth that makes every bite interesting. It’s comfort food reimagined—healthier, faster, but with the same soul-soothing satisfaction. Perfect for impressing guests without stress, or turning a simple evening into something memorable.
What Ingredients You Will Need
This recipe uses simple, wholesome ingredients to deliver bold flavor and satisfying texture without the fuss. Most of these are pantry staples, and I’ve included notes on substitutions so you can adapt based on what you have on hand.
For the Crust
- 1 ½ cups all-purpose flour (I use King Arthur for consistent results; you can substitute a 1:1 gluten-free baking flour if needed)
- ½ cup unsalted butter, cold and cubed (cold butter is key for a flaky, tender crust; if using salted butter, reduce the added salt slightly)
- ¼ cup granulated sugar (just enough to give the crust a hint of sweetness without overpowering the filling)
- ¼ teaspoon salt (fine sea salt works best)
- 2-3 tablespoons ice water (add slowly—you want the dough to just come together, not be wet)
For the Filling
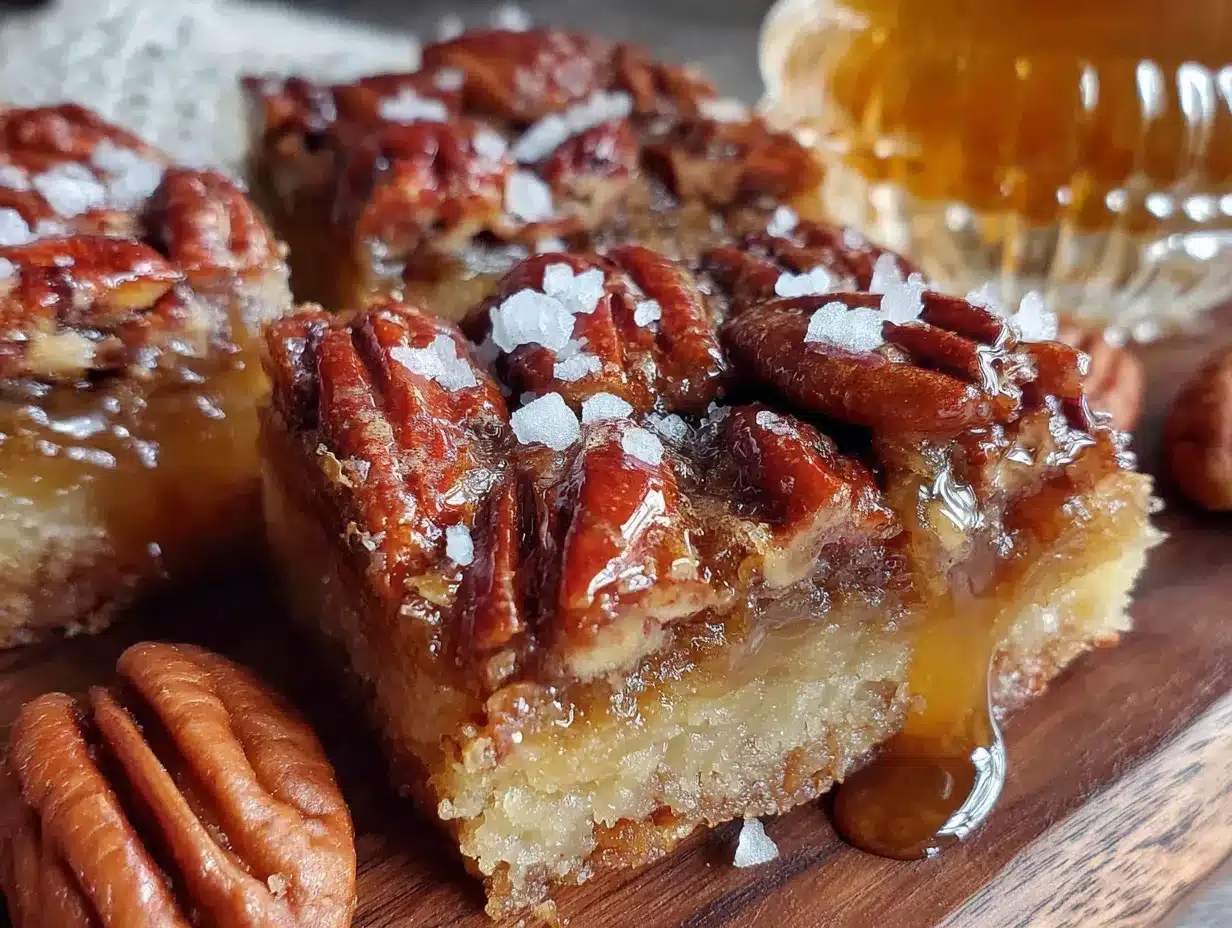
- ¾ cup pure maple syrup (grade A dark amber is my preference for its robust flavor; avoid pancake syrup, which is thinner and sweeter)
- ¼ cup packed light brown sugar (adds depth and moisture; you can use coconut sugar for a less refined option)
- 2 large eggs, room temperature (room temperature eggs blend more smoothly into the filling; if you forgot to set them out, place them in warm water for 5 minutes)
- 2 tablespoons unsalted butter, melted (gives the filling richness; you can use coconut oil for a dairy-free version)
- 2 tablespoons bourbon (I recommend a smooth, not-too-smoky bourbon like Buffalo Trace or Maker’s Mark; the alcohol mostly cooks off, leaving just the flavor. You can substitute 1 teaspoon vanilla extract plus 1 tablespoon water if you prefer no alcohol)
- 1 teaspoon vanilla extract (pure extract, not imitation, for the best flavor)
- ¼ teaspoon salt (balances the sweetness)
- 2 cups pecan halves or chopped pecans (pecan halves look prettier on top; chopped pecans distribute more evenly. Both work great—use what you have)
Ingredient Selection Tip: For the best texture, look for fresh pecans. Stale pecans can taste bitter or rancid. I store mine in the freezer to keep them fresh longer. If you’re buying from a bulk bin, give them a sniff—they should smell nutty and sweet, not like old oil.
Substitution Guidance: For a nut-free version, you can replace the pecans with roasted pumpkin seeds or sunflower seeds, though the flavor profile will change significantly. For a gluten-free crust, use a high-quality 1:1 gluten-free flour blend that contains xanthan gum. I’ve tried this with oat flour as well, and it works, but the crust is more crumbly.
Equipment Needed
You don’t need a fancy kitchen to make these bars. Here’s what you’ll need:
- 9×13-inch baking pan (a metal pan gives a crisper crust than glass; if using glass, reduce the oven temperature by 25°F and check for doneness a few minutes earlier)
- Parchment paper (essential for easy removal—leave an overhang on two sides to lift the bars out cleanly)
- Large mixing bowls (one for the crust, one for the filling)
- Pastry cutter or two forks (to cut the butter into the flour for the crust; a food processor works too, but be careful not to overwork the dough)
- Whisk (for combining the filling ingredients smoothly)
- Measuring cups and spoons (accurate measurements matter in baking)
- Rolling pin (optional) (you can press the crust into the pan with your fingers, so a rolling pin isn’t necessary, but it helps if you want an even thickness)
- Cooling rack (allows the bars to cool evenly and prevents a soggy bottom)
I’ve made these bars with a cheap baking pan from the grocery store and they turned out just fine. The key is lining the pan well with parchment. If you don’t have a pastry cutter, two forks work perfectly—just move them in opposite directions to cut the butter into the flour. And honestly, if you don’t have a cooling rack, you can use the stovetop grates or even a clean dish towel. We’re not running a test kitchen here!
Preparation Method
Let’s get baking. Follow these steps carefully, and you’ll have a pan of golden, gooey bars that will disappear fast.
- Preheat your oven to 350°F (175°C). Line your 9×13-inch baking pan with parchment paper, leaving an overhang on the two long sides. This will let you lift the entire block of bars out later for easy slicing. Lightly grease the parchment with a little butter or non-stick spray.
- Make the crust. In a large mixing bowl, whisk together the flour, granulated sugar, and salt. Add the cold, cubed butter. Using a pastry cutter or two forks, cut the butter into the flour mixture until it resembles coarse meal with pea-sized butter pieces. Don’t overdo it—those little butter lumps create flakiness. Drizzle in the ice water, one tablespoon at a time, tossing with a fork until the dough just starts to come together. It should hold together when you squeeze a handful, but not be sticky.
- Press the crust into the pan. Transfer the dough to your prepared pan. Press it evenly into the bottom, using your fingers or the bottom of a flat measuring cup. Make sure it’s an even layer, especially at the edges. Prick the crust all over with a fork (this prevents it from puffing up). Bake for 15-18 minutes, until the edges are just lightly golden. The center might still look a little pale—that’s fine. Set the pan on a cooling rack while you make the filling.
- Prepare the filling. In a medium bowl, whisk together the maple syrup, brown sugar, eggs, melted butter, bourbon, vanilla extract, and salt until smooth and well combined. The mixture should be a uniform golden brown. Don’t over-whisk—you don’t want to incorporate too much air, which can cause the filling to puff up and then collapse.
- Add the pecans. Sprinkle the pecan halves or chopped pecans evenly over the pre-baked crust. Pour the maple-bourbon mixture over the pecans, making sure it spreads evenly. The pecans will float a bit—that’s okay. Use a spatula to gently nudge them into a single, even layer if needed.
- Bake the bars. Return the pan to the oven and bake for 22-28 minutes. The filling should be set around the edges but still have a slight jiggle in the center when you gently shake the pan. It will continue to set as it cools. The top should be a deep golden brown and slightly puffed. If the edges start to look too dark before the center is set, tent the pan loosely with foil.
- Cool completely. Place the pan on a cooling rack and let the bars cool completely at room temperature. This is crucial—at least 2 hours. If you slice them while they’re warm, the filling will ooze everywhere. I know it’s tempting, but patience pays off here. Once cool, use the parchment overhang to lift the entire block out of the pan and onto a cutting board.
- Slice and serve. Use a sharp chef’s knife to cut the bars into squares or rectangles. For clean slices, wipe the knife clean between cuts. I usually cut them into 24 small bars (4 rows by 6 rows), which is perfect for parties. For a more generous serving, cut into 12 larger bars.
Troubleshooting Tip: If your crust seems too crumbly after baking, you might have added too little water or overworked the dough. Next time, add the water a tablespoon at a time until the dough holds together easily. If the filling seems too runny after baking, it might need another 2-3 minutes in the oven. The jiggle test is your best friend—it should wobble like Jell-O, not ripple like water.
Cooking Tips & Techniques
I’ve made these bars more times than I can count, and I’ve learned a few things the hard way. Here are my best tips for perfect results every time.
Don’t skip the pre-bake for the crust. I tried skipping this step once, thinking it would save time. The result was a soggy, underdone crust that couldn’t support the filling. Pre-baking for just 15-18 minutes creates a barrier that keeps the crust crisp. It’s a small step that makes a huge difference.
Use room temperature eggs. Cold eggs can seize the melted butter in the filling, creating a lumpy texture. If you forgot to take them out of the fridge, place them in a bowl of warm water for 5 minutes. It’s a simple trick that ensures a smooth, silky filling.
Watch the baking time. Ovens vary, and the difference between perfectly set bars and overbaked ones is just a couple of minutes. Start checking at the 22-minute mark. The edges should be set and golden, and the center should have a slight jiggle. If you insert a toothpick into the center, it should come out with a little sticky filling—not wet batter. Overbaking will make the filling tough and the pecans bitter.
Let them cool completely. I cannot stress this enough. I once cut into a pan after just an hour, and the filling ran everywhere. It was still delicious, but it looked like a mess. Cooling for the full 2 hours (or even overnight) allows the filling to set into that perfect, sliceable consistency. If you’re in a hurry, you can pop the pan in the fridge for 30 minutes after it’s cooled to room temperature, but don’t rush the initial cool-down.
Toast your pecans first (optional but recommended). Spread the pecans on a baking sheet and toast them at 350°F for 5-7 minutes, until fragrant. This deepens their nutty flavor and adds a lovely crunch. Just watch them closely—they burn quickly. I forgot them in the oven once and ended up with a smoky kitchen and a sad batch of charred pecans.
Variations & Adaptations
One of the best things about this recipe is how adaptable it is. Here are a few ways to make it your own.
Bourbon-Free Version: If you’re serving kids or prefer to skip the alcohol, simply replace the bourbon with 1 teaspoon of vanilla extract plus 1 tablespoon of water or apple juice. You’ll lose that warm, oaky note, but the maple flavor still shines. I’ve made this version for a family gathering with young kids, and no one missed the bourbon.
Chocolate Maple Pecan Bars: For a richer twist, sprinkle ½ cup of dark chocolate chips over the crust before adding the pecans and filling. The chocolate melts into the filling and creates these pockets of gooey goodness. It’s a little more indulgent, but sometimes that’s exactly what you need. I tried this on a whim one rainy Sunday, and it’s become my secret weapon for potlucks.
Gluten-Free Adaptation: Use a 1:1 gluten-free flour blend in the crust. I’ve had great results with Bob’s Red Mill 1-to-1 Baking Flour. The texture is slightly more crumbly, but the flavor is still spot-on. Just be sure to press the crust firmly into the pan and let it cool completely before slicing.
Vegan Option: Replace the butter in the crust with cold coconut oil (use the solid, not liquid, form). For the filling, use 2 flax eggs (2 tablespoons ground flaxseed mixed with 6 tablespoons water, let sit for 5 minutes) and replace the melted butter with coconut oil. The texture will be a bit different—less rich, but still delicious. I’ve made this for a vegan friend, and she went back for thirds.
Seasonal Spice Version: Add 1 teaspoon of pumpkin pie spice or a mix of cinnamon, nutmeg, and ginger to the filling. This is perfect for fall gatherings or Thanksgiving. The warm spices complement the maple and bourbon beautifully. I made this last November, and it smelled like the holidays in my kitchen.
Serving & Storage Suggestions
These bars are versatile and can be served in many ways. Here’s how to get the most out of them.
Serving Temperature: These bars are best served at room temperature. The filling is perfectly set and the crust is tender. If you’ve stored them in the fridge, let them sit on the counter for 15-20 minutes before serving. You can also serve them slightly warm—just pop them in a 300°F oven for 5 minutes—but be aware that the filling will be a bit softer.
Presentation Ideas: Dust the tops with a little powdered sugar just before serving for a pretty, snowy look. Or drizzle with a simple maple glaze (1 cup powdered sugar whisked with 2 tablespoons maple syrup and a splash of milk). Arrange the bars on a wooden board with fresh rosemary sprigs and a pile of pecans for a rustic, Pinterest-worthy display.
Pairings: These bars are fantastic with a cup of strong coffee or a mug of chai tea. For a dessert spread, serve them alongside vanilla ice cream or a dollop of lightly sweetened whipped cream. If you’re feeling fancy, a glass of bourbon on the rocks makes a perfect adult pairing. I once served them at a brunch with a side of fresh fruit salad, and the contrast was lovely.
Storage Instructions: Store the bars in an airtight container at room temperature for up to 3 days. If your kitchen is warm, you can refrigerate them for up to a week—just bring them to room temperature before serving. To freeze, wrap individual bars tightly in plastic wrap, then place them in a freezer-safe bag or container. They’ll keep for up to 3 months. Thaw overnight in the fridge or at room temperature for about an hour.
Flavor Development: Honestly, these bars taste even better the next day. The flavors meld together, and the filling becomes more cohesive. If you can resist eating them right away, make them a day ahead. I’ve found that the maple and bourbon flavors deepen overnight, creating a more complex, satisfying bar.
Nutritional Information & Benefits
While these bars are a treat, they’re a lighter version of the classic. Here’s a rough estimate per bar (based on 24 servings):
- Calories: Approximately 190-210
- Fat: 12g
- Saturated Fat: 4g
- Carbohydrates: 22g
- Sugar: 15g
- Protein: 3g
- Fiber: 1g
Health Benefits of Key Ingredients: Pecans are a great source of healthy monounsaturated fats, which are good for heart health. They also contain antioxidants and minerals like zinc and magnesium. Maple syrup, while still a sugar, has a lower glycemic index than refined sugar and contains small amounts of minerals like manganese and zinc. Using maple syrup instead of corn syrup (which is often used in traditional pecan pie) reduces the processed sugar content and adds a more complex flavor.
Dietary Considerations: This recipe is vegetarian and can be made gluten-free or vegan with the substitutions listed above. It contains dairy (butter), eggs, and nuts (pecans). If you have a nut allergy, you can substitute pumpkin seeds or omit the nuts entirely for a maple-bourbon bar, though the texture will be different.
Personal Wellness Perspective: I believe in balance. These bars are a treat, but they’re a smarter treat. They satisfy that deep craving for something sweet and nutty without the sugar crash that often follows traditional pecan pie. I feel good serving them to my family and friends, knowing they’re getting a little less refined sugar and a little more real flavor. That’s a win in my book.
Conclusion
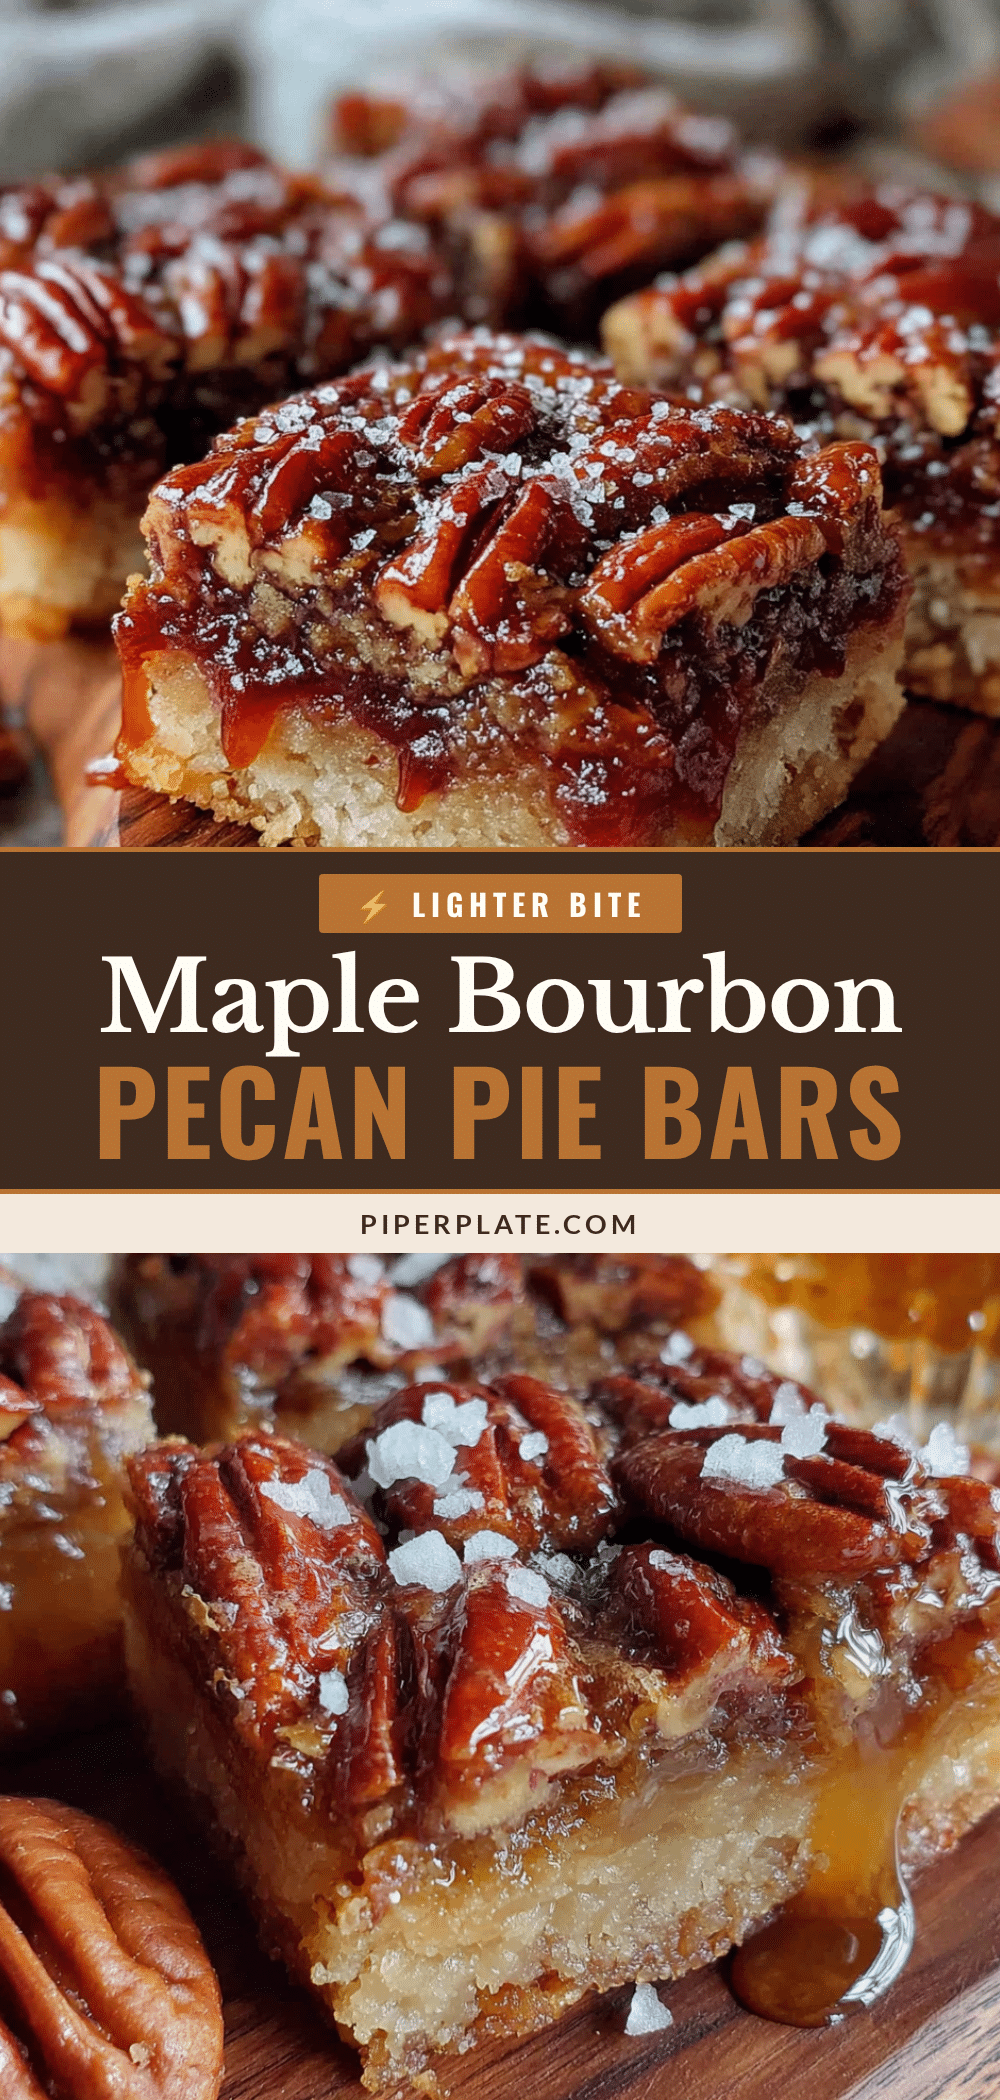
These Lighter Maple Bourbon Pecan Pie Bars are proof that you don’t have to sacrifice flavor for a healthier dessert. They’re everything you love about pecan pie—the buttery crust, the gooey filling, the crunchy pecans—but with a lighter touch and a sophisticated twist. The maple syrup and bourbon create a depth of flavor that makes every bite interesting, and the simpler crust means you can have them on the table in less than an hour.
I love this recipe because it reminds me that good ideas can come from the most unexpected places. An accountant, a phone call, and a scribbled note on an envelope—that’s where this journey started. And now it’s become a staple in my kitchen. I hope it becomes one in yours too.
Don’t be afraid to customize these bars to your taste. Add chocolate, swap the bourbon, or play with the spices. Baking is about making a recipe your own. And when you do, I’d love to hear about it. Leave a comment below and tell me how yours turned out. Did you try a variation? Did you serve them at a party? Share your stories—I read every single one. Happy baking, friends!
Frequently Asked Questions
Can I use a different type of syrup?
Yes, you can use honey or agave nectar instead of maple syrup, but the flavor will change. Honey is sweeter and has a floral note, while agave is milder. Maple syrup gives these bars their signature taste, so I recommend sticking with it if possible.
Can I make these bars ahead of time?
Absolutely! In fact, they taste better the next day. You can make them up to 3 days in advance and store them in an airtight container at room temperature. For longer storage, freeze them for up to 3 months.
Can I skip the bourbon?
Yes, just replace it with 1 teaspoon of vanilla extract and 1 tablespoon of water or apple juice. The bars will still be delicious, just without the warm, oaky note from the bourbon.
Why did my filling turn out runny?
This usually happens if the bars weren’t baked long enough or if they were cut while still warm. Make sure the edges are set and the center has only a slight jiggle before removing from the oven. And always cool completely—at least 2 hours—before slicing.
Can I use a different nut?
Yes, walnuts or almonds would work well. Walnuts have a slightly bitter edge that pairs nicely with the maple, while almonds add a different kind of crunch. Just keep in mind that the flavor profile will shift. Pecans are classic for a reason, but don’t be afraid to experiment.
Pin This Recipe!
Lighter Maple Bourbon Pecan Pie Bars
These Lighter Maple Bourbon Pecan Pie Bars are everything you want from the classic dessert—the gooey, nutty, buttery filling and that signature crunch—but they don’t leave you feeling like you need a nap afterward. The maple syrup adds a deep, almost woodsy sweetness that plays perfectly with the warm kick of bourbon.
- Prep Time: 15 minutes
- Cook Time: 30 minutes
- Total Time: 45 minutes
- Yield: 24 servings 1x
- Category: Dessert
- Cuisine: American
Ingredients
- 1 ½ cups all-purpose flour
- ½ cup unsalted butter, cold and cubed
- ¼ cup granulated sugar
- ¼ teaspoon salt
- 2–3 tablespoons ice water
- ¾ cup pure maple syrup
- ¼ cup packed light brown sugar
- 2 large eggs, room temperature
- 2 tablespoons unsalted butter, melted
- 2 tablespoons bourbon
- 1 teaspoon vanilla extract
- ¼ teaspoon salt
- 2 cups pecan halves or chopped pecans
Instructions
- Preheat your oven to 350°F (175°C). Line your 9×13-inch baking pan with parchment paper, leaving an overhang on the two long sides. Lightly grease the parchment with a little butter or non-stick spray.
- Make the crust. In a large mixing bowl, whisk together the flour, granulated sugar, and salt. Add the cold, cubed butter. Using a pastry cutter or two forks, cut the butter into the flour mixture until it resembles coarse meal with pea-sized butter pieces. Drizzle in the ice water, one tablespoon at a time, tossing with a fork until the dough just starts to come together.
- Press the crust into the pan. Transfer the dough to your prepared pan. Press it evenly into the bottom, using your fingers or the bottom of a flat measuring cup. Prick the crust all over with a fork. Bake for 15-18 minutes, until the edges are just lightly golden. Set the pan on a cooling rack while you make the filling.
- Prepare the filling. In a medium bowl, whisk together the maple syrup, brown sugar, eggs, melted butter, bourbon, vanilla extract, and salt until smooth and well combined.
- Add the pecans. Sprinkle the pecan halves or chopped pecans evenly over the pre-baked crust. Pour the maple-bourbon mixture over the pecans, making sure it spreads evenly. Use a spatula to gently nudge them into a single, even layer if needed.
- Bake the bars. Return the pan to the oven and bake for 22-28 minutes. The filling should be set around the edges but still have a slight jiggle in the center when you gently shake the pan. If the edges start to look too dark before the center is set, tent the pan loosely with foil.
- Cool completely. Place the pan on a cooling rack and let the bars cool completely at room temperature—at least 2 hours. Once cool, use the parchment overhang to lift the entire block out of the pan and onto a cutting board.
- Slice and serve. Use a sharp chef’s knife to cut the bars into squares or rectangles. For clean slices, wipe the knife clean between cuts. Usually cut into 24 small bars (4 rows by 6 rows) or 12 larger bars.
Notes
Don’t skip the pre-bake for the crust. Use room temperature eggs. Watch the baking time. Let them cool completely. Toast your pecans first (optional but recommended).
Nutrition
- Serving Size: 1 bar
- Calories: 200
- Sugar: 15
- Sodium: 100
- Fat: 12
- Saturated Fat: 4
- Carbohydrates: 22
- Fiber: 1
- Protein: 3
Keywords: pecan pie bars, maple bourbon, lighter dessert, fall baking, Thanksgiving dessert, pecan bars, bourbon pecan


