Love this? Save it for later!
Share the inspiration with your friends
There used to be a tiny French bistro tucked away on a side street in Portland, Oregon, called Le Petite Fourneau, that made a chicken pot pie that ruined me for all others. When they closed their doors back in 2018—the landlord doubled the rent, the rumor went—I actually stood outside on the sidewalk staring at the papered-over windows like I’d lost a friend. That first bite of their pot pie, with its impossibly flaky, golden puff pastry dome and that velvety, deeply savory filling, was the kind of food memory that gets permanently etched into your brain. After twelve tries—twelve, I counted, including one where I forgot the butter entirely and ended up with what can only be described as chicken-flavored wallpaper paste—I finally got it. This cozy chicken pot pie with crispy puff pastry is the one. It’s the one that finally made me stop missing that little bistro.
Honestly, I didn’t set out to make a perfect replica. I mean, how could I? I never got their recipe, and I doubt they’d have handed it over even if I’d asked nicely. But I knew what I was chasing: that first crack of the pastry under my fork, the steam that would rush out carrying the smell of thyme and butter, the way the filling was creamy but not gloopy, packed with tender chicken and sweet vegetables. Let me tell you, getting that balance right took some serious trial and error. There were a lot of sad, soggy pastries in my kitchen before I figured out the tricks. Maybe you’ve been there too—chasing a ghost of a dish from a restaurant that no longer exists, wondering if you’ll ever taste it again.
This recipe is my love letter to that little bistro. It’s warm, it’s comforting, and it’s got that puff pastry crown that shatters beautifully when you dig in. I still think about Le Petite Fourneau sometimes, especially on cold, rainy evenings. But now, instead of feeling sad about it, I just pull out my baking dish and make this. And honestly? It might even be a little bit better.
Why You’ll Love This Recipe
This isn’t just another chicken pot pie recipe floating around the internet. I’ve tested this one over and over, tweaking the filling-to-pastry ratio, adjusting the cooking time, and figuring out how to keep that puff pastry crispy instead of turning into a sad, soggy blanket. It’s been family-approved, neighbor-approved, and even picky-toddler-approved (which is honestly the toughest crowd). Here’s why I think you’ll fall for it too:
- Quick & Easy: Despite how fancy it looks, this comes together in about 45 minutes of active prep. The oven does the rest of the work.
- Simple Ingredients: You probably already have most of these in your pantry or fridge. No hunting down obscure ingredients at specialty stores.
- Perfect for Cozy Nights: This is the ultimate comfort food for cold weather, a rough day, or any time you need a warm hug in a bowl.
- Crowd-Pleaser: I’ve yet to meet someone who doesn’t go back for seconds. It’s got that universal appeal that works for both kids and adults.
- Unbelievably Delicious: The contrast between the crispy, buttery puff pastry and the creamy, savory filling is honestly next-level comfort food.
What makes this version different from the rest? It’s the technique. Instead of just plopping puff pastry on top and hoping for the best, I use a few key tricks to ensure the bottom doesn’t get soggy and the top gets that perfect golden-brown puff. I also blend in a touch of heavy cream with the chicken broth for a filling that’s rich and luxurious without being heavy. This isn’t just another version—it’s my best version, the one I make for friends when I want to impress them without breaking a sweat.
This recipe is the kind that makes you close your eyes after the first bite. It’s comfort food at its finest—soul-soothing, warm, and deeply satisfying. Perfect for turning a simple Tuesday night into something a little bit special.
What Ingredients You Will Need
This recipe uses simple, wholesome ingredients to deliver that bold, comforting flavor without any fuss. Most of these are pantry staples, which makes this perfect for those days when you need a little comfort but don’t want to make a special trip to the store.
- For the Filling:
- 2 tablespoons unsalted butter (adds richness and helps create the roux)
- 1 medium yellow onion, diced (about 1 cup) (provides the aromatic base)
- 2 medium carrots, peeled and diced (about 1 cup) (adds sweetness and color)
- 2 celery stalks, diced (about 1/2 cup) (adds earthy flavor)
- 3 cloves garlic, minced (because garlic makes everything better)
- 1/3 cup all-purpose flour (for thickening the sauce)
- 1 1/2 cups low-sodium chicken broth (I prefer Swanson for consistent flavor)
- 1/2 cup heavy cream (adds richness; you can use half-and-half if needed)
- 1 teaspoon dried thyme (or 1 tablespoon fresh, chopped)
- 1/2 teaspoon dried rosemary (optional, but I love the woodsy flavor)
- 1/2 teaspoon salt (plus more to taste)
- 1/4 teaspoon black pepper
- 3 cups cooked chicken, shredded or diced (rotisserie chicken works great here)
- 1 cup frozen peas (no need to thaw) (adds a pop of color and sweetness)
- For the Topping:
- 1 sheet (about 10×10 inches) frozen puff pastry, thawed (I recommend Pepperidge Farm for reliable results)
- 1 large egg, beaten with 1 tablespoon water (for an egg wash that gives a golden shine)
Ingredient Tips & Substitutions: For the chicken, a store-bought rotisserie chicken is my secret weapon for busy nights. Just shred the meat from the breast and thighs, and you’re good to go. If you want to use leftover turkey after Thanksgiving, that works beautifully too. For a vegetarian version, swap the chicken for a mix of mushrooms and extra vegetables, and use vegetable broth instead of chicken broth. If you’re watching your dairy intake, you can substitute the heavy cream with full-fat coconut milk—it adds a slight sweetness that’s actually quite lovely with the thyme. Just make sure to use a good quality puff pastry; the cheaper brands tend to be less flaky and can turn greasy.
Equipment Needed
You don’t need a fancy kitchen to pull this off. Here’s what you’ll need:
- A large skillet or Dutch oven (I use my trusty 12-inch cast iron skillet for even heat distribution)
- A 9×13-inch baking dish or a 10-inch round pie dish (ceramic or glass works best for even cooking)
- A sharp knife and cutting board for prepping vegetables
- A whisk for making the roux without lumps
- A rolling pin (optional, but helpful if your puff pastry needs a little shaping)
- A pastry brush for the egg wash
- A rimmed baking sheet (place the dish on this to catch any bubbling filling)
If you don’t have a Dutch oven, a large, deep skillet works perfectly. Just be careful when adding the flour and broth—you want enough room to whisk without splashing. I picked up my pastry brush at a dollar store years ago, and it’s still going strong. No need to spend a lot on equipment for this one.
Preparation Method

Let’s get cooking. This recipe is straightforward, but following the steps in order makes everything come together smoothly.
- Preheat your oven to 400°F (200°C). Place a rimmed baking sheet on the middle rack to heat up. This helps cook the bottom of the pot pie and prevents a soggy crust.
- Melt the butter in your large skillet or Dutch oven over medium heat. Once it’s foaming, add the diced onion, carrots, and celery. Cook for about 6-8 minutes, stirring occasionally, until the vegetables have softened and the onion is translucent. You’ll know they’re ready when the kitchen starts smelling amazing.
- Add the minced garlic and cook for another 30 seconds until fragrant. Be careful not to burn the garlic—it turns bitter fast. I learned this the hard way on attempt number three.
- Sprinkle the flour over the vegetables and stir constantly for about 2 minutes. This cooks out the raw flour taste and creates a roux that will thicken your sauce. The mixture will look pasty and clumpy—that’s totally normal.
- Slowly pour in the chicken broth while whisking continuously. Keep whisking until the mixture is smooth and starts to thicken, about 3-4 minutes. It should coat the back of a spoon.
- Stir in the heavy cream, dried thyme, rosemary (if using), salt, and pepper. Let it simmer for another 2 minutes, stirring occasionally. The sauce should be thick and velvety at this point.
- Fold in the cooked chicken and frozen peas. Stir until everything is well coated in the sauce. Taste and adjust seasoning—I usually add another pinch of salt and a crack of pepper here. Remove from heat.
- Pour the filling into your 9×13-inch baking dish (or pie dish). Spread it into an even layer.
- Prepare the puff pastry: On a lightly floured surface, gently roll out the thawed puff pastry sheet just enough to fit over your baking dish with about an inch of overhang. Don’t overwork it—you want those layers to stay intact.
- Place the pastry over the filling. Tuck the edges under themselves and press them against the rim of the dish. Cut 4-5 small slits in the top to allow steam to escape. This prevents the pastry from getting soggy.
- Brush the top with the egg wash, making sure to get the edges. This gives that beautiful golden color.
- Place the dish on the preheated baking sheet in the oven. Bake for 25-30 minutes, until the pastry is puffed up and deep golden brown. The filling should be bubbling up through the slits.
- Let it rest for at least 10 minutes before serving. This is the hardest part, I know, but it allows the filling to set so you don’t end up with a runny mess on your plate.
Pro tip: If the edges of your pastry are browning too quickly but the center isn’t done yet, loosely tent the dish with foil for the last 10 minutes of baking. This happened to me on attempt number seven, and the foil trick saved the day.
Cooking Tips & Techniques
After twelve attempts, I’ve collected a few hard-won lessons that make this recipe foolproof. Here’s what I wish someone had told me before I started:
- Don’t skip the preheated baking sheet. This is the number one trick for a crispy bottom crust. The direct heat from the hot pan helps cook the bottom of the pastry so it doesn’t turn into a soggy mess. Trust me on this one—I learned it after scraping a sad, wet pastry off the bottom of my dish on attempt number five.
- Keep your puff pastry cold. If it gets too warm, the butter melts before it hits the oven, and you lose those beautiful flaky layers. If your kitchen is warm, pop the assembled pot pie in the fridge for 10-15 minutes before baking. This also helps the pastry hold its shape better.
- Don’t overfill the dish. Leave about half an inch of space between the filling and the rim. If the dish is too full, the filling will bubble over and make a mess on your baking sheet—and worse, it can make the pastry soggy.
- Use a sharp knife to cut the slits. Dull blades can press the pastry layers together, which prevents proper puffing. A clean, sharp cut helps the steam escape evenly and gives you that gorgeous puffed top.
- Let it rest. I know I said this already, but it’s worth repeating. That 10-minute rest is crucial. The filling continues to thicken as it cools slightly, and the pastry sets up. If you cut into it too soon, you’ll end up with a soupy mess. I learned this one the hard way on attempt number two when I was too hungry to wait.
Variations & Adaptations
One of the best things about this recipe is how adaptable it is. Here are a few ways I’ve tweaked it over the years:
- Vegetarian Version: Swap the chicken for 2 cups of diced mushrooms (cremini or portobello work great) and 1 cup of diced sweet potatoes. Use vegetable broth instead of chicken broth. The mushrooms add that savory, umami depth that makes you forget the chicken is even missing.
- Herb Swap: Not a fan of thyme and rosemary? Try using 1 teaspoon of dried tarragon instead. It has a subtle anise flavor that pairs beautifully with chicken. Or go with 1/2 teaspoon of dried sage for a more traditional, Thanksgiving-style flavor.
- Dairy-Free Adaptation: Use olive oil instead of butter for the roux, and swap the heavy cream for full-fat canned coconut milk. The coconut flavor is very mild and actually complements the herbs nicely. Just make sure to use a dairy-free puff pastry—most brands are actually dairy-free, but check the label.
- Individual Pot Pies: Instead of one large dish, divide the filling among 4-6 oven-safe ramekins. Cut the puff pastry into circles slightly larger than the ramekins and bake for about 18-22 minutes. These are perfect for dinner parties—everyone gets their own little golden dome to crack open.
- Add Some Greens: Stir in a handful of fresh spinach or chopped kale along with the peas. It wilts down into the sauce and adds a boost of color and nutrients without changing the flavor much.
Serving & Storage Suggestions
This pot pie is best served warm, straight from the oven, with that glorious puff pastry still crisp and crackling. I like to serve it in shallow bowls so the filling has room to spread out a little. A simple side salad with a lemony vinaigrette cuts through the richness beautifully, but honestly, it’s hearty enough to stand on its own.
Storage: Leftovers keep well in the refrigerator for up to 3 days. Cover the dish tightly with foil or transfer individual portions to airtight containers. The pastry will soften as it sits, but it’s still delicious.
Reheating: For the best results, reheat in a 350°F oven for about 15-20 minutes. This helps crisp the pastry back up a bit. If you’re in a hurry, the microwave works, but the pastry will be soft. To refresh the pastry in the microwave, pop it under the broiler for a minute or two after reheating—just watch it closely so it doesn’t burn.
Freezing: You can freeze the unbaked pot pie for up to 3 months. Assemble the dish completely but don’t add the egg wash. Wrap tightly in plastic wrap and then foil. When you’re ready to bake, thaw overnight in the refrigerator, add the egg wash, and bake as directed, adding about 10-15 minutes to the cooking time since you’re starting from cold. The flavors actually get better after freezing—the herbs have time to meld together.
Nutritional Information & Benefits
While this is definitely a comfort food indulgence, it does have some redeeming qualities. Here’s a rough estimate per serving (based on 6 servings):
| Nutrient | Amount per Serving |
|---|---|
| Calories | ~450 |
| Protein | 28g |
| Fat | 22g |
| Carbohydrates | 32g |
| Fiber | 4g |
| Sodium | 680mg |
The chicken provides a solid dose of lean protein, which helps keep you full and satisfied. The carrots and peas add fiber, vitamins A and C, and a touch of natural sweetness. If you’re watching your sodium, use low-sodium broth and go easy on the added salt. For a lower-carb option, you can skip the puff pastry and top the filling with a layer of mashed cauliflower instead—it’s not the same, but it’s still pretty good. This recipe is not gluten-free as written, but you can use a gluten-free flour blend for the roux and a gluten-free puff pastry if needed.
Conclusion
This cozy chicken pot pie with crispy puff pastry is more than just a recipe—it’s a little piece of comfort you can make any night of the week. It’s the kind of dish that makes a rainy day feel cozy, that turns a regular dinner into something special, that brings people to the table with smiles on their faces. I’ve made it for sick friends, for holiday gatherings, and for quiet nights when I just needed something warm and familiar. It never disappoints.
I’d love to hear how yours turns out. Did you add any fun twists? Did your family go back for seconds? Drop a comment below and let me know—I read every single one. And if you’re looking for more cozy comfort food, you might enjoy my creamy mushroom soup or my easy biscuits and gravy. Until next time, happy cooking, and remember: the best meals are the ones made with a little bit of love and a whole lot of butter.
Frequently Asked Questions
Can I use store-bought rotisserie chicken for this recipe?
Absolutely! In fact, that’s my go-to shortcut. It saves time and adds great flavor. Just shred the meat from a whole rotisserie chicken—you’ll get about 3 cups of meat from a standard-sized bird.
My puff pastry always comes out soggy. What am I doing wrong?
The most common culprit is not preheating the baking sheet. Placing your dish on a hot baking sheet helps cook the bottom of the pastry from the start. Also, make sure your filling isn’t too thin—it should be thick and creamy before you add the pastry. And don’t skip those steam vents!
Can I make this ahead of time?
Yes! You can prepare the filling up to 2 days in advance and store it in the refrigerator. When you’re ready to bake, just reheat the filling slightly on the stovetop, pour it into the dish, top with the pastry, and bake as directed. You can also assemble the entire dish (without the egg wash) and refrigerate for up to 24 hours before baking.
What if I don’t have puff pastry? Can I use pie crust instead?
You can, but the texture will be different. Puff pastry gives you those light, flaky layers that shatter when you bite into them. A pie crust will be more sturdy and dense. If you use pie crust, you might want to do a double crust—one on the bottom and one on top—for a more traditional pot pie experience.
How do I know when the pot pie is done?
The pastry should be puffed up and deep golden brown. You should also see the filling bubbling up through the slits in the pastry. If you insert a knife into the center, the filling should be hot and bubbling. If you’re unsure, use an instant-read thermometer—the filling should be at least 165°F.
Pin This Recipe!
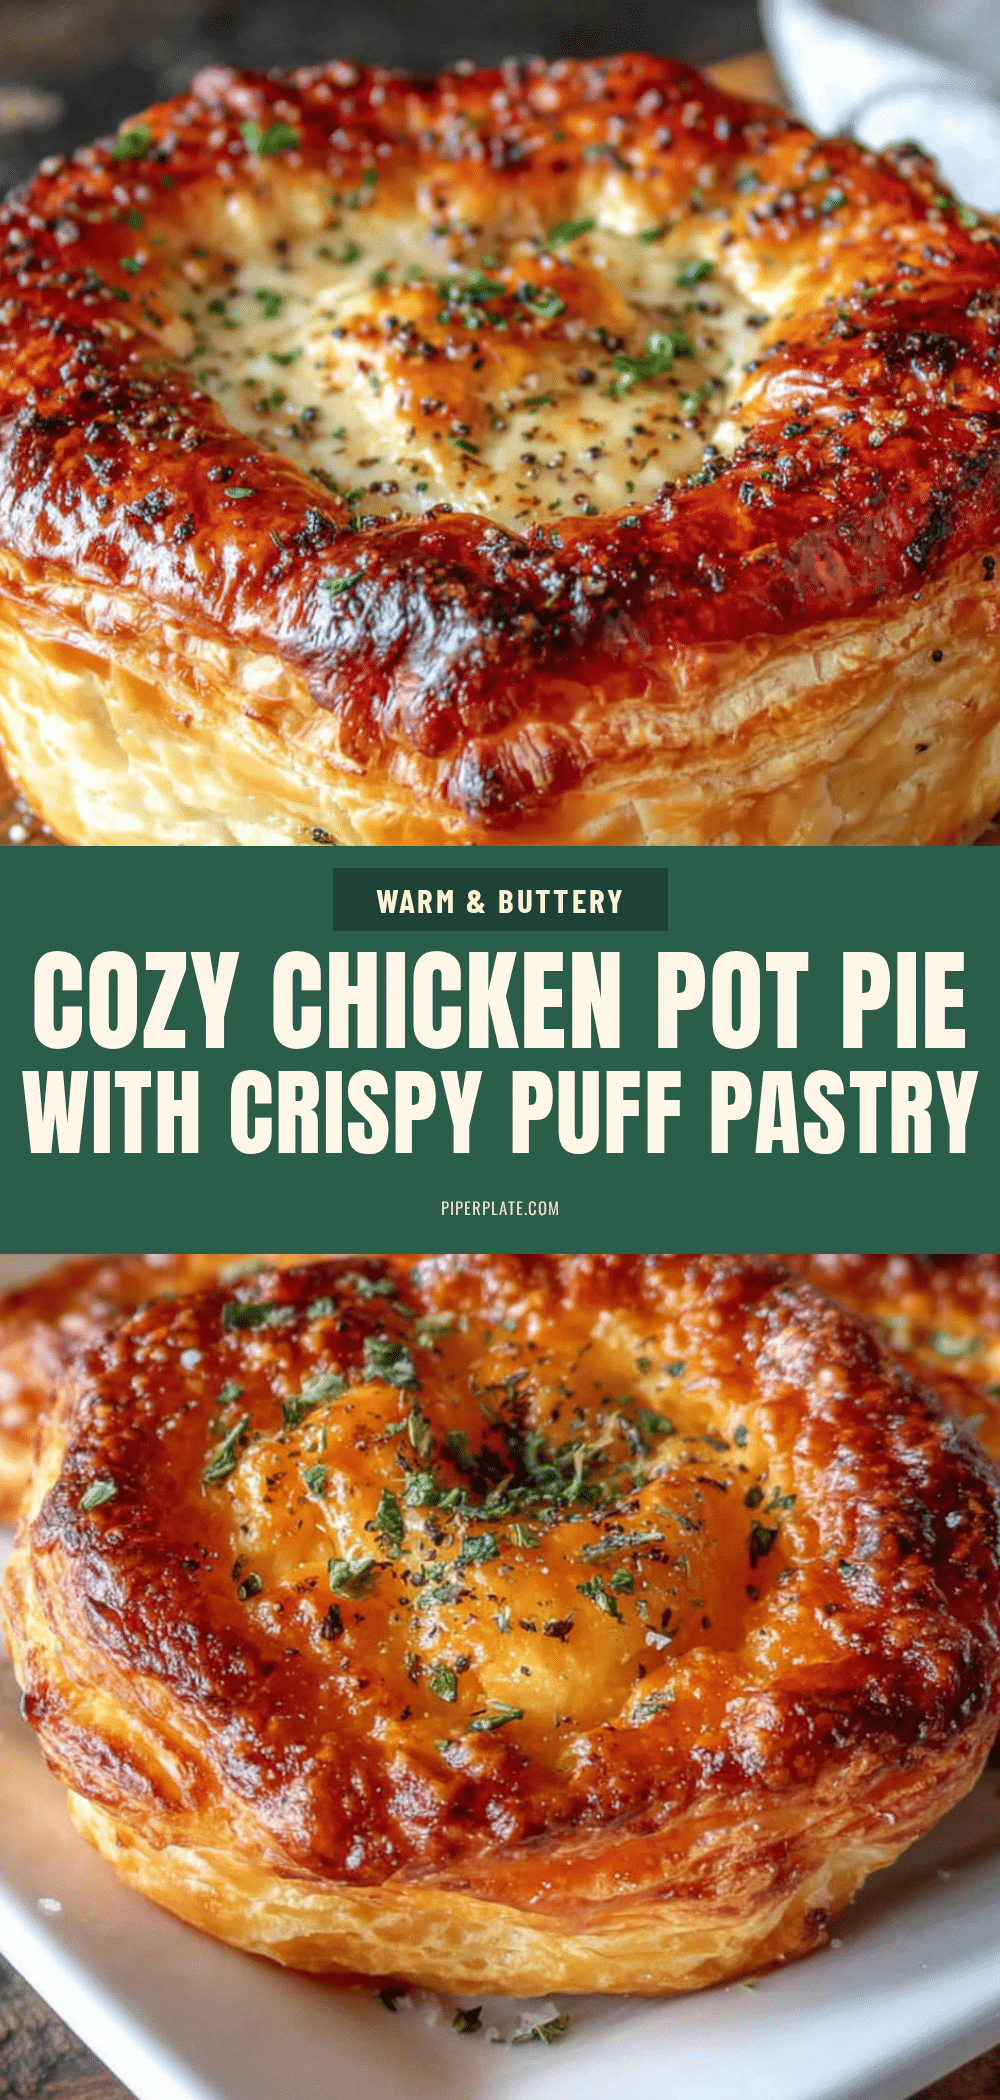
Easy Homemade Chicken Pot Pie with Crispy Puff Pastry

A cozy, comforting chicken pot pie with a velvety, deeply savory filling and an impossibly flaky, golden puff pastry dome. This recipe is a love letter to a beloved bistro classic, perfected after twelve tries.
- Prep Time: 45 minutes
- Cook Time: 30 minutes
- Total Time: 1 hour 15 minutes
- Yield: 6 servings 1x
- Category: Main Course
- Cuisine: American
Ingredients
- 2 tablespoons unsalted butter
- 1 medium yellow onion, diced (about 1 cup)
- 2 medium carrots, peeled and diced (about 1 cup)
- 2 celery stalks, diced (about 1/2 cup)
- 3 cloves garlic, minced
- 1/3 cup all-purpose flour
- 1 1/2 cups low-sodium chicken broth
- 1/2 cup heavy cream
- 1 teaspoon dried thyme
- 1/2 teaspoon dried rosemary (optional)
- 1/2 teaspoon salt
- 1/4 teaspoon black pepper
- 3 cups cooked chicken, shredded or diced
- 1 cup frozen peas
- 1 sheet (about 10x10 inches) frozen puff pastry, thawed
- 1 large egg, beaten with 1 tablespoon water
Instructions
- Preheat your oven to 400°F (200°C). Place a rimmed baking sheet on the middle rack to heat up.
- Melt the butter in your large skillet or Dutch oven over medium heat. Once foaming, add the diced onion, carrots, and celery. Cook for about 6-8 minutes, stirring occasionally, until softened and the onion is translucent.
- Add the minced garlic and cook for another 30 seconds until fragrant.
- Sprinkle the flour over the vegetables and stir constantly for about 2 minutes to create a roux.
- Slowly pour in the chicken broth while whisking continuously. Keep whisking until the mixture is smooth and starts to thicken, about 3-4 minutes.
- Stir in the heavy cream, dried thyme, rosemary (if using), salt, and pepper. Let it simmer for another 2 minutes, stirring occasionally.
- Fold in the cooked chicken and frozen peas. Stir until everything is well coated. Taste and adjust seasoning. Remove from heat.
- Pour the filling into your 9×13-inch baking dish (or pie dish). Spread it into an even layer.
- On a lightly floured surface, gently roll out the thawed puff pastry sheet just enough to fit over your baking dish with about an inch of overhang.
- Place the pastry over the filling. Tuck the edges under themselves and press them against the rim of the dish. Cut 4-5 small slits in the top to allow steam to escape.
- Brush the top with the egg wash, making sure to get the edges.
- Place the dish on the preheated baking sheet in the oven. Bake for 25-30 minutes, until the pastry is puffed up and deep golden brown and the filling is bubbling up through the slits.
- Let it rest for at least 10 minutes before serving.
Notes
For a crispy bottom crust, don’t skip preheating the baking sheet. Keep puff pastry cold for best flakiness. Let the pot pie rest for 10 minutes before serving to allow the filling to set. If edges brown too quickly, tent with foil for the last 10 minutes of baking.
Nutrition
- Serving Size: 1 serving
- Calories: 450
- Sugar: 6
- Sodium: 680
- Fat: 22
- Saturated Fat: 12
- Carbohydrates: 32
- Fiber: 4
- Protein: 28
Keywords: chicken pot pie, puff pastry, comfort food, easy dinner, cozy meal, chicken recipe


