Love this? Save it for later!
Share the inspiration with your friends
“You know that moment when you realize the party is tomorrow, and you still haven’t found the perfect graduation treat?” That was me last May, standing in my tiny kitchen with a box of undecorated sugar cookies and a shaky plan. Honestly, I wasn’t expecting to become a royal icing pro overnight, but somehow, in the chaos of last-minute prep, these Perfect Graduation Cap Royal Icing Sugar Cookies with Gold Detail came together like magic.
It all started when my neighbor, Mrs. Delgado, peeked through my kitchen window and laughed, “Planning a graduation bash, huh?” She shared a quick royal icing tip she learned from her pastry chef daughter—something about the perfect flood consistency and how a little edible gold paint could turn simple cookies into keepsakes. I was skeptical, but figured, why not?
The next few hours were a blur of mixing, piping, tiny mistakes (I dropped a cookie face-down—yes, that happened), and a little gleam of gold shimmering on black icing that made me stop and grin. These cookies weren’t just treats; they were little caps of celebration, each with its own tiny tassel and a splash of gold that caught the light just right.
Maybe you’ve been there—scrambling to whip up something festive that’s both impressive and doable. That’s exactly why I kept coming back to this recipe. Because it’s not about perfection; it’s about that sweet, joyous feeling when you hand over a cookie that says “Congrats” with style and a little sparkle. Let me tell you, these cookies have stuck with me through every graduation party since— and I know they’ll make your celebration just a bit more memorable too.
Why You’ll Love This Recipe
I’ve tested this Perfect Graduation Cap Royal Icing Sugar Cookies recipe more times than I can count (and trust me, I’m not complaining). It’s family-approved, stress-friendly, and just plain fun to make. Here’s why it’s a winner:
- Quick & Easy: From dough to decorated cookie in under 3 hours, perfect for last-minute celebrations or weekend baking sessions.
- Simple Ingredients: No tricky or exotic items. Most are pantry staples like butter, sugar, and powdered sugar for the royal icing.
- Perfect for Graduation Parties: These cookies make a stylish centerpiece or party favor that guests will rave about.
- Crowd-Pleaser: Kids love the fun cap shapes, and adults appreciate the delicate gold detail and buttery flavor.
- Unbelievably Delicious: The cookies stay crisp on the edges but soft inside, with smooth royal icing that melts in your mouth.
This isn’t just another sugar cookie recipe. The secret lies in the balance of the icing’s texture—thick enough to hold those sharp edges, yet smooth enough for that flawless flood. Plus, the gold detail? It’s a simple brushstroke that adds a touch of elegance without the fuss. Honestly, the first time I painted those golden tassels, I closed my eyes and pictured the proud graduate’s smile. That’s the kind of joy these cookies bring to the table.
What Ingredients You Will Need
This recipe uses simple, wholesome ingredients that come together to create cookies with bold flavor and satisfying texture. Most are kitchen staples, making it super convenient. Here’s what you’ll need:
- For the Sugar Cookie Dough:
- All-purpose flour – 3 ½ cups (440 g), sifted
- Unsalted butter, softened – 1 cup (227 g) (I recommend Land O’Lakes for best creaminess)
- Granulated sugar – 1 cup (200 g)
- Large egg – 1, room temperature
- Vanilla extract – 2 teaspoons (pure if possible)
- Baking powder – 1 teaspoon
- Salt – ¼ teaspoon
- For the Royal Icing:
- Powdered sugar – 4 cups (480 g), sifted
- Egg whites or meringue powder – 3 tablespoons (I usually use meringue powder for safety and consistency)
- Water – 5 to 6 tablespoons (adjust for desired consistency)
- Black gel food coloring – a few drops (AmeriColor is my go-to for vibrant color)
- Vanilla or almond extract – ½ teaspoon (optional, for flavor)
- For the Gold Detail:
- Edible gold luster dust – ½ teaspoon
- Clear vanilla extract or lemon extract – 1 teaspoon (to mix with the dust for painting)
Feel free to swap all-purpose flour with gluten-free flour blend if needed (results may vary slightly). For dairy-free options, use vegan butter and egg replacer, although the texture will be a bit different. In spring or summer, fresh edible flowers can add an extra touch if you want to go beyond gold.
Equipment Needed
Here’s the gear you’ll want on hand to make these royal icing sugar cookies with gold detail come out just right:
- Stand mixer or hand mixer: For creaming butter and sugar, and whipping the royal icing. I prefer a stand mixer for hands-free mixing, but a hand mixer works fine.
- Mixing bowls: Medium and large sizes for dough and icing preparation.
- Rolling pin: A smooth, sturdy rolling pin helps keep dough even. I have a silicone one that’s easy to clean.
- Graduation cap cookie cutter: Essential to get that classic shape. If you don’t have one, a square cutter combined with a triangle can work.
- Piping bags and tips: Small round tips (#1 or #2) for outlining and flooding cookies. Disposable bags are convenient, but reusable ones are eco-friendly.
- Fine paintbrush: For the delicate gold detailing – a size 0 or 1 synthetic brush works best.
- Baking sheets and parchment paper: To prevent sticking and ensure even baking.
- Wire rack: For cooling cookies completely before decorating.
If you don’t have specialized piping tips, cut the piping bag’s tip to size—it’s an old trick that works surprisingly well. Also, cleaning royal icing tools right after use prevents crusty buildup, which I learned after a messy session once. Budget-wise, many of these tools are one-time investments that pay off for countless celebrations.
Preparation Method
- Make the cookie dough: In your mixer bowl, cream together 1 cup (227 g) softened unsalted butter and 1 cup (200 g) granulated sugar until light and fluffy, about 3 minutes. Scrape down the sides once or twice.
- Add egg and vanilla: Beat in 1 large egg and 2 teaspoons vanilla extract until fully combined. The mixture might look a bit curdled—that’s normal.
- Mix dry ingredients: In a separate bowl, whisk together 3 ½ cups (440 g) all-purpose flour, 1 teaspoon baking powder, and ¼ teaspoon salt.
- Combine wet and dry: Gradually add the dry ingredients to the wet, mixing on low speed until dough just comes together. Avoid overmixing to keep cookies tender.
- Chill the dough: Divide dough into two discs, wrap in plastic, and refrigerate for at least 1 hour (or overnight). Chilling prevents spreading and makes rolling easier.
- Preheat oven and prepare pans: Set oven to 350°F (175°C). Line baking sheets with parchment paper.
- Roll and cut: Lightly flour your surface and rolling pin. Roll dough to about ¼-inch (6 mm) thick. Use your graduation cap cookie cutter to cut shapes, transferring carefully to baking sheets.
- Bake: Bake for 8-10 minutes, until edges are just turning golden. Avoid overbaking to keep cookies soft inside.
- Cool: Let cookies cool on the pan for 5 minutes before moving to a wire rack to cool completely. Decorating warm cookies will melt icing.
- Prepare royal icing: In a clean bowl, combine 4 cups (480 g) powdered sugar, 3 tablespoons meringue powder, and 5 tablespoons water. Beat on medium-high for 7-10 minutes until stiff peaks form.
- Color and thin icing: Divide icing into two bowls. Add black gel food coloring to one bowl, mixing until deep black. Thin with small amounts of water (a few drops at a time) to get flood consistency—smooth but not runny. Keep some thick icing for outlining.
- Outline cookies: Using thick black icing and a small round tip, pipe around the edges of each cookie. Let dry 15 minutes until slightly crusty.
- Flood cookies: Fill cookies with thinned black icing, using a toothpick or small spatula to spread evenly and pop air bubbles.
- Let icing set: Allow cookies to dry for at least 4 hours or overnight (place in a dry, cool area).
- Paint gold details: Mix ½ teaspoon edible gold luster dust with 1 teaspoon clear vanilla extract. Using a fine brush, carefully paint the tassel and trim of each graduation cap. Let dry completely before handling.
Watch for icing pooling—too thin and it runs off edges; too thick and it won’t spread smoothly. I learned to test by dripping a bit on parchment first. And hey, if your first few cookies aren’t perfect, keep going! The last ones usually look best, promise.
Cooking Tips & Techniques
Royal icing can feel intimidating, but here’s what I’ve picked up over the years to keep things smooth and stress-free:
- Consistency is king: For outlining, the icing should hold its shape on a spoon; for flooding, it should slowly level out like melted chocolate. Adjust with tiny drops of water or powdered sugar.
- Use gel colors: Gel food coloring won’t thin your icing like liquid colors do, preserving perfect texture.
- Practice piping: Before tackling cookies, test your piping on parchment to get a feel for pressure and flow.
- Dry times matter: Don’t rush drying. Icing that isn’t fully set can smudge when adding gold paint or stacking cookies.
- Store icing airtight: Royal icing dries out fast; cover with plastic wrap pressed on the surface when not in use.
- Brush gently with gold: Too much liquid can dissolve the icing’s surface. Use a light hand and let the paint dry fully.
One time, I ignored drying times and ended up with smudged black icing and a golden mess. Lesson learned: patience really does pay off. Also, multitasking helps—while cookies bake or dry, clean your tools or prep the next batch of icing. Saves time and keeps the flow going.
Variations & Adaptations
This recipe is flexible, so you can tweak it to fit your needs or mood:
- Flavor twists: Add almond or lemon extract to the dough for a subtle zing. I once made a batch with a hint of orange zest—surprisingly delightful!
- Dietary swaps: Substitute gluten-free flour blend for all-purpose flour. Use aquafaba in place of egg for vegan cookies (the texture shifts but still tasty).
- Color changes: Instead of black icing, try navy or a rich maroon for school colors. The gold detail pops beautifully against any dark shade.
- Alternative decorations: Swap edible gold paint for silver or pearl dust for a different shimmer effect.
- Different shapes: If you don’t have a graduation cap cutter, try a diploma scroll or simple star shapes to mix things up.
Personally, I once experimented with a fun twist—adding tiny edible confetti sprinkles before flooding. It added a festive crunch, perfect for a kid’s party. You might want to try that if you’re feeling adventurous!
Serving & Storage Suggestions
These cookies are best served at room temperature, ideally on a pretty platter or wrapped individually in clear bags tied with ribbon for gifts. They pair wonderfully with a cup of coffee, tea, or a cold glass of milk.
Store cookies in an airtight container at room temperature for up to 5 days. If you want to keep them longer, freeze undecorated cookies wrapped well for up to 3 months; decorate after thawing. Avoid refrigerating decorated cookies—the humidity can dull the icing and cause softening.
When reheating, let cookies come to room temperature naturally—avoid microwaving as it can soften the icing and make colors run. Over time, the flavors deepen, especially if you’ve used extracts or zest, so these cookies can be made a day ahead to maximize taste and texture.
Nutritional Information & Benefits
Each cookie (about 3 inches in size) contains approximately:
- Calories: 150
- Fat: 7g (mostly from butter)
- Carbohydrates: 22g (mostly sugars and flour)
- Protein: 1g
- Sodium: 60mg
While these are a treat and not a health food, the butter and real vanilla add wholesome flavor without artificial shortcuts. For those mindful of allergens, be aware the recipe contains eggs, dairy, and gluten (unless substituted). Using meringue powder instead of raw egg whites improves safety, especially with kids around.
From a wellness perspective, I love that these cookies bring people together—there’s something nourishing about sharing homemade sweets with loved ones, especially at milestones like graduation. They’re a reminder that celebration and care go hand in hand.
Conclusion
So there you have it—the Perfect Graduation Cap Royal Icing Sugar Cookies with Gold Detail that are as fun to make as they are to eat. Whether you’re a seasoned baker or a first-timer, this recipe offers a manageable way to create stunning, heartfelt treats for your graduate’s big day.
Feel free to customize with your own colors, flavors, and special touches. Honestly, the joy is in the process as much as the final product. I keep coming back to this recipe because it captures the excitement of achievement and the sweetness of celebration in every bite.
If you try these cookies, I’d love to hear how your decorating went or what variations you made—drop a comment or share your photos! Let’s keep making memories one cookie at a time.
Frequently Asked Questions
Can I make the cookie dough ahead of time?
Absolutely! The dough can be made and refrigerated for up to 3 days or frozen for up to 1 month. Just thaw in the fridge before rolling.
Is it safe to use raw egg whites in royal icing?
Using pasteurized meringue powder is safer and easier, especially if kids will be eating the cookies. Raw egg whites carry a slight risk of salmonella.
How do I fix runny or cracked royal icing?
If your icing is too runny, add more powdered sugar a little at a time. If it cracks while drying, it was probably too thick or dried too quickly—try a slightly thinner flood consistency next time.
What’s the best way to store decorated sugar cookies?
Store in an airtight container at room temperature. Avoid refrigeration to prevent icing from sweating or softening.
Can I use this icing for other cookie shapes?
Definitely! This royal icing recipe works great on all sugar cookie shapes and designs, so feel free to get creative beyond graduation caps.
Pin This Recipe!
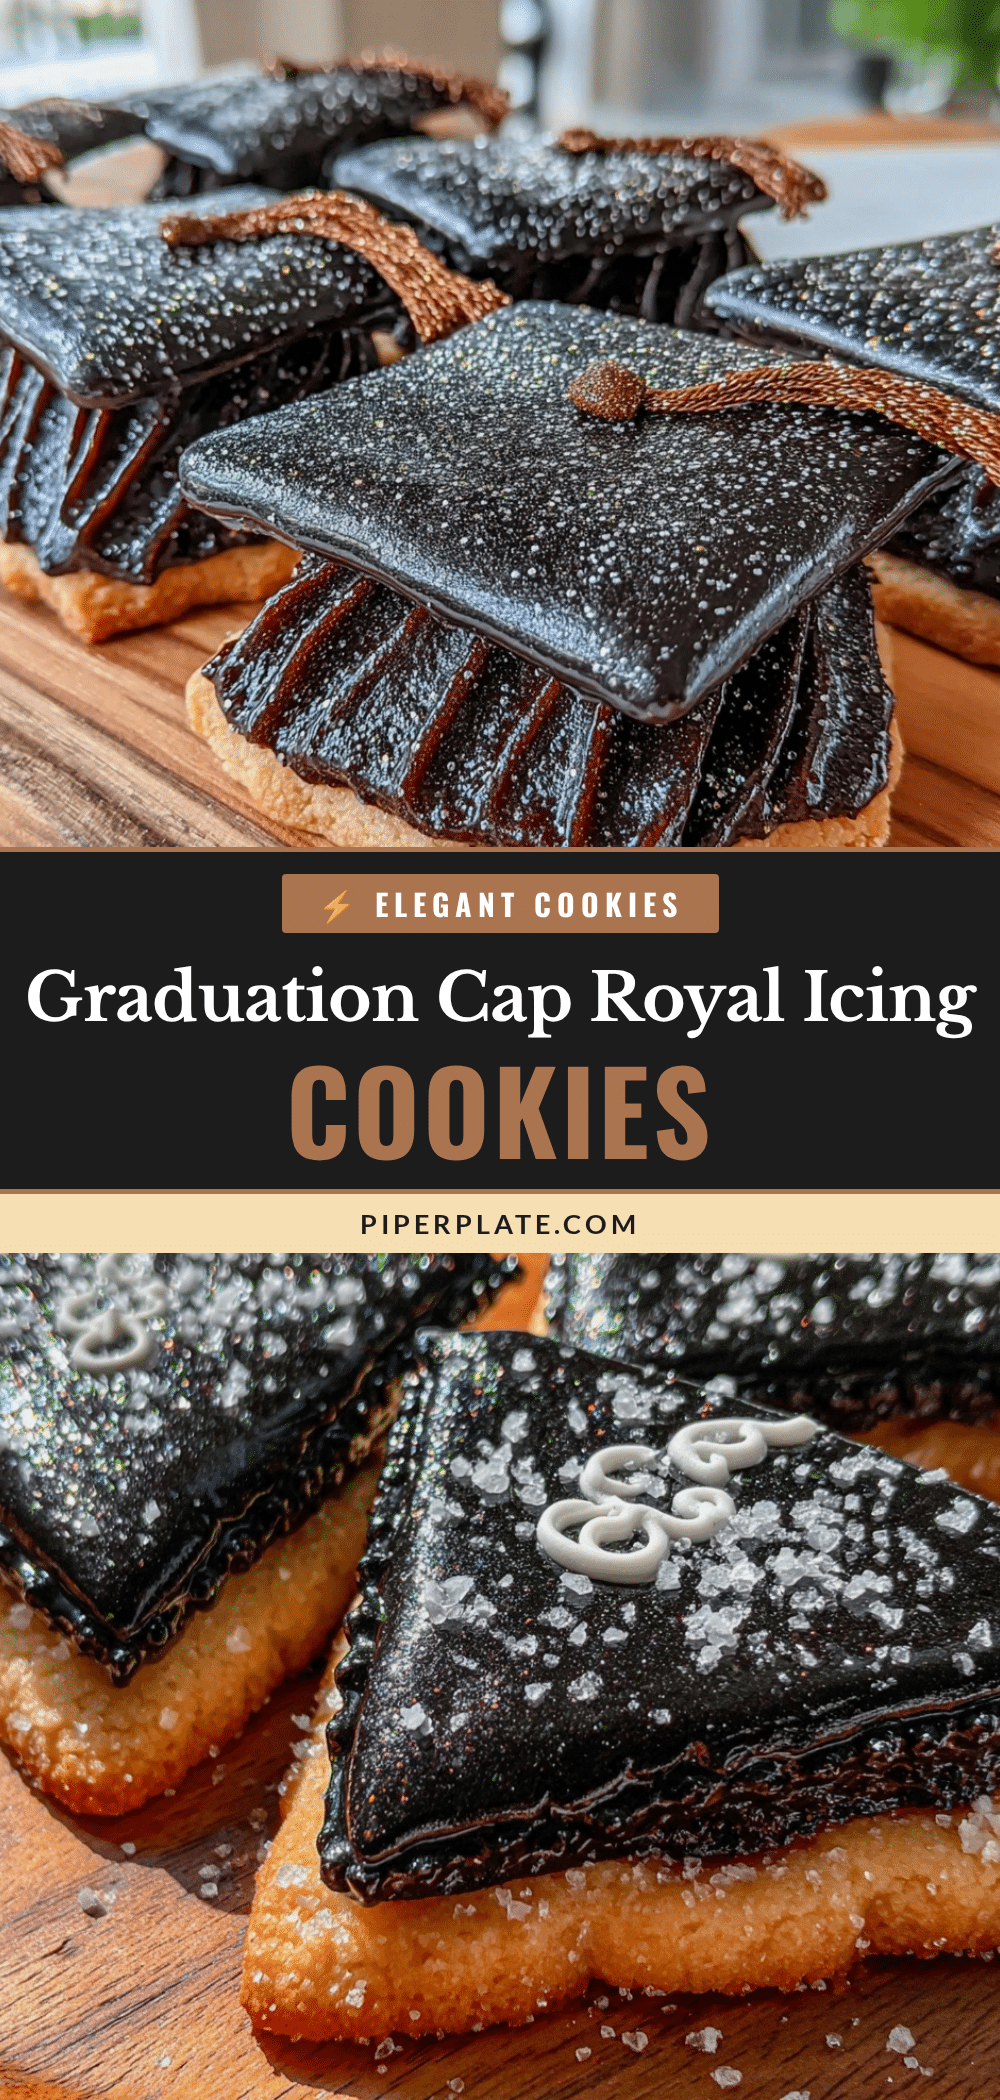
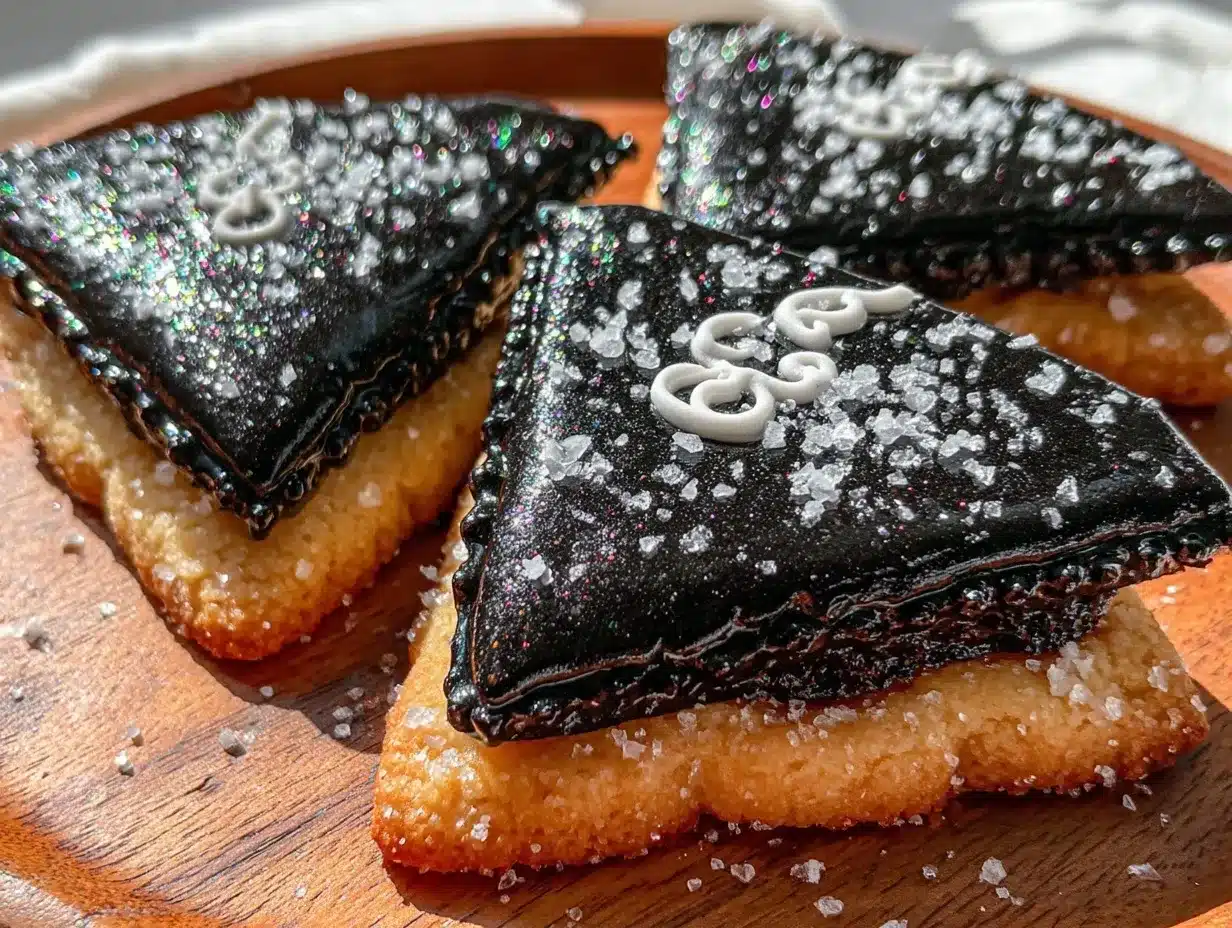
Perfect Graduation Cap Royal Icing Sugar Cookies with Gold Detail
These graduation cap sugar cookies feature a crisp yet soft texture with smooth royal icing and elegant edible gold detailing, perfect for celebrating milestones with style.
- Prep Time: 1 hour 15 minutes
- Cook Time: 10 minutes
- Total Time: 1 hour 25 minutes plus drying time
- Yield: 24 cookies 1x
- Category: Dessert
- Cuisine: American
Ingredients
- 3 ½ cups (440 g) all-purpose flour, sifted
- 1 cup (227 g) unsalted butter, softened
- 1 cup (200 g) granulated sugar
- 1 large egg, room temperature
- 2 teaspoons vanilla extract
- 1 teaspoon baking powder
- ¼ teaspoon salt
- 4 cups (480 g) powdered sugar, sifted
- 3 tablespoons egg whites or meringue powder
- 5 to 6 tablespoons water
- Black gel food coloring, a few drops
- ½ teaspoon vanilla or almond extract (optional)
- ½ teaspoon edible gold luster dust
- 1 teaspoon clear vanilla extract or lemon extract
Instructions
- In a mixer bowl, cream together 1 cup softened unsalted butter and 1 cup granulated sugar until light and fluffy, about 3 minutes. Scrape down the sides once or twice.
- Beat in 1 large egg and 2 teaspoons vanilla extract until fully combined.
- In a separate bowl, whisk together 3 ½ cups all-purpose flour, 1 teaspoon baking powder, and ¼ teaspoon salt.
- Gradually add the dry ingredients to the wet mixture on low speed until dough just comes together. Avoid overmixing.
- Divide dough into two discs, wrap in plastic, and refrigerate for at least 1 hour or overnight.
- Preheat oven to 350°F (175°C). Line baking sheets with parchment paper.
- Lightly flour surface and rolling pin. Roll dough to about ¼-inch (6 mm) thick. Cut shapes using a graduation cap cookie cutter and transfer to baking sheets.
- Bake for 8-10 minutes until edges are just turning golden. Avoid overbaking.
- Cool cookies on the pan for 5 minutes, then transfer to a wire rack to cool completely.
- Prepare royal icing by combining 4 cups powdered sugar, 3 tablespoons meringue powder, and 5 tablespoons water. Beat on medium-high for 7-10 minutes until stiff peaks form.
- Divide icing into two bowls. Add black gel food coloring to one bowl and mix until deep black. Thin with small amounts of water to flood consistency; keep some thick icing for outlining.
- Outline cookies using thick black icing and a small round tip. Let dry 15 minutes until slightly crusty.
- Flood cookies with thinned black icing, spreading evenly and popping air bubbles.
- Allow cookies to dry for at least 4 hours or overnight in a dry, cool area.
- Mix ½ teaspoon edible gold luster dust with 1 teaspoon clear vanilla extract. Using a fine brush, paint the tassel and trim of each graduation cap. Let dry completely before handling.
Notes
Use meringue powder instead of raw egg whites for safer royal icing. Adjust icing consistency carefully for outlining and flooding. Let icing dry fully before painting gold details to avoid smudging. Dough can be refrigerated up to 3 days or frozen for 1 month. Store decorated cookies in an airtight container at room temperature up to 5 days; avoid refrigeration.
Nutrition
- Serving Size: 1 cookie (about 3 in
- Calories: 150
- Sugar: 15
- Sodium: 60
- Fat: 7
- Saturated Fat: 4.5
- Carbohydrates: 22
- Protein: 1
Keywords: graduation cookies, royal icing sugar cookies, gold detail cookies, graduation party treats, decorated sugar cookies