Love this? Save it for later!
Share the inspiration with your friends
“I never thought a dessert could spark a neighborhood conversation, but this Perfect Berry Pavlova Flag did just that last Fourth of July,” I confessed to my friend Lisa while we were prepping for the block party. You see, the idea came to me rather unexpectedly during a last-minute grocery run at the corner store. I was juggling a cracked basket, a toddler asking for “red and blue candy,” and a sudden craving for something sweet but light. Honestly, the usual pies and heavy cakes felt a bit much for the summer heat, and I was determined to bring something festive yet gluten-free that everyone could enjoy.
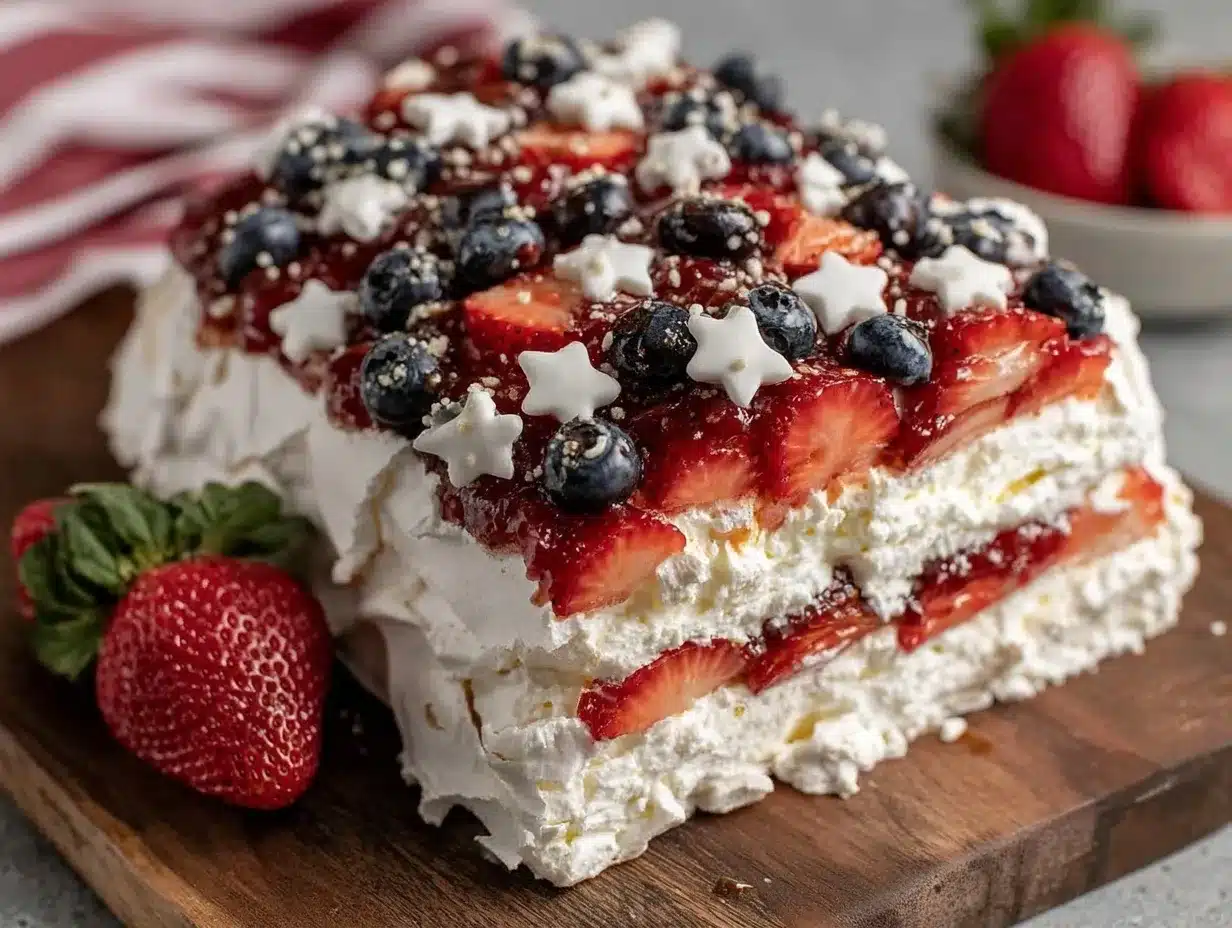
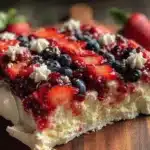
The pavlova’s crisp meringue base, topped with fluffy whipped cream and a colorful arrangement of fresh berries, seemed like the perfect answer. But the real magic happened when I arranged the strawberries, blueberries, and raspberries to mimic the American flag. The neighbors caught sight as I carried it over, and I swear the buzz of admiration was louder than the fireworks that night. Maybe you’ve been there—stuck trying to find a dessert that’s both stunning and allergy-friendly for your celebrations. This recipe stuck with me because it’s not just about the look; it’s about the effortless joy of sharing a treat that feels like a little slice of summer patriotism on your plate.
Let me tell you, the first time I made this, I forgot to add the vanilla extract (classic me moment), but even then, it was a hit. Since then, it’s become my go-to for July 4th, a dish that’s as much about the smiles as it is about the flavors. If you love berries, meringue, and a dessert that’s both gluten-free and crowd-pleasing, you’re going to want to keep reading.
Why You’ll Love This Recipe
This Perfect Berry Pavlova Flag isn’t just a pretty face at your Fourth of July table—it’s a winner for so many reasons, and I’ve tested it enough times to say so with confidence:
- Quick & Easy: Comes together in under 45 minutes, including baking and cooling time—ideal for last-minute celebrations or when guests drop by unexpectedly.
- Simple Ingredients: Uses pantry staples like egg whites and sugar, plus fresh berries that you can find year-round or swap seasonally.
- Perfect for Summer Entertaining: Light, refreshing, and gluten-free, it’s a crowd-pleaser for all ages and dietary needs.
- Crowd-Pleaser: Kids love the colorful flag design, and adults appreciate the delicate balance of crisp meringue and creamy toppings.
- Unbelievably Delicious: The combination of textures—crunchy outside, marshmallowy inside, topped with luscious cream and juicy berries—is pure comfort food that feels fancy.
What makes this pavlova different from the rest? The secret is in the meringue’s perfect crackle, achieved by a slow bake at a low temperature, and the way the berries are arranged to create that iconic flag look without fuss. I also like to whip the cream just right—not too stiff, so it spreads easily but still holds peaks. Honestly, it’s the kind of dessert that makes you close your eyes after the first bite and say, “Yep, this was worth the effort.” Whether you’re a seasoned baker or just trying to impress your summer guests without stress, this berry pavlova is your new best friend.
What Ingredients You Will Need
This recipe calls for straightforward, wholesome ingredients that come together beautifully to create that light, airy pavlova base and vibrant flag topping. You probably have most of these on hand, and the fresh berries bring the perfect splash of color and flavor.
- For the Meringue Base:
- 4 large egg whites, at room temperature (helps with volume)
- 1 cup (200g) granulated sugar (superfine if possible, for smooth meringue)
- 1 tsp white vinegar (stabilizes the meringue)
- 1 tsp cornstarch (adds that marshmallowy texture inside)
- 1 tsp vanilla extract (optional but recommended for flavor)
- For the Topping:
- 1 cup (240ml) heavy whipping cream, chilled (I prefer Organic Valley for its richness)
- 2 tbsp powdered sugar (to lightly sweeten the cream)
- 1/2 tsp vanilla extract (to complement the creaminess)
- For the Berry Flag:
- 1 cup fresh strawberries, hulled and sliced (for the red stripes)
- 1 cup fresh raspberries (additional red accent)
- 1 cup fresh blueberries (for the blue canton)
Feel free to swap the heavy cream with a dairy-free coconut cream if you’re dairy sensitive, and for a fun twist, try adding a sprinkle of lemon zest to the whipped cream for brightness. If fresh berries aren’t in season, frozen berries work fine; just thaw and drain excess juice to avoid sogginess. Also, I keep a little extra sugar on hand in case my egg whites need a bit more sweetness—it’s a subtle adjustment I learned from a baking class last fall.
Equipment Needed
- Mixing Bowls: Use a large, clean, grease-free bowl to beat the egg whites—glass or metal works best.
- Electric Mixer or Stand Mixer: Essential for whipping the egg whites to stiff peaks. A handheld mixer works fine if you don’t have stand equipment.
- Baking Sheet: A rimmed baking sheet to hold the pavlova base. I line mine with parchment paper for easy removal and cleanup.
- Spatula: Silicone spatula for folding in cornstarch and vinegar gently.
- Whisk: For whipping the cream by hand if you prefer, though an electric mixer saves you arm strength.
- Sifter: To dust powdered sugar on the cream, optional but pretty.
- Fine-Mesh Sieve: Helpful if you want to sift the sugar for a silky meringue texture.
If you don’t have a mixer, whisking egg whites by hand is totally doable but expect some serious arm workout! Also, I recommend investing in a good-quality silicone spatula; it’s saved me from many frustrating baking moments where batter sticks stubbornly to metal or plastic.
Preparation Method
- Preheat your oven to 275°F (135°C). Line a baking sheet with parchment paper. Draw a 9-inch (23cm) circle on the parchment as a guide, then flip the paper so the pencil side is down.
- Beat the egg whites: Place the egg whites in your mixing bowl and begin beating on medium speed until soft peaks form (about 2-3 minutes). This is when the egg whites start to hold their shape but still look a bit glossy.
- Gradually add sugar: Increase the mixer speed to high and add sugar one tablespoon at a time, beating well after each addition. This slow addition is key to a shiny, stable meringue. Continue until the mixture is thick, glossy, and stiff peaks form—when you lift the beaters, the peaks should stand straight up without drooping.
- Fold in dry ingredients: Sift the cornstarch and add vinegar and vanilla extract. Gently fold these in with a spatula—don’t overmix, or you’ll deflate the meringue. The cornstarch gives that soft marshmallow center, and the vinegar helps stabilize the structure.
- Shape the pavlova: Spoon the meringue onto the parchment circle, spreading it evenly and building up the edges slightly higher than the center to create a shallow bowl shape. This will hold your cream and berries later.
- Bake: Place in the oven and immediately reduce heat to 250°F (120°C). Bake for 1 hour 15 minutes to 1 hour 30 minutes. The pavlova should be crisp on the outside but still soft inside. Turn off the oven and leave the pavlova inside to cool completely (about 1-2 hours). This slow cooling prevents cracks and keeps it tender.
- Prepare the whipped cream: In a chilled bowl, beat the heavy cream, powdered sugar, and vanilla extract until soft peaks form. Don’t overbeat—it should be fluffy but spreadable.
- Assemble the flag: Carefully transfer the cooled pavlova to a serving plate. Spread the whipped cream evenly inside the pavlova’s center. Arrange the blueberries in the top left corner to form the blue field, then create red stripes alternating with strawberries and raspberries across the rest of the pavlova.
Pro tip: If your pavlova cracks a bit, don’t panic. It just adds character, and the cream will help hide any imperfections. Also, I like to chill the berries before assembling so they stay fresh longer on the cream. Once assembled, serve immediately or refrigerate for up to 3 hours before serving.
Cooking Tips & Techniques
Getting that perfect pavlova can feel tricky, but a few tips from my kitchen experiments might save you some hassle:
- Use room temperature egg whites: They whip up easier and reach higher volume than cold ones straight from the fridge.
- Make sure your bowl and beaters are squeaky clean: Even a tiny bit of grease can prevent egg whites from whipping properly.
- Add sugar slowly: This is the secret to a glossy, stable meringue. Dumping it all in at once can cause graininess or collapse.
- Don’t rush the baking: Low and slow is the name of the game. Baking at too high a temperature will brown the pavlova and make it brittle.
- Leave the pavlova in the oven to cool: Sudden temperature changes can cause cracking, so patience here pays off.
- Whip cream just before serving: It tastes best fresh and holds better texture if whipped close to assembly time.
I once tried to speed up the cooling by popping the pavlova in the fridge right out of the oven. Big mistake—the sudden chill made it crack like crazy. Since then, I stick to the slow cooling method, and honestly, it’s worth waiting for that delicate texture. Also, keep an eye on your oven temperature with an oven thermometer; my old oven tends to run hot, and that threw off my first two pavlovas.
Variations & Adaptations
This recipe is flexible and can be adapted to suit various dietary needs and flavor preferences:
- Dairy-Free Option: Swap the heavy cream with chilled coconut cream whipped until fluffy. The coconut adds a subtle tropical note that pairs nicely with the berries.
- Seasonal Berry Mix: In fall or winter, try pomegranate seeds, sliced kiwi, or even mandarins for a festive twist. Adjust the color pattern to keep that patriotic vibe or get creative with your own design.
- Chocolate Drizzle: For a richer dessert, drizzle melted dark chocolate over the assembled pavlova. It adds depth without overpowering the fresh flavors.
- Nutty Crunch: Sprinkle toasted sliced almonds or crushed pistachios on the whipped cream for texture contrast and a nutty flavor.
Personally, I once made a mini pavlova version for a picnic using frozen berries and coconut cream because I forgot to buy heavy cream. Surprisingly, it was a hit! The key is to keep the meringue base light and crisp, then experiment with toppings that suit your occasion.
Serving & Storage Suggestions
Serve your Perfect Berry Pavlova Flag chilled or at room temperature for best flavor. It’s a showstopper on any 4th of July table, especially when paired with light, summery drinks like sparkling lemonade or iced tea.
If you want to prep ahead, you can make the meringue base a day in advance and store it in an airtight container at room temperature. Assemble the cream and berries just before serving to keep everything fresh and crisp.
Leftovers? While pavlova is best fresh, you can store assembled portions in the fridge for up to 24 hours. Reheat the meringue base alone in a low oven (about 250°F/120°C) for 5-10 minutes to restore crispness before adding fresh cream and berries again.
Flavors tend to meld overnight, so if you have to prepare ahead, try to keep the cream and fruit separate until serving. This way, the berries won’t release too much juice into the meringue, which can make it soggy.
Nutritional Information & Benefits
This gluten-free dessert is a treat that balances indulgence with lighter ingredients. Here’s an estimate per serving (recipe makes about 8 servings):
| Calories | 210 |
|---|---|
| Fat | 11g (mostly from the cream) |
| Carbohydrates | 25g (mostly from sugar and berries) |
| Protein | 3g |
| Fiber | 3g (mostly from berries) |
The fresh berries add antioxidants and vitamins, while egg whites provide a low-fat source of protein. Being gluten-free, it’s great for those with gluten sensitivities or celiac disease. Just watch the sugar content if you’re monitoring intake, but honestly, it’s a special occasion dessert worth savoring.
Conclusion
This Perfect Berry Pavlova Flag is more than just a dessert—it’s a little celebration of summer, freedom, and simple joys on a plate. Its light texture, bright flavors, and festive presentation make it a standout at any Fourth of July gathering. I love how easy it is to customize and how it brings people together with smiles and “oohs” over the colors.
Whether you’re new to pavlova or a seasoned baker, this recipe invites you to have fun with the process and the presentation. I encourage you to make it your own, share it with friends, and maybe even inspire a new tradition. If you give this a try, I’d love to hear how your berry pavlova turns out—drop a comment or share any tweaks you made!
Here’s to sweet, simple celebrations that bring everyone closer around the table.
FAQs
What makes this pavlova gluten-free?
The pavlova is naturally gluten-free because it’s made from egg whites, sugar, and cream without any flour or gluten-containing ingredients.
Can I make the pavlova base ahead of time?
Yes, you can bake the meringue base a day in advance and store it in an airtight container at room temperature. Assemble the toppings just before serving.
Why did my meringue crack?
Cracking often happens if the pavlova cools too quickly or the oven temperature was too high. Letting it cool slowly in the oven with the door slightly open helps prevent cracks.
Can I use frozen berries for the flag?
Frozen berries work but should be thawed and drained well to avoid excess moisture making the meringue soggy.
How do I know when the egg whites have reached stiff peaks?
When you lift the beaters, the peaks should hold their shape firmly without drooping. The mixture will look glossy and thick.
For a delightful addition to your summer dessert repertoire, you might also enjoy the light and tangy lemon berry trifle or the fresh and crispy crispy garlic chicken for a savory complement to your festive meal.
Pin This Recipe!
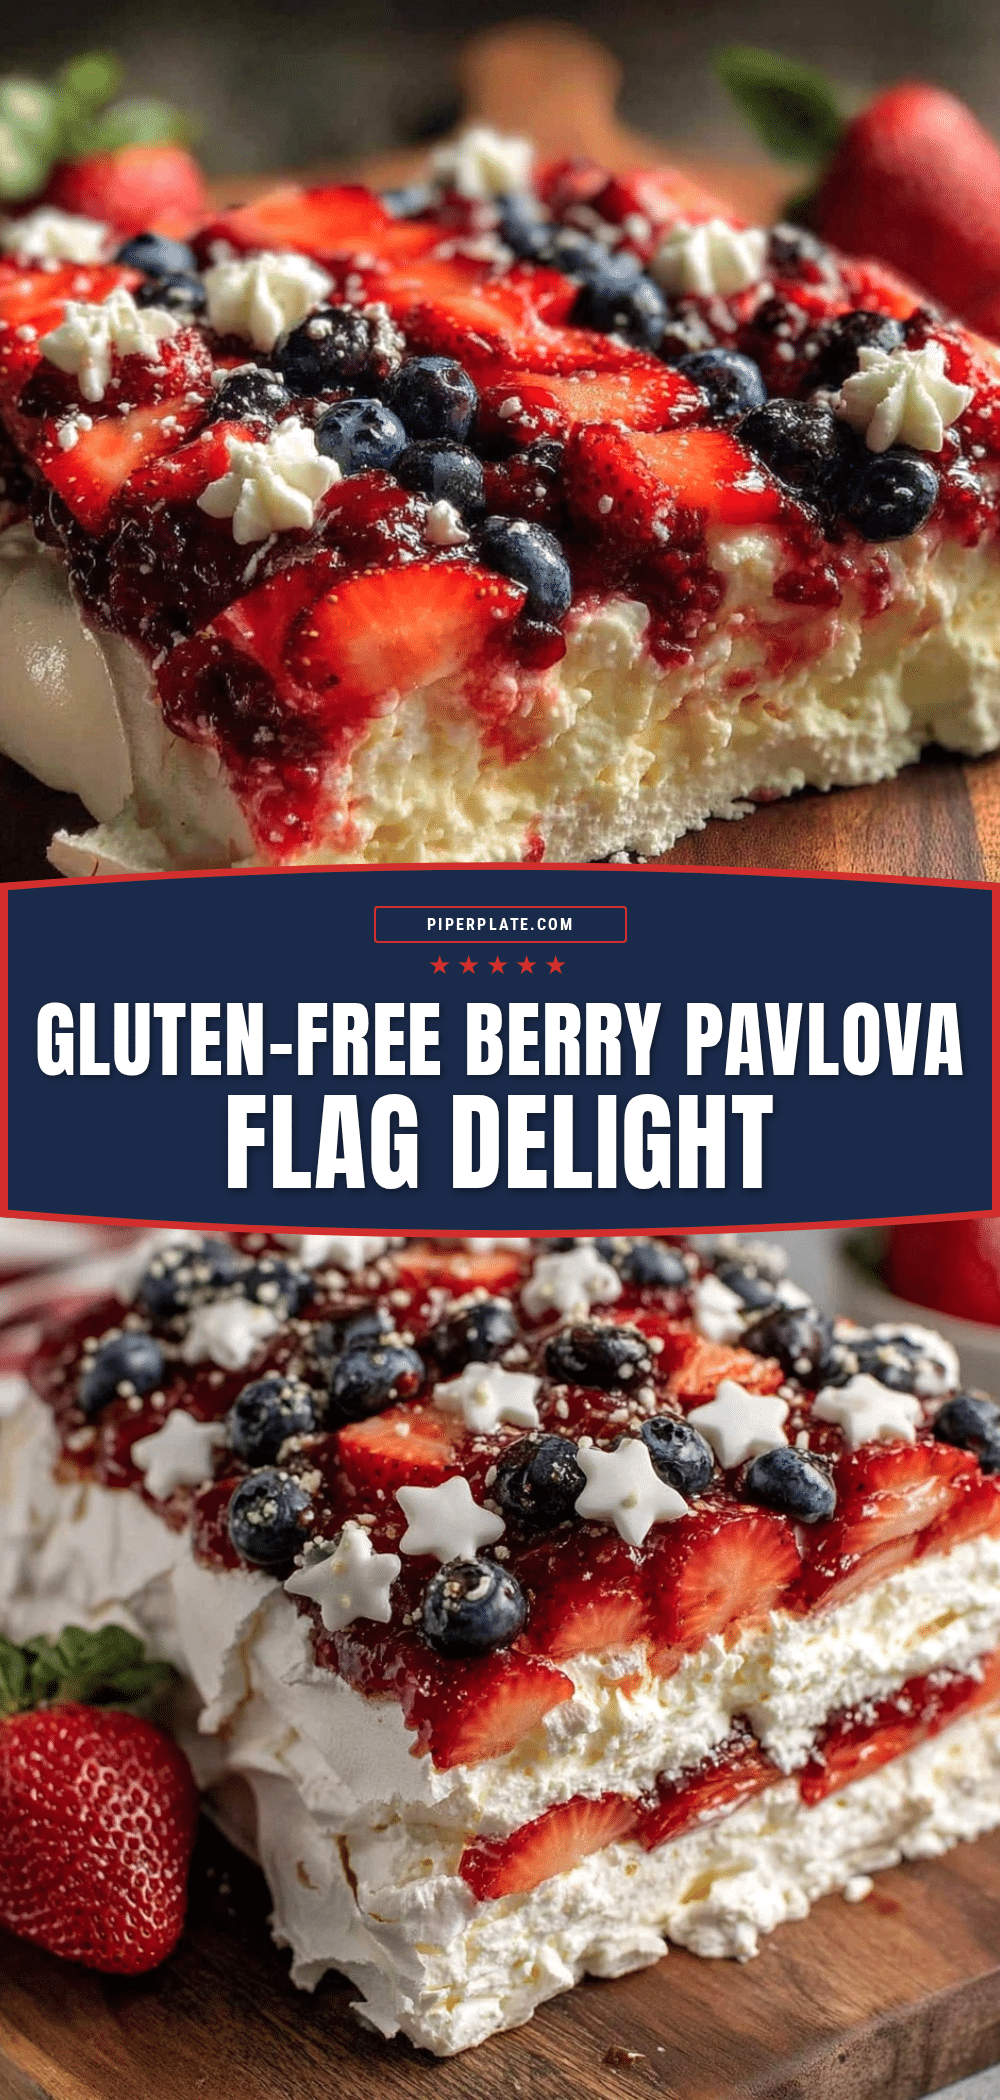
Perfect Berry Pavlova Flag Gluten-Free 4th of July Dessert Recipe for Easy Celebration
A light and festive gluten-free pavlova dessert featuring a crisp meringue base topped with whipped cream and fresh berries arranged to mimic the American flag, perfect for summer celebrations.
- Prep Time: 15 minutes
- Cook Time: 1 hour 30 minutes
- Total Time: 2 hours 15 minutes
- Yield: 8 servings 1x
- Category: Dessert
- Cuisine: American
Ingredients
- 4 large egg whites, at room temperature
- 1 cup (200g) granulated sugar (superfine if possible)
- 1 tsp white vinegar
- 1 tsp cornstarch
- 1 tsp vanilla extract (optional)
- 1 cup (240ml) heavy whipping cream, chilled
- 2 tbsp powdered sugar
- 1/2 tsp vanilla extract
- 1 cup fresh strawberries, hulled and sliced
- 1 cup fresh raspberries
- 1 cup fresh blueberries
Instructions
- Preheat your oven to 275°F (135°C). Line a baking sheet with parchment paper. Draw a 9-inch (23cm) circle on the parchment as a guide, then flip the paper so the pencil side is down.
- Place the egg whites in your mixing bowl and begin beating on medium speed until soft peaks form (about 2-3 minutes).
- Increase the mixer speed to high and add sugar one tablespoon at a time, beating well after each addition until the mixture is thick, glossy, and stiff peaks form.
- Sift the cornstarch and add vinegar and vanilla extract. Gently fold these in with a spatula—don’t overmix.
- Spoon the meringue onto the parchment circle, spreading it evenly and building up the edges slightly higher than the center to create a shallow bowl shape.
- Place in the oven and immediately reduce heat to 250°F (120°C). Bake for 1 hour 15 minutes to 1 hour 30 minutes until crisp outside but soft inside. Turn off the oven and leave the pavlova inside to cool completely (about 1-2 hours).
- In a chilled bowl, beat the heavy cream, powdered sugar, and vanilla extract until soft peaks form. Do not overbeat.
- Carefully transfer the cooled pavlova to a serving plate. Spread the whipped cream evenly inside the pavlova’s center.
- Arrange the blueberries in the top left corner to form the blue field, then create red stripes alternating with strawberries and raspberries across the rest of the pavlova.
Notes
Use room temperature egg whites for better volume. Add sugar slowly for a glossy, stable meringue. Bake low and slow to avoid browning and cracking. Cool pavlova slowly in the oven to prevent cracks. Whip cream just before serving for best texture. Frozen berries can be used if thawed and drained well. Pavlova base can be made a day ahead and stored airtight at room temperature. Assemble toppings just before serving.
Nutrition
- Serving Size: 1 slice (1/8 of pavl
- Calories: 210
- Fat: 11
- Carbohydrates: 25
- Fiber: 3
- Protein: 3
Keywords: pavlova, berry pavlova, gluten-free dessert, 4th of July dessert, patriotic dessert, meringue dessert, summer dessert, berry flag dessert