Love this? Save it for later!
Share the inspiration with your friends
Maggie wasn’t trying to impress anyone. I’d stopped by to borrow a ladder on a random Saturday afternoon, and the smell hit me before I even got through the side gate. Something savory and sweet, buttery and sharp all at once, drifting out of her tiny apartment kitchen window. When she opened the door, she was holding a half-eaten sandwich, crumbs on her shirt, looking mildly annoyed that I’d interrupted her lunch break.
“Oh, this old thing?” she said when I asked what in the world smelled so incredible. “It’s just a grilled cheese. I was cleaning out the fridge.” She gestured vaguely toward her counter, where a pile of apple slices sat next to a block of cheddar and a loaf of sourdough that was clearly from yesterday. She’d thrown it together in five minutes flat, she told me, because she was hungry and there wasn’t much else to eat.
I stood there in her doorway, ladder forgotten, watching her take another bite. The cheese stretched in that perfect way, and I swear I could hear the bread crackle. She offered me one, totally casual, like it was nothing special. Let me tell you, that first bite stopped me cold. The sweetness of the apple, the sharpness of the cheddar, the crunch of that golden-brown butter bread — it was one of those flavor combinations that makes you wonder why you haven’t been eating it your whole life.
Maybe you’ve been there, standing in someone else’s kitchen, watching them make something extraordinary out of ordinary ingredients and acting like it’s no big deal. That’s exactly what happened to me. I went home that day with a borrowed ladder and a new obsession. I’ve been making this Honeycrisp Apple Cheddar Grilled Cheese ever since, tweaking it just enough to call it my own, but always remembering that it started with Maggie and her casual Saturday lunch.
Why You’ll Love This Recipe
This isn’t your average grilled cheese, and I’m not just saying that to be dramatic. I’ve tested this combination more times than I care to admit — different breads, different cheeses, different apple varieties — and I can tell you with confidence that this version hits every single note perfectly. It’s the kind of sandwich that makes people close their eyes on the first bite, and honestly, that never gets old.
- Quick & Easy : From start to finish, this comes together in about 15 minutes. Perfect for those days when you need lunch on the table fast but still want something that feels special.
- Simple Ingredients : Nothing fancy here. You probably already have most of these items in your kitchen right now, minus maybe the Honeycrisp apples.
- Perfect for Hosting : Here’s the thing — this sandwich scales beautifully for a crowd. You can prep everything ahead of time and assemble them in batches while your guests mingle. It’s the kind of impressive-but-effortless food that makes people think you tried way harder than you actually did.
- Crowd-Pleaser : I’ve served these at casual get-togethers and slightly nicer gatherings, and they disappear every single time. Kids love them, adults love them, even picky eaters come back for seconds.
- Unbelievably Delicious : The combination of tart-sweet apples and sharp, melty cheddar is honestly next-level. The texture contrast between the crispy bread and the soft filling is pure comfort food magic.
What makes this recipe different from all the other apple grilled cheese recipes out there? Two things. First, I use a specific technique for preparing the apples — a quick toss in lemon juice and a tiny pinch of salt — that keeps them from browning and actually enhances their flavor. Second, I’ve cracked the code on getting that perfect golden-brown crust every single time without burning the bread. It’s not complicated, but it makes all the difference.
This is the kind of recipe that makes you look like a hero at your own gathering. It’s comfort food reimagined — familiar enough to feel cozy, but unexpected enough to spark conversation. Perfect for impressing guests without stress, or turning a simple lunch into something memorable.
What Ingredients You Will Need
This recipe uses simple, wholesome ingredients that work together to create something genuinely greater than the sum of their parts. Most of these are pantry staples or easy to find at any grocery store.
For the Sandwich Base
- 8 slices sourdough bread (I prefer a good bakery-style loaf, not the pre-sliced stuff from the bread aisle — the sturdier texture holds up better. If you can’t find sourdough, a hearty country white works well too.)
- 8 ounces sharp white cheddar cheese, thinly sliced (I recommend Tillamook or Cabot for consistent melting and bold flavor. Avoid pre-shredded cheese here — it doesn’t melt as smoothly.)
- 2 medium Honeycrisp apples (You want them firm and crisp, not mealy. Honeycrisp holds its texture during cooking and has the perfect sweet-tart balance. If Honeycrisp isn’t available, Fuji or Pink Lady are good substitutes.)
- 4 tablespoons unsalted butter, softened (Kerrygold is my go-to for the rich flavor it adds to the crust. Let it come to room temperature for easy spreading.)
- 1 tablespoon fresh lemon juice (This prevents the apples from browning and adds a subtle brightness that cuts through the richness of the cheese.)
- Pinch of fine sea salt (Just a tiny bit — it makes the apples taste more like themselves.)
Optional Add-Ins

- 2 tablespoons honey or maple syrup, for drizzling (Adds a lovely sweetness that complements the apples. I personally prefer honey, but maple syrup gives it a nice fall vibe.)
- 1/4 cup caramelized onions (If you have the time, these add an incredible savory depth that takes the sandwich to another level. I make a batch on weekends and keep them in the fridge for exactly this purpose.)
- Fresh thyme leaves, for sprinkling (A few leaves add an unexpected herbaceous note that works surprisingly well with the apple and cheddar.)
- Dijon mustard, for spreading (A thin layer on the inside of the bread adds a tangy kick. I use Grey Poupon, but any good Dijon works.)
Ingredient Selection Tips
When you’re shopping for this recipe, pay attention to your apples. Look for Honeycrisps that feel heavy for their size and have no soft spots or bruises. The skin should be smooth and taut. For the cheese, buy a block and slice it yourself — it melts more evenly and has better flavor than pre-shredded options. And please, please use real butter. Margarine or spreads won’t give you that beautiful golden crust that makes this sandwich so special.
Equipment Needed
- Large non-stick skillet or cast iron pan (I prefer cast iron for the even heat distribution and the superior crust it creates. If you’re using non-stick, just be careful not to scratch it with metal utensils.)
- Spatula (A thin, flexible metal spatula works best for flipping grilled cheese without disturbing the filling. I’ve broken too many sandwiches with a thick plastic spatula — learn from my mistakes.)
- Chef’s knife (You need a sharp knife for thinly slicing the apples. A dull knife will crush them and release too much juice.)
- Cutting board (Preferably one that’s dedicated to fruit, to avoid any lingering onion or garlic flavors.)
- Small bowl (For tossing the apple slices with lemon juice and salt.)
- Butter knife (For spreading butter evenly on the bread. Room temperature butter makes this so much easier.)
- Plate or baking sheet (For holding assembled sandwiches before cooking. If you’re making multiple batches, a baking sheet in a low oven (200°F) keeps them warm while you finish the rest.)
That’s really all you need. No fancy gadgets required. If you don’t have a cast iron pan, don’t worry — any heavy-bottomed skillet will work. The key is making sure the pan is preheated properly before you add the sandwiches.
Preparation Method
- Prepare your apples. Core the Honeycrisp apples (no need to peel them — the skin adds color and texture) and slice them into thin rounds, about 1/8-inch thick. You want them thin enough to soften during cooking but thick enough to retain some crunch. Place the slices in a small bowl and toss with the lemon juice and a tiny pinch of salt. Set aside while you prepare everything else.
- Butter the bread. Lay your 8 slices of sourdough on a clean work surface. Using a butter knife, spread a thin, even layer of softened butter on one side of each slice. Don’t skimp here, but also don’t go overboard — you want enough to create a golden crust, not a greasy mess. I find about 1/2 tablespoon per slice is perfect.
- Assemble the sandwiches. Flip 4 of the bread slices over so the buttered side is facing down (toward the cutting board). This is the bottom of your sandwich. Layer on the sliced cheddar cheese, dividing it evenly among the 4 slices. Then arrange the apple slices on top of the cheese, overlapping them slightly. If you’re using any optional add-ins like honey, caramelized onions, or fresh thyme, add them now. Top with the remaining 4 bread slices, buttered side up.
- Preheat your pan. Place your skillet or cast iron pan over medium heat. Let it heat up for about 2 minutes — you want it hot but not smoking. A good test is to sprinkle a few drops of water on the pan; if they sizzle and evaporate immediately, you’re ready to go.
- Cook the first side. Carefully place 2 sandwiches in the pan (or as many as will fit without overcrowding). Press down gently with the spatula to ensure even contact with the pan. Cook for 3-4 minutes, or until the bottom is golden brown and crispy. Peek underneath after 3 minutes to check the color — you’re looking for a deep, even golden brown.
- Flip and cook the second side. Using your spatula, carefully flip the sandwiches. Press down gently again. Cook for another 3-4 minutes, until the second side is golden brown and the cheese is fully melted. If the bread is browning too quickly but the cheese hasn’t melted yet, reduce the heat slightly and cover the pan with a lid for the last minute of cooking.
- Rest and slice. Transfer the cooked sandwiches to a cutting board and let them rest for 1-2 minutes. This allows the cheese to set slightly so it doesn’t all ooze out when you cut. Slice each sandwich diagonally (it just tastes better that way, I swear) and serve immediately.
- Repeat with remaining sandwiches. If you’re making multiple batches, wipe out the pan between batches and adjust the heat as needed. You can keep finished sandwiches warm on a baking sheet in a 200°F oven while you finish the rest.
Cooking Tips & Techniques
Let me save you some of the frustration I went through in my early days of making these. The biggest mistake people make is using too high heat. I know it’s tempting to crank it up and get that crust fast, but all you’ll get is burnt bread and unmelted cheese. Medium heat is your friend here — it gives the cheese time to melt fully while the bread turns that perfect shade of golden brown.
Another thing I learned the hard way: don’t overcrowd the pan. If you put too many sandwiches in at once, the temperature drops and the bread starts steaming instead of crisping. You’ll end up with soggy, pale sandwiches that nobody wants. Cook in batches if you need to. Your patience will be rewarded.
Here’s a trick I picked up from a diner cook years ago: after you flip the sandwich, press down on it gently with the spatula and hold it for about 10 seconds. This ensures maximum contact with the pan and gives you that extra-crispy crust. Just don’t press so hard that you squeeze out all the filling.
If you’re making these for a crowd, here’s my strategy: slice all the apples and toss them with lemon juice up to an hour ahead. Keep them in the fridge in an airtight container. Butter all the bread and assemble the sandwiches on a baking sheet, then cover with plastic wrap and refrigerate for up to 4 hours. When your guests arrive, just cook them in batches. It takes about 10 minutes to cook 4 sandwiches, and you can keep them warm in the oven while you finish the rest.
One more thing — if your cheese isn’t melting as quickly as you’d like, try covering the pan with a lid for the last minute of cooking on each side. The trapped steam helps melt the cheese without burning the bread. Just don’t leave the lid on too long, or the crust will lose its crunch.
Variations & Adaptations
One of the things I love most about this recipe is how adaptable it is. Here are a few variations I’ve tried and loved:
- Savory Herb Version : Add a few fresh sage leaves and a thin layer of Dijon mustard to each sandwich before cooking. The earthiness of the sage pairs beautifully with the apple and cheddar, and the mustard adds a nice tangy kick. I made these for a fall dinner party once and they were gone in minutes.
- Spicy Kick Version : Spread a thin layer of fig jam on the inside of the bread, then add a few thin slices of jalapeño (seeds removed if you want less heat). The sweetness of the fig jam and the heat from the jalapeño create an incredible sweet-spicy-savory balance that’s honestly addictive.
- Dietary Adaptations : For a gluten-free version, use your favorite sturdy gluten-free bread (I’ve had good luck with Schar’s sourdough-style loaf). For a dairy-free version, use a good-quality vegan cheddar and plant-based butter. Miyoko’s makes an excellent vegan butter that browns beautifully.
- Different Apple Varieties : While Honeycrisp is my first choice, don’t hesitate to experiment. Granny Smith apples add a tartness that’s wonderful with sharp cheddar. Gala or Fuji apples are sweeter and milder. I’ve even used sliced pears in a pinch, and they were fantastic.
- Indoor vs. Outdoor Cooking : This recipe works beautifully on a griddle or even on a campfire grate if you’re cooking outdoors. Just make sure to adjust your heat accordingly — outdoor cooking tends to be hotter and less controlled, so keep a close eye on the sandwiches.
Serving & Storage Suggestions
These sandwiches are best served hot, straight from the pan, when the cheese is still stretchy and the bread is at its crispiest. I like to cut them diagonally and serve them on a wooden board with a small bowl of tomato soup on the side for dipping. It’s a classic combination for a reason.
If you’re serving these at a gathering, consider setting up a little grilled cheese bar. Keep the cooked sandwiches warm on a baking sheet in a low oven (200°F), and set out small bowls of honey, fig jam, Dijon mustard, and maybe some pickled onions for people to customize their own. It’s interactive and fun, and guests love being able to choose their own adventure.
For beverages, these pair beautifully with a crisp hard cider or a light lager. If you’re going non-alcoholic, a sparkling apple cider or even a good old-fashioned lemonade works wonderfully. The acidity cuts through the richness of the cheese and complements the apples.
As for storage, these sandwiches don’t reheat particularly well — the bread loses its crunch and the apples can get mushy. If you have leftovers (which honestly, rarely happens in my house), wrap them tightly in foil and refrigerate for up to 2 days. To reheat, place them in a skillet over medium-low heat for 2-3 minutes per side, or pop them in an air fryer at 350°F for 3-4 minutes. The microwave will make them sad and soggy, so avoid it if you can.
One thing I’ve noticed is that the flavors actually meld together nicely after the sandwiches sit for a few hours. The apple and cheese flavors marry in a way that’s different from the fresh version — not better, just different. If you’re meal-prepping, you can assemble the sandwiches (without cooking them) and refrigerate them for up to 24 hours. Then just cook them when you’re ready to eat.
Nutritional Information & Benefits
Per sandwich (approximate values, based on 4 servings):
- Calories: 480-520
- Fat: 28g
- Carbohydrates: 45g
- Fiber: 4g
- Sugar: 12g
- Protein: 18g
- Sodium: 680mg
While this isn’t exactly health food, it does have some redeeming qualities. Honeycrisp apples are a good source of fiber and vitamin C, and they contain antioxidants that support overall health. The cheddar cheese provides calcium and protein, which help keep you feeling full and satisfied. And sourdough bread, being fermented, is often easier to digest than other breads and has a lower impact on blood sugar.
For those with dietary concerns, please note that this recipe contains gluten, dairy, and (if you add honey) honey. It can be made gluten-free with appropriate bread substitutions, and dairy-free with vegan cheese and butter alternatives. As always, check your specific ingredients for any hidden allergens.
I personally love that this sandwich, while indulgent, uses whole, real ingredients. There’s nothing processed or artificial here — just good bread, real cheese, and fresh fruit. It’s the kind of food that feels like a treat but doesn’t leave you feeling heavy or guilty afterward.
Conclusion
This Honeycrisp Apple Cheddar Grilled Cheese is one of those recipes that proves simple things done well are often the most memorable. It started as a casual lunch at a friend’s house, and it’s become a staple in my own kitchen — something I turn to when I need a quick meal that feels special, or when I want to impress guests without breaking a sweat.
I hope you’ll give this recipe a try, and more than that, I hope you’ll make it your own. Add your favorite herbs, swap in a different cheese, or serve it alongside your favorite soup. The beauty of a recipe like this is that it’s a starting point, not a rigid set of rules.
When you make it — and I really hope you do — I’d love to hear how it turns out. Drop a comment below and let me know what variations you tried, or tag me in your photos on social media. There’s something special about knowing that a recipe born from a borrowed ladder and a casual Saturday lunch is now being made in kitchens all over the place. Happy cooking, friends!
Frequently Asked Questions
Can I use a different type of apple?
Absolutely! While Honeycrisp is my top recommendation for its perfect balance of sweetness and tartness, you can use Fuji, Pink Lady, Granny Smith, or Gala apples. Just keep in mind that Granny Smith will be much tarter, and Gala will be sweeter and softer. Adjust your other ingredients accordingly.
Can I make these sandwiches ahead of time?
You can assemble the sandwiches (without cooking them) up to 24 hours ahead and keep them refrigerated. When you’re ready to eat, just cook them straight from the fridge — you might need to add an extra minute to the cooking time. I don’t recommend cooking them fully ahead of time, as they lose their crispiness.
What’s the best bread to use?
Sourdough is my first choice because it’s sturdy enough to hold up to the filling and has a tangy flavor that complements the apples and cheese. Other good options include a hearty country white, brioche (for a richer sandwich), or even a good-quality whole wheat. Avoid very soft, airy breads that will get soggy.
Can I add meat to this sandwich?
You sure can! Thinly sliced ham, turkey, or even crispy bacon would be delicious additions. Just be careful not to overload the sandwich, or it will be hard to flip and the bread might not get crispy. I’d recommend adding no more than 2-3 ounces of meat per sandwich.
How do I prevent the apples from making the bread soggy?
The key is to slice the apples thinly and toss them with lemon juice, which helps them hold their texture. Also, make sure you’re using a sturdy bread like sourdough that can handle some moisture. If you’re particularly worried about sogginess, you can pat the apple slices dry with a paper towel before assembling the sandwiches.
Pin This Recipe!
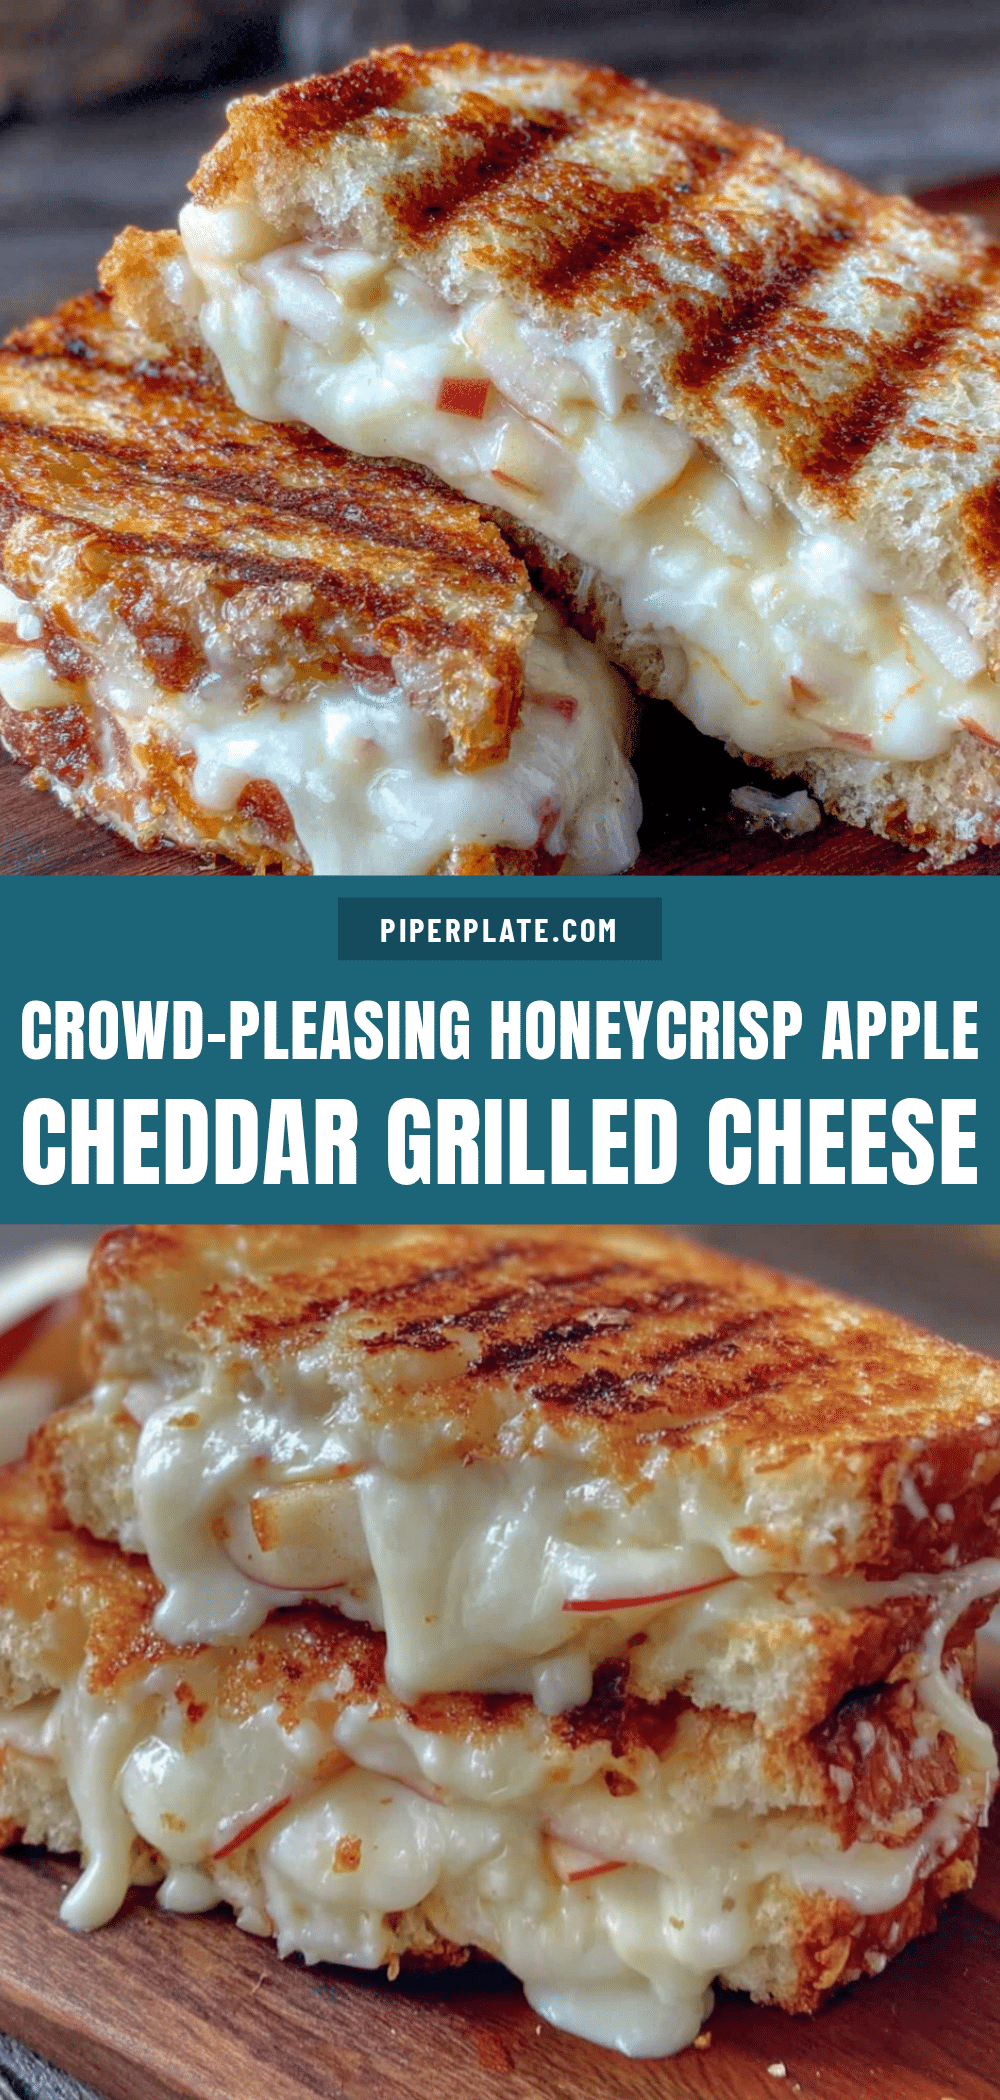
Easy Honeycrisp Apple Cheddar Grilled Cheese

A quick and easy grilled cheese sandwich featuring tart-sweet Honeycrisp apples and sharp white cheddar on crispy sourdough bread. Perfect for a fast lunch or impressing guests with minimal effort.
- Prep Time: 10 minutes
- Cook Time: 8 minutes
- Total Time: 18 minutes
- Yield: 4 servings 1x
- Category: Main Course
- Cuisine: American
Ingredients
- 8 slices sourdough bread
- 8 ounces sharp white cheddar cheese, thinly sliced
- 2 medium Honeycrisp apples, cored and thinly sliced (about 1/8-inch thick)
- 4 tablespoons unsalted butter, softened
- 1 tablespoon fresh lemon juice
- Pinch of fine sea salt
- 2 tablespoons honey or maple syrup (optional)
- 1/4 cup caramelized onions (optional)
- Fresh thyme leaves (optional)
- Dijon mustard (optional)
Instructions
- Core the Honeycrisp apples (no need to peel) and slice into thin rounds, about 1/8-inch thick. Place slices in a small bowl and toss with lemon juice and a tiny pinch of salt. Set aside.
- Lay 8 slices of sourdough on a clean work surface. Spread a thin, even layer of softened butter on one side of each slice (about 1/2 tablespoon per slice).
- Flip 4 slices over so the buttered side faces down. Layer on the sliced cheddar cheese, dividing evenly. Arrange apple slices on top of the cheese, overlapping slightly. Add any optional add-ins (honey, caramelized onions, fresh thyme, or Dijon mustard) if desired. Top with remaining 4 bread slices, buttered side up.
- Place a large non-stick skillet or cast iron pan over medium heat and let it heat for about 2 minutes (until a few drops of water sizzle and evaporate immediately).
- Carefully place 2 sandwiches in the pan (or as many as fit without overcrowding). Press down gently with a spatula. Cook for 3-4 minutes, until the bottom is golden brown and crispy.
- Flip the sandwiches carefully. Press down gently again. Cook for another 3-4 minutes, until the second side is golden brown and the cheese is fully melted. If bread browns too quickly, reduce heat and cover pan with a lid for the last minute.
- Transfer cooked sandwiches to a cutting board and let rest for 1-2 minutes. Slice diagonally and serve immediately.
- Repeat with remaining sandwiches. Wipe out pan between batches if needed. Keep finished sandwiches warm on a baking sheet in a 200°F oven.
Notes
Use medium heat to avoid burning the bread before the cheese melts. For extra-crispy crust, press down gently on the sandwich after flipping and hold for 10 seconds. If making for a crowd, assemble sandwiches up to 4 hours ahead and refrigerate; cook in batches and keep warm in a 200°F oven. Leftovers can be refrigerated for up to 2 days and reheated in a skillet or air fryer (avoid microwave).
Nutrition
- Serving Size: 1 sandwich
- Calories: 500
- Sugar: 12
- Sodium: 680
- Fat: 28
- Saturated Fat: 16
- Carbohydrates: 45
- Fiber: 4
- Protein: 18
Keywords: grilled cheese, apple cheddar, Honeycrisp, sourdough, quick lunch, comfort food, fall recipe


