Love this? Save it for later!
Share the inspiration with your friends
Honestly, these Graveyard Dirt Cups aren’t just for Halloween. I mean, sure, they’re a showstopper at a spooky party, but I’ve brought them to summer barbecues, Easter brunches, and even a casual Tuesday night dinner with friends. They always, always get that reaction—the one where people lean in, point, and say, “Wait, are those little tombstones?!”
Here’s why this version has become my go-to for hosting:
- No-Bake & Incredibly Easy: You don’t even need to turn on the oven. It’s a simple mix, layer, and chill situation. Perfect for when you’re already running around getting the house ready.
- Made with Simple Ingredients: Cool Whip, instant pudding, cream cheese, and Oreos. You probably have most of this in your pantry right now. No fancy grocery store trips needed.
- Perfect for a Crowd: This recipe scales beautifully. I’ve made a giant trifle bowl version for a potluck and individual cups for a sit-down dinner. Both work like a charm.
- Unbelievably Delicious: The texture is what gets me every time. You’ve got the creamy, tangy pudding mixture, the slight crunch from the crushed Oreos, and then the gummy worms hiding inside. It’s a party in a cup.
- Always a Crowd-Pleaser: Kids go absolutely wild for them, and adults? They’re the first ones to grab a spoon and dig in. It’s one of those desserts that makes everyone feel like a kid again.
This isn’t just another dirt cup recipe. The trick is in the cream cheese—it gives the pudding layer a richness that store-bought pudding cups just don’t have. It’s the kind of dessert that makes you close your eyes after the first bite. It’s comfort food, reimagined for a party.
What Ingredients You Will Need
This recipe uses simple, wholesome ingredients to deliver bold flavor and satisfying texture without the fuss. Most of these are pantry staples, which is exactly what you want when you’re hosting.
- For the Creamy Pudding Layer:
- 1 (8-ounce) package cream cheese, softened (I always use full-fat Philadelphia for the best texture)
- 1/2 cup (1 stick) unsalted butter, softened (adds richness and helps the pudding set up firmly)
- 1 cup powdered sugar (you can sift it if you want, but I never bother)
- 1 (3.9-ounce) package instant chocolate pudding mix (I prefer Jell-O brand)
- 2 cups cold milk (whole milk gives the creamiest result, but 2% works fine)
- 1 (8-ounce) container Cool Whip, thawed (or use homemade whipped cream if you’re feeling fancy)
- For the Dirt & Decorations:
- 1 (14.3-ounce) package Oreo cookies (about 36 cookies)
- Gummy worms (I get the big bag from the bulk section)
- Small candy pumpkins or other seasonal candy (optional, but so cute)
- Chocolate wafer cookies or chocolate graham crackers for “tombstones” (or just buy pre-made candy tombstones)
- Ingredient Substitutions:
- For a dairy-free version, use vegan cream cheese, plant-based butter, and coconut milk. The texture will be slightly different, but still delicious.
- If you don’t have Cool Whip, you can make your own stabilized whipped cream. Just whip 1 1/2 cups heavy cream with 2 tablespoons powdered sugar until stiff peaks form.
- Gluten-free? Use gluten-free chocolate sandwich cookies. They work perfectly.
Equipment Needed
You don’t need a lot of fancy gear for this one. Here’s what I use:
- Electric hand mixer or stand mixer: You could do this by hand, but your arm will get tired. A hand mixer is perfect.
- Large mixing bowls: One for the pudding layer, one for crushing Oreos.
- Food processor or a zip-top bag and rolling pin: I’ve used both. The food processor is faster, but smashing the Oreos in a bag is oddly satisfying.
- Small clear cups or glasses: I use 8-ounce plastic cups for parties (they’re disposable, which is great for cleanup), but small mason jars or juice glasses look adorable.
- Spatula: For scraping every last bit of that creamy goodness into the cups.
- Measuring cups and spoons: Standard baking gear.
Preparation Method
This recipe comes together in about 20 minutes of active time, plus at least 2 hours of chilling. Trust me, the chilling is non-negotiable—it’s what makes the layers set perfectly.
- Crush the Oreos. Place the entire package of Oreos (filling and all) into a food processor. Pulse until you get fine crumbs that look like dirt. If you don’t have a food processor, put them in a large zip-top bag and smash them with a rolling pin. You want some small chunks for texture, but mostly fine crumbs. Set aside.
- Make the pudding layer. In a large bowl, beat the softened cream cheese and butter together with an electric mixer until smooth and fluffy—about 2 minutes. Add the powdered sugar and beat until combined. It should look like a thick frosting.
- Prepare the pudding. In a separate medium bowl, whisk the instant chocolate pudding mix with the cold milk for about 2 minutes, until it starts to thicken. It will be very soft at this point—that’s normal.
- Combine everything. Pour the pudding mixture into the cream cheese mixture and beat until smooth. Then, gently fold in the thawed Cool Whip with a spatula until no white streaks remain. The mixture should be light, fluffy, and incredibly creamy.
- Start layering. Grab your cups. Spoon about 2 tablespoons of the Oreo “dirt” into the bottom of each cup. Press it down lightly with the back of a spoon.
- Add the pudding. Spoon or pipe the pudding mixture over the Oreo layer, filling the cup about halfway. I like to use a piping bag for a cleaner look, but a spoon works just fine.
- Hide the worms. This is the fun part. Press 2 or 3 gummy worms into the pudding layer, letting their tails stick out slightly. This is the “surprise” element that makes everyone smile.
- Finish layering. Add another layer of pudding, filling the cup to about 3/4 full. Then top with a generous layer of Oreo crumbs, completely covering the pudding. It should look like a little pot of dirt.
- Decorate and chill. Place a candy tombstone or a chocolate wafer on top, and maybe add a few more gummy worms peeking out. Cover the cups with plastic wrap and refrigerate for at least 2 hours, but overnight is even better. The flavors meld together beautifully.
Cooking Tips & Techniques
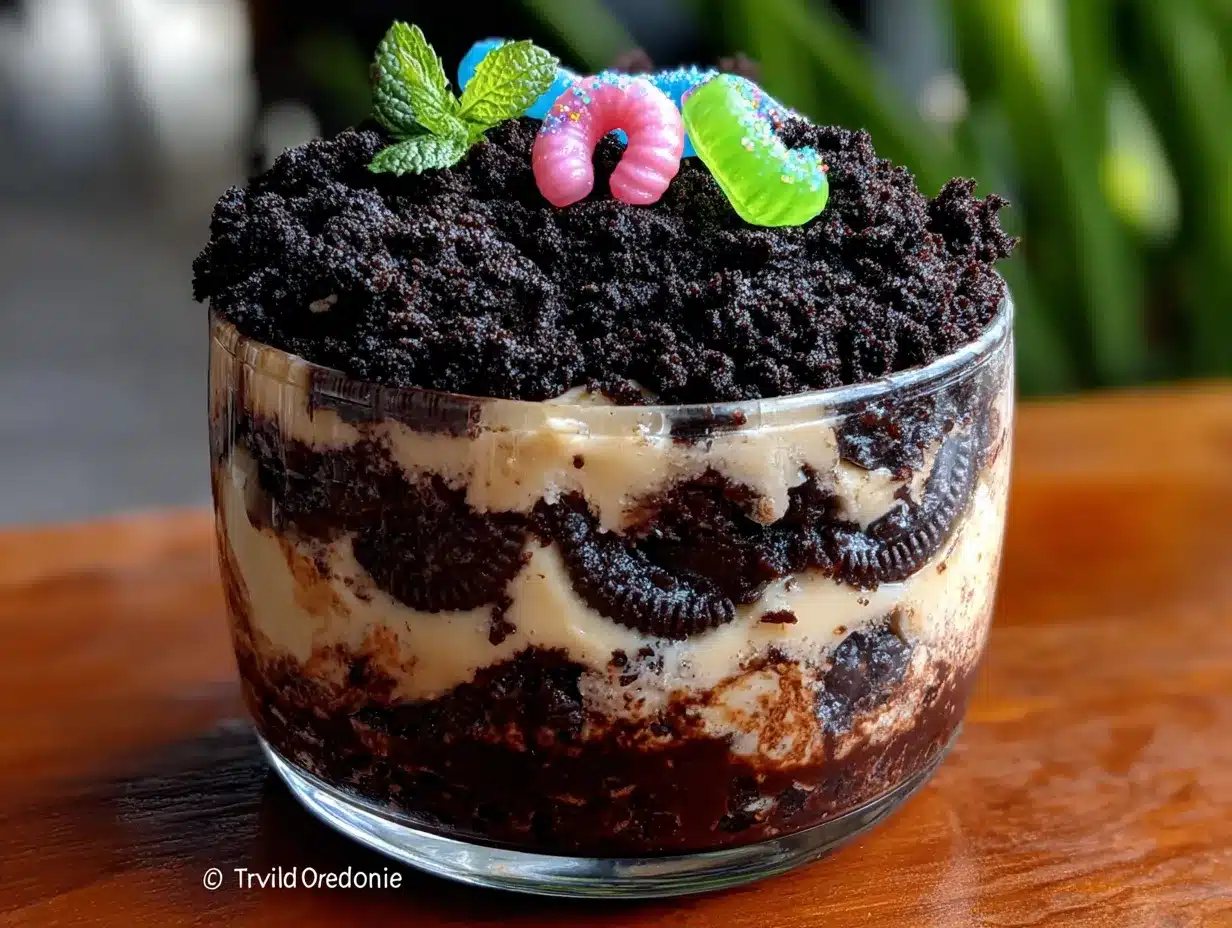
I’ve made these Graveyard Dirt Cups more times than I can count, and I’ve learned a few things along the way. Here are my best tips for getting them perfect every time.
- Don’t over-mix the Cool Whip. Fold it in gently. If you beat it too hard, you’ll deflate the air and end up with a dense, heavy pudding layer. You want it light and cloud-like.
- Chill the cups before serving. I know I said this, but it’s worth repeating. The pudding needs time to set up. If you serve them right away, it will be soupy. Patience, my friend.
- Crush the Oreos just before using. If you crush them too far in advance, they can get stale and lose their crunch. I usually crush them while the pudding is chilling.
- Use room temperature cream cheese. This is crucial. Cold cream cheese will leave lumps in your pudding mixture. Let it sit on the counter for 30 minutes before you start.
- Make it ahead of time. These are actually better the next day. The Oreo crumbs soften slightly against the pudding, creating a texture that’s almost like a cake. I often make them the night before a party.
Variations & Adaptations
This recipe is incredibly versatile. Here are a few ways I’ve switched it up over the years.
- Peanut Butter Dirt Cups: Add 1/2 cup of creamy peanut butter to the cream cheese mixture. It gives the pudding a subtle nutty flavor that pairs beautifully with the chocolate. I tried this once on a whim, and it was a huge hit.
- Mint Chocolate Chip Dirt Cups: Use mint chocolate sandwich cookies instead of regular Oreos, and add 1/2 teaspoon of peppermint extract to the pudding mixture. Top with a few chocolate chips for extra crunch.
- Vegan Version: Use vegan cream cheese, plant-based butter, and coconut milk. For the Cool Whip, there’s a vegan version available, or you can whip a can of full-fat coconut cream. The texture is a little different, but still delicious.
- Individual Trifle: Instead of small cups, layer everything in a large glass trifle bowl. It makes for a stunning presentation at a potluck. Just double the recipe.
- Gluten-Free Option: Use gluten-free chocolate sandwich cookies. The filling is usually the same, so the taste is almost identical.
Serving & Storage Suggestions
These Graveyard Dirt Cups are best served cold, straight from the fridge. I like to take them out about 10 minutes before serving so they’re not ice-cold, but still nicely chilled.
- Presentation tips: Arrange the cups on a large tray or platter. Add a few fake spiders, some plastic bones, or a spooky sign that says “Rest in Peace.” It makes for a fantastic centerpiece.
- What to serve alongside: These are rich, so I like to serve them with something light. A fruit platter with grapes and apple slices works well. For a full Halloween spread, pair them with spooky pizza pockets or mummy hot dogs.
- Storage: Cover the cups tightly with plastic wrap or pop on a lid. They’ll keep in the refrigerator for up to 3 days. The Oreo crumbs will soften over time, but that’s not a bad thing—it turns into a kind of cookie crust.
- Freezing: You can freeze these for up to a month. Just wrap each cup individually in plastic wrap and then foil. Thaw in the refrigerator overnight before serving. The texture might be slightly different, but still tasty.
- Flavor development: Honestly, these taste even better the next day. The flavors meld together, and the pudding gets even creamier. I always make them at least 24 hours in advance for parties.
Nutritional Information & Benefits
Let’s be real—this is a dessert. It’s meant to be indulgent and fun. But I do like to know what I’m eating, so here’s a rough estimate for one serving (based on 8 servings per recipe).
| Nutrient | Amount per Serving |
|---|---|
| Calories | ~380 |
| Total Fat | 22g |
| Saturated Fat | 12g |
| Cholesterol | 45mg |
| Sodium | 320mg |
| Total Carbohydrates | 45g |
| Dietary Fiber | 1g |
| Sugars | 32g |
| Protein | 4g |
While this isn’t a health food, the cream cheese does provide a small amount of protein and calcium. And honestly, sometimes you just need a dessert that makes you smile. These dirt cups are all about joy, fun, and a little bit of nostalgia. I think that counts for something.
Conclusion
These Graveyard Dirt Cups have become my secret weapon for every gathering. They’re easy to make, endlessly customizable, and they always, always get that reaction. You know the one—where people’s eyes light up and they can’t stop smiling. It’s the best feeling.
I’d love to hear how yours turn out. Did you add your own twist? Use different candies? Make a giant version for a party? Drop a comment below and let me know. And if you’re looking for more crowd-pleasing desserts, check out my pumpkin pie dip or caramel apple bites.
Happy haunting, and happy eating!
Frequently Asked Questions
Can I make these Graveyard Dirt Cups ahead of time?
Absolutely! In fact, they’re better the next day. Make them up to 24 hours in advance and keep them covered in the fridge. The flavors meld together beautifully.
Can I use homemade whipped cream instead of Cool Whip?
Yes, you can. Just whip 1 1/2 cups of heavy cream with 2 tablespoons of powdered sugar until stiff peaks form. Fold it into the pudding mixture gently. The texture will be a little lighter, but still delicious.
How do I keep the Oreo crumbs from getting soggy?
The crumbs will soften slightly over time, which is part of the charm. If you want them to stay crunchy, add the top layer of Oreo crumbs just before serving. You can also toast the crumbs in a dry pan for a few minutes to help them hold up better.
Can I use sugar-free pudding and Cool Whip?
Yes, you can. I’ve done it before for a lower-sugar version. Use sugar-free instant chocolate pudding and sugar-free Cool Whip. The taste is still great, though the texture might be slightly less creamy.
What other candies can I use for decoration?
The possibilities are endless! Candy corn, candy pumpkins, chocolate spiders, or even small plastic bones work well. For a non-Halloween version, try using fresh berries or edible flowers. It’s all about having fun with it.
Pin This Recipe!
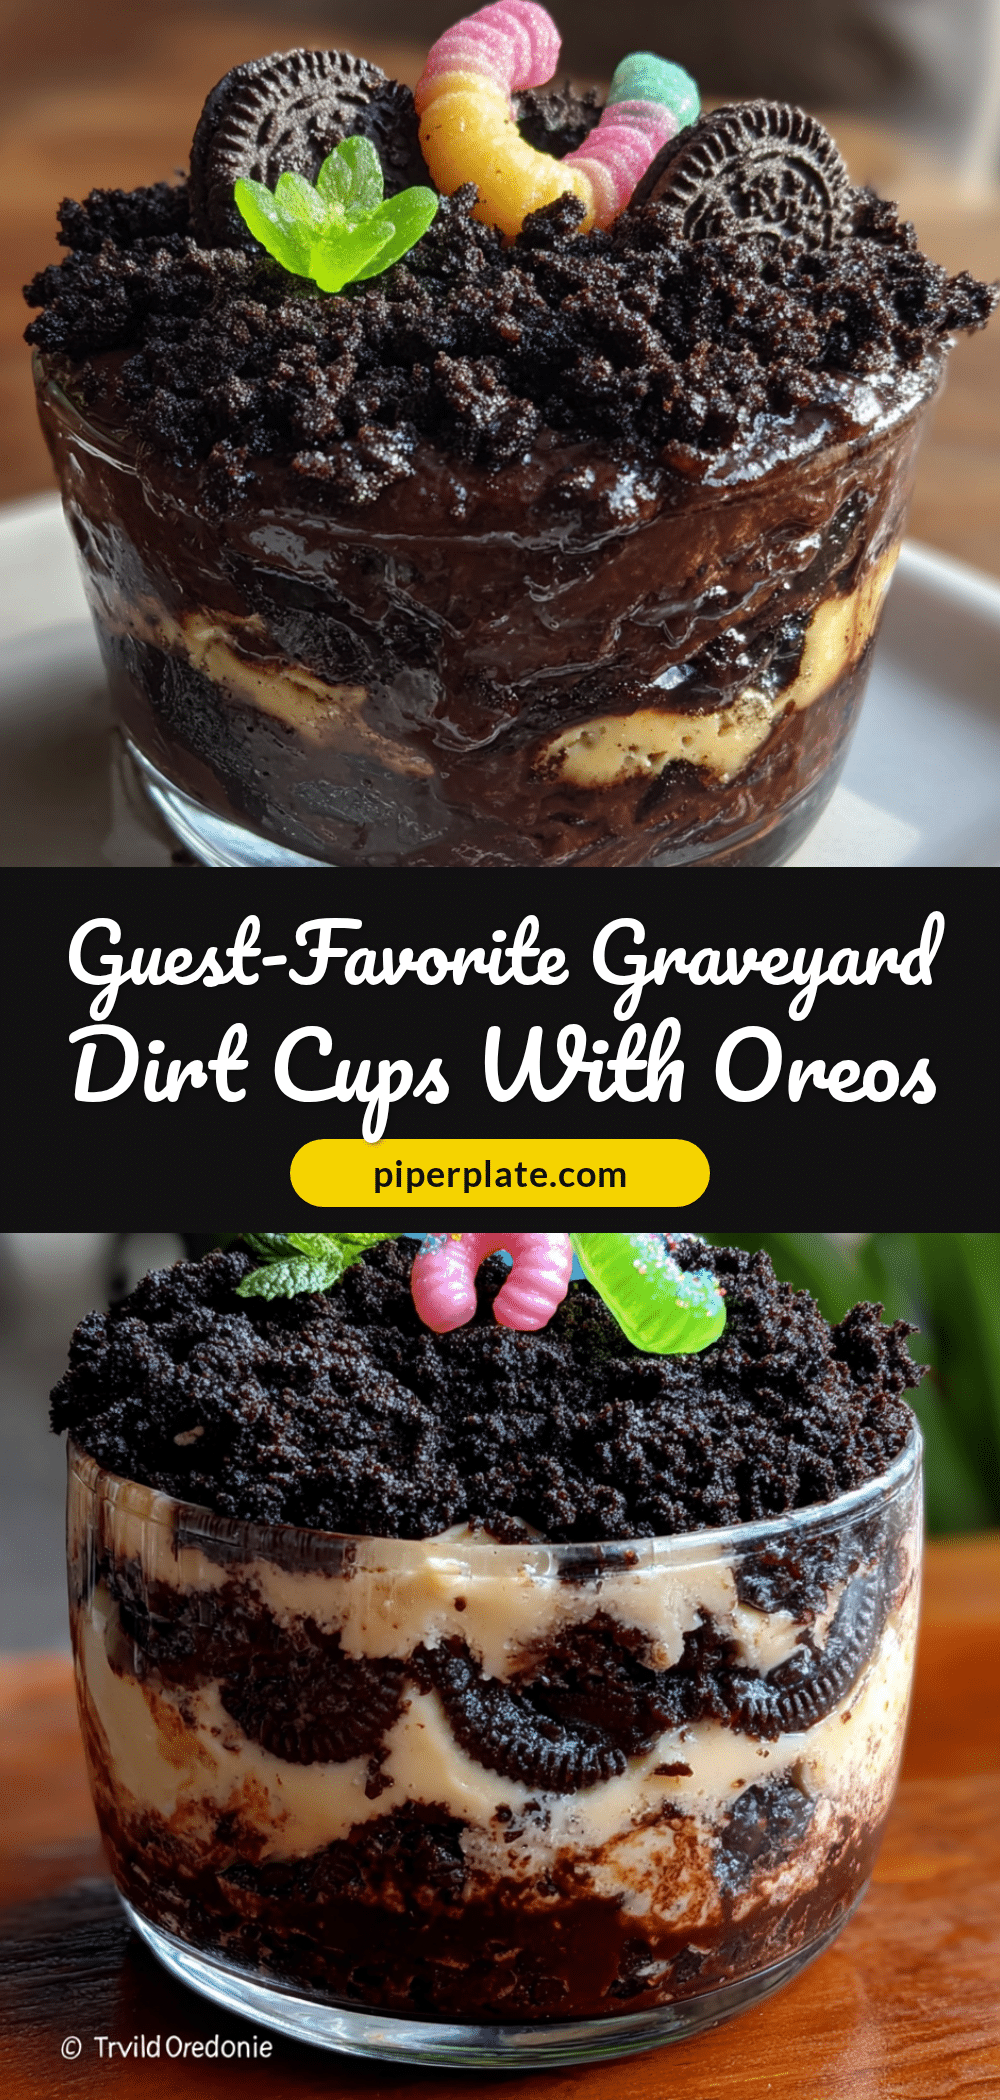
Graveyard Dirt Cups: Easy Oreo Dessert Recipe
These no-bake Graveyard Dirt Cups are a spooky and fun dessert made with layers of creamy chocolate pudding, crushed Oreos, and gummy worms. Perfect for Halloween parties or any gathering, they’re incredibly easy to make and always a crowd-pleaser.
- Prep Time: 20 minutes
- Cook Time: 0 minutes
- Total Time: 2 hours 20 minutes (includes chilling)
- Yield: 8 servings 1x
- Category: Dessert
- Cuisine: American
Ingredients
- 1 (8-ounce) package cream cheese, softened
- 1/2 cup (1 stick) unsalted butter, softened
- 1 cup powdered sugar
- 1 (3.9-ounce) package instant chocolate pudding mix
- 2 cups cold milk
- 1 (8-ounce) container Cool Whip, thawed
- 1 (14.3-ounce) package Oreo cookies (about 36 cookies)
- Gummy worms
- Small candy pumpkins or other seasonal candy (optional)
- Chocolate wafer cookies or chocolate graham crackers for ‘tombstones’
Instructions
- Crush the Oreos. Place the entire package of Oreos (filling and all) into a food processor. Pulse until you get fine crumbs that look like dirt. If you don’t have a food processor, put them in a large zip-top bag and smash them with a rolling pin. You want some small chunks for texture, but mostly fine crumbs. Set aside.
- Make the pudding layer. In a large bowl, beat the softened cream cheese and butter together with an electric mixer until smooth and fluffy—about 2 minutes. Add the powdered sugar and beat until combined. It should look like a thick frosting.
- Prepare the pudding. In a separate medium bowl, whisk the instant chocolate pudding mix with the cold milk for about 2 minutes, until it starts to thicken. It will be very soft at this point—that’s normal.
- Combine everything. Pour the pudding mixture into the cream cheese mixture and beat until smooth. Then, gently fold in the thawed Cool Whip with a spatula until no white streaks remain. The mixture should be light, fluffy, and incredibly creamy.
- Start layering. Grab your cups. Spoon about 2 tablespoons of the Oreo ‘dirt’ into the bottom of each cup. Press it down lightly with the back of a spoon.
- Add the pudding. Spoon or pipe the pudding mixture over the Oreo layer, filling the cup about halfway. I like to use a piping bag for a cleaner look, but a spoon works just fine.
- Hide the worms. This is the fun part. Press 2 or 3 gummy worms into the pudding layer, letting their tails stick out slightly. This is the ‘surprise’ element that makes everyone smile.
- Finish layering. Add another layer of pudding, filling the cup to about 3/4 full. Then top with a generous layer of Oreo crumbs, completely covering the pudding. It should look like a little pot of dirt.
- Decorate and chill. Place a candy tombstone or a chocolate wafer on top, and maybe add a few more gummy worms peeking out. Cover the cups with plastic wrap and refrigerate for at least 2 hours, but overnight is even better. The flavors meld together beautifully.
Notes
Don’t over-mix the Cool Whip; fold it in gently. Chill the cups for at least 2 hours before serving. Use room temperature cream cheese to avoid lumps. These are even better the next day.
Nutrition
- Serving Size: 1 cup
- Calories: 380
- Sugar: 32
- Sodium: 320
- Fat: 22
- Saturated Fat: 12
- Carbohydrates: 45
- Fiber: 1
- Protein: 4
Keywords: dirt cups, graveyard dirt cups, Oreo dessert, no-bake dessert, Halloween dessert, chocolate pudding, gummy worms


