Love this? Save it for later!
Share the inspiration with your friends
I used to think cheesecake bars were a compromise—something you make when you don’t have the patience for a full cheesecake. And honestly, I wasn’t wrong about that. But what I didn’t expect was that this particular version would actually become my go-to dessert, even when I have all the time in the world. It happened last fall, on a rainy Tuesday that felt more like a Thursday. I had a bag of apples threatening to go soft and a block of cream cheese that needed using up. So I threw together what I thought would be a quick fix. Three hours later, I was standing over the pan, fork in hand, trying to convince myself I’d save some for the neighbors. I didn’t.
The thing about these caramel apple cheesecake bars is that they don’t feel like a shortcut. They feel intentional—like you spent all day layering flavors and textures, when really it’s just a buttery crust, a creamy filling, and a whole lot of apples swimming in caramel. The first time I made them, I forgot to line the pan with parchment. Let me tell you, wrestling a stuck bar out of a metal pan with a butter knife is not my idea of fun. But that first bite? Completely worth the struggle. The tangy cream cheese, the soft cinnamon apples, the sticky caramel pooling around the edges—it was the kind of dessert that makes you close your eyes without meaning to.
Maybe you’ve been there too. Standing in your kitchen, staring at ingredients, wondering if you should just make something simple or go all out. These bars are the answer to that question. They’re simple enough for a Wednesday night but impressive enough for a holiday table. And honestly, they’re the reason I stopped thinking of cheesecake bars as a compromise. They’re their own thing entirely. That rainy Tuesday turned into a new tradition. Now I make them every year when the leaves start turning, and every time, someone asks for the recipe. This is that recipe.
Why You’ll Love These Caramel Apple Cheesecake Bars
Let me be straight with you—I’ve tested this recipe about seven times to get it just right. The first batch was too runny. The second had a crust that crumbled like sand. By the third, I figured out the trick to keeping the apples from releasing too much juice, and by the fifth, I had neighbors knocking on my door asking what smelled so good. So when I say these are the best caramel apple cheesecake bars, I mean it with the full weight of those seven batches behind me.
- Quick & Easy: No water bath. No complicated techniques. Just mix, layer, and bake. You’re looking at about 20 minutes of active prep time.
- Simple Ingredients: Butter, flour, cream cheese, apples, caramel sauce—all stuff you probably already have or can grab at any grocery store.
- Perfect for Fall Gatherings: Thanksgiving, Friendsgiving, Halloween parties, or just a cozy Sunday afternoon—these bars fit right in.
- Crowd-Pleaser: I’ve served them to kids, adults, picky eaters, and dessert snobs. Empty pan every single time.
- Unbelievably Delicious: The contrast between the crisp crust, the creamy cheesecake layer, and the tender caramelized apples is honestly next-level.
What makes these different from every other apple cheesecake bar recipe out there? It’s the technique. Most recipes just pile raw apples on top of cheesecake filling, which turns the whole thing watery. I pre-cook the apples just enough to concentrate their flavor and cook off excess moisture. It’s a small step that makes a massive difference. Plus, I use a shortbread-style crust that actually stays crisp instead of turning soggy. This isn’t just another version of the same old thing. It’s the version I’d serve to someone who said they didn’t like cheesecake bars—and then watch them ask for seconds.
There’s something about the combination of tart apples, rich cream cheese, and sweet caramel that just feels like comfort. It’s the kind of dessert that makes you slow down and actually taste what you’re eating. Whether you’re bringing it to a potluck or keeping the whole pan for yourself (no judgment here), these bars deliver that soul-soothing satisfaction without the stress.
What Ingredients You Will Need
This recipe uses simple, wholesome ingredients that work together to create layers of flavor and texture. Most of these are pantry staples, and the ones that aren’t are easy to find at any grocery store. Here’s what you’ll need and why each ingredient matters.
For the Crust
- 1 ½ cups all-purpose flour (210g) — Gives the crust structure without making it tough. I use Gold Medal or King Arthur for consistent results.
- ½ cup granulated sugar (100g) — Adds sweetness and helps the crust brown nicely.
- ½ cup unsalted butter, cold and cubed (113g) — Cold butter is key here. It creates that shortbread-like crumbly texture. If you only have salted butter, reduce the added salt to ¼ teaspoon.
- ¼ teaspoon salt — Balances the sweetness and enhances the buttery flavor.
For the Cheesecake Filling
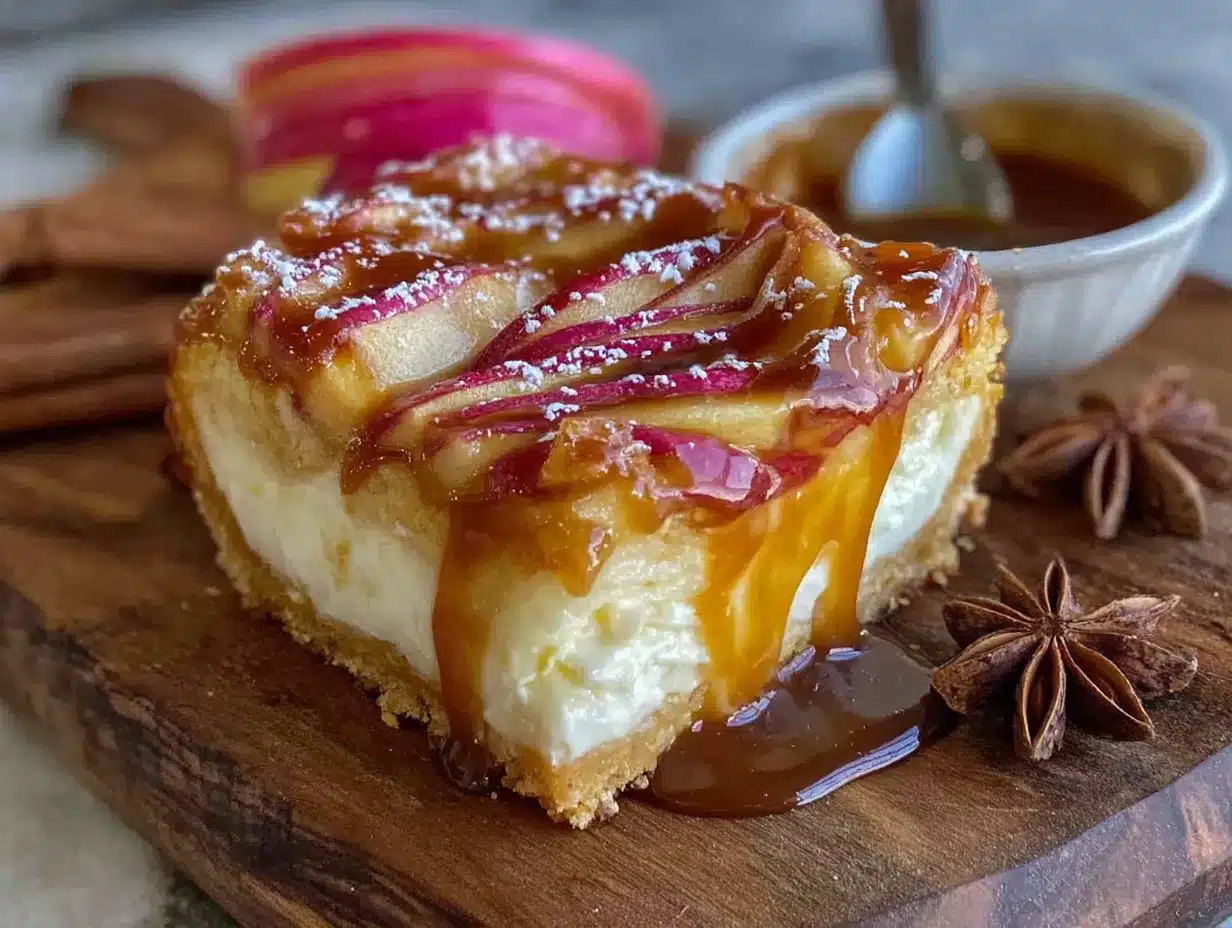
- 16 oz cream cheese, softened (two 8-ounce blocks) — Full-fat cream cheese gives the richest texture. I’ve tried low-fat versions and they work, but the filling won’t be as creamy. Leave it out on the counter for about an hour before starting.
- ½ cup granulated sugar (100g) — Sweetens the filling without overwhelming the tanginess of the cream cheese.
- 2 large eggs, room temperature — Room temperature eggs blend more smoothly into the batter, preventing lumps. If you forgot to take them out, place them in a bowl of warm water for 5 minutes.
- 1 teaspoon vanilla extract — Pure vanilla extract makes a difference here. Imitation vanilla works in a pinch, but the flavor won’t be as rich.
For the Apple Layer
- 3 medium apples, peeled, cored, and diced (about 450g) — I recommend Granny Smith for their tartness and firm texture. Honeycrisp or Fuji also work well. Avoid Red Delicious—they turn mushy when baked.
- 2 tablespoons unsalted butter (28g) — For sautéing the apples. Adds richness and helps the apples soften evenly.
- 2 tablespoons brown sugar, packed (25g) — Brown sugar adds a deeper, molasses-like sweetness that pairs beautifully with the caramel.
- 1 teaspoon ground cinnamon — The classic apple spice. Fresh cinnamon is more aromatic, but ground works perfectly.
- ¼ teaspoon ground nutmeg — Optional, but I love the warmth it adds. Freshly grated nutmeg is even better.
For the Topping
- ½ cup caramel sauce, plus more for drizzling — Store-bought works great (I like the jarred kind from the ice cream aisle). If you’re feeling ambitious, homemade caramel sauce takes this over the top. Just watch it carefully—caramel can burn in seconds.
Substitution Guidance: For a gluten-free version, swap the all-purpose flour with a 1:1 gluten-free baking flour blend. For a dairy-free option, use dairy-free cream cheese and butter substitutes—just know the texture will be slightly different. If you’re watching your sugar intake, you can reduce the sugar in the crust and filling by a quarter cup each, but the caramel topping is harder to replace without changing the flavor profile.
Equipment Needed
You don’t need a professional kitchen to make these bars, but having the right tools makes the process smoother. Here’s what I use:
- 9×9-inch baking pan — An 8×8 pan works too, but the bars will be thicker and may need a few extra minutes of baking time. I prefer a metal pan over glass for more even baking.
- Parchment paper — Non-negotiable. Line your pan with two overlapping strips, leaving overhang on two sides. This lets you lift the entire block of bars out cleanly. Trust me on this one.
- Electric hand mixer or stand mixer — You can mix the cheesecake filling by hand if you have strong arms, but a mixer ensures a smooth, lump-free texture. I use a hand mixer for this recipe because it’s less cleanup.
- Large skillet — For pre-cooking the apples. A non-stick skillet works well, but stainless steel is fine too.
- Mixing bowls — At least two: one for the crust and one for the filling.
- Sharp knife and cutting board — For dicing the apples. A dull knife will crush them instead of cutting cleanly.
- Measuring cups and spoons — For accuracy. I know some people eyeball it, but baking is a science.
- Cooling rack — Helps the bars cool evenly. If you don’t have one, just be patient and let them cool in the pan for longer.
If you don’t have a 9×9 pan, a 9×13 pan will work—just know the bars will be thinner and bake faster. Check them at 25 minutes instead of 35. And if you’re using a glass pan, reduce the oven temperature by 25°F to prevent over-browning.
Preparation Method
Let’s get to the fun part. I’ve broken this down into clear steps with time estimates and sensory cues so you know exactly what to look for at each stage. Take your time—rushing is the enemy of good baking.
Step 1: Prep Your Pan and Oven (5 minutes)
Preheat your oven to 350°F (175°C). Line your 9×9-inch baking pan with parchment paper, leaving about 2 inches of overhang on two opposite sides. This will be your handle later. Lightly grease the parchment with butter or non-stick spray. I learned this the hard way after a batch stuck to the paper despite the non-stick coating.
Step 2: Make the Crust (10 minutes)
In a medium mixing bowl, whisk together the flour, sugar, and salt. Add the cold, cubed butter. Use a pastry cutter, two forks, or your fingertips to work the butter into the flour mixture until it resembles coarse meal with pea-sized butter pieces. Don’t overwork it—the little bits of butter create that flaky, tender texture. Press the mixture firmly into the bottom of your prepared pan. I use the bottom of a measuring cup to really pack it down. Bake for 12-15 minutes, until the edges are just starting to turn golden. The center should look set but not browned. Set aside to cool slightly while you make the filling.
Step 3: Pre-Cook the Apples (10 minutes)
While the crust is baking, melt 2 tablespoons of butter in a large skillet over medium heat. Add the diced apples, brown sugar, cinnamon, and nutmeg. Cook for 5-7 minutes, stirring occasionally, until the apples are tender but still hold their shape. You’ll know they’re done when they look glossy and the liquid in the pan has thickened slightly. Don’t cook them until they’re mushy—they’ll continue to soften in the oven. Remove from heat and let them cool while you make the filling.
Step 4: Make the Cheesecake Filling (10 minutes)
In a large bowl, beat the softened cream cheese with an electric mixer on medium speed until smooth and creamy, about 2 minutes. Scrape down the sides of the bowl. Add the sugar and beat until combined, another minute. Add the eggs one at a time, beating on low speed after each addition just until incorporated. Over-mixing at this stage can incorporate too much air and cause cracks in the filling. Finally, beat in the vanilla extract. The mixture should be smooth, thick, and slightly glossy.
Step 5: Assemble the Layers (5 minutes)
Pour the cheesecake filling over the warm crust and spread it evenly with a spatula. Spoon the pre-cooked apples evenly over the cheesecake layer. Drizzle about ½ cup of caramel sauce over the apples. Use a knife to gently swirl the caramel into the top layer—don’t overdo it, or you’ll lose the distinct layers.
Step 6: Bake (35-40 minutes)
Place the pan in the preheated oven and bake for 35-40 minutes. The edges should look set and slightly puffed, while the center should still have a slight jiggle when you gently shake the pan. It will continue to set as it cools. If the top starts browning too quickly around the 25-minute mark, tent the pan loosely with aluminum foil.
Step 7: Cool and Chill (3+ hours)
Let the bars cool in the pan on a wire rack for about 1 hour at room temperature. Then transfer the pan to the refrigerator and chill for at least 2 hours, preferably 4 hours or overnight. This step is crucial—the bars need time to fully set so you can cut clean slices. I know it’s hard to wait, but trust me, it’s worth it.
Step 8: Slice and Serve (10 minutes)
Once fully chilled, use the parchment overhang to lift the entire block out of the pan. Place it on a cutting board and use a sharp knife to slice into 16 squares. For the cleanest cuts, wipe the knife clean between each slice. Drizzle with extra caramel sauce just before serving.
Cooking Tips & Techniques
After seven batches and a few spectacular failures, here’s what I’ve learned about making these bars perfect every time.
Don’t skip the apple pre-cooking step. I know it adds an extra pan to wash, but it’s the single most important technique in this recipe. Raw apples release a ton of liquid as they bake, which turns the cheesecake layer into a watery mess. Pre-cooking concentrates their flavor and removes that excess moisture. I learned this lesson after my third batch came out looking like apple soup. Never again.
Room temperature ingredients matter. Cold cream cheese creates lumps that are nearly impossible to smooth out. Cold eggs can cause the batter to curdle. Set everything out on the counter about an hour before you start. If you’re short on time, cut the cream cheese into cubes and microwave it in 10-second bursts until it’s softened but not melted.
Watch your oven like a hawk. Every oven runs differently. My old oven would burn the edges while leaving the center raw. I now use an oven thermometer to check the actual temperature. If your bars are browning too quickly, tent them with foil. If they’re still jiggly after 40 minutes, give them another 5 minutes and check again.
Patience with cooling is non-negotiable. I once tried to speed up the cooling process by putting the bars in the freezer for an hour. The edges froze while the center stayed soft, and the texture was all wrong. Let them cool at room temperature first, then refrigerate. Overnight chilling gives the best texture—the flavors meld together and the cheesecake becomes perfectly dense and creamy.
Use a sharp knife for slicing. A dull knife will drag through the cheesecake and smear the layers. Run the knife under hot water, dry it off, and make clean cuts. Wipe the blade between each slice. This is the difference between Instagram-worthy bars and a messy pile of deliciousness.
Variations & Adaptations
One of the things I love about this recipe is how adaptable it is. Here are some variations I’ve tried and loved.
Gluten-Free Version: Substitute the all-purpose flour with a 1:1 gluten-free baking flour blend. I’ve used Bob’s Red Mill and King Arthur’s gluten-free blends with great results. The crust will be slightly more crumbly, but the flavor is still fantastic. Just make sure your caramel sauce is also gluten-free—some brands use wheat-based thickeners.
Dairy-Free Version: Use dairy-free cream cheese (Kite Hill and Violife are my favorites) and vegan butter. The texture won’t be quite as rich, but it’s still delicious. I made this version for a friend with dairy allergies and she said it was the best dessert she’d had in years. Just watch the baking time—dairy-free cream cheese can set a little differently.
Spiced Apple Variation: Add ¼ teaspoon of ground cloves and ⅛ teaspoon of ground cardamom to the apple mixture. The warm spices give the bars a chai-like flavor that’s amazing in the colder months. I tried this last December and it was a hit at our Christmas party.
Nutty Crust: Replace ¼ cup of the flour with finely chopped pecans or walnuts. Toast the nuts first for extra flavor. This adds a wonderful crunch and pairs beautifully with the caramel. Just be aware that nut flours can make the crust more delicate, so press it firmly into the pan.
Bourbon Caramel Version: Add 1 tablespoon of bourbon to the caramel sauce before drizzling. The alcohol cooks off during baking, leaving behind a warm, smoky flavor. I tried this on a whim one night and now it’s my husband’s favorite version. Just don’t tell the kids.
Serving & Storage Suggestions
These bars are incredibly versatile when it comes to serving. Here’s how I like to enjoy them.
Serving Temperature: I prefer these bars chilled straight from the fridge. The cheesecake layer is firm and creamy, and the flavors are clean and distinct. That said, they’re also wonderful at room temperature—the cheesecake softens slightly and the caramel becomes more fluid. For a warm dessert, microwave a single bar for about 15 seconds and top with a scoop of vanilla ice cream. Pure heaven.
Presentation Ideas: Drizzle extra caramel sauce over the top and sprinkle with flaky sea salt for a salted caramel effect. Add a dollop of whipped cream and a dusting of cinnamon. For holidays, arrange the bars on a platter with fresh apple slices and cinnamon sticks for a rustic look.
Complementary Pairings: A scoop of vanilla bean ice cream is the classic pairing, but I also love these bars with a warm mug of spiced chai or a strong cup of black coffee. For a boozy pairing, try a glass of bourbon or a dark rum cocktail. The caramel and apple flavors play beautifully with the warmth of the alcohol.
Storage Instructions: Store leftover bars in an airtight container in the refrigerator for up to 5 days. Layer them between sheets of parchment paper to prevent sticking. I don’t recommend storing them at room temperature for more than a few hours because of the cream cheese filling.
Freezing Instructions: These bars freeze beautifully. Wrap individual bars tightly in plastic wrap, then place them in a freezer-safe bag or container. They’ll keep for up to 3 months. To thaw, transfer a bar to the refrigerator overnight or let it sit at room temperature for about 30 minutes. The texture remains nearly identical to fresh—I’ve tested this multiple times.
Flavor Development: Honestly, these bars taste even better on day two. The flavors have time to meld together, and the cheesecake sets into a denser, creamier texture. If you can resist eating them the same day, you’re in for a treat.
Nutritional Information & Benefits
I’m not a nutritionist, but I do pay attention to what goes into my food. Here’s a rough breakdown per bar (based on 16 servings).
| Nutrient | Amount Per Serving |
|---|---|
| Calories | 320 |
| Total Fat | 20g |
| Saturated Fat | 12g |
| Cholesterol | 80mg |
| Sodium | 220mg |
| Total Carbohydrates | 34g |
| Dietary Fiber | 1g |
| Sugars | 24g |
| Protein | 5g |
These bars are definitely a treat, but they do have some redeeming qualities. Apples are a good source of fiber and vitamin C, and cinnamon has anti-inflammatory properties. The cream cheese provides calcium and protein. That said, this is a dessert—enjoy it in moderation and savor every bite.
Dietary Considerations: This recipe contains gluten, dairy, and eggs. For gluten-free and dairy-free options, see the variations section above. If you’re watching your sugar intake, you can reduce the sugar in the crust and filling, but the caramel topping is harder to modify without changing the flavor.
Conclusion
These caramel apple cheesecake bars are the kind of recipe that earns a permanent spot in your rotation. They’re simple enough for a weeknight but impressive enough for company. The buttery crust, the creamy cheesecake, the tender spiced apples, and that sticky caramel drizzle—every layer works together in perfect harmony. I’ve made this recipe more times than I can count, and I still get excited every time I pull the pan out of the oven.
What I love most about these bars is how forgiving they are. You can tweak the spices, swap the apples, or change up the topping, and they still come out amazing. Don’t be afraid to make them your own. Maybe you’ll add extra cinnamon or use a different variety of apple. Maybe you’ll skip the nutmeg or double the caramel. That’s the beauty of a good base recipe—it’s a starting point, not a strict rule.
I’d love to hear how these turn out for you. Did you try a variation? Did your family devour them in five minutes? Drop a comment below and let me know. And if you share a photo on Pinterest, tag me—I’m always looking for new baking inspiration. Until next time, happy baking, and remember: the best desserts are the ones you share with the people you love.
Frequently Asked Questions
Can I use a different type of apple?
Absolutely. Granny Smith apples are my go-to because they hold their shape well and provide a nice tart contrast to the sweet cheesecake and caramel. But Honeycrisp, Fuji, or Braeburn all work beautifully. Avoid Red Delicious or McIntosh—they tend to break down into mush when cooked.
Can I make these bars ahead of time?
Yes, and I actually recommend it. These bars taste even better after a day in the fridge because the flavors have time to meld together. You can make them up to 2 days in advance and store them covered in the refrigerator. Just add the extra caramel drizzle right before serving.
Why did my cheesecake layer crack?
Cheesecake cracks usually happen for one of two reasons: over-mixing or over-baking. Mix the filling on low speed and stop as soon as the ingredients are combined. And don’t bake until the center is completely firm—it should still have a slight jiggle when you shake the pan. The residual heat will finish cooking it as it cools.
Can I freeze these caramel apple cheesecake bars?
Yes, they freeze wonderfully. Wrap individual bars tightly in plastic wrap and place them in a freezer-safe bag or container. They’ll keep for up to 3 months. To thaw, transfer to the refrigerator overnight or let sit at room temperature for about 30 minutes. The texture stays remarkably close to fresh.
Can I use store-bought crust instead of making my own?
You can, but I wouldn’t recommend it. The homemade shortbread crust is what gives these bars their signature texture—crisp on the bottom, slightly crumbly, and perfectly buttery. A store-bought graham cracker crust will be too soft and sweet, and it won’t hold up as well to the cheesecake filling. The homemade crust takes about 10 minutes to make, and it’s absolutely worth the effort.
Pin This Recipe!
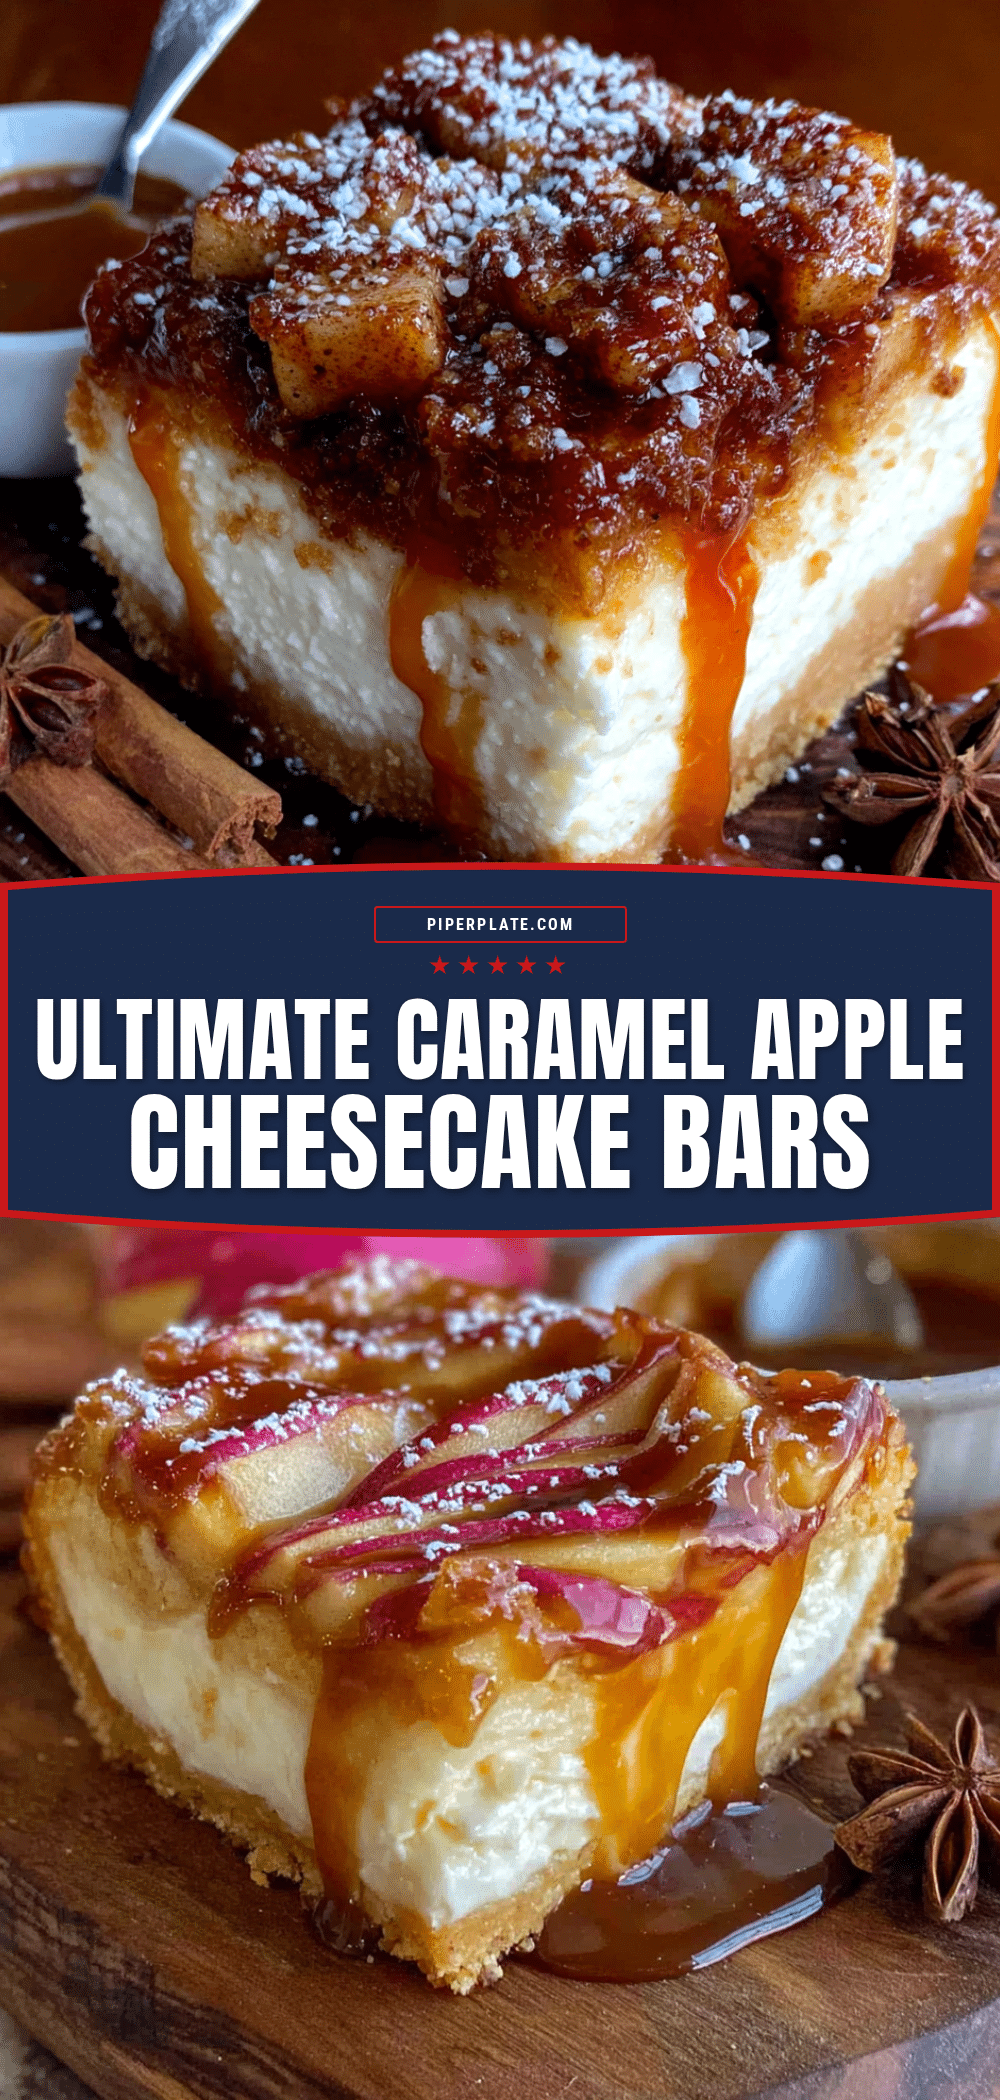
Best Caramel Apple Cheesecake Bars (Easy Homemade Recipe)
These caramel apple cheesecake bars feature a buttery shortbread crust, creamy cheesecake filling, tender spiced apples, and a drizzle of caramel. They’re simple enough for a weeknight but impressive enough for company.
- Prep Time: 20 minutes
- Cook Time: 35-40 minutes
- Total Time: 3 hours 55 minutes (including chilling)
- Yield: 16 servings 1x
- Category: Dessert
- Cuisine: American
Ingredients
- 1 ½ cups all-purpose flour (210g)
- ½ cup granulated sugar (100g)
- ½ cup unsalted butter, cold and cubed (113g)
- ¼ teaspoon salt
- 16 oz cream cheese, softened (two 8-ounce blocks)
- ½ cup granulated sugar (100g)
- 2 large eggs, room temperature
- 1 teaspoon vanilla extract
- 3 medium apples, peeled, cored, and diced (about 450g)
- 2 tablespoons unsalted butter (28g)
- 2 tablespoons brown sugar, packed (25g)
- 1 teaspoon ground cinnamon
- ¼ teaspoon ground nutmeg
- ½ cup caramel sauce, plus more for drizzling
Instructions
- Preheat oven to 350°F (175°C). Line a 9×9-inch baking pan with parchment paper, leaving overhang on two sides. Lightly grease the parchment.
- In a medium bowl, whisk together flour, ½ cup sugar, and salt. Cut in cold butter using a pastry cutter or fingertips until mixture resembles coarse meal with pea-sized butter pieces. Press firmly into the bottom of the prepared pan. Bake for 12-15 minutes until edges are just golden. Set aside to cool slightly.
- While crust bakes, melt 2 tablespoons butter in a large skillet over medium heat. Add diced apples, brown sugar, cinnamon, and nutmeg. Cook for 5-7 minutes, stirring occasionally, until apples are tender but still hold their shape. Remove from heat and let cool.
- In a large bowl, beat softened cream cheese with an electric mixer on medium speed until smooth, about 2 minutes. Add ½ cup sugar and beat until combined. Add eggs one at a time, beating on low speed after each addition. Beat in vanilla extract until smooth.
- Pour cheesecake filling over warm crust and spread evenly. Spoon pre-cooked apples over the filling. Drizzle ½ cup caramel sauce over apples and gently swirl with a knife.
- Bake for 35-40 minutes until edges are set and center has a slight jiggle. Tent with foil if browning too quickly.
- Cool in pan on a wire rack for 1 hour at room temperature, then refrigerate for at least 2 hours (preferably 4 hours or overnight) until fully set.
- Use parchment overhang to lift the block out of the pan. Slice into 16 squares with a sharp knife, wiping blade clean between cuts. Drizzle with extra caramel sauce before serving.
Notes
Don’t skip pre-cooking the apples to prevent a watery filling. Room temperature ingredients ensure a smooth cheesecake. For clean slices, chill thoroughly and wipe the knife between cuts. Bars taste even better on day two.
Nutrition
- Serving Size: 1 bar
- Calories: 320
- Sugar: 24
- Sodium: 220
- Fat: 20
- Saturated Fat: 12
- Carbohydrates: 34
- Fiber: 1
- Protein: 5
Keywords: caramel apple cheesecake bars, apple cheesecake bars, fall dessert, cheesecake bars, apple dessert, caramel apple dessert


