Love this? Save it for later!
Share the inspiration with your friends
I was standing in the grocery store aisle last October, staring at a jar of olives, when a memory hit me so hard I almost laughed out loud. I was seven years old again, sitting at my aunt Carol’s kitchen table, watching her turn ordinary hard-boiled eggs into the creepiest, coolest things I had ever seen. She wasn’t trying to be fancy—she was just trying to keep me and my cousins entertained while the adults talked. But those spider deviled eggs? They were magic. I can still see her hands, a little flour-dusted from the pie she’d just baked, carefully slicing olives into perfect little legs. The way she’d wink and say, “Don’t worry, they won’t crawl away.”
I tried to recreate that moment a dozen times over the years. Some attempts were disasters—eggs that peeled like they had a personal vendetta against me, spiders that looked more like sad blobs. Honestly, there was one batch I had to throw out because the kids refused to even look at them. But last Halloween, something clicked. Maybe it was the pressure of hosting my daughter’s first real costume party, or maybe I just finally remembered the trick my aunt used. These kid-approved spider deviled eggs are the result of that stubborn, slightly messy journey. They are the ones that finally made my own kids shriek with delight instead of disgust.
You know that feeling when you want to make something fun for the holidays but you’re also trying to get dinner on the table without losing your mind? That’s exactly where these come in. They look like you spent hours, but they come together in about 20 minutes of active work. The secret is in the details—the way the olive legs are angled, the tiny bit of paprika for a “spooky” dusting. I messed up the first few batches so you don’t have to. And honestly? Watching my daughter’s face light up when she saw the finished platter made every cracked egg and sticky finger worth it. This recipe stayed with me because it’s not just about the food—it’s about the moment you create around it.
Why You’ll Love This Recipe
Let me tell you why these spider deviled eggs have become the star of our Halloween table year after year. I’ve tested this recipe on a crowd of skeptical eight-year-olds, my picky-eating nephew, and even a few grown-ups who swore they were “too old for themed food.” Every single one of them went back for seconds. That’s not an exaggeration—I counted.
- Quick & Easy: These come together in under 30 minutes, including the time it takes to boil the eggs. Perfect for busy weeknights when you’re juggling costumes, candy, and chaos.
- Simple Ingredients: You probably already have eggs, mayo, and mustard in your fridge. The only special purchase is a can of black olives, which costs about a dollar. No fancy grocery trips needed.
- Perfect for Halloween Parties: Whether you’re hosting a classroom party, a neighborhood potluck, or just a spooky family dinner, these are guaranteed to be the first thing to disappear from the table.
- Crowd-Pleaser: Kids love the creepy factor, and adults love the classic deviled egg taste. It’s the rare recipe that actually bridges the gap between generations.
- Unbelievably Delicious: The creamy yolk filling gets a subtle tang from pickle relish, and the olive “spiders” add a briny pop that balances everything out. It’s comfort food with a spooky twist.
What makes this recipe different from the dozens of other spider deviled eggs you’ll find online? It’s the texture. I spent weeks perfecting the yolk-to-mayo ratio so the filling is silky smooth but still holds its shape when piped. Most recipes end up too runny or too stiff. This one? It’s just right. Plus, I figured out the trick to keeping the olive legs from sliding off—a tiny dab of cream cheese acts like glue. That’s the kind of real-world testing that comes from making these for five Halloweens straight.
This isn’t just a fun snack. It’s the kind of recipe that makes you close your eyes after the first bite because it tastes like childhood. It’s comfort food reimagined for a holiday that’s supposed to be a little bit scary but a whole lot of fun. Perfect for impressing guests without stress, or turning a simple appetizer into the memory your kids will talk about for years.
What Ingredients You Will Need
This recipe uses simple, everyday ingredients to deliver big flavor and maximum creepiness without the fuss. You likely have most of these in your kitchen right now, which is exactly how Halloween snacking should be—spontaneous and stress-free.
- 12 large eggs (room temperature for easier peeling, but cold works too)
- 1/3 cup mayonnaise (I prefer Hellmann’s for its creamy consistency, but any brand works)
- 1 tablespoon yellow mustard (adds that classic tang and a hint of color)
- 1 tablespoon sweet pickle relish (optional but highly recommended—adds sweetness and texture)
- 1/2 teaspoon salt (fine sea salt dissolves better)
- 1/4 teaspoon black pepper (freshly ground if you have it)
- 1/4 teaspoon paprika (for dusting—smoked paprika adds an extra layer of flavor)
- 1 can (6 ounces) large black olives (look for whole olives, not sliced, so you can cut the legs yourself)
- 2 tablespoons cream cheese (softened—this is my secret weapon for keeping the spider legs attached)
- Fresh chives or green onion tops (for optional “grass” garnish—not required but adds a nice touch)
Ingredient Tips from My Kitchen:
Let me save you some trouble. For the olives, don’t buy the pre-sliced ones. I know it’s tempting, but you need whole olives so you can cut the legs to the right length. The canned ones in the Mexican food aisle are usually the largest and easiest to work with. I’ve also tried using kalamata olives for a fancier version, but my kids complained they were too salty. Stick with plain black olives for the authentic kid-approved experience.
For the eggs, freshness matters less than you think when it comes to peeling. Older eggs actually peel easier, so if you have eggs that have been sitting in your fridge for a week or two, those are perfect for hard boiling. I learned this the hard way after crying over a dozen farm-fresh eggs that refused to let go of their shells.
The cream cheese is non-negotiable if you want your spiders to look good. I tried using extra mayo as “glue” and the legs slid right off within an hour. A tiny dab of softened cream cheese holds everything in place, even if you’re transporting the platter to a party. Just make sure it’s at room temperature so it spreads smoothly.
If you’re feeding a crowd with dietary restrictions, you can swap the mayo for vegan mayo and the cream cheese for a dairy-free version. The texture will be slightly different, but the overall effect is still delicious. I’ve tested this with my neighbor who’s lactose intolerant, and she didn’t even notice the difference.
Equipment Needed
You don’t need any fancy gadgets for these spider deviled eggs, which is part of their charm. Here’s what you’ll want to have on hand:
- Large pot (big enough to hold 12 eggs in a single layer)
- Mixing bowl (medium-sized for the yolk mixture)
- Fork or potato masher (for mashing the yolks—I prefer a fork for more control)
- Piping bag or zip-top bag (a gallon-size zip-top bag works perfectly if you don’t have a piping bag)
- Sharp paring knife (for slicing olives into legs—a dull knife will crush them)
- Cutting board (small one for olive prep)
- Serving platter (a dark plate makes the spiders pop visually)
- Small cookie scoop or teaspoon (for filling the eggs if you’re not piping)
My Personal Tool Preferences:
I’ve made these with a piping bag and with a simple zip-top bag, and honestly, the zip-top bag is easier for kids to help with. Just spoon the filling into one corner, snip off the tip, and squeeze. The cleanup is also way faster—just toss the bag when you’re done. If you’re using a piping bag, a star tip creates a nice ridged effect on the filling, but a plain round tip works just fine.
For the knife, use the sharpest one you own. A dull blade will squish the olives and make the legs look ragged. I keep a small paring knife specifically for this recipe because I make these at least three times every October. It’s a worthwhile investment if you plan on making these a tradition.
Budget-friendly tip: If you don’t have a piping bag, don’t buy one. The zip-top bag method works perfectly and costs nothing extra. And if you don’t have a cookie scoop, two spoons work just fine—one to scoop and one to scrape the filling into the egg white.
Preparation Method
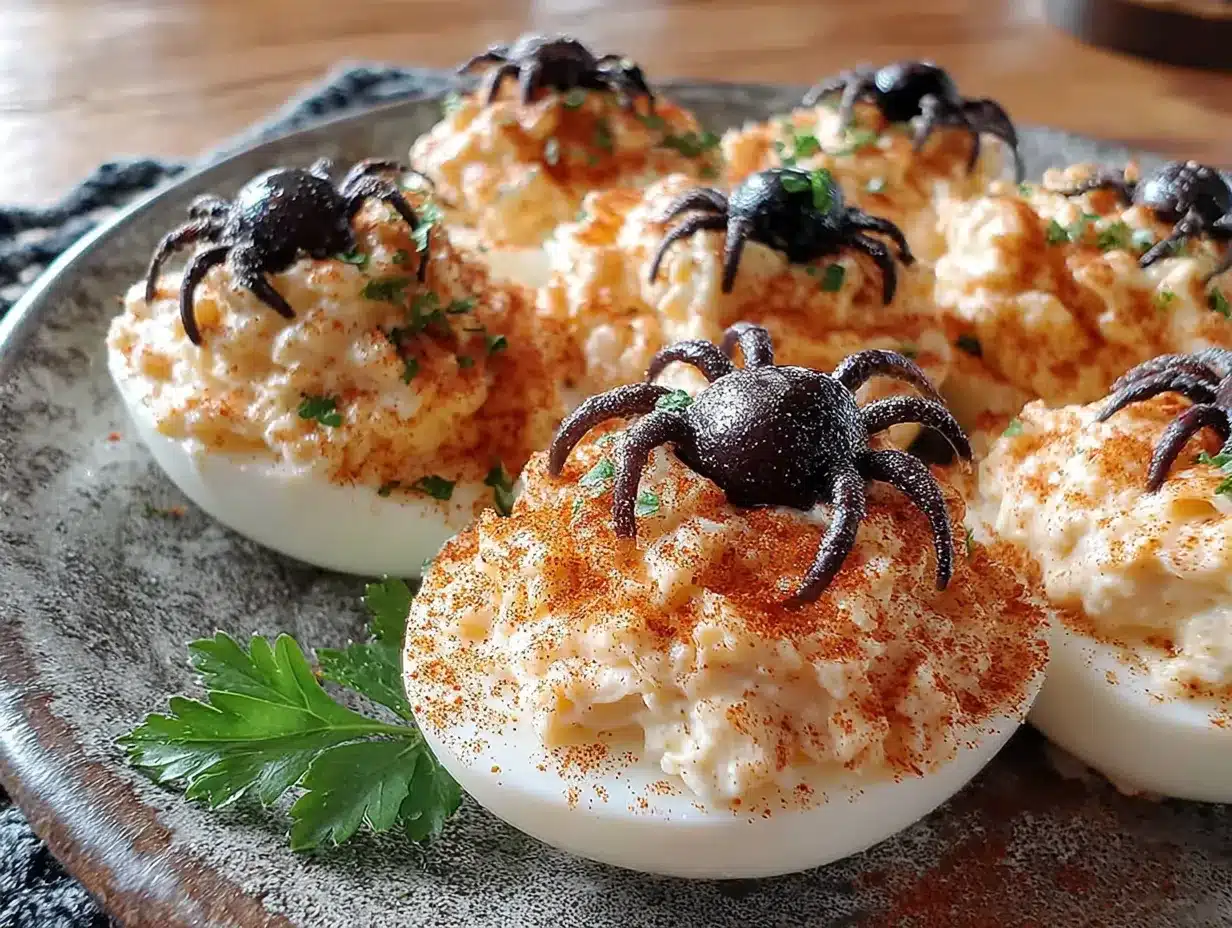
Let’s get into the nitty-gritty of making these adorable little spiders. I’ve broken this down into clear steps with all the little tricks I’ve learned from years of trial and error.
- Hard boil the eggs. Place your 12 eggs in a single layer in a large pot. Cover them with cold water by about an inch. Bring the water to a full rolling boil over high heat. Once boiling, cover the pot, turn off the heat, and let it sit for exactly 12 minutes. I set a timer on my phone because I’ve forgotten before and ended up with green-ringed yolks. While the eggs are sitting, prepare an ice bath—a large bowl filled with ice and cold water.
- Cool and peel. After 12 minutes, transfer the eggs to the ice bath using a slotted spoon. Let them sit for at least 10 minutes. This stops the cooking process and makes peeling much easier. Gently tap each egg on the counter to crack the shell all over, then roll it between your palms to loosen the shell. Start peeling from the wider end where the air pocket is—the shell comes off more easily there. Rinse the peeled eggs under cold water to remove any tiny shell fragments.
- Cut the eggs. Using a sharp knife, slice each egg in half lengthwise. Wipe the knife clean between cuts to keep the edges neat. Gently pop out the yolks into a medium mixing bowl. Arrange the egg white halves on your serving platter, cut side up. I like to put them on a dark-colored platter because it makes the spiders stand out better.
- Make the filling. Add the mayonnaise, yellow mustard, sweet pickle relish, salt, and pepper to the bowl with the yolks. Mash everything together with a fork until smooth. I start by breaking the yolks into small pieces, then stir in the wet ingredients. Taste it at this point and adjust the seasoning—I usually add a pinch more salt. The filling should be creamy but thick enough to hold its shape when piped. If it seems too runny, add a little more mashed yolk. If too thick, add a teaspoon more mayo.
- Prepare the olive spiders. Drain the can of black olives and pat them dry with a paper towel. Select 12 olives that are roughly the same size for the spider bodies. Set those aside. For the remaining olives, slice them crosswise into thin rounds—these will be the legs. You want each spider to have 8 legs, so you’ll need about 96 small olive rounds total. Don’t stress if they’re not perfect; the kids won’t notice. Using your sharp paring knife, cut each round in half to create two “leg” pieces. You should end up with small half-moon shapes.
- Assemble the spiders. This is the fun part. Take one of the reserved whole olives and use a tiny dab of softened cream cheese to attach four leg pieces to each side. I use a toothpick to apply the cream cheese because it’s more precise. The legs should angle slightly outward so the spider looks like it’s crawling. Place the assembled spider on top of one of the filled egg halves, pressing gently so it sticks. Repeat with the remaining 11 spiders.
- Pipe the filling. Spoon the yolk mixture into a piping bag or a zip-top bag with the corner snipped off. Pipe a generous swirl of filling into each egg white half. You want it to come up slightly above the rim of the egg white so the spider sits on a nice little mound. If you don’t have a piping bag, use a small cookie scoop or two teaspoons to fill the eggs.
- Add the spiders. Place one assembled olive spider on top of each filled egg half. Press down very gently so it sticks to the filling. The cream cheese on the bottom of the olive will help it adhere. If the spider wobbles, add a tiny bit more cream cheese to the bottom of the olive body.
- Dust with paprika. Using a fine-mesh sieve, lightly dust the finished deviled eggs with paprika. This gives them a slightly “spooky” look and adds a subtle smoky flavor. Don’t overdo it—a light dusting is all you need.
- Garnish (optional). If you want to go the extra mile, arrange fresh chives or thin slices of green onion tops around the eggs to look like grass or spider webs. This is purely decorative but looks amazing in photos.
Sensory Cues to Watch For: The filling should be smooth and creamy, not lumpy. When you pipe it, it should hold a nice swirl shape without collapsing. The olive legs should look like they’re crawling, not just stuck on randomly. The paprika should create a subtle reddish-brown dusting, not a thick coating.
Troubleshooting Tip: If your filling is too runny, you probably added too much mayo. Next time, start with 1/4 cup and add more if needed. If the eggs are hard to peel, they were too fresh—next time use older eggs. If the spiders keep falling over, the cream cheese needs to be softer. Let it sit out for 15 minutes before using.
Cooking Tips & Techniques
After making these spider deviled eggs for five Halloweens straight, I’ve collected a few tips that make the process smoother and the results more impressive. Some of these I learned from my aunt, and some I learned from spectacular failures.
The Perfect Boiled Egg, Every Time: The 12-minute rest method I mentioned earlier is foolproof, but here’s the real secret—pierce the wider end of each egg with a pin before boiling. This creates a tiny hole that lets air escape, preventing the eggs from cracking and making them easier to peel. I was skeptical when I first heard this, but it honestly works. Just make sure the pin is clean.
Keep the Filling Stable: If you’re making these ahead of time for a party, pipe the filling into the egg whites but don’t add the spiders yet. Cover the platter with plastic wrap and refrigerate. Add the olive spiders right before serving. The cream cheese can soften if the eggs sit out for too long, and the legs might slide off. I learned this the hard way when I brought a platter to a party and half the spiders had collapsed by the time we arrived.
Multitasking Strategy: While the eggs are boiling and then cooling in the ice bath, use that time to prepare the olive spiders. Slice all the olives and arrange the leg pieces. This way, by the time the eggs are peeled and cut, you’re ready to assemble everything quickly. I’ve timed myself, and this shaves about 10 minutes off the total prep time.
Consistency is Key: For the most uniform spiders, try to select olives that are similar in size. The canned black olives from the same brand are usually consistent, but sometimes you get a rogue small one. Use those smaller ones for the legs and save the larger ones for the bodies. Your spiders will look more professional and less like a mismatched creepy-crawly collection.
My Biggest Failure: One year, I decided to get creative and use green olives with pimentos for the spider bodies. I thought the red pimento would look like a scary eye. It looked like a spider with a red nose. The kids laughed at it, which was fine, but it didn’t have the same spooky effect. Stick with black olives—they look like actual spiders and that’s the whole point.
Variations & Adaptations
One of the best things about this recipe is how easy it is to adapt. Here are some variations I’ve tried over the years, each with its own charm.
Dietary Adaptations: For a gluten-free version, this recipe is naturally gluten-free as written—just double-check your mustard and pickle relish labels. For a dairy-free version, use vegan mayo and skip the cream cheese. Instead, use a tiny dab of hummus to attach the olive legs. It works surprisingly well and adds a subtle savory flavor. For a lower-fat version, replace half the mayo with plain Greek yogurt. The filling will be tangier and slightly less creamy, but still delicious.
Flavor Twists: Add 1/4 teaspoon of smoked paprika to the yolk mixture for a deeper, smokier flavor. I tried this last year and it was a hit with the adults. You can also add a dash of hot sauce or a pinch of cayenne pepper for a spicy kick—just be careful if kids are eating them. For a more savory version, add 1 tablespoon of finely chopped fresh dill or chives to the filling.
Seasonal Variations: For a Christmas version, use red bell pepper strips instead of olives for the spider legs. For a spring-themed party, use green olives and arrange the eggs on a bed of arugula to look like bugs in the grass. For a non-spooky version, skip the spiders entirely and top each deviled egg with a small piece of smoked salmon or a caper. The filling recipe works beautifully as a base for any topping.
Different Cooking Methods: If you have an Instant Pot, you can hard boil the eggs in 5 minutes with a 5-minute natural release. The peelability is even better than the stovetop method. I’ve also made these with air-fryer hard-boiled eggs, but the shells tend to crack more easily, so I don’t recommend it for this recipe where presentation matters.
My Personal Variation: Last year, I tried adding a tiny bit of truffle oil to the yolk mixture. It sounded fancy and I thought it would impress my foodie friends. Honestly? It was weird. The truffle flavor clashed with the pickle relish and the kids refused to eat them. Stick with the classic version—it’s a crowd-pleaser for a reason.
Serving & Storage Suggestions
These spider deviled eggs are best served chilled or at room temperature, which makes them perfect for parties. Arrange them on a dark platter or a black serving board to make the spiders really pop. I like to scatter a few extra olive “legs” around the platter for a creepy effect, as if the spiders have been crawling around.
Complementary Dishes: These pair beautifully with other Halloween-themed snacks like mummy hot dogs, pumpkin-shaped cheese slices, or a bowl of warm chili. For a drink, apple cider or a dark soda like cola fits the spooky theme. If you’re serving adults, a dry rosé or a light beer complements the creamy, tangy filling without overpowering it.
Storage Instructions: Leftover spider deviled eggs can be stored in an airtight container in the refrigerator for up to 2 days. I recommend removing the olive spiders before storing, as the cream cheese can make the egg whites soggy. Store the spiders separately in a small container. When you’re ready to serve again, just reattach the spiders with a fresh dab of cream cheese.
Reheating: Do not microwave these. The egg whites will become rubbery and the filling will separate. If you prefer them warm, let them sit at room temperature for 15 minutes before serving. The flavors actually develop more as they sit, so making them a few hours ahead is a great strategy.
How Flavors Develop: The filling gets even better after a few hours in the fridge. The mayo, mustard, and pickle relish meld together into a more cohesive flavor. I’ve actually started making the filling the night before and piping it into the egg whites the next day. The texture is slightly firmer and the taste is more balanced. Just add the spiders right before serving.
Nutritional Information & Benefits
While these are a treat, they do offer some nutritional benefits. Here’s the approximate breakdown per deviled egg (one half with spider):
- Calories: 85
- Protein: 6g
- Fat: 6g
- Carbohydrates: 1g
- Fiber: 0g
- Sugar: 0.5g
- Sodium: 180mg
Health Benefits: Eggs are an excellent source of high-quality protein and contain all nine essential amino acids. They’re also rich in choline, which supports brain health—perfect for growing kids. The olives provide healthy monounsaturated fats and are a good source of vitamin E, an antioxidant. The mayonnaise adds a small amount of vitamin K, which is important for bone health.
Dietary Considerations: This recipe is naturally gluten-free and low-carb, making it suitable for keto and paleo diets in moderation. It contains eggs and dairy (cream cheese), so it’s not suitable for vegans or those with dairy allergies. The sodium content is moderate, so those watching their salt intake should enjoy these in moderation.
My Personal Wellness Perspective: I don’t believe in demonizing foods, especially around the holidays. These spider deviled eggs are a fun, protein-rich snack that fits into a balanced diet. The key is portion control—two or three are satisfying without overdoing it. I love that they’re a healthier alternative to candy-filled Halloween snacks, and my kids actually ask for them year-round.
Conclusion
These kid-approved spider deviled eggs are more than just a Halloween appetizer—they’re a tradition waiting to happen. They’re the kind of recipe that brings people together, sparks laughter, and creates the kind of memories that stick with you long after the candy is gone. The best part? They’re so simple that you can involve the kids in making them, which is exactly how traditions are born.
I encourage you to make this recipe your own. Maybe you’ll use green olives instead of black, or add a sprinkle of cayenne for heat. Maybe you’ll arrange them on a bed of spinach to look like spiders in the grass. The beauty of this recipe is its flexibility. Don’t be afraid to experiment—the worst that can happen is you’ll have a plate of delicious deviled eggs that look a little funny.
Personally, I love this recipe because it reminds me of my aunt Carol and the way she could turn anything into an adventure. Every time I make these spiders, I feel like she’s right there in the kitchen with me, winking and saying, “Don’t worry, they won’t crawl away.” And they won’t—but they might just crawl right into your heart.
I’d love to hear how your spider deviled eggs turn out! Leave a comment below and tell me about your Halloween traditions, or share a photo of your spooky creations. And if you try any fun variations, I want to hear about those too. Happy Halloween, and happy cooking!
Frequently Asked Questions
Can I make these spider deviled eggs a day ahead?
Absolutely! Prepare the egg whites and the filling separately. Pipe the filling into the whites, but don’t add the olive spiders. Store everything covered in the fridge. Assemble the spiders and add them right before serving for the best presentation.
How do I keep the olive legs from falling off?
Use a tiny dab of softened cream cheese as “glue” to attach the legs to the olive body. Make sure the cream cheese is at room temperature so it spreads easily. If you’re transporting the platter, keep the spiders separate and add them at your destination.
Can I use pre-sliced olives instead of whole ones?
I don’t recommend it. Pre-sliced olives are usually too thin and break easily when you try to cut them into leg shapes. Whole olives give you more control over the size and shape of the legs, and they look much more like actual spider legs.
What if my deviled egg filling is too runny?
If your filling is too runny, you probably added too much mayonnaise. To fix it, mash in another hard-boiled egg yolk. If you don’t have one, add a tablespoon of plain breadcrumbs or crushed crackers to absorb the excess moisture. Next time, start with less mayo and add more as needed.
Can I freeze spider deviled eggs?
I don’t recommend freezing these. The egg whites become watery and rubbery when thawed, and the filling separates. These are best made fresh or up to two days ahead and stored in the refrigerator. If you need to prep further ahead, hard boil the eggs and store them unpeeled in the fridge for up to a week, then assemble when you’re ready.
Pin This Recipe!
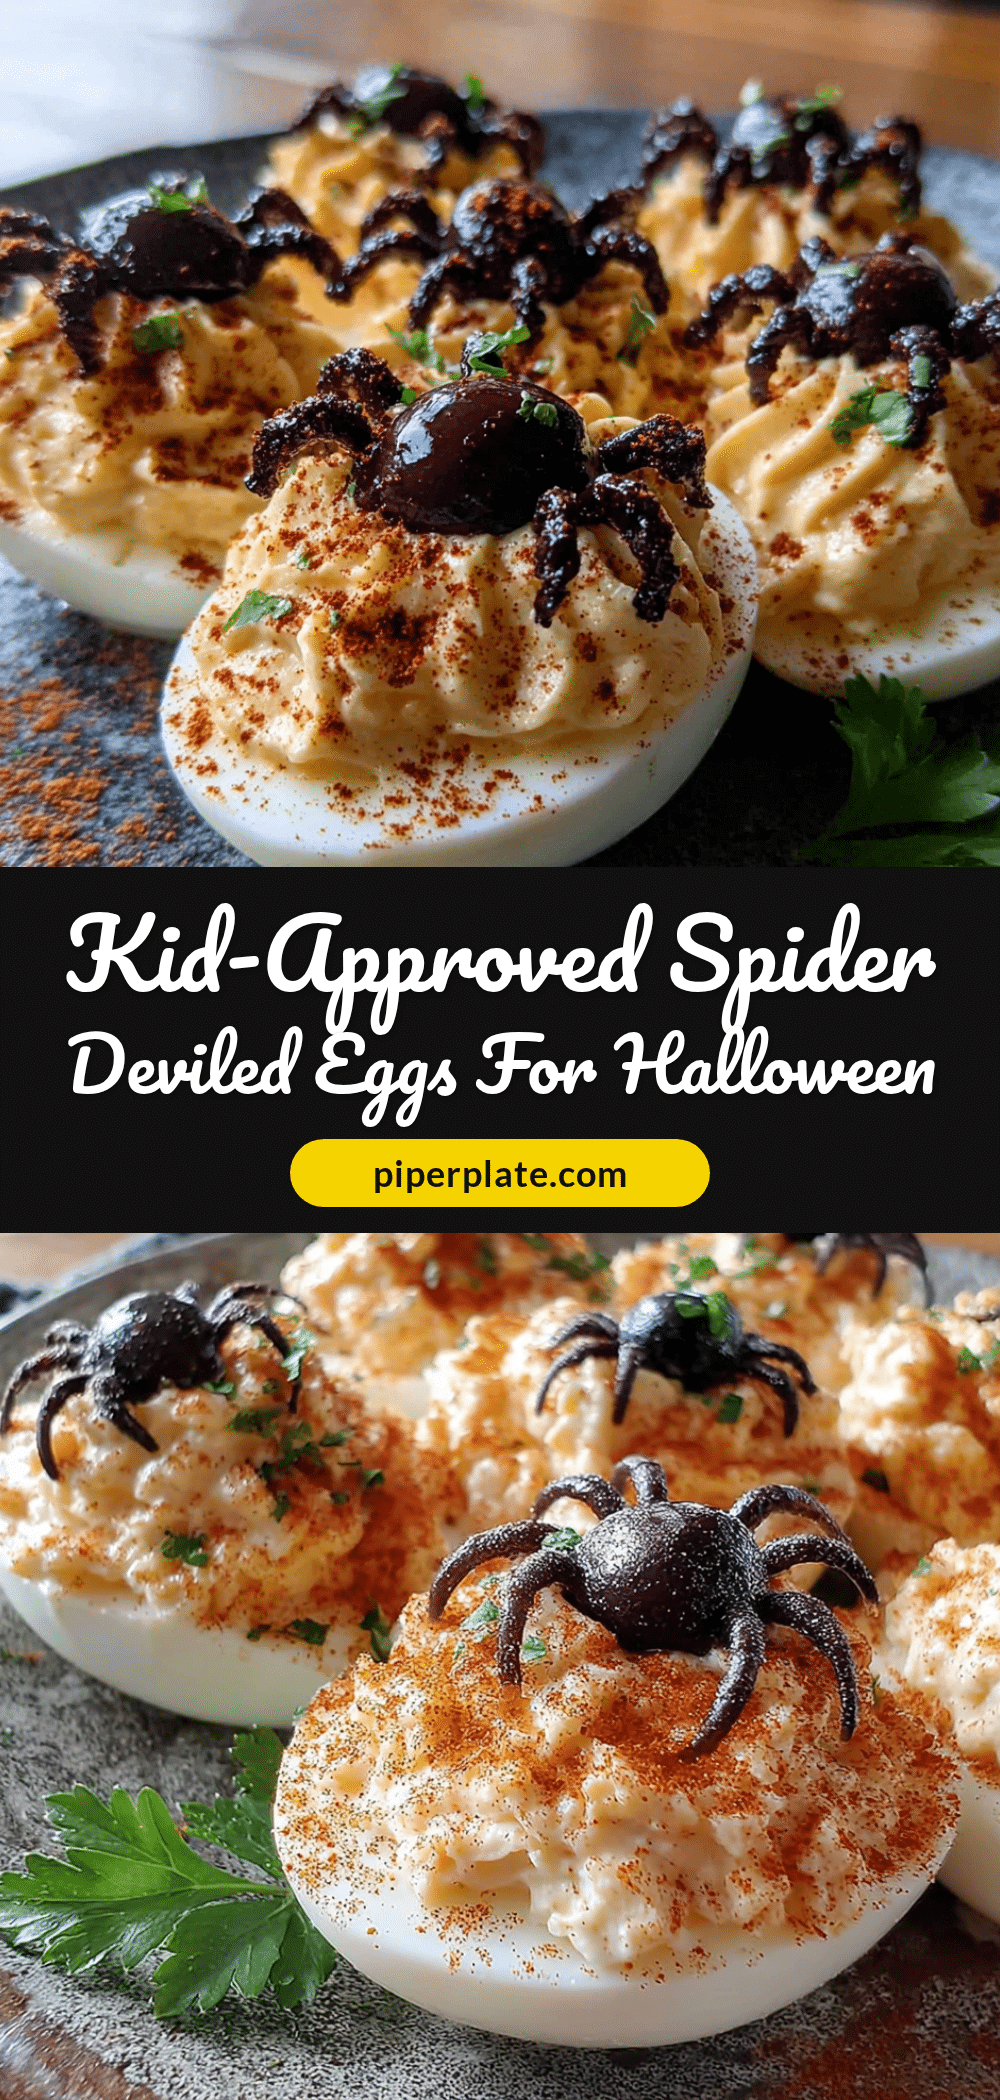
Best Easy Spider Deviled Eggs for Halloween Fun
These kid-approved spider deviled eggs are a fun and easy Halloween appetizer that comes together in under 30 minutes. With creamy filling and olive spiders, they’re perfect for parties and guaranteed to be a crowd-pleaser.
- Prep Time: 20 minutes
- Cook Time: 12 minutes
- Total Time: 32 minutes
- Yield: 24 deviled egg halves (12 servings of 2 halves each) 1x
- Category: Appetizer
- Cuisine: American
Ingredients
- 12 large eggs (room temperature for easier peeling)
- 1/3 cup mayonnaise
- 1 tablespoon yellow mustard
- 1 tablespoon sweet pickle relish (optional)
- 1/2 teaspoon fine sea salt
- 1/4 teaspoon black pepper (freshly ground preferred)
- 1/4 teaspoon paprika (smoked paprika adds extra flavor)
- 1 can (6 ounces) large black olives (whole, not sliced)
- 2 tablespoons cream cheese (softened)
- Fresh chives or green onion tops (optional, for garnish)
Instructions
- Hard boil the eggs: Place 12 eggs in a single layer in a large pot. Cover with cold water by about 1 inch. Bring to a full rolling boil over high heat. Once boiling, cover the pot, turn off the heat, and let sit for exactly 12 minutes. Meanwhile, prepare an ice bath (a large bowl filled with ice and cold water).
- Cool and peel: After 12 minutes, transfer eggs to the ice bath using a slotted spoon. Let sit for at least 10 minutes. Gently tap each egg on the counter to crack the shell all over, then roll between palms to loosen. Start peeling from the wider end. Rinse peeled eggs under cold water to remove shell fragments.
- Cut the eggs: Using a sharp knife, slice each egg in half lengthwise. Wipe the knife clean between cuts. Gently pop out the yolks into a medium mixing bowl. Arrange egg white halves on a serving platter, cut side up.
- Make the filling: Add mayonnaise, yellow mustard, sweet pickle relish, salt, and pepper to the bowl with the yolks. Mash together with a fork until smooth. Taste and adjust seasoning if needed. The filling should be creamy but thick enough to hold its shape when piped.
- Prepare the olive spiders: Drain the can of black olives and pat dry with a paper towel. Select 12 olives of similar size for the spider bodies and set aside. For the remaining olives, slice crosswise into thin rounds (these will be the legs). You need about 96 small olive rounds total. Using a sharp paring knife, cut each round in half to create two ‘leg’ pieces (small half-moon shapes).
- Assemble the spiders: Take one reserved whole olive and use a tiny dab of softened cream cheese to attach four leg pieces to each side. Use a toothpick to apply the cream cheese precisely. Angle the legs slightly outward so the spider looks like it’s crawling. Repeat with remaining 11 olives.
- Pipe the filling: Spoon the yolk mixture into a piping bag or a zip-top bag with the corner snipped off. Pipe a generous swirl of filling into each egg white half, coming slightly above the rim. Alternatively, use a small cookie scoop or two teaspoons to fill the eggs.
- Add the spiders: Place one assembled olive spider on top of each filled egg half. Press down very gently so it sticks. If the spider wobbles, add a tiny bit more cream cheese to the bottom of the olive body.
- Dust with paprika: Using a fine-mesh sieve, lightly dust the finished deviled eggs with paprika. Do not overdo it.
- Garnish (optional): Arrange fresh chives or thin slices of green onion tops around the eggs to look like grass or spider webs.
Notes
For best results, use older eggs for easier peeling. The cream cheese is essential for keeping the olive legs attached. If making ahead, pipe the filling and add spiders just before serving. Store leftovers in an airtight container in the refrigerator for up to 2 days, but remove spiders before storing.
Nutrition
- Serving Size: 2 deviled egg halves
- Calories: 170
- Sugar: 1
- Sodium: 360
- Fat: 12
- Saturated Fat: 3
- Carbohydrates: 2
- Protein: 12
Keywords: spider deviled eggs, Halloween appetizer, easy deviled eggs, kid-friendly Halloween snack, spooky deviled eggs


