Love this? Save it for later!
Share the inspiration with your friends
The community bake sale was in twelve hours and I’d completely forgotten. Not just forgotten—I’d signed up to bring “something special” and then promptly buried the reminder under a pile of work emails and grocery lists. Everyone else would be bringing those picture-perfect tiered cakes and fussy French pastries that take two days to assemble. I had a bag of slightly bruised apples, some oats that were about to expire, and a half-empty jar of caramel sauce in my fridge. Not exactly competition material.
I stood there staring into my pantry, honestly feeling a little panicky. You know that feeling when you want to contribute something good, but life just got in the way? That was me, Tuesday night, apron on, no plan. I grabbed the apples and started peeling, figuring I’d throw together something simple. My neighbor had lent me her good baking dish last week, and I really didn’t want to return it empty-handed.
The bars came together in a bit of a frenzy—I forgot to line the pan properly and had to fish a stray piece of parchment out of the batter. But the smell that filled my kitchen? Pure comfort. I cut them into squares, crossed my fingers, and brought them to the sale the next morning. They were gone in forty-five minutes. Three people asked for the recipe. One woman actually said they were the best thing there, which felt ridiculous given my chaotic start. That’s the thing about these wholesome caramel apple crumble bars—they don’t need fancy techniques or hours of work. They just need a little trust and some really good apples.
Why You’ll Love This Recipe
I’ve tested this recipe more times than I care to admit, tweaking the oat-to-flour ratio and playing with the caramel consistency until everything felt just right. Here’s why I keep coming back to it, and why I think you will too:
- Quick & Easy: From start to oven in about twenty minutes. No stand mixer needed, no complicated folds or chilling steps. Just mix, press, layer, and bake.
- Simple Ingredients: You probably have most of this in your kitchen right now. Oats, flour, butter, apples, and a good caramel sauce. No trips to specialty stores required.
- Perfect for Any Occasion: Bake sale? Check. Cozy fall weekend? Absolutely. Last-minute dessert for unexpected guests? These bars save the day every time.
- Crowd-Pleaser: Kids love the sweet crumble topping. Adults appreciate the real apple chunks and not-too-sweet caramel. Everyone reaches for seconds.
- Unbelievably Delicious: The contrast between the buttery crust, the soft cinnamon-spiced apples, and that sticky caramel layer is honestly next-level. It’s comfort food that feels a little bit fancy without trying so hard.
What makes these different from other apple bars? I use a combination of rolled oats and whole wheat flour in the crust and crumble, which gives it this nutty, wholesome texture that pairs beautifully with the sweet filling. Plus, I layer the caramel in two places—some in the middle, some drizzled on top—so every bite has that sticky, gooey moment. It’s not just another version. It’s the one that makes you close your eyes after the first bite.
What Ingredients You Will Need
This recipe uses simple, wholesome ingredients to deliver bold flavor and satisfying texture without any fuss. Most of these are pantry staples, which makes these bars perfect for spontaneous baking sessions.
- Rolled oats – 1 ½ cups (150g). Use old-fashioned rolled oats, not quick oats. They give the crumble a better texture and hold up during baking.
- Whole wheat flour – 1 cup (120g). Adds a nutty flavor and makes these bars feel heartier. You can substitute all-purpose flour if you prefer a lighter texture.
- All-purpose flour – ½ cup (60g). Helps balance the whole wheat flour so the crust isn’t too dense.
- Brown sugar – ¾ cup (150g), packed. I use light brown sugar for a mild molasses flavor that complements the apples.
- Unsalted butter – ½ cup (113g), cold and cubed. Keep it cold—this is key for a flaky, tender crust.
- Ground cinnamon – 1 ½ teaspoons. The star spice here. I use Ceylon cinnamon for a milder, sweeter flavor.
- Ground nutmeg – ¼ teaspoon. Just a touch for warmth. Freshly grated if you have it.
- Salt – ½ teaspoon. Balances the sweetness and enhances the caramel.
- Apples – 3 medium (about 450g). I prefer Honeycrisp or Granny Smith. Honeycrisp for sweetness, Granny Smith for tartness. A mix of both is lovely.
- Lemon juice – 1 tablespoon. Keeps the apples from browning and adds brightness.
- Cornstarch – 1 tablespoon. Helps thicken the apple filling so it’s not watery.
- Caramel sauce – ½ cup (120ml). Use a good-quality store-bought sauce or make your own. I like the one from Trader Joe’s for convenience.
- Vanilla extract – 1 teaspoon. Pure, not imitation, for the best flavor.
For the apple filling, look for firm apples that hold their shape during baking. If using frozen apples, thaw and drain them well first. In summer, you could swap in sliced peaches or nectarines for a different twist—just reduce the sugar slightly.
Equipment Needed
You don’t need a fancy kitchen to make these bars. Here’s what I use:
- 8×8-inch baking pan – The perfect size for thick, satisfying bars. A 9×9 works too, but the bars will be slightly thinner.
- Parchment paper – Line the pan with overhang on two sides for easy lifting. Trust me on this—I learned the hard way after a sticky cleanup.
- Mixing bowls – One large for the crust mixture, one medium for the apple filling.
- Pastry cutter or fork – To cut the cold butter into the flour mixture. Two knives work fine if you don’t have one.
- Sharp knife and cutting board – For peeling and chopping the apples.
- Measuring cups and spoons – Accurate measurements matter here for the right texture.
- Rubber spatula – For spreading the apple mixture evenly.
A food processor can speed up the crust step, but I actually prefer doing it by hand—it’s easier to control the butter pieces and you get a better feel for the dough.
Preparation Method
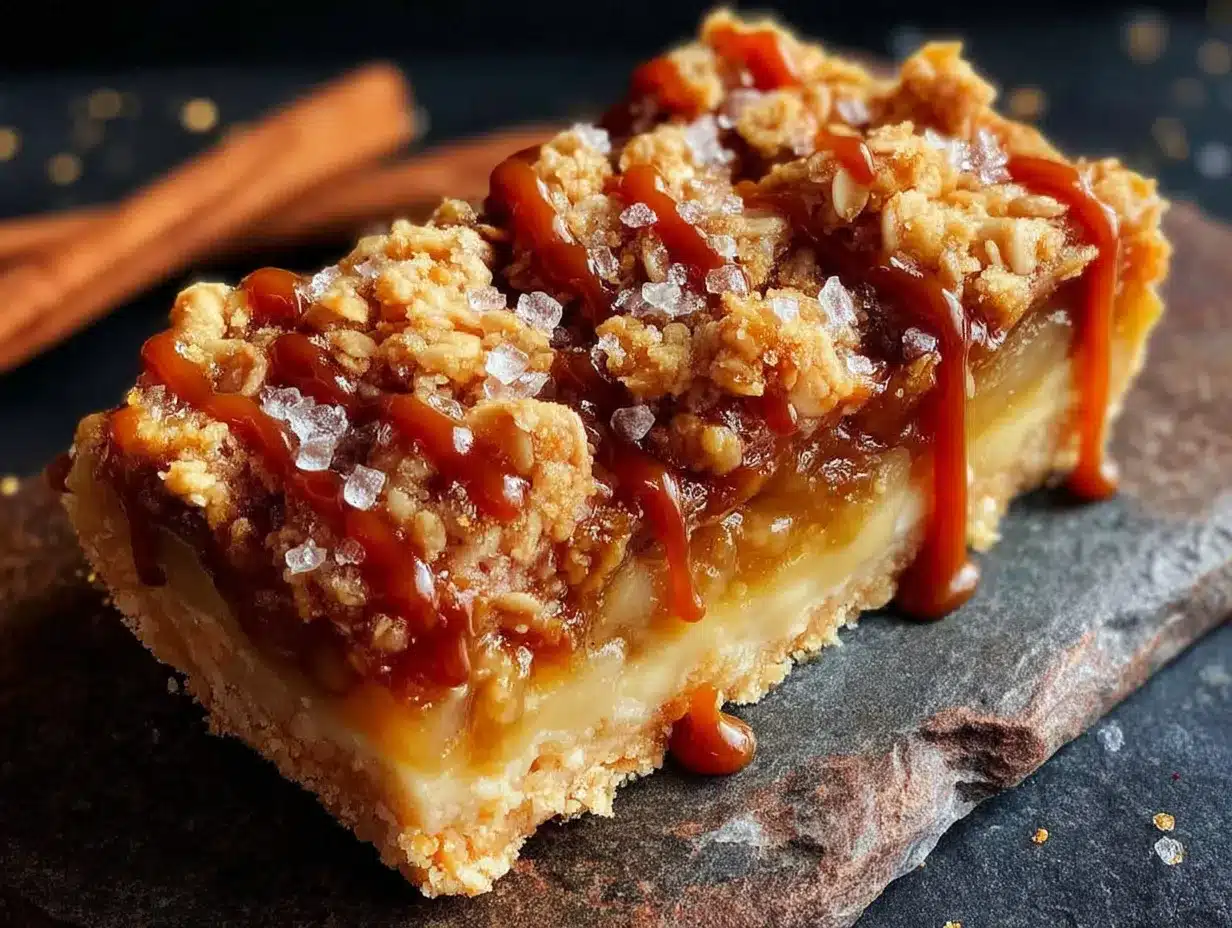
Let me walk you through this step by step. I’ve included all the little details I wish someone had told me the first time.
- Preheat and prep. Preheat your oven to 350°F (175°C). Line your 8×8 baking pan with parchment paper, leaving about 2 inches of overhang on two sides. This makes lifting the bars out so much easier.
- Make the crust and crumble mixture. In a large bowl, combine 1 ½ cups rolled oats, 1 cup whole wheat flour, ½ cup all-purpose flour, ¾ cup packed brown sugar, 1 ½ teaspoons cinnamon, ¼ teaspoon nutmeg, and ½ teaspoon salt. Whisk everything together. Add ½ cup cold, cubed butter. Use a pastry cutter or your fingertips to work the butter into the dry ingredients until the mixture looks like coarse sand with some pea-sized butter pieces remaining. Don’t overwork it—those little butter chunks create flakiness.
- Press the crust. Reserve about 1 cup of the crumble mixture for the topping. Transfer the rest to your prepared pan. Press it down firmly and evenly into the bottom. I use the bottom of a measuring cup to really compact it. Bake for 12 minutes, until it’s just starting to turn golden at the edges.
- Prepare the apple filling. While the crust bakes, peel and chop your 3 apples into small cubes—about ¼ inch each. In a medium bowl, toss the apples with 1 tablespoon lemon juice, 1 tablespoon cornstarch, and 1 teaspoon vanilla extract. The cornstarch helps prevent a soggy bottom.
- Layer the filling. Once the crust is out of the oven, spread the apple mixture evenly over it. Drizzle about ¼ cup of your caramel sauce over the apples. Don’t drown them—you want ribbons of caramel, not a pool.
- Add the crumble topping. Sprinkle the reserved crumble mixture evenly over the apples and caramel. Press it down gently with your hands so it sticks to the filling.
- Bake. Place the pan in the oven and bake for 30-35 minutes. The top should be golden brown and the filling should be bubbling around the edges. If the top is browning too quickly, tent loosely with foil for the last 10 minutes.
- Cool and drizzle. Let the bars cool in the pan for at least 20 minutes. Then drizzle the remaining ¼ cup caramel sauce over the top. Let them cool completely—about 1 hour—before lifting them out and cutting into squares. I know it’s tempting to cut while warm, but they’ll fall apart. Patience pays off here.
Cooking Tips & Techniques
I’ve made these bars more times than I can count, and I’ve definitely learned a few things the hard way. Here’s what I wish I knew from the start:
- Keep your butter cold. This is the number one tip for a flaky crust. If the butter warms up, your crust will be dense and greasy. Pop the cubed butter in the freezer for 10 minutes before you start.
- Don’t skip the parchment paper. The first time I made these, I greased the pan and hoped for the best. Let’s just say I spent twenty minutes chiseling caramel off the bottom. Parchment paper with overhang is a game-changer.
- Watch your oven. All ovens run differently. Mine runs a little hot, so I check the bars at the 25-minute mark. Look for golden edges and bubbling filling—that’s your cue they’re done.
- Cool completely. I know, I know. The smell is intoxicating and you want a warm bar immediately. But cutting too early turns them into crumble. Let them set fully for clean, beautiful squares.
- Toast the oats first. For an extra layer of flavor, spread the rolled oats on a baking sheet and toast them at 350°F for 5-7 minutes before mixing the crust. It adds a subtle nuttiness that’s absolutely worth the extra step.
One time I forgot the cornstarch in the filling and ended up with soupy bars that wouldn’t set. They still tasted good, but they were a mess to eat. Learn from my mistake—that little tablespoon makes a big difference.
Variations & Adaptations
These bars are wonderfully flexible. Here are a few ways I’ve adapted them:
- Gluten-free version: Substitute the whole wheat and all-purpose flour with a 1:1 gluten-free baking blend. Make sure your oats are certified gluten-free. The texture will be slightly more delicate, but still delicious.
- Vegan option: Use cold coconut oil or vegan butter in place of regular butter. For the caramel, use a dairy-free caramel sauce. The crust will be a bit less flaky, but the flavor holds up beautifully.
- Seasonal fruit swaps: In summer, try sliced peaches or nectarines instead of apples. In spring, rhubarb works wonderfully—just increase the sugar slightly to balance the tartness.
- Spice it up: Add ¼ teaspoon of cardamom or ginger to the apple mixture for a warming twist. A pinch of cloves also works if you’re feeling bold.
- Nutty crunch: Fold ½ cup of chopped pecans or walnuts into the crumble topping. Toast them first for maximum flavor.
I once made a version with pears and a drizzle of white chocolate—it was a happy accident after I ran out of apples. Sometimes the best variations come from what you have on hand.
Serving & Storage Suggestions
These bars are wonderful at room temperature, but I actually prefer them slightly warm. Pop a square in the microwave for about 10 seconds to soften the caramel and bring out the apple flavor.
For serving, I love adding a scoop of vanilla ice cream or a dollop of whipped cream on top. A dusting of cinnamon makes it look extra special. They’re also fantastic with a cup of hot coffee or a glass of cold milk—perfect for an afternoon treat.
To store, keep the bars in an airtight container at room temperature for up to 3 days. If your kitchen is warm, refrigerate them to keep the caramel from getting too soft. Layer them with parchment paper between squares to prevent sticking.
For longer storage, these freeze beautifully. Wrap individual bars tightly in plastic wrap, then place them in a freezer-safe bag. They’ll keep for up to 3 months. Thaw at room temperature for about 30 minutes, or warm in the microwave for 20 seconds. The flavors actually deepen after freezing—I’ve hidden a few in the freezer for “emergencies” more than once.
Nutritional Information & Benefits
Here’s the estimated nutrition per bar (based on 9 servings):
- Calories: 320
- Total Fat: 14g
- Saturated Fat: 8g
- Carbohydrates: 48g
- Fiber: 4g
- Sugar: 26g
- Protein: 4g
The whole wheat flour and oats provide fiber and complex carbohydrates, which help keep you full and provide steady energy. Apples are rich in antioxidants and vitamin C, and the cinnamon has anti-inflammatory properties. While these bars are definitely a treat, they’re a more wholesome one compared to many store-bought desserts. I love that I can feel good about serving them to my family—they’re indulgent enough to satisfy a sweet tooth, but made with real, recognizable ingredients.
Conclusion
These wholesome caramel apple crumble bars have become my go-to for everything from bake sales to cozy weekends at home. They’re forgiving enough for a beginner baker, but impressive enough to serve to company. The combination of buttery oat crust, tender cinnamon apples, and sticky caramel is just unbeatable—especially when you know it came together in under an hour.
I hope you give them a try and make them your own. Maybe you’ll add extra cinnamon or swap in pears or sneak in some pecans. That’s the beauty of a good recipe—it’s a starting point, not a rulebook. Let me know how yours turn out in the comments below. Did you try a variation? Did your family fight over the last piece? I’d love to hear your story.
Happy baking, friends. You’ve got this.
Frequently Asked Questions
Can I use quick oats instead of rolled oats?
You can, but the texture will be softer and less chewy. Rolled oats give the crust and crumble a heartier structure. If you only have quick oats, reduce the butter slightly since they absorb less liquid.
Why did my bars turn out soggy?
Soggy bars usually mean the apples released too much moisture. Make sure you toss them with cornstarch, and don’t skip the pre-bake for the crust. Using firmer apples like Granny Smith also helps.
Can I make these bars ahead of time?
Absolutely. They actually taste better the next day after the flavors meld. Bake them a day ahead, cool completely, and store in an airtight container. Add the final caramel drizzle just before serving.
How do I cut clean bars without them falling apart?
Patience is key. Let the bars cool completely—at least 1 hour. Use a sharp knife and wipe it clean between cuts. For the cleanest edges, chill the bars in the fridge for 30 minutes before slicing.
Can I freeze the unbaked bars?
Yes! Assemble the bars in the pan but don’t bake. Wrap tightly in plastic wrap and foil, then freeze for up to 3 months. Bake directly from frozen, adding about 10 minutes to the baking time.
Pin This Recipe!
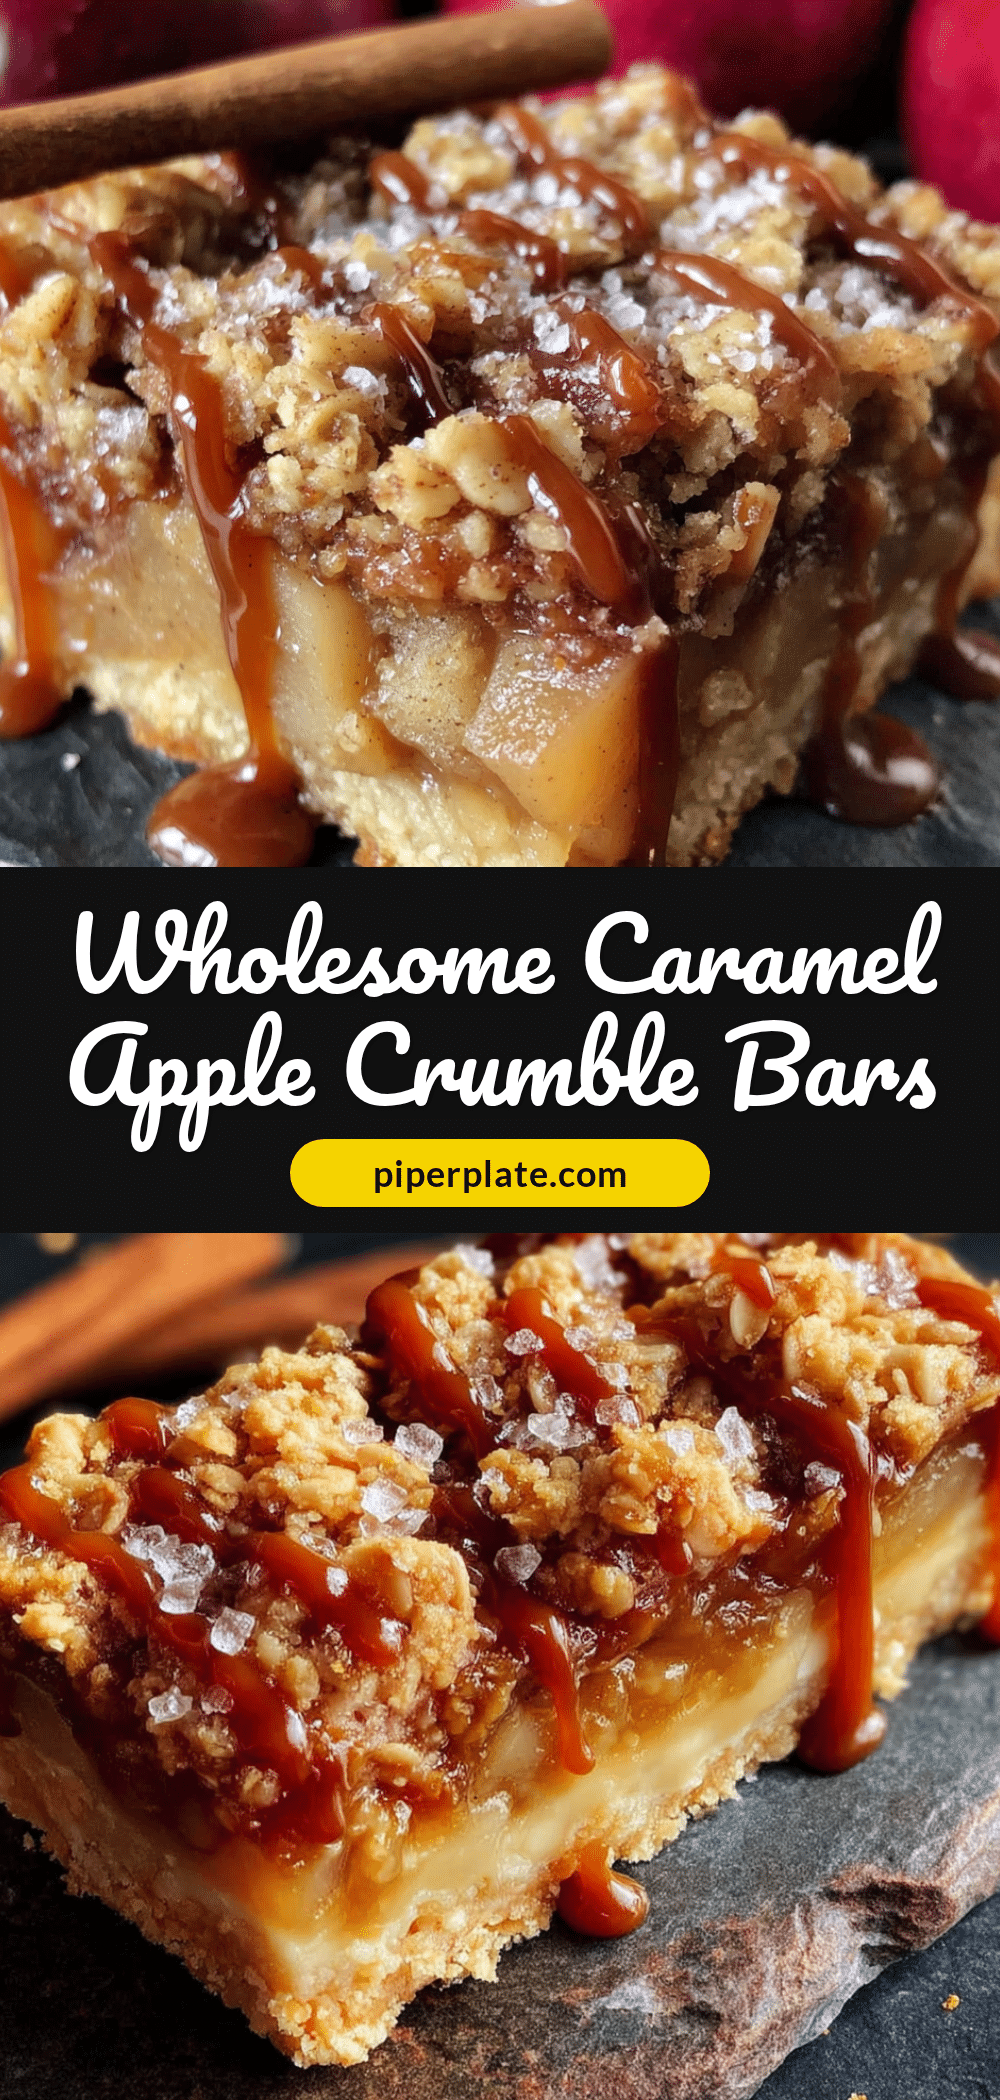
Best Homemade Caramel Apple Crumble Bars Recipe
These wholesome caramel apple crumble bars feature a buttery oat crust, tender cinnamon-spiced apples, and a gooey caramel layer. They come together in under an hour and are perfect for bake sales, cozy weekends, or last-minute desserts.
- Prep Time: 20 minutes
- Cook Time: 35 minutes
- Total Time: 55 minutes
- Yield: 9 servings 1x
- Category: Dessert
- Cuisine: American
Ingredients
- 1 ½ cups (150g) rolled oats
- 1 cup (120g) whole wheat flour
- ½ cup (60g) all-purpose flour
- ¾ cup (150g) packed brown sugar
- ½ cup (113g) unsalted butter, cold and cubed
- 1 ½ teaspoons ground cinnamon
- ¼ teaspoon ground nutmeg
- ½ teaspoon salt
- 3 medium apples (about 450g), peeled and chopped into ¼-inch cubes
- 1 tablespoon lemon juice
- 1 tablespoon cornstarch
- 1 teaspoon vanilla extract
- ½ cup (120ml) caramel sauce, divided
Instructions
- Preheat oven to 350°F (175°C). Line an 8×8-inch baking pan with parchment paper, leaving about 2 inches of overhang on two sides.
- In a large bowl, combine rolled oats, whole wheat flour, all-purpose flour, brown sugar, cinnamon, nutmeg, and salt. Whisk together.
- Add cold cubed butter. Use a pastry cutter or fingertips to work the butter into the dry ingredients until the mixture resembles coarse sand with some pea-sized butter pieces remaining.
- Reserve about 1 cup of the crumble mixture for the topping. Transfer the rest to the prepared pan and press firmly and evenly into the bottom. Bake for 12 minutes, until just starting to turn golden at the edges.
- While the crust bakes, prepare the apple filling: In a medium bowl, toss the chopped apples with lemon juice, cornstarch, and vanilla extract.
- Once the crust is out of the oven, spread the apple mixture evenly over it. Drizzle about ¼ cup of caramel sauce over the apples.
- Sprinkle the reserved crumble mixture evenly over the apples and caramel. Press down gently with your hands.
- Bake for 30-35 minutes, until the top is golden brown and the filling is bubbling around the edges. If browning too quickly, tent loosely with foil for the last 10 minutes.
- Let the bars cool in the pan for at least 20 minutes. Drizzle the remaining ¼ cup caramel sauce over the top. Cool completely (about 1 hour) before lifting out and cutting into squares.
Notes
Keep butter cold for a flaky crust. Don’t skip the parchment paper for easy removal. Cool completely before cutting to prevent crumbling. For extra flavor, toast the oats before mixing. If using frozen apples, thaw and drain well.
Nutrition
- Serving Size: 1 bar
- Calories: 320
- Sugar: 26
- Fat: 14
- Saturated Fat: 8
- Carbohydrates: 48
- Fiber: 4
- Protein: 4
Keywords: caramel apple crumble bars, apple bars, crumble bars, fall dessert, bake sale recipe, easy dessert, apple crumble bars


