Love this? Save it for later!
Share the inspiration with your friends
I was standing in line at a tiny coffee shop last Tuesday—the kind with mismatched chairs and a chalkboard menu that changes daily—when the scent hit me. It wasn’t coffee. It was something warmer, spicier, more specific. Cardamom, mostly. A little clove. Someone had just walked past me carrying a paper bag, and the smell was so sharp and familiar that suddenly I was nine years old, sitting cross-legged on Mrs. Chen’s linoleum kitchen floor, watching her sift flour into a blue mixing bowl. She wasn’t my grandmother, not by blood. She was the retired botanist who lived three doors down and let me help her bake every Saturday morning because she said I was “the only person in the neighborhood who didn’t rush things.” And that scent—that exact blend of chai spices and something sweet baking—was her signature.
I never got her recipe. She moved away when I was twelve, and I never thought to ask. So for years, I’ve been chasing it. I’ve tried a dozen versions, some too dry, some too sweet, some that tasted more like a candle than a scone. But this one? Honestly, this one finally got close. Maybe it’s the way the pumpkin keeps everything tender. Maybe it’s the double dose of spice—both in the dough and the glaze. Or maybe it’s just that I finally stopped trying to copy her exactly and started making something that felt like mine.
You know that feeling when you take a bite and something clicks? That’s what these chai-spiced pumpkin scones are for me. They’re the recipe I bring to every fall brunch, every holiday gathering, every time someone says “bring something you’re proud of.” And let me tell you—they disappear fast.
Why You’ll Love This Recipe
These aren’t your average pumpkin scones. I’ve tested this recipe six times over two months to get the texture just right—not too cakey, not too dense, with that perfect crumbly-but-tender scone thing that so many recipes miss. Here’s why they keep ending up on my table:
- Quick & Easy: From mixing bowl to oven in under 20 minutes. No stand mixer needed, no chilling the dough overnight. Just a bowl, a pastry cutter, and your hands.
- Simple Ingredients: You probably have most of this in your pantry right now. Pumpkin puree, flour, butter, sugar, and a few spices. Nothing weird or hard to find.
- Perfect for Hosting: These are made for a crowd. The recipe scales beautifully, and they look impressive on a platter without any fancy decorating skills.
- Crowd-Pleaser: I’ve served these at four different gatherings this fall, and every single time someone asked for the recipe. One friend texted me the next day saying she’d eaten three for breakfast.
- Unbelievably Delicious: The chai spices aren’t just in the scone—they’re in the glaze too. That double hit of flavor makes all the difference.
What makes these different from every other pumpkin scone recipe out there? It’s the method. Most recipes overwork the dough, which makes scones tough. I use a technique where you grate frozen butter into the flour mixture—it creates these tiny pockets of steam as they bake, giving you that flaky, tender interior without any fuss. Plus, the chai spice blend is balanced specifically to complement the pumpkin, not overwhelm it. This isn’t just another version. It’s the one I’d serve to anyone I wanted to impress.
What Ingredients You Will Need
This recipe uses simple, wholesome ingredients to deliver bold flavor and satisfying texture without the fuss. Most of these are pantry staples, and the ones that aren’t—like the pumpkin puree—are easy to find at any grocery store this time of year.
For the Scones
- 2 cups all-purpose flour (I use King Arthur for consistent results; spoon and level for accuracy)
- 1/3 cup granulated sugar (adds just enough sweetness without making them taste like cake)
- 1 tablespoon baking powder (make sure it’s fresh—old baking powder ruins scones)
- 1/2 teaspoon salt (fine sea salt works best)
- 1 1/2 teaspoons ground cinnamon
- 1 teaspoon ground ginger
- 1/2 teaspoon ground cardamom (this is the key to that chai flavor—don’t skip it)
- 1/4 teaspoon ground cloves
- 1/4 teaspoon ground nutmeg (freshly grated if you have it)
- 1/2 cup cold unsalted butter (frozen is even better for that flaky texture)
- 1/2 cup pumpkin puree (not pumpkin pie filling—make sure it’s 100% pumpkin)
- 1/4 cup heavy cream (plus extra for brushing the tops)
- 1 large egg (room temperature if you remember, but cold works fine too)
- 1 teaspoon vanilla extract
For the Chai Spice Glaze
- 1 cup powdered sugar (sift it if it’s lumpy)
- 2 tablespoons heavy cream (or milk, but cream makes it richer)
- 1/2 teaspoon ground cinnamon
- 1/4 teaspoon ground cardamom
- 1/8 teaspoon ground ginger
- 1 tablespoon melted butter (optional, but it adds a beautiful sheen)
Ingredient Tip: For the best chai flavor, try to find freshly ground cardamom. The pre-ground stuff from the spice aisle is fine, but it loses its punch quickly. I buy whole cardamom pods and grind them myself in a mortar and pestle—it takes an extra two minutes and makes a noticeable difference. Also, if you’re using a different brand of pumpkin puree, check the consistency. Some brands are more watery than others. If yours seems thin, drain it on a paper towel for a few minutes before using.
Equipment Needed
You don’t need much for this recipe, which is part of why I love it. Here’s what you’ll want to have on hand:
- Large mixing bowl (any bowl works, but a wide one makes mixing easier)
- Pastry cutter or two forks (for cutting the butter into the flour; I’ve used both, and honestly, a pastry cutter is faster)
- Box grater (for grating frozen butter—this is my secret weapon for flaky scones)
- Baking sheet (lined with parchment paper or a silicone mat)
- Bench scraper or sharp knife (for cutting the scone dough into triangles)
- Whisk (for mixing the glaze)
- Pastry brush (for brushing cream on top before baking)
If you don’t have a pastry cutter, don’t worry. You can use two knives or even your fingertips—just work quickly so the butter doesn’t warm up. And if you don’t have a box grater, you can cube the frozen butter with a knife instead. It takes a little longer, but it works just as well. I’ve made these in a friend’s kitchen with a butter knife and a cereal bowl, and they still turned out great.
Preparation Method
Preheat your oven to 400°F (200°C) and line a baking sheet with parchment paper.
- Grate the frozen butter. Take your cold butter—it should be straight from the freezer—and grate it on the large holes of a box grater into a small bowl. Pop that bowl back in the freezer while you mix the dry ingredients. This step is non-negotiable if you want flaky scones. Trust me on this.
- Mix the dry ingredients. In a large bowl, whisk together the flour, sugar, baking powder, salt, and all the spices (cinnamon, ginger, cardamom, cloves, nutmeg). Make sure everything is evenly distributed—you don’t want one scone to get all the cardamom while another gets none.
- Cut in the butter. Add the grated frozen butter to the flour mixture. Use your pastry cutter or fingertips to work the butter into the flour until it looks like coarse meal with some pea-sized butter pieces still visible. Don’t overdo it—those little butter bits are what create the flaky layers.
- Mix the wet ingredients. In a separate small bowl, whisk together the pumpkin puree, heavy cream, egg, and vanilla extract until smooth. It should look like a thick, orange custard.
- Combine wet and dry. Pour the wet mixture into the dry mixture. Stir with a spatula or wooden spoon just until combined. The dough will look shaggy and a little dry in spots—that’s exactly what you want. If it looks too dry to come together, add another tablespoon of cream. If it looks too wet, add a tablespoon of flour.
- Shape the dough. Turn the dough out onto a lightly floured surface. Gently bring it together with your hands, patting it into a circle about 3/4-inch thick. Don’t knead it—just press it together. Use a bench scraper or sharp knife to cut the circle into 8 equal wedges, like you’re cutting a pizza.
- Bake. Place the scone wedges on your prepared baking sheet, spacing them about 2 inches apart. Brush the tops with a little extra cream (this helps them get that golden-brown crust). Bake for 15-18 minutes, until the edges are lightly golden and the tops are firm to the touch. They should look pale golden, not dark brown.
- Cool. Let the scones cool on the baking sheet for 5 minutes, then transfer them to a wire rack to cool completely before glazing. If you glaze them while they’re still warm, the glaze will just melt and run off—I learned this the hard way.
- Make the glaze. While the scones cool, whisk together the powdered sugar, heavy cream, cinnamon, cardamom, ginger, and melted butter (if using) in a small bowl. The glaze should be thick but pourable—add more cream a teaspoon at a time if it’s too stiff, or more powdered sugar if it’s too thin.
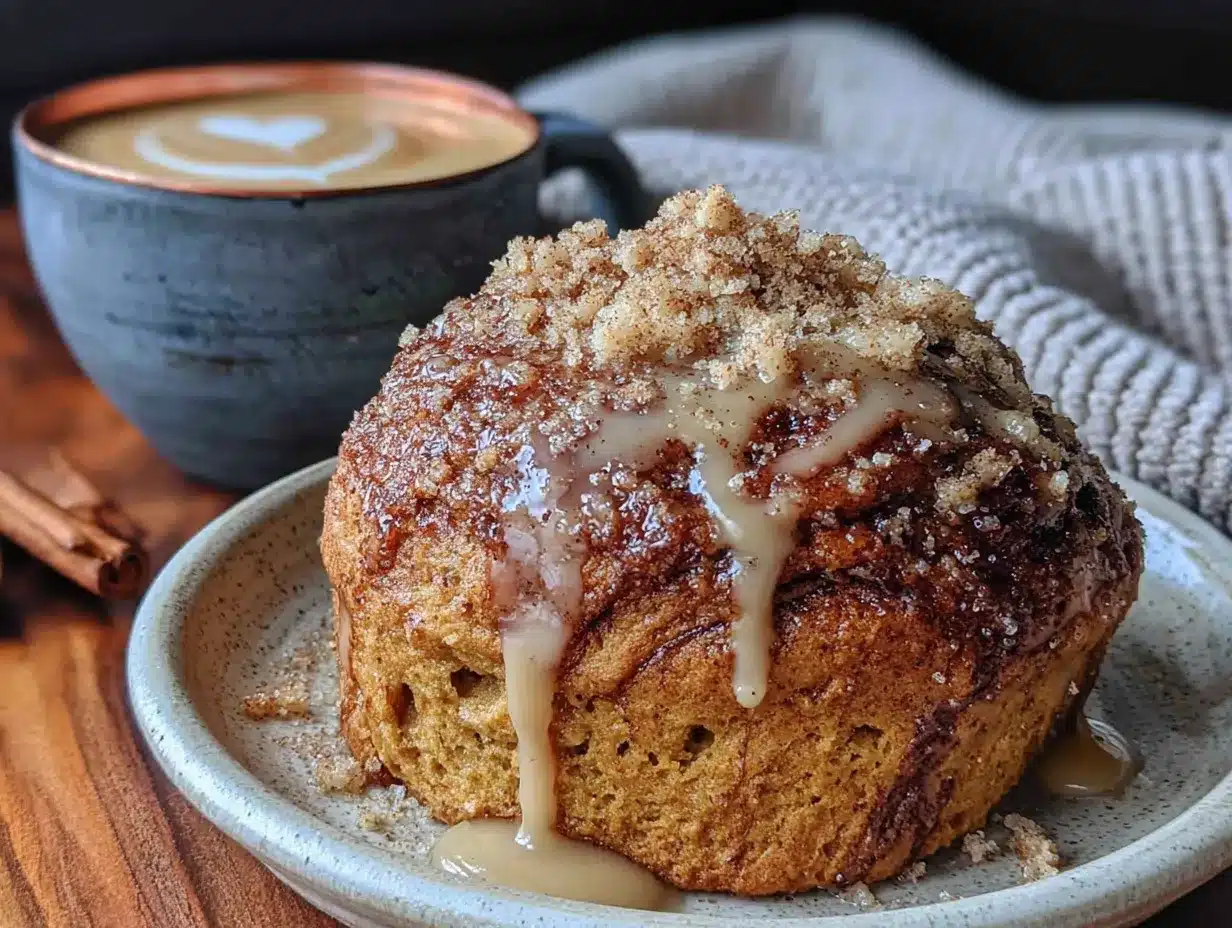
- Glaze and serve. Once the scones are completely cool, drizzle the glaze over the tops. I like to use a spoon and let it cascade naturally, but you can also dip the tops directly into the glaze for a thicker coating. Let the glaze set for about 10 minutes before serving.
Cooking Tips & Techniques
I’ve made this recipe enough times to know exactly where things can go wrong. Here’s what I’ve learned the hard way so you don’t have to:
The butter must stay cold. This is the single most important rule of scone-making. If your butter warms up before the scones hit the oven, you’ll end up with dense, flat disks instead of tall, flaky wedges. I keep my grated butter in the freezer until the very last second. On hot days, I even chill my mixing bowl and flour for 10 minutes before starting.
Don’t overmix the dough. I know it’s tempting to keep stirring until everything looks smooth and uniform, but stop as soon as the dough comes together. Overmixing develops the gluten, which makes scones tough. Your dough should look a little rough and shaggy. That’s a good thing.
Use a sharp cutter. When you cut the scone wedges, use a sharp knife or bench scraper and press straight down—don’t twist. Twisting seals the edges and prevents the scones from rising properly. I ruined my first batch this way and couldn’t figure out why they came out so flat.
Watch your oven temperature. Every oven runs a little differently. If your scones are browning too quickly on the bottom but still pale on top, your oven might run hot. Try baking them on the middle rack and checking a few minutes early. I’ve had to adjust my baking time by up to 3 minutes depending on the oven I’m using.
Make ahead tip: You can freeze the unbaked scone wedges on a baking sheet, then transfer them to a freezer bag. Bake them straight from frozen—just add 2-3 minutes to the baking time. This is a lifesaver when you’re hosting and want fresh scones without the morning rush.
Variations & Adaptations
One of the best things about this recipe is how flexible it is. Here are some variations I’ve tried and loved:
Gluten-Free Version: Substitute the all-purpose flour with a 1:1 gluten-free baking flour blend (I like Bob’s Red Mill). Add 1/4 teaspoon xanthan gum if your blend doesn’t already include it. The texture will be slightly more tender and a little less flaky, but still delicious. I’ve served these to gluten-free guests who didn’t even notice the difference.
Vegan Adaptation: Use cold coconut oil or vegan butter instead of regular butter. Replace the heavy cream with full-fat coconut cream, and use a flax egg (1 tablespoon ground flaxseed mixed with 3 tablespoons water, let sit for 5 minutes) instead of the egg. The scones will be a little denser but still very good. For the glaze, use coconut cream and melted coconut oil.
Extra Spicy Version: If you really love that chai kick, add 1/4 teaspoon black pepper and a pinch of allspice to the spice blend. I tried this on a whim last winter and it was incredible—the pepper adds this subtle warmth that lingers on your tongue.
Maple Pumpkin Scones: Swap the granulated sugar for 1/3 cup maple syrup (reduce the cream by 2 tablespoons to compensate for the extra liquid). Add maple extract instead of vanilla for an even stronger maple flavor. This version is especially good with a maple glaze instead of the chai glaze.
Chocolate Chip Pumpkin Scones: Fold in 1/2 cup white chocolate chips or dark chocolate chips after combining the wet and dry ingredients. The chocolate adds a nice sweetness that balances the spices. My niece insists this is the only way to make them.
Serving & Storage Suggestions
These scones are best served slightly warm or at room temperature. If you’re hosting, I recommend baking them just before your guests arrive so they’re still warm from the oven. Arrange them on a nice platter or wooden board, drizzle with the glaze, and watch them disappear.
What to serve alongside: These pair beautifully with a hot cup of chai tea (obviously), a latte, or even a simple cup of coffee. For a brunch spread, serve them alongside a frittata or scrambled eggs, fresh fruit, and maybe some yogurt with granola. They also make a lovely dessert with a dollop of whipped cream or a scoop of vanilla ice cream.
Storage: Store leftover scones in an airtight container at room temperature for up to 3 days. The glaze will soften slightly, but they’ll still taste great. If you’ve already glazed them, place a piece of parchment paper between layers to prevent sticking.
Freezing: You can freeze baked, unglazed scones for up to 3 months. Wrap each scone individually in plastic wrap, then place them in a freezer bag. To serve, thaw at room temperature for about 30 minutes, then reheat in a 350°F oven for 5-7 minutes. Glaze after reheating.
Reheating: The best way to reheat a scone is in the oven or toaster oven at 350°F for 5 minutes. The microwave works in a pinch, but it makes them soft and a little rubbery. If you’re in a hurry, split the scone in half and toast it—the edges get crispy while the inside stays tender.
Flavor development: Honestly, these scones taste even better the next day. The spices have time to meld together, and the texture settles into this perfect balance of tender and crumbly. I’ve been known to make them a day ahead on purpose.
Nutritional Information & Benefits
Here’s the approximate nutritional breakdown for one scone (with glaze):
- Calories: 320
- Fat: 16g
- Carbohydrates: 42g
- Protein: 4g
- Fiber: 2g
- Sugar: 22g
These numbers will vary depending on your specific ingredients and portion sizes. The pumpkin puree adds a good dose of vitamin A and fiber, while the spices—especially ginger and cinnamon—have anti-inflammatory properties. Cardamom is also known for its digestive benefits, which is fitting since chai has traditionally been served after meals in many cultures.
Dietary considerations: This recipe contains gluten, dairy, and eggs. See the variations section for gluten-free and vegan adaptations. If you’re watching your sugar intake, you can reduce the sugar in the scones to 1/4 cup and skip the glaze entirely—they’ll still be flavorful from the spices and pumpkin.
I don’t pretend these are health food, but I do feel better about serving something that has real pumpkin and actual spices instead of artificial flavors. It’s comfort food made with real ingredients, and that counts for something.
Conclusion
These chai-spiced pumpkin scones have become my go-to for every fall gathering, and I don’t see that changing anytime soon. They’re the recipe that makes people stop mid-conversation and say “wait, what’s in these?” They’re the ones I’m asked to bring to Friendsgiving, the ones my neighbor texts me about in October asking if I’m “making those scones again this year.”
What I love most about them is that they feel special without being complicated. You don’t need fancy equipment or hard-to-find ingredients. You just need good butter, the right spices, and a little patience with the technique. And once you nail that flaky, tender texture, you’ll never go back to dry, crumbly scones again.
I’d love to hear how these turn out for you. Did you try one of the variations? Did you add your own twist? Drop a comment below and let me know—I read every single one, and your feedback helps me make these recipes even better. And if you’re looking for more fall baking inspiration, don’t miss my crispy garlic chicken for a savory option that’s perfect for cozy dinners.
Happy baking, friends. May your scones be flaky and your kitchen smell like a chai shop.
Frequently Asked Questions
Can I use pumpkin pie filling instead of pumpkin puree?
No, I wouldn’t recommend it. Pumpkin pie filling already has sugar and spices added, which will throw off the balance of this recipe. Stick with 100% pure pumpkin puree for the best results.
Why did my scones turn out dry?
This usually happens for one of three reasons: too much flour (make sure you’re spooning and leveling it), overbaking (check them a few minutes early), or not enough pumpkin puree. Pumpkin moisture content can vary by brand, so if your dough seems dry, add an extra tablespoon of cream.
Can I make the dough ahead of time?
Absolutely. You can shape the scone wedges and refrigerate them on a baking sheet for up to 24 hours before baking. Just cover them loosely with plastic wrap. You can also freeze them for up to 3 months—bake straight from frozen, adding 2-3 minutes to the baking time.
What’s the best way to store leftover scones?
Store them in an airtight container at room temperature for up to 3 days. If you’ve already glazed them, place parchment paper between layers to prevent sticking. For longer storage, freeze unglazed scones for up to 3 months.
Can I reduce the sugar in this recipe?
Yes! You can cut the sugar in the scones down to 1/4 cup without affecting the texture too much. If you skip the glaze entirely, each scone will have about half the sugar. The spices and pumpkin provide plenty of flavor on their own.
Pin This Recipe!

Best Homemade Chai Pumpkin Scones Recipe

These chai-spiced pumpkin scones are tender, flaky, and packed with warm spices. Made with a secret technique of grating frozen butter for the perfect texture, they’re topped with a double dose of chai flavor in the glaze.
- Prep Time: 20 minutes
- Cook Time: 18 minutes
- Total Time: 38 minutes
- Yield: 8 servings 1x
- Category: Breakfast
- Cuisine: American
Ingredients
- 2 cups all-purpose flour
- 1/3 cup granulated sugar
- 1 tablespoon baking powder
- 1/2 teaspoon fine sea salt
- 1 1/2 teaspoons ground cinnamon
- 1 teaspoon ground ginger
- 1/2 teaspoon ground cardamom
- 1/4 teaspoon ground cloves
- 1/4 teaspoon ground nutmeg
- 1/2 cup cold unsalted butter (frozen preferred)
- 1/2 cup pumpkin puree (100% pumpkin, not pie filling)
- 1/4 cup heavy cream (plus extra for brushing)
- 1 large egg
- 1 teaspoon vanilla extract
- 1 cup powdered sugar
- 2 tablespoons heavy cream (for glaze)
- 1/2 teaspoon ground cinnamon (for glaze)
- 1/4 teaspoon ground cardamom (for glaze)
- 1/8 teaspoon ground ginger (for glaze)
- 1 tablespoon melted butter (optional, for glaze)
Instructions
- Preheat oven to 400°F (200°C) and line a baking sheet with parchment paper.
- Grate frozen butter on the large holes of a box grater into a small bowl. Return to freezer.
- In a large bowl, whisk together flour, sugar, baking powder, salt, cinnamon, ginger, cardamom, cloves, and nutmeg.
- Add grated frozen butter to flour mixture. Use a pastry cutter or fingertips to work butter into flour until it resembles coarse meal with some pea-sized butter pieces.
- In a separate bowl, whisk together pumpkin puree, heavy cream, egg, and vanilla extract until smooth.
- Pour wet mixture into dry mixture. Stir with a spatula just until combined. Dough should be shaggy and slightly dry.
- Turn dough onto a lightly floured surface. Gently pat into a 3/4-inch thick circle. Cut into 8 equal wedges.
- Place wedges on prepared baking sheet, spacing 2 inches apart. Brush tops with extra cream.
- Bake for 15-18 minutes until edges are lightly golden and tops are firm. Cool on baking sheet for 5 minutes, then transfer to a wire rack to cool completely.
- For glaze: Whisk together powdered sugar, heavy cream, cinnamon, cardamom, ginger, and melted butter (if using) until thick but pourable.
- Once scones are completely cool, drizzle glaze over tops. Let set for 10 minutes before serving.
Notes
Keep butter frozen until last second for flakiest scones. Don’t overmix dough. Use sharp cutter and press straight down without twisting. For make-ahead, freeze unbaked wedges and bake straight from frozen, adding 2-3 minutes. Scones taste even better the next day as spices meld.
Nutrition
- Serving Size: 1 scone with glaze
- Calories: 320
- Sugar: 22
- Fat: 16
- Carbohydrates: 42
- Fiber: 2
- Protein: 4
Keywords: pumpkin scones, chai scones, fall baking, pumpkin recipes, scone recipe, chai spice, breakfast pastry


