Love this? Save it for later!
Share the inspiration with your friends
My brother had sworn off sugar cookies for a solid decade. Ten years. He claimed they were “dry, disappointing disks of disappointment”—his exact words, said at least once every holiday season. I’d watch him bypass the cookie platter at every family gathering, loading up on brownies and pecan bars instead, making his little grumpy face. I just let him be. Honestly, I figured he just had terrible taste in cookies.
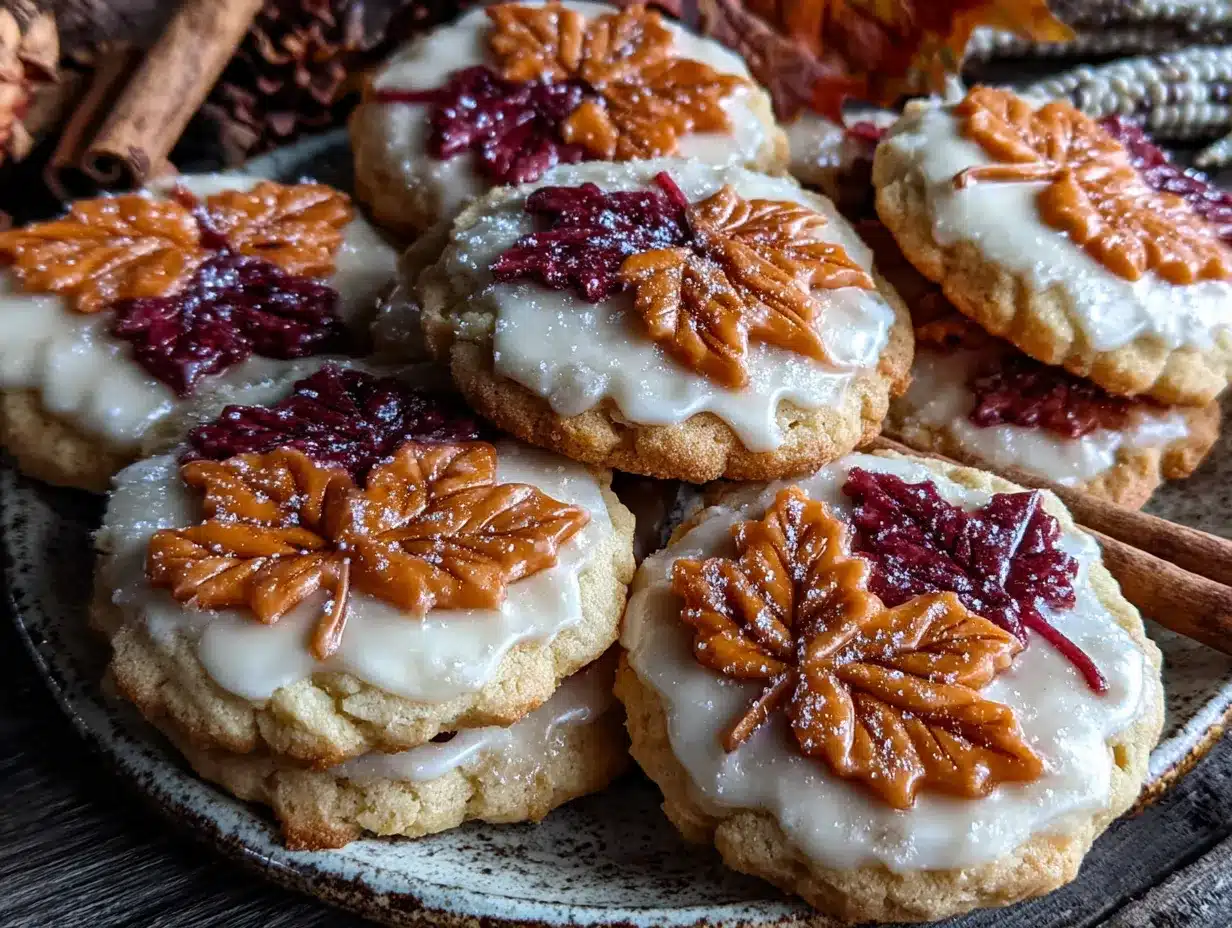
Then, last November, I was testing this recipe for Thanksgiving sugar cookies. I had royal icing leaves drying on parchment all over my kitchen counters—little maple, oak, and birch shapes in shades of burnt orange, deep crimson, and golden yellow. They looked so pretty I almost didn’t want anyone to eat them. I left a single test cookie on a plate near the coffee maker, decorated with one perfect little iced leaf, and went to take a shower. When I came back, the cookie was gone. And my brother was standing there, crumbs on his shirt, trying to look innocent.
“That was an accident,” he said, mouth still half-full. “I thought it was a cracker.”
I didn’t say a word. I just handed him another one. He ate that one on purpose. Then he asked me to show him how to pipe the little leaf veins. So yeah—this recipe has some serious conversion power. If you’ve got a sugar cookie skeptic in your life, or if you just want the prettiest, most delicious Thanksgiving cookies on the table, you’re in the right place. Let’s make some magic happen.
Why You’ll Love This Recipe
These aren’t just any sugar cookies. They’re the kind that make people close their eyes after the first bite, and then immediately reach for a second. I’ve tested this dough more times than I care to admit—through too much butter, not enough chilling, and one memorable incident involving baking powder instead of baking soda (don’t ask). This version is the one. It’s the one that works every single time.
- Perfectly Soft & Sturdy: The cookies hold their shape beautifully for decorating, but they have that tender, melt-in-your-mouth texture you actually want to eat. No cardboard disks here.
- Simple Pantry Ingredients: You probably have everything you need already—butter, sugar, flour, eggs, vanilla. No weird specialty items required.
- Made for Fall Gatherings: These are the star of any Thanksgiving dessert table, Friendsgiving party, or cozy afternoon baking session with the kids.
- Royal Icing That Actually Works: I’ll walk you through the exact consistency you need. No more runny icing disasters or clogged piping tips.
- Unbelievably Beautiful Results: The leaf decorations look incredibly fancy—like something from a bakery window—but they’re totally doable at home. I promise.
What makes these cookies different? It’s the technique. I blend the butter and sugar a little longer than most recipes call for, which creates a lighter, more tender crumb. And the chilling time isn’t optional—it’s the secret to sharp edges and no spreading. Plus, the royal icing uses meringue powder instead of raw egg whites, so it’s safe for everyone and dries to a beautiful matte finish. This isn’t just another sugar cookie recipe. It’s the one you’ll pull out every Thanksgiving from now on.
What Ingredients You Will Need
This recipe uses simple, wholesome ingredients to create cookies that taste as good as they look. Everything is easy to find at any grocery store, and I’ve tested substitutions so you can adapt if needed.
For the Sugar Cookies
- 2 ¾ cups (345g) all-purpose flour – Spoon and level it for accuracy. Too much flour makes dense cookies.
- 1 teaspoon baking powder – This gives the cookies a gentle lift without spreading.
- ½ teaspoon salt – Balances the sweetness. I use fine sea salt.
- 1 cup (226g) unsalted butter, softened – Let it sit out for about an hour. It should be soft but not melty.
- 1 cup (200g) granulated sugar – Regular white sugar works perfectly.
- 1 large egg, room temperature – Cold eggs can make the dough seize up.
- 1 ½ teaspoons vanilla extract – Pure vanilla makes a real difference. Imitation works in a pinch.
- ½ teaspoon almond extract – This is my secret weapon. It adds a subtle, almost floral note that makes people ask “what’s in these?” (optional but highly recommended)
For the Royal Icing
- 4 cups (480g) powdered sugar, sifted – Sifting prevents lumps. Trust me on this one.
- 3 tablespoons meringue powder – I prefer Wilton brand for consistent results.
- 6-8 tablespoons warm water – Add slowly. You can always add more, but you can’t take it out.
- Gel food coloring – Americolor or Wilton gels in autumn colors: warm brown, orange, red, golden yellow, and leaf green.
- Disposable piping bags or zip-top bags – For decorating.
- Small round piping tips (#2 or #3) – For detail work like leaf veins.
Equipment Needed
You don’t need a professional bakery setup for these cookies, but a few key tools make the job much easier. Here’s what I use:
- Stand mixer or hand mixer – A stand mixer is ideal for creaming butter and sugar, but a hand mixer works fine. You’ll just need to cream a little longer.
- Rolling pin with thickness rings – These are game-changers. They ensure your dough is perfectly even, which means cookies bake evenly. I use a wooden rolling pin with adjustable rings.
- Leaf-shaped cookie cutters – Look for a set that includes maple, oak, birch, and simple leaf shapes. You can find them at craft stores or online for under $10.
- Parchment paper or silicone baking mats – Silpat mats are my favorite for even browning and easy cleanup.
- Cooling racks – Essential for letting cookies cool completely before decorating.
- Piping tips (#2 and #3) – Small round tips are perfect for outlining and flooding leaves. I keep a separate set just for royal icing.
- Cling wrap – For chilling the dough.
If you don’t have leaf cutters, you can use a sharp knife to freehand leaf shapes. I’ve done it before, and it works—just takes a little more patience. And if you don’t have meringue powder, you can substitute 3 pasteurized egg whites, but the texture will be slightly different.
Preparation Method
Let’s make some cookies. I’ll walk you through every step so you feel confident, even if you’ve never decorated with royal icing before.
Step 1: Make the Cookie Dough
In a medium bowl, whisk together the flour, baking powder, and salt. Set aside. In the bowl of a stand mixer fitted with the paddle attachment, cream the softened butter and granulated sugar on medium speed for 3-4 minutes until light and fluffy. You want it to look pale and almost whipped. Scrape down the sides halfway through. Add the egg, vanilla extract, and almond extract, then beat on medium until fully combined, about 1 minute. The mixture might look slightly curdled at this point—that’s normal. Don’t panic.
With the mixer on low, gradually add the dry ingredients. Mix just until the dough comes together. You should see no more streaks of flour. Overmixing develops gluten and makes tough cookies. I stop the mixer as soon as the dough forms a ball. Divide the dough in half, flatten each half into a disk about 1-inch thick, wrap tightly in plastic wrap, and refrigerate for at least 2 hours. Overnight is even better. This step is non-negotiable—cold dough holds its shape during baking.
Step 2: Roll and Cut
Preheat your oven to 350°F (175°C). Line two baking sheets with parchment paper or silicone mats. Remove one disk of dough from the fridge. Let it sit at room temperature for 5 minutes so it’s slightly easier to roll. Lightly flour your work surface, rolling pin, and the top of the dough. Roll the dough to ¼-inch thickness. I use thickness rings on my rolling pin for perfect consistency. If the dough starts to stick, dust with a little more flour.
Dip your leaf cookie cutters in flour to prevent sticking. Cut out as many leaves as you can, pressing straight down without twisting. Twisting seals the edges and makes cookies spread unevenly. Transfer the cut cookies to the prepared baking sheets, spacing them about 2 inches apart. Gather the scraps, gently press them together, re-roll, and cut more cookies. Repeat with the second disk of dough. Place the baking sheets in the fridge for 15 minutes before baking. Chilled cookies hold their shape better.
Step 3: Bake
Bake one sheet at a time on the center rack for 8-10 minutes. The cookies should look set around the edges but still pale on top. They will not look golden brown. That’s good—overbaked sugar cookies are dry. Let the cookies cool on the baking sheet for 5 minutes, then transfer to a wire rack to cool completely. Do not decorate warm cookies. The icing will melt right off.
Step 4: Make the Royal Icing
In the bowl of a stand mixer fitted with the paddle attachment (or using a hand mixer), combine the sifted powdered sugar and meringue powder. Add 6 tablespoons of warm water and mix on low until combined. Increase speed to medium-high and beat for 5-7 minutes. The icing should be thick, glossy, and hold a stiff peak. If it’s too thick, add water 1 teaspoon at a time. If it’s too thin, add more sifted powdered sugar. Cover the bowl with a damp paper towel to prevent the icing from drying out while you work.
Step 5: Color and Decorate
Divide the icing into separate bowls for each color. Add gel food coloring a tiny drop at a time—a little goes a long way. For the leaves, I make four colors: deep orange, golden yellow, burgundy red, and warm brown. For each color, you’ll need two consistencies: a thicker outlining consistency and a slightly thinner flooding consistency. To thin icing for flooding, add water ½ teaspoon at a time until it flows like honey. Test it: drizzle a ribbon of icing back into the bowl. It should disappear in about 10 seconds.
Fit piping bags with #2 tips. Outline each leaf shape with the thicker icing, then fill in with the thinner flooding icing. Use a toothpick to spread the icing into corners and pop any air bubbles. Let the base layer dry for at least 1 hour. Then, using a slightly darker shade of the same color, pipe veins on each leaf. For a realistic look, pipe a center vein and small diagonal lines branching off. Let the cookies dry completely, uncovered, for 6-8 hours or overnight. The icing should be hard to the touch.
Cooking Tips & Techniques
I’ve made every mistake in the book with sugar cookies, so you don’t have to. Here’s what I’ve learned the hard way.
Don’t skip the chilling time. I know it’s tempting to rush, but warm dough spreads into shapeless blobs. I once tried to “save time” by refrigerating for only 30 minutes. My maple leaves looked like deflated balloons. Chilling for 2 hours minimum is the secret to sharp, bakery-quality edges.
Watch your oven temperature. Ovens run differently. I burned my first batch because my oven runs 25 degrees hot. An inexpensive oven thermometer will save your cookies. Bake until the edges are just set and the centers look slightly underdone. They’ll continue setting on the hot baking sheet.
Royal icing consistency is everything. If your flooding icing is too thick, it won’t spread smoothly. Too thin, and it runs off the edges. The “10-second rule” is your friend: lift your spatula and let the icing drizzle back. If it takes 10 seconds to disappear into the bowl, you’re golden. I keep a small spray bottle of water nearby to adjust consistency in tiny increments.
Work in batches. Don’t try to decorate all the cookies at once. I outline and flood 6-8 cookies at a time, then move on. This prevents the icing from drying before you can add details. And keep your icing bowls covered with damp paper towels at all times. Royal icing dries fast.
Practice on parchment first. Before you decorate a cookie, pipe a few practice leaves on a piece of parchment paper. It helps you get the feel for pressure and motion. Plus, you can scrape it back into the bowl and reuse it.
Variations & Adaptations
One of the best things about this recipe is how flexible it is. Here are some ways to make it your own.
Gluten-Free Version: Substitute the all-purpose flour with a 1:1 gluten-free baking flour blend. I’ve used Bob’s Red Mill with great results. The dough will be slightly more fragile, so chill it for an extra 30 minutes before rolling.
Vegan Adaptations: Use vegan butter (I like Earth Balance) and a flax egg (1 tablespoon ground flaxseed mixed with 3 tablespoons water, let sit for 5 minutes). For the royal icing, meringue powder is typically vegan, but check the label. You can also use aquafaba (chickpea brine) instead of water—3 tablespoons aquafaba replaces the meringue powder and water.
Different Leaf Shapes: Don’t limit yourself to autumn leaves. Use this same recipe and technique for spring flowers, summer butterflies, or winter snowflakes. The cookie base works year-round. For Thanksgiving, I sometimes add a small turkey-shaped cookie cutter to the mix.
Spiced Sugar Cookies: Add 1 teaspoon of pumpkin pie spice or cinnamon to the dry ingredients for a warmer flavor profile. It pairs beautifully with the royal icing leaves. I tested this last year and my family fought over the spiced ones.
Glaze Instead of Royal Icing: If you’re short on time, skip the royal icing and make a simple powdered sugar glaze. Mix 1 cup powdered sugar with 2-3 tablespoons milk and ½ teaspoon vanilla. Drizzle over cooled cookies and sprinkle with sanding sugar or edible gold dust.
Serving & Storage Suggestions
These cookies are meant to be the star of your dessert table, but they also make beautiful edible gifts.
Serving: Serve the cookies at room temperature. Arrange them on a wooden board or tiered stand for maximum visual impact. I like to scatter a few real fall leaves (washed and dried) around the platter for a rustic look. They pair wonderfully with hot apple cider, spiced chai, or a warm cup of coffee. For Thanksgiving dinner, I set out a plate of these alongside pumpkin pie and pecan tart—everyone always grabs one (or three).
Storage: Store decorated cookies in a single layer in an airtight container at room temperature. Place a sheet of parchment paper between layers if you need to stack them. They’ll stay fresh for up to 2 weeks. Do not refrigerate—the humidity can make the royal icing soft and sticky. If you live in a humid climate, add a food-safe silica gel packet to the container to absorb moisture.
Freezing: You can freeze undecorated baked cookies for up to 3 months. Wrap them tightly in plastic wrap, then place in a freezer-safe bag. Thaw at room temperature before decorating. The royal icing itself does not freeze well—it can become grainy. I always decorate fresh. The cookie dough also freezes beautifully. Wrap the disks tightly and freeze for up to 3 months. Thaw overnight in the fridge before rolling and baking.
Flavor Development: Here’s a little secret—these cookies actually taste better the day after baking. The flavors meld together, and the texture softens just slightly. If you can wait, bake them a day ahead and decorate the morning of your event.
Nutritional Information & Benefits
Let’s be real—these are sugar cookies, not health food. But I believe in enjoying treats mindfully, and this recipe uses real, recognizable ingredients. Here’s a rough estimate per cookie (based on 24 cookies):
- Calories: 180
- Fat: 8g
- Carbohydrates: 26g
- Sugar: 16g
- Protein: 2g
These numbers include the royal icing. If you’re watching sugar intake, you can reduce the icing or use a sugar-free powdered sugar substitute. The almond extract adds a lovely flavor without extra calories. And the butter provides a small amount of vitamin A. Honestly, the biggest benefit here is the joy of creating something beautiful with your hands—and sharing it with people you love. That counts for something, right?
Dietary Considerations: This recipe contains dairy (butter), eggs, and gluten (flour). For allergen-friendly options, see the variations section above. The royal icing made with meringue powder is egg-free and safe for those with egg allergies.
Conclusion
These homemade Thanksgiving sugar cookies with royal icing leaves are more than just a dessert. They’re a little piece of edible art that brings people together. I’ve watched my brother go from sugar cookie hater to asking for the recipe. I’ve seen kids carefully choose their favorite leaf shape from the platter. I’ve sat with friends, piping bags in hand, laughing as we tried to make our leaves look “professional.”
This recipe is forgiving, adaptable, and absolutely delicious. Whether you’re a seasoned baker or a complete beginner, you can make these cookies. Don’t stress about perfection—every slight imperfection in the icing just makes the leaves look more organic, more real. That’s the beauty of fall, right? No two leaves are exactly alike.
I’d love to see your creations! Leave a comment below and tell me how your cookies turned out. Did you try a different color combo? Did your kids help decorate? Share your photos on Pinterest and tag me—I’m always looking for inspiration. And if you make these for Thanksgiving, prepare for everyone to ask for the recipe. You might even convert a sugar cookie skeptic or two.
Happy baking, friends. Here’s to warm kitchens, messy counters, and cookies that taste like love.
Frequently Asked Questions
Can I make the dough ahead of time?
Absolutely! The dough can be refrigerated for up to 3 days or frozen for up to 3 months. Just wrap it tightly in plastic wrap. Let frozen dough thaw overnight in the fridge before rolling.
Why did my cookies spread in the oven?
This usually happens when the dough isn’t chilled enough. Make sure you refrigerate the cut cookies on the baking sheet for at least 15 minutes before baking. Also, check that your butter was properly softened—not too warm.
How do I get smooth royal icing?
The key is proper consistency. Your flooding icing should flow like honey. Use the “10-second rule”—lift your spatula, and the ribbon of icing should disappear back into the bowl in about 10 seconds. Sift your powdered sugar to prevent lumps.
Can I use store-bought royal icing mix?
You can, but I don’t recommend it for detailed decorating. Homemade royal icing with meringue powder gives you much better control over consistency and dries to a harder, more durable finish. The flavor is better too.
How do I store decorated cookies without ruining the icing?
Store them in a single layer in an airtight container at room temperature. If you must stack them, place a sheet of parchment paper between layers. Keep them away from humidity and direct sunlight. They’ll stay beautiful for up to 2 weeks.
Pin This Recipe!
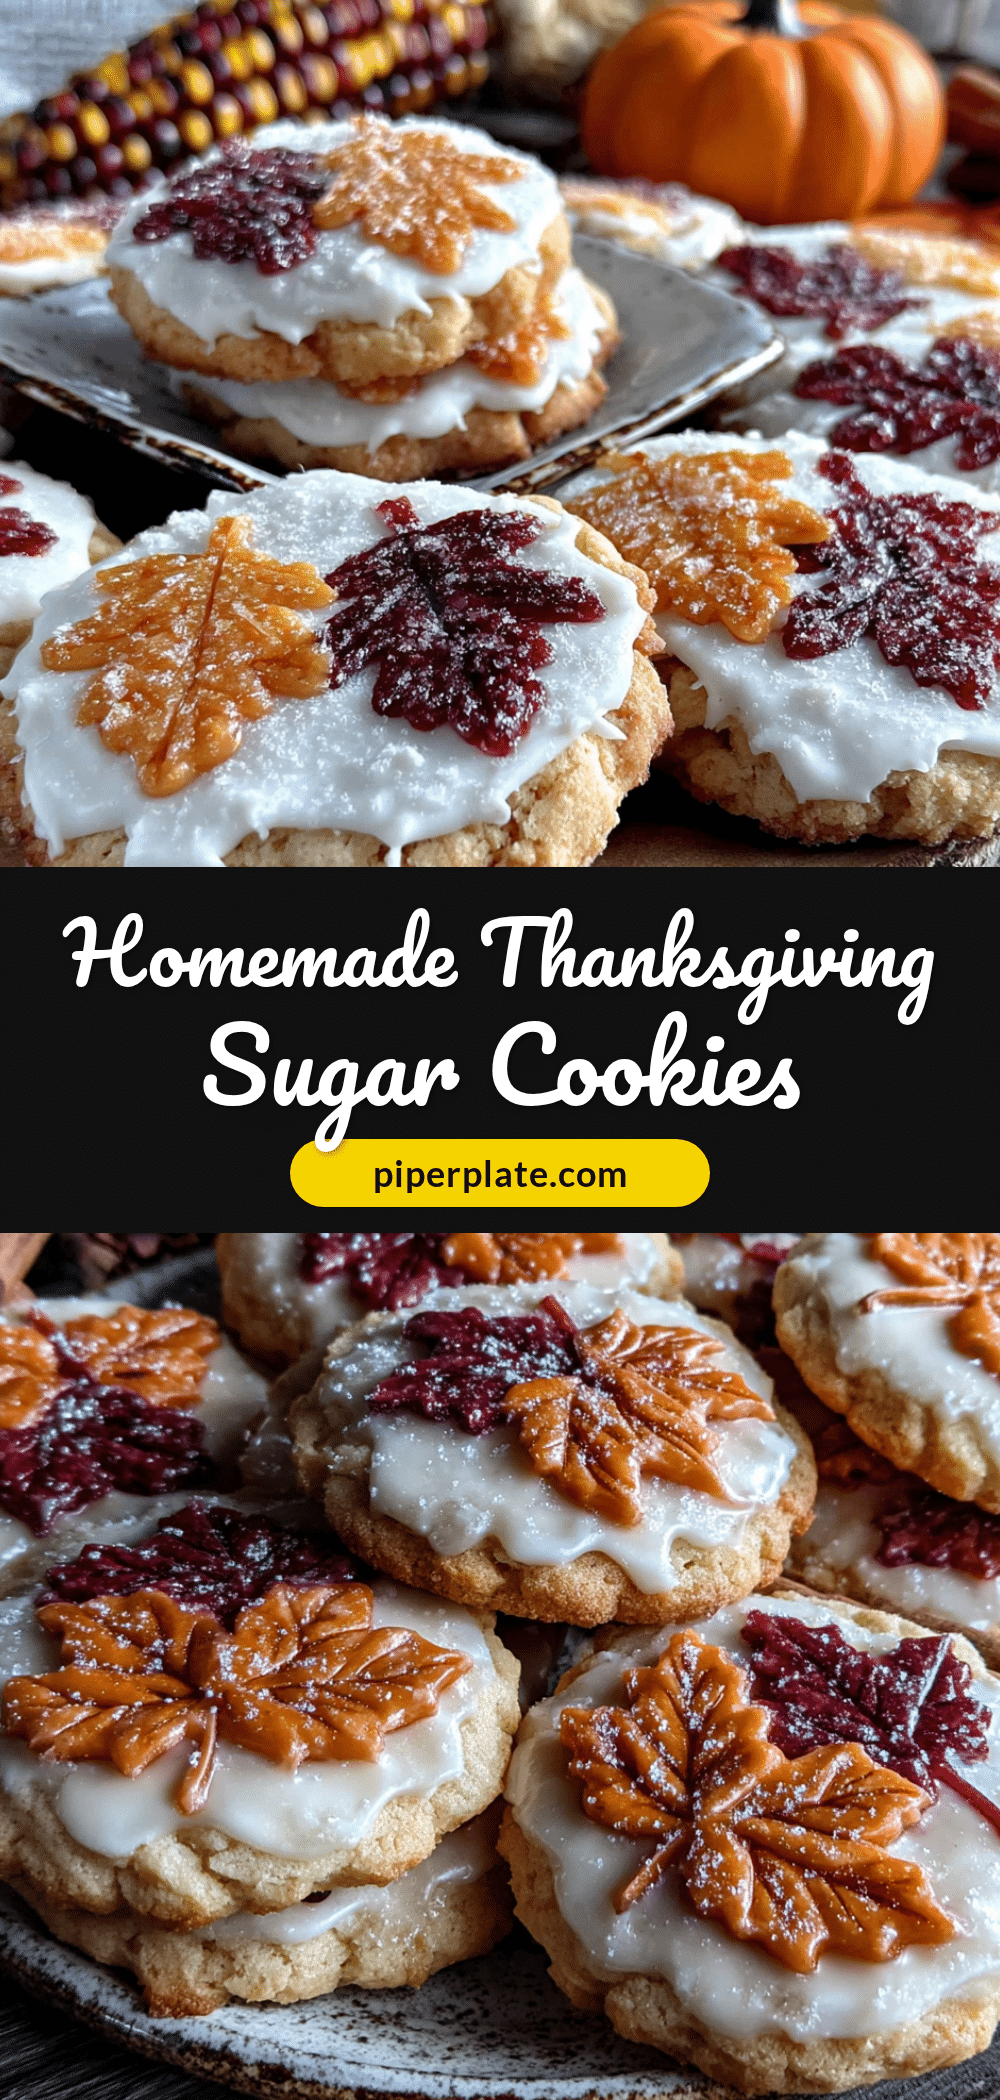
Best Homemade Thanksgiving Sugar Cookies with Royal Icing

These soft, sturdy sugar cookies hold their shape beautifully for decorating with royal icing leaves in autumn colors. Perfect for Thanksgiving dessert tables, Friendsgiving parties, or cozy baking sessions, this recipe converts even the most stubborn sugar cookie skeptics.
- Prep Time: 30 minutes
- Cook Time: 10 minutes
- Total Time: 2 hours 40 minutes (plus 6-8 hours drying time)
- Yield: 24 cookies 1x
- Category: Dessert
- Cuisine: American
Ingredients
- 2 ¾ cups (345g) all-purpose flour
- 1 teaspoon baking powder
- ½ teaspoon salt
- 1 cup (226g) unsalted butter, softened
- 1 cup (200g) granulated sugar
- 1 large egg, room temperature
- 1 ½ teaspoons vanilla extract
- ½ teaspoon almond extract (optional but recommended)
- 4 cups (480g) powdered sugar, sifted
- 3 tablespoons meringue powder
- 6–8 tablespoons warm water
- Gel food coloring (warm brown, orange, red, golden yellow, leaf green)
- Disposable piping bags or zip-top bags
- Small round piping tips (#2 or #3)
Instructions
- In a medium bowl, whisk together flour, baking powder, and salt. Set aside.
- In a stand mixer fitted with the paddle attachment, cream softened butter and granulated sugar on medium speed for 3-4 minutes until light and fluffy. Scrape down sides halfway through.
- Add egg, vanilla extract, and almond extract. Beat on medium until fully combined, about 1 minute.
- With mixer on low, gradually add dry ingredients. Mix just until dough comes together. Divide dough in half, flatten each half into a 1-inch thick disk, wrap tightly in plastic wrap, and refrigerate for at least 2 hours (overnight is better).
- Preheat oven to 350°F (175°C). Line two baking sheets with parchment paper or silicone mats.
- Remove one disk of dough from fridge. Let sit at room temperature for 5 minutes. Lightly flour work surface, rolling pin, and top of dough. Roll dough to ¼-inch thickness.
- Dip leaf cookie cutters in flour. Cut out leaves, pressing straight down without twisting. Transfer to prepared baking sheets, spacing 2 inches apart. Gather scraps, re-roll, and cut more cookies. Repeat with second disk.
- Place baking sheets in fridge for 15 minutes before baking.
- Bake one sheet at a time on center rack for 8-10 minutes. Cookies should look set around edges but still pale on top. Let cool on baking sheet for 5 minutes, then transfer to wire rack to cool completely.
- For royal icing: In stand mixer bowl, combine sifted powdered sugar and meringue powder. Add 6 tablespoons warm water and mix on low until combined. Increase speed to medium-high and beat for 5-7 minutes until thick, glossy, and holds a stiff peak. Adjust consistency with water or powdered sugar as needed.
- Divide icing into separate bowls for each color. Add gel food coloring a tiny drop at a time. For each color, prepare thicker outlining consistency and thinner flooding consistency (add water ½ teaspoon at a time until it flows like honey).
- Fit piping bags with #2 tips. Outline each leaf shape with thicker icing, then fill with thinner flooding icing. Use toothpick to spread into corners and pop air bubbles. Let base layer dry for at least 1 hour.
- Using slightly darker shade of same color, pipe veins on each leaf (center vein with small diagonal lines branching off). Let cookies dry completely, uncovered, for 6-8 hours or overnight until icing is hard to the touch.
Notes
Don’t skip the chilling time—cold dough holds its shape during baking. Watch oven temperature; an inexpensive oven thermometer helps. Royal icing consistency is key: use the ’10-second rule’ for flooding icing. Work in batches to prevent icing from drying. Practice on parchment first. Cookies taste even better the day after baking.
Nutrition
- Serving Size: 1 cookie
- Calories: 180
- Sugar: 16
- Sodium: 95
- Fat: 8
- Saturated Fat: 5
- Carbohydrates: 26
- Protein: 2
Keywords: Thanksgiving sugar cookies, royal icing cookies, leaf cookies, fall cookies, decorated sugar cookies, holiday baking, autumn cookies


