Love this? Save it for later!
Share the inspiration with your friends
I was standing in line at my local hardware store last November, holding a bag of lightbulbs and trying to remember if I needed more extension cords for the holiday lights. The man ahead of me turned around—he was the quiet guy from the paint counter, the one who never says more than “receipt in the bag”—and he just started talking. Not about paint. Not about weather. About mini cheesecakes.
“You need a gingersnap crust,” he said, like we were mid-conversation about dessert plans. “And pumpkin, obviously. But the trick is the cream cheese to pumpkin ratio. Too much pumpkin and they get wet. Too little and what’s the point?” He scribbled on a scrap of receipt paper, handed it over, and paid for his caulk. I stood there holding a recipe for mini pumpkin cheesecake bites from the paint guy at Ace Hardware. Honestly, it was the last place I expected to find holiday dessert inspiration.
I almost threw the paper away. I mean, who takes baking advice from someone whose job involves color swatches and paint thinner? But something made me keep it. Maybe it was the confidence in his voice. Or maybe I was just desperate for a dessert that didn’t involve a full-size cheesecake sitting in my fridge for a week, staring at me every time I grabbed milk. Either way, I tried it that weekend. And let me tell you—it was the best decision I made all season.
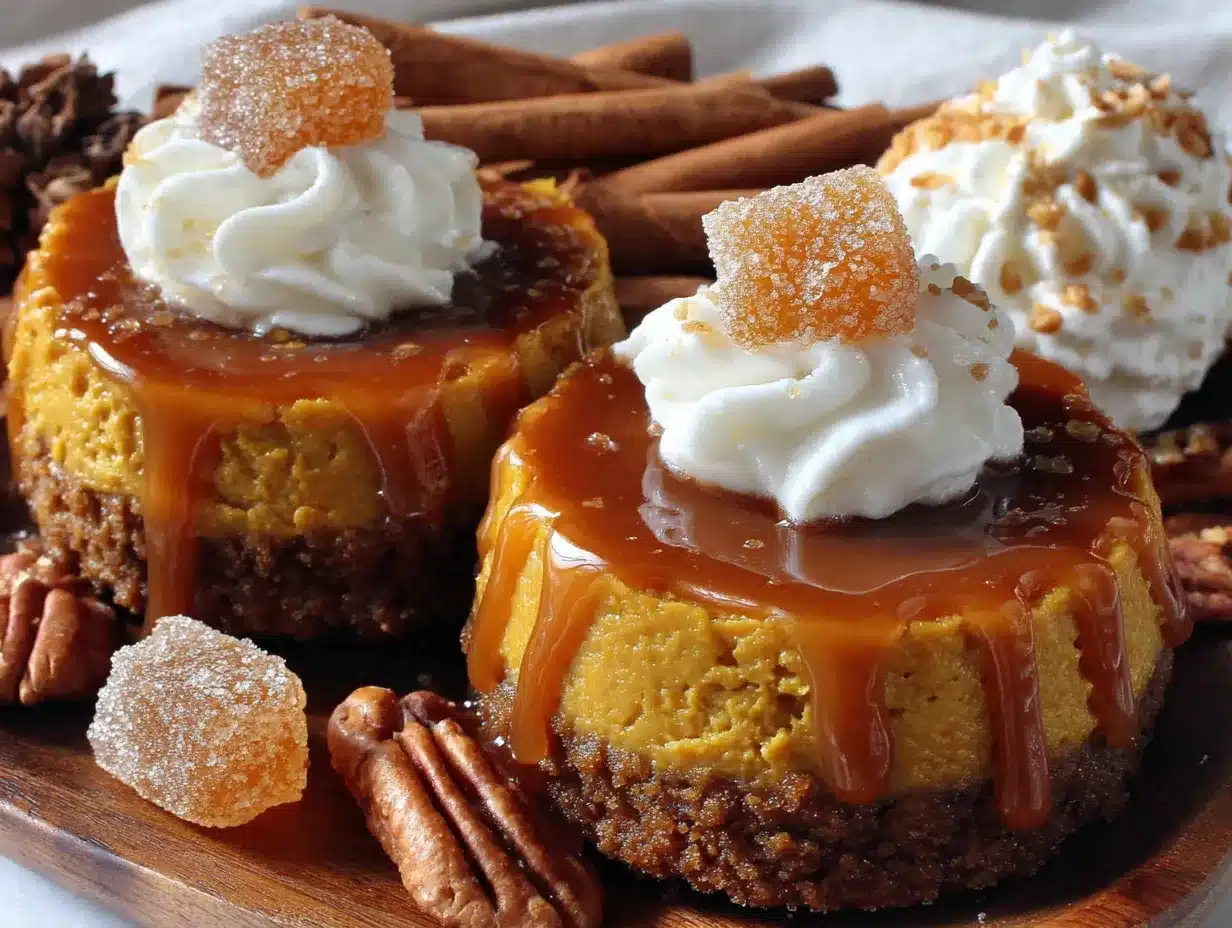
These mini pumpkin cheesecake bites with gingersnap crust are now my go-to for every fall gathering. They’re small enough that guests don’t feel guilty grabbing two. They’re fancy-looking without requiring a pastry degree. And that crust? The gingersnap adds this warm, spicy crunch that plain graham crackers just can’t touch. You know that feeling when you take a bite of something and immediately think, “Where has this been my whole life?” That’s this recipe.
So yeah, I got my lightbulbs that day. But I also got a recipe that’s been making me look like a hosting genius for three years running. Funny how the best things show up when you’re not looking for them.
Why You’ll Love This Recipe
I’ve tested this recipe at least a dozen times—for Thanksgiving, for Friendsgiving, for random Tuesday nights when I needed something sweet. I’ve brought it to potlucks where people asked for the recipe before they finished chewing. I’ve scaled it up for a crowd of thirty and down for a quiet night with my husband. Every single time, it delivers.
Here’s why these mini pumpkin cheesecake bites deserve a spot in your hosting rotation:
- Perfect for Parties: Individual portions mean no slicing, no mess, and no awkward “who gets the bigger piece” drama. Just grab and go.
- Make-Ahead Friendly: You can prep these a day or two before your gathering. One less thing to stress about when guests arrive.
- Simple Ingredients: Nothing weird here. Cream cheese, pumpkin puree, spices, and gingersnaps. You probably already have most of it.
- Impressive Without Effort: They look like they came from a bakery, but the whole process takes about 30 minutes of active work.
- Consistently Delicious: I’ve tweaked the ratios over time, and this version hits that perfect balance—creamy, spiced, not too sweet, with that gingersnap crunch.
What makes this recipe different from the dozens of other pumpkin cheesecake recipes out there? It’s the crust, honestly. Most recipes use graham crackers, which are fine, but gingersnaps bring a deeper, warmer flavor that actually complements the pumpkin instead of just sitting there being neutral. And the texture? These are baked in a water bath—yes, even the mini ones—so they come out silky smooth instead of cracked and dry.
This is the kind of dessert that makes people close their eyes after the first bite. It’s comfort food dressed up for company. And when you’re hosting, that’s exactly what you need.
Ingredients Needed
This recipe uses straightforward ingredients, but a few details make a real difference in the final result. Let’s walk through what you’ll need and why each one matters.
For the Gingersnap Crust
- 1 ½ cups gingersnap cookie crumbs (about 24 cookies, crushed fine—I use Nabisco or store brand, both work great)
- ¼ cup granulated sugar (just enough to sweeten the crust without overpowering the ginger)
- 5 tablespoons unsalted butter, melted (use the real stuff here, not margarine—it makes the crust hold together better)
- Pinch of salt (balances the sweetness and brings out the spice)
For the Pumpkin Cheesecake Filling
- 16 ounces cream cheese, softened to room temperature (full-fat is best for texture; low-fat can make the filling less creamy)
- ¾ cup granulated sugar (I’ve tried reducing this, and the filling gets too tangy—this amount hits the sweet spot)
- 1 cup pumpkin puree (not pumpkin pie filling—make sure it’s 100% pure pumpkin. Libby’s is my go-to)
- 2 large eggs, room temperature (cold eggs can make the batter lumpy, so let them sit out for 30 minutes)
- 1 teaspoon vanilla extract (pure, not imitation, if you have it)
- 1 ½ teaspoons pumpkin pie spice (or make your own with ¾ tsp cinnamon, ½ tsp ginger, ¼ tsp nutmeg, ⅛ tsp cloves)
- ½ teaspoon ground cinnamon (extra warmth because pumpkin loves cinnamon)
- 2 tablespoons all-purpose flour (helps stabilize the filling and prevents cracking)
- ¼ cup sour cream, room temperature (adds tanginess and makes the texture extra velvety)
For the Topping (Optional but Recommended)
- ½ cup heavy cream (for whipping into clouds of goodness)
- 1 tablespoon powdered sugar
- ½ teaspoon vanilla extract
- Caramel sauce for drizzling (store-bought is fine, but warm it slightly before using)
- Pinch of flaky sea salt (trust me on this one—it makes the flavors pop)
A quick note on ingredient sourcing: I’ve tested this with both name-brand and store-brand cream cheese, and honestly, the difference is minimal as long as you use full-fat. For the gingersnaps, I prefer the ones that are a little snappy, not too soft—they crush better and hold their texture after baking. If you can’t find gingersnaps, you can substitute with graham crackers plus ½ teaspoon of ground ginger and ¼ teaspoon of cloves, but the flavor won’t be quite the same.
Equipment Needed
You don’t need a professional kitchen to make these, but a few specific tools make the process smoother.
- Mini cheesecake pan with removable bottoms (I use a 24-cup mini cheesecake pan, but you can also use two 12-cup mini muffin tins lined with paper liners)
- Food processor or rolling pin (for crushing the gingersnaps—food processor is faster, but a zip-top bag and rolling pin works in a pinch)
- Electric mixer (handheld or stand mixer both work; you just need something to get the cream cheese smooth)
- Large roasting pan or baking dish (for the water bath—needs to be big enough to hold your cheesecake pan)
- Medium mixing bowls (one for crust, one for filling)
- Measuring cups and spoons
- Spatula (a rubber one for scraping every last bit of filling)
- Piping bag or zip-top bag (for filling the cups neatly—optional but helpful)
- Cooling rack
If you don’t have a mini cheesecake pan, don’t stress. I’ve made these in regular muffin tins with paper liners, and they work fine—you’ll just get slightly larger portions and need to adjust the baking time by about 5 minutes. Just keep an eye on them.
Preparation Method
Let me walk you through this step by step. I’ve made these so many times that I’ve got the rhythm down, and I’ll share every little trick I’ve picked up along the way.
- Preheat your oven to 325°F (163°C). Place the oven rack in the middle position. Line your mini cheesecake pan with paper liners if using, or lightly grease the cups if your pan has removable bottoms.
- Make the crust. Pulse the gingersnap cookies in a food processor until they become fine crumbs. You should have about 1½ cups. Transfer to a medium bowl, add the sugar and salt, then pour in the melted butter. Stir with a fork until every crumb is moistened. The mixture should look like wet sand and hold together when you squeeze it.
- Press the crust into the pan. Drop about 1 tablespoon of the crust mixture into each cup. Use the bottom of a shot glass or a small measuring cup to press it down firmly. You want it compact so it holds together after baking. Pop the pan in the fridge while you make the filling—this helps the crust set.
- Start the filling. In a large bowl, beat the softened cream cheese with an electric mixer on medium speed until smooth and creamy, about 2 minutes. Scrape down the sides and bottom of the bowl with a spatula. Add the sugar and beat for another minute until well combined.
- Add the pumpkin and wet ingredients. Mix in the pumpkin puree, sour cream, and vanilla extract until smooth. The mixture should be a beautiful pale orange color. Don’t overmix here—just until everything comes together.
- Add the eggs one at a time. Crack each egg into a small bowl first (just in case you get shell fragments), then add to the batter. Beat on low speed after each addition just until the yolk disappears. Overbeating at this stage adds too much air, which can cause cracks later.
- Add the dry ingredients. Sprinkle the flour, pumpkin pie spice, and cinnamon over the batter. Mix on low speed just until combined. Give the bowl one last scrape with your spatula to make sure everything is evenly mixed.
- Fill the cups. Spoon or pipe the filling into each cup, filling almost to the top—leave about ⅛ inch of space. A piping bag makes this much neater and faster, but a spoon works too. Tap the pan gently on the counter a few times to release any air bubbles.
- Prepare the water bath. Place the filled cheesecake pan inside a larger roasting pan. Carefully pour hot water into the outer pan until it reaches about halfway up the sides of the cheesecake pan. Be careful not to splash water onto the cheesecakes. This step is non-negotiable—the steam keeps the cheesecakes moist and prevents cracking.
- Bake. Bake for 18-22 minutes, or until the edges are set but the centers still jiggle slightly when you gently shake the pan. They’ll continue to set as they cool. If you see any cracks forming, they’re probably overbaked—pull them out immediately.
- Cool gradually. Remove the pan from the water bath and place it on a cooling rack. Let the cheesecakes cool in the pan for 30 minutes at room temperature, then transfer to the refrigerator. Chill for at least 4 hours, but overnight is better. The texture improves dramatically after a full chill.
- Remove from pan. Once fully chilled, gently remove each cheesecake bite from the pan. If using a pan with removable bottoms, push up from the bottom. If using liners, just peel them off carefully.
- Add toppings just before serving. Whip the heavy cream with powdered sugar and vanilla until soft peaks form. Pipe or dollop onto each cheesecake bite. Drizzle with caramel sauce and sprinkle with flaky sea salt if you’re feeling fancy.
One thing I learned the hard way: don’t rush the cooling process. I once tried to speed things up by putting them in the freezer, and the texture turned grainy. Let them chill properly—your patience will be rewarded.
Cooking Tips & Techniques
After making these mini pumpkin cheesecake bites more times than I can count, I’ve collected a few tricks that make the process easier and the results more consistent.
Room temperature ingredients matter. I know, I know—every recipe says this. But with cheesecake, it’s actually critical. Cold cream cheese creates lumps that no amount of mixing will fix. Cold eggs can cause the batter to curdle. Set everything out on the counter an hour before you start. If you forget, you can soften cream cheese in the microwave in 10-second bursts, but be careful—you want it soft, not melted.
Don’t skip the flour. Some recipes don’t include flour, but I’ve found that 2 tablespoons make a noticeable difference in stability. The cheesecakes puff up less, sink less, and crack less. It’s a small addition with big results.
The water bath is your friend. I know it’s a hassle. I know it’s annoying to wrap pans in foil and worry about water seeping in. But for mini cheesecakes, a water bath is the difference between silky smooth and dry and cracked. If you’re using a pan with removable bottoms, wrap the outside tightly with heavy-duty foil before adding the water. And use hot water, not cold—cold water can shock the batter and cause issues.
Watch for the jiggle. The biggest mistake I made early on was overbaking. Cheesecakes should still wobble in the center when you take them out. They’ll firm up as they cool. If the edges are pulling away from the pan, you’ve gone too far.
Make-ahead strategy for hosting. If you’re serving these at a gathering, make them two days ahead. They actually taste better after a day in the fridge—the flavors meld and mellow. Just hold off on the whipped cream and caramel until right before serving. Nobody wants soggy toppings.
Use a piping bag for the filling. This is one of those small things that makes a big difference. Spooning the filling into 24 tiny cups is messy and slow. A piping bag (or even a zip-top bag with the corner snipped off) makes it fast, clean, and consistent. You’ll thank me when you’re not wiping pumpkin filling off every surface.
Variations & Adaptations
One of the best things about this recipe is how flexible it is. Here are some variations I’ve tried and loved.
Gluten-Free Version: Use gluten-free gingersnap cookies for the crust. Most major brands make a gluten-free version now, and the texture is nearly identical. Double-check your pumpkin pie spice too—some blends contain wheat starch.
Dairy-Free Adaptation: Substitute the cream cheese with a high-quality dairy-free alternative (I like Miyoko’s or Kite Hill). Use coconut cream instead of sour cream, and vegan butter for the crust. The texture will be slightly less creamy, but still delicious. I’ve served these to dairy-free guests who couldn’t tell the difference.
Chocolate Twist: Add 2 tablespoons of cocoa powder to the crust mixture for a chocolate-ginger combo that’s surprisingly good. You can also drizzle melted dark chocolate over the top instead of caramel.
Pecan Praline Topping: Toast some chopped pecans and mix them with brown sugar and a little butter. Sprinkle over the cheesecakes before serving. Adds a nice crunch and Southern-style sweetness.
Maple Bourbon Version: Replace the vanilla extract with 1 teaspoon of maple extract and add 1 tablespoon of bourbon to the filling. The bourbon bakes off, leaving just a warm, complex flavor that pairs beautifully with the pumpkin and ginger.
Mini Pumpkin Cheesecake Bites with Gingersnap Crust – No-Bake Option: If you don’t want to turn on the oven, you can make a no-bake version. Use the same crust but press it into a mini muffin tin lined with paper liners. For the filling, beat the cream cheese with sugar, then fold in pumpkin puree and a cup of stabilized whipped cream. Chill for at least 6 hours. The texture is lighter and mousse-like—different from the baked version, but just as good for a quick fix.
My personal favorite variation is the maple bourbon version. I made it for a Friendsgiving last year, and people were literally licking the mini liners. It’s become my go-to for adult gatherings where I want something a little unexpected.
Serving & Storage Suggestions
These mini pumpkin cheesecake bites are designed for hosting, so let’s talk about how to serve them in a way that makes you look like you planned everything perfectly.
Serving Temperature: Serve them cold, straight from the fridge. They hold their shape better and the flavors are more pronounced. If you’ve added whipped cream, let it come to room temperature for about 10 minutes before serving—cold whipped cream can taste a bit flat.
Presentation Tips: Arrange them on a large platter or cake stand. If you’re feeling extra, place a few whole gingersnap cookies around the edges for visual interest. I like to add a few fresh cranberries and small rosemary sprigs for a holiday look. The red and green against the orange cheesecake is gorgeous.
What to Serve Alongside: These pair beautifully with a cup of hot cider or a spiced chai latte. For a dessert spread, serve them alongside a chocolate tart or a simple apple crisp. They’re also great on a brunch table with coffee and mimosas.
Storage: Store leftover cheesecake bites in an airtight container in the refrigerator for up to 5 days. Place them in a single layer or separate layers with parchment paper so the toppings don’t get smushed. Without the whipped cream topping, they’ll last a day or two longer.
Freezing: These freeze beautifully. Place the un-topped cheesecake bites on a baking sheet and freeze until solid, about 2 hours. Transfer to a freezer-safe container or zip-top bag, separating layers with parchment paper. They’ll keep for up to 3 months. Thaw in the refrigerator overnight before adding toppings and serving.
Reheating: Honestly, I prefer these cold. But if you want a warm dessert, pop them in a 300°F oven for 5-7 minutes. The crust gets a little crunchier, and the filling becomes soft and almost pudding-like. Not traditional, but delicious in its own way.
One thing I’ve noticed: the flavors actually improve after a day in the fridge. The spices meld together, and the pumpkin and cream cheese become more harmonious. So don’t worry if you make them ahead—they’ll be even better.
Nutritional Information & Benefits
Let’s be real—these are a treat. But they’re not as indulgent as a full slice of cheesecake, and the ingredients bring some surprising benefits.
| Nutrient | Per Serving (1 bite with topping) |
|---|---|
| Calories | 185 |
| Total Fat | 12g |
| Saturated Fat | 7g |
| Cholesterol | 45mg |
| Sodium | 145mg |
| Total Carbohydrates | 17g |
| Dietary Fiber | 1g |
| Sugars | 12g |
| Protein | 3g |
| Vitamin A | 45% DV |
| Calcium | 4% DV |
| Iron | 3% DV |
Pumpkin is packed with vitamin A, which supports eye health and immune function. It’s also a good source of fiber and antioxidants. The ginger in the crust has anti-inflammatory properties, and cinnamon can help regulate blood sugar. Of course, these benefits come in a package that also includes butter and cream cheese, so moderation is key.
These mini cheesecake bites are vegetarian. They contain gluten, dairy, and eggs, so they’re not suitable for vegan or allergen-free diets without modifications. I’ve included substitution suggestions in the variations section for those needs.
From a wellness perspective, I love that these give me the satisfaction of a rich dessert without the commitment of a full slice. Two bites and I’m happy. That’s a win in my book.
Conclusion
These mini pumpkin cheesecake bites with gingersnap crust have become my signature fall dessert, and I’m honestly a little proud of that. They’re the recipe that people ask for, the one I bring to every gathering, the one that makes me look like I have my life together even when I definitely don’t.
The best part? They’re forgiving. If you overbake them slightly, they’re still delicious. If your crust crumbles a bit, no one cares once they taste the filling. This isn’t a fussy, high-stress recipe. It’s a reliable, crowd-pleasing dessert that lets you focus on what really matters—enjoying time with the people you’ve invited into your home.
I’d love to hear how these turn out for you. Did you try a variation? Did your guests go crazy for them? Drop a comment below and let me know. And if you’re looking for another showstopper dessert, you might also enjoy my spiced apple cider donuts or this maple pecan tart that I make every Thanksgiving.
Now go make some memories—and some mini cheesecakes. You’ve got this.
Frequently Asked Questions
Can I use a regular muffin tin instead of a mini cheesecake pan?
Absolutely. Line a standard 12-cup muffin tin with paper liners and follow the same instructions. You’ll get 12 larger cheesecake bites instead of 24 mini ones. Bake for about 25-28 minutes instead of 18-22. The texture and flavor will be exactly the same.
Why did my cheesecake bites crack on top?
This usually happens for one of three reasons: overbaking, overmixing the batter, or skipping the water bath. The water bath is the most common culprit. It provides gentle, even heat and keeps the cheesecakes moist. If you’re already using a water bath, try reducing your bake time by 2-3 minutes. A few small cracks are normal and can be covered with whipped cream.
Can I make these without a food processor for the crust?
Yes! Place the gingersnap cookies in a zip-top bag and crush them with a rolling pin or the bottom of a heavy skillet. It takes a few extra minutes and you might have some slightly larger pieces, but it works perfectly. Just make sure the crumbs are relatively uniform so the crust bakes evenly.
How far in advance can I make these for a party?
You can make the cheesecake bites (without toppings) up to 3 days ahead. Store them in an airtight container in the refrigerator. Add the whipped cream and caramel sauce no more than 2 hours before serving. If you want to prep even further ahead, freeze them for up to 3 months and thaw overnight in the fridge.
Can I use pumpkin pie filling instead of pumpkin puree?
I don’t recommend it. Pumpkin pie filling is already sweetened and spiced, so it will throw off the sugar and spice balance in this recipe. The texture is also different—pumpkin pie filling is thicker and more processed. Stick with 100% pure pumpkin puree for the best results. Libby’s is my go-to brand.
Pin This Recipe!
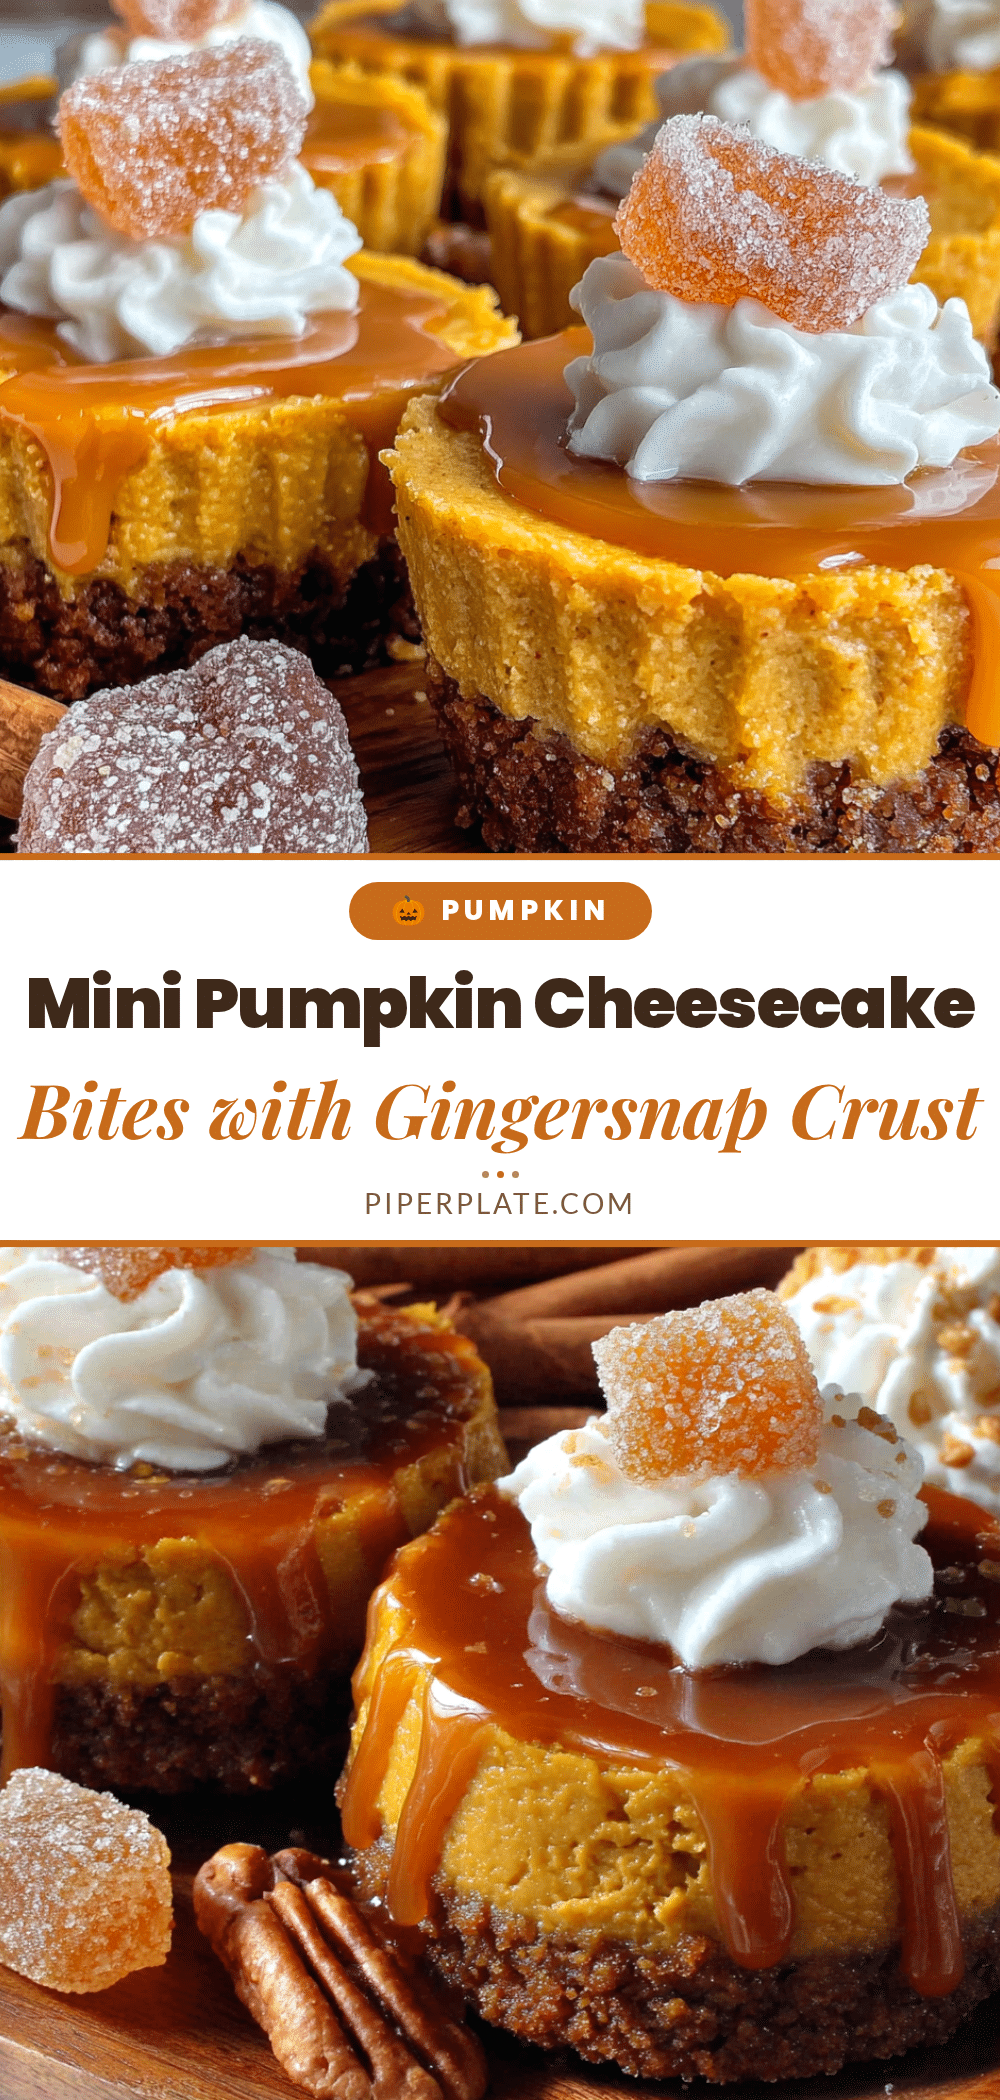
Best Mini Pumpkin Cheesecake Bites with Gingersnap Crust
These mini pumpkin cheesecake bites feature a crunchy gingersnap crust and a creamy, spiced pumpkin filling. Perfect for fall gatherings, they’re make-ahead friendly and always a crowd-pleaser.
- Prep Time: 30 minutes
- Cook Time: 20 minutes
- Total Time: 4 hours 50 minutes (includes chilling)
- Yield: 24 servings 1x
- Category: Dessert
- Cuisine: American
Ingredients
- 1 ½ cups gingersnap cookie crumbs (about 24 cookies)
- ¼ cup granulated sugar
- 5 tablespoons unsalted butter, melted
- Pinch of salt
- 16 ounces cream cheese, softened to room temperature
- ¾ cup granulated sugar
- 1 cup pumpkin puree (not pumpkin pie filling)
- 2 large eggs, room temperature
- 1 teaspoon vanilla extract
- 1 ½ teaspoons pumpkin pie spice
- ½ teaspoon ground cinnamon
- 2 tablespoons all-purpose flour
- ¼ cup sour cream, room temperature
- ½ cup heavy cream
- 1 tablespoon powdered sugar
- ½ teaspoon vanilla extract
- Caramel sauce for drizzling
- Pinch of flaky sea salt
Instructions
- Preheat oven to 325°F (163°C). Line a mini cheesecake pan with paper liners or lightly grease the cups.
- Make the crust: Pulse gingersnap cookies in a food processor until fine crumbs. Transfer to a bowl, add sugar and salt, then pour in melted butter. Stir until moistened and holds together when squeezed.
- Press about 1 tablespoon of crust mixture into each cup. Use a shot glass or small measuring cup to press firmly. Refrigerate while making filling.
- In a large bowl, beat cream cheese with an electric mixer on medium speed until smooth, about 2 minutes. Add sugar and beat for another minute.
- Mix in pumpkin puree, sour cream, and vanilla extract until smooth and pale orange.
- Add eggs one at a time, beating on low after each addition just until yolk disappears. Do not overmix.
- Sprinkle flour, pumpkin pie spice, and cinnamon over batter. Mix on low just until combined. Scrape bowl.
- Spoon or pipe filling into each cup, filling almost to the top (leave about ⅛ inch space). Tap pan gently to release air bubbles.
- Place filled cheesecake pan inside a larger roasting pan. Carefully pour hot water into the outer pan until it reaches halfway up the sides of the cheesecake pan.
- Bake for 18-22 minutes, until edges are set but centers still jiggle slightly. Remove from water bath immediately if cracks form.
- Cool in pan on a rack for 30 minutes at room temperature, then refrigerate for at least 4 hours (overnight is best).
- Remove cheesecake bites from pan. Just before serving, whip heavy cream with powdered sugar and vanilla until soft peaks form. Pipe or dollop onto each bite. Drizzle with caramel sauce and sprinkle with flaky sea salt.
Notes
Room temperature ingredients are crucial for a smooth batter. Do not skip the water bath—it prevents cracking. Cheesecakes are done when edges are set but centers still jiggle. For best flavor, chill overnight. Toppings should be added just before serving.
Nutrition
- Serving Size: 1 bite with topping
- Calories: 185
- Sugar: 12
- Sodium: 145
- Fat: 12
- Saturated Fat: 7
- Carbohydrates: 17
- Fiber: 1
- Protein: 3
Keywords: mini pumpkin cheesecake, gingersnap crust, fall dessert, Thanksgiving, party dessert, mini cheesecake bites


