Love this? Save it for later!
Share the inspiration with your friends
I wasn’t supposed to be there for the food. I’d stopped by my neighbor Carla’s place to pick up a package that got delivered to her by mistake, and the smell hit me before I even got through the door. It was this warm, toasty, slightly smoky aroma that made my stomach growl immediately—honestly, it was a little embarrassing. Carla was just standing there in her sweatpants, holding a sheet pan piled high with the most glorious-looking nachos I’d ever seen, and she barely looked up. “Oh, hey,” she said, like she wasn’t holding a platter of pure magic. “Grab a plate.”
That’s the thing about the best recipes, right? They never happen at a fancy dinner party or a planned cooking session. They happen on a random Tuesday when someone’s just throwing stuff together. And let me tell you, those nachos changed how I think about game day food forever. Carla wasn’t trying to impress anyone. She was just hungry, the game was on, and she had a bag of chips and some odds and ends from the fridge. But what she created—this perfectly layered, never-soggy, fully-loaded masterpiece—was the kind of thing people would pay for at a restaurant. I stood there in her kitchen, eating nachos off a paper plate, and I knew I had to figure out how she did it.
Maybe you’ve been there. You make nachos for a party, and by the time everyone gets to them, the chips are a sad, soggy mess. Or the toppings are all clumped in one spot, and someone’s left with a sad chip that’s just bare. I’ve been there too, friend. More times than I care to admit. But after watching Carla that day—and then spending the next few weekends perfecting my own version—I cracked the code. This Ultimate Loaded Nacho Bar for Game Day is the result. It’s the recipe I bring to every Super Bowl party, every playoff game, every casual hang where people just want to eat something incredible without a lot of fuss. It’s the reason my friends now text me asking if I’m bringing “the nachos.” And honestly? I love that for me.
Why You’ll Love This Recipe
Look, I’ve tested a lot of nacho recipes over the years. Some were good, some were disasters, and a few were just… fine. But this one? This is the one I keep coming back to. And here’s why I think you’ll love it too:
- Quick & Easy: From start to finish, this comes together in about 30 minutes. Perfect for when you’re juggling game day prep and trying to catch the kickoff.
- Simple Ingredients: No fancy grocery trips needed. Ground beef, cheese, beans, chips, and a few fresh toppings—you probably have most of this in your kitchen right now.
- Perfect for Game Day: Whether it’s the Super Bowl, March Madness, or just a regular Sunday football game, this nacho bar is the ultimate crowd-pleaser. Everyone can build their own plate.
- Crowd-Pleaser: I’ve served this to kids, adults, picky eaters, and serious foodies. It gets rave reviews every single time. Every. Single. Time.
- Unbelievably Delicious: The secret is in the layering and the timing. You get perfectly melted cheese on every chip, seasoned meat that’s actually flavorful, and fresh toppings that add crunch and brightness. It’s next-level comfort food.
What makes this different from all the other nacho recipes out there? It’s the technique, honestly. Most people just dump everything on a tray and hope for the best. But I’ve figured out the exact order of layering, the right oven temperature, and the perfect balance of toppings so that every single chip gets some love. No more sad, bare chips at the bottom of the pile. Plus, the seasoning blend for the meat is something I worked on for weeks—it’s smoky, a little spicy, and totally addictive. This isn’t just another version of nachos. This is the best version.
And emotionally? This recipe is the kind that makes people close their eyes after the first bite. It’s comfort food at its finest—warm, cheesy, satisfying, and just a little bit messy. It’s the food you want to eat while you’re cheering for your team, laughing with friends, and having a cold beer in your hand. It’s game day in a bite.
What Ingredients You Will Need
This recipe uses simple, wholesome ingredients to deliver bold flavor and satisfying texture without the fuss. Most of these are pantry staples or easy to find at any grocery store. Let me walk you through what you’ll need and why each ingredient matters.
For the Meat Layer
- 1 lb ground beef (80/20 works best for flavor, but you can use lean if you prefer)
- 1 tablespoon olive oil (for sautéing)
- 1 small yellow onion, diced (adds sweetness and depth)
- 3 cloves garlic, minced (because garlic makes everything better)
- 1 packet taco seasoning (I prefer Old El Paso or make your own blend—see notes below)
- 1/4 cup water (to help the seasoning coat the meat)
- Salt and black pepper, to taste
For the Nacho Base
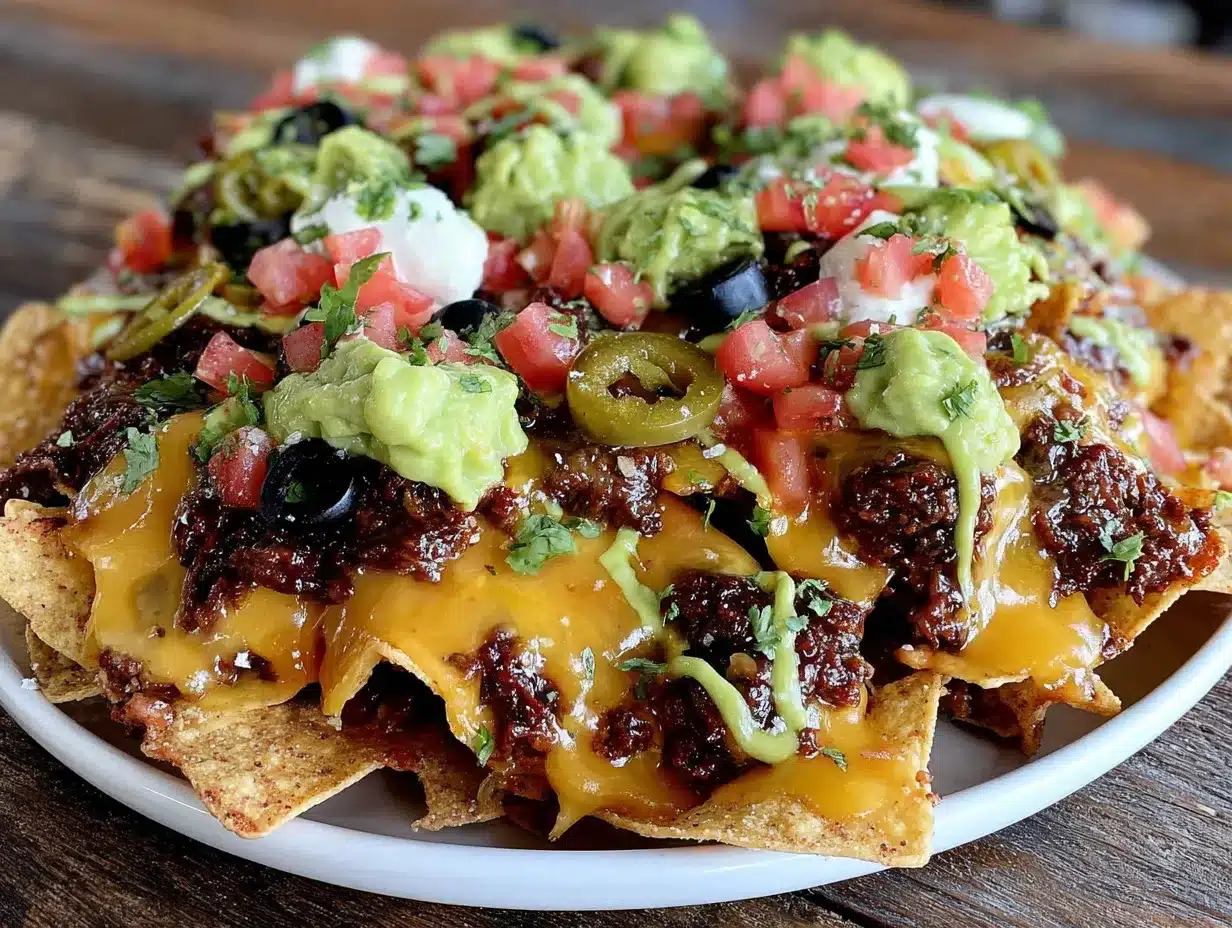
- 1 large bag (13-16 oz) restaurant-style tortilla chips (look for thick, sturdy chips—thin chips will break under the weight)
- 2 cups shredded Mexican blend cheese (or a mix of cheddar and Monterey Jack)
- 1 cup shredded pepper jack cheese (adds a little heat and creamy meltability)
- 1 can (15 oz) black beans, drained and rinsed (adds fiber and heartiness)
- 1 can (15 oz) pinto beans, drained and rinsed (optional, but I love the texture contrast)
For the Fresh Toppings
- 1 cup cherry tomatoes, diced (adds brightness and acidity)
- 1/2 cup pickled jalapeños (for heat and tang—I use the jarred ones from La Costeña)
- 1/2 cup sliced black olives (adds a briny, earthy note)
- 1/2 cup fresh cilantro, chopped (for freshness and color)
- 1 avocado, diced (or use guacamole if you’re feeling fancy)
- 1/2 cup sour cream (for creaminess and cooling the heat)
- 1 lime, cut into wedges (a squeeze of lime at the end is non-negotiable)
Optional Add-Ins
- 1/2 cup salsa or pico de gallo (for extra tomato flavor)
- 1/4 cup sliced green onions (adds a mild onion kick)
- 1 jalapeño, thinly sliced (for fresh heat, if you’re brave)
A quick note on ingredient selection: For the best texture, I recommend using a block of cheese and shredding it yourself. Pre-shredded cheese has anti-caking agents that prevent it from melting as smoothly. I know it’s a little extra work, but trust me on this one—the melt is so much better. Also, if you’re making your own taco seasoning, combine 1 tablespoon chili powder, 1 teaspoon cumin, 1 teaspoon smoked paprika, 1/2 teaspoon garlic powder, 1/2 teaspoon onion powder, 1/2 teaspoon oregano, and a pinch of cayenne. It takes two minutes and tastes so much fresher.
Equipment Needed
You don’t need a lot of fancy equipment for this recipe, which is part of why I love it. Here’s what you’ll need:
- Large rimmed baking sheet (half-sheet size works best—about 13×18 inches)
- Large skillet or frying pan (for cooking the meat)
- Cheese grater (if you’re shredding your own cheese)
- Cutting board and sharp knife (for prepping veggies)
- Spatula or wooden spoon (for stirring the meat)
- Small bowls (for setting up the nacho bar with toppings)
- Aluminum foil (for easy cleanup—trust me on this)
If you don’t have a rimmed baking sheet, you can use a 9×13 baking dish or even a cast iron skillet. Just keep in mind that you might need to do two batches if you’re feeding a crowd. I’ve also used disposable aluminum pans for parties—they work great and make cleanup even easier. My favorite budget-friendly option is the Nordic Ware half-sheet pan from Target. It’s like $15 and has lasted me years.
One tip: line your baking sheet with aluminum foil before you start. It makes cleanup a breeze, and you can just fold it up and toss it when you’re done. No soaking pans overnight!
Preparation Method
Alright, let’s get to the fun part. Here’s how to build the Ultimate Loaded Nacho Bar for Game Day, step by step. I’ve included time estimates and sensory cues so you know exactly what to look for at each stage.
Step 1: Preheat and Prep (5 minutes)
Preheat your oven to 400°F (200°C). While it’s heating up, line your baking sheet with aluminum foil and set it aside. Dice your onion, mince your garlic, and prep all your fresh toppings. Having everything ready before you start cooking makes the whole process so much smoother. I learned this the hard way after burning garlic more times than I’d like to admit.
Step 2: Cook the Meat (10-12 minutes)
Heat 1 tablespoon of olive oil in a large skillet over medium-high heat. Add the diced onion and cook for 2-3 minutes, until it’s translucent and starting to soften. You should smell that sweet onion aroma—that’s your cue. Add the ground beef and break it up with a spatula. Cook for 5-7 minutes, stirring occasionally, until the beef is browned and no longer pink. The sizzle should be steady but not violent. If it’s smoking, turn the heat down a notch. Drain off any excess fat (leave about a tablespoon for flavor), then add the minced garlic and cook for another 30 seconds until fragrant. Stir in the taco seasoning and 1/4 cup water, and let it simmer for 2-3 minutes until the sauce thickens and coats the meat. The meat should look glossy and smell deeply spiced. Season with salt and pepper to taste.
Step 3: Layer the Nachos (5 minutes)
Spread half the tortilla chips in an even layer on your prepared baking sheet. Make sure they’re not too crowded—you want each chip to have room to get topped. Sprinkle half the black beans and pinto beans over the chips, then scatter half the cooked meat on top. Add half of each cheese (Mexican blend and pepper jack) evenly over everything. Now repeat the layers: the remaining chips, the rest of the beans, the rest of the meat, and the rest of the cheese. This double-layering is the secret to getting cheesy, loaded chips in every bite. I know it seems like extra work, but it’s so worth it.
Step 4: Bake to Perfection (10-12 minutes)
Place the baking sheet in the preheated oven and bake for 10-12 minutes, until the cheese is fully melted and bubbly. The edges of the chips should be lightly golden, and the cheese should be stretchy when you pull a chip up. Keep an eye on it after 8 minutes—ovens vary, and you don’t want burnt edges. The nachos are ready when the cheese is melted but the chips are still crisp. If you see any chips turning dark brown, pull them out immediately.
Step 5: Add Fresh Toppings (5 minutes)
Remove the baking sheet from the oven and let it cool for 2 minutes. Then scatter the diced tomatoes, pickled jalapeños, black olives, and fresh cilantro over the top. Add dollops of sour cream and diced avocado (or guacamole) in small clusters so everyone gets some. Squeeze a few lime wedges over the whole thing—the acidity cuts through the richness and brightens everything up. Serve immediately while the cheese is still hot and stretchy.
One thing I always do: I set up a small “nachos bar” on the side with extra toppings in little bowls. That way, people can customize their own plates. Some folks want extra jalapeños, others want extra sour cream. It makes everyone happy, and it takes zero extra effort on your part.
Cooking Tips & Techniques
Over the years, I’ve made every mistake in the book when it comes to nachos. Soggy chips, burnt cheese, uneven toppings—you name it, I’ve done it. But that’s how you learn, right? Here are the tips I wish someone had told me from the start.
Don’t overload the chips. I know it’s tempting to pile everything on, but too many toppings will make the chips soggy before they even hit the oven. Stick to the double-layer method I described above. It ensures every chip gets some love without drowning them.
Use room temperature ingredients. Cold cheese doesn’t melt as evenly, and cold meat can lower the temperature of the whole dish. Let your cheese sit out for 15-20 minutes before you start, and make sure the meat is hot when you layer it. This helps everything bake evenly.
Watch the oven like a hawk. Nachos go from perfect to burnt in about 60 seconds. I learned this the hard way when I got distracted by a touchdown and ended up with charcoal chips. Set a timer for 8 minutes, then check every 2 minutes after that.
Make extra meat. Seriously. The seasoned beef is so good that people will eat it straight from the pan. I always make 1.5 pounds instead of 1 pound, and I’ve never regretted it. Leftovers are amazing in tacos or on salads the next day.
Timing is everything. If you’re serving these for a party, cook the meat ahead of time and reheat it right before assembling. Bake the nachos just before everyone’s ready to eat, and have the fresh toppings ready to go. That way, everything comes together in about 15 minutes, and you’re not stuck in the kitchen while everyone else is having fun.
One more thing: if you’re feeding a big crowd, consider making two separate sheet pans instead of one giant one. It’s easier to manage, and you can keep one warm in the oven while the other gets devoured. Trust me, they’ll go fast.
Variations & Adaptations
One of the best things about this nacho bar is how customizable it is. Here are some of my favorite variations that I’ve tried over the years.
Vegetarian Option
Skip the ground beef and use two cans of black beans instead. Mash half the beans with a fork before layering them—it gives you a meatier texture. You can also add sautéed bell peppers and onions for extra flavor. I’ve made this version for my vegetarian friends, and they always ask for the recipe.
Spicy Lover’s Version
Add 1 teaspoon of cayenne pepper to the taco seasoning, use spicy chorizo instead of ground beef, and top with fresh sliced jalapeños and a drizzle of hot sauce. I like Valentina or Cholula for this. The heat builds with every bite, but the sour cream and avocado cool it down beautifully.
Loaded Chicken Nachos
Swap the ground beef for shredded rotisserie chicken. Just shred the chicken, toss it with the taco seasoning and a splash of chicken broth, and warm it in a skillet before layering. It’s lighter than beef but just as satisfying. I’ve also used leftover grilled chicken from the night before, and it works perfectly.
Breakfast Nachos
Okay, this one’s a little wild, but hear me out. Use the same base, but swap the taco meat for crispy bacon and breakfast sausage. Top with scrambled eggs, cheddar cheese, and a drizzle of salsa verde. Bake until the cheese melts, then finish with fresh pico de gallo and a dollop of crema. It’s the best breakfast-for-dinner option I’ve ever made.
Gluten-Free and Dairy-Free Adaptations
This recipe is naturally gluten-free if you use certified gluten-free tortilla chips. For a dairy-free version, use vegan shredded cheese (I like Daiya or Violife) and dairy-free sour cream. The texture will be slightly different, but it’s still delicious. I’ve tested both versions, and they hold up surprisingly well.
Serving & Storage Suggestions
These nachos are best served immediately, right out of the oven, while the cheese is still hot and stretchy. I like to put the baking sheet right in the middle of the table with a stack of small plates and let everyone dig in. It’s casual, it’s fun, and it keeps the party vibe going.
For presentation, I arrange the fresh toppings in little bowls around the baking sheet. It looks pretty, and it lets people customize their plates. I also like to have extra chips on the side for scooping up any fallen toppings—because let’s be real, there will be fallen toppings.
As for drinks, this nacho bar pairs beautifully with cold beer (a light lager or Mexican beer like Corona or Modelo works great), margaritas, or even a crisp white wine like Sauvignon Blanc. For non-alcoholic options, try a sparkling limeade or horchata. The creamy, sweet horchata is a surprisingly good contrast to the spicy, savory nachos.
Storage: If you have leftovers (which is rare in my house, but it happens), let the nachos cool completely, then transfer them to an airtight container. Store in the refrigerator for up to 2 days. The chips will soften, but the flavors will meld together beautifully.
Reheating: The best way to reheat leftover nachos is in the oven. Spread them on a baking sheet and warm them at 350°F (175°C) for 5-7 minutes, until heated through. Avoid the microwave—it makes the chips rubbery and the cheese tough. If you’re in a hurry, you can use an air fryer at 350°F for 3-4 minutes. It works surprisingly well.
One thing I love about this recipe is that the flavors actually get better after a day in the fridge. The spices meld together, and the cheese gets all gooey and integrated. I’ve been known to eat cold nacho leftovers straight from the container the next day. No judgment, please.
Nutritional Information & Benefits
Let’s be real—these nachos aren’t health food. But they’re made with real, whole ingredients, and that counts for something. Here’s an approximate nutritional breakdown per serving (based on 8 servings):
- Calories: 480
- Protein: 22g
- Fat: 28g
- Carbohydrates: 38g
- Fiber: 8g
- Sugar: 4g
- Sodium: 890mg
The black beans and pinto beans add a good amount of fiber and plant-based protein, which helps keep you full and satisfied. The avocado provides healthy monounsaturated fats, and the tomatoes and cilantro add a dose of vitamins A and C. If you want to lighten things up, you can use lean ground turkey instead of beef, reduce the cheese by half, and load up on fresh veggies. I’ve tried that version, and it’s still pretty darn good.
For dietary considerations: This recipe is naturally gluten-free (just check your taco seasoning and chips). It can be made dairy-free with substitutions. It’s not low-carb, but you can reduce the chips and load up on more meat and veggies if you’re watching your carbs. And if you’re watching your sodium, use low-sodium beans and make your own taco seasoning without added salt.
Honestly, I believe in balance. Game day is about having fun, enjoying good food, and spending time with people you care about. These nachos are part of that experience. One meal isn’t going to derail your health goals, and the joy of sharing this with friends is good for the soul. So eat up, enjoy it, and don’t overthink it.
Conclusion
So there you have it—my Ultimate Loaded Nacho Bar for Game Day. It’s the recipe that started with a random Tuesday at my neighbor’s house and turned into the dish I’m now known for. It’s simple, it’s satisfying, and it’s guaranteed to make you the hero of any party you bring it to.
What I love most about this recipe is how adaptable it is. You can make it as simple or as loaded as you want. You can swap in your favorite proteins, add your favorite toppings, and adjust the spice level to your liking. It’s a canvas for your creativity, and that’s what makes it so fun.
I really hope you give this a try for your next game day gathering. Whether it’s the Super Bowl, a playoff game, or just a regular Sunday with friends, these nachos will make the occasion feel special. And I’d love to hear how they turn out for you! Drop a comment below and let me know what variations you tried, or tag me in your photos on social media. Your feedback and ideas inspire me to keep experimenting and sharing.
Until next time, happy cooking—and go team!
Frequently Asked Questions
Can I make these nachos ahead of time?
You can prep the components ahead of time—cook the meat, shred the cheese, and chop the veggies—but I recommend assembling and baking the nachos right before serving. They’re best fresh out of the oven when the cheese is hot and the chips are still crisp.
How do I keep the chips from getting soggy?
The double-layer method is key. By layering chips, toppings, and cheese in two layers, you ensure every chip gets covered without being overloaded. Also, drain the beans well and pat them dry with a paper towel before adding them to the nachos. Excess moisture is the enemy of crisp chips.
Can I use a different type of meat?
Absolutely! Shredded chicken, carnitas, chorizo, or even ground turkey all work great. Just make sure the meat is well-seasoned and cooked before layering. For a vegetarian option, double up on the beans or add sautéed mushrooms and peppers.
What’s the best cheese for nachos?
I recommend a mix of Mexican blend cheese (which usually includes cheddar, Monterey Jack, and asadero) and pepper jack for a little heat. Shredding your own cheese from a block gives you the best melt. Pre-shredded cheese has anti-caking agents that can make it grainy.
How do I scale this recipe for a crowd?
This recipe serves about 6-8 people as a main dish or 10-12 as an appetizer. For larger crowds, make two separate sheet pans and bake them one after the other. You can keep the first batch warm in a 200°F oven while the second one bakes. Just don’t cover them with foil or they’ll steam and get soggy.
Pin This Recipe!
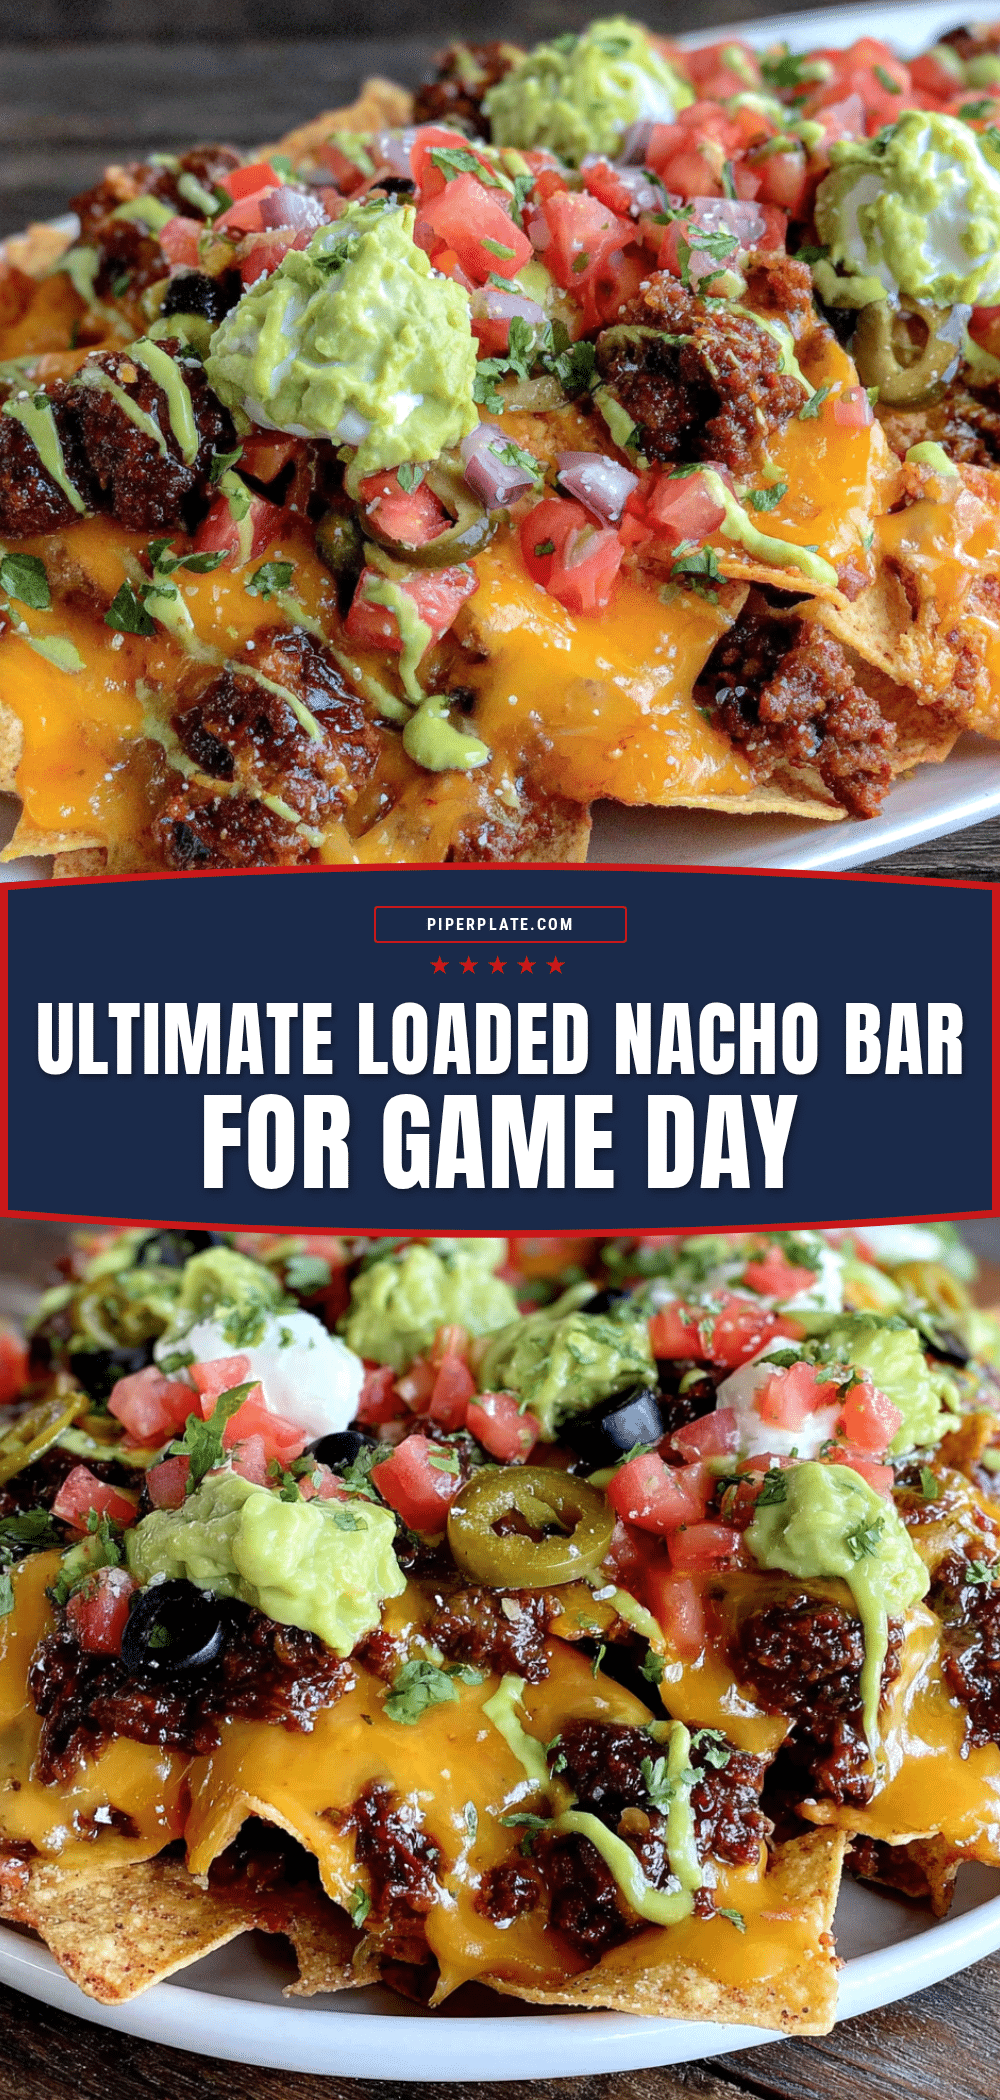
Best Ultimate Loaded Nacho Bar for Game Day
Perfectly layered, never-soggy, fully-loaded nachos with seasoned ground beef, melted cheese, beans, and fresh toppings. Ideal for game day gatherings, this crowd-pleaser comes together in about 30 minutes.
- Prep Time: 15 minutes
- Cook Time: 15 minutes
- Total Time: 30 minutes
- Yield: 8 servings 1x
- Category: Main Course
- Cuisine: Mexican-American
Ingredients
- 1 lb ground beef (80/20 works best)
- 1 tablespoon olive oil
- 1 small yellow onion, diced
- 3 cloves garlic, minced
- 1 packet taco seasoning (or homemade blend)
- 1/4 cup water
- Salt and black pepper, to taste
- 1 large bag (13–16 oz) restaurant-style tortilla chips
- 2 cups shredded Mexican blend cheese
- 1 cup shredded pepper jack cheese
- 1 can (15 oz) black beans, drained and rinsed
- 1 can (15 oz) pinto beans, drained and rinsed (optional)
- 1 cup cherry tomatoes, diced
- 1/2 cup pickled jalapeños
- 1/2 cup sliced black olives
- 1/2 cup fresh cilantro, chopped
- 1 avocado, diced
- 1/2 cup sour cream
- 1 lime, cut into wedges
- 1/2 cup salsa or pico de gallo (optional)
- 1/4 cup sliced green onions (optional)
- 1 jalapeño, thinly sliced (optional)
Instructions
- Preheat oven to 400°F (200°C). Line a large rimmed baking sheet with aluminum foil. Dice onion, mince garlic, and prep all fresh toppings.
- Heat olive oil in a large skillet over medium-high heat. Add onion and cook 2-3 minutes until translucent. Add ground beef and cook 5-7 minutes, breaking it up, until browned. Drain excess fat, leaving about 1 tablespoon. Add garlic and cook 30 seconds until fragrant.
- Stir in taco seasoning and water. Simmer 2-3 minutes until sauce thickens and coats meat. Season with salt and pepper.
- Spread half the tortilla chips on the prepared baking sheet. Top with half the black beans, pinto beans, cooked meat, Mexican blend cheese, and pepper jack cheese. Repeat layers with remaining chips, beans, meat, and cheeses.
- Bake 10-12 minutes until cheese is melted and bubbly, and chips are lightly golden. Watch closely after 8 minutes to prevent burning.
- Remove from oven and let cool 2 minutes. Scatter tomatoes, pickled jalapeños, black olives, and cilantro over top. Dollop sour cream and diced avocado. Squeeze lime wedges over everything. Serve immediately.
Notes
For best melt, shred cheese from a block instead of using pre-shredded. Double-layer chips and toppings to ensure every chip is covered. Watch oven closely after 8 minutes to avoid burning. For a crowd, make two separate sheet pans. Leftovers can be stored in an airtight container in the fridge for up to 2 days; reheat in oven at 350°F for 5-7 minutes.
Nutrition
- Serving Size: 1 serving (about 1/8
- Calories: 480
- Sugar: 4
- Sodium: 890
- Fat: 28
- Saturated Fat: 12
- Carbohydrates: 38
- Fiber: 8
- Protein: 22
Keywords: nachos, game day, loaded nachos, super bowl, party food, ground beef, cheese, beans, easy appetizer


