Love this? Save it for later!
Share the inspiration with your friends
My roommate asked me why I couldn’t just throw everything into one bowl and bake it. I was mid-lecture about the importance of creaming butter and sugar separately, about how cookie chemistry demands a certain order of operations. I started to explain why that wouldn’t work — then stopped. Honestly, I had no good reason. I’d just always done it that way.
So I handed her the bowl. She dumped in the peanut butter, the oats, the butter, the sugars, the M&Ms — all at once, like some kind of kitchen anarchist. I bit my tongue so hard I tasted blood. The batter looked wrong. Too wet, maybe. Too chunky. I was already planning the “I told you so” speech in my head.
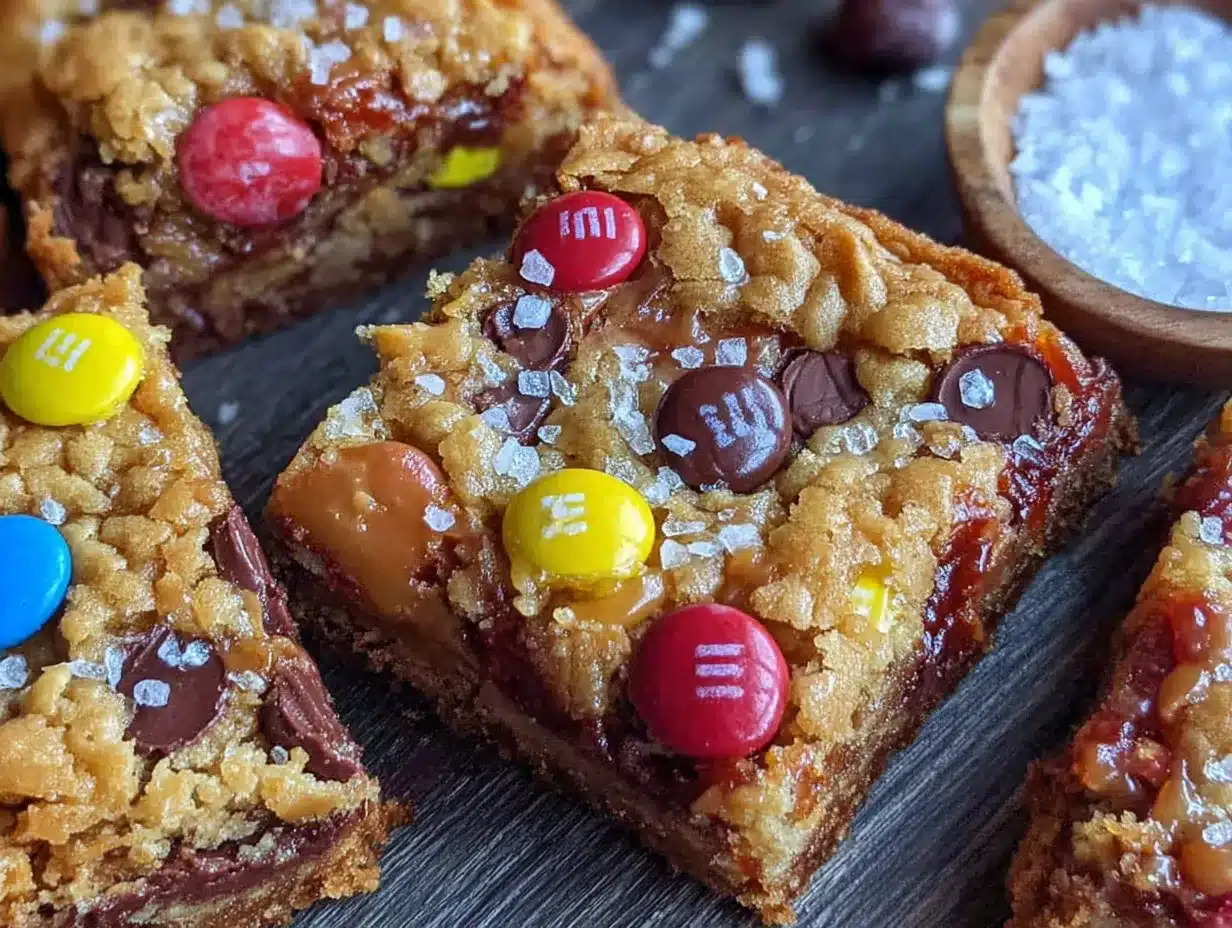
Twenty-two minutes later, I was eating my words — literally. Those bars came out of the oven golden, crackly on top, and so impossibly chewy I almost dropped the spatula. The peanut butter had melded with the oats into this dense, almost fudge-like texture, and the M&Ms had stayed perfectly intact, little pockets of melted chocolate in every bite.
She didn’t even gloat. She just took a bite and said, “Told you.”
That was three years ago, and I haven’t made cookies the old way since. These chewy monster cookie bars with M&Ms are now my go-to for bake sales, potlucks, and those days when you need something sweet without the fuss. No chilling, no shaping, no stand mixer required. Just one bowl, a spatula, and a little bit of trust in the process.
Maybe you’ve been there — so sure your way is the only way that you miss a simpler, better one. Let me save you the trouble.
Why You’ll Love This Recipe
Let me tell you why these monster cookie bars have earned a permanent spot in my recipe rotation. I’ve tested this recipe at least a dozen times — tweaking the oat-to-flour ratio, playing with bake times, even trying different peanut butter brands. What I landed on is the version I’d serve my mom, bring to a friend’s housewarming, and eat for breakfast when nobody’s watching.
- One Bowl, No Mixer: You don’t need a stand mixer or even a hand mixer. Just a bowl and a sturdy spatula. Less cleanup, more cookie.
- No Chilling Required: The dough goes straight from bowl to pan. No waiting, no planning ahead. This is instant gratification baking at its finest.
- Perfectly Chewy Texture: The combination of rolled oats and peanut butter creates a dense, chewy crumb that stays soft for days. No dry, crumbly bars here.
- Pantry-Friendly Ingredients: Chances are you already have butter, peanut butter, oats, and sugar in your kitchen. The M&Ms are the only “special” ingredient, and you can find those anywhere.
- Crowd-Pleasing Appeal: Kids go nuts for the M&Ms. Adults love the peanut butter-oatmeal combo. Everyone wins.
What makes these different from every other monster cookie recipe out there? It’s the texture. Most recipes yield bars that are either too cakey or too greasy. Mine hits that sweet spot — dense but not heavy, chewy but not tough. The secret is using melted butter and a specific oat-to-flour ratio that I figured out after a few too many batches of disappointing bars.
This is the kind of recipe that makes you close your eyes after the first bite. It’s comfort food at its finest — familiar, satisfying, and just a little bit nostalgic. Perfect for impressing guests without breaking a sweat.
What Ingredients You Will Need
This recipe uses simple, mostly pantry-friendly ingredients to create something truly special. Here’s what you’ll need and why each one matters.
For the Cookie Bars
- 1/2 cup (1 stick) unsalted butter, melted — Melting the butter is key for that dense, chewy texture. It eliminates the need for creaming and creates a richer flavor. I use Land O’Lakes, but any brand works.
- 3/4 cup creamy peanut butter — Use the regular kind (like Jif or Skippy), not natural peanut butter that separates. Natural peanut butter can make the bars greasy and crumbly. Trust me on this one.
- 1 cup packed light brown sugar — Brown sugar adds moisture and that deep, caramel-like sweetness. Dark brown sugar works too, but the bars will be slightly darker and more molasses-forward.
- 1/4 cup granulated sugar — A little white sugar helps with browning and gives the bars a slightly crisper top.
- 2 large eggs, room temperature — Room temperature eggs incorporate more evenly into the batter. If you forget to take them out, place them in a bowl of warm water for 5 minutes.
- 2 teaspoons vanilla extract — Pure vanilla extract is worth the splurge here. It rounds out all the flavors beautifully.
- 2 cups old-fashioned rolled oats — Do not use quick oats or steel-cut oats. Old-fashioned oats give the bars their signature chewy texture and hearty bite.
- 1 cup all-purpose flour — Spoon and level your flour for accuracy. Scooping directly from the bag can pack in too much flour, making the bars dry.
- 1 teaspoon baking soda — Helps the bars rise just enough without becoming cakey.
- 1/2 teaspoon salt — Salt balances the sweetness and enhances the peanut butter flavor. If using salted butter, reduce to 1/4 teaspoon.
- 1 1/2 cups M&Ms, divided — I use regular milk chocolate M&Ms, but peanut M&Ms or mini M&Ms work great too. Reserve about 1/4 cup for pressing on top before baking.
Ingredient Selection Tip: For the best results, use a peanut butter you actually enjoy eating straight from the jar. The flavor really comes through in the final bars. I personally love Skippy Natural Creamy — it has the right consistency without separating.
Substitution Guidance: If you need a gluten-free option, use certified gluten-free rolled oats and a 1:1 gluten-free baking flour blend (like King Arthur Measure for Measure). The texture will be slightly different but still delicious. For a dairy-free version, use vegan butter and dairy-free chocolate chips instead of M&Ms.
Equipment Needed
You don’t need fancy equipment for this recipe. Here’s what you’ll actually use:
- 9×13-inch baking pan — This is the standard size for these bars. An 8×8 pan will work but your bars will be much thicker and will need extra baking time (about 5-7 minutes more).
- Parchment paper — Line your pan with parchment paper, leaving some overhang on the long sides. This creates “handles” for lifting the bars out cleanly. I learned this trick after a few too many bars that refused to leave the pan.
- Large mixing bowl — Any big bowl works. I use a ceramic one because it doesn’t slide around on the counter.
- Sturdy spatula or wooden spoon — The dough is thick, so you need something with some muscle. A silicone spatula is my go-to.
- Measuring cups and spoons — Accuracy matters, especially with the flour and oats.
- Cooling rack — Letting the bars cool completely in the pan is fine, but a wire rack speeds things up if you’re impatient (like me).
Budget-Friendly Tip: If you don’t have parchment paper, you can grease the pan generously with butter or non-stick spray. Just know the bars might be a little trickier to remove. I’ve used the spray-and-dust-with-flour method in a pinch, and it works okay.
Preparation Method
Ready to make the best chewy monster cookie bars of your life? Let’s go.
- Preheat your oven to 350°F (175°C). Line a 9×13-inch baking pan with parchment paper, leaving about 2 inches of overhang on the long sides. This will help you lift the bars out later.
- Melt the butter. In a large microwave-safe bowl, melt the butter in 30-second intervals until fully liquid. Let it cool for a minute — you don’t want it hot enough to cook the eggs.
- Mix the wet ingredients. Add the peanut butter, brown sugar, and granulated sugar to the melted butter. Stir until smooth and well combined. The mixture will look a little grainy from the sugar — that’s normal.
- Add the eggs and vanilla. Crack the eggs into the bowl and add the vanilla extract. Stir vigorously until the mixture is smooth and glossy. This should take about 30 seconds. The batter will look almost like a thick caramel sauce at this point.
- Combine the dry ingredients. In a separate small bowl (or just on top of the wet mixture, if you’re feeling brave), whisk together the flour, baking soda, and salt. Add this to the wet mixture and stir until just combined. Do not overmix — a few streaks of flour are fine.
- Fold in the oats and most of the M&Ms. Add the rolled oats and 1 1/4 cups of the M&Ms. Fold gently until everything is evenly distributed. The dough will be thick and slightly sticky — that’s exactly what you want.
- Press the dough into the pan. Transfer the dough to your prepared pan. Use a spatula or lightly greased hands to press it into an even layer. The dough is thick, so take your time. I find that wetting my fingers slightly helps prevent sticking.
- Top with remaining M&Ms. Press the reserved 1/4 cup of M&Ms into the top of the dough. This gives the bars that beautiful, bakery-style look with visible candy pieces on top.
- Bake for 20-24 minutes. The bars are done when the edges are golden brown and the center looks set but still slightly soft. A toothpick inserted into the center should come out with a few moist crumbs — not wet batter. My oven runs hot, so I start checking at 20 minutes.
- Cool completely before cutting. This is the hardest part. Let the bars cool in the pan on a wire rack for at least 1 hour. For clean slices, refrigerate for 30 minutes before cutting. I know it’s tempting, but cutting them warm will give you a crumbly mess.
Sensory Cue: When the bars are done, your kitchen will smell like a peanut butter cookie dream. The top will be golden and slightly crackled, and the edges will have pulled away from the pan just a little.
Cooking Tips & Techniques
After making these chewy monster cookie bars more times than I care to count, I’ve picked up a few tricks that make a real difference.
- Use room temperature eggs. Cold eggs can seize the melted butter, creating a lumpy batter. If you forget, place the eggs in a bowl of warm water for 5 minutes before using.
- Don’t overmix the dough. Once you add the flour, stir just until you don’t see any more white streaks. Overmixing develops gluten, which can make the bars tough instead of tender.
- Press the dough evenly. An uneven layer means some bars will be underbaked while others are overbaked. Use a piece of parchment paper on top of the dough to press it flat without sticking.
- Check for doneness early. Every oven is different. Start checking at 20 minutes. The center should be set but still soft — it will continue to cook as it cools.
- Let them cool completely. I once cut into a pan after 20 minutes because I couldn’t wait. The bars crumbled into a delicious but ugly mess. Patience is a virtue, and in this case, it’s the difference between beautiful bars and cookie rubble.
Common Mistake to Avoid: Using natural peanut butter. I tried it once because it was all I had, and the bars turned out greasy and fell apart. Stick with the processed stuff for this recipe — it’s actually better here.
Variations & Adaptations
One of the best things about this recipe is how easy it is to customize. Here are some variations I’ve tried and loved:
- Chocolate Peanut Butter Monster Bars: Swap 1/2 cup of the M&Ms for 1/2 cup chocolate chips. The double chocolate-peanut butter combo is dangerously good.
- White Chocolate Cranberry Version: Replace the M&Ms with 1 1/2 cups white chocolate chips and 1/2 cup dried cranberries. This is my go-to for holiday baking.
- Gluten-Free Adaptation: Use certified gluten-free rolled oats and a 1:1 gluten-free flour blend. I’ve tested this with King Arthur Measure for Measure, and the texture is almost identical to the original.
- Nut-Free Version: Substitute the peanut butter with sunflower seed butter (like SunButter). The color will be slightly greener (don’t worry, that’s normal), and the flavor will be different but still delicious.
- Extra Crunchy: Use crunchy peanut butter instead of creamy, and add 1/2 cup chopped peanuts. The texture contrast is fantastic.
Personal Variation: My favorite twist is using peanut M&Ms instead of regular milk chocolate ones. The extra crunch from the peanut center takes these bars to another level. I discovered this by accident when I grabbed the wrong bag at the store — best mistake I ever made.
Serving & Storage Suggestions
These bars are incredibly versatile when it comes to serving and storing.
Serving: Serve at room temperature for the best texture. They’re perfect on their own, but a glass of cold milk takes them to dessert heaven. For a next-level treat, warm a bar in the microwave for 10-15 seconds and top with a scoop of vanilla ice cream. I’ve also been known to crumble them over yogurt for a decadent breakfast (no judgment, please).
Storage: Store the bars in an airtight container at room temperature for up to 5 days. Place a sheet of parchment paper between layers to prevent sticking. They actually get even better on day two — the flavors meld together and the texture becomes even more fudgy.
Freezing: These bars freeze beautifully. Wrap individual bars tightly in plastic wrap, then place them in a freezer-safe bag or container. They’ll keep for up to 3 months. To thaw, leave them at room temperature for about 30 minutes, or microwave for 15-20 seconds for that fresh-from-the-oven feel.
Reheating: For the best texture, reheat bars in a 300°F oven for 5-7 minutes. The microwave works in a pinch but can make them a little soft. If you’re eating them within a day or two, room temperature is really the way to go.
Nutritional Information & Benefits
Let’s be real — these are a treat, not a health food. But here’s the nutritional breakdown for one bar (based on 24 servings):
- Calories: Approximately 250-280 per bar
- Protein: 6-7 grams (thanks to the peanut butter and eggs)
- Carbohydrates: 32-35 grams
- Fat: 12-14 grams
- Fiber: 2-3 grams (from the oats)
- Sugar: 20-22 grams
Health Benefits: The rolled oats provide a good source of soluble fiber, which can help with heart health and digestion. Peanut butter adds protein and healthy monounsaturated fats. The M&Ms? Well, they’re chocolate — and chocolate has antioxidants. I’m not saying these are good for you, but they’re not completely without redeeming qualities.
Dietary Considerations: This recipe contains gluten, dairy, eggs, peanuts, and soy (from the M&Ms). For gluten-free and nut-free variations, check the adaptations section above.
Conclusion
These chewy monster cookie bars with M&Ms are everything I want in a dessert — easy to make, impossible to resist, and perfect for sharing. They’ve saved me at bake sales, potlucks, and those late-night cravings that demand something sweet and satisfying.
The best part? You can make them your own. Swap the M&Ms for your favorite candy, add some chocolate chips, or go wild with different extracts. The base recipe is forgiving and flexible, which is exactly what a good cookie bar should be.
I’d love to hear how yours turn out. Did you try a fun variation? Did you manage to wait for them to cool before cutting (I won’t judge if you didn’t)? Drop a comment below and let me know. And if you share a photo on Pinterest, tag me — I want to see your beautiful bars!
Happy baking, friend. You’ve got this.
Frequently Asked Questions
Can I use quick oats instead of old-fashioned oats?
I wouldn’t recommend it. Quick oats are more finely processed and will absorb moisture differently, resulting in a denser, less chewy texture. Old-fashioned oats are the way to go for that signature chew.
Why did my bars turn out dry?
Overbaking is the most common culprit. Check your bars at 20 minutes and remove them when the center is still slightly soft. The bars will continue to set as they cool. Also, make sure you’re measuring your flour correctly — spoon it into the measuring cup and level it off, don’t scoop directly from the bag.
Can I freeze the dough instead of baking it?
Absolutely! Press the dough into the pan, cover tightly with plastic wrap and foil, and freeze for up to 3 months. When you’re ready to bake, let it thaw in the refrigerator overnight, then bake as directed. You may need to add 2-3 minutes to the baking time.
Can I use natural peanut butter?
I don’t recommend it. Natural peanut butter (the kind that separates) has a different fat content and can make the bars greasy and crumbly. Stick with regular creamy peanut butter like Jif or Skippy for the best results.
How do I get clean, neat slices?
Patience is key. Let the bars cool completely in the pan — at least 1 hour. For the cleanest cuts, refrigerate the pan for 30 minutes before slicing. Use a sharp knife and wipe it clean between cuts. This makes a huge difference.
Pin This Recipe!
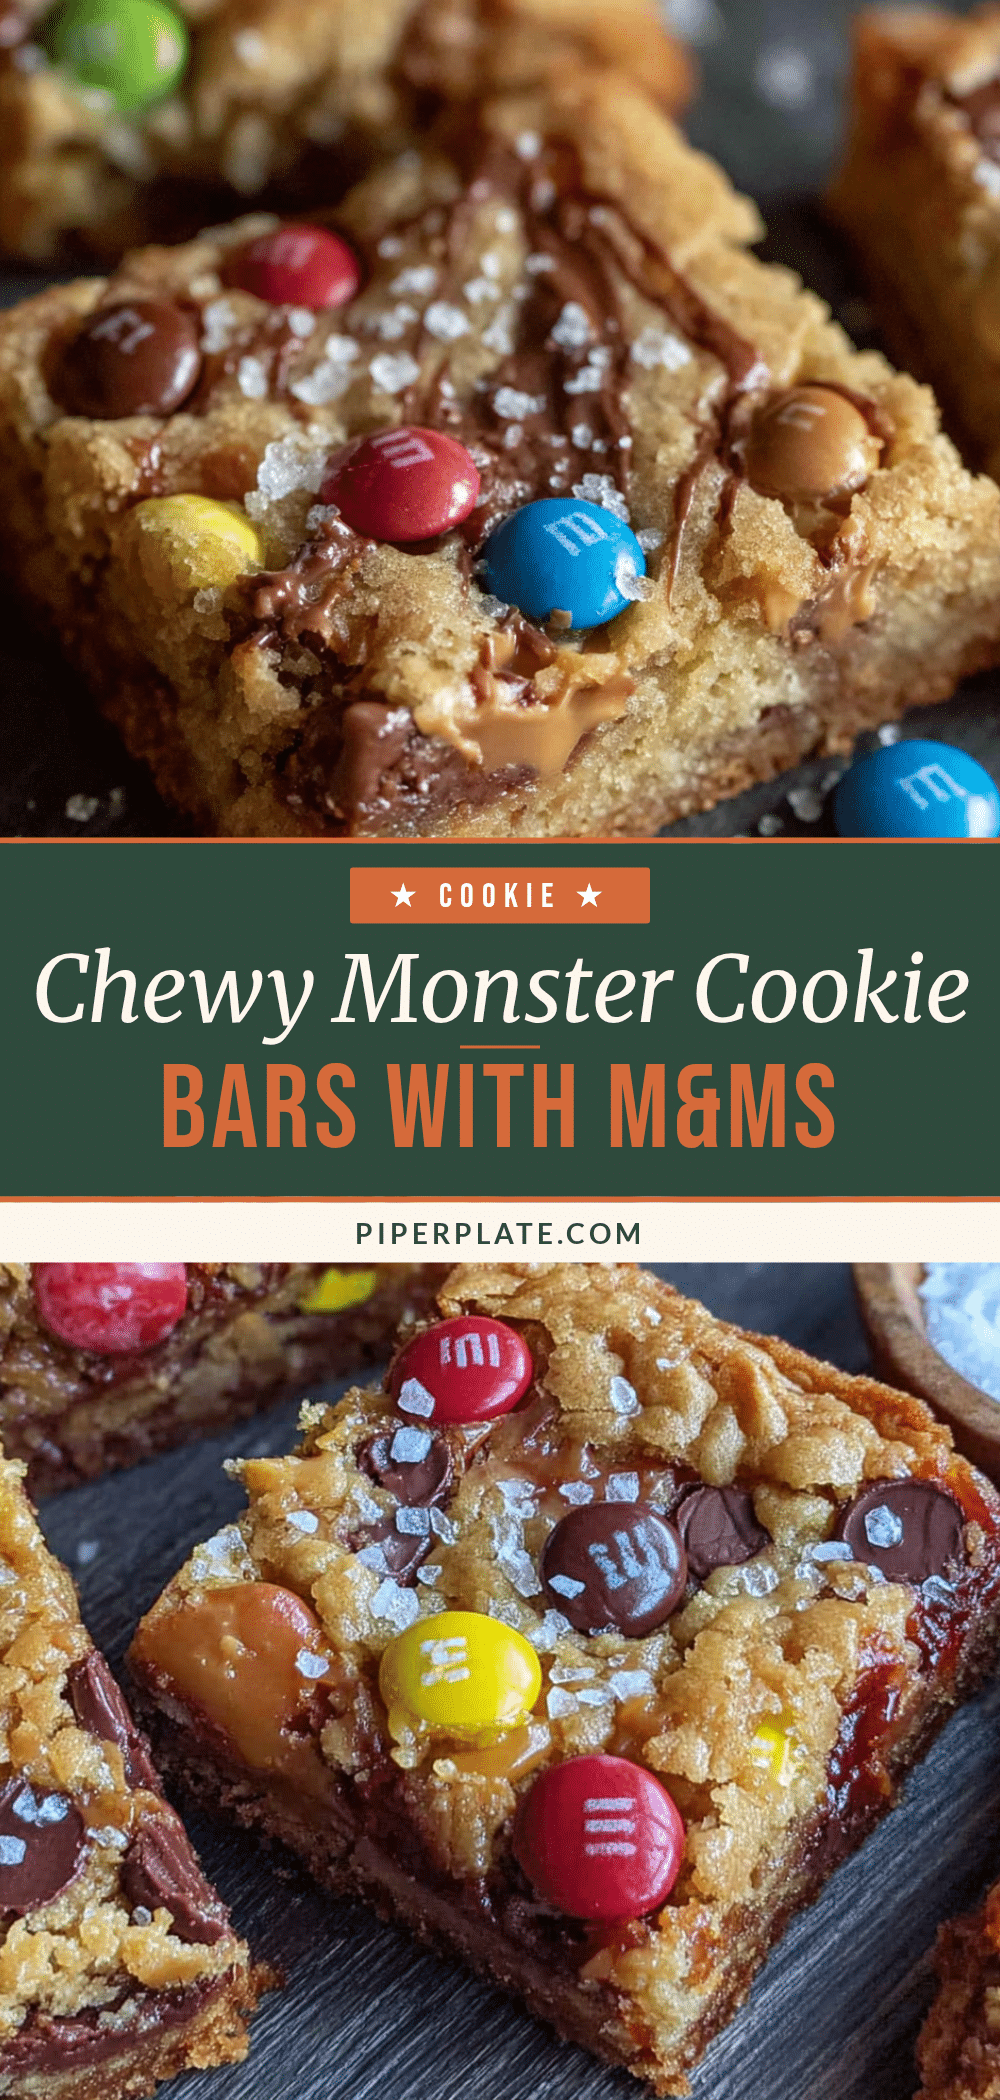
Chewy Monster Cookie Bars with M&Ms
These one-bowl, no-mixer monster cookie bars are perfectly chewy with a dense, fudge-like texture. Packed with peanut butter, oats, and M&Ms, they’re an easy, crowd-pleasing dessert that requires no chilling.
- Prep Time: 15 minutes
- Cook Time: 22 minutes
- Total Time: 1 hour 37 minutes (including cooling)
- Yield: 24 bars 1x
- Category: Dessert
- Cuisine: American
Ingredients
- 1/2 cup (1 stick) unsalted butter, melted
- 3/4 cup creamy peanut butter (like Jif or Skippy)
- 1 cup packed light brown sugar
- 1/4 cup granulated sugar
- 2 large eggs, room temperature
- 2 teaspoons vanilla extract
- 2 cups old-fashioned rolled oats
- 1 cup all-purpose flour, spooned and leveled
- 1 teaspoon baking soda
- 1/2 teaspoon salt (reduce to 1/4 teaspoon if using salted butter)
- 1 1/2 cups M&Ms, divided (reserve 1/4 cup for topping)
Instructions
- Preheat your oven to 350°F (175°C). Line a 9×13-inch baking pan with parchment paper, leaving about 2 inches of overhang on the long sides.
- In a large microwave-safe bowl, melt the butter in 30-second intervals until fully liquid. Let it cool for a minute.
- Add the peanut butter, brown sugar, and granulated sugar to the melted butter. Stir until smooth and well combined.
- Add the eggs and vanilla extract. Stir vigorously until the mixture is smooth and glossy, about 30 seconds.
- In a separate small bowl, whisk together the flour, baking soda, and salt. Add this to the wet mixture and stir until just combined. Do not overmix.
- Fold in the rolled oats and 1 1/4 cups of the M&Ms until evenly distributed. The dough will be thick and slightly sticky.
- Transfer the dough to the prepared pan. Use a spatula or lightly greased hands to press it into an even layer.
- Press the reserved 1/4 cup of M&Ms into the top of the dough.
- Bake for 20-24 minutes, until the edges are golden brown and the center looks set but still slightly soft. A toothpick inserted into the center should come out with a few moist crumbs.
- Cool completely in the pan on a wire rack for at least 1 hour. For clean slices, refrigerate for 30 minutes before cutting.
Notes
Use regular creamy peanut butter (like Jif or Skippy), not natural peanut butter, to avoid greasy bars. For gluten-free, use certified gluten-free rolled oats and a 1:1 gluten-free flour blend. For dairy-free, use vegan butter and dairy-free chocolate chips instead of M&Ms. Bars can be stored in an airtight container at room temperature for up to 5 days, or frozen for up to 3 months.
Nutrition
- Serving Size: 1 bar
- Calories: 265
- Sugar: 21
- Sodium: 180
- Fat: 13
- Saturated Fat: 5
- Carbohydrates: 34
- Fiber: 2
- Protein: 6
Keywords: monster cookie bars, chewy cookie bars, M&M bars, peanut butter oatmeal bars, one bowl cookie bars, no mixer cookies, easy dessert recipe


