Love this? Save it for later!
Share the inspiration with your friends
I used to think apple cider donuts were a strictly seasonal affair, meant only for crisp weekend mornings at the orchard, eaten with sticky fingers and a paper napkin that’s already disintegrating. Then a friend dropped off a bundt cake that smelled like everything I loved about autumn, and I found myself standing in my kitchen at 9 PM, eating slice after slice, trying to figure out what magic she had worked. The texture was tender and buttery, the top had that perfect cinnamon-sugar crunch, and somehow the whole thing tasted exactly like those beloved cider mill donuts—but without the deep fryer or the 45-minute wait in line.
Honestly, I was a little annoyed. I had spent years perfecting my apple cider donut recipe, rolling out dough and cutting rings, only to discover that a bundt pan could deliver the same nostalgic flavor with about half the effort. The secret, I learned after three test batches and one very messy kitchen, is reducing the apple cider down to a concentrated syrup that packs all that fruity, tangy flavor into every bite. The power went out halfway through my second attempt—lost the whole batch—but by the third try, I had it dialed in. Maybe you’ve been there, chasing a flavor memory and refusing to settle for anything less.
This cake stays with me because it bridges two worlds. It has the cozy, spiced soul of a fall festival donut, but it bakes up into a beautiful, company-worthy cake that doesn’t need to be served hot or eaten within an hour. It’s the recipe I bring to potlucks when I want to impress without stress, and the one I make on a random Tuesday in October just because. Let me tell you, once you taste that cider reduction working its magic, you won’t go back to plain bundt cakes either.
Why You’ll Love This Recipe
This Cozy Apple Cider Donut Bundt Cake isn’t just another fall dessert—it’s the one that makes people close their eyes after the first bite. I’ve tested this recipe six times to get the texture just right, and here’s why it belongs in your regular rotation:
- Big Flavor, Small Effort : No deep frying, no rolling out dough, no standing over a pot of hot oil. The bundt pan does all the shaping work for you, and the reduced apple cider delivers concentrated flavor that tastes like you spent hours at the orchard.
- Simple Pantry Ingredients : You probably have everything except the apple cider already in your kitchen. Butter, sugar, eggs, flour, and a few warm spices—that’s it. No fancy extracts or hard-to-find specialties.
- Perfect for Fall Gatherings : This cake travels beautifully, slices cleanly, and looks stunning on a cake stand with a dusting of cinnamon sugar. It’s my go-to for Thanksgiving brunch, Halloween parties, and cozy weekend visits.
- Crowd-Pleaser Guaranteed : Kids love the donut-like coating, adults appreciate the sophisticated spice blend, and everyone goes back for seconds. I’ve watched people who “don’t like cake” eat two slices.
- Unbelievably Moist : The secret technique of reducing the cider and using buttermilk creates a crumb that stays tender for days. No dry cake here—just that melt-in-your-mouth texture you dream about.
What makes this recipe different from every other apple cider cake out there is the double hit of cider flavor. You reduce it down to a syrup for the batter, then brush more over the warm cake before coating it in cinnamon sugar. It’s like giving the cake a flavor hug from the inside and the outside. This is comfort food reimagined—faster than traditional donuts, but with the same soul-soothing satisfaction that makes you close your eyes and sigh.
What Ingredients You Will Need
This recipe uses simple, wholesome ingredients that work together to create that unmistakable apple cider donut flavor without any fuss. Most of these are pantry staples, and the few fresh items are easy to find at any grocery store during fall.
For the Cake
- 1 cup apple cider (unfiltered is best for flavor, but any variety works)
- 2 ½ cups all-purpose flour (315 grams) — I prefer King Arthur for consistent results
- 1 ½ teaspoons baking powder
- ½ teaspoon baking soda
- 1 teaspoon ground cinnamon
- ½ teaspoon ground nutmeg (freshly grated if you have it—worth the extra step)
- ¼ teaspoon ground cloves
- ½ teaspoon salt
- ½ cup unsalted butter (1 stick, softened to room temperature)
- 1 cup granulated sugar (200 grams)
- ½ cup packed light brown sugar (100 grams)
- 2 large eggs (room temperature)
- 1 teaspoon vanilla extract
- ½ cup buttermilk (room temperature — or use ½ cup milk mixed with 1 ½ teaspoons lemon juice)
For the Cinnamon Sugar Coating
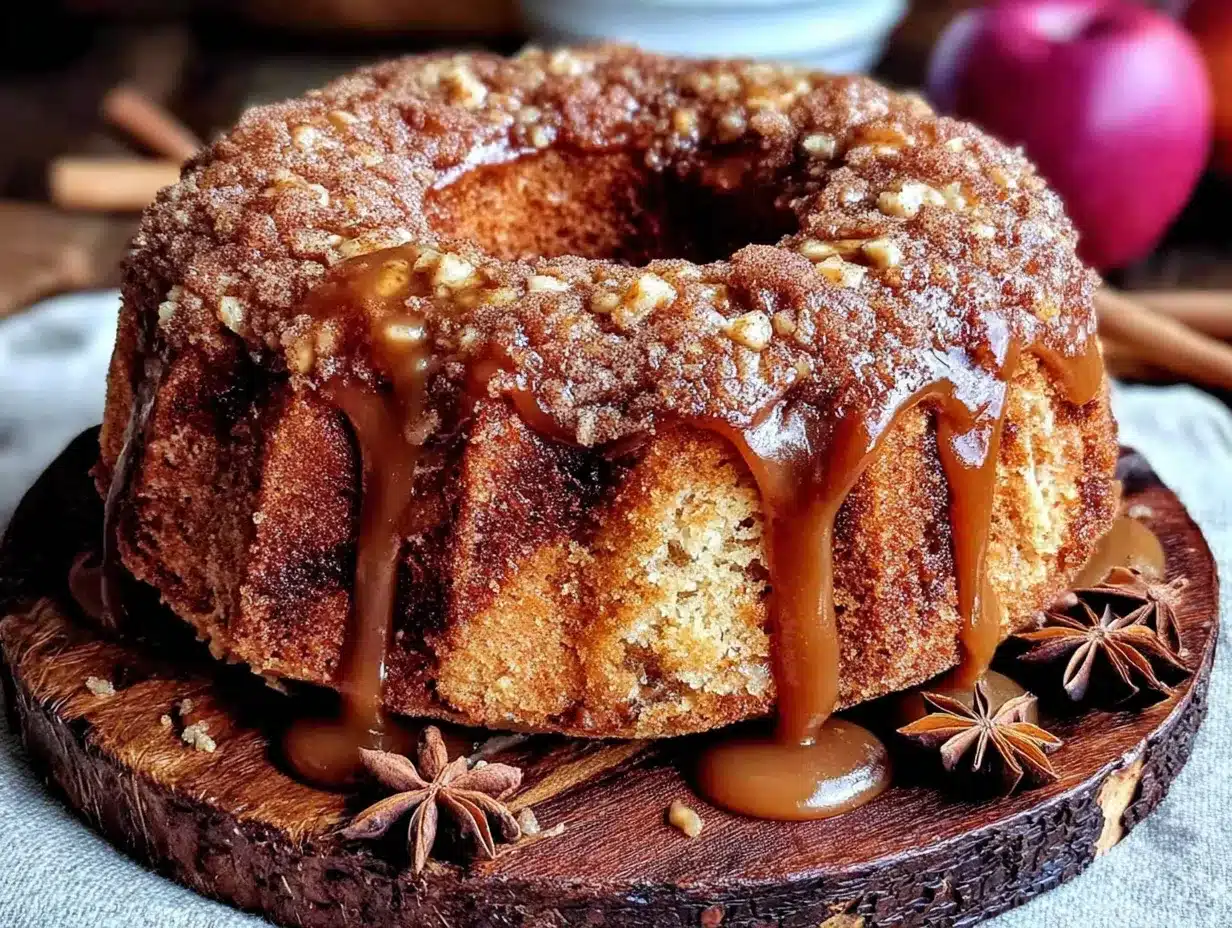
- ¼ cup unsalted butter (melted)
- ½ cup granulated sugar
- 1 ½ teaspoons ground cinnamon
A quick note on the apple cider: don’t substitute apple juice here. Cider has that tangy, slightly fermented depth that makes donut shops famous. If you can find fresh-pressed cider from a local orchard, even better. The flavor concentrates beautifully when you reduce it, and that’s where the magic happens.
For the buttermilk, I honestly just use the milk-and-lemon-juice trick most of the time. It works perfectly and saves me a trip to the store. If you have real buttermilk on hand, though, use it—the extra tang complements the cider beautifully.
One more thing: the brown sugar should be packed firmly into your measuring cup. I learned this the hard way after a few flat-tasting batches. That molasses richness is key to the warm, cozy flavor profile.
Equipment Needed
You don’t need a bakery’s worth of equipment for this cake, which is part of why I love it. Here’s what you’ll need:
- 10-cup bundt pan — The standard size for this recipe. If yours is smaller, fill it only two-thirds full and bake the extra batter as cupcakes (about 15 minutes).
- Small saucepan — For reducing the apple cider. A 1-quart size works perfectly.
- Large mixing bowl — For dry ingredients
- Medium mixing bowl — For wet ingredients
- Hand mixer or stand mixer — A hand mixer works fine; I’ve made this with both. A whisk and some elbow grease also works if you’re feeling ambitious.
- Wire cooling rack — Essential for even cooling and that perfect coating application
- Pastry brush — For brushing the melted butter onto the warm cake. A silicone one is easiest to clean.
- Non-stick baking spray with flour — Trust me on this one. Regular cooking spray can leave stubborn spots. The kind with flour built in is worth every penny.
If you don’t have a pastry brush, you can drizzle the melted butter over the cake with a spoon. It’s not as elegant, but it works. And if your bundt pan is dark-colored, reduce the oven temperature by 25 degrees to prevent over-browning on the outside before the inside is done.
Preparation Method
Let me walk you through this step by step. I’ve organized it so you can work efficiently without feeling rushed.
- Reduce the apple cider (about 15 minutes): Pour the 1 cup of apple cider into a small saucepan and bring it to a simmer over medium heat. Let it bubble gently until it reduces down to about ¼ cup. This usually takes 12-15 minutes. You’re looking for a syrupy consistency that coats the back of a spoon. Watch it carefully toward the end—it can go from perfect to burnt in about 30 seconds. Set it aside to cool while you prep everything else.
- Preheat and prep the pan: Preheat your oven to 350°F (175°C). Generously spray your bundt pan with non-stick baking spray that contains flour. Get into every nook and cranny of those decorative ridges—I use a small pastry brush to spread the spray into the grooves. This step is non-negotiable if you want that beautiful, intact cake.
- Mix the dry ingredients: In a large bowl, whisk together the 2 ½ cups flour, 1 ½ teaspoons baking powder, ½ teaspoon baking soda, 1 teaspoon cinnamon, ½ teaspoon nutmeg, ¼ teaspoon cloves, and ½ teaspoon salt. Whisk for about 20 seconds to aerate everything evenly.
- Cream the butter and sugars: In a separate large bowl (or your stand mixer bowl), beat the ½ cup softened butter with 1 cup granulated sugar and ½ cup packed brown sugar until light and fluffy, about 3 minutes. You’ll see the mixture turn pale and increase in volume. Scrape down the sides halfway through.
- Add the eggs and vanilla: Add the 2 eggs one at a time, beating well after each addition. Then mix in the 1 teaspoon vanilla extract and the cooled cider reduction. The batter might look a little curdled at this point—that’s totally normal, don’t panic.
- Alternate adding dry ingredients and buttermilk: With the mixer on low speed, add about one-third of the flour mixture, then half of the buttermilk, mixing just until combined. Repeat with another third of flour, the remaining buttermilk, and finish with the last of the flour. Stop mixing as soon as you can’t see any more dry streaks. Over-mixing will make the cake tough, and nobody wants that.
- Fill the pan and bake: Pour the batter into your prepared bundt pan and spread it evenly with a spatula. Give the pan a gentle tap on the counter to release any air bubbles. Bake for 45-55 minutes, or until a wooden skewer inserted near the center comes out clean or with just a few moist crumbs. The top should be golden brown and spring back when lightly touched.
- Cool in the pan: Let the cake cool in the pan on a wire rack for exactly 15 minutes. Set a timer—I’ve forgotten before and ended up with half the cake stuck to the pan. After 15 minutes, place a cooling rack on top of the pan and carefully invert it. Lift the pan off slowly. If any pieces stick, let it cool another 5 minutes and try again.
- Apply the coating while warm: While the cake is still warm (but not hot), use your pastry brush to coat the entire surface with the ¼ cup melted butter. Mix the ½ cup sugar and 1 ½ teaspoons cinnamon in a shallow bowl, then generously sprinkle it over the buttered cake. I use my hands for this—it’s messy but effective. The sugar will stick to the butter and create that signature donut crust.
- Cool completely before serving: Let the coated cake cool completely on the rack. The coating will set into a beautiful, crackly shell. Slice and serve at room temperature for the best texture.
Cooking Tips & Techniques
After making this cake more times than I care to count, I’ve collected a few tips that make a real difference.
Watch the cider reduction like a hawk. I burned my first batch because I walked away to answer a text. The difference between perfect syrup and burnt sugar is about 45 seconds. When you see the bubbles get smaller and the liquid starts looking thicker, swirl the pan and watch closely. It should coat the back of a spoon but still flow freely.
Room temperature ingredients matter here. I know, I know—every recipe says this, and sometimes you just want to bake. But cold butter won’t cream properly with the sugar, and cold eggs can seize up the batter. If you forgot to set things out, place the eggs in a bowl of warm water for 5 minutes and microwave the buttermilk for 15 seconds. The butter needs actual time to soften, though—no shortcuts there.
Don’t overmix the batter. This is the most common mistake I see in bundt cakes. Mix until the flour just disappears, then stop. A few small lumps are perfectly fine. Overmixing develops gluten and creates a dense, tough cake instead of that tender, tender crumb we’re after.
The cooling time is critical. I ruined my first bundt cake by trying to flip it too early. The cake needs those 15 minutes to firm up enough to hold its shape. But if you wait too long (more than 20 minutes), the steam condenses and makes the cake stick. Set that timer and stick to it.
For the prettiest presentation, apply the cinnamon sugar in two layers. Brush butter, sprinkle sugar, then brush a tiny bit more butter and add another light dusting. It creates a thicker, more satisfying crust that looks like a professional bakery made it.
Variations & Adaptations
This recipe is wonderfully flexible, and I’ve played around with several versions over the years.
Gluten-Free Version: Substitute the all-purpose flour with a good 1:1 gluten-free baking blend that contains xanthan gum. I’ve had great results with King Arthur’s Measure for Measure. Add an extra tablespoon of buttermilk to compensate for the drier texture of gluten-free flours. The crumb will be slightly more delicate, so handle the cake gently when coating.
Dairy-Free Adaptation: Use vegan butter sticks (not tub margarine) and substitute the buttermilk with ½ cup unsweetened almond milk mixed with 1 ½ teaspoons apple cider vinegar. The vinegar actually enhances the apple flavor—it’s a happy accident I discovered when I ran out of buttermilk. The cake will be slightly less tender but still delicious.
Spiced Apple Cake Variation: Fold 1 cup of finely diced fresh apple (Honeycrisp or Granny Smith work well) into the batter just before pouring it into the pan. Toss the diced apples in a tablespoon of flour first to prevent them from sinking to the bottom. This adds little pockets of tender fruit throughout the cake and makes it even more autumnal.
Maple Glaze Version: Skip the cinnamon sugar coating and drizzle the cooled cake with a maple glaze instead. Whisk together 1 cup powdered sugar, 2 tablespoons maple syrup, and 1 tablespoon milk until smooth. Pour over the cake and let it set for 10 minutes. The maple flavor pairs beautifully with the apple cider and spices.
Mini Bundt or Cupcake Option: Divide the batter among mini bundt pans or a 12-cup muffin tin. Bake mini bundts for 20-25 minutes and cupcakes for 15-18 minutes. The coating technique stays the same, but you’ll have individual servings that are perfect for sharing.
Serving & Storage Suggestions
This cake is at its absolute best served at room temperature on the day it’s made. The cinnamon sugar coating stays crisp, and the interior is perfectly tender. I love serving it with a hot cup of spiced chai or a steaming mug of mulled cider for the full autumn experience.
For a truly indulgent dessert, warm a slice in the microwave for 15 seconds and top it with a scoop of vanilla bean ice cream or a dollop of lightly sweetened whipped cream. The warm cake against the cold cream is pure comfort food magic. I’ve also served it with a drizzle of warm caramel sauce for special occasions, and it disappears in minutes.
Storage: Keep the cake in an airtight container at room temperature for up to 3 days. The cinnamon sugar coating will soften slightly over time, but the cake itself stays moist and flavorful. If your kitchen runs warm, store it in the refrigerator and bring slices to room temperature before serving.
Freezing: This cake freezes beautifully. Wrap the completely cooled, uncoated cake tightly in plastic wrap, then in a layer of aluminum foil. Freeze for up to 3 months. When you’re ready to serve, thaw it overnight in the refrigerator, then warm it in a 300°F oven for 10 minutes. Apply the butter and cinnamon sugar coating while the cake is still warm for that fresh-from-the-oven experience.
Flavor development note: The spices actually deepen and mellow after a day or two. Some people prefer the cake on day two for this reason. The cider flavor becomes more pronounced, and the spices feel more integrated. It’s a lovely surprise if you can resist eating it all on day one.
Nutritional Information & Benefits
Here’s the approximate nutritional breakdown per slice (based on 12 servings):
| Nutrient | Amount per Slice |
|---|---|
| Calories | 385 |
| Total Fat | 16g |
| Saturated Fat | 10g |
| Cholesterol | 68mg |
| Sodium | 285mg |
| Total Carbohydrates | 57g |
| Dietary Fiber | 1g |
| Sugars | 38g |
| Protein | 4g |
This is definitely a treat rather than an everyday snack, but it does offer a few bright spots. The apple cider provides a small amount of vitamin C and antioxidants. The cinnamon has anti-inflammatory properties and can help regulate blood sugar levels when paired with carbohydrates. Using buttermilk adds a bit of calcium and probiotics, especially if you use cultured buttermilk.
If you’re watching your sugar intake, you can reduce the granulated sugar to ¾ cup and the brown sugar to ⅓ cup without significantly affecting the texture. The cake will be slightly less sweet, but the cider reduction and spice flavors will shine through even more.
This recipe contains gluten, dairy, and eggs, so it’s not suitable for those with allergies to those ingredients without the substitutions mentioned in the variations section.
Conclusion
This Cozy Apple Cider Donut Bundt Cake is the kind of recipe that becomes a tradition. It captures everything we love about fall—the warm spices, the orchard flavors, the feeling of wrapping your hands around something warm and sweet—in a cake that’s surprisingly easy to make. No deep frying, no complicated techniques, just honest, delicious baking that fills your kitchen with the best kind of aroma.
I love this recipe because it reminds me that the best desserts don’t have to be fussy. They just have to taste like home. Whether you’re making it for a Thanksgiving gathering, a cozy Sunday afternoon, or just because you deserve something wonderful, this cake delivers every single time. Don’t be afraid to make it your own—tweak the spices, try the glaze, add some diced apple. The base is forgiving and the results are always rewarding.
I’d love to hear how yours turns out! Leave a comment below and let me know if you tried any variations, or tag me in your photos on social media. Happy baking, and here’s to a season full of warm, spiced, unforgettable treats.
Frequently Asked Questions
Can I use apple juice instead of apple cider?
You can, but the flavor won’t be as deep or tangy. Apple juice is sweeter and lacks that slightly fermented complexity that makes cider donuts so distinctive. If you only have juice, reduce it the same way and add a pinch of citric acid or a teaspoon of lemon juice to brighten the flavor.
Why did my bundt cake stick to the pan?
This usually happens for one of two reasons: either the pan wasn’t greased thoroughly enough, or the cake didn’t cool long enough before flipping. Make sure you use a baking spray that contains flour, and get it into every groove of the pan. And don’t skip that 15-minute cooling time—it’s essential for the cake to firm up.
Can I make this cake ahead of time?
Absolutely. Bake the cake a day ahead, wrap it tightly in plastic wrap once completely cool, and store it at room temperature. Apply the butter and cinnamon sugar coating on the day you plan to serve it for the best texture. The coating stays crisp for about 6-8 hours after application.
How do I know when the apple cider is reduced enough?
Look for it to coat the back of a spoon and measure about ¼ cup. It should be syrupy but still pourable, not thick like honey. When you tilt the pan, it should move slowly but steadily. If it starts looking dark and smelling caramelized, you’ve gone a bit too far—but it’s still usable if it hasn’t burned.
Can I double this recipe for a larger crowd?
Yes, but bake it in two separate bundt pans rather than one giant pan. The baking time will stay about the same. If you only have one pan, bake the cakes in batches, storing the extra batter at room temperature while the first one bakes. Don’t refrigerate the batter—the butter will solidify and affect the texture.
Pin This Recipe!
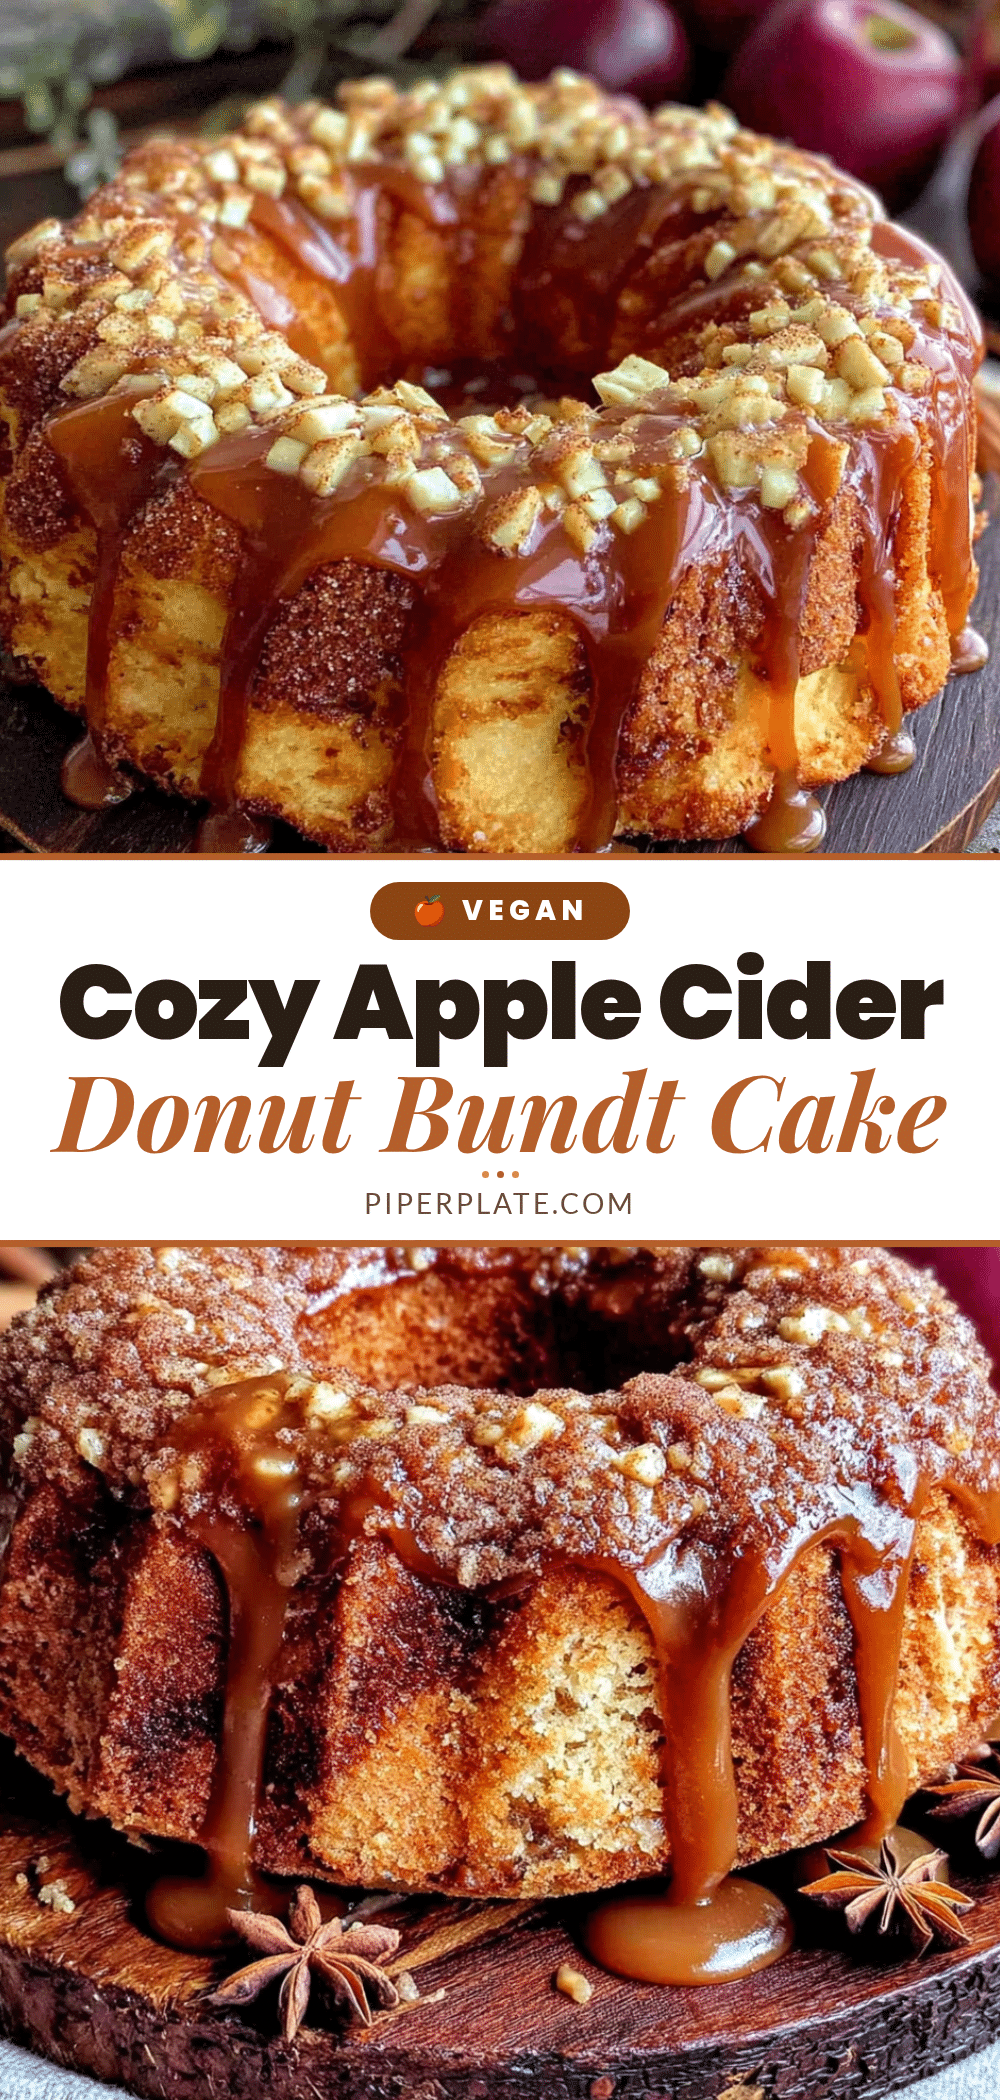
Cozy Apple Cider Donut Bundt Cake: Easy Homemade Recipe
This Cozy Apple Cider Donut Bundt Cake captures the nostalgic flavor of apple cider donuts without the deep frying. The secret is reducing apple cider to a concentrated syrup, creating a tender, buttery cake with a cinnamon-sugar crust that’s perfect for fall gatherings.
- Prep Time: 20 minutes
- Cook Time: 50 minutes
- Total Time: 1 hour 10 minutes
- Yield: 12 servings 1x
- Category: Dessert
- Cuisine: American
Ingredients
- 1 cup apple cider (unfiltered preferred)
- 2 ½ cups all-purpose flour (315 grams)
- 1 ½ teaspoons baking powder
- ½ teaspoon baking soda
- 1 teaspoon ground cinnamon
- ½ teaspoon ground nutmeg (freshly grated preferred)
- ¼ teaspoon ground cloves
- ½ teaspoon salt
- ½ cup unsalted butter (1 stick, softened)
- 1 cup granulated sugar (200 grams)
- ½ cup packed light brown sugar (100 grams)
- 2 large eggs (room temperature)
- 1 teaspoon vanilla extract
- ½ cup buttermilk (room temperature, or ½ cup milk mixed with 1 ½ teaspoons lemon juice)
- ¼ cup unsalted butter (melted, for coating)
- ½ cup granulated sugar (for coating)
- 1 ½ teaspoons ground cinnamon (for coating)
Instructions
- Reduce the apple cider: Pour 1 cup apple cider into a small saucepan and bring to a simmer over medium heat. Let it bubble gently until reduced to about ¼ cup, 12-15 minutes. Watch carefully toward the end to avoid burning. Set aside to cool.
- Preheat and prep the pan: Preheat oven to 350°F (175°C). Generously spray a 10-cup bundt pan with non-stick baking spray that contains flour, getting into all the grooves.
- Mix the dry ingredients: In a large bowl, whisk together 2 ½ cups flour, 1 ½ teaspoons baking powder, ½ teaspoon baking soda, 1 teaspoon cinnamon, ½ teaspoon nutmeg, ¼ teaspoon cloves, and ½ teaspoon salt. Whisk for about 20 seconds.
- Cream the butter and sugars: In a separate large bowl, beat ½ cup softened butter with 1 cup granulated sugar and ½ cup packed brown sugar until light and fluffy, about 3 minutes. Scrape down the sides halfway through.
- Add the eggs and vanilla: Add 2 eggs one at a time, beating well after each addition. Mix in 1 teaspoon vanilla extract and the cooled cider reduction. The batter may look curdled; that’s normal.
- Alternate adding dry ingredients and buttermilk: With mixer on low, add about one-third of the flour mixture, then half of the buttermilk, mixing just until combined. Repeat with another third of flour, the remaining buttermilk, and finish with the last of the flour. Stop mixing as soon as no dry streaks remain.
- Fill the pan and bake: Pour batter into prepared bundt pan and spread evenly. Tap the pan gently on the counter to release air bubbles. Bake for 45-55 minutes, until a wooden skewer inserted near the center comes out clean or with a few moist crumbs. The top should be golden and spring back when touched.
- Cool in the pan: Let cake cool in the pan on a wire rack for exactly 15 minutes. After 15 minutes, place a cooling rack on top and carefully invert. Lift the pan off slowly. If any pieces stick, let it cool another 5 minutes and try again.
- Apply the coating while warm: While the cake is still warm (but not hot), brush the entire surface with ¼ cup melted butter. Mix ½ cup sugar and 1 ½ teaspoons cinnamon in a shallow bowl, then generously sprinkle over the buttered cake. Use your hands for best coverage.
- Cool completely before serving: Let the coated cake cool completely on the rack. The coating will set into a crackly shell. Slice and serve at room temperature.
Notes
Watch the cider reduction carefully; it can burn quickly. Room temperature ingredients are important for proper creaming and batter consistency. Do not overmix the batter. The 15-minute cooling time in the pan is critical for easy release. For a thicker crust, apply the cinnamon sugar in two layers: brush butter, sprinkle sugar, then brush a tiny bit more butter and add another light dusting. The cake can be made ahead and coated on the day of serving. Freezes well for up to 3 months (uncoated).
Nutrition
- Serving Size: 1 slice
- Calories: 385
- Sugar: 38
- Sodium: 285
- Fat: 16
- Saturated Fat: 10
- Carbohydrates: 57
- Fiber: 1
- Protein: 4
Keywords: apple cider donut bundt cake, fall bundt cake, apple cider cake, cinnamon sugar bundt cake, easy bundt cake recipe


