Love this? Save it for later!
Share the inspiration with your friends
My neighbor Sarah wasn’t trying to impress anyone. I’d stopped by to borrow a ladder—our gutters were clogged and the forecast called for rain—and the smell hit me before I even reached her front door. Cinnamon, butter, something warm and almost caramel-like mixing with the crisp October air. She opened the door holding a spatula, flour on her sleeve, and said, “Oh, you’re saving me. Taste this and tell me if it needs more nutmeg.”
She handed me a cookie that looked like a regular snickerdoodle—crackled, sugared, unassuming. But the first bite stopped me mid-sentence. It was soft, almost pillowy, with this gentle warmth that spread through my whole mouth. And there was something else underneath the cinnamon. Something earthy and sweet that I couldn’t quite place. “Is that…?” I started, and she just grinned. “Pumpkin. Canned pumpkin. Don’t tell anyone.”
I stood there in her doorway, eating a second cookie before I’d even finished the first, while she told me how she’d been messing around with the recipe for weeks. She’d wanted a fall cookie that felt familiar but different—something that didn’t scream “pumpkin spice latte” but still tasted like the season. Honestly, I forgot about the ladder entirely. I went home with a paper towel full of cookies and a new obsession.
That afternoon, I made my own batch. And then another. I tweaked the spice ratio, tested different pumpkin purées, and figured out the trick to keeping them soft instead of cakey. These cozy pumpkin snickerdoodle cookies with cinnamon sugar are the result—and let me tell you, they’re the kind of cookie you keep reaching for long after you swore you’d have just one. Maybe you’ve been there, standing in your own kitchen at 10 p.m., telling yourself one more won’t hurt. Trust me, it won’t.
Why You’ll Love This Recipe
I’ve tested this recipe more times than I care to admit. Like, six batches in one weekend kind of testing. My kitchen looked like a flour bomb went off, and my family started hiding from me when they saw the mixer come out. But you know what? Every single tweak was worth it because these cookies are genuinely something special. Here’s why they’ll become your go-to fall bake:
- Perfectly Soft Texture: Unlike some pumpkin cookies that turn out dense or gummy, these have a tender, almost cloud-like crumb. The secret is blotting the pumpkin purée to remove excess moisture—a trick I learned after my first disastrous batch turned into flat, soggy discs.
- Real Pumpkin Flavor, Not Just Spice: So many “pumpkin” recipes just taste like cinnamon and nutmeg with orange food coloring. These actually taste like pumpkin—warm, earthy, and subtly sweet—with the cinnamon sugar coating adding that classic snickerdoodle tang.
- Simple Pantry Ingredients: No weird additives or specialty flours. You probably have everything except maybe the pumpkin, and that’s a dollar-fifty can at any grocery store. I use Libby’s because it’s consistently thick and not watery.
- Perfect for Fall Gatherings: Whether it’s a Halloween party, Thanksgiving dessert table, or just a cozy Sunday afternoon, these cookies fit right in. They’re not fussy or fancy—just honest, homemade goodness that people actually get excited about.
- Crowd-Pleaser Guaranteed: I brought a batch to my book club last month, and three people asked for the recipe before we even discussed chapter five. Kids love them, adults love them, even my neighbor who “doesn’t really do pumpkin” ate four.
What makes this recipe different from the dozens of pumpkin snickerdoodle recipes out there? It’s the technique. Blotting the pumpkin, chilling the dough long enough, and using cream of tartar for that signature tang. It’s not rocket science—it’s just paying attention to the details that turn a good cookie into a great one. And honestly? The first time you pull a tray out of the oven and see those crackled tops dusted with cinnamon sugar, you’ll understand why I wouldn’t shut up about them.
What Ingredients You Will Need
This recipe uses simple, wholesome ingredients that work together to create that perfect balance of soft pumpkin interior and crunchy cinnamon-sugar exterior. Most of these are pantry staples, which means you can whip up a batch whenever the fall baking urge strikes—and trust me, it will strike.
For the Cookie Dough
- 1 cup (226g) unsalted butter, softened — I prefer Land O’Lakes for consistent results. Make sure it’s truly soft, not melted. You want it to give slightly when you press it, but still hold its shape.
- 1 cup (200g) granulated sugar — Regular white sugar works perfectly. The sugar helps create that slight crackle on top as the cookies bake.
- 1/2 cup (100g) packed light brown sugar — Adds moisture and a hint of molasses flavor that complements the pumpkin. Dark brown sugar works too if that’s what you have.
- 1/2 cup (122g) pumpkin purée — Not pumpkin pie filling! Make sure you grab the 100% pure pumpkin. I use Libby’s because it’s consistently thick. If your purée looks watery, blot it with paper towels before adding (more on that below).
- 1 large egg, room temperature — Cold egg will seize up your butter mixture. Leave it on the counter for 30 minutes, or float it in warm water for 5 minutes.
- 1 teaspoon vanilla extract — Pure vanilla, not imitation. It makes a difference in depth of flavor.
- 2 1/2 cups (312g) all-purpose flour — Spoon and level your flour. Scooping directly from the bag packs in too much and makes dry cookies.
- 1 teaspoon cream of tartar — This is the secret ingredient that gives snickerdoodles their signature tang. Don’t skip it! If you don’t have it, you can substitute 2 teaspoons of lemon juice or white vinegar, but the texture won’t be quite the same.
- 1/2 teaspoon baking soda — Helps the cookies spread just enough without turning into pancakes.
- 1/2 teaspoon salt — Fine sea salt or table salt. It balances the sweetness and enhances the pumpkin flavor.
- 1 1/2 teaspoons ground cinnamon — The backbone of the spice blend. I use McCormick, but any brand works.
- 1/2 teaspoon ground nutmeg — Freshly grated if you have it, but pre-ground is fine. It adds that warm, nutty undertone.
- 1/4 teaspoon ground ginger — Optional, but I love the little kick it adds. It makes the pumpkin flavor pop.
- 1/4 teaspoon ground cloves — Just a pinch. Cloves are potent, so go easy.
For the Cinnamon Sugar Coating
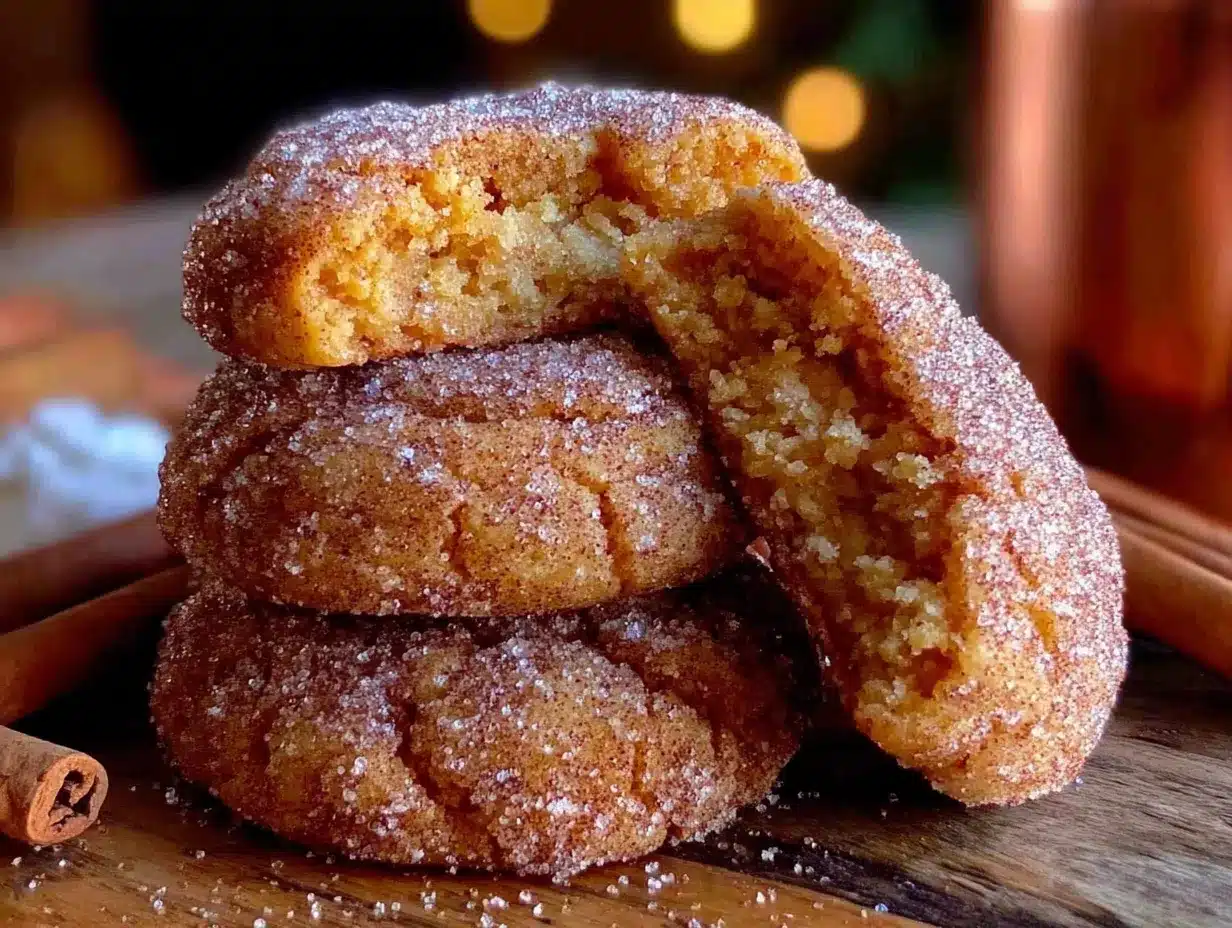
- 1/4 cup (50g) granulated sugar — The base of the coating.
- 2 tablespoons ground cinnamon — Yes, this seems like a lot, but it creates that beautiful, fragrant crust. I’ve tried less, and the cookies just don’t have the same wow factor.
Equipment Needed
You don’t need a fancy bakery setup for these cookies. Here’s what I use, plus a few alternatives if you’re working with a minimal kitchen. I’ve learned the hard way that the right tools make baking less stressful—and cleanup way faster.
- Stand mixer or hand mixer — I use my KitchenAid for the creaming step because it’s hands-free, but a hand mixer works perfectly. You could even do it by hand with a wooden spoon if you’re feeling strong and patient.
- Large mixing bowls — One for wet ingredients, one for dry. I like glass bowls because they don’t retain odors.
- Measuring cups and spoons — For accuracy. I’ve learned that eyeballing baking ingredients leads to sad cookies.
- Kitchen scale (optional but recommended) — Weighing your flour and sugar gives consistent results every time. My $15 scale from Amazon has paid for itself in not-wasted ingredients.
- Rubber spatula — For scraping down the bowl and folding in the flour mixture without overmixing.
- Baking sheets — I use Nordic Ware aluminum sheets because they heat evenly. Dark nonstick sheets can cause the bottoms to brown too fast.
- Parchment paper or silicone baking mats — Parchment is cheaper and disposable; silicone mats are reusable and eco-friendly. Both prevent sticking and promote even browning.
- Cookie scoop (1.5 tablespoon size) — For uniform cookies that bake evenly. A #40 scoop is perfect. If you don’t have one, use two spoons.
- Cooling rack — Essential for letting the cookies cool without steaming and getting soggy on the bottom.
- Small bowl for cinnamon sugar coating — Something wide enough to roll the dough balls in easily.
- Plastic wrap — For chilling the dough. Trust me, don’t skip this step.
Preparation Method
Alright, let’s get baking. I’ve broken this down into clear steps with all the little notes I wish someone had told me the first time I made these. Take your time—good cookies are worth the extra few minutes.
- Blot the pumpkin purée. This is the most important step, and I learned it the hard way. Spread your 1/2 cup of pumpkin purée onto a plate lined with a few layers of paper towels. Place another paper towel on top and press gently to absorb excess moisture. Let it sit for 5 minutes while you gather your other ingredients. If you skip this, your cookies will spread too much and turn out flat and gummy. Trust me on this—I’ve made that mistake three times before I learned.
- Preheat your oven to 350°F (175°C). Line two baking sheets with parchment paper or silicone mats. I like to prep both sheets so I can bake two trays at once, rotating them halfway through.
- Cream the butter and sugars. In a large mixing bowl (or the bowl of your stand mixer), beat the softened butter, granulated sugar, and brown sugar together on medium speed for 2-3 minutes until light and fluffy. It should look pale and almost doubled in volume. Scrape down the sides and bottom of the bowl with your spatula at least once. This step creates air pockets that give the cookies their tender texture.
- Add the wet ingredients. Beat in the blotted pumpkin purée, egg, and vanilla extract on medium speed until fully combined. The mixture might look slightly curdled or separated—that’s totally normal. Don’t panic. It’ll come together when you add the dry ingredients.
- Whisk the dry ingredients. In a separate medium bowl, whisk together the flour, cream of tartar, baking soda, salt, cinnamon, nutmeg, ginger, and cloves. Whisking ensures everything is evenly distributed. If you just dump them in, you might get a pocket of baking soda in one cookie—and nobody wants that.
- Combine wet and dry. Gradually add the dry ingredients to the wet mixture, mixing on low speed (or folding with a spatula) just until no streaks of flour remain. Stop as soon as it comes together. Overmixing develops gluten and makes tough cookies. A few streaks of flour are better than overmixed dough.
- Chill the dough. This is non-negotiable. Cover the bowl with plastic wrap and refrigerate for at least 30 minutes, or up to 3 days. Chilling firms up the butter, which prevents the cookies from spreading too much in the oven. It also allows the flavors to meld and deepen. I’ve baked them after 15 minutes of chilling, and they spread into sad, flat disks. Give it the full 30 minutes.
- Make the cinnamon sugar coating. In a small, shallow bowl, whisk together the 1/4 cup granulated sugar and 2 tablespoons cinnamon. Set aside.
- Shape and coat the cookies. Using a 1.5-tablespoon cookie scoop (or two spoons), scoop portions of the chilled dough. Roll each portion into a smooth ball between your palms. The dough will be slightly sticky—that’s fine. Roll each ball generously in the cinnamon sugar mixture, pressing gently so it adheres. Place the coated balls on the prepared baking sheets, spacing them about 2 inches apart. They will spread, so give them room.
- Bake. Bake one sheet at a time (or two if your oven has convection) for 10-12 minutes. The cookies should look puffed, slightly cracked on top, and set around the edges but still soft in the center. A toothpick inserted in the center should come out with a few moist crumbs, not wet batter. I start checking at 10 minutes because ovens vary wildly. My old oven took 13 minutes; my current one is done at 11.
- Cool on the baking sheet. Let the cookies rest on the baking sheet for 5 minutes. They will continue to set as they cool. This step is crucial—if you try to move them immediately, they’ll fall apart. After 5 minutes, transfer them to a wire cooling rack to cool completely. The tops will develop beautiful crackles as they cool.
- Repeat with remaining dough. Let your baking sheets cool completely between batches, or use a second set of sheets. Placing dough on a hot sheet will cause premature spreading.
Cooking Tips & Techniques
I’ve made more batches of these cookies than I can count, and I’ve collected a few tricks that make the process smoother and the results more consistent. Some of these I learned from recipe testing, others from happy accidents in my own kitchen.
Blotting isn’t optional. I know I’ve said this already, but it bears repeating. Canned pumpkin holds a surprising amount of water. If you don’t blot it, that extra moisture turns your dough into a sticky mess and your cookies into flat, gummy discs. I use three layers of paper towels and press firmly. You’ll be shocked at how much liquid comes out.
Use room temperature ingredients. Cold butter won’t cream properly, and a cold egg can seize up your batter. Set everything out 30-45 minutes before you start. If you forgot, cut the butter into small cubes and let it sit for 15 minutes, and float the egg in warm water for 5 minutes.
Don’t overbake. This is the number one mistake I see in cookie recipes. These cookies look underdone when you pull them out—puffy, soft, barely golden around the edges. That’s exactly what you want. They continue baking on the hot sheet for those 5 minutes of resting time. Overbaked snickerdoodles are dry and crumbly. Underbaked ones are soft and perfect.
Chill between batches. If you’re baking multiple trays, keep the remaining dough in the refrigerator. Warm dough spreads more. I learned this the hard way when my third batch turned into cookie pancakes because the dough had been sitting on the counter for an hour.
Double the coating. I like to make extra cinnamon sugar and roll the cookies twice—once right after shaping, then again just before baking. It creates a thicker, crunchier crust that contrasts beautifully with the soft interior. It’s a small extra step that makes a big difference.
Freeze the dough balls. These freeze beautifully. Scoop and roll the dough balls, coat them in cinnamon sugar, then freeze them on a baking sheet until solid. Transfer to a freezer bag. When you’re ready to bake, place frozen dough balls on a lined sheet and add 2-3 minutes to the baking time. Fresh cookies whenever you want them!
Variations & Adaptations
One of the things I love about this recipe is how adaptable it is. I’ve tried several variations over the past few months, and here are my favorites. Feel free to experiment and make them your own.
Gluten-Free Version: Substitute the all-purpose flour with a 1:1 gluten-free baking flour blend. I’ve had great results with King Arthur Measure for Measure. Add 1/4 teaspoon xanthan gum if your blend doesn’t include it. The texture will be slightly more delicate, but still delicious. Let the dough chill for a full hour to help the gluten-free flour hydrate properly.
Vegan Version: Replace the butter with vegan butter (I like Earth Balance buttery sticks) and the egg with a flax egg (1 tablespoon ground flaxseed mixed with 3 tablespoons water, let sit for 5 minutes). Use a flax egg instead of a chia egg—chia adds little seeds that change the texture. The cookies will be slightly less tender but still very good.
Spice It Up: If you love a bold spice profile, add 1/4 teaspoon cardamom and a pinch of black pepper to the flour mixture. The pepper doesn’t make it spicy—it just enhances the warmth of the other spices. I tried this on a whim and now it’s my go-to version.
Chocolate Drizzle: Melt 1/2 cup semi-sweet chocolate chips with 1 teaspoon coconut oil and drizzle over the cooled cookies. The chocolate and pumpkin-cinnamon combo is surprisingly good. I did this for a holiday cookie exchange, and they disappeared first.
Pumpkin Seed Crunch: Before baking, press a few raw pumpkin seeds (pepitas) into the top of each coated dough ball. It adds a nice crunch and makes them look extra pretty. Toast the seeds first for more flavor.
Maple Glaze: Whisk together 1 cup powdered sugar, 2 tablespoons maple syrup, and 1-2 tablespoons milk until smooth. Drizzle over cooled cookies. It’s over-the-top in the best way possible.
Serving & Storage Suggestions
These cookies are wonderful at room temperature, but I actually prefer them slightly warm—the centers are extra soft, and the cinnamon sugar coating is still a little crunchy. If you’re serving them at a gathering, pop them in a 300°F oven for 3-4 minutes just before serving to revive that fresh-baked feel.
How to Serve: Arrange them on a rustic wooden board or a simple white platter. They look beautiful next to a cup of hot apple cider or a chai latte. For a dessert spread, pair them with vanilla ice cream or a dollop of whipped cream. I’ve also crumbled them over vanilla yogurt for a quick fall breakfast—no judgment here.
Storage: Store cooled cookies in an airtight container at room temperature for up to 5 days. Place a slice of plain bread in the container—it absorbs excess moisture and keeps the cookies soft. Replace the bread every other day. I learned this trick from my grandmother, and it works like magic.
Freezing Baked Cookies: Freeze cooled cookies in a single layer on a baking sheet, then transfer to a freezer-safe bag or container. They’ll keep for up to 3 months. Thaw at room temperature for about 20 minutes, or warm in a 300°F oven for 5 minutes.
Freezing Dough: As I mentioned above, freeze the shaped, coated dough balls. Bake from frozen, adding 2-3 minutes to the baking time. This is my favorite way to have fresh cookies on demand—I always keep a bag in the freezer for unexpected guests or late-night cravings.
Flavor Development: Here’s something interesting—these cookies actually taste better the day after baking. The spices meld and mellow overnight, and the texture becomes even more tender. So don’t feel like you have to serve them immediately. Make them a day ahead and thank me later.
Nutritional Information & Benefits
Let’s be real—these are cookies, not health food. But they do have a few redeeming qualities, mostly thanks to the pumpkin. Here’s a rough estimate per cookie (based on 24 cookies):
- Calories: Approximately 165 per cookie
- Total Fat: 8g
- Saturated Fat: 5g
- Carbohydrates: 22g
- Sugar: 13g
- Fiber: 1g
- Protein: 2g
- Vitamin A: 35% of the Daily Value (from the pumpkin)
Pumpkin is packed with vitamin A (mostly beta-carotene), which supports eye health and immune function. It also provides fiber and potassium. So while I wouldn’t call these a health food, they’re certainly not the worst thing you could bake. And honestly? Sometimes the mental health benefits of a warm, homemade cookie are worth more than any nutritional stat.
Dietary Considerations: These cookies contain dairy (butter) and gluten (wheat flour). They can be made vegan and gluten-free with the substitutions listed above. They are nut-free as written, but check your specific ingredients if allergies are a concern.
Conclusion
These cozy pumpkin snickerdoodle cookies with cinnamon sugar have become my official fall baking project. They’re the cookies I bring to every gathering, the ones I make when I need a little comfort, the ones that make my whole house smell like October. And honestly? They’re not complicated. They don’t require fancy techniques or hard-to-find ingredients. They just need a little patience—for the blotting, for the chilling, for the 5-minute rest on the baking sheet.
What I love most about this recipe is how it brings people together. That afternoon at Sarah’s house, standing in her doorway with a paper towel full of cookies, I felt that little spark of connection that only food can create. And now, every time I bake these, I think about her nonchalant grin and the way she said, “It’s just cookies.” But they’re not just cookies. They’re little rounds of fall joy, and I hope they bring you as much happiness as they’ve brought me.
I’d love to hear how yours turn out! Did you try any variations? Did your family fight over the last one? Leave a comment below and let me know. And if you’re looking for more cozy fall recipes, check out my pumpkin bread with brown butter glaze or these cinnamon spice blondies. Happy baking, friends!
Frequently Asked Questions
Can I use fresh pumpkin instead of canned?
You can, but you’ll need to cook and purée it first, then strain it through cheesecloth or a fine-mesh sieve to remove as much water as possible. Fresh pumpkin purée is usually more watery than canned, so you’ll need to blot it even more thoroughly. Honestly, I stick with canned for consistency. Libby’s is reliable and gives predictable results every time.
Why did my cookies turn out flat?
Flat cookies usually mean one of three things: the butter was too soft or melted, the dough wasn’t chilled long enough, or the pumpkin wasn’t blotted properly. Make sure your butter is softened but still cool to the touch, chill the dough for at least 30 minutes, and blot that pumpkin well. Also, check your baking soda—if it’s old, it won’t provide enough lift.
Can I reduce the sugar?
You can reduce the granulated sugar in the dough to 3/4 cup, but I wouldn’t go lower than that. Sugar isn’t just for sweetness—it affects the texture, moisture, and spread of the cookies. The cinnamon sugar coating is essential for the snickerdoodle experience, so I’d leave that as is. If you’re watching sugar, make a smaller batch and enjoy them as a treat.
How do I know when the cookies are done?
Look for puffed, slightly crackled tops with edges that are just barely golden. The centers should look soft and slightly underdone—they’ll continue setting as they cool. A toothpick inserted in the center should come out with a few moist crumbs, not wet batter. When in doubt, underbake rather than overbake. Dry snickerdoodles are sad snickerdoodles.
Can I make these cookies ahead of time?
Absolutely! You have two options: bake the cookies up to 2 days ahead and store them in an airtight container (they actually taste better the next day), or prepare the dough, shape it into balls, coat them in cinnamon sugar, and freeze them on a baking sheet. Once frozen solid, transfer to a freezer bag. Bake from frozen, adding 2-3 minutes to the baking time. Fresh cookies in 15 minutes—what’s not to love?
Pin This Recipe!
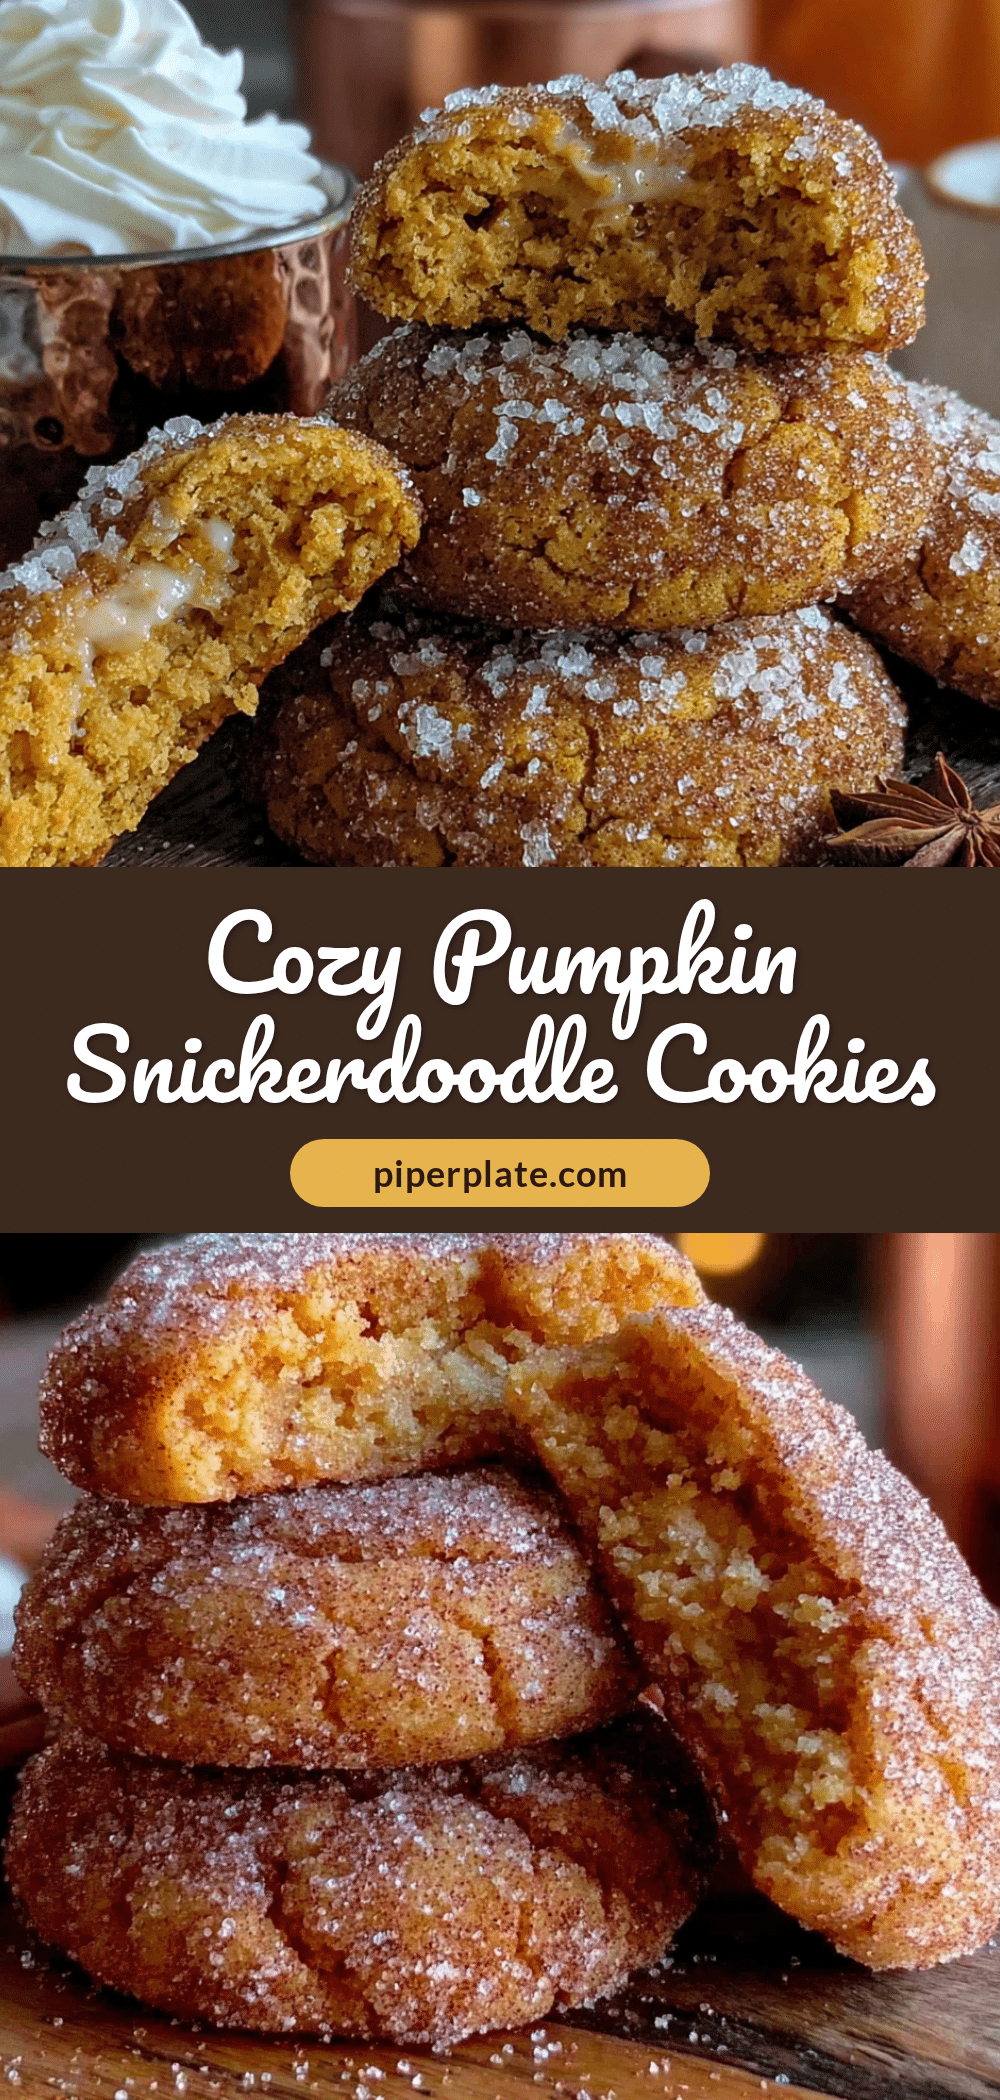
Cozy Pumpkin Snickerdoodle Cookies | Easy Cinnamon Sugar Recipe
These soft, pillowy pumpkin snickerdoodle cookies are coated in cinnamon sugar and packed with warm fall spices. The secret to their tender texture is blotting the pumpkin purée to remove excess moisture, resulting in a perfectly crackled, cloud-like crumb that tastes like autumn in every bite.
- Prep Time: 20 minutes
- Cook Time: 12 minutes
- Total Time: 1 hour 2 minutes (including chilling)
- Yield: 24 cookies 1x
- Category: Dessert
- Cuisine: American
Ingredients
- 1 cup (226g) unsalted butter, softened
- 1 cup (200g) granulated sugar
- 1/2 cup (100g) packed light brown sugar
- 1/2 cup (122g) pumpkin purée (not pumpkin pie filling)
- 1 large egg, room temperature
- 1 teaspoon vanilla extract
- 2 1/2 cups (312g) all-purpose flour
- 1 teaspoon cream of tartar
- 1/2 teaspoon baking soda
- 1/2 teaspoon salt
- 1 1/2 teaspoons ground cinnamon
- 1/2 teaspoon ground nutmeg
- 1/4 teaspoon ground ginger
- 1/4 teaspoon ground cloves
- 1/4 cup (50g) granulated sugar (for coating)
- 2 tablespoons ground cinnamon (for coating)
Instructions
- Blot the pumpkin purée: Spread 1/2 cup pumpkin purée onto a plate lined with paper towels. Place another paper towel on top and press gently to absorb excess moisture. Let sit for 5 minutes.
- Preheat oven to 350°F (175°C). Line two baking sheets with parchment paper or silicone mats.
- Cream the butter and sugars: In a large bowl, beat softened butter, granulated sugar, and brown sugar on medium speed for 2-3 minutes until light and fluffy. Scrape down the bowl.
- Add wet ingredients: Beat in blotted pumpkin purée, egg, and vanilla extract until fully combined. Mixture may look slightly curdled.
- Whisk dry ingredients: In a separate bowl, whisk together flour, cream of tartar, baking soda, salt, cinnamon, nutmeg, ginger, and cloves.
- Combine wet and dry: Gradually add dry ingredients to wet mixture, mixing on low speed just until no streaks of flour remain. Do not overmix.
- Chill the dough: Cover bowl with plastic wrap and refrigerate for at least 30 minutes, or up to 3 days.
- Make cinnamon sugar coating: In a small bowl, whisk together 1/4 cup granulated sugar and 2 tablespoons cinnamon.
- Shape and coat cookies: Using a 1.5-tablespoon cookie scoop, scoop portions of chilled dough and roll into smooth balls. Roll each ball generously in cinnamon sugar mixture. Place on prepared baking sheets, spacing 2 inches apart.
- Bake: Bake one sheet at a time for 10-12 minutes, until puffed, slightly cracked on top, and set around edges but still soft in center.
- Cool on baking sheet: Let cookies rest on baking sheet for 5 minutes, then transfer to a wire cooling rack to cool completely.
- Repeat with remaining dough, letting baking sheets cool between batches.
Notes
Blotting the pumpkin purée is crucial to prevent flat, gummy cookies. Chill the dough for at least 30 minutes to prevent spreading. For best results, use room temperature ingredients. Cookies taste even better the day after baking. To freeze, shape and coat dough balls, freeze on a baking sheet, then transfer to a freezer bag. Bake from frozen, adding 2-3 minutes to baking time.
Nutrition
- Serving Size: 1 cookie
- Calories: 165
- Sugar: 13
- Sodium: 95
- Fat: 8
- Saturated Fat: 5
- Carbohydrates: 22
- Fiber: 1
- Protein: 2
Keywords: pumpkin snickerdoodle cookies, pumpkin cookies, snickerdoodle recipe, fall cookies, cinnamon sugar cookies, pumpkin dessert, easy cookie recipe


