Love this? Save it for later!
Share the inspiration with your friends
Hand me that bowl. Those were the first words my neighbor, Mrs. Gable, said to me through her kitchen window. I was maybe twenty-three, fresh out of college, and absolutely terrible at baking. I had just moved into the tiny apartment next door, and the smell of something warm and sweet was drifting through the thin walls. It was the kind of smell that makes you stop what you are doing and just breathe in. I was standing on my fire escape, trying to untangle a string of cheap fairy lights, and I must have looked so pitiful that she took pity on me.
She didn’t hand me a full recipe card or a fancy cookbook. She just slid a warm cookie across the counter and said, “You look like you need this more than I do.” It was a small batch, barely six cookies on a chipped plate. That first bite was a revelation. It wasn’t too sweet. The edges were perfectly crisp, but the center was so soft it practically melted. I asked her for the recipe, and she just laughed. “There’s no recipe, honey. It’s just a feeling.” It took me years to translate that feeling into actual measurements, honestly. But that is the story of how these cozy small-batch chocolate chip cookies came to be in my kitchen.
I have made a lot of mistakes since then, let me tell you. I have forgotten the butter, over-mixed the dough until it was tough, and once, I even used baking soda instead of powder. It was a disaster. But through all those flops, I kept coming back to the memory of Mrs. Gable’s kitchen. It wasn’t about perfection. It was about the moment. Maybe you have been there—craving something warm, something homemade, but you don’t want a whole batch staring at you from the counter, tempting you for days. That is exactly why this recipe exists. It is for those quiet evenings when you just need one perfect cookie, or maybe four, and nothing else will do.
Why You’ll Love This Recipe
After years of testing and tweaking, I can honestly say this is the best small-batch cookie recipe I have ever made. It hits every single note you want from a classic chocolate chip cookie, but it is designed for one or two people. It is not a scaled-down version of a bigger recipe—it was born small. Here is why it has become a staple in my kitchen:
- Quick & Easy: From start to finish, you are looking at about 25 minutes. No chilling required, which is a game-changer for sudden cravings.
- Simple Ingredients: You probably have everything in your pantry right now. No trips to the store for specialty flours or fancy extracts.
- Perfect for a Cozy Night In: This is the recipe for a rainy Tuesday, a snowy afternoon, or a rough day that just needs a little sweetness.
- Crowd-Pleaser (for a Small Crowd): It makes exactly six generous cookies. Perfect for sharing with a partner or just hoarding for yourself.
- Unbelievably Delicious: The texture is the star here. Crispy edges, a soft and chewy center, and pools of melted chocolate in every bite.
What makes this different from every other cookie recipe out there? It is the technique. Most small-batch recipes just cut the ingredients in half and hope for the best. This one uses a slightly higher ratio of brown sugar to white sugar to keep the centers ultra-soft, and we use a melted butter technique that creates that perfect chew without needing to wait for the dough to chill. It is comfort food reimagined—faster, simpler, but with the same soul-soothing satisfaction that makes you close your eyes after the first bite. Whether you are impressing a date with a spontaneous dessert or just treating yourself, these cookies deliver every single time.
What Ingredients You Will Need
This recipe uses simple, wholesome ingredients to deliver big flavor without the fuss. Each one plays a specific role in creating that perfect texture and taste.
- Unsalted Butter (4 tablespoons, melted and slightly cooled): I always use unsalted so I can control the salt level. Melting the butter gives the cookies a denser, chewier texture. Let it cool for a couple of minutes so it doesn’t cook the egg when you mix it in.
- Granulated Sugar (3 tablespoons): This adds a little crunch to the edges and helps with spread. It also contributes to that classic golden color.
- Light Brown Sugar (3 tablespoons, packed): This is the secret to the soft, tender centers. The molasses in brown sugar adds moisture and a hint of caramel flavor. Make sure it is packed firmly into the measuring spoon.
- Large Egg Yolk (1): We only use the yolk here. The white would make the cookies cakey and dry. The yolk adds richness and fat, which keeps the texture soft. Save the white for a scramble or an omelet the next morning.
- Vanilla Extract (1/2 teaspoon): Real vanilla makes a difference. I prefer Nielsen-Massey for its pure, floral flavor, but any good brand works. Avoid imitation vanilla if you can—it leaves a weird aftertaste.
- All-Purpose Flour (1/2 cup, spooned and leveled): Standard AP flour is perfect here. Do not scoop directly with the measuring cup—spoon it in and level it off with a knife. Too much flour makes dry cookies.
- Baking Soda (1/4 teaspoon): This helps the cookies spread just the right amount and gives them a slightly crispy edge. Make sure it is fresh—old baking soda won’t work as well.
- Salt (1/4 teaspoon): Salt is not optional. It balances the sweetness and makes the chocolate flavor pop. I use fine sea salt for baking.
- Semi-Sweet Chocolate Chips (1/3 cup): I love Ghirardelli or Guittard for their deep flavor and meltability. You can also chop up a chocolate bar for bigger puddles of chocolate. If you prefer milk chocolate or dark chocolate, swap them in equally.
- Flaky Sea Salt (for sprinkling, optional but highly recommended): A tiny pinch on top right when they come out of the oven takes these from great to unforgettable. It adds a little crunch and a salty contrast.
For substitutions, you can use salted butter—just reduce the added salt to 1/8 teaspoon. If you need a dairy-free option, use a good quality plant-based butter like Miyoko’s. The texture will be slightly different, but still delicious.
Equipment Needed
You don’t need a fancy kitchen to make these cookies. Here is what you will need:
- Mixing Bowls: One medium bowl for the wet ingredients and one small bowl for the dry. I use a set of ceramic nesting bowls, but any bowl works.
- Whisk: For combining the melted butter and sugars. A fork works in a pinch, but a whisk makes it smoother.
- Rubber Spatula: For folding in the flour and chocolate chips. It helps you scrape the sides of the bowl and avoid over-mixing.
- Measuring Cups and Spoons: Get a good set with clear markings. The difference between a packed and unpacked tablespoon of brown sugar matters here.
- Baking Sheet: A standard half-sheet pan is perfect. Avoid dark non-stick pans—they make the bottoms burn faster. A light-colored aluminum pan gives the best results.
- Parchment Paper or Silicone Baking Mat: This prevents sticking and makes clean-up a breeze. Parchment paper gives slightly crisper bottoms.
- Cookie Scoop or Tablespoon: For evenly sized cookies. A #40 scoop (about 1.5 tablespoons) is ideal. If you don’t have one, just use a regular spoon and eyeball it.
- Cooling Rack: Lets the cookies cool evenly so they don’t steam and get soggy on the bottom. If you don’t have one, transfer them to a plate after a few minutes.
A budget-friendly tip: you can skip the cookie scoop and just use two spoons to portion the dough. I did that for years before I finally bought a scoop, and it worked just fine.
Preparation Method
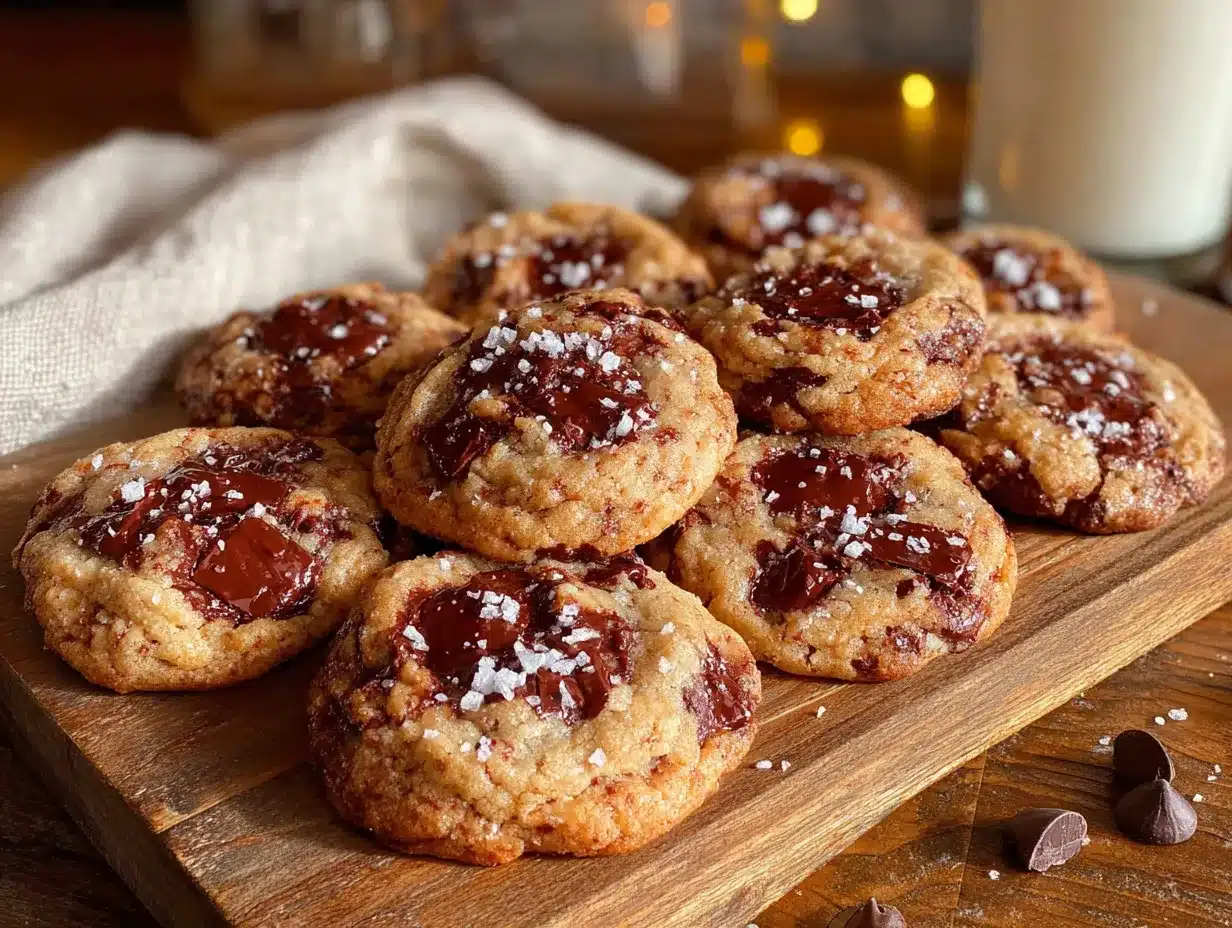
Let me walk you through this step by step. It is simple, but each step matters.
- Preheat your oven to 350°F (175°C). Line your baking sheet with parchment paper. This is important—do not skip the preheat. A cold oven will mess with the spread and texture.
- Melt the butter. Place 4 tablespoons of unsalted butter in a microwave-safe bowl. Microwave in 15-second bursts until just melted. It should be liquid but not hot. Let it sit for 2 minutes to cool slightly. If it is too hot, it will scramble the egg yolk later.
- Mix the sugars and butter. In a medium bowl, whisk together the melted butter, 3 tablespoons granulated sugar, and 3 tablespoons packed brown sugar. Whisk for about 30 seconds until it looks like a thick, grainy paste. It should smell amazing already.
- Add the wet ingredients. Whisk in the egg yolk and 1/2 teaspoon vanilla extract. Keep whisking until the mixture is smooth and slightly lighter in color. This takes about 20 seconds. The texture should look like a thick caramel sauce.
- Combine the dry ingredients. In a small bowl, whisk together the 1/2 cup all-purpose flour, 1/4 teaspoon baking soda, and 1/4 teaspoon salt. Make sure the baking soda is evenly distributed—nobody wants a pocket of bitter baking soda in their cookie.
- Fold the dry into the wet. Pour the dry ingredients into the wet mixture. Use your rubber spatula to fold it together gently. Stop as soon as you no longer see streaks of flour. Over-mixing at this stage develops gluten and makes tough cookies. A few lumps are fine.
- Add the chocolate chips. Fold in the 1/3 cup of semi-sweet chocolate chips. Reserve about 6 chips to press on top of the dough balls later for a prettier look. The dough should be stiff but slightly sticky.
- Portion the dough. Use your cookie scoop or a tablespoon to scoop out 6 equal portions of dough. Roll each one into a smooth ball. Place them on the prepared baking sheet, spacing them about 2 inches apart. They will spread, so give them room.
- Bake. Place the baking sheet on the center rack of your preheated oven. Bake for exactly 10 to 12 minutes. At 10 minutes, the edges should be golden brown but the centers will still look slightly puffy and underdone. That is exactly what you want. For softer cookies, pull them at 10 minutes. For slightly crispier cookies, go to 12 minutes.
- Finish with flaky salt. As soon as the cookies come out of the oven, press a few of the reserved chocolate chips into the tops. Sprinkle a tiny pinch of flaky sea salt over each cookie. This step is optional, but trust me, it makes a difference.
- Cool on the pan. Let the cookies sit on the hot baking sheet for 5 minutes. They will continue to cook from the residual heat. After 5 minutes, transfer them to a cooling rack. If you try to move them too soon, they will fall apart.
A quick warning: do not be tempted to flatten the dough balls before baking. They will spread on their own. Flattening them makes the cookies too thin and they will burn on the edges before the center is done.
Cooking Tips & Techniques
I have learned these tips the hard way—through burnt bottoms and flat, sad cookies. Here is what I wish I had known from the start.
Weigh your ingredients if you can. Flour is notoriously tricky to measure. A cup of flour can weigh anywhere from 120 to 150 grams depending on how you scoop it. For this recipe, 60 grams of flour is the sweet spot. If you don’t have a scale, spoon the flour into the measuring cup and level it with a knife. Never scoop directly from the bag—you will end up with 25% more flour than you need.
Watch the oven like a hawk. Ovens run at different temperatures. My old oven ran hot, and I burnt three batches before I figured it out. Start checking at the 9-minute mark. The cookies are done when the edges are set and golden, but the centers still look soft and slightly puffed. They will continue to set as they cool.
Don’t skip the cooling step. I know it is tempting to grab a cookie right away. But if you try to move them when they are hot, they will crumble. Let them rest on the pan for exactly 5 minutes. That rest time is when the magic happens—the centers finish cooking and the structure sets.
Use room temperature egg yolk. Cold egg yolk can seize the melted butter and make the dough lumpy. If you forgot to take the egg out ahead of time, place it in a bowl of warm water for 5 minutes. It will come to room temperature quickly.
Chill the dough if you have time. I said no chilling was required, and that is true. But if you can wait 30 minutes, the cookies will be even better. Chilling the dough lets the flavors meld and prevents excessive spreading. The centers will be thicker and chewier. It is a small extra step that pays off.
Double the batch if you want. This recipe scales beautifully. Just double every ingredient and bake in two batches. The second batch might spread a little more if the baking sheet is still warm, so let it cool completely between batches.
Variations & Adaptations
One of the best things about this recipe is how easy it is to adapt. Here are some of my favorite twists.
Double Chocolate Chip: Replace 1 tablespoon of the all-purpose flour with 1 tablespoon of unsweetened cocoa powder. Use dark chocolate chips instead of semi-sweet. The result is a rich, fudgy cookie that tastes like a brownie in cookie form. I made these for a friend who claimed she didn’t like chocolate chip cookies, and she ate four of them.
Nutty Delight: Add 1/4 cup of toasted, chopped pecans or walnuts along with the chocolate chips. Toast the nuts in a dry pan over medium heat for 3-4 minutes until they smell fragrant. Let them cool completely before folding them in. The crunch adds a lovely texture contrast.
Gluten-Free Version: Swap the all-purpose flour with a 1-to-1 gluten-free baking flour blend that contains xanthan gum. I have used Bob’s Red Mill with great success. The texture will be slightly more tender and crumbly, but the flavor is spot on. Do not over-mix the dough, as gluten-free flours can get gummy.
Vegan Adaptation: Use a vegan butter stick (like Earth Balance) and replace the egg yolk with 1 tablespoon of unsweetened applesauce or a flax egg (1 tablespoon ground flaxseed mixed with 3 tablespoons water, left to sit for 5 minutes). The cookies will be a little less chewy, but they are still delicious. I tested this version for a vegan friend, and she said they were the best cookies she had had in years.
Brown Butter Version: For a deeper, nuttier flavor, brown the butter before using it. Melt the butter in a small saucepan over medium heat. Cook, swirling the pan often, until it turns a deep amber color and smells nutty. This takes about 5-7 minutes. Watch it carefully—it can go from brown to burnt in seconds. Let it cool completely before using. The cookies will have an incredible, almost toffee-like flavor.
Serving & Storage Suggestions
These cookies are best served warm, straight from the oven. There is nothing quite like that moment when the chocolate is still melty and the edges are perfectly crisp. Serve them with a cold glass of milk, a hot cup of coffee, or a scoop of vanilla ice cream for an extra indulgent treat.
If you are serving them to guests, arrange them on a small plate or a wooden board. A light dusting of powdered sugar or an extra sprinkle of flaky salt makes them look bakery-worthy. They pair beautifully with a cup of chai tea or a dark roast coffee. The bitterness of the coffee balances the sweetness of the cookies perfectly.
Storage: Store any leftover cookies in an airtight container at room temperature. They will stay fresh for up to 3 days. Place a piece of bread in the container to keep them soft—the cookies will absorb the moisture from the bread. Replace the bread every day if you are storing them for longer.
Freezing: These cookies freeze beautifully. You can freeze the baked cookies for up to 3 months. Wrap them individually in plastic wrap, then place them in a freezer-safe bag. To reheat, pop them in a 300°F oven for 5 minutes, or microwave for 10 seconds. Even better, freeze the raw dough balls. Scoop the dough onto a parchment-lined baking sheet and freeze until solid. Transfer the frozen dough balls to a freezer bag. When you want fresh cookies, bake them straight from frozen—just add 2-3 minutes to the baking time.
Flavor Development: Honestly, these cookies taste even better the next day. The flavors meld together overnight, and the texture becomes perfectly balanced. If you can resist eating them all on day one, you are in for a treat on day two.
Nutritional Information & Benefits
Let’s be real—these are cookies, not health food. But knowing what is in them helps you enjoy them mindfully. Here is the estimated nutritional breakdown per cookie (based on 6 cookies):
| Nutrient | Amount |
|---|---|
| Calories | ~210 |
| Total Fat | 12g |
| Saturated Fat | 7g |
| Carbohydrates | 26g |
| Sugar | 17g |
| Protein | 3g |
| Sodium | 150mg |
Dark chocolate is a surprising source of antioxidants, and the small batch size naturally controls portions—you are only making six cookies, not three dozen. Using butter and an egg yolk provides a small amount of vitamin A and healthy fats. The flaky salt on top also adds a touch of electrolytes, if you want to look at it that way.
For dietary considerations, this recipe is vegetarian and can easily be made gluten-free or vegan with the substitutions listed above. It contains dairy, eggs, and gluten in its standard form, so be mindful of allergies.
I personally love that this recipe lets me enjoy a treat without having a giant batch staring at me from the counter. It is about balance—indulging in something delicious without going overboard. That feels good, you know?
Conclusion
These cozy small-batch chocolate chip cookies have become a ritual in my home. They are the answer to a bad day, the perfect companion for a quiet evening, and the easiest way to make a small moment feel special. They remind me of Mrs. Gable’s kitchen, of that first warm bite, and of the lesson that sometimes the best things in life come in small batches.
I hope you give them a try. Make them your own—add extra chocolate, swap in different chips, or sprinkle on your favorite salt. The beauty of this recipe is that it is forgiving. It wants to be made. It wants to be shared. And it definitely wants to be eaten warm with a glass of milk.
When you make them, I would love to hear how they turned out. Did you try a variation? Did you burn the first batch like I did? Drop a comment below and let me know. Share this recipe with someone who needs a little coziness in their life. And if you are looking for another warm, comforting treat, check out these soft ginger cookies for a spiced twist, or these fudgy brownies when only chocolate will do. Happy baking, friend!
Frequently Asked Questions
Can I use margarine instead of butter?
I would not recommend it. Margarine has a higher water content than butter, which will make the cookies spread too much and turn out flat. Stick with real butter for the best texture and flavor.
Why did my cookies turn out flat?
This usually happens if the butter was too warm or if you used too much sugar. Make sure your melted butter has cooled slightly before mixing. Also, check that your baking soda is fresh—old baking soda loses its power and won’t help the cookies rise properly.
Can I make these cookies without an egg yolk?
Yes, you can replace the egg yolk with 1 tablespoon of milk or water. The cookies will be slightly less rich and a bit more crumbly, but they will still taste good. For a vegan option, use a flax egg as mentioned in the variations section.
How do I know when the cookies are done?
The edges should be golden brown and set, but the centers will still look soft and slightly puffy. They will continue to cook on the hot baking sheet after you take them out of the oven. If the centers look fully set in the oven, they will be overbaked and hard when cooled.
Can I double this recipe?
Absolutely. Double all the ingredients and bake in two batches. Let the baking sheet cool completely between batches to ensure even baking. The second batch might spread a little more if the pan is still warm.
Pin This Recipe!
Cozy Small-Batch Chocolate Chip Cookies: Best Easy Recipe

These cozy small-batch chocolate chip cookies are quick, easy, and perfect for a quiet evening. With crispy edges, soft centers, and melty chocolate, they deliver comfort in every bite without needing a full batch.
- Prep Time: 10 minutes
- Cook Time: 12 minutes
- Total Time: 22 minutes
- Yield: 6 cookies 1x
- Category: Dessert
- Cuisine: American
Ingredients
- 4 tablespoons unsalted butter, melted and slightly cooled
- 3 tablespoons granulated sugar
- 3 tablespoons light brown sugar, packed
- 1 large egg yolk
- 1/2 teaspoon vanilla extract
- 1/2 cup all-purpose flour, spooned and leveled
- 1/4 teaspoon baking soda
- 1/4 teaspoon salt
- 1/3 cup semi-sweet chocolate chips
- Flaky sea salt for sprinkling (optional)
Instructions
- Preheat your oven to 350°F (175°C). Line a baking sheet with parchment paper.
- Melt the butter in a microwave-safe bowl in 15-second bursts until just melted. Let it cool for 2 minutes.
- In a medium bowl, whisk together the melted butter, granulated sugar, and brown sugar until it forms a thick, grainy paste (about 30 seconds).
- Whisk in the egg yolk and vanilla extract until smooth and slightly lighter in color (about 20 seconds).
- In a small bowl, whisk together the flour, baking soda, and salt.
- Pour the dry ingredients into the wet mixture and fold gently with a rubber spatula until just combined. Do not over-mix.
- Fold in the chocolate chips, reserving about 6 chips to press on top later.
- Scoop the dough into 6 equal portions and roll into smooth balls. Place them on the prepared baking sheet, spacing about 2 inches apart.
- Bake on the center rack for 10 to 12 minutes. The edges should be golden brown and the centers still slightly puffy.
- As soon as the cookies come out of the oven, press the reserved chocolate chips into the tops and sprinkle with flaky sea salt (if using).
- Let the cookies cool on the baking sheet for 5 minutes, then transfer to a cooling rack.
Notes
For best results, use room temperature egg yolk. If you have time, chill the dough for 30 minutes for thicker, chewier cookies. Do not flatten the dough balls before baking. Store leftovers in an airtight container at room temperature for up to 3 days. Freeze baked cookies for up to 3 months or freeze raw dough balls for up to 3 months.
Nutrition
- Serving Size: 1 cookie
- Calories: 210
- Sugar: 17
- Sodium: 150
- Fat: 12
- Saturated Fat: 7
- Carbohydrates: 26
- Fiber: 1
- Protein: 3
Keywords: small-batch chocolate chip cookies, easy cookie recipe, quick cookies, no chill cookies, cozy cookies


