Love this? Save it for later!
Share the inspiration with your friends
It was 10:47 PM on a random Wednesday, and I was hit with the kind of craving that doesn’t negotiate. I wanted chicken tenders—the crispy, golden, salty kind that makes you forget about your diet for a solid ten minutes. But here’s the thing: I didn’t have a deep fryer, I didn’t have breadcrumbs, and honestly, I was wearing pajamas I had no intention of changing out of. What I did have was a half-full box of panko, a block of Parmesan that was past its prime but not past its purpose, and this wild idea that maybe—just maybe—I could get that same crunchy satisfaction without standing over a pot of hot oil.
I started pulling things out of the fridge like a woman on a mission. Chicken breasts? Check. Eggs? Check. That sad little wedge of Parmesan that smelled like it had been waiting for its moment? Oh, it was ready. I grabbed a baking sheet, lined it with foil (because I’m not a monster who enjoys scrubbing pans at midnight), and just went for it. I’ll be honest—I didn’t measure anything. I just tossed panko and Parmesan into a bowl, cracked an egg into another, and started dipping and coating like my life depended on it.
The result was absurd. Like, laugh-out-loud absurd. These chicken tenders came out of the oven looking like they’d been kissed by a golden god. They were crunchy, cheesy, and so ridiculously satisfying that I stood at the counter eating them straight off the baking sheet. No plate. No dipping sauce. Just me, a pair of sweatpants, and the best chicken tenders I’d ever made. And you know what? I’ve been making them ever since. Maybe you’ve been there—standing in your kitchen at an unreasonable hour, wondering if you can make something magical out of what you’ve got. Spoiler alert: you absolutely can.
Why You’ll Love This Recipe
Let me tell you why these crispy baked Parmesan chicken tenders have become my go-to for everything from busy weeknights to lazy Sunday afternoons. I’ve tested this recipe more times than I care to admit, and I can confidently say it delivers every single time.
- Quick & Easy: From start to finish, you’re looking at about 30 minutes. That’s faster than ordering takeout and waiting for delivery.
- Simple Ingredients: You probably have most of these in your kitchen right now. No fancy grocery store runs required.
- Perfect for Any Occasion: Game day? Check. Kids’ dinner? Double check. Meal prep for the week? You bet.
- Crowd-Pleaser: I’ve served these to picky eaters, foodie friends, and my grandma—they all went back for seconds.
- Unbelievably Delicious: The Parmesan creates this crispy, nutty crust that’s next-level good. You won’t miss the frying, I promise.
What makes this recipe different from all the others? It’s the technique. Instead of just breading and baking, we’re using a combination of finely grated Parmesan and panko breadcrumbs that creates an almost shatteringly crisp coating. Plus, we’re baking them on a wire rack set over a baking sheet, which means hot air circulates all around each tender. No soggy bottoms here, folks.
This isn’t just another chicken tender recipe—it’s the one that makes you close your eyes after the first bite. It’s comfort food reimagined: healthier, faster, and with the same soul-soothing satisfaction. Perfect for impressing guests without stress, or turning a simple Tuesday into something memorable.
What Ingredients You Will Need
This recipe uses simple, wholesome ingredients that come together to create something truly special. Most of these are pantry staples, which makes this recipe perfect for those nights when you need dinner on the table fast.
- Chicken breasts (1.5 lbs or about 2 large breasts) – Look for evenly sized breasts so they cook at the same rate. You can also use chicken tenders if you prefer.
- Panko breadcrumbs (1 cup) – These are flakier than regular breadcrumbs and create that signature crunch. I prefer the unseasoned kind so I can control the flavor.
- Parmesan cheese (3/4 cup, finely grated) – Please, for the love of all things crispy, grate it yourself. The pre-shredded stuff in the green can won’t melt the same way. I recommend a good block of Parmigiano-Reggiano if you can swing it.
- Eggs (2 large) – These help the coating stick. Make sure they’re at room temperature for best results.
- All-purpose flour (1/2 cup) – This creates a dry surface for the egg wash to grab onto. You can swap this for almond flour if you’re gluten-free.
- Garlic powder (1 teaspoon) – Adds that savory depth without being overpowering.
- Onion powder (1/2 teaspoon) – Trust me on this one. It rounds out the flavor beautifully.
- Paprika (1 teaspoon) – Use smoked paprika if you want a subtle smoky flavor. Regular works great too.
- Salt (1 teaspoon) – I use kosher salt for better control.
- Black pepper (1/2 teaspoon) – Freshly ground is always better.
- Olive oil spray – This is key for getting that golden brown color without deep frying. An oil mister works best.
Equipment Needed
You don’t need a fancy kitchen to make these tenders, but a few key tools will make your life a whole lot easier.
- Baking sheet – A standard half-sheet pan works perfectly. I’ve used the same beat-up one for years, and it does the job.
- Wire rack – This is non-negotiable if you want crispy tenders. It allows air to circulate underneath so the coating stays crunchy. If you don’t have one, you can flip the tenders halfway through, but it’s not the same.
- Three shallow bowls – For the flour, egg wash, and breadcrumb mixture. Pie plates work great for this.
- Tongs – For transferring the chicken without making a mess.
- Knife and cutting board – For slicing the chicken breasts into even strips.
- Meat mallet or rolling pin – Optional, but helpful for evening out thicker pieces of chicken.
Preparation Method
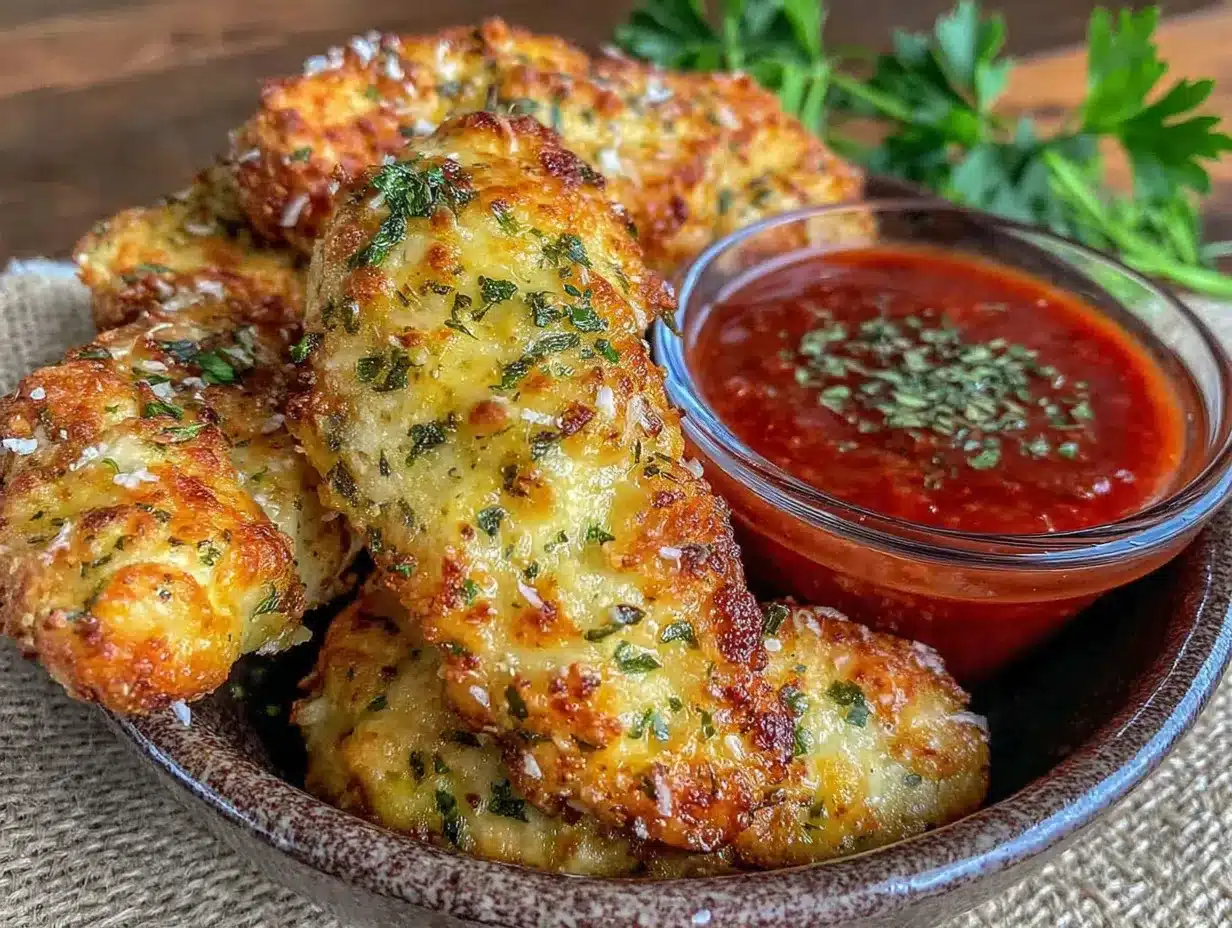
Alright, let’s get cooking. I’ve broken this down into simple steps so you can follow along without any hiccups.
- Preheat your oven to 400°F (200°C). Place a wire rack on top of a baking sheet and spray it lightly with olive oil. This prevents sticking and helps with crisping.
- Prep the chicken. If you’re using chicken breasts, slice them lengthwise into strips about 1-inch thick. I usually get 4-5 strips per breast. If some pieces are thicker than others, place them between two sheets of plastic wrap and gently pound them to even thickness. This ensures they cook evenly.
- Set up your breading station. Grab three shallow bowls. In the first bowl, mix the flour, garlic powder, onion powder, paprika, salt, and pepper. In the second bowl, beat the eggs until they’re smooth. In the third bowl, combine the panko breadcrumbs and finely grated Parmesan cheese. Give it a good stir to distribute the cheese evenly.
- Bread the chicken. Working with one piece at a time, dredge the chicken in the flour mixture, shaking off any excess. Then dip it into the egg wash, letting any extra drip off. Finally, press it into the panko-Parmesan mixture, making sure it’s fully coated. I like to use one hand for the dry ingredients and one for the wet to avoid turning my fingers into breaded messes.
- Place on the rack. Arrange the breaded tenders on the prepared wire rack, leaving a little space between each piece. Don’t overcrowd them—they need room for the hot air to circulate.
- Spray with oil. Give the tops of the tenders a generous spray with olive oil. This is what gives them that gorgeous golden color. Don’t skip this step—it makes all the difference.
- Bake for 15 minutes. Pop them in the oven and set a timer. At the 15-minute mark, flip each tender over using tongs and spray the other side with oil. Bake for another 10-12 minutes, or until the internal temperature reaches 165°F (74°C) and the coating is deep golden brown and crispy.
- Rest before serving. Let the tenders rest on the rack for 2-3 minutes. This helps the coating set so it stays crispy. Trust me, the wait is worth it.
Cooking Tips & Techniques
After making these tenders more times than I can count, I’ve picked up a few tricks that take them from good to absolutely unforgettable.
Don’t skip the flour. I know it seems like an extra step, but the flour creates a dry surface that helps the egg wash stick. Without it, the breading slides right off. I learned this the hard way when I tried to skip it one night and ended up with a sad pile of naked chicken and a baking sheet full of loose breadcrumbs.
Grate your own Parmesan. I cannot stress this enough. Pre-shredded cheese contains anti-caking agents that prevent it from melting and sticking properly. Freshly grated Parmesan creates a cohesive coating that crisps up beautifully. Plus, it tastes way better.
Use a thermometer. Chicken is done when it reaches 165°F (74°C) internally. I’ve pulled tenders out of the oven that looked perfect on the outside but were still pink in the middle. A simple instant-read thermometer saves you from that heartbreak.
Don’t overcrowd the rack. If the tenders are touching, they’ll steam instead of crisp. Give them space. If you’re making a double batch, use two baking sheets and rotate them halfway through.
Let them rest. I know it’s tempting to dig in right away, but letting the tenders rest for a few minutes allows the coating to set. You’ll be rewarded with crunch that lasts, even after they’ve cooled down.
Variations & Adaptations
One of the best things about this recipe is how easily it adapts to different tastes and dietary needs. Here are some of my favorite variations.
Spicy Buffalo Tenders: Add 1 teaspoon of cayenne pepper to the flour mixture and serve with a side of buffalo sauce for dipping. I made these for a game day party and they disappeared in minutes.
Gluten-Free Option: Swap the all-purpose flour for almond flour or gluten-free all-purpose blend, and use gluten-free panko breadcrumbs. The texture is slightly different but still incredibly crispy.
Herb-Crusted Tenders: Add 2 tablespoons of dried Italian seasoning or fresh chopped herbs (rosemary, thyme, oregano) to the breadcrumb mixture. This version is perfect for serving with marinara sauce.
Air Fryer Method: Cook the breaded tenders in an air fryer at 375°F (190°C) for 10-12 minutes, flipping halfway through. They come out even crispier, if you can believe it.
Lemon Pepper Tenders: Add the zest of one lemon and 1 teaspoon of cracked black pepper to the breadcrumb mixture. The bright citrus flavor cuts through the richness beautifully.
Serving & Storage Suggestions
These tenders are incredibly versatile when it comes to serving. Here’s how I like to enjoy them.
Serving Temperature: Serve them hot out of the oven for maximum crunch. They’re also surprisingly good at room temperature, which makes them perfect for picnics or lunchboxes.
Dipping Sauces: My personal favorites are honey mustard, ranch dressing, and a simple marinara. For something different, try a spicy sriracha mayo or a creamy garlic aioli.
Side Dishes: These tenders pair beautifully with a crisp green salad, roasted vegetables, or sweet potato fries. For a complete meal, serve them alongside steamed broccoli and rice.
Storage: Leftover tenders can be stored in an airtight container in the refrigerator for up to 3 days. To reheat, place them on a wire rack over a baking sheet and warm them in a 350°F (175°C) oven for 8-10 minutes. The microwave will make them soggy, so avoid it if you can.
Freezing: You can freeze the breaded, uncooked tenders on a baking sheet until solid, then transfer them to a freezer bag. When you’re ready to cook, bake them straight from frozen, adding 5-7 minutes to the cooking time.
Nutritional Information & Benefits
While these tenders are definitely a treat, they’re actually a healthier alternative to traditional fried chicken. Here’s the breakdown per serving (about 3 tenders).
| Nutrient | Amount Per Serving |
|---|---|
| Calories | 385 |
| Protein | 42g |
| Carbohydrates | 22g |
| Fat | 14g |
| Saturated Fat | 5g |
| Fiber | 1g |
| Sodium | 780mg |
Chicken breast is an excellent source of lean protein, which supports muscle health and keeps you feeling full. Parmesan cheese adds calcium and a boost of umami flavor without needing much. By baking instead of frying, you’re saving a significant amount of oil and calories while still getting that satisfying crunch.
If you’re watching your sodium intake, you can reduce the salt in the breading and use unsalted Parmesan. This recipe is naturally low-carb if you use almond flour in place of the all-purpose flour.
Conclusion
These crispy baked Parmesan chicken tenders have become a staple in my kitchen for good reason. They’re quick, they’re easy, and they deliver that irresistible crunch without the hassle of deep frying. Whether you’re feeding a crowd or just treating yourself on a random Wednesday night, this recipe never disappoints.
I love how versatile this recipe is—you can tweak the seasonings, swap the cheese, or change up the dipping sauces, and it always comes out amazing. It’s the kind of recipe that makes you feel like a kitchen pro, even on your laziest days.
I’d love to hear how yours turn out! Drop a comment below and let me know what variations you tried, or tag me in your photos if you share them online. Happy cooking, friends—you’ve got this.
Frequently Asked Questions
Can I use chicken thighs instead of chicken breasts?
Absolutely! Chicken thighs will work just as well. They’re a bit more forgiving since they have more fat, so they stay juicy even if you overcook them slightly. Just adjust the cooking time as needed since thighs can be thicker.
Why did my breading fall off?
This usually happens when the chicken isn’t properly dried before breading, or when the flour step is skipped. Make sure to pat the chicken dry with paper towels and follow the flour-egg-breadcrumb order. Also, pressing the breadcrumb mixture firmly onto the chicken helps it adhere better.
Can I make these ahead of time?
You can bread the chicken up to 24 hours in advance and keep it covered in the refrigerator. When you’re ready to cook, just spray with oil and bake as directed. This is a great time-saver for parties or busy weeknights.
How do I get the coating extra crispy?
Three things: use a wire rack, spray generously with oil, and don’t overcrowd the pan. The wire rack allows hot air to circulate, the oil helps the coating brown and crisp, and leaving space prevents steaming.
Can I freeze the cooked tenders?
Yes! Let them cool completely, then place them in a single layer on a baking sheet and freeze until solid. Transfer to a freezer bag and store for up to 3 months. Reheat in a 350°F (175°C) oven for 10-12 minutes until hot and crispy.
Pin This Recipe!

Crispy Baked Parmesan Chicken Tenders: Best Easy Recipe

These crispy baked Parmesan chicken tenders are quick, easy, and deliver that irresistible crunch without deep frying. Perfect for busy weeknights or lazy Sundays, they’re made with simple ingredients and ready in about 30 minutes.
- Prep Time: 15 minutes
- Cook Time: 25 minutes
- Total Time: 40 minutes
- Yield: 4 servings 1x
- Category: Main Course
- Cuisine: American
Ingredients
- 1.5 lbs chicken breasts (about 2 large breasts)
- 1 cup panko breadcrumbs
- 3/4 cup finely grated Parmesan cheese
- 2 large eggs, at room temperature
- 1/2 cup all-purpose flour
- 1 teaspoon garlic powder
- 1/2 teaspoon onion powder
- 1 teaspoon paprika (smoked or regular)
- 1 teaspoon kosher salt
- 1/2 teaspoon freshly ground black pepper
- Olive oil spray
Instructions
- Preheat your oven to 400°F (200°C). Place a wire rack on top of a baking sheet and spray it lightly with olive oil.
- Slice chicken breasts lengthwise into strips about 1-inch thick. If some pieces are thicker, place them between plastic wrap and gently pound to even thickness.
- Set up a breading station with three shallow bowls. In the first bowl, mix flour, garlic powder, onion powder, paprika, salt, and pepper. In the second bowl, beat the eggs until smooth. In the third bowl, combine panko breadcrumbs and finely grated Parmesan cheese.
- Working one piece at a time, dredge chicken in flour mixture, shaking off excess. Dip into egg wash, letting extra drip off. Press into panko-Parmesan mixture until fully coated.
- Arrange breaded tenders on the prepared wire rack, leaving space between each piece.
- Spray the tops of the tenders generously with olive oil.
- Bake for 15 minutes. Flip each tender using tongs, spray the other side with oil, and bake for another 10-12 minutes, until internal temperature reaches 165°F (74°C) and coating is deep golden brown and crispy.
- Let the tenders rest on the rack for 2-3 minutes before serving.
Notes
Don’t skip the flour step—it helps the breading stick. Grate your own Parmesan for best results. Use a wire rack for maximum crispiness. Let tenders rest after baking to set the coating.
Nutrition
- Serving Size: 3 tenders
- Calories: 385
- Sodium: 780
- Fat: 14
- Saturated Fat: 5
- Carbohydrates: 22
- Fiber: 1
- Protein: 42
Keywords: chicken tenders, baked chicken tenders, Parmesan chicken, crispy chicken, easy chicken recipe, healthy chicken tenders


