Love this? Save it for later!
Share the inspiration with your friends
It was 10:47 PM on a chilly, rain-slicked Thursday in early November, and I was hit with a craving for something that wasn’t chocolate or chips. I wanted a salad — but not a sad, limp one. I wanted a salad that could stand up to the weather outside my window. I didn’t have the fancy arugula or the expensive goat cheese that most recipes call for, but I had a bag of slightly-forgotten pears on the counter and a jar of maple syrup that was almost empty. That’s when the idea just arrived: what if I roasted the pears until they were sticky and caramelized, and threw them into a bowl with whatever crunch I could find? Honestly, I was half-asleep and didn’t think it would work. I mean, roasted pears in a salad? It felt a little weird, a little rebellious.
I pulled out a cutting board, and the first pear slipped right out of my hand, rolling across the floor like it was trying to escape. I just laughed, picked it up, rinsed it off, and got to work. There’s something about cooking late at night that makes you less afraid to just try things. You stop overthinking and start doing. I tossed the pear slices in a little maple syrup and a pinch of salt, put them in the oven, and while they roasted, I toasted some walnuts in a dry pan until I could smell them from the living room. The whole apartment filled with this warm, sweet, nutty scent — it was the kind of cozy that makes you want to curl up in a blanket and never leave.
When I finally took a bite, I was genuinely surprised. The pears were soft and jammy on the inside with these beautifully caramelized edges, and the walnuts added this deep, toasty crunch. I tossed everything with some fresh greens and a simple vinaigrette, and it was honestly one of the best salads I’d ever made. Maybe you’ve been there — you throw something together on a whim, not expecting much, and it turns out to be the thing you crave for weeks afterward. This is that salad. It’s the one I keep making, the one that feels like a warm hug on a cold night.
Why You’ll Love This Recipe
Let me tell you, this isn’t just another fall salad. I’ve tested this one at least half a dozen times, tweaking the roasting time, playing with the vinaigrette ratio, and even trying different types of pears. It’s been taste-tested by my skeptical neighbor, my picky nephew, and a group of friends who claimed they “weren’t salad people.” Every single one of them asked for the recipe. That’s when I knew I had something special.
- Quick & Easy: From start to finish, this salad comes together in about 30 minutes. Most of that time is hands-off while the pears roast, so you can prep the rest of your ingredients or just relax.
- Simple Ingredients: You likely already have the maple syrup, olive oil, and walnuts in your pantry. The only fresh items are pears and greens, making this a low-stress recipe for any night of the week.
- Perfect for Fall Gatherings: Whether it’s a Thanksgiving side dish, a cozy dinner party starter, or a weeknight dinner for one, this salad fits right in. It’s impressive enough for guests but simple enough for a Tuesday.
- Crowd-Pleaser: The combination of sweet, roasted pears and crunchy, toasty walnuts wins over even the most devoted salad skeptics. I’ve seen it happen with my own eyes.
- Unbelievably Delicious: The texture is what gets you — soft, caramelized pears against crisp greens and crunchy walnuts, all tied together with a tangy-sweet dressing. It’s comfort food in salad form.
What makes this recipe different from the rest is the roasting technique. Most pear salads use raw pears, which can be bland and watery. By roasting them, you concentrate their natural sweetness and add a layer of caramelized flavor that you just can’t get any other way. Plus, the maple syrup creates a sticky glaze that clings to the pears and mixes into the dressing, making every bite perfectly balanced. This isn’t just another version of a pear salad — it’s the best version, the one that makes you close your eyes after the first bite. It’s comfort food reimagined: healthier, faster, but with the same soul-soothing satisfaction. Perfect for impressing guests without stress, or turning a simple meal into something memorable.
What Ingredients You Will Need
This recipe uses simple, wholesome ingredients to deliver bold flavor and satisfying texture without any fuss. Most of these are pantry staples or easy to find at any grocery store, so you won’t need to hunt down anything exotic.
- Pears: 2 large, firm but ripe pears (Bosc or Anjou work best). Bosc pears hold their shape beautifully during roasting, while Anjou pears get a little softer and sweeter. Look for pears that yield slightly to gentle pressure near the stem. If they’re too hard, let them sit on the counter for a day or two.
- Maple syrup: 3 tablespoons pure maple syrup (not pancake syrup). I prefer Grade A dark amber for its robust flavor, but any pure maple syrup will work. It adds natural sweetness and helps create that gorgeous caramelized coating.
- Walnuts: 1/2 cup raw walnut halves or pieces. Toasting them is non-negotiable — it brings out their nutty oils and adds a deep, earthy crunch. I usually buy raw walnuts and toast them myself for the freshest flavor.
- Mixed greens: 4 cups (about 5 ounces) of a spring mix or baby arugula. Arugula adds a peppery kick that balances the sweet pears, but a mild spring mix works beautifully too.
- Olive oil: 3 tablespoons extra-virgin olive oil. Use a good quality one for the dressing since its flavor really shines. I like California Olive Ranch for its smooth, buttery taste.
- Apple cider vinegar: 2 tablespoons. It adds a bright, tangy note that cuts through the sweetness of the pears and maple syrup. You can substitute white wine vinegar or lemon juice if needed.
- Dijon mustard: 1 teaspoon. This helps emulsify the dressing and adds a subtle tangy kick. I use Grey Poupon, but any smooth Dijon will work.
- Salt and black pepper: To taste. A generous pinch of flaky sea salt on the roasted pears makes a huge difference.
- Optional additions: Crumbled blue cheese or feta (about 1/4 cup), dried cranberries (2 tablespoons), or a handful of pomegranate arils for extra color and sweetness.
For ingredient selection, I recommend using Bosc pears if you want them to hold their shape nicely after roasting. They have a firmer texture that doesn’t turn mushy. If you’re using Anjou pears, keep an eye on them in the oven — they cook a little faster. For the walnuts, I always buy raw and toast them myself because pre-toasted nuts can sometimes taste stale. And for the maple syrup, please don’t use the artificial stuff. Pure maple syrup makes a world of difference in both flavor and texture.
Equipment Needed
You don’t need a fancy kitchen to make this salad, which is one of the reasons I love it. Here’s what you’ll need:
- Baking sheet: A rimmed baking sheet works best to catch any sticky maple syrup drips. I use a standard half-sheet pan, but any size will work as long as the pear slices fit in a single layer.
- Parchment paper or silicone baking mat: This makes cleanup a breeze and prevents the pears from sticking. I’ve forgotten it before and spent 10 minutes scrubbing caramelized sugar off my pan — trust me, use the parchment.
- Small skillet or frying pan: For toasting the walnuts. A dry pan over medium heat is all you need. You can also use a toaster oven or even a microwave, but the stovetop gives you the most control.
- Mixing bowls: One large bowl for the salad and one small bowl for the dressing. I use a wooden bowl for the salad because it looks pretty, but any large bowl works.
- Whisk or fork: For mixing the dressing. A small whisk is ideal, but a fork does the job in a pinch.
- Sharp knife and cutting board: A good chef’s knife makes slicing the pears clean and even. I learned the hard way that a dull knife can bruise the pears.
- Measuring spoons: For precise amounts of maple syrup, vinegar, and oil. I eyeball it sometimes, but for the best results, measure it out.
If you don’t have a baking sheet, you can use a cast iron skillet or even a glass baking dish. Just make sure the pears are in a single layer so they caramelize evenly. And if you don’t have parchment paper, you can lightly grease the pan with a little butter or oil, but expect some sticky spots.
Preparation Method
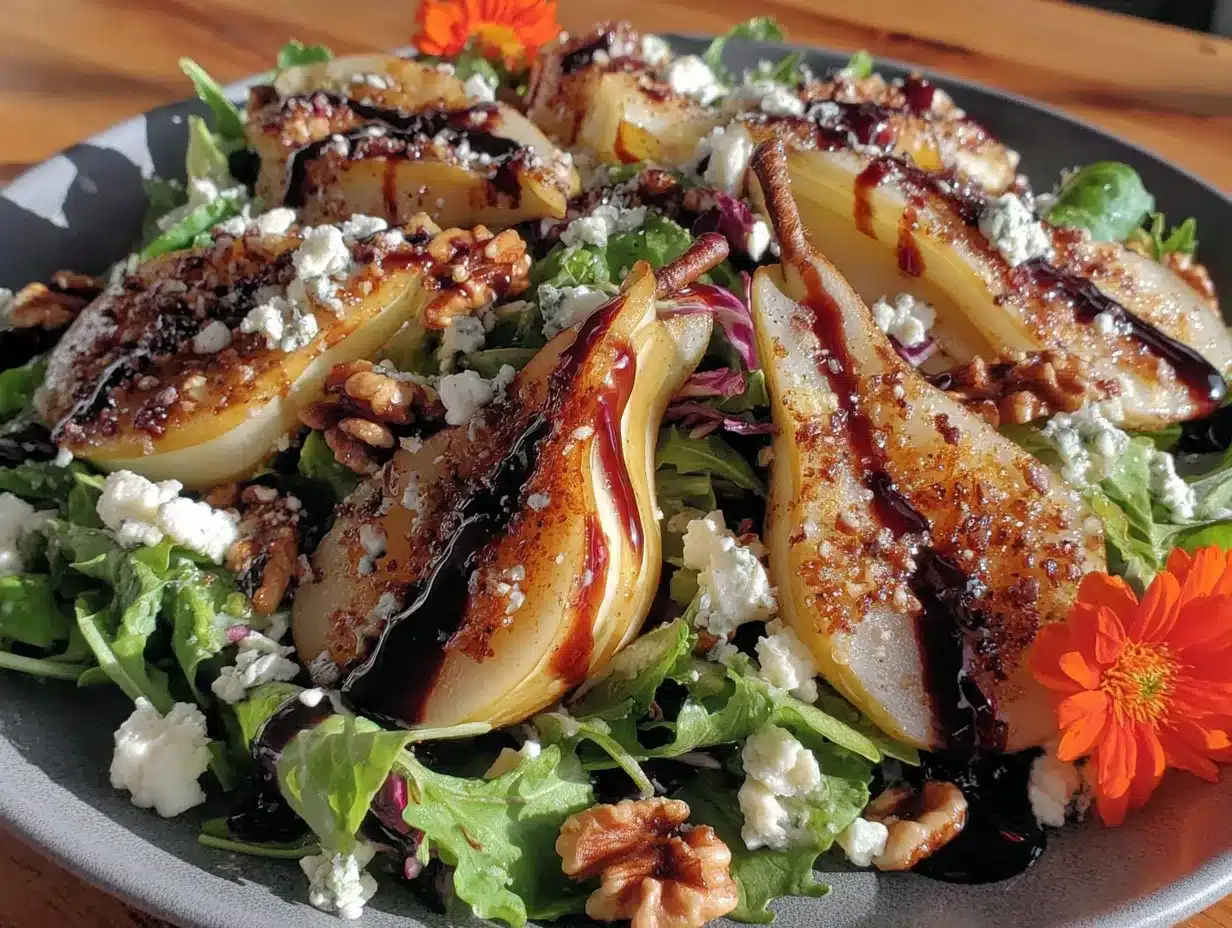
Let’s get cooking! This recipe moves quickly, so I like to have everything prepped before I start. It makes the whole process feel smooth and relaxing.
- Preheat your oven to 400°F (200°C). Line a rimmed baking sheet with parchment paper or a silicone baking mat. This is your insurance policy against sticky cleanup later.
- Prep the pears: Wash and dry 2 large pears. Cut them in half lengthwise, then use a small spoon or melon baller to scoop out the core and seeds. Slice each half into 4 wedges (about 1/2-inch thick at the widest part). You should have 16 wedges total. Don’t peel them — the skin helps the wedges hold their shape and adds a nice texture.
- Coat the pears: In a medium bowl, gently toss the pear wedges with 2 tablespoons of the maple syrup and a generous pinch of salt. Use a spatula to gently coat each wedge, being careful not to break them. Let them sit for 2-3 minutes while the maple syrup soaks in.
- Roast the pears: Arrange the pear wedges in a single layer on the prepared baking sheet, cut side down. Leave a little space between each wedge so they caramelize instead of steam. Roast for 15 minutes, then flip each wedge over using a spatula. Roast for another 10-15 minutes, until the pears are tender and the edges are golden brown and sticky. The syrup should be bubbling and caramelized. Remove from the oven and let them cool on the pan for 5 minutes. They’ll firm up slightly as they cool.
- Toast the walnuts: While the pears are roasting, place 1/2 cup of raw walnuts in a dry skillet over medium heat. Shake the pan occasionally and watch them closely — they can go from perfectly toasted to burnt in about 30 seconds. Toast for 3-4 minutes until they smell nutty and are lightly browned. Immediately transfer them to a plate to cool, or they’ll keep cooking in the hot pan. I once got distracted and burned a batch, and the whole kitchen smelled like bitter smoke for hours. Learn from my mistake!
- Make the dressing: In a small bowl, whisk together the remaining 1 tablespoon of maple syrup, 2 tablespoons of apple cider vinegar, 1 teaspoon of Dijon mustard, and a pinch of salt and pepper. Slowly drizzle in 3 tablespoons of olive oil while whisking constantly, until the dressing is emulsified and creamy. Taste it and adjust — if it’s too tart, add a little more maple syrup; if it’s too sweet, add a splash more vinegar.
- Assemble the salad: In a large bowl, add 4 cups of mixed greens. Drizzle about half the dressing over the greens and toss gently with your hands or tongs until evenly coated. Add the roasted pears (they can be warm or at room temperature) and the toasted walnuts. Drizzle the remaining dressing over the top and give everything one more gentle toss. The warm pears will slightly wilt the greens, which is actually a lovely effect.
- Serve immediately: Divide the salad among plates or serve it family-style in a large bowl. If you’re adding cheese or dried cranberries, sprinkle them on top right before serving. This salad is best enjoyed right away while the pears are still warm and the walnuts are crunchy.
A quick note: if your pears are very ripe, reduce the roasting time by 5 minutes. You want them tender but not mushy. And if you’re making this for a crowd, you can roast the pears and toast the walnuts up to a day ahead and store them separately. Just assemble the salad right before serving.
Cooking Tips & Techniques
Over the years, I’ve learned a few tricks that make this salad even better. Let me share them with you so you can skip my mistakes.
Don’t skip the salt on the pears. I know it sounds weird to add salt to something sweet, but it’s crucial. A pinch of flaky sea salt on the pears before roasting enhances their natural sweetness and balances the maple syrup. Without it, the pears can taste one-dimensionally sweet. I’ve made this mistake more than once, and the difference is night and day.
Toast your walnuts in a single layer. If you pile them up in the pan, they’ll steam instead of toast, and you’ll end up with soft, sad walnuts. Spread them out and give the pan a shake every minute. Listen for the change in sound — they’ll start to make a slight crackling noise when they’re done. And trust your nose: when you smell that warm, nutty aroma, they’re ready.
Warm pears, cold greens? I actually prefer to let the roasted pears cool for 5-10 minutes before adding them to the salad. If they’re too hot, they’ll wilt the greens into a sad, soggy mess. But if they’re room temperature or just slightly warm, they’ll gently soften the greens without ruining them. It’s a delicate balance, but you’ll get the hang of it.
Double the dressing. I always make a little extra dressing because this salad is so good that you’ll want every leaf coated. Plus, leftover dressing keeps in the fridge for up to a week and is amazing on any other salad. Just shake it up before using it.
Timing is everything. Start the walnuts after you flip the pears. That way, both are done around the same time, and you can assemble everything while it’s all still warm. It’s a small multitasking trick that makes the whole process feel effortless.
Variations & Adaptations
This recipe is incredibly flexible, so feel free to make it your own. Here are some of my favorite variations:
- Cheese it up: Add 1/4 cup of crumbled blue cheese, goat cheese, or feta right before serving. The salty, tangy cheese is a beautiful contrast to the sweet pears. I personally love gorgonzola with this salad — it’s bold and creamy.
- Add some crunch: Swap the walnuts for pecans, almonds, or even pumpkin seeds. Pecans have a sweeter, more buttery flavor that pairs wonderfully with the maple glaze. Toasted pepitas (pumpkin seeds) add a nice earthy crunch too.
- Make it a meal: Add grilled chicken, sliced steak, or roasted chickpeas to turn this into a hearty main dish. The sweet and savory combination works with almost any protein. I’ve also added crispy bacon bits on top, and let me tell you, it’s incredible.
- Seasonal swaps: In the summer, swap the pears for peaches or nectarines and use a lighter vinaigrette. In the winter, add pomegranate arils and a sprinkle of cinnamon. This salad is adaptable to whatever fruit is in season.
- Dietary adaptations: For a vegan version, skip the cheese or use a plant-based feta. For a gluten-free option, make sure your Dijon mustard is certified gluten-free (most are). This salad is naturally gluten-free as written.
- Dressing variations: Try a balsamic vinaigrette instead of the apple cider version for a deeper, more complex flavor. Or add a teaspoon of fresh thyme or rosemary to the dressing for an herbal twist.
I once tried this with Asian pears because that’s all I had on hand, and it was surprisingly good. They’re crunchier and less sweet, so I added a little extra maple syrup to the roasting pan. It worked! Don’t be afraid to experiment — that’s half the fun of cooking.
Serving & Storage Suggestions
This salad is best served immediately, while the pears are still warm and the walnuts are crunchy. The contrast of temperatures and textures is what makes it so special. I like to serve it on a large platter or in a wide, shallow bowl so everything is visible and inviting.
For a fall dinner party, pair this salad with a roasted butternut squash soup or a hearty grain bowl. It also works beautifully alongside a roast chicken or a slice of crusty bread. For drinks, a crisp white wine like Sauvignon Blanc or a dry Riesling complements the sweet pears perfectly. If you’re serving it as a main dish, add some grilled chicken or chickpeas for protein.
Storage: If you have leftovers (which is rare in my house), store the salad components separately. The roasted pears can be kept in an airtight container in the refrigerator for up to 3 days. The toasted walnuts can be stored at room temperature in a sealed bag for up to a week. The dressing will keep in the fridge for up to a week — just give it a good shake before using. I don’t recommend storing the assembled salad because the greens will get soggy.
Reheating: To reheat the pears, pop them in a 350°F (175°C) oven for 5-7 minutes, or microwave them for 20-30 seconds. They won’t be as crisp as fresh-roasted, but they’ll still be delicious. If you’re making this ahead for a party, roast the pears and toast the walnuts up to a day in advance, then assemble everything just before serving. The flavors actually develop a bit overnight — the pears become even more tender and the maple glaze gets stickier.
Nutritional Information & Benefits
Here’s an approximate nutritional breakdown for one serving (based on 4 servings, without optional cheese or add-ins):
| Nutrient | Amount per Serving |
|---|---|
| Calories | 280 |
| Total Fat | 18g |
| Saturated Fat | 2g |
| Carbohydrates | 30g |
| Fiber | 5g |
| Sugar | 20g |
| Protein | 4g |
| Sodium | 180mg |
This salad is packed with health benefits. Pears are an excellent source of dietary fiber, which supports digestive health and helps you feel full longer. They also contain vitamin C and antioxidants that support your immune system — especially welcome during fall and winter. Walnuts are rich in omega-3 fatty acids, which are great for heart health and brain function. The olive oil provides healthy monounsaturated fats, and the greens are loaded with vitamins A, C, and K.
This recipe is naturally gluten-free, vegetarian, and can easily be made vegan by skipping the cheese. It’s also low in saturated fat and contains no added refined sugars — only the natural sweetness from the pears and a touch of maple syrup. From my perspective, this is the kind of salad that feels indulgent but is actually really good for you. It’s comfort food that nourishes your body at the same time.
Conclusion
This Crispy Maple Roasted Pear and Walnut Salad has become a staple in my kitchen, and I have a feeling it will become one in yours too. It’s the kind of recipe that proves you don’t need complicated techniques or hard-to-find ingredients to create something truly memorable. The combination of warm, caramelized pears, crunchy toasted walnuts, and fresh greens is simple, but it hits every note — sweet, savory, tangy, and crunchy all at once.
I hope you give this recipe a try, and I hope you make it your own. Maybe you’ll add a sprinkle of blue cheese, swap the walnuts for pecans, or serve it alongside your favorite fall soup. Whatever you do, I’d love to hear about it. Leave a comment below and let me know how it turned out, or share your own twist on this salad. And if you’re looking for more cozy fall recipes, be sure to check out my roasted butternut squash soup or maple glazed carrots for a complete seasonal meal.
Thank you for stopping by, and happy cooking! Remember, the best recipes are the ones you make with a little bit of heart and a whole lot of flavor.
Frequently Asked Questions
Can I use a different type of pear?
Absolutely! Bosc and Anjou are my top picks because they hold up well during roasting, but you can use Bartlett or even Asian pears. Just keep an eye on them while they roast — softer pears will cook faster and might get mushy if left in too long.
Can I make this salad ahead of time?
You can prep the components ahead, but I don’t recommend assembling the salad more than 30 minutes before serving. Roast the pears and toast the walnuts up to a day in advance, and make the dressing up to a week ahead. Just store everything separately and toss it together right before you’re ready to eat.
What if I don’t have maple syrup?
You can substitute honey, agave nectar, or even brown sugar dissolved in a little warm water. The flavor will change slightly, but it will still be delicious. If using honey, reduce the roasting temperature to 375°F (190°C) to prevent burning.
How do I keep the walnuts crunchy in the salad?
Toast the walnuts until they’re just golden and let them cool completely before adding them to the salad. If you add them while they’re still warm, they can release moisture and become soft. Also, store any leftover walnuts in an airtight container at room temperature, not in the fridge.
Can I add protein to make this a main dish?
Yes! Grilled chicken, sliced steak, roasted chickpeas, or even flaked salmon all work beautifully with this salad. I love adding grilled chicken marinated in a little maple and Dijon for a cohesive flavor profile. It turns this side dish into a satisfying meal in no time.
Pin This Recipe!
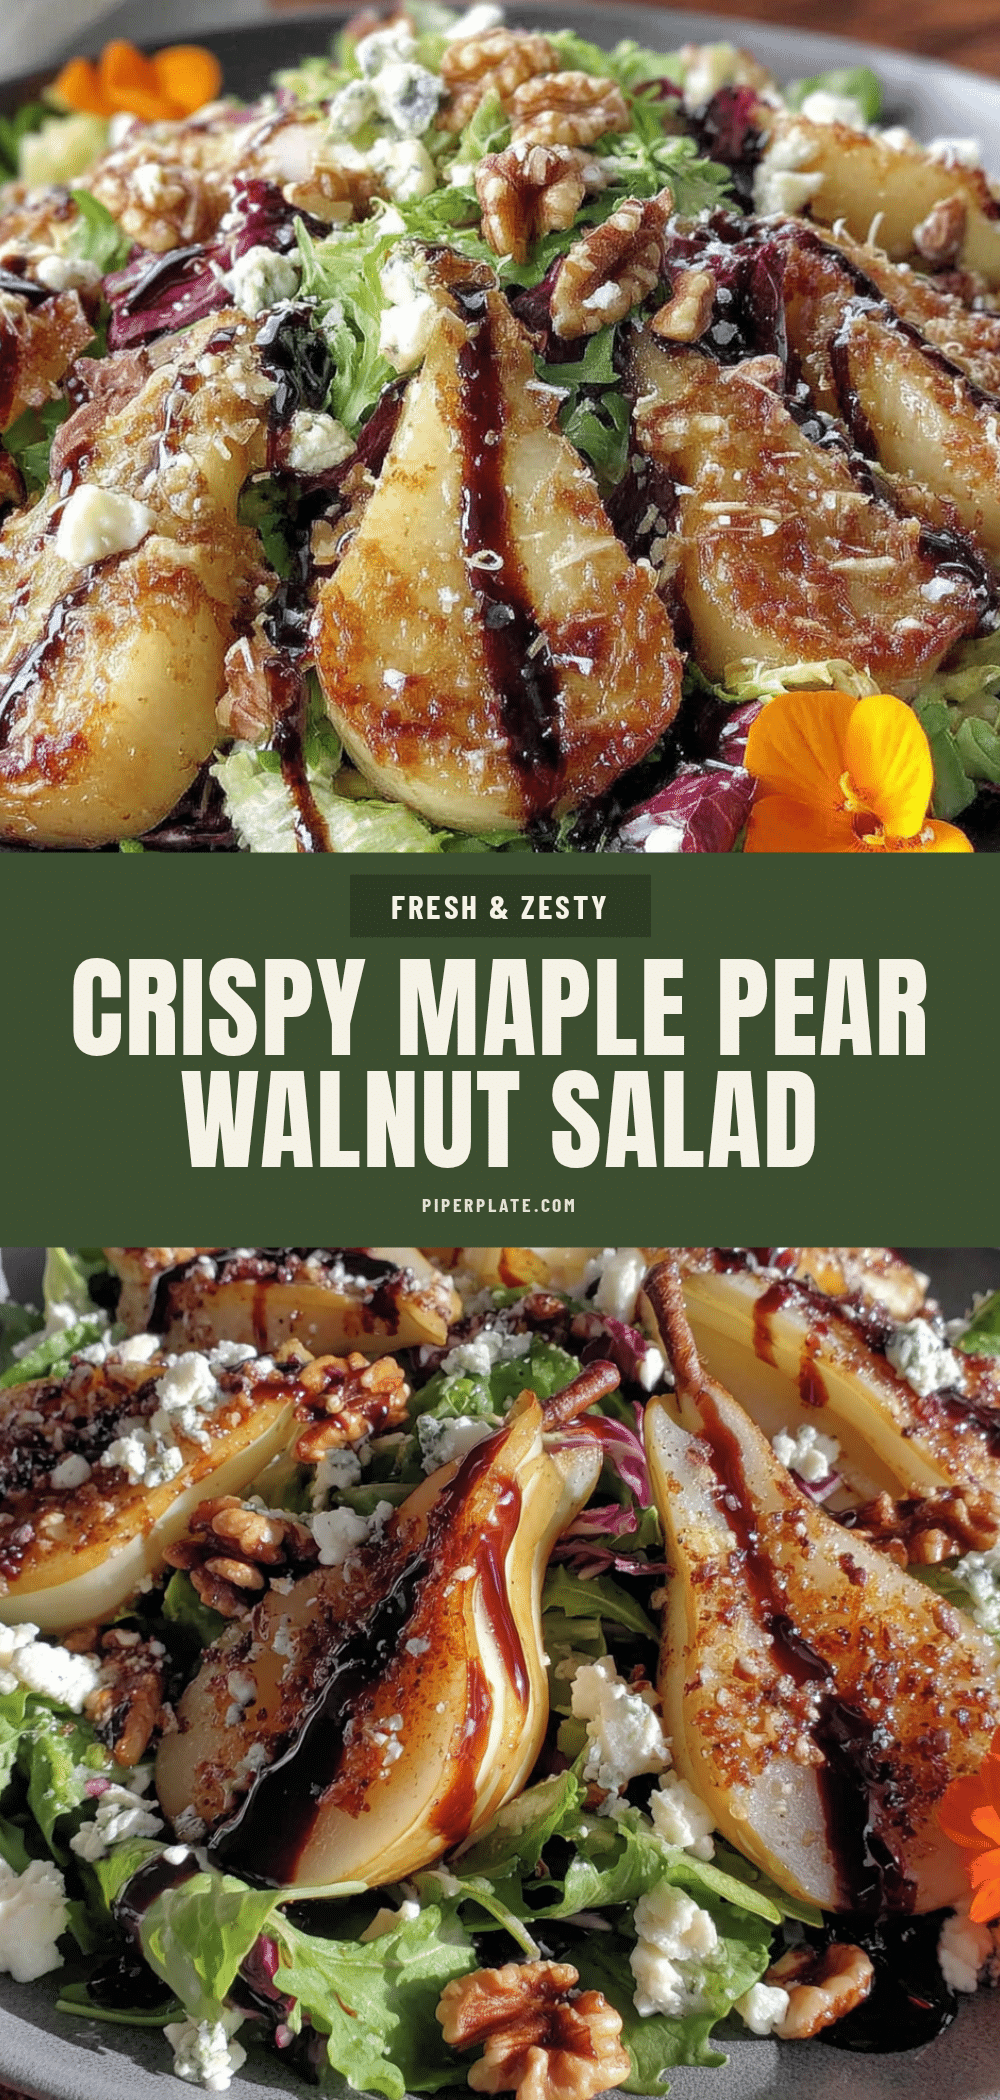
Crispy Maple Roasted Pear & Walnut Salad: Easy Fall Recipe
A warm and cozy fall salad featuring caramelized roasted pears, crunchy toasted walnuts, and fresh greens tossed in a tangy maple-Dijon vinaigrette. Perfect for a quick weeknight dinner or an impressive holiday side dish.
- Prep Time: 10 minutes
- Cook Time: 25 minutes
- Total Time: 35 minutes
- Yield: 4 servings 1x
- Category: Salad
- Cuisine: American
Ingredients
- 2 large firm but ripe pears (Bosc or Anjou)
- 3 tablespoons pure maple syrup, divided
- 1/2 cup raw walnut halves or pieces
- 4 cups mixed greens (spring mix or baby arugula)
- 3 tablespoons extra-virgin olive oil
- 2 tablespoons apple cider vinegar
- 1 teaspoon Dijon mustard
- Salt and black pepper to taste
- Optional: 1/4 cup crumbled blue cheese or feta, 2 tablespoons dried cranberries, pomegranate arils
Instructions
- Preheat oven to 400°F (200°C). Line a rimmed baking sheet with parchment paper or a silicone baking mat.
- Wash and dry pears. Cut in half lengthwise, core, and slice each half into 4 wedges (about 1/2-inch thick).
- In a medium bowl, gently toss pear wedges with 2 tablespoons maple syrup and a generous pinch of salt. Let sit 2-3 minutes.
- Arrange pear wedges in a single layer on prepared baking sheet, cut side down. Roast for 15 minutes, then flip and roast another 10-15 minutes until tender and caramelized. Let cool on pan for 5 minutes.
- While pears roast, toast walnuts in a dry skillet over medium heat for 3-4 minutes until fragrant and lightly browned. Transfer to a plate to cool.
- Make dressing: In a small bowl, whisk together remaining 1 tablespoon maple syrup, apple cider vinegar, Dijon mustard, and a pinch of salt and pepper. Slowly drizzle in olive oil while whisking until emulsified.
- In a large bowl, toss mixed greens with half the dressing. Add roasted pears and toasted walnuts, then drizzle with remaining dressing and toss gently.
- Serve immediately, topped with optional cheese or dried cranberries if desired.
Notes
Don’t skip salting the pears—it enhances sweetness. Toast walnuts in a single layer to avoid steaming. Let roasted pears cool 5-10 minutes before adding to greens to prevent wilting. Double the dressing for extra. Store components separately: roasted pears in fridge up to 3 days, toasted walnuts at room temp up to a week, dressing in fridge up to a week.
Nutrition
- Serving Size: 1 serving
- Calories: 280
- Sugar: 20
- Sodium: 180
- Fat: 18
- Saturated Fat: 2
- Carbohydrates: 30
- Fiber: 5
- Protein: 4
Keywords: fall salad, roasted pear salad, maple walnut salad, easy salad recipe, Thanksgiving side dish, vegetarian salad, gluten-free salad


