Love this? Save it for later!
Share the inspiration with your friends
My nephew Leo asked why I couldn’t just brown the butter in the microwave. I started to explain why that wouldn’t work—then stopped. I mean, honestly, I had no good reason. I’d been browning butter in a saucepan for years, stirring and watching like it was some sacred ritual. But he was twelve, hungry, and wanted cookies. So I melted a stick of butter in a Pyrex bowl, zapped it for thirty-second intervals, and watched it turn that perfect amber color without a single pan to wash. I felt ridiculous. And delighted.
That moment changed how I make these Easy Brown Butter Pumpkin Snickerdoodle Cookies forever. Here I was, the “experienced” cook, learning from a kid who just wanted cookies faster. Maybe you’ve been there—stuck in your ways, convinced there’s only one right way to do something in the kitchen. Let me tell you, being wrong never tasted so good.
These cookies combine nutty brown butter with warm pumpkin and a cinnamon-sugar coating that shatters when you bite in. They’re soft, chewy, and taste like fall in a way that doesn’t require three hours in the kitchen. The microwave trick? It saves about ten minutes and one dirty dish. Perfect for a Tuesday night when you’re tired but still craving something homemade.
I keep coming back to this recipe because it reminds me that cooking doesn’t have to be complicated to be incredible. Sometimes the best discoveries happen when you let go of what you think you know.
Why You’ll Love This Recipe
These Easy Brown Butter Pumpkin Snickerdoodle Cookies aren’t just another pumpkin cookie recipe. They’re the result of countless batches, burnt butter disasters, and one very honest nephew. Here’s why they work so well for busy weeknights:
- Quick & Easy: From start to finish, these cookies take about 30 minutes. The brown butter comes together in the microwave in under two minutes.
- Simple Ingredients: You probably have most of these in your pantry right now. No specialty flours or obscure spices needed.
- Perfect for Fall Weeknights: When you want that cozy pumpkin flavor but don’t have time for a complicated dessert, these deliver.
- Crowd-Pleaser: Kids love the cinnamon-sugar coating, and adults appreciate the sophisticated brown butter flavor. Everyone wins.
- Unbelievably Delicious: The combination of nutty brown butter, tender pumpkin, and that crunchy cinnamon exterior is pure comfort food magic.
What makes these different from every other pumpkin snickerdoodle? It’s the technique. Browning the butter adds a deep, almost toasty flavor that complements the pumpkin perfectly. And using the microwave? That’s my nephew’s contribution—and honestly, it works better than the stovetop method for small batches. No scorching, no mess, just perfectly browned butter every time.
These are the kind of cookies that make you close your eyes after the first bite. They’re weeknight-friendly, but special enough for a holiday cookie swap. And they’ll make your kitchen smell like heaven for about fifteen minutes—which is worth the price of admission alone.
What Ingredients You Will Need
This recipe uses simple, wholesome ingredients to deliver big flavor with minimal fuss. Most are pantry staples, and the few that aren’t are easy to find at any grocery store.
- Unsalted butter, 1 cup (2 sticks): This is the star of the show. I use Land O’Lakes for consistent results, but any good-quality unsalted butter works. The browning process is what gives these cookies their signature nutty flavor.
- Pumpkin puree, ½ cup: Not pumpkin pie filling—make sure you grab 100% pure pumpkin puree. Libby’s is my go-to for consistent moisture content. Canned is perfectly fine here.
- Granulated sugar, 1 cup: For the cookie dough itself. You’ll also need ¼ cup more for rolling.
- Light brown sugar, ½ cup, packed: Adds moisture and a hint of molasses flavor that pairs beautifully with the pumpkin and brown butter.
- Large egg, 1: Room temperature is best for even incorporation. If you forgot to take it out ahead of time, place it in a bowl of warm water for 5 minutes.
- Vanilla extract, 2 teaspoons: Pure vanilla extract makes a difference here. I’m partial to Nielsen-Massey, but store brand works fine too.
- All-purpose flour, 2 ½ cups: Spoon and level for accuracy. Scooping directly from the bag can pack in too much flour and make your cookies dry.
- Cornstarch, 1 tablespoon: This is my secret ingredient for extra-soft cookies. It tenderizes the gluten and keeps them from spreading too much.
- Baking soda, 1 teaspoon: Helps the cookies rise and spread just the right amount.
- Baking powder, ½ teaspoon: Adds a little extra lift for a softer texture.
- Salt, ½ teaspoon: Balances the sweetness and enhances the brown butter flavor. I use fine sea salt for baking.
- Pumpkin pie spice, 1 ½ teaspoons: You can use store-bought or make your own with cinnamon, nutmeg, ginger, and cloves. I prefer making my own—it’s fresher and you can adjust the ratios.
- Cinnamon, 1 teaspoon (for dough) + 2 tablespoons (for coating): Cinnamon is non-negotiable for snickerdoodles. The coating is what makes them iconic.
- Granulated sugar, ¼ cup (for coating): Mixed with the cinnamon for rolling the dough balls before baking.
Substitution Notes: If you’re gluten-free, swap the all-purpose flour with a 1:1 gluten-free baking blend that contains xanthan gum. For a dairy-free version, use vegan butter—just note that it won’t brown quite the same way, so watch it carefully. And if you’re out of pumpkin pie spice, use 1 teaspoon cinnamon, ¼ teaspoon nutmeg, ¼ teaspoon ginger, and a pinch of cloves.
Equipment Needed
You don’t need fancy equipment for these cookies. Here’s what you’ll need:
- Microwave-safe bowl: For browning the butter. A Pyrex measuring cup works perfectly—the spout makes pouring easy.
- Large mixing bowl: For combining your wet and dry ingredients. I use a sturdy ceramic bowl, but any large bowl works.
- Whisk: For mixing the dry ingredients and the cinnamon-sugar coating.
- Wooden spoon or rubber spatula: For stirring the dough. A spatula is easier for scraping down the sides.
- Measuring cups and spoons: Accurate measurements matter in baking. I recommend metal measuring cups for dry ingredients and glass for liquids.
- Baking sheets: Two standard half-sheet pans work well. If you only have one, let it cool completely between batches.
- Parchment paper: Non-stick and makes cleanup a breeze. Silicone baking mats also work great.
- Cookie scoop: A 1.5-tablespoon scoop gives consistent-sized cookies. If you don’t have one, use two spoons to portion the dough.
- Cooling rack: Lets air circulate around the cookies so they cool evenly. If you don’t have one, transfer them to a plate after a few minutes.
Budget-Friendly Tip: Skip the fancy mixer—these cookies come together by hand in under five minutes. And if you don’t have a cookie scoop, use a tablespoon measure instead. No one will know the difference.
Preparation Method
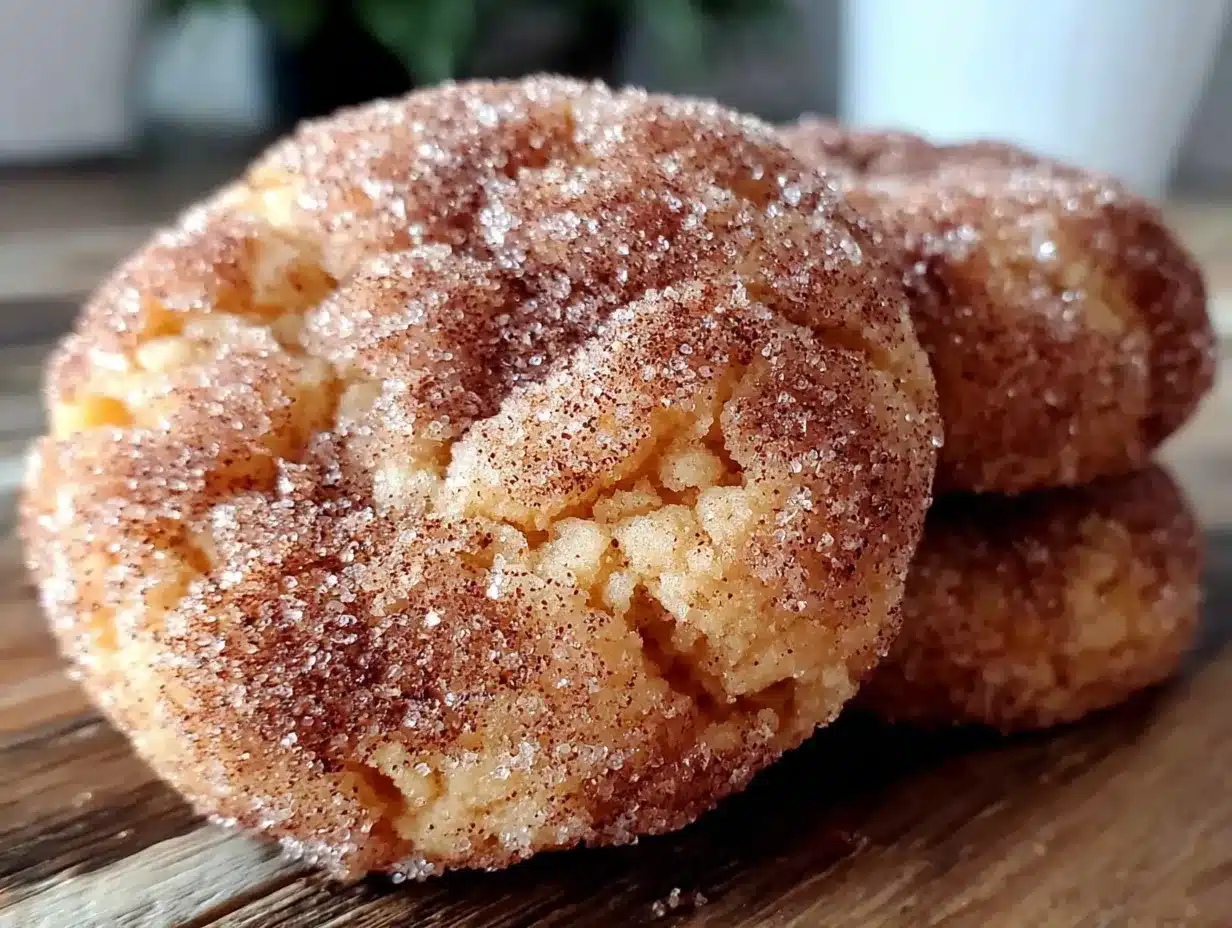
Let’s make these Easy Brown Butter Pumpkin Snickerdoodle Cookies. Follow these steps, and you’ll have warm, fragrant cookies in about half an hour.
- Brown the butter. Cut the butter into tablespoon-sized pieces and place them in a microwave-safe bowl. Microwave on high for 30 seconds, then stir. Repeat in 30-second intervals, stirring each time, until the butter turns a deep amber color and smells nutty—about 2 to 3 minutes total. Watch closely during the last interval; it can go from perfect to burnt quickly. Pour the browned butter into a large mixing bowl and let it cool for 5 minutes. (This is important—hot butter can cook the egg and ruin the texture.)
- Mix the wet ingredients. Add the granulated sugar and brown sugar to the cooled browned butter. Whisk until smooth and well combined—it should look like wet sand. Add the pumpkin puree, egg, and vanilla extract. Whisk vigorously until everything is fully incorporated and the mixture is smooth and glossy. The pumpkin will make it look a bit thick, but that’s exactly right.
- Combine the dry ingredients. In a separate bowl, whisk together the all-purpose flour, cornstarch, baking soda, baking powder, salt, pumpkin pie spice, and 1 teaspoon of cinnamon. Whisking ensures everything is evenly distributed—no one wants a pocket of baking soda in their cookie.
- Make the dough. Gradually add the dry ingredients to the wet mixture, stirring with a wooden spoon or rubber spatula until just combined. Stop as soon as you no longer see streaks of flour. Overmixing makes cookies tough. The dough will be soft and slightly sticky—that’s normal. Cover the bowl with plastic wrap and refrigerate for 15 minutes. (This step is optional but helps prevent excessive spreading.)
- Prepare the coating. In a small bowl, mix the remaining 2 tablespoons of cinnamon with ¼ cup of granulated sugar. Set aside.
- Shape the cookies. Preheat your oven to 350°F (175°C). Line two baking sheets with parchment paper. Using a cookie scoop or tablespoon, portion out rounded balls of dough—about 1.5 tablespoons each. Roll each ball between your palms until smooth, then roll generously in the cinnamon-sugar mixture. Place them on the prepared baking sheets, spacing them about 2 inches apart. They will spread a bit, so give them room.
- Bake. Bake one sheet at a time for 10 to 12 minutes, or until the edges are set and the tops look slightly cracked. The centers will still look soft and puffy—that’s okay. They’ll continue to set as they cool. For softer cookies, bake for 10 minutes. For slightly crispier edges, go for 12.
- Cool. Let the cookies cool on the baking sheet for 5 minutes. This allows them to firm up without sticking. Then transfer them to a wire rack to cool completely. If you try to move them too soon, they’ll fall apart. Trust me, I’ve learned this the hard way.
Pro Tip: For perfectly round cookies, use a round cookie cutter or the rim of a glass to gently scoot the edges while they’re still warm on the baking sheet. It’s a small touch that makes them look bakery-perfect.
Cooking Tips & Techniques
After making these cookies at least a dozen times (including some spectacular failures), here’s what I’ve learned:
Don’t skip cooling the brown butter. I know you’re impatient—I am too. But if you add the egg to hot butter, you’ll end up with scrambled egg bits in your cookie dough. Let it cool for at least 5 minutes. Trust me, it’s worth the wait.
Use a light hand with the flour. The number one mistake I see in cookie recipes is measuring flour incorrectly. Spoon it into your measuring cup and level it off with a knife. Scooping directly from the bag can add up to 25% more flour, which makes dry, crumbly cookies.
Watch the microwave carefully. Brown butter can go from perfect to burnt in about 15 seconds. When you see it turn a deep amber color and smell that nutty aroma, stop immediately. If it looks too dark, it probably is—start over. Burnt butter tastes bitter and will ruin the cookies.
Chill the dough if you have time. The 15-minute chill in the fridge helps prevent the cookies from spreading too much. If you’re in a hurry, you can skip it—your cookies will just be a little flatter and crisper. Both versions are delicious, just different.
Bake one sheet at a time. I know it’s tempting to cram both sheets in the oven, but the uneven heat will lead to uneven baking. The bottom sheet will overbake while the top sheet underbakes. Take the extra 10 minutes and bake them separately.
My biggest failure: I once forgot the cornstarch entirely. The cookies spread into thin, lacy disks that were crispy but not chewy. They still tasted good, but they weren’t the soft, pillowy cookies I wanted. That little bit of cornstarch makes a huge difference.
Variations & Adaptations
These cookies are flexible, so feel free to make them your own. Here are some variations I’ve tried and loved:
Chocolate Chip Pumpkin Snickerdoodles: Fold in 1 cup of semi-sweet chocolate chips after mixing the dough. The chocolate pairs beautifully with the brown butter and pumpkin. My nephew’s favorite version, naturally.
Gluten-Free Version: Swap the all-purpose flour with a 1:1 gluten-free baking blend that contains xanthan gum. I’ve had great results with King Arthur’s Measure for Measure. Add an extra tablespoon of pumpkin puree to compensate for the drier gluten-free flour.
Vegan Adaptation: Use vegan butter (I like Miyoko’s) and a flax egg (1 tablespoon ground flaxseed mixed with 3 tablespoons water, let sit for 5 minutes). The vegan butter won’t brown as deeply, so add ¼ teaspoon of almond extract to mimic that nutty flavor.
Spiced-Up Version: Add ¼ teaspoon of cardamom and a pinch of black pepper to the dough for a more complex spice profile. It sounds unusual, but the pepper adds a subtle warmth that’s incredible with the pumpkin.
Pumpkin Cream Cheese Frosted: Make a simple cream cheese frosting (4 ounces cream cheese, 2 tablespoons butter, 1 cup powdered sugar, ½ teaspoon vanilla) and spread it on cooled cookies. It turns them into something closer to a pumpkin whoopie pie—decadent and totally worth the extra effort.
Serving & Storage Suggestions
These cookies are best served slightly warm, when the edges are still a little soft and the cinnamon-sugar coating is at its crunchiest. Let them cool for at least 10 minutes after baking, but if you can wait, 20 minutes is ideal—the texture really sets in.
What to serve with them: A cold glass of milk is the classic pairing, but I also love them with a hot cup of chai or a pumpkin spice latte. For a dessert spread, they’re fantastic alongside vanilla ice cream or a dollop of whipped cream.
Storage: Store the cookies in an airtight container at room temperature for up to 5 days. Place a slice of bread in the container to keep them soft—the bread absorbs excess moisture and releases it slowly. Replace the bread every other day.
Freezing: These cookies freeze beautifully. Place cooled cookies in a single layer in a freezer-safe container, separating layers with parchment paper. Freeze for up to 3 months. To thaw, let them sit at room temperature for about 15 minutes. You can also freeze the unbaked dough balls—roll them in the cinnamon-sugar first, then freeze on a baking sheet until solid. Transfer to a freezer bag and bake directly from frozen, adding 2 to 3 minutes to the baking time.
Reheating: Pop a cookie in the microwave for 10 seconds for that fresh-from-the-oven warmth. Or place them on a baking sheet in a 300°F oven for 5 minutes. The flavors actually deepen after a day or two—the brown butter and pumpkin meld together beautifully.
Nutritional Information & Benefits
Here’s the estimated nutritional breakdown for one cookie (based on 24 cookies):
| Nutrient | Amount per Cookie |
|---|---|
| Calories | 165 |
| Total Fat | 8g |
| Saturated Fat | 5g |
| Cholesterol | 25mg |
| Sodium | 95mg |
| Total Carbohydrates | 22g |
| Dietary Fiber | 1g |
| Sugars | 13g |
| Protein | 2g |
Health Benefits: Pumpkin is packed with vitamin A, which supports eye health and immune function. It’s also a good source of fiber and potassium. The brown butter provides a small amount of vitamin A and healthy fats. While these are definitely a treat, the pumpkin adds a nutritional boost that regular snickerdoodles don’t have.
Dietary Considerations: This recipe contains gluten, dairy, and eggs. For allergen-friendly options, see the variations section above.
Conclusion
These Easy Brown Butter Pumpkin Snickerdoodle Cookies are proof that you don’t need complicated techniques or fancy ingredients to make something truly special. The brown butter adds a nutty depth that transforms a simple cookie into something memorable, and the pumpkin keeps them soft and tender for days.
I love that this recipe works for busy weeknights when you’re craving something homemade but don’t have hours to spend in the kitchen. It’s the kind of cookie that makes you feel like you’ve accomplished something wonderful, even on a Tuesday after a long day.
So go ahead—make a batch tonight. Let the butter brown, roll those dough balls in cinnamon sugar, and fill your kitchen with the smell of fall. And if a twelve-year-old suggests a shortcut, maybe listen. You never know what you might learn.
I’d love to hear how these turn out for you! Drop a comment below with your variations, questions, or just to say hi. And if you share them on social media, tag me—I want to see your beautiful cookies. Happy baking!
Frequently Asked Questions
Can I use homemade pumpkin puree instead of canned?
Absolutely! Just make sure to strain it well. Homemade pumpkin puree tends to be more watery than canned, so place it in a fine-mesh strainer lined with paper towels for about 15 minutes to remove excess moisture. Otherwise, your cookies might spread too much.
Why did my cookies turn out flat?
Flat cookies usually mean the butter was too warm or the dough wasn’t chilled long enough. Make sure your browned butter has cooled to room temperature before mixing, and don’t skip the 15-minute chill in the fridge. Also, check that your baking soda and baking powder are fresh—they lose potency over time.
Can I make these cookies ahead of time?
Yes! You can make the dough up to 3 days in advance and keep it in the fridge. Let it sit at room temperature for 10 minutes before scooping and baking. You can also freeze the baked cookies for up to 3 months.
How do I know when the cookies are done baking?
Look for set edges and slightly cracked tops. The centers will still look soft and puffy—that’s perfect. They’ll continue to set as they cool on the baking sheet. If you wait until the centers look firm, they’ll be overbaked and dry.
Can I use salted butter instead of unsalted?
You can, but reduce the added salt in the recipe to ¼ teaspoon. Salted butter has varying amounts of salt depending on the brand, so it’s harder to control the final flavor. Unsalted butter gives you more consistent results.
Pin This Recipe!
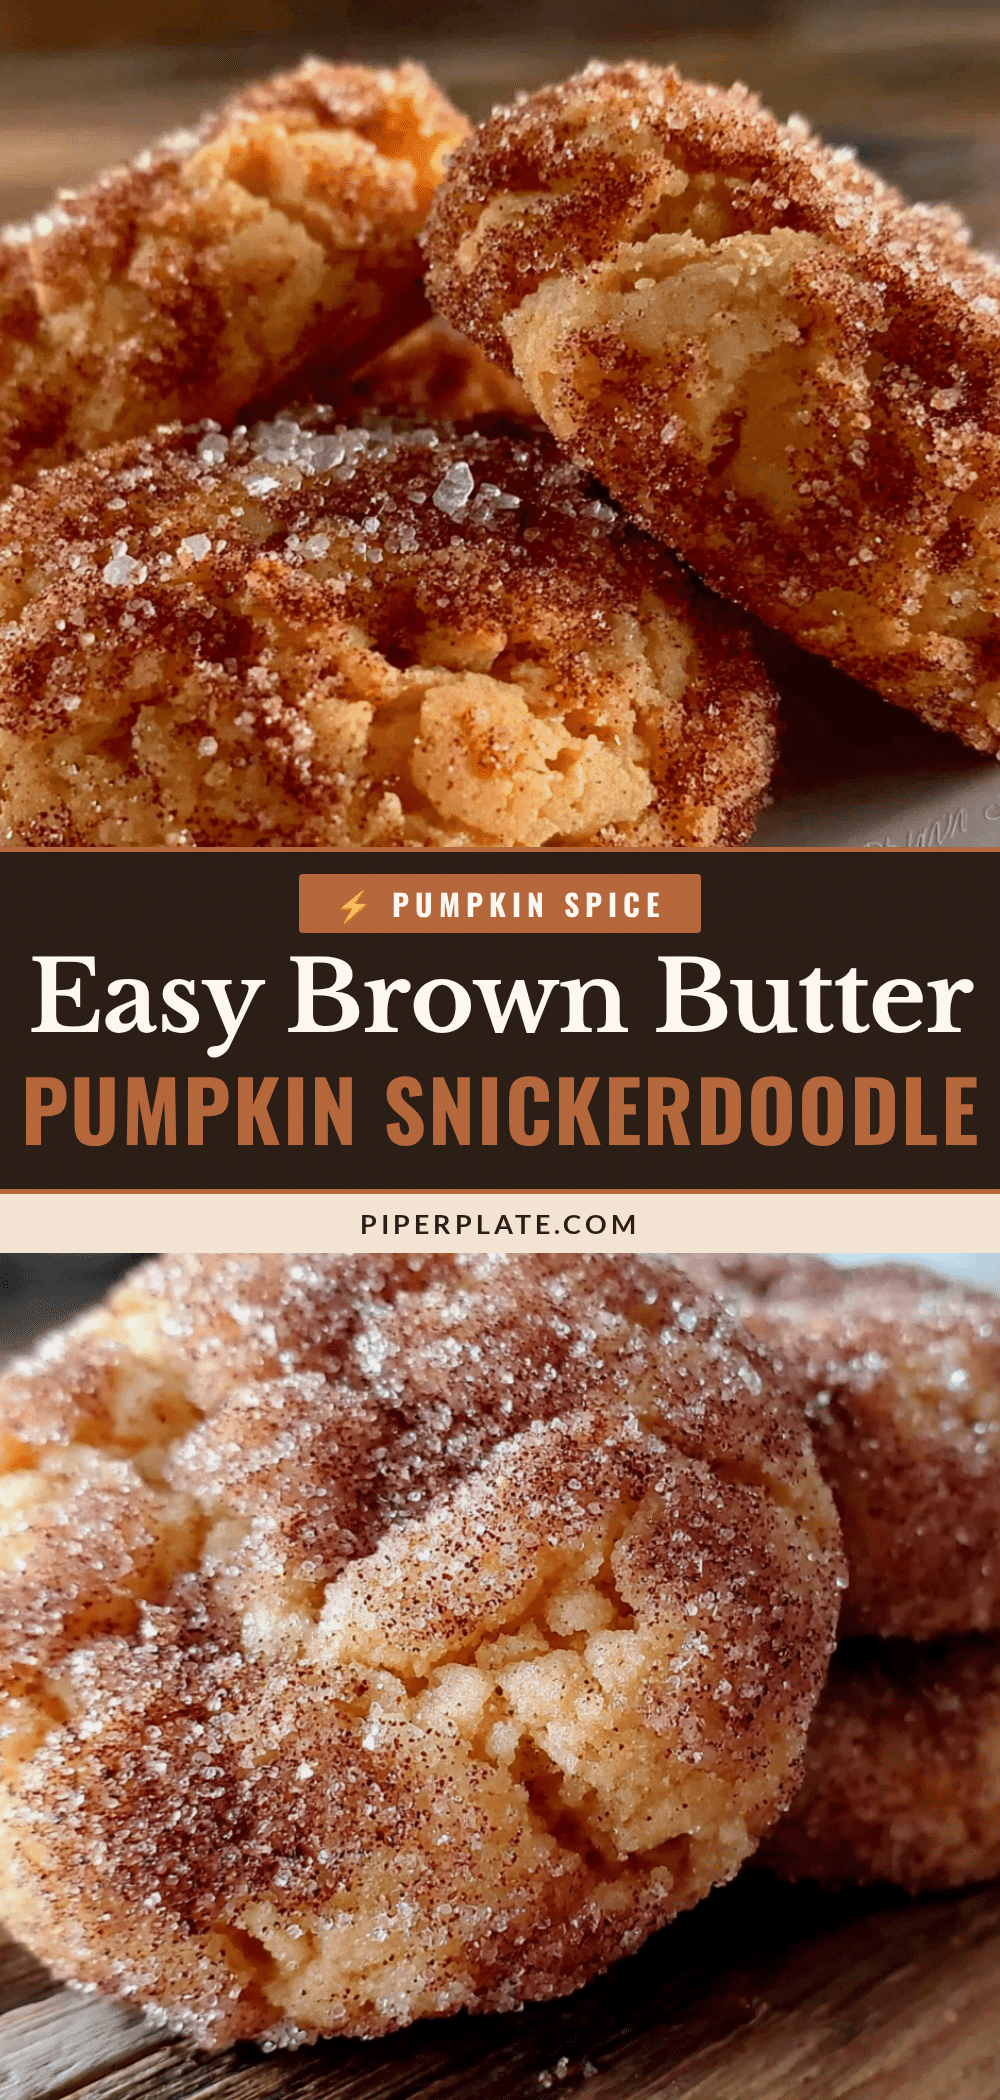
Easy Brown Butter Pumpkin Snickerdoodle Cookies
These Easy Brown Butter Pumpkin Snickerdoodle Cookies combine nutty brown butter with warm pumpkin and a cinnamon-sugar coating that shatters when you bite in. They’re soft, chewy, and taste like fall in a way that doesn’t require three hours in the kitchen.
- Prep Time: 15 minutes
- Cook Time: 12 minutes
- Total Time: 30 minutes
- Yield: 24 cookies 1x
- Category: Dessert
- Cuisine: American
Ingredients
- 1 cup (2 sticks) unsalted butter
- ½ cup pumpkin puree (not pumpkin pie filling)
- 1 cup granulated sugar
- ¼ cup granulated sugar (for coating)
- ½ cup light brown sugar, packed
- 1 large egg, room temperature
- 2 teaspoons vanilla extract
- 2 ½ cups all-purpose flour
- 1 tablespoon cornstarch
- 1 teaspoon baking soda
- ½ teaspoon baking powder
- ½ teaspoon salt
- 1 ½ teaspoons pumpkin pie spice
- 1 teaspoon cinnamon (for dough)
- 2 tablespoons cinnamon (for coating)
Instructions
- Brown the butter: Cut the butter into tablespoon-sized pieces and place in a microwave-safe bowl. Microwave on high for 30 seconds, then stir. Repeat in 30-second intervals, stirring each time, until the butter turns a deep amber color and smells nutty—about 2 to 3 minutes total. Pour into a large mixing bowl and let cool for 5 minutes.
- Mix the wet ingredients: Add the granulated sugar and brown sugar to the cooled browned butter. Whisk until smooth. Add the pumpkin puree, egg, and vanilla extract. Whisk vigorously until fully incorporated and smooth.
- Combine the dry ingredients: In a separate bowl, whisk together the all-purpose flour, cornstarch, baking soda, baking powder, salt, pumpkin pie spice, and 1 teaspoon cinnamon.
- Make the dough: Gradually add the dry ingredients to the wet mixture, stirring with a wooden spoon or rubber spatula until just combined. Do not overmix. Cover the bowl with plastic wrap and refrigerate for 15 minutes (optional but recommended).
- Prepare the coating: In a small bowl, mix the remaining 2 tablespoons cinnamon with ¼ cup granulated sugar. Set aside.
- Shape the cookies: Preheat oven to 350°F (175°C). Line two baking sheets with parchment paper. Using a cookie scoop or tablespoon, portion out rounded balls of dough—about 1.5 tablespoons each. Roll each ball between your palms until smooth, then roll generously in the cinnamon-sugar mixture. Place on prepared baking sheets, spacing about 2 inches apart.
- Bake: Bake one sheet at a time for 10 to 12 minutes, or until edges are set and tops look slightly cracked. Centers will still look soft and puffy.
- Cool: Let cookies cool on the baking sheet for 5 minutes, then transfer to a wire rack to cool completely.
Notes
Don’t skip cooling the brown butter before adding the egg to avoid scrambling. Use a light hand when measuring flour—spoon and level. Watch the microwave carefully as brown butter can burn quickly. Chilling the dough helps prevent spreading. Bake one sheet at a time for even results.
Nutrition
- Serving Size: 1 cookie
- Calories: 165
- Sugar: 13
- Sodium: 95
- Fat: 8
- Saturated Fat: 5
- Carbohydrates: 22
- Fiber: 1
- Protein: 2
Keywords: pumpkin snickerdoodle, brown butter cookies, fall cookies, easy pumpkin cookies, snickerdoodle recipe


