Love this? Save it for later!
Share the inspiration with your friends
I was standing in the checkout line at the grocery store, mentally running through my list for the third time, when the cashier—a woman named Delores who looked like she’d been working there since before I was born—leaned over her little counter and said, “You look like you need something sweet.” I laughed, because honestly, I probably did. It was mid-September, the air had that first crisp bite of fall, and I was already tired of the same old pumpkin-everything trend. “I’ve got a recipe for you,” she continued, scribbling on a torn piece of receipt paper. “My grandson calls them Halloween crack. They’re candy corn rice krispie treats.”
I almost didn’t take the note. I mean, candy corn is one of those polarizing candies—people either love it or act like it’s a crime against humanity. But there was something about Delores’s confidence. She wasn’t asking, she was telling. So I stuffed the paper in my pocket and figured I’d look at it later. When I finally did, I saw it was just a handful of ingredients and a method that sounded almost too simple. But let me tell you, the first batch I made disappeared before I could even snap a picture for Instagram. My kids were standing at the counter, faces smeared with marshmallow, asking when I was making more.
That was three falls ago, and these Easy Candy Corn Rice Krispie Treats have become my unofficial kickoff to the season. They’re not fancy. They’re not complicated. But they are exactly the kind of thing you need when you want something festive without spending hours in the kitchen. Maybe you’ve been there—staring at a Pinterest board full of elaborate fall desserts, feeling like you need a pastry degree just to make a decent treat. These are the opposite of that. They’re forgiving, they’re fast, and they taste like the best parts of childhood. And honestly? They’re the reason I still go through Delores’s checkout line every chance I get.
Why You’ll Love This Recipe
I’ve tested this recipe about a dozen times over the past few years, tweaking the butter-to-marshmallow ratio, trying different brands of cereal, and even experimenting with homemade candy corn (don’t do it, it’s not worth the hassle). What I landed on is the version that just works—every single time. Here is why I think you’re going to love it as much as I do:
- Quick & Easy: From start to finish, these come together in under 20 minutes. No baking, no complicated steps, no waiting around for dough to chill.
- Simple Ingredients: You probably already have butter, marshmallows, and rice krispie cereal in your pantry. All you need to pick up is a bag of candy corn.
- Perfect for Fall Gatherings: Whether it’s a Halloween party, a classroom treat, or just a cozy Sunday afternoon, these treats fit right in. They’re festive without being over-the-top.
- Crowd-Pleaser: I’ve served these to kids, adults, and even that one friend who claims they don’t like sweets. They always disappear. Even the candy corn skeptics come back for seconds.
- Unbelievably Delicious: The combination of salty butter, sweet marshmallow, and that slightly waxy, honey-flavored candy corn is surprisingly perfect. The texture is chewy with little pockets of soft candy in every bite.
What makes this recipe different from every other rice krispie treat out there is the timing. Most recipes tell you to stir the candy corn in at the end, but it melts into a sticky mess. I figured out that folding it in gently after the mixture has cooled just slightly keeps the candy corn intact, so you get those beautiful little orange and yellow specks throughout. It is not just another version—it is the best version, tested by a mom who has cleaned marshmallow off more countertops than she cares to admit.
This is the kind of treat that makes you close your eyes after the first bite. It is comfort food reimagined for the fall season—faster than baking a pie, simpler than making caramel apples, and with the same soul-soothing satisfaction. Perfect for impressing guests without any stress, or turning an ordinary afternoon into something memorable.
What Ingredients You Will Need
This recipe uses simple, pantry-friendly ingredients to deliver that nostalgic rice krispie treat texture with a festive fall twist. The ingredients are easy to find, and most of them are probably already in your kitchen. Here is what you will need:
- 3 tablespoons unsalted butter (salted butter works too, just reduce any added salt)
- 1 package (10 ounces) regular marshmallows (about 40 large marshmallows, or 4 cups mini marshmallows)
- 6 cups crispy rice cereal (I recommend Kellogg’s Rice Krispies for the best texture, but store brands work fine)
- 1 cup candy corn (about 6 ounces, or half a standard bag; Brach’s is my go-to for consistent texture)
- 1/4 teaspoon vanilla extract (optional, but adds a lovely warmth that complements the candy corn)
- Pinch of salt (if using unsalted butter, this balances the sweetness beautifully)
A few notes on ingredient selection. For the butter, I prefer unsalted because it lets me control the salt level, but if all you have is salted, just skip the extra pinch. The marshmallows should be fresh—stale marshmallows don’t melt as smoothly and can leave you with lumpy treats. I usually grab a new bag even if I have one in the pantry, just to be safe.
For the rice cereal, the brand matters a little less than you might think. I have used generic versions and they work fine, though they can be slightly less crispy. If you want that classic snap, stick with the name brand. The candy corn is where you have options. Brach’s is the most common and holds its shape well during folding. Some store brands are softer and may melt more, so keep that in mind. I have also tried the autumn blend with the little pumpkins, and those work great too—just cut the pumpkins in half if they are large.
If you want to get creative, you can swap the candy corn for candy pumpkins or even chopped caramel candies for a different fall vibe. For a gluten-free option, this recipe is naturally gluten-free as long as you use certified gluten-free rice cereal. Some brands have malt flavoring that contains gluten, so check the label if that is a concern.
Equipment Needed
You don’t need any fancy tools for this recipe, which is honestly one of my favorite things about it. Here is what you will need:
- Large pot or Dutch oven (at least 5-quart capacity, to give you room to stir without making a mess)
- Rubber spatula or wooden spoon (a silicone spatula is ideal because it scrapes the sides clean and won’t scratch your pot)
- 9×13-inch baking dish (a glass dish works best, but metal is fine too—just line it well)
- Parchment paper or wax paper (for lining the dish and for pressing the mixture down)
- Butter knife or offset spatula (for spreading and cutting)
- Sharp knife or bench scraper (for clean cuts after they set)
If you don’t have a 9×13 dish, you can use a larger rimmed baking sheet for thinner treats, or an 8×8 dish for thicker, chunkier ones. Just adjust the pressing time—thicker treats need a little more gentle pressing to avoid gaps. I have also made these in a mini muffin tin for bite-sized portions, which is great for parties. Just grease the tin well and press a spoonful into each cup.
One tip I learned the hard way: line your dish with parchment paper that hangs over the edges. This creates little handles that let you lift the whole block out for easier cutting. Trust me, trying to dig these out of the pan without parchment is a sticky disaster. Also, keep a bowl of cold water nearby to wet your hands or spatula when pressing the mixture—it prevents everything from sticking to you.
Preparation Method
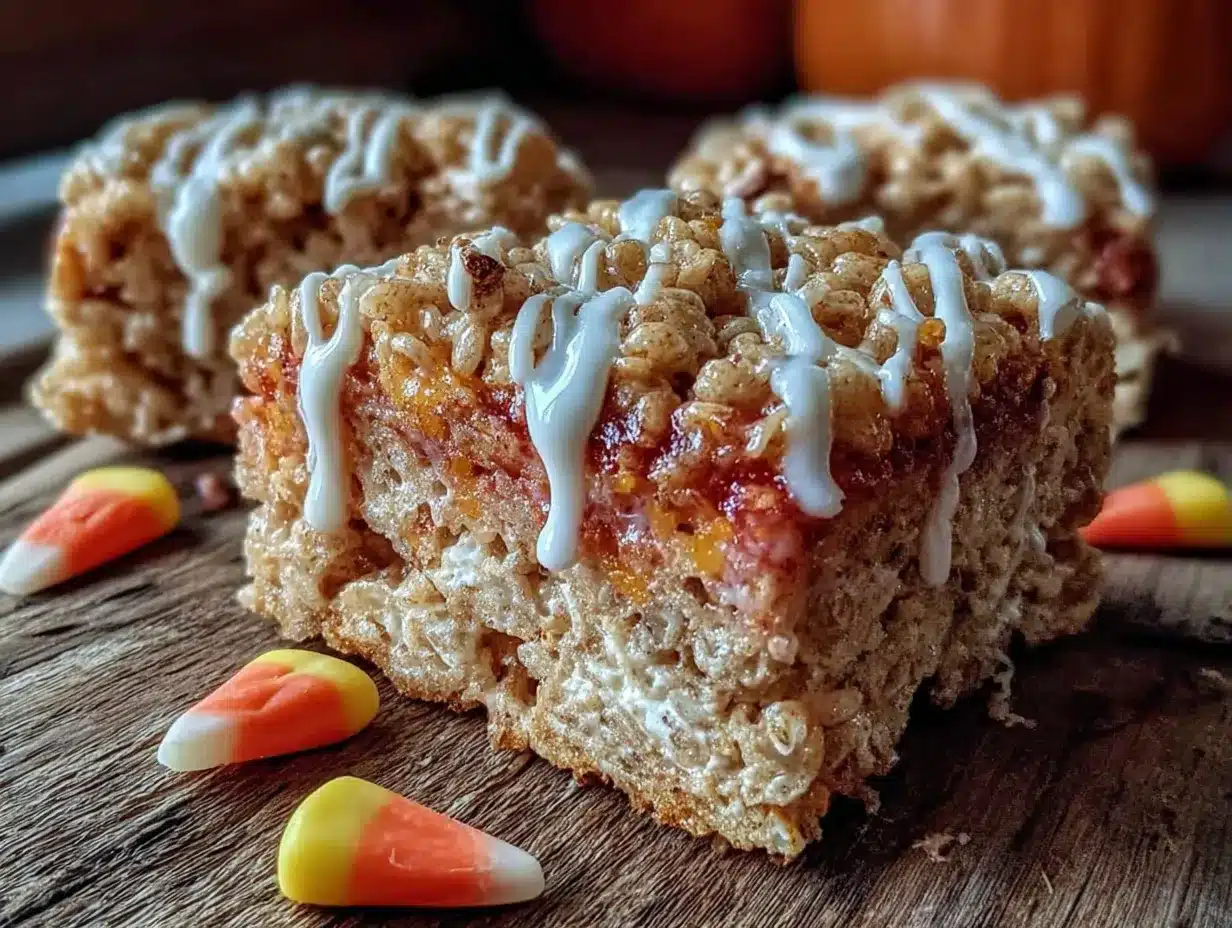
Making these Easy Candy Corn Rice Krispie Treats is straightforward, but there are a few key moments where attention to detail makes all the difference. Follow these steps, and you’ll have perfect treats every time.
- Prepare your baking dish. Line a 9×13-inch baking dish with parchment paper, leaving about 2 inches of overhang on two opposite sides. Lightly grease the parchment with butter or nonstick spray. This will make lifting and cutting the treats much easier later.
- Melt the butter. Place the 3 tablespoons of unsalted butter in a large pot over low heat. Let it melt slowly, swirling the pot occasionally. Do not rush this step—high heat can brown the butter, which changes the flavor. You want it just melted, not sizzling.
- Add the marshmallows. Once the butter is fully melted, pour in the entire package of marshmallows. Stir constantly with your rubber spatula until the marshmallows are completely melted and the mixture is smooth. This takes about 3-4 minutes on low heat. If you see any lumps, keep stirring—they will eventually melt. The mixture should look glossy and thick.
- Add vanilla and salt. Remove the pot from the heat. Stir in the 1/4 teaspoon vanilla extract and the pinch of salt (if using). Mix until fully incorporated. The vanilla will make the kitchen smell incredible, by the way.
- Fold in the cereal. Pour the 6 cups of crispy rice cereal into the pot. Gently fold it into the marshmallow mixture using a folding motion—lift from the bottom and turn over. Do not stir vigorously or you’ll crush the cereal. It should take about 10-15 folds to get everything evenly coated. Work quickly but gently.
- Let the mixture cool slightly. This is the step that makes or breaks the recipe. Let the mixture sit in the pot for 2-3 minutes. It should still be warm, but not hot. If you add the candy corn while the mixture is too hot, the candy will melt into sticky orange puddles. If you wait too long, the mixture will harden and won’t incorporate evenly. The sweet spot is when you can touch the mixture without burning your fingers but it is still pliable.
- Fold in the candy corn. Sprinkle the 1 cup of candy corn over the top of the cereal mixture. Fold it in gently, using about 5-7 folds. You want the candy corn distributed throughout, but you don’t want to overmix and break the cereal or melt the candy. Some pieces will stay whole, some will soften—that is perfect.
- Press into the dish. Transfer the mixture to your prepared baking dish. Lightly wet your hands or a spatula with cold water (this prevents sticking). Gently press the mixture into an even layer. Do not press too hard—you want them chewy, not dense. If you press too firmly, the treats will be hard and compact. Just a light, even pressure is all you need.
- Let them set. Allow the treats to cool completely at room temperature, about 30-45 minutes. Do not put them in the refrigerator—this can make them hard and dry. Once they are fully set, use the parchment overhang to lift the block out of the dish.
- Cut and serve. Use a sharp knife or bench scraper to cut the treats into squares. A 9×13 dish typically yields 12 large squares or 24 smaller ones. For clean cuts, wipe the knife clean between cuts. If the knife starts to stick, run it under warm water and dry it off before continuing.
A few sensory cues to watch for: when you fold the cereal, you should hear a gentle crackling sound—that means the cereal is still crisp. The mixture should look glossy and stretchy, not dry or crumbly. When you press it into the dish, it should feel soft and slightly springy, not hard. If it feels too stiff, you may have cooked the marshmallows too long. Don’t worry, they will still taste good—just a little firmer.
Cooking Tips & Techniques
After making these treats more times than I can count, I’ve gathered a few hard-earned tips that will save you from the mistakes I made along the way.
The low heat rule is non-negotiable. I know it is tempting to crank up the heat to melt the marshmallows faster, but do not do it. High heat can cause the sugar in the marshmallows to seize up, leaving you with a grainy, stiff mixture that is impossible to work with. Low and slow is the way to go. I learned this the hard way when I was rushing to make a batch for my daughter’s class party and ended up with a pot of sticky, burnt-smelling goo that I had to throw out. Patience pays off here.
Wet your tools. Keep a small bowl of cold water nearby while you work. Dip your spatula or your hands in the water before pressing the mixture into the dish. This prevents the marshmallow from sticking to everything. I also wet my knife before cutting, which gives me much cleaner edges. It is a small step that makes a huge difference.
Timing is everything with the candy corn. I cannot stress this enough. If you add the candy corn too early, it melts into a sticky mess that stains the whole batch orange. If you add it too late, the mixture is too stiff to fold it in evenly. I count to 120 after removing the pot from the heat before adding the candy corn. That two-minute window is my sweet spot.
Use fresh marshmallows. Marshmallows that have been sitting in your pantry for months will not melt as smoothly. They can be dry and crumbly, which leads to a lumpy texture. Always use a fresh bag for the best results. I keep a backup bag in my pantry and rotate them out regularly.
Multitask wisely. While the marshmallows are melting, I line my dish and measure out the cereal and candy corn. That way, when the marshmallow mixture is ready, I can move quickly without scrambling. The mixture sets fast, so having everything prepped and within reach is essential.
One last thing—do not skip the salt. Even if you are using salted butter, a tiny pinch of salt balances the intense sweetness of the candy corn and marshmallows. It makes the flavors pop rather than just hitting you with sugar. I add it every single time now, and it makes a noticeable difference.
Variations & Adaptations
One of the best things about this recipe is how easy it is to adapt. Here are a few variations I have tried and loved:
Chocolate Drizzle Version. After the treats have set, melt 1/2 cup of chocolate chips with 1 teaspoon of coconut oil in the microwave (30-second intervals, stirring between each). Drizzle the melted chocolate over the top of the treats in zigzag lines. Let the chocolate set before cutting. The combination of chocolate, marshmallow, and candy corn is surprisingly good—like a candy bar in treat form.
Peanut Butter Twist. Add 1/4 cup of creamy peanut butter to the marshmallow mixture after it melts, stirring until smooth. The peanut butter adds a savory richness that balances the sweetness perfectly. If you have a peanut allergy, sunflower seed butter works well too. I made this version for a football party and it was gone in ten minutes.
Gluten-Free Option. This recipe is naturally gluten-free as long as you use certified gluten-free rice cereal. Some brands add malt flavoring that contains gluten, so check the label. I use Nature’s Path Organic Crispy Rice Cereal for a gluten-free version that tastes just as good as the original.
Spiced Fall Version. Add 1/2 teaspoon of pumpkin pie spice to the marshmallow mixture along with the vanilla. The warm spices—cinnamon, nutmeg, ginger, and cloves—complement the candy corn beautifully and give the treats an even more autumnal flavor. I made this version for Thanksgiving last year and it was a hit with both kids and adults.
Mini Muffin Bite Version. Instead of pressing the mixture into a dish, grease a mini muffin tin and press a spoonful of the mixture into each cup. Let them set, then pop them out. These are perfect for parties or lunchbox treats. They are also easier to portion control—though I cannot promise you will stop at one.
Serving & Storage Suggestions
These treats are best served at room temperature, right after they have set. The texture is perfectly chewy with just a little give, and the candy corn pieces are still soft but not melted. If you are serving them at a party, I recommend cutting them into small squares—about 2 inches each—so people can grab one easily without making a mess.
For presentation, arrange the treats on a platter lined with fall-colored napkins or parchment paper. You can sprinkle a few extra candy corn pieces on top for a festive look. They also look great stacked in a mason jar or a clear cellophane bag tied with a ribbon—perfect for Halloween treat bags or teacher gifts.
As for storage, these treats keep well at room temperature in an airtight container for up to 5 days. I layer them between sheets of parchment paper to prevent them from sticking together. Do not store them in the refrigerator—the cold air dries them out and makes them hard. If your kitchen is warm, they will still be fine at room temperature for a few days.
For longer storage, you can freeze these treats for up to 3 months. Wrap each square individually in plastic wrap, then place them in a freezer-safe bag or container. To thaw, let them sit at room temperature for about 30 minutes. They will be just as chewy and delicious as the day you made them. I always freeze a batch in October so I have treats ready for unexpected visitors or last-minute school events.
One thing to note: the candy corn may soften slightly over time, especially if the treats are stored in a humid environment. That is not a bad thing—it actually makes the treats even more tender. If you prefer a firmer texture, eat them within the first two days.
Nutritional Information & Benefits
Let me be honest with you—these are a treat, not a health food. But knowing what is in them can help you enjoy them mindfully. Here is the estimated nutritional breakdown for one large square (based on 12 servings per recipe):
| Nutrient | Amount per Serving |
|---|---|
| Calories | 210 |
| Total Fat | 5g |
| Saturated Fat | 3g |
| Carbohydrates | 42g |
| Sugar | 28g |
| Protein | 2g |
| Sodium | 180mg |
On the positive side, the crispy rice cereal does provide a small amount of iron and B vitamins, and the butter adds a touch of vitamin A. But honestly, I make these because they make people happy, not because they are nutrient-dense. They are a celebration treat, meant to be enjoyed in moderation alongside a balanced diet.
If you have dietary concerns, note that this recipe contains dairy (butter) and is not vegan unless you substitute the butter with a plant-based alternative. I have used vegan butter successfully, though the texture is slightly less tender. The recipe is naturally nut-free and egg-free, making it a safe option for many common allergies. Always check your ingredient labels if you are serving someone with specific dietary needs.
From a wellness perspective, I believe treats like these have a place in a healthy life. They are about connection—sharing something sweet with people you care about, making memories in the kitchen, and allowing yourself a little indulgence without guilt. That matters just as much as the nutritional numbers.
Conclusion
These Easy Candy Corn Rice Krispie Treats have become a staple in my fall rotation, and I think they deserve a spot in yours too. They are simple enough to make on a whim, festive enough to impress at a party, and delicious enough that you will find yourself making excuses to whip up another batch. I love that they bring together the nostalgia of classic rice krispie treats with the playful spirit of Halloween candy, all without requiring any special skills or equipment.
I encourage you to make these your own. Add chocolate if that calls to you. Stir in some peanut butter. Sprinkle a little sea salt on top. The beauty of this recipe is that it is forgiving and adaptable—it wants you to succeed. And when you take that first bite, with the chewy marshmallow and the little pockets of candy corn, I think you will understand why Delores was so insistent that I try them.
If you make these, I would love to hear about it. Leave a comment below telling me how they turned out, or share a photo of your treats on social media. Did you try a variation? Did your kids help you make them? Did you burn the first batch like I did? I want to hear it all. That is what makes this community special—sharing the wins and the sticky messes alike.
So go ahead, grab a bag of candy corn and a box of cereal, and give these a try. Your kitchen is about to smell like fall, and your taste buds are in for a treat. Happy fall baking, friends.
Frequently Asked Questions
Can I use mini marshmallows instead of regular ones?
Yes, absolutely. If you are using mini marshmallows, use about 4 cups to replace the 10-ounce bag of regular marshmallows. Mini marshmallows actually melt a little faster, so keep an eye on them and stir constantly.
Why did my candy corn melt into the mixture?
This usually happens if you add the candy corn while the marshmallow mixture is still too hot. Let the mixture cool for 2-3 minutes after folding in the cereal before adding the candy corn. If your kitchen is warm, you might even need to wait an extra minute or two.
Can I use a different type of cereal?
You can, but the texture will change. Puffed rice cereal works best because it stays crispy. Cocoa rice cereal would give you a chocolate version, but the flavor might compete with the candy corn. I would stick with plain crispy rice cereal for the best results.
How do I get clean cuts without the treats crumbling?
Use a sharp knife and wipe it clean between each cut. You can also run the knife under warm water and dry it before cutting. Press down firmly and evenly—do not saw back and forth. A bench scraper works even better than a knife for this.
Can I make these treats ahead of time for a party?
Yes, you can make them up to 2 days in advance. Store them in an airtight container at room temperature. If you need to make them further ahead, freeze them as I described above and thaw them the day of your party. They taste best within the first 3 days.
Pin This Recipe!

Easy Candy Corn Rice Krispie Treats: Best Fall Dessert

These Easy Candy Corn Rice Krispie Treats are a quick, no-bake fall dessert that combines the nostalgic crunch of crispy rice cereal with the sweet, honey-flavored pop of candy corn. Perfect for Halloween parties, classroom treats, or a cozy afternoon snack, they come together in under 20 minutes with simple pantry ingredients.
- Prep Time: 10 minutes
- Cook Time: 10 minutes
- Total Time: 20 minutes
- Yield: 12 servings 1x
- Category: Dessert
- Cuisine: American
Ingredients
- 3 tablespoons unsalted butter
- 1 package (10 ounces) regular marshmallows (about 40 large or 4 cups mini)
- 6 cups crispy rice cereal (e.g., Kellogg’s Rice Krispies)
- 1 cup candy corn (about 6 ounces, half a standard bag)
- 1/4 teaspoon vanilla extract (optional)
- Pinch of salt (if using unsalted butter)
Instructions
- Line a 9×13-inch baking dish with parchment paper, leaving about 2 inches of overhang on two opposite sides. Lightly grease the parchment with butter or nonstick spray.
- Place 3 tablespoons unsalted butter in a large pot over low heat. Melt slowly, swirling occasionally, until just melted (do not brown).
- Add the entire package of marshmallows to the melted butter. Stir constantly with a rubber spatula over low heat until completely melted and smooth (about 3-4 minutes).
- Remove the pot from heat. Stir in 1/4 teaspoon vanilla extract and a pinch of salt (if using) until fully incorporated.
- Pour 6 cups crispy rice cereal into the pot. Gently fold with a folding motion (lift from bottom and turn over) until evenly coated, about 10-15 folds. Work quickly but gently to avoid crushing the cereal.
- Let the mixture cool in the pot for 2-3 minutes. It should still be warm but not hot to the touch.
- Sprinkle 1 cup candy corn over the cereal mixture. Fold gently with 5-7 folds to distribute evenly without melting the candy.
- Transfer the mixture to the prepared baking dish. Lightly wet your hands or a spatula with cold water, then gently press the mixture into an even layer. Do not press too hard.
- Let the treats cool completely at room temperature, about 30-45 minutes. Do not refrigerate.
- Use the parchment overhang to lift the block out of the dish. Cut into squares using a sharp knife (wipe clean between cuts). A 9×13 dish yields 12 large or 24 small squares.
Notes
Do not add candy corn while mixture is too hot or it will melt. Let mixture cool 2-3 minutes after adding cereal. Use fresh marshmallows for best texture. Wet hands or spatula with cold water to prevent sticking when pressing mixture. Store in an airtight container at room temperature for up to 5 days. Freeze for up to 3 months.
Nutrition
- Serving Size: 1 large square
- Calories: 210
- Sugar: 28
- Sodium: 180
- Fat: 5
- Saturated Fat: 3
- Carbohydrates: 42
- Protein: 2
Keywords: candy corn rice krispie treats, fall dessert, Halloween treats, no-bake dessert, easy rice krispie treats


