Love this? Save it for later!
Share the inspiration with your friends
My niece looked up from the store-bought pumpkin pie she was pushing around her plate and asked, “Auntie, why can’t you just put that filling inside a cookie?” I started to explain why that wouldn’t work—something about moisture ratios and soggy crusts—then stopped. She was seven. She didn’t care about my food science lecture. She wanted a handheld dessert she could eat while watching Hocus Pocus without a fork. So I grabbed my pie dough, a round cookie cutter, and the leftover can of pumpkin puree sitting in my fridge. I figured I’d humor her, then show her why the adults knew better. Twenty minutes later, I was eating my words—literally. Those clumsy little hand pies, with their slightly too-thick edges and filling that bubbled out the sides, were honestly the best thing I’d made all season. My niece didn’t say “I told you so,” but she didn’t have to. Her grin said it all. I’ve made them every October since, and let me tell you—she still reminds me about the time she taught her aunt how to bake.
These easy mini pumpkin hand pies are exactly what you need for Halloween—a fun, portable twist on classic pumpkin pie that comes together in under an hour. They’re perfect for school parties, trunk-or-treat events, or just a cozy night in with the family. And the best part? You probably already have most of the ingredients in your pantry. No fancy equipment required. Just a little pumpkin, some warm spices, and store-bought pie crust if you’re short on time. I mean, who doesn’t love a dessert that tastes like fall but doesn’t require a single fork?
Why You’ll Love This Recipe
Look, I’ve tested a lot of pumpkin recipes over the years. Some were gorgeous but took forever. Others were quick but tasted, well, like shortcuts. These mini hand pies hit that sweet spot between impressive and effortless. Here’s what makes them stand out:
- Kid-Approved and Parent-Friendly: My own kids devour these within minutes. No plates, no forks, no mess. They’re the ultimate Halloween treat for busy parents who still want something homemade.
- Budget-Friendly Ingredients: You don’t need anything fancy. Canned pumpkin, basic pantry spices, and refrigerated pie crust keep the grocery bill low while delivering that classic fall flavor.
- Comes Together in 45 Minutes: From start to finish, you’re looking at under an hour. That includes prep, assembly, and baking. Perfect for those chaotic school nights when someone inevitably forgets they need a treat for tomorrow’s class party.
- Perfect for Halloween Gatherings: These little pies are portable, easy to grab, and they don’t require any special serving dishes. Bring them to a potluck, hand them out at a party, or pack them in lunch boxes for a fun surprise.
- Crowd-Pleasing Flavor: The filling tastes just like traditional pumpkin pie—warm, spiced, and creamy—but the flaky pastry crust makes it even more irresistible. Even my neighbor who “doesn’t like pumpkin” asked for the recipe after trying one.
What sets this recipe apart is the texture. The filling is thick enough to hold its shape inside the pastry, so you don’t end up with a soggy mess. I figured that out after my first attempt—let’s just say my niece was very kind about the “pumpkin soup pockets” I served her. A little cornstarch makes all the difference, keeping everything neat and bakery-worthy. Honestly, these hand pies are the kind of treat that makes you close your eyes after the first bite. They’re comfort food reimagined—faster, simpler, but with the same soul-soothing satisfaction of a classic pumpkin pie.
What Ingredients You Will Need
This recipe uses simple, humble ingredients to create something genuinely special. Most of these are probably already in your kitchen, especially if you do any fall baking. Here’s what you’ll need to grab:
For the Pumpkin Filling
- 1 cup (240g) canned pumpkin puree (not pumpkin pie filling—look for 100% pure pumpkin, I prefer Libby’s for consistent texture)
- 1/4 cup (50g) packed brown sugar (light or dark both work; dark gives a deeper molasses flavor)
- 1 large egg yolk (this adds richness and helps bind the filling)
- 1 teaspoon pumpkin pie spice (or make your own: 1/2 tsp cinnamon, 1/4 tsp ginger, 1/8 tsp nutmeg, 1/8 tsp cloves)
- 1/2 teaspoon vanilla extract (pure vanilla makes a difference here)
- 1 tablespoon cornstarch (this is the secret to a firm, non-runny filling—don’t skip it)
- Pinch of salt (just enough to balance the sweetness)
For the Pastry
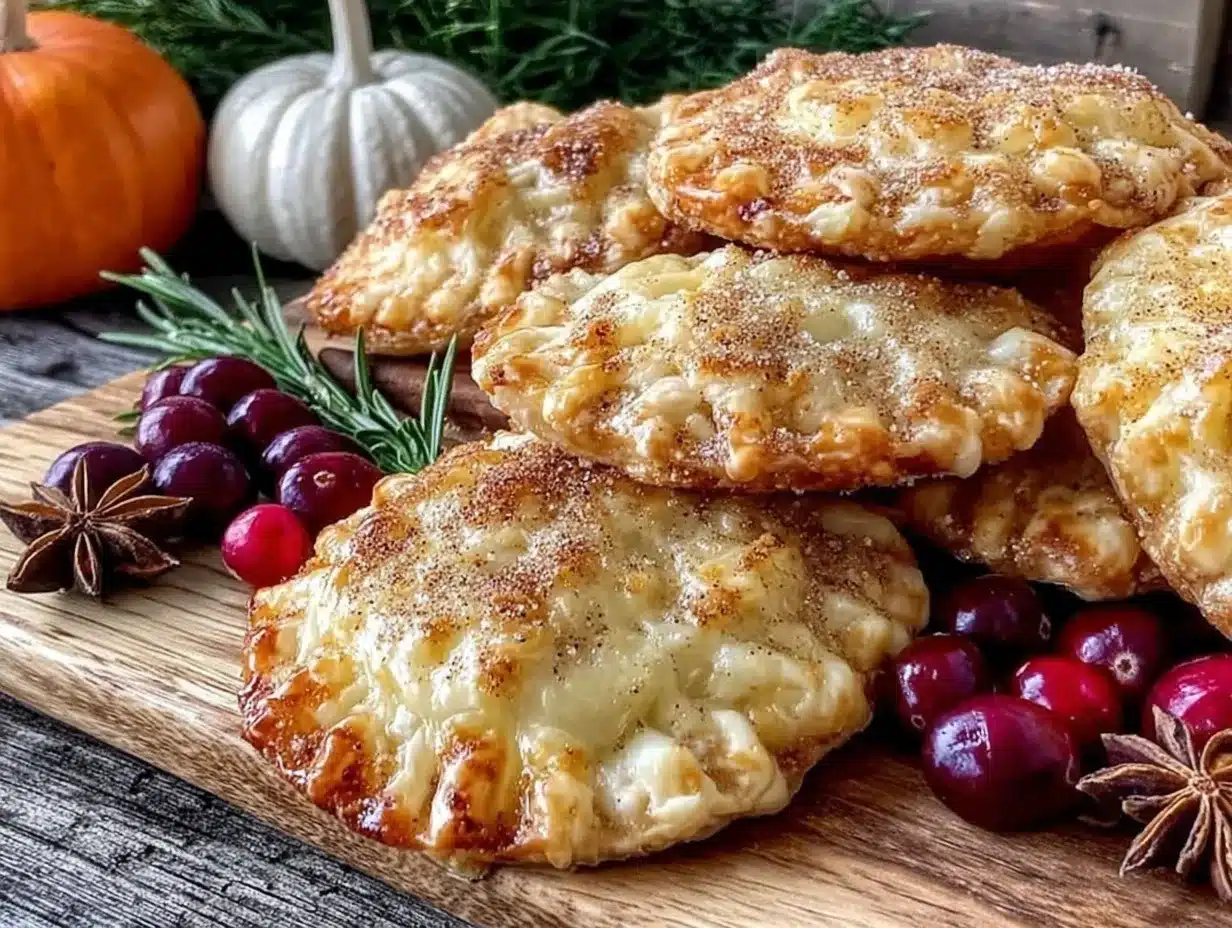
- 1 package (14-15 ounces) refrigerated pie crusts (you’ll need both crusts from the box; Pillsbury works great, or use homemade if you have a favorite recipe)
- 1 tablespoon milk or heavy cream (for brushing the tops)
- 1 tablespoon coarse sugar (like turbinado or demerara—this gives that lovely sparkly crunch)
Ingredient Tips from My Kitchen: Make sure your pumpkin puree isn’t too watery. If it looks loose, drain it through a fine-mesh sieve lined with a paper towel for about 15 minutes before mixing. I learned this the hard way when my first batch of hand pies leaked filling all over the baking sheet. Also, if you’re dairy-free, use a plant-based milk for brushing—almond or oat milk work fine. For a gluten-free version, grab a gluten-free pie crust mix and follow the package directions. Just note that gluten-free crusts can be more fragile, so handle them gently.
One more thing—don’t be tempted to use pumpkin pie filling instead of pure pumpkin. The pre-sweetened stuff has added sugar and spices that throw off the balance. You want to control the sweetness yourself. Trust me on this one.
Equipment Needed
You don’t need a fancy kitchen setup for these hand pies, which is part of their charm. Here’s what you’ll want to have on hand:
- Baking sheet (a standard half-sheet pan works perfectly)
- Parchment paper (non-stick foil works too, but parchment makes cleanup easier)
- Round cookie cutter (3 to 4 inches in diameter—I use a 3.5-inch cutter, but a drinking glass works in a pinch if you don’t have one)
- Rolling pin (even if you’re using pre-rolled crusts, a light roll helps even out the thickness)
- Small bowl (for mixing the filling)
- Fork (for crimping the edges and poking vent holes)
- Pastry brush (a silicone one is nice, but a clean paper towel dabbed in milk works fine)
- Measuring cups and spoons (standard set)
If you don’t have a cookie cutter, don’t run out and buy one. Use the rim of a glass or a small bowl to cut circles. I’ve even used a clean tuna can in a pinch—just make sure the edges aren’t sharp. And honestly, the imperfections make them look more homemade and charming. My first batch looked like abstract art, and my niece loved them even more for it.
Preparation Method
Let’s get baking. This is straightforward, but I’ll walk you through every step so you get perfect hand pies on your first try. Preheat your oven to 375°F (190°C) and line a baking sheet with parchment paper.
- Make the filling: In a small bowl, whisk together the pumpkin puree, brown sugar, egg yolk, pumpkin pie spice, vanilla extract, cornstarch, and salt. Stir until completely smooth. Give it a taste—it should be sweet and spiced, with the pumpkin flavor shining through. Set the bowl aside while you prepare the pastry.
- Prep your work surface: Lightly flour your counter or a large cutting board. Unroll both pie crusts and place them on the floured surface. If they’re a bit cold and stiff, let them sit at room temperature for 5 minutes—they’ll be easier to work with.
- Roll and cut: Use your rolling pin to gently roll each crust to about 1/8-inch thickness. You don’t need to go crazy here—just even them out a bit. Using your cookie cutter, cut out as many circles as you can from both crusts. You should get about 8 to 10 circles total, depending on the size of your cutter. Gather the scraps, gently press them together, and re-roll to cut a few more if needed. Don’t overwork the dough, or it’ll get tough.
- Fill the pies: Place half of the circles on your prepared baking sheet, spacing them about 2 inches apart. Spoon about 1 heaping tablespoon of filling onto the center of each circle. Leave a 1/2-inch border around the edges—this is important for sealing later. Don’t overfill, or they’ll burst open in the oven. I speak from experience. My kitchen looked like a pumpkin crime scene that one time.
- Seal them up: Place the remaining circles on top of the filled bottoms. Gently press the edges together with your fingertips to seal. Then take a fork and crimp all around the edges—this not only makes them look pretty but also helps create a tight seal. Use the fork to poke 3 or 4 small vent holes in the top of each pie. This lets steam escape so they don’t explode. (Another lesson I learned the messy way.)
- Give them a wash: In a small bowl, whisk the milk or cream. Use your pastry brush (or a paper towel) to lightly brush the tops of each hand pie. This gives them that beautiful golden-brown finish. Sprinkle the coarse sugar generously over the tops—don’t be shy with it. That crunchy texture is half the appeal.
- Bake: Place the baking sheet in the preheated oven and bake for 18 to 22 minutes, or until the crusts are golden brown and the filling is bubbly. You might see a little filling escape from the vent holes—that’s totally normal. Let them cool on the baking sheet for 5 minutes, then transfer to a wire rack to cool completely. I know they smell amazing, but let them cool for at least 15 minutes before serving. The filling gets lava-hot and can burn little mouths.
Pro tip: If you want to make these ahead of time, you can assemble them completely and freeze them on the baking sheet before baking. Once frozen solid, transfer them to a freezer bag. When you’re ready to bake, just add 3 to 5 minutes to the baking time. No thawing needed. This is a lifesaver for Halloween parties.
Cooking Tips & Techniques
I’ve made these hand pies more times than I can count, and I’ve definitely learned a few things along the way. Here are the tips I wish someone had told me before my first attempt:
Don’t skip the cornstarch. I know it seems like a small thing, but it’s what keeps your filling from turning into pumpkin soup. Without it, the moisture from the pumpkin soaks into the pastry crust, and you end up with a soggy bottom. Nobody wants that. The cornstarch thickens the filling as it bakes, giving you that perfect, sliceable texture.
Keep your filling thick. If your pumpkin puree seems watery, drain it before mixing. I mentioned this earlier, but it’s worth repeating. A thin filling is the number one reason hand pies leak in the oven. You want the filling to be thick and spreadable, not runny. If it looks loose, add another teaspoon of cornstarch.
Chill the assembled pies. If your kitchen is warm, pop the filled and sealed hand pies in the fridge for 10 minutes before brushing them with milk and baking. This firms up the butter in the pastry, which helps the crust stay flaky and prevents it from spreading too much. I do this especially when I’m baking in summer or in a stuffy kitchen.
Watch the edges. The most common mistake I see is over-brushing the edges with milk. This can glue the layers together and prevent them from puffing up. Just brush the tops, not the crimped edges. And don’t let the milk pool around the base of the pies—it can make the bottoms soggy.
Multitask wisely. While the hand pies are baking, clean up your workspace and get out any serving plates. They bake quickly, so you don’t want to be scrambling when the timer goes off. I usually make these while my kids are doing homework, and the whole process—from mixing to cooling—fits neatly into that window.
One last thing: if you’re making these with little helpers, expect some messy pies. That’s part of the fun. My youngest once made a hand pie that looked more like a ravioli, and it was her favorite one. Imperfect pies still taste perfect.
Variations & Adaptations
These hand pies are incredibly forgiving, so feel free to play around. Here are some variations I’ve tried and loved:
Spice it up: Add a pinch of cayenne pepper or a dash of cardamom to the filling for a grown-up twist. The heat pairs beautifully with the sweetness. I did this for a Halloween party last year, and the adults kept sneaking extras.
Make them savory: Skip the sugar and add some crumbled bacon or shredded cheddar to the pumpkin filling. Use a pinch of black pepper and sage instead of pumpkin pie spice. These make a great appetizer for a fall gathering—my brother-in-law actually prefers these over the sweet version.
Try different crusts: Use puff pastry instead of pie crust for an extra-flaky, buttery texture. Just cut the puff pastry into squares, fill, fold into triangles, and crimp the edges. Bake at 400°F (200°C) for about 15 minutes. They puff up beautifully and look super fancy with almost no effort.
Go gluten-free: As I mentioned, a gluten-free pie crust works well here. Just be extra gentle when handling it, and don’t overfill. I’ve also used gluten-free puff pastry with great results. The texture is slightly different, but the flavor is still spot-on.
Add a filling twist: Stir in a tablespoon of mini chocolate chips or chopped pecans to the pumpkin filling. The chocolate melts into little pockets of gooey goodness. My niece insists this is the “only acceptable way” to make them now. A dollop of cream cheese mixed into the filling is also amazing—it adds a tangy richness that balances the sweetness.
Dairy-free option: Use a vegan pie crust (many store-bought ones are accidentally vegan) and brush with oat milk or almond milk. The filling is naturally dairy-free if you skip the cream cheese variation. These still bake up beautifully.
Serving & Storage Suggestions
These hand pies are best served warm, but they’re delicious at room temperature too. Here’s how to make the most of them:
Serving temperature: Let them cool for at least 15 minutes after baking so the filling sets. If you serve them too soon, the filling will be runny and can burn tongues. Warm is good—lava-hot is not. I usually let them cool on a wire rack while I brew a pot of coffee or pour some cold milk for the kids.
Presentation ideas: Arrange them on a platter with a dusting of powdered sugar and a few cinnamon sticks for a fall vibe. For Halloween, place them on a black or orange platter with some candy corn scattered around. Kids love the festive look, and it makes the dessert table feel special without much effort.
What to serve with them: A scoop of vanilla ice cream is the classic pairing—the cold creaminess contrasts beautifully with the warm, spiced filling. A drizzle of caramel sauce takes them over the top. For a lighter option, serve with a dollop of whipped cream (canned is totally fine—I won’t judge) and a sprinkle of cinnamon. They also pair wonderfully with a hot apple cider or a pumpkin spice latte for the adults.
Storage instructions: Store leftover hand pies in an airtight container at room temperature for up to 2 days. For longer storage, refrigerate them for up to 5 days. The pastry will soften slightly in the fridge, but they’re still delicious. To reheat, pop them in a 350°F (175°C) oven for 5 to 7 minutes, or until warmed through. A toaster oven works great too. Avoid the microwave if you can—it makes the pastry soggy. If you’re in a hurry, 15 seconds in the microwave is okay, but the texture won’t be as nice.
Freezer tips: These freeze beautifully, both baked and unbaked. For baked pies, let them cool completely, then freeze in a single layer on a baking sheet. Once frozen, transfer to a freezer bag. They’ll keep for up to 3 months. Thaw at room temperature or reheat directly from frozen in a 350°F oven for 8 to 10 minutes. For unbaked pies, freeze them on the baking sheet, then transfer to a bag. Bake directly from frozen, adding 3 to 5 minutes to the baking time.
Flavor development: Honestly, these hand pies taste even better the next day. The spices meld together, and the pastry softens just slightly, making them extra tender. If you can resist eating them all on day one, you’re in for a treat on day two. I’ve been known to hide a few in the back of the fridge for “emergencies.”
Nutritional Information & Benefits
Let’s be real—these are a treat, not a health food. But compared to store-bought Halloween sweets, they’re actually a step up. Here’s a rough breakdown per hand pie (based on 10 servings):
- Calories: approximately 180-220
- Fat: 9-11g (mostly from the butter in the crust)
- Carbohydrates: 24-28g
- Sugar: 10-12g (significantly less than a candy bar)
- Protein: 2-3g
- Fiber: 1-2g
What makes them a bit better for you: Pumpkin is packed with vitamin A (beta-carotene), which supports eye health and immune function. It’s also a good source of fiber, which helps keep everyone full and satisfied. The spices—cinnamon, ginger, nutmeg—have anti-inflammatory properties and add flavor without extra sugar. Plus, since you’re making them at home, you control exactly what goes in. No preservatives, no high-fructose corn syrup, no weird additives.
Dietary considerations: This recipe can easily be made dairy-free (use vegan crust and plant-based milk) and can be adapted to be gluten-free (use a gluten-free crust). It’s naturally nut-free, though be sure to check your pie crust label if allergies are a concern. The filling contains egg, so it’s not vegan, but you could try a flax egg substitute if needed—though I haven’t tested that myself, so results may vary.
I’m not a nutritionist, and I firmly believe that treats have a place in a balanced diet. These hand pies are a fun, homemade alternative to ultra-processed Halloween candy. They’re special because they’re made with love, and that counts for something, doesn’t it?
Conclusion
These easy mini pumpkin hand pies have become a non-negotiable part of our Halloween tradition. They’re simple enough for a weeknight, special enough for a party, and forgiving enough for even the most inexperienced baker. My niece still makes them with me every year, and she still reminds me about that first time she taught me something in the kitchen. Honestly, that’s the best part of this recipe—it’s not just about the food. It’s about the messy, imperfect, wonderful moments you create with the people you love.
I’d love to hear how yours turn out. Did your kids have any brilliant suggestions? Did you try a variation that blew your mind? Drop a comment below and let me know—I read every single one. And if you share a photo on Pinterest or Instagram, tag me so I can see your beautiful (or beautifully imperfect) hand pies. Happy Halloween, friends. Go make some memories in the kitchen.
Frequently Asked Questions
Can I use homemade pie crust instead of store-bought?
Absolutely. Homemade pie crust works beautifully here. Just roll it out to about 1/8-inch thickness and cut your circles. If you have a favorite butter crust recipe, use it. The hand pies will be even flakier and more delicious. Just keep in mind that homemade crust may shrink slightly more than store-bought, so leave a little extra room around the edges when cutting.
Why did my hand pies leak in the oven?
This usually happens for one of three reasons: the filling was too thin (add more cornstarch next time), the edges weren’t sealed tightly enough (use that fork to really crimp them), or the vent holes weren’t big enough (poke a few extra holes). Don’t worry—leaky pies still taste amazing. Just scrape off any burnt filling and enjoy them anyway.
Can I make these ahead of time for a party?
Yes! You have two options. Assemble the hand pies completely, freeze them unbaked on a baking sheet, then transfer to a freezer bag. Bake directly from frozen, adding 3 to 5 minutes to the baking time. Or bake them fully, cool completely, and store in an airtight container at room temperature for up to 2 days. Reheat in a 350°F oven for 5 minutes before serving.
Can I use fresh pumpkin instead of canned?
You can, but you’ll need to cook and puree it first, then drain it very well. Fresh pumpkin tends to be more watery than canned, so spread the puree on a paper towel-lined plate and let it sit for 15 minutes to remove excess moisture. I usually stick with canned for consistency and convenience, especially during the busy Halloween season.
How do I make these vegan?
To make vegan hand pies, use a vegan pie crust (many store-bought brands are accidentally vegan), replace the egg yolk with 1 tablespoon of cornstarch mixed with 2 tablespoons of water, and brush the tops with plant-based milk. The filling will be slightly less rich, but still delicious. I’ve made them this way for a friend’s vegan Halloween party, and they disappeared in minutes.
Pin This Recipe!
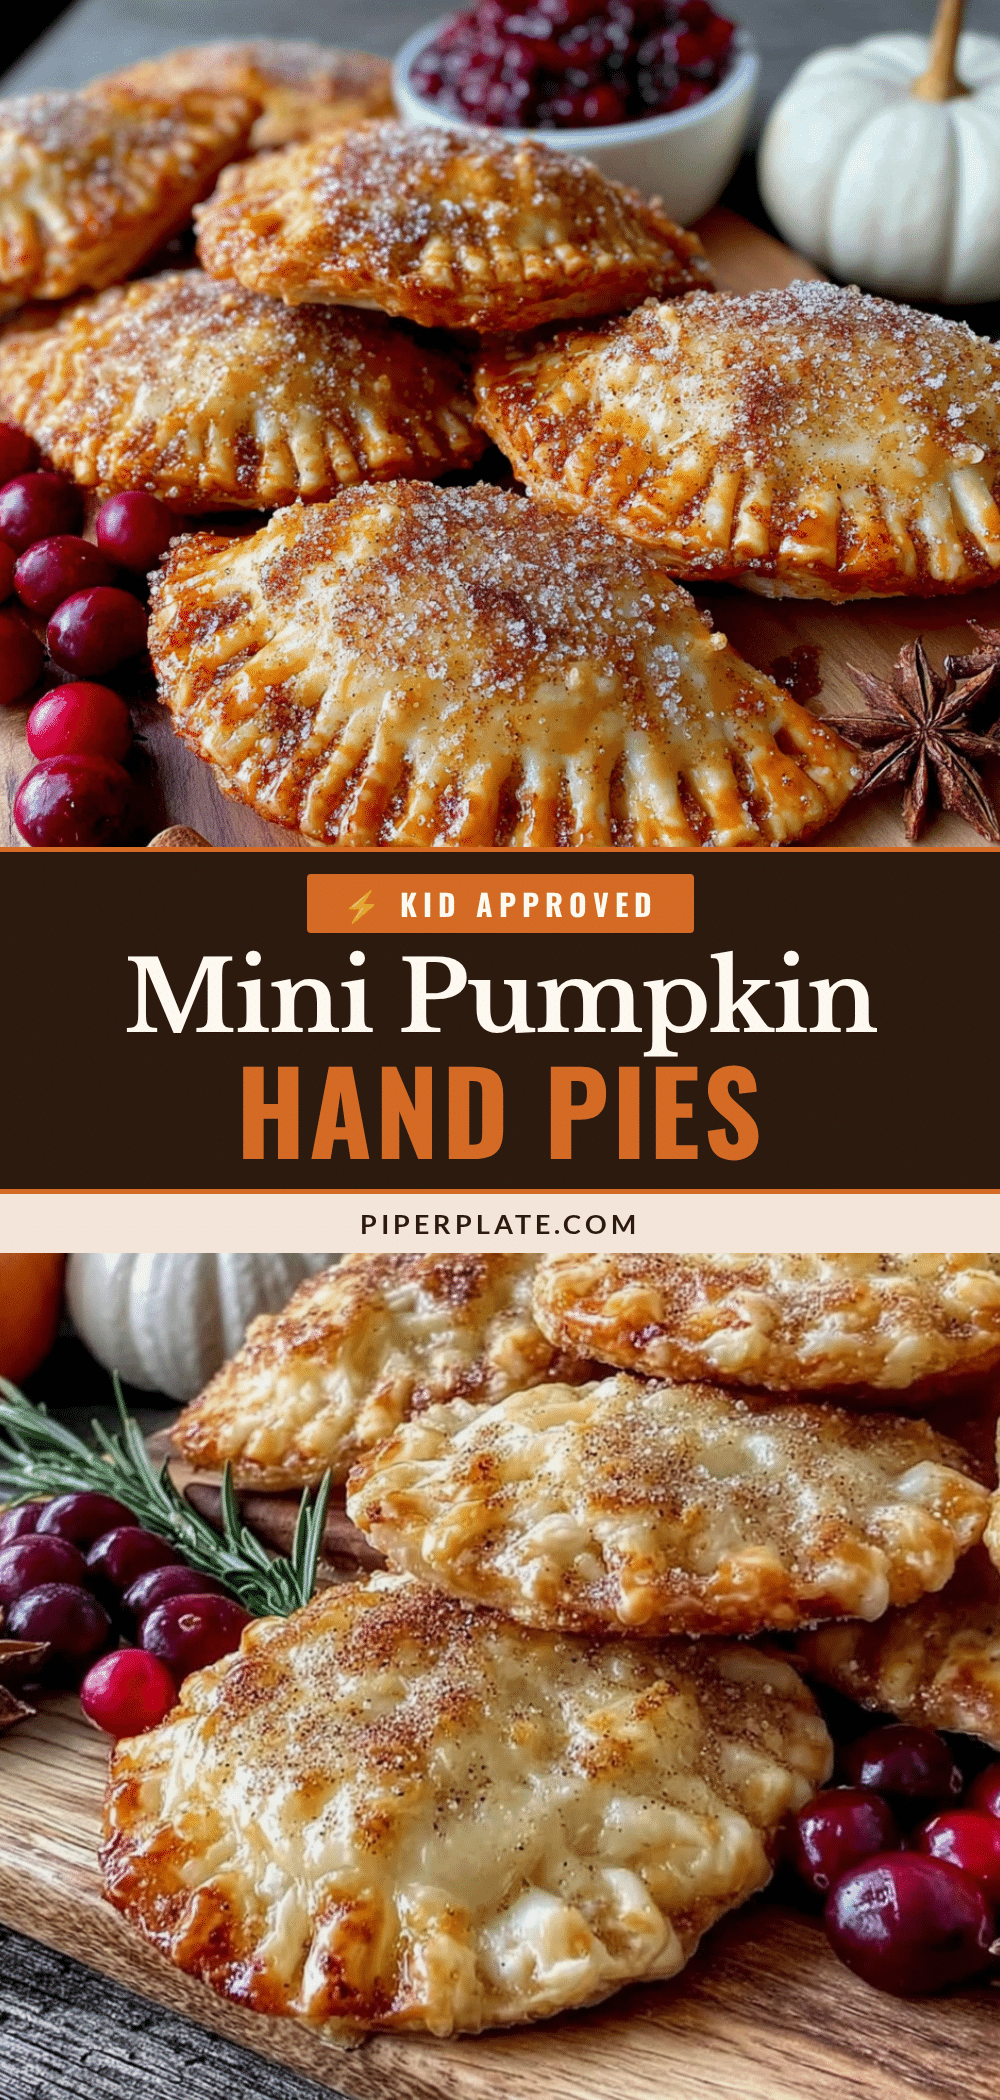
Easy Mini Pumpkin Hand Pies for Halloween

These easy mini pumpkin hand pies are a fun, portable twist on classic pumpkin pie that comes together in under an hour. Perfect for Halloween parties, trunk-or-treat events, or a cozy night in with the family.
- Prep Time: 20 minutes
- Cook Time: 20 minutes
- Total Time: 45 minutes
- Yield: 8 to 10 servings 1x
- Category: Dessert
- Cuisine: American
Ingredients
- 1 cup (240g) canned pumpkin puree (not pumpkin pie filling)
- 1/4 cup (50g) packed brown sugar (light or dark)
- 1 large egg yolk
- 1 teaspoon pumpkin pie spice (or 1/2 tsp cinnamon, 1/4 tsp ginger, 1/8 tsp nutmeg, 1/8 tsp cloves)
- 1/2 teaspoon vanilla extract
- 1 tablespoon cornstarch
- Pinch of salt
- 1 package (14-15 ounces) refrigerated pie crusts (2 crusts)
- 1 tablespoon milk or heavy cream (for brushing)
- 1 tablespoon coarse sugar (like turbinado or demerara)
Instructions
- Preheat oven to 375°F (190°C) and line a baking sheet with parchment paper.
- Make the filling: In a small bowl, whisk together pumpkin puree, brown sugar, egg yolk, pumpkin pie spice, vanilla extract, cornstarch, and salt until smooth. Set aside.
- Lightly flour your work surface. Unroll both pie crusts and let sit at room temperature for 5 minutes if cold.
- Roll each crust to about 1/8-inch thickness. Use a round cookie cutter (3 to 4 inches) to cut out circles. Gather scraps, press together, and re-roll to cut more. You should get 8 to 10 circles.
- Place half of the circles on the prepared baking sheet, spacing 2 inches apart. Spoon about 1 heaping tablespoon of filling onto the center of each, leaving a 1/2-inch border.
- Place remaining circles on top. Press edges together with fingertips, then crimp with a fork. Poke 3-4 vent holes in the top of each pie.
- Brush tops with milk or cream and sprinkle generously with coarse sugar.
- Bake for 18 to 22 minutes, until golden brown and filling is bubbly. Cool on baking sheet for 5 minutes, then transfer to a wire rack. Let cool at least 15 minutes before serving.
Notes
Don’t skip the cornstarch—it keeps the filling from becoming runny. If pumpkin puree seems watery, drain it through a fine-mesh sieve lined with a paper towel for 15 minutes. For a dairy-free version, use plant-based milk for brushing. For gluten-free, use a gluten-free pie crust. Assemble and freeze unbaked pies for up to 3 months; bake directly from frozen, adding 3-5 minutes to baking time.
Nutrition
- Serving Size: 1 hand pie
- Calories: 200
- Sugar: 11
- Sodium: 180
- Fat: 10
- Saturated Fat: 4
- Carbohydrates: 26
- Fiber: 1.5
- Protein: 2.5
Keywords: mini pumpkin hand pies, Halloween dessert, pumpkin hand pies, easy pumpkin recipe, fall dessert, portable pumpkin pie


