Love this? Save it for later!
Share the inspiration with your friends
My sister-in-law, Jen, wasn’t trying to impress anyone. It was a random Tuesday night in late October, and I’d stopped by to drop off a casserole dish I’d borrowed. The smell hit me before I even got past her front door—warm, buttery, and a little bit savory, with that unmistakable toasty scent of baking dough. I walked into her kitchen to find her casually pulling a baking sheet out of the oven, covered in the most ridiculous, adorable little mummy hot dogs I’d ever seen. She looked at me, shrugged, and said, “Oh, it’s just something quick for the kids.” Just something quick. Let me tell you, there was nothing “just” about it. They were perfect—crispy, golden, with little mustard eyes peeking out from the dough wraps. She made it look like it was nothing, but I knew in that moment I’d be making these for years. Honestly, maybe you’ve been there—you see a recipe that looks too fun to be easy, and you just know you have to try it. That was me, standing in her kitchen, already planning my next grocery run for crescent rolls and hot dogs.
This recipe for quick mummy hot dogs with crescent dough wrap has become a staple in my house, especially on those weeknights when you need dinner on the table in under 20 minutes. It’s the kind of meal that makes the kids cheer and the adults secretly smile because it’s so ridiculously simple. I’ve made them for Halloween parties, for after-school snacks, and for those nights when I just don’t have the energy to cook anything complicated. And every single time, they disappear within minutes. There’s something about the flaky, buttery crescent dough wrapped around a juicy hot dog that feels like pure comfort food magic. Plus, the mummy look is just too fun not to share. I mean, who doesn’t love a hot dog that stares back at you with little mustard eyes?
Why You’ll Love This Recipe
Let’s be real for a second. You’re busy. You’re tired. And you need something that’s going to get dinner on the table without a lot of fuss. These mummy hot dogs are exactly that. They come together in about 15 minutes from start to finish, which means you can have a hot, satisfying meal even on the craziest weeknights. No complicated steps, no fancy ingredients—just simple, delicious food that everyone will love.
- Quick & Easy: From prep to plate in under 20 minutes. Seriously, you can have these in the oven before your kids even finish asking what’s for dinner.
- Simple Ingredients: You only need three main ingredients—hot dogs, crescent dough, and mustard. Chances are, you already have everything in your kitchen right now.
- Perfect for Weeknights: Whether it’s a busy Tuesday or a lazy Sunday, these mummy hot dogs are perfect for those nights when you need dinner fast without sacrificing fun.
- Crowd-Pleaser: Kids absolutely adore them, and adults can’t resist the buttery, flaky goodness either. They’re great for parties, playdates, or just a fun family dinner.
- Unbelievably Delicious: The combination of salty hot dog wrapped in tender, golden crescent dough is next-level comfort food. It’s simple, but it’s perfect.
What makes this recipe different from the rest? It’s the technique. Instead of cutting the dough into strips and wrapping each one individually (which takes forever and makes a mess), I’ve found a much faster method. You simply cut the dough into thin strips all at once, then wrap each hot dog quickly and efficiently. It’s a game-changer, I promise. This isn’t just another version of mummy dogs—it’s the best version. The one that saves you time and delivers the same amazing results every single time.
And honestly, there’s something about the first bite that just makes everything better. The flaky dough gives way to the juicy hot dog, and the little mustard eyes add just a hint of tangy flavor. It’s comfort food reimagined—faster, easier, but with the same soul-soothing satisfaction. Perfect for impressing your kids without stress, or turning a simple weeknight dinner into something memorable.
What Ingredients You Will Need
This recipe uses simple, everyday ingredients to deliver big flavor and fun presentation without any fuss. Everything is easy to find at your local grocery store, and you probably have most of it on hand already.
- Hot dogs (8 count): Use your favorite brand. I personally prefer beef hot dogs for their richer flavor, but chicken or turkey hot dogs work great too. Look for standard-sized hot dogs, not the jumbo ones, for the best dough-to-meat ratio.
- Refrigerated crescent roll dough (2 cans, 8 oz each): This is the star of the show. I recommend Pillsbury for consistent results, but any brand will work. The dough should be cold when you work with it—it’s much easier to cut into strips when it’s firm.
- Yellow mustard (for the eyes): A little squeeze of mustard creates the perfect “mummy eyes.” You can use yellow mustard, Dijon, or even ketchup if you prefer. I like classic yellow mustard for that authentic hot dog stand flavor.
- Optional: Cooking spray or butter for greasing: A light spray on the baking sheet prevents sticking and helps the dough brown evenly. You can also use parchment paper if you prefer no-mess cleanup.
- Optional: Everything bagel seasoning or sesame seeds for garnish: If you want to get fancy, a sprinkle of seasoning adds extra flavor and texture. But honestly, they’re perfect just as they are.
One thing I’ve learned from making these dozens of times is that the quality of the crescent dough really matters. I’ve tried generic brands, and while they work, they just don’t get as flaky and golden as Pillsbury. It’s worth spending the extra dollar or two for the real deal. Also, make sure your hot dogs are at room temperature before wrapping—cold hot dogs can cause the dough to tear when you’re wrapping them.
For a fun twist, try using different types of hot dogs. I’ve made these with cheese-filled hot dogs (the kids went crazy), spicy jalapeño hot dogs for the adults, and even vegetarian hot dogs for a meatless option. The recipe is incredibly forgiving, so feel free to experiment with whatever you have on hand.
Equipment Needed
You don’t need any fancy equipment to make these mummy hot dogs. Here’s what you’ll need:
- Baking sheet (1 large): A standard half-sheet pan works perfectly. If you don’t have one, any rimmed baking sheet will do. Just make sure it’s large enough to hold all 8 mummy dogs without crowding.
- Parchment paper or silicone baking mat: This makes cleanup a breeze and prevents the dough from sticking. I prefer parchment paper because it’s disposable and I don’t have to wash anything.
- Sharp knife or pizza cutter: You’ll need something sharp to cut the crescent dough into strips. A pizza cutter makes quick work of it, but a sharp knife works just as well. A dull knife will squish the dough, so make sure it’s sharp.
- Pastry brush (optional): If you want to brush the dough with butter or egg wash for extra golden color, a pastry brush is handy. But honestly, I skip this step most of the time—the dough browns beautifully on its own.
- Small bowl for mustard: You’ll need a tiny bowl to squeeze the mustard into for the eyes. Alternatively, you can just squeeze it directly onto the hot dog, but a bowl gives you more control.
I’ve made these with and without parchment paper, and honestly, the parchment paper is a game-changer. The dough can stick to the pan if you’re not careful, and nobody wants to scrape crispy bits off a baking sheet. Plus, it makes cleanup so much faster—just toss the paper and you’re done. If you don’t have parchment, a light spray of cooking spray will work, but keep an eye on them to make sure they don’t stick.
Preparation Method
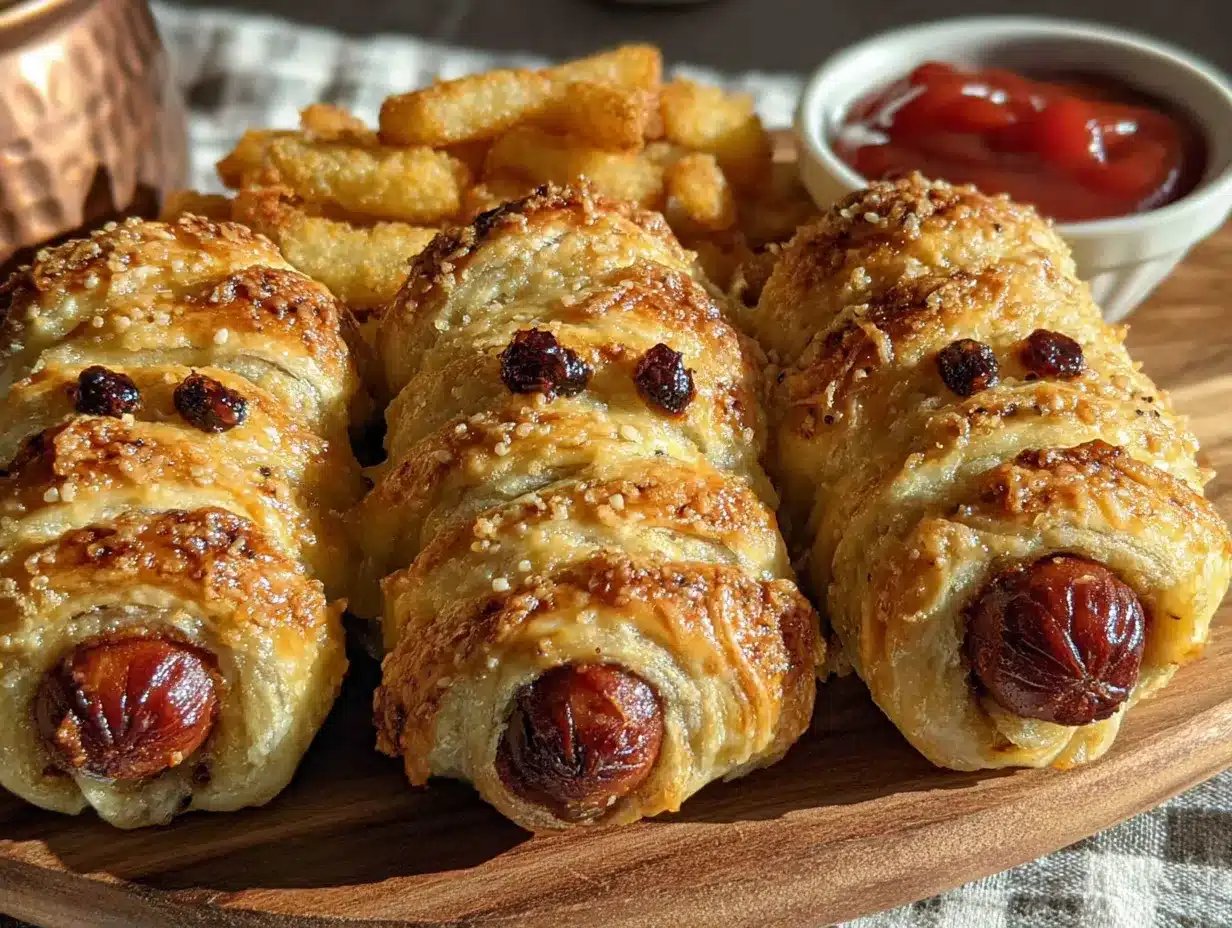
Let me walk you through exactly how to make these mummy hot dogs. Trust me, it’s easier than you think. I’ve made these dozens of times, and I’ve learned a few tricks along the way that make the process even smoother.
- Preheat your oven to 375°F (190°C). Line a large baking sheet with parchment paper or a silicone baking mat. Getting the oven hot before you start is important—you want that dough to start puffing up as soon as it hits the heat.
- Prepare the crescent dough. Open both cans of crescent roll dough carefully. Don’t unroll them yet! Instead, keep the dough in its rolled-up shape and use a sharp knife or pizza cutter to slice it crosswise into thin strips—about 1/4 inch to 1/2 inch wide. I usually get about 8-10 strips per tube. The strips don’t have to be perfect; rustic is part of the charm. Pro tip: If the dough gets too soft and sticky, pop it in the fridge for 5 minutes to firm up.
- Separate the strips gently. Once you’ve cut all the strips, carefully separate them. They might stick together a little, but they’ll pull apart easily. Work quickly so the dough doesn’t get too warm. If you’re making these with kids, this is a great step for them to help with—they love pulling the strips apart.
- Wrap the hot dogs. Take one hot dog and start wrapping a dough strip around it, leaving a small gap near the top for the eyes. Don’t wrap too tightly—the dough will expand as it bakes, and you want it to have room to puff up. Leave a little space between each wrap so it looks like mummy bandages. I usually use 2-3 strips per hot dog, depending on how thick I cut them. Place each wrapped hot dog on the prepared baking sheet, seam side down.
- Repeat with all hot dogs. Continue wrapping until all 8 hot dogs are done. Space them about 1 inch apart on the baking sheet. They won’t spread much, so you can fit all 8 on one standard sheet pan.
- Bake for 10-12 minutes. Pop the baking sheet into the preheated oven and bake until the dough is golden brown and puffy. The exact time depends on your oven and how thick you cut the strips. Start checking at 10 minutes—you’re looking for a beautiful golden color. The hot dogs will be fully heated through by this time.
- Add the eyes. Remove the baking sheet from the oven and let the mummy dogs cool for 2-3 minutes. They’ll be very hot! While they’re still warm, use a toothpick or the tip of a knife to make two small indentations in the exposed hot dog area. Squeeze a tiny dot of mustard into each indentation to create the eyes. You can also use ketchup or sriracha for different colored eyes.
- Serve immediately. These are best eaten warm, right out of the oven. The dough is at its flakiest and most delicious when fresh. Serve them on a platter with extra mustard for dipping, and watch them disappear!
One thing I want to mention—don’t skip the cooling step before adding the eyes. I learned this the hard way. The first time I made these, I added the mustard right away, and it just melted into a puddle. Waiting those 2-3 minutes makes all the difference. The mustard stays put and actually looks like little eyes staring back at you. It’s a small detail, but it makes the presentation so much better.
Cooking Tips & Techniques
After making these mummy hot dogs more times than I can count, I’ve picked up a few tricks that make the process even easier. Here are my best tips for perfect results every time.
Keep the dough cold. This is probably the most important tip. Crescent dough is much easier to work with when it’s cold. If it gets too warm, it becomes sticky and difficult to cut into clean strips. If you’re in a warm kitchen or your hands are hot, pop the dough in the fridge for 5-10 minutes before cutting. You can even chill the wrapped hot dogs on the baking sheet for 5 minutes before baking for extra flaky results.
Don’t over-wrap. I know it’s tempting to use more dough strips to make the mummy look “more wrapped,” but trust me, less is more. Two to three strips per hot dog is perfect. You want to see the hot dog peeking through in places—that’s what makes it look like a mummy! Over-wrapping also means the dough might not cook through properly, leaving you with a doughy center.
Use a pizza cutter. A pizza cutter makes cutting the dough strips so much faster and easier than a knife. It glides right through without squishing the dough. If you don’t have a pizza cutter, a sharp chef’s knife works, but make sure it’s really sharp. A dull knife will press the dough together instead of cutting it cleanly.
Make extra for the freezer. These freeze beautifully! You can assemble the mummy dogs (without baking) and freeze them on a baking sheet until solid, then transfer them to a freezer bag. When you’re ready to bake, just add 2-3 minutes to the baking time. It’s a lifesaver for busy weeknights or last-minute gatherings.
Watch the first batch closely. Every oven is different, so keep an eye on the first batch to see how your oven behaves. You’re looking for a deep golden brown color. If they’re browning too quickly, you can tent the baking sheet with foil for the last few minutes. If they’re not browning enough, give them an extra minute or two.
One mistake I made early on was trying to use too much mustard for the eyes. A tiny dot is all you need—think the size of a peppercorn. Too much mustard just runs and makes a mess. Also, if you’re serving these at a party, you can add the eyes right before serving so they stay fresh and don’t get absorbed into the hot dog.
Variations & Adaptations
One of the best things about this recipe is how easy it is to customize. Here are some of my favorite variations that I’ve tried over the years.
Cheesy Mummy Dogs: Before wrapping the hot dogs, use a sharp knife to cut a slit lengthwise down the center of each hot dog. Stuff a thin strip of cheddar or mozzarella cheese into the slit, then wrap with dough as usual. The cheese melts into the hot dog as it bakes, creating an ooey-gooey surprise inside. My kids beg for these every time.
Spicy Mummy Dogs: For the adults, try using spicy jalapeño or chorizo hot dogs. You can also add a thin smear of sriracha or chipotle mayo to the dough before wrapping. The spicy kick pairs beautifully with the buttery, flaky dough. I made these for a Halloween party last year, and they were the first thing to disappear.
Vegetarian Mummy Dogs: This works great with vegetarian hot dogs or even vegan sausages. Just make sure to use dairy-free crescent dough (some brands are accidentally vegan, so check the label). The cooking time is the same, and they taste just as delicious. I’ve served these to a mixed crowd, and nobody missed the meat.
Breakfast Mummy Dogs: Swap the hot dogs for breakfast sausages or even cooked bacon wrapped in the dough. Serve with a side of maple syrup for dipping. It’s a fun twist for a Halloween morning or a weekend brunch. The sweet and savory combination is absolutely addictive.
Gluten-Free Option: You can use gluten-free crescent dough if you can find it. I’ve tried a few brands, and they work surprisingly well. Just be gentle when handling the dough—gluten-free dough is a bit more fragile. The baking time might be slightly shorter, so start checking at 8 minutes.
One variation I tried that surprised me was using puff pastry instead of crescent dough. It worked, but it wasn’t as good. The puff pastry was too flaky and didn’t hold the mummy shape as well. Crescent dough really is the perfect choice for this recipe. Stick with it, and you won’t be disappointed.
Serving & Storage Suggestions
These mummy hot dogs are best served warm, right out of the oven. The dough is at its flakiest and most delicious when fresh. I like to arrange them on a large platter with a small bowl of mustard for dipping in the center. The yellow eyes staring up at everyone always gets a laugh, especially from kids.
For a complete meal, serve them with simple sides that don’t require much effort. I love pairing them with a crunchy coleslaw, some potato chips, or a simple green salad. If you’re making them for a Halloween party, set up a dipping station with different sauces—ketchup, mustard, barbecue sauce, and ranch dressing. It’s fun and lets everyone customize their experience.
These also pair beautifully with other finger foods. Try serving them alongside my crispy baked chicken tenders for a crowd-pleasing spread that kids and adults both love. The combination of flavors and textures is perfect for parties or casual get-togethers.
Storage: If you have leftovers (which is rare in my house), let them cool completely, then store them in an airtight container in the refrigerator for up to 3 days. The dough will soften slightly, but they’re still delicious. To reheat, pop them in a 350°F oven for 5-7 minutes until warm and crispy again. Avoid the microwave—it makes the dough soggy and sad.
Freezer Instructions: As I mentioned earlier, these freeze beautifully. Assemble the mummy dogs on a baking sheet and freeze until solid, about 1-2 hours. Transfer to a freezer bag or container and freeze for up to 3 months. To bake from frozen, add 2-3 minutes to the baking time. No need to thaw first. It’s a lifesaver for busy nights when you need something fun and fast.
One thing I love about this recipe is that the flavors actually improve slightly after a day in the fridge. The mustard eyes meld into the hot dog, and the dough absorbs some of the savory flavor. They’re not as crispy as fresh, but they’re still incredibly tasty. I’ve been known to eat them cold straight from the fridge the next day—don’t judge me!
Nutritional Information & Benefits
Let’s be honest—these mummy hot dogs are a treat, not a health food. But that doesn’t mean they can’t be part of a balanced diet. Here’s the estimated nutritional breakdown for one mummy hot dog (using standard ingredients):
| Nutrient | Amount per serving |
|---|---|
| Calories | 280 |
| Total Fat | 18g |
| Saturated Fat | 7g |
| Cholesterol | 30mg |
| Sodium | 680mg |
| Total Carbohydrates | 22g |
| Dietary Fiber | 0g |
| Sugars | 5g |
| Protein | 8g |
The crescent dough provides some calcium and iron, while the hot dog offers a decent amount of protein. If you’re looking to make them a bit healthier, try using turkey or chicken hot dogs, which are lower in fat and calories. You can also use reduced-fat crescent dough, though I find the texture isn’t quite as good.
For dietary considerations, this recipe contains gluten (from the crescent dough) and dairy (from the butter in the dough). If you have allergies, look for gluten-free crescent dough or dairy-free alternatives. The mustard is naturally gluten-free and dairy-free, which is a bonus.
My personal take? Everything in moderation. These mummy hot dogs are a fun, occasional treat that brings joy to the table. They’re not meant to be an everyday meal, but they’re perfect for special occasions, holidays, or those nights when you just need something fun and easy. And honestly, the happiness they bring is worth every calorie.
Conclusion
These quick mummy hot dogs with crescent dough wrap are more than just a recipe—they’re a memory in the making. Whether you’re making them for a Halloween party, a weeknight dinner, or just because you need a smile, they deliver every single time. The flaky, buttery dough wrapped around a juicy hot dog, with those adorable little mustard eyes staring back at you—it’s pure comfort food magic.
I love how this recipe brings people together. Kids get excited about the mummy look, adults appreciate how easy they are, and everyone loves the taste. It’s one of those rare recipes that checks all the boxes: quick, delicious, fun, and foolproof. I’ve never had a batch fail, and I’ve made them dozens of times.
So go ahead and give them a try! Customize them with your favorite hot dogs, add cheese if you’re feeling fancy, or keep them classic. However you make them, I promise they’ll be a hit. And when you do make them, I’d love to hear about it. Leave a comment below and let me know how they turned out, or share your own creative variations. Did you add something unexpected? Did your kids help with the wrapping? I want to hear all about it!
Until next time, happy cooking—and may your kitchen be filled with flaky, golden, mummy-shaped deliciousness.
Frequently Asked Questions
Can I make these mummy hot dogs ahead of time?
Absolutely! You can assemble them up to 24 hours in advance and keep them covered in the refrigerator. When you’re ready to bake, just pop them in the oven straight from the fridge. You might need to add 1-2 minutes to the baking time since they’re starting from cold.
Can I use a different type of dough?
Crescent dough works best because it’s flaky, buttery, and easy to cut into strips. You could try puff pastry, but it’s more delicate and might not hold the mummy shape as well. Pizza dough is another option, but it will be chewier and less flaky. I really recommend sticking with crescent dough for the best results.
How do I prevent the dough from tearing?
The key is to keep the dough cold. If it gets too warm, it becomes soft and sticky and tears easily. If you’re having trouble, pop the dough in the fridge for 5-10 minutes before cutting and wrapping. Also, handle the strips gently—don’t pull or stretch them too much.
Can I use something other than mustard for the eyes?
Of course! Ketchup works great for red eyes, and sriracha gives a spicy kick. You can also use small dots of melted cheese, or even place a tiny black olive slice on top. For a sweeter version, try using chocolate chips or candy eyes. Get creative!
How do I reheat leftover mummy hot dogs?
The best way to reheat them is in the oven at 350°F for 5-7 minutes. This helps restore the crispiness of the dough. You can also use an air fryer at 350°F for 3-4 minutes. Avoid the microwave—it makes the dough soft and soggy. If you’re in a hurry, you can eat them cold; they’re still tasty!
Pin This Recipe!

Easy Mummy Hot Dogs with Crescent Wrap Recipe

Quick and adorable mummy hot dogs wrapped in flaky crescent dough, perfect for weeknight dinners or Halloween parties. Ready in under 20 minutes with just three main ingredients.
- Prep Time: 10 minutes
- Cook Time: 12 minutes
- Total Time: 22 minutes
- Yield: 8 servings 1x
- Category: Appetizer
- Cuisine: American
Ingredients
- 8 hot dogs (standard size, beef preferred)
- 2 cans (8 oz each) refrigerated crescent roll dough (e.g., Pillsbury)
- Yellow mustard (for the eyes)
- Optional: Cooking spray or butter for greasing
- Optional: Everything bagel seasoning or sesame seeds for garnish
Instructions
- Preheat your oven to 375°F (190°C). Line a large baking sheet with parchment paper or a silicone baking mat.
- Open both cans of crescent roll dough carefully. Keep the dough in its rolled-up shape and use a sharp knife or pizza cutter to slice it crosswise into thin strips—about 1/4 inch to 1/2 inch wide (about 8-10 strips per tube).
- Carefully separate the strips. Work quickly so the dough doesn’t get too warm.
- Take one hot dog and start wrapping a dough strip around it, leaving a small gap near the top for the eyes. Don’t wrap too tightly. Leave a little space between each wrap. Use 2-3 strips per hot dog. Place each wrapped hot dog on the prepared baking sheet, seam side down.
- Repeat with all 8 hot dogs. Space them about 1 inch apart on the baking sheet.
- Bake for 10-12 minutes, until the dough is golden brown and puffy.
- Remove from the oven and let cool for 2-3 minutes. Use a toothpick or the tip of a knife to make two small indentations in the exposed hot dog area. Squeeze a tiny dot of mustard into each indentation to create the eyes.
- Serve immediately. Best eaten warm.
Notes
Keep the dough cold for easier handling. Don’t over-wrap the hot dogs; 2-3 strips per hot dog is perfect. Let the mummy dogs cool for 2-3 minutes before adding mustard eyes to prevent melting. These can be assembled ahead and refrigerated for up to 24 hours before baking, or frozen for up to 3 months.
Nutrition
- Serving Size: 1 mummy hot dog
- Calories: 280
- Sugar: 5
- Sodium: 680
- Fat: 18
- Saturated Fat: 7
- Carbohydrates: 22
- Protein: 8
Keywords: mummy hot dogs, crescent wrap, Halloween recipe, easy appetizer, kid-friendly, quick dinner, hot dog recipe


