Love this? Save it for later!
Share the inspiration with your friends
Last Tuesday, I was walking through the grocery store parking lot when the air shifted—that damp, earthy smell of fallen leaves and cooling asphalt after an autumn rain. And just like that, I was eight years old again, sitting on my neighbor Mrs. Kowalski’s scratchy floral couch, watching her stir something orange and magical in a glass bowl. She wasn’t my grandmother, not even a relative. She was just this sweet older lady who let me hang around her kitchen after school because my mom worked late. I can still see her wrinkled hands, the way she’d lick the spatula clean without a second thought.
Mrs. Kowalski made these little no-bake desserts that felt like pure sorcery to me as a kid. No oven required, which honestly seemed impossible. She’d pull out graham crackers and cream cheese like they were secret ingredients to happiness. I remember one afternoon I was supposed to be helping her, but I got distracted by her cat, Mr. Whiskers, and accidentally knocked over the entire bowl of crushed graham crackers. She just laughed, scooped it off the floor, and said, “Floor crumbs add character, honey.” I mean, I don’t recommend that approach now, but the memory makes me smile every time.
These creamy no-bake pumpkin cheesecake cups are my grown-up tribute to those afternoons. They’ve got that same effortless, no-fuss magic—no oven, no water bath, no stress. But they also have this deep, spiced pumpkin flavor that feels like fall in a cup. Maybe you’ve had those moments where you’re chasing a taste from your past, something you can almost but not quite recreate. That’s what this recipe is for me. It’s the reason I keep making them every single autumn, tweaking the spices, testing the texture, until I finally got it right. And honestly, they’re so good, I think even Mrs. Kowalski would approve—floor crumbs and all.
Why You’ll Love This Recipe
Let me tell you, I’ve tested a lot of pumpkin desserts over the years. Some were too dense, others too sweet, and a few just fell apart before they even made it to the table. These creamy no-bake pumpkin cheesecake cups are the ones I keep coming back to, and here’s exactly why.
- Quick & Easy: They come together in about 20 minutes of active work. No baking, no complicated steps. Perfect for those evenings when a pumpkin craving hits out of nowhere.
- Simple Ingredients: You probably already have most of these in your pantry. Cream cheese, pumpkin puree, spices, and graham crackers. No fancy grocery store runs required.
- Perfect for Fall Gatherings: Whether it’s a Friendsgiving, a cozy dinner party, or just a Tuesday night that needs a little extra warmth, these cups deliver. They look impressive but are secretly effortless.
- Crowd-Pleaser: I’ve served these to kids, adults, and even my picky uncle who swears he doesn’t like pumpkin. Every single time, the cups come back empty. It’s kind of my party trick now.
- Unbelievably Creamy: The texture is what sets these apart. It’s not too heavy, not too light—just perfectly smooth and luscious. The secret is blending the cream cheese and pumpkin until there’s not a single lump left.
What makes this version different from all the others? It’s the balance. I spent weeks tweaking the ratio of pumpkin to cream cheese, adjusting the spices until they were warm but not overpowering. And the crust? It’s buttery, slightly salty, and holds together without being too hard. This isn’t just another pumpkin dessert—it’s the one that makes you close your eyes after the first bite. It’s comfort food reimagined: quicker, simpler, but with that same soul-soothing satisfaction that only a perfect cheesecake can bring.
What Ingredients You Will Need
This recipe uses simple, wholesome ingredients to deliver that rich, creamy texture and bold pumpkin flavor. Most of these are pantry staples, especially if you do a lot of fall baking. Here’s everything you need to know about each one.
For the Crust
- Graham cracker crumbs – 1 ½ cups (about 12 full sheets, crushed). You can buy pre-crushed crumbs, but I find crushing your own gives a better texture. I like using Nabisco brand for consistent crunch.
- Unsalted butter – 6 tablespoons, melted. Use the unsalted kind so you can control the salt level. If you only have salted, just skip the pinch of salt later.
- Granulated sugar – 2 tablespoons. Just enough to sweeten the crust without making it candy-like.
- Pinch of salt – A tiny pinch balances the sweetness and brings out the buttery flavor.
For the Pumpkin Cheesecake Filling
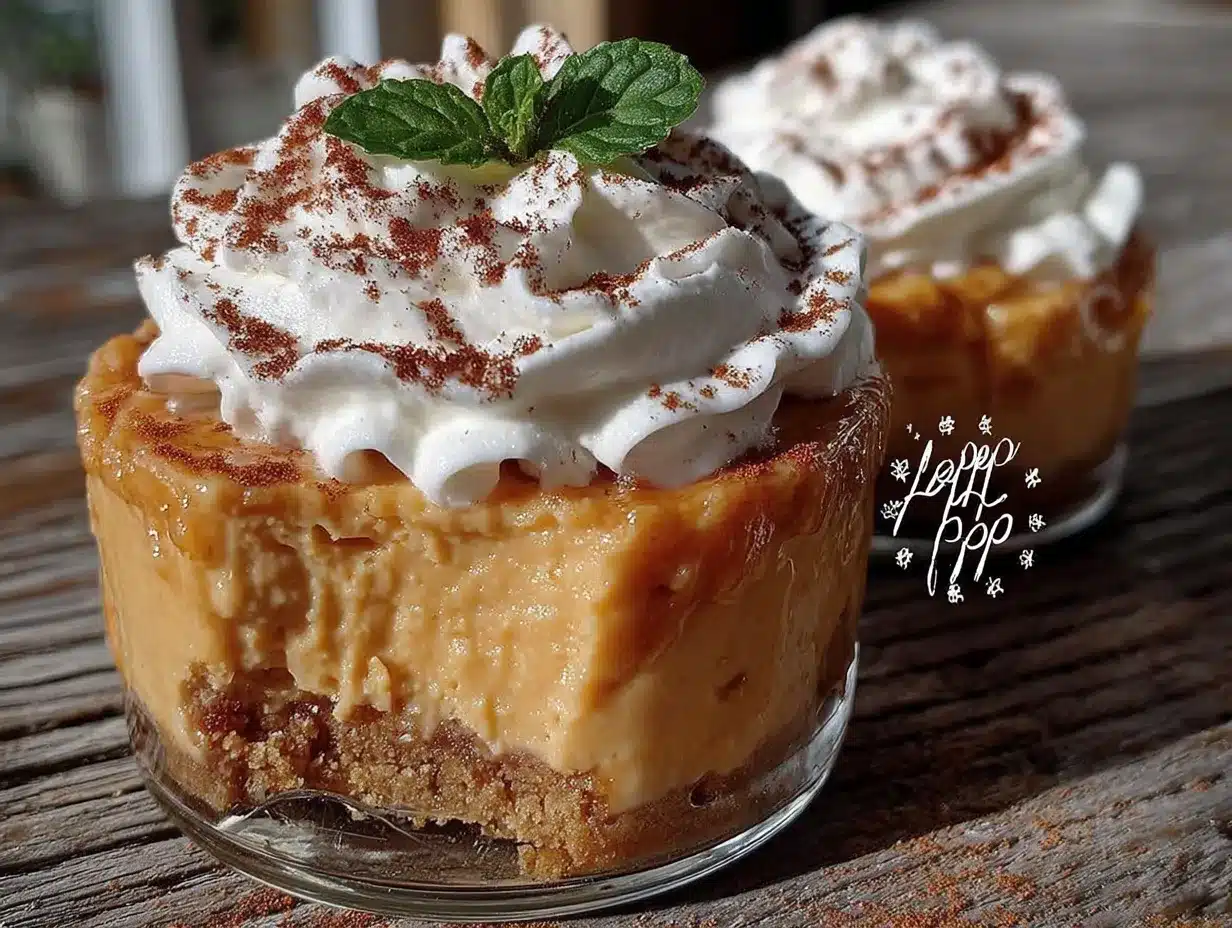
- Full-fat cream cheese – 16 ounces (two 8-ounce blocks), softened to room temperature. This is non-negotiable for that ultra-creamy texture. Low-fat versions can turn out grainy. I recommend Philadelphia brand for the smoothest results.
- Pumpkin puree – 1 cup (not pumpkin pie filling!). Make sure it’s 100% pure pumpkin. I use Libby’s because it’s consistently thick and not watery.
- Powdered sugar – ½ cup, sifted. This dissolves easily and keeps the filling silky. Granulated sugar can leave a gritty texture.
- Heavy cream – ¼ cup, cold. This helps whip air into the filling, making it light and fluffy. For a dairy-free option, use full-fat coconut cream.
- Vanilla extract – 1 teaspoon. Pure vanilla is best, but imitation works in a pinch.
- Pumpkin pie spice – 1 ½ teaspoons. You can buy it pre-mixed, or make your own with ½ teaspoon cinnamon, ¼ teaspoon ginger, ¼ teaspoon nutmeg, ¼ teaspoon cloves, and ¼ teaspoon allspice.
- Cinnamon – ½ teaspoon, for extra warmth.
For the Topping (Optional but Recommended)
- Whipped cream – Homemade or store-bought. I love making my own with a little extra vanilla.
- Crushed graham crackers – A sprinkle on top for texture.
- Caramel sauce – A drizzle adds a lovely sweetness. I use Smucker’s in a pinch, but homemade is even better.
Equipment Needed
You don’t need a fancy kitchen to make these cups. Here’s what you’ll need, along with some tips from my own experience.
- Mixing bowls – At least two medium-sized ones. I prefer glass or stainless steel because they don’t retain odors.
- Electric hand mixer or stand mixer – A hand mixer works perfectly. If you’re using a stand mixer, use the paddle attachment. You can technically whisk by hand, but your arm will thank you for using a mixer.
- Small dishes or ramekins – You’ll need 6 to 8, depending on the size. I love using 6-ounce glass jars because they look pretty and are perfect for portion control.
- Ziploc bag or rolling pin – For crushing graham crackers. A Ziploc bag and a rolling pin are my go-to. Less mess than a food processor, honestly.
- Spatula – A rubber spatula for scraping every last bit of filling. Don’t waste a drop.
- Measuring cups and spoons – Standard set for dry and wet ingredients.
If you don’t have a mixer, you can use a whisk and some elbow grease. Just make sure the cream cheese is very soft. I’ve also used a food processor for the filling in a pinch, and it works great—just be careful not to overmix.
Preparation Method
Let’s get to the fun part. I’ve broken this down into clear steps with all the little tricks I’ve learned along the way. Take your time, and don’t rush the chilling process—it’s worth the wait.
Step 1: Make the Crust (5 minutes)
In a medium bowl, combine 1 ½ cups graham cracker crumbs, 2 tablespoons granulated sugar, and a pinch of salt. Pour in 6 tablespoons of melted unsalted butter and stir with a fork until every crumb is moistened. The mixture should look like wet sand and hold together when you squeeze it. If it’s too dry, add another tablespoon of melted butter. If it’s greasy, you’ve added too much—just add a few more crumbs to balance it out.
Step 2: Press the Crust (10 minutes)
Divide the crust mixture evenly among your 6 to 8 serving cups or ramekins. Use the back of a spoon or a small flat-bottomed glass to press it down firmly and evenly. You want a compact layer about ¼-inch thick. Don’t skimp on this step—a loose crust will fall apart when you eat it. Pop the cups in the refrigerator while you make the filling.
Step 3: Beat the Cream Cheese (5 minutes)
In a large mixing bowl, beat 16 ounces of softened cream cheese with an electric mixer on medium speed until smooth and fluffy, about 2 minutes. Scrape down the sides of the bowl with a spatula. This step is crucial—any lumps now will stay in the final filling. If your cream cheese is still cold, microwave it for 10-second intervals until it’s soft but not warm.
Step 4: Add the Pumpkin and Sugar (3 minutes)
Add 1 cup of pumpkin puree, ½ cup of sifted powdered sugar, 1 teaspoon vanilla extract, 1 ½ teaspoons pumpkin pie spice, and ½ teaspoon cinnamon to the cream cheese. Beat on low speed until combined, then increase to medium and beat for another minute until the mixture is completely smooth and uniform in color. Stop and scrape the bowl at least once.
Step 5: Whip the Cream (3 minutes)
In a separate small bowl, pour ¼ cup of cold heavy cream. Using clean beaters, whip the cream on high speed until stiff peaks form, about 2 to 3 minutes. You’ll know it’s ready when you lift the beaters and the cream stands up in peaks without flopping over. Be careful not to overwhip, or you’ll end up with butter.
Step 6: Fold Everything Together (2 minutes)
Gently fold the whipped cream into the pumpkin-cream cheese mixture using a rubber spatula. Use a light hand—fold from the bottom up, turning the bowl as you go. Stop as soon as you don’t see any white streaks. Overmixing will deflate the air and make the filling dense. The final mixture should be light, airy, and a beautiful pale orange.
Step 7: Assemble the Cups (5 minutes)
Remove the crust cups from the refrigerator. Spoon or pipe the filling evenly into each cup, dividing it equally. I like to use a piping bag with a large round tip for a clean look, but a spoon works just fine. Smooth the tops with the back of a spoon.
Step 8: Chill and Set (4 hours minimum)
Place the assembled cups in the refrigerator, uncovered, for at least 4 hours. Overnight is even better. This allows the filling to firm up and the flavors to meld together. Don’t rush this—if you serve them too soon, they’ll be soft and runny.
Step 9: Add Toppings and Serve (5 minutes)
Just before serving, top each cup with a dollop of whipped cream, a sprinkle of crushed graham crackers, and a drizzle of caramel sauce if you’re feeling fancy. Serve chilled. The contrast between the cold, creamy filling and the buttery crust is pure magic.
Cooking Tips & Techniques
I’ve made these cups more times than I can count, and I’ve learned a few things the hard way. Here are my best tips to ensure success every time.
Room temperature cream cheese is non-negotiable. I know we’re all in a hurry, but cold cream cheese will give you lumpy filling. Take it out of the fridge at least 30 minutes before you start. If you forget, cut it into small cubes and let it sit for 15 minutes. I once tried to beat cold cream cheese, and I ended up with chunks that never smoothed out. Lesson learned.
Don’t skip the sifting. Powdered sugar can have clumps that don’t break down easily. Sifting it takes an extra 30 seconds and saves you from biting into a pocket of dry sugar. Trust me on this one.
Fold, don’t stir. When you add the whipped cream, be gentle. Stirring aggressively will deflate all that air you just whipped in. Use a folding motion and stop as soon as it’s combined. The difference between a light, mousse-like filling and a dense one is literally 10 seconds of overmixing.
Chill time matters. Four hours is the minimum, but overnight is ideal. The filling needs time to set properly. I made the mistake of serving these after only 2 hours once, and they were more like a pudding than a cheesecake. Still delicious, but not what I was going for.
Use a piping bag for a clean look. If you want those Instagram-worthy cups, a piping bag makes all the difference. No bag? No problem. Snip the corner off a Ziploc bag and use that. It’s my favorite budget hack.
Variations & Adaptations
One of the best things about this recipe is how versatile it is. Here are some of my favorite ways to change it up.
Gluten-Free Version
Swap the graham crackers for gluten-free graham crackers or crushed gluten-free cookies. I’ve used Pamela’s brand with great results. You can also use crushed pecans or almonds mixed with a little butter for a nutty, gluten-free crust.
Dairy-Free Version
Use dairy-free cream cheese (like Kite Hill or Violife) and full-fat coconut cream instead of heavy cream. The texture will be slightly different—a bit denser—but still delicious. Make sure the cream cheese is softened just like the regular kind.
Vegan Version
Follow the dairy-free substitutions above, and use a flax egg (1 tablespoon ground flaxseed mixed with 3 tablespoons water) if your cream cheese needs binding. Most vegan cream cheeses are already stable, so you might not need it. I’ve made these for a vegan friend’s birthday, and they were a hit.
Spice It Up
Add a pinch of cayenne pepper or chipotle powder to the filling for a spicy-sweet kick. It sounds weird, but it works. The heat plays off the sweetness beautifully. Start with ⅛ teaspoon and taste before adding more.
Chocolate Pumpkin Cups
Add 2 tablespoons of melted dark chocolate to the filling for a chocolate-pumpkin twist. Or, use chocolate graham crackers for the crust. I tried this last Thanksgiving, and it was gone in minutes.
Serving & Storage Suggestions
These cups are best served cold, straight from the fridge. The contrast between the chilled, creamy filling and the buttery crust is what makes them so satisfying. I like to take them out about 5 minutes before serving to take the edge off the cold, but that’s a personal preference.
What to serve with them: These cups are rich enough to stand alone, but they pair beautifully with a cup of hot coffee, a spiced chai latte, or even a glass of cold milk. If you’re serving them for dessert after a heavy meal, keep the portions small—they’re decadent.
Storage: Store any leftover cups in the refrigerator, covered with plastic wrap or in an airtight container. They’ll keep for up to 4 days. The crust may soften slightly over time, but the flavor actually improves as the spices meld.
Freezing: You can freeze these cups for up to 2 months. Wrap each cup tightly in plastic wrap, then foil. Thaw in the refrigerator overnight before serving. Don’t add the toppings until just before serving. I’ve frozen a batch for a last-minute holiday party, and they tasted just as good as fresh.
Reheating: Don’t. These are meant to be served cold. If you want a warm pumpkin dessert, try a baked pumpkin cheesecake instead.
Nutritional Information & Benefits
Here’s an approximate nutritional breakdown for one serving (based on 8 servings, without optional toppings):
| Nutrient | Amount Per Serving |
|---|---|
| Calories | 320 |
| Total Fat | 22g |
| Saturated Fat | 13g |
| Cholesterol | 65mg |
| Sodium | 280mg |
| Total Carbohydrates | 28g |
| Dietary Fiber | 2g |
| Sugars | 18g |
| Protein | 5g |
Pumpkin is packed with vitamin A, which is great for your eyes and immune system. It’s also a good source of fiber, which helps keep you full. The cream cheese adds calcium and protein, though it’s also higher in fat—so enjoy these in moderation. For a lighter version, you can use reduced-fat cream cheese and skip the whipped cream topping. Honestly, I think the full-fat version is worth the indulgence, especially during the cozy fall season.
Conclusion
These creamy no-bake pumpkin cheesecake cups are everything I love about fall baking without the fuss of turning on the oven. They’re quick, they’re forgiving, and they taste like you spent hours in the kitchen. Whether you’re making them for a holiday gathering or just because it’s Tuesday and you deserve a treat, they never disappoint.
I hope you give them a try and make them your own. Maybe add a little extra cinnamon, or swap the graham crackers for ginger snaps. That’s the beauty of this recipe—it’s a starting point, not a rulebook. I’d love to hear how they turn out for you. Leave a comment below and let me know if you tried any variations. And if you loved them, share this post with a friend who needs a little pumpkin magic in their life. Happy fall, friends!
Frequently Asked Questions
Can I use pumpkin pie filling instead of pumpkin puree?
No, stick with 100% pure pumpkin puree. Pumpkin pie filling already has sugar and spices added, which will throw off the sweetness and texture of your cheesecake filling. If you only have pie filling, reduce the sugar and spices in the recipe by about half.
Do I have to use cream cheese?
Yes, for the classic creamy texture. You can substitute with mascarpone for a richer, slightly tangier flavor. Neufchâtel cheese (low-fat cream cheese) also works, but the filling will be a bit less firm.
Can I make these cups ahead of time?
Absolutely! They’re actually better made a day ahead. The flavors meld and deepen overnight. Just wait to add the toppings until right before serving to keep them fresh and pretty.
How do I get the crust to stay together?
Press the crust firmly into the cups using the back of a spoon or a flat-bottomed glass. Make sure your butter-to-crumb ratio is correct—the mixture should feel like wet sand. If it’s too crumbly, add a little more melted butter.
Can I use this filling for a full-sized cheesecake?
This filling is designed for no-bake cups and won’t hold up as a full-sized cheesecake. For a larger no-bake cheesecake, you’d need to add gelatin or increase the cream cheese to stabilize it. Stick with the cup version for best results.
Pin This Recipe!
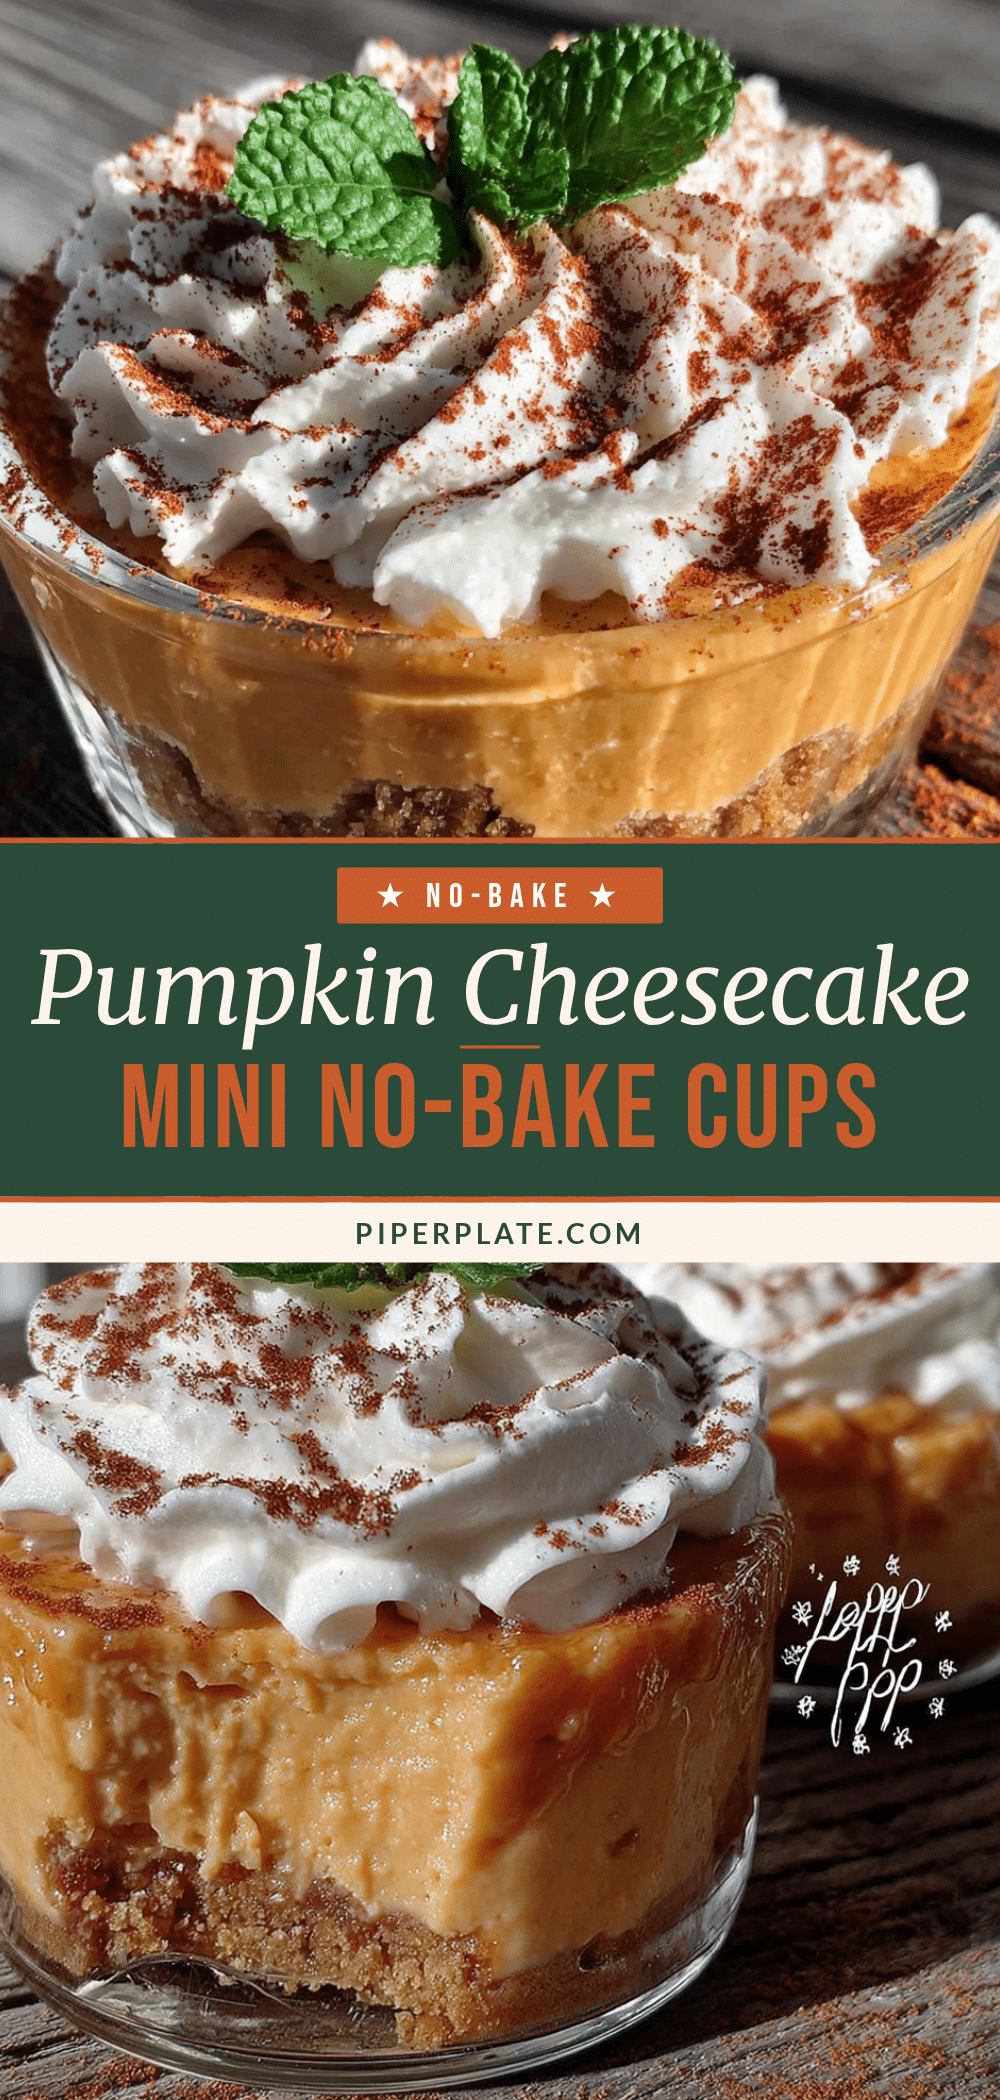
Easy No-Bake Pumpkin Cheesecake Cups: Best Creamy Dessert
These creamy no-bake pumpkin cheesecake cups are a quick and easy fall dessert with a buttery graham cracker crust and a luscious, spiced pumpkin filling. Perfect for gatherings or a cozy night in, they come together in just 20 minutes of active work.
- Prep Time: 20 minutes
- Cook Time: 0 minutes
- Total Time: 4 hours 20 minutes (includes chilling)
- Yield: 8 servings 1x
- Category: Dessert
- Cuisine: American
Ingredients
- 1 ½ cups graham cracker crumbs (about 12 full sheets)
- 6 tablespoons unsalted butter, melted
- 2 tablespoons granulated sugar
- Pinch of salt
- 16 ounces full-fat cream cheese, softened
- 1 cup pumpkin puree (not pumpkin pie filling)
- ½ cup powdered sugar, sifted
- ¼ cup heavy cream, cold
- 1 teaspoon vanilla extract
- 1 ½ teaspoons pumpkin pie spice
- ½ teaspoon cinnamon
- Whipped cream, for topping (optional)
- Crushed graham crackers, for topping (optional)
- Caramel sauce, for drizzling (optional)
Instructions
- Make the crust: In a medium bowl, combine graham cracker crumbs, granulated sugar, and a pinch of salt. Pour in melted butter and stir until every crumb is moistened. The mixture should look like wet sand.
- Press the crust: Divide the crust mixture evenly among 6 to 8 serving cups or ramekins. Use the back of a spoon or a flat-bottomed glass to press it down firmly and evenly into a compact layer about ¼-inch thick. Refrigerate while making the filling.
- Beat the cream cheese: In a large mixing bowl, beat softened cream cheese with an electric mixer on medium speed until smooth and fluffy, about 2 minutes. Scrape down the sides of the bowl.
- Add pumpkin and sugar: Add pumpkin puree, sifted powdered sugar, vanilla extract, pumpkin pie spice, and cinnamon. Beat on low until combined, then increase to medium and beat for another minute until completely smooth.
- Whip the cream: In a separate small bowl, whip cold heavy cream on high speed until stiff peaks form, about 2 to 3 minutes.
- Fold everything together: Gently fold the whipped cream into the pumpkin-cream cheese mixture using a rubber spatula. Fold until no white streaks remain. Do not overmix.
- Assemble the cups: Remove the crust cups from the refrigerator. Spoon or pipe the filling evenly into each cup. Smooth the tops with the back of a spoon.
- Chill and set: Refrigerate the assembled cups, uncovered, for at least 4 hours, or overnight for best results.
- Add toppings and serve: Just before serving, top each cup with whipped cream, a sprinkle of crushed graham crackers, and a drizzle of caramel sauce if desired. Serve chilled.
Notes
Room temperature cream cheese is essential for a smooth filling. Sift powdered sugar to avoid lumps. Fold whipped cream gently to keep the filling light. Chill for at least 4 hours, preferably overnight. For a gluten-free version, use gluten-free graham crackers. For dairy-free, use dairy-free cream cheese and coconut cream.
Nutrition
- Serving Size: 1 cup
- Calories: 320
- Sugar: 18
- Sodium: 280
- Fat: 22
- Saturated Fat: 13
- Carbohydrates: 28
- Fiber: 2
- Protein: 5
Keywords: no-bake pumpkin cheesecake, pumpkin dessert, fall dessert, easy cheesecake cups, creamy pumpkin


