Love this? Save it for later!
Share the inspiration with your friends
I was supposed to be making a pumpkin cheesecake. A proper one, with a graham cracker crust and a water bath and all the fuss that comes with it. But then my toddler decided it was the perfect moment to dump an entire bag of Oreos onto the kitchen floor, and honestly, I just stood there staring at the mess. The crumbs were everywhere—on the dog, in my coffee, ground into the rug. I grabbed a package of instant pudding mix from the pantry, some cream cheese I was saving for something else, and started throwing things together in a complete, desperate panic. What came out of that chaotic afternoon was nothing like the plan—and so much better.
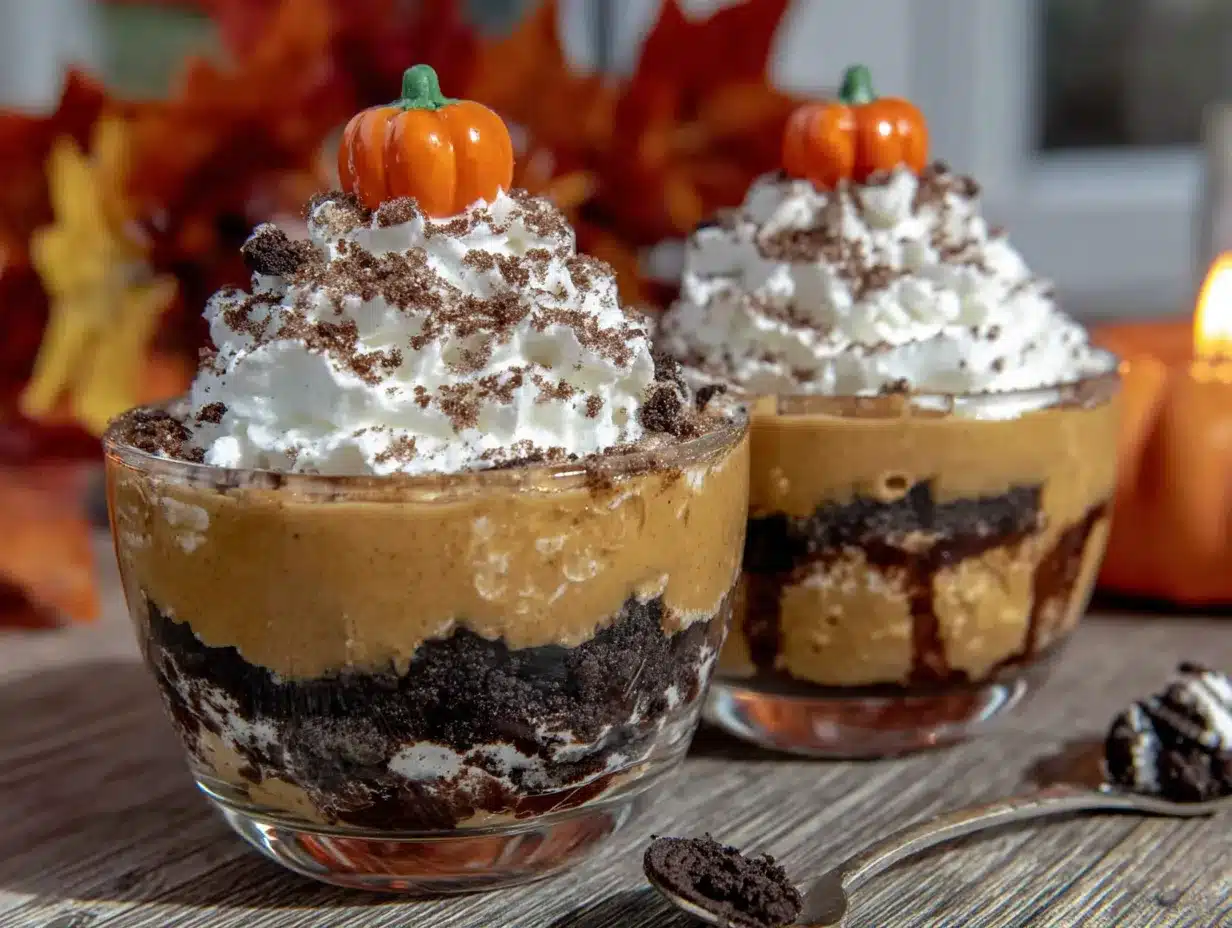
These Easy No-Bake Pumpkin Patch Pudding Cups with Oreos are that happy accident. They are creamy, they are crunchy, and they look like a little garden of pumpkins sitting in dirt. I mean, the kids thought I was some kind of kitchen magician. The best part? No oven, no mixer, no stress. You just stir, layer, and chill. It is the kind of dessert that makes you look like you tried really hard when you actually just avoided a meltdown. Maybe you have been there—standing in a trashed kitchen, wondering if you should just order pizza and call it a night. This recipe saved my evening, and I keep making it because it feels like a small victory every single time.
Why You Will Love This Recipe
Let me tell you, I have made a lot of desserts in my time. Some were triumphs, and some were, well, learning experiences. These pudding cups fall firmly in the triumph category, and here is why you will feel the same way.
- Quick & Easy: This comes together in under 15 minutes of active time. No baking, no boiling, no complicated techniques. It is perfect for those days when you need dessert, and you need it now.
- Simple Ingredients: You probably have most of these in your pantry already. No trips to a specialty store for obscure extracts or hard-to-find spices. It is all grocery store staples.
- Perfect for Fall Gatherings: Great for Halloween parties, Thanksgiving dinners, or just a cozy night in. Kids love the playful presentation, and adults appreciate the nostalgic flavor without the fuss.
- Crowd-Pleaser: I have brought these to potlucks and watch parties, and they disappear faster than anything else on the table. The combination of creamy pumpkin pudding and crunchy Oreo “dirt” is universally loved.
- Unbelievably Delicious: The texture is what gets me every time. Silky, spiced pumpkin pudding layered over a buttery Oreo crust, topped with more crushed cookies and a little candy pumpkin. It is comfort food in a cup.
What makes this recipe different from the rest? It is the ratio. I spent a few batches figuring out the perfect balance of cream cheese to pudding to milk so that the filling is rich but not heavy, and sets up beautifully without being too firm. It is not just another no-bake pudding cup—it is my best version, tested on picky kids and discerning adults alike.
This recipe is the kind that makes you close your eyes after the first bite. It is fall in a cup—cozy, spiced, and deeply satisfying without weighing you down. Perfect for impressing guests without any stress, or turning a simple Tuesday night into something a little more special.
What Ingredients You Will Need
This recipe uses simple, wholesome ingredients to deliver that classic pumpkin pie flavor with a fun, kid-friendly twist. Most of these are pantry staples, especially if you keep a well-stocked baking cabinet for the fall season.
For the Oreo Crust
- 24 Oreo cookies (regular, not double-stuf—you want a good cookie-to-creme ratio for the crust)
- 3 tablespoons unsalted butter, melted (salted butter works too, just skip the pinch of salt I sometimes add)
For the Pumpkin Pudding Filling
- 1 package (3.4 ounces) instant vanilla pudding mix (I prefer Jell-O brand for consistent results, but store brands work fine)
- 1 cup cold milk (whole milk gives the creamiest texture, but 2% works well too)
- 1/2 cup pumpkin puree (not pumpkin pie filling—make sure it is 100% pure pumpkin. Libby’s is my go-to)
- 1 teaspoon pumpkin pie spice (or a mix of 1/2 teaspoon cinnamon, 1/4 teaspoon ginger, 1/4 teaspoon nutmeg, and a pinch of cloves)
- 4 ounces cream cheese, softened to room temperature (this is key for the creamy, cheesecake-like texture)
- 1/4 cup powdered sugar (to sweeten the cream cheese without grittiness)
- 1/2 cup frozen whipped topping, thawed (like Cool Whip, or use homemade whipped cream if you are feeling fancy)
For the Topping & Decoration
- 6 additional Oreo cookies, crushed (for the “dirt” on top)
- 6 candy pumpkins or candy corn (for the little pumpkin decoration. I use the Brach’s mellowcreme pumpkins)
- A few green candy melts or green frosting (optional, for little “vines” or stems. I skip this half the time)
For substitution guidance: You can use gluten-free chocolate sandwich cookies if needed. For a dairy-free version, use plant-based butter, dairy-free cream cheese, and almond or oat milk. The texture will be slightly different, but still delicious. I have also made this with sugar-free pudding mix and it works just fine—just check the package directions for milk amount adjustments.
Equipment Needed
You do not need much for this recipe, which is honestly my favorite part. Here is what you will need:
- 6 to 8 small cups or jars (I use 8-ounce mason jars or small glass dessert cups. Plastic cups work for parties too)
- Food processor or zip-top bag and rolling pin (for crushing the Oreos. I have used both methods, and honestly, the bag and rolling pin is more satisfying—and great for letting kids help)
- Medium mixing bowls (one for the crust mixture, one for the pudding)
- Hand mixer or whisk (a hand mixer makes the cream cheese mixture silky smooth, but a strong arm and a whisk will get the job done)
- Measuring cups and spoons
- Spatula (for scraping every last bit of that creamy filling)
- Small spoon (for layering)
If you do not have a food processor, do not worry. I actually prefer the bag method because you can control the texture better. You want some fine crumbs and some slightly larger pieces for that “dirt” look. Also, a tip from experience: use glass cups if you have them. They show off the layers beautifully, and that is half the fun of this dessert.
Preparation Method
Alright, let us get to the fun part. I am going to walk you through this step by step, including the little things I have learned from making these about a dozen times now.
- Crush the Oreos for the crust. Place 24 Oreos in a food processor and pulse until they turn into fine crumbs. If you are using the bag method, put them in a zip-top bag, seal it tight, and go to town with a rolling pin. You want a mix of fine crumbs and some slightly chunkier bits. Transfer to a medium bowl.
- Mix the crust. Pour the 3 tablespoons of melted butter over the Oreo crumbs and stir with a fork until everything is evenly moistened. It should look like damp, dark sand. Set aside about 2 tablespoons of this mixture for the very top garnish later.
- Divide the crust among your cups. Spoon about 2 tablespoons of the Oreo mixture into the bottom of each cup. Press it down firmly with the back of a small spoon or the bottom of a shot glass. You want a compact, even layer. Pop these in the fridge while you make the filling.
- Make the cream cheese base. In a medium mixing bowl, beat the softened cream cheese and powdered sugar together with a hand mixer until smooth and fluffy. This takes about 2 minutes. Scrape down the sides of the bowl. Make sure your cream cheese is truly at room temperature—cold cream cheese will leave you with lumps, and nobody wants lumpy pudding cups.
- Prepare the pudding. In a separate bowl, whisk together the instant vanilla pudding mix and the cold milk for about 2 minutes until it starts to thicken. It will be quite soft at this point. Stir in the pumpkin puree and the pumpkin pie spice until fully combined and smooth.
- Combine the mixtures. Add the pumpkin pudding mixture to the cream cheese mixture and beat on low speed until everything is well combined and silky. It should be a beautiful, pale orange color. Fold in the thawed whipped topping gently with a spatula until no white streaks remain. This lightens the filling and gives it that mousse-like texture.
- Layer the filling. Spoon or pipe the pumpkin filling over the Oreo crust in each cup. Fill them almost to the top, leaving a little room for the topping. Smooth the tops with the back of a spoon.
- Chill. Place the cups in the refrigerator for at least 2 hours, or up to overnight. This is the hardest part, I know, but it is essential. The filling needs time to set up properly so you get clean layers when you dig in.
- Add the topping. Just before serving, sprinkle the reserved crushed Oreos over the top of each cup to create the “dirt.” Place a candy pumpkin on top of each one. If you are feeling extra, you can pipe a little green frosting stem or vine next to the pumpkin.
- Serve cold. These are best enjoyed straight from the fridge. The contrast between the cold, creamy filling and the crunchy Oreo layers is pure magic.
A quick note: if your filling seems a little soft after the initial mixing, do not panic. It will firm up beautifully in the fridge. I have had batches that looked almost soupy before chilling, and they set up perfectly every time.
Cooking Tips & Techniques
I have made these enough times to have a few tricks up my sleeve. Here is what I have learned, sometimes the hard way.
Room temperature cream cheese is non-negotiable. I know, I know, we are all in a hurry. But cold cream cheese will give you lumps that no amount of beating will fix. Let it sit on the counter for 30 minutes, or if you are like me and always forget, microwave it in 10-second bursts until it is soft but not melted.
Do not overmix the whipped topping. Fold it in gently. If you beat it too vigorously, you will deflate all that air and end up with a dense, heavy filling. We want it light and mousse-like.
Press the crust firmly. This is the foundation of your dessert. If the crust is too loose, it will mix into the filling and you will lose that distinct layer. I use the bottom of a small spice jar to really compact it down.
Let them chill fully. I once served these after only an hour in the fridge, and they were a soupy mess. The filling needs at least 2 hours to set. Overnight is even better—the flavors meld and the texture becomes incredibly smooth.
Crush the topping Oreos separately. I keep a few cookies aside and crush them just before serving. If you add them too early, they get soggy from the moisture in the fridge. Nobody wants soggy dirt.
One more thing: if you are making these for a party, assemble them in the cups but leave the Oreo “dirt” and candy pumpkins off until right before serving. This keeps everything looking fresh and crisp.
Variations & Adaptations
This recipe is wonderfully flexible. Here are some ways I have played around with it.
Gluten-Free Version: Use gluten-free chocolate sandwich cookies for the crust and topping. Everything else is naturally gluten-free, so this is an easy swap. I have tested this with a few brands, and the Schar double chocolate cookies work really well.
Dairy-Free Adaptation: Use dairy-free cream cheese (I like Kite Hill), plant-based butter, and your favorite non-dairy milk. Coconut milk gives a lovely richness. The texture will be slightly softer, so chill them for an extra hour.
Pumpkin Cheesecake Style: Double the cream cheese to 8 ounces and reduce the milk to 3/4 cup. This gives you a denser, more cheesecake-like filling. It is richer and feels a little more decadent—perfect for Thanksgiving.
Spiced Variation: Add a pinch of cardamom or a dash of allspice to the pudding mixture. I tried this on a whim one year, and it added this warm, almost floral note that was incredible. Just be careful not to overdo it—a little goes a long way.
Individual Trifles: Instead of cups, layer everything in a large glass dish for a pumpkin patch trifle. It looks stunning on a buffet table, and you get those beautiful layers in every scoop.
My personal favorite variation? I swap out the vanilla pudding for butterscotch pudding. The caramel-like flavor pairs beautifully with the pumpkin and the chocolate Oreos. It is a little unexpected, and everyone always asks what I did differently.
Serving & Storage Suggestions
These pudding cups are best served cold, straight from the fridge. I like to take them out about 5 minutes before serving to take the chill off slightly—it lets the flavors open up a bit.
For presentation, I use small mason jars or clear plastic cups with lids. The layers are the star of the show, so you want to show them off. I sometimes tie a little piece of twine or ribbon around the jar with a small tag that says “Pumpkin Patch.” It makes for a cute party favor or a thoughtful hostess gift.
These pair beautifully with a hot cup of apple cider or a pumpkin spice latte. For a dessert spread, I serve them alongside apple crisp or a simple sugar cookie. The lightness of the pudding cups balances out heavier desserts.
Storage: Keep the assembled cups (without the topping) covered in the refrigerator for up to 3 days. The filling stays creamy and the crust stays crunchy. Add the crushed Oreos and candy pumpkins just before serving. I do not recommend freezing these—the texture of the pudding becomes grainy when thawed.
One thing I have noticed: the flavors actually get better after a day in the fridge. The pumpkin spice melds with the cream cheese, and everything becomes more cohesive. So feel free to make these a day ahead—your future self will thank you.
Nutritional Information & Benefits
Here is an approximate nutritional breakdown for one serving (based on 8 servings):
- Calories: 320
- Fat: 18g
- Carbohydrates: 38g
- Protein: 4g
- Fiber: 1g
- Sugar: 26g
While this is certainly a treat, there are a few bright spots. Pumpkin is packed with vitamin A and fiber, and it is a great source of antioxidants. The cream cheese adds a bit of protein and calcium. I like to think of these as a slightly more nutritious alternative to a slice of pumpkin pie—you get the same cozy flavors with a lighter, less heavy finish.
For those watching their sugar intake, you can use sugar-free pudding mix and reduce the powdered sugar to 2 tablespoons. The filling will be slightly less sweet, but the Oreo crust still provides that satisfying sweetness. As always, this is a dessert meant to be enjoyed in moderation, and I firmly believe that a little indulgence is good for the soul.
Conclusion
These Easy No-Bake Pumpkin Patch Pudding Cups with Oreos are proof that the best recipes often come from the most chaotic moments. They are simple enough for a weeknight treat, but cute enough to steal the show at any fall gathering. The creamy, spiced pumpkin filling, the crunchy Oreo “dirt,” and the little candy pumpkin on top—it is pure, unpretentious joy in a cup.
I love this recipe because it reminds me that you do not need fancy equipment or hours of time to create something that feels special. It is forgiving, it is fun, and it never fails to make people smile. Whether you are making these with your kids on a rainy afternoon or bringing them to a Halloween party, I hope they bring you the same little burst of happiness they bring me.
Have you tried these? I would love to hear how they turned out! Drop a comment below and let me know if you added your own twist—I am always looking for new ideas. And if you loved them, share this recipe with a friend who needs a little pumpkin patch magic in their life. Happy no-baking!
Frequently Asked Questions
Can I use homemade whipped cream instead of Cool Whip?
Absolutely! Whip 1/2 cup of heavy cream with 1 tablespoon of powdered sugar until stiff peaks form, then fold it in. It will be a little less stable, but the flavor is incredible.
How far in advance can I make these?
You can make the cups (without the topping) up to 3 days in advance. Add the crushed Oreos and candy pumpkins just before serving to keep everything fresh and crunchy.
Can I use pumpkin pie filling instead of pumpkin puree?
I would not recommend it. Pumpkin pie filling is already sweetened and spiced, so it will throw off the balance of the recipe. Stick with 100% pure pumpkin puree for the best results.
Why is my filling runny?
This usually happens if the pudding has not set long enough, or if the cream cheese was too cold. Make sure your cream cheese is at room temperature, and give the cups at least 2 hours in the fridge to firm up.
Can I make these in a large dish instead of individual cups?
Yes! Layer everything in a 9×9 dish or a trifle bowl. Just double the recipe if you want a thicker dessert. It works beautifully for a crowd.
Pin This Recipe!
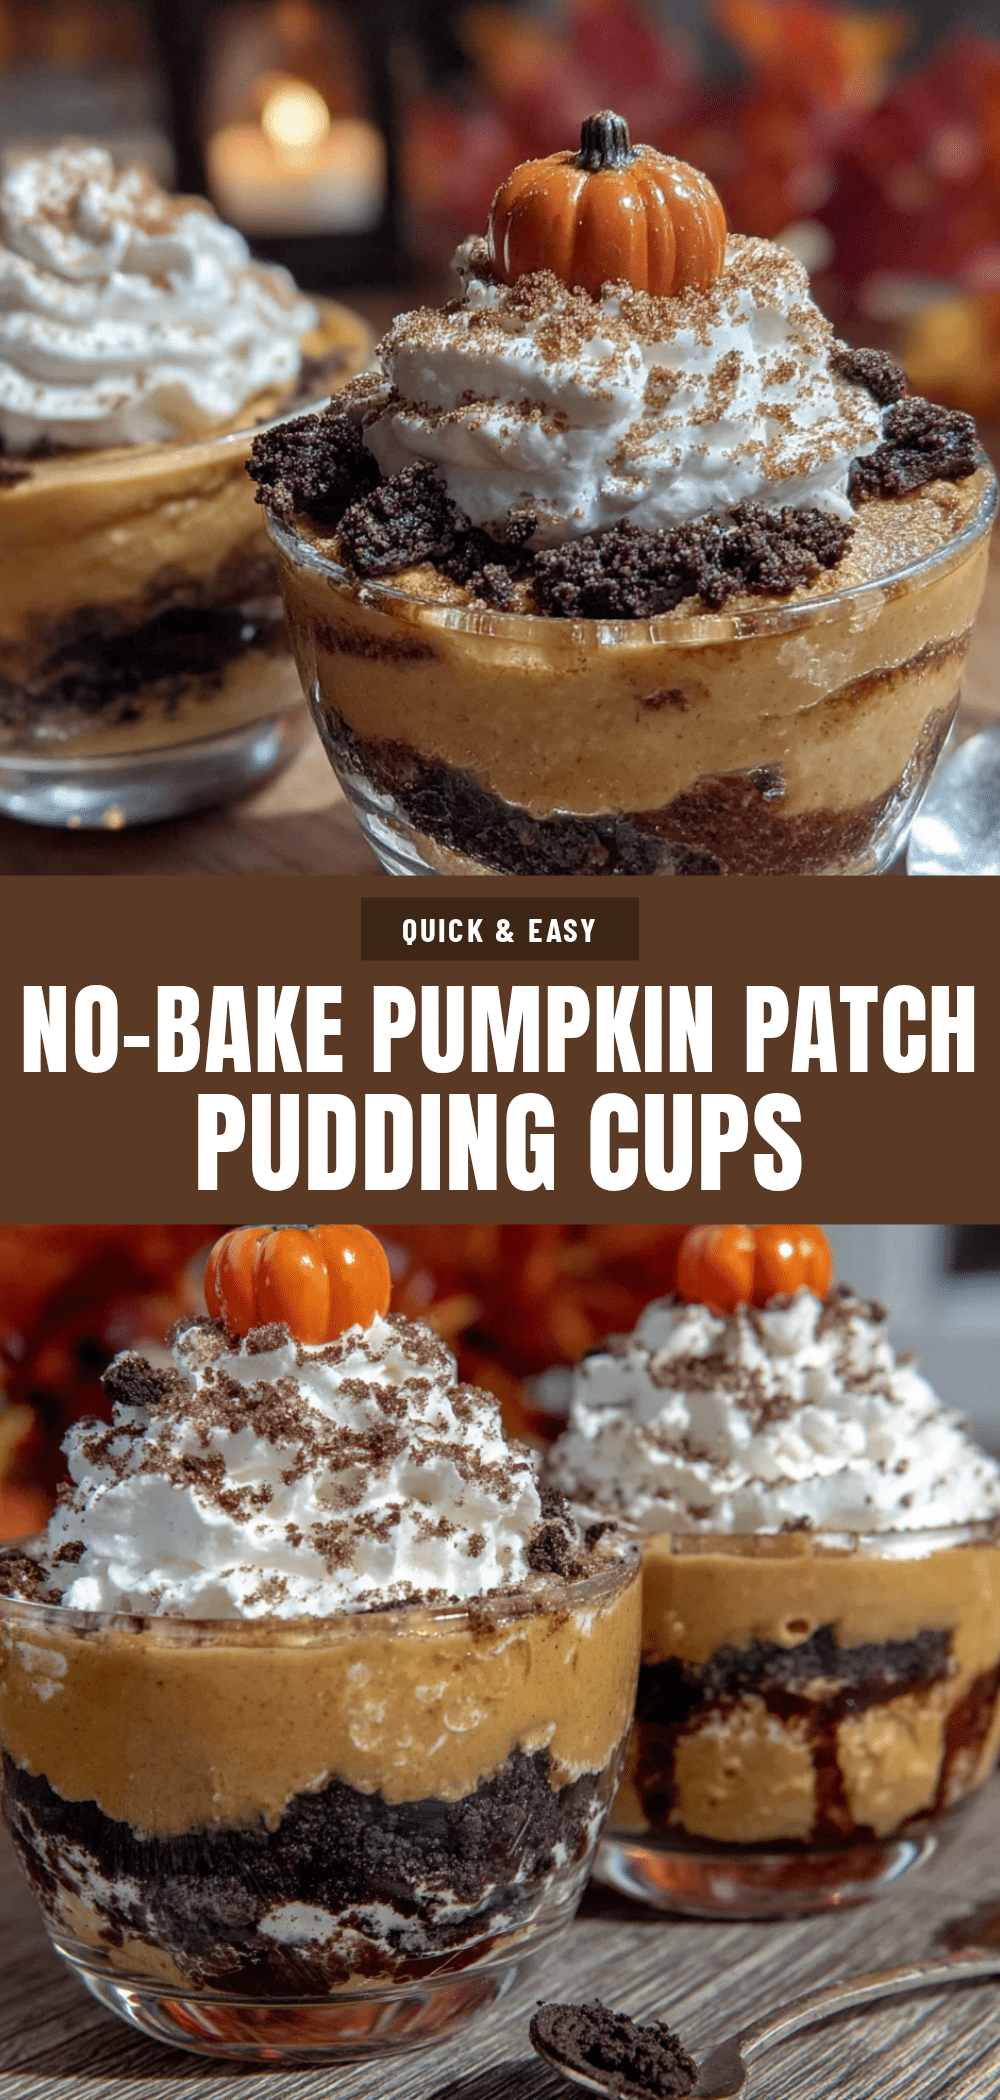
Easy No-Bake Pumpkin Patch Pudding Cups

These Easy No-Bake Pumpkin Patch Pudding Cups with Oreos are creamy, crunchy, and look like a little garden of pumpkins sitting in dirt. No oven, no mixer, no stress—just stir, layer, and chill for a perfect fall treat.
- Prep Time: 15 minutes
- Cook Time: 0 minutes
- Total Time: 2 hours 15 minutes (includes chilling)
- Yield: 6-8 servings 1x
- Category: Dessert
- Cuisine: American
Ingredients
- 24 Oreo cookies (regular, not double-stuf)
- 3 tablespoons unsalted butter, melted
- 1 package (3.4 ounces) instant vanilla pudding mix
- 1 cup cold milk
- 1/2 cup pumpkin puree (100% pure pumpkin)
- 1 teaspoon pumpkin pie spice
- 4 ounces cream cheese, softened to room temperature
- 1/4 cup powdered sugar
- 1/2 cup frozen whipped topping, thawed
- 6 additional Oreo cookies, crushed (for topping)
- 6 candy pumpkins or candy corn (for decoration)
- A few green candy melts or green frosting (optional, for stems)
Instructions
- Crush 24 Oreos into fine crumbs using a food processor or a zip-top bag and rolling pin. Transfer to a medium bowl.
- Pour melted butter over Oreo crumbs and stir with a fork until evenly moistened. Set aside about 2 tablespoons for garnish.
- Spoon about 2 tablespoons of the Oreo mixture into the bottom of each cup (6-8 cups). Press down firmly with the back of a spoon or a shot glass. Refrigerate while making filling.
- In a medium bowl, beat softened cream cheese and powdered sugar with a hand mixer until smooth and fluffy, about 2 minutes. Scrape down sides.
- In a separate bowl, whisk together instant vanilla pudding mix and cold milk for about 2 minutes until thickened. Stir in pumpkin puree and pumpkin pie spice until smooth.
- Add the pumpkin pudding mixture to the cream cheese mixture and beat on low speed until well combined and silky. Fold in thawed whipped topping gently with a spatula until no white streaks remain.
- Spoon or pipe the pumpkin filling over the Oreo crust in each cup, filling almost to the top. Smooth tops with the back of a spoon.
- Refrigerate cups for at least 2 hours, or up to overnight, until filling is set.
- Just before serving, sprinkle reserved crushed Oreos over the top of each cup to create ‘dirt.’ Place a candy pumpkin on top. Optionally, pipe a small green frosting stem or vine.
- Serve cold straight from the fridge.
Notes
Room temperature cream cheese is essential to avoid lumps. Do not overmix the whipped topping; fold gently to keep the filling light. Press the crust firmly to maintain distinct layers. Chill for at least 2 hours; overnight is better for flavor melding. Add the Oreo ‘dirt’ and candy pumpkins just before serving to keep them crunchy. For a dairy-free version, use plant-based butter, dairy-free cream cheese, and almond or oat milk. For a gluten-free version, use gluten-free chocolate sandwich cookies.
Nutrition
- Serving Size: 1 pudding cup
- Calories: 320
- Sugar: 26
- Sodium: 280
- Fat: 18
- Saturated Fat: 9
- Carbohydrates: 38
- Fiber: 1
- Protein: 4
Keywords: no-bake, pumpkin, pudding cups, Oreo, fall, Halloween, easy dessert, kid-friendly


