Love this? Save it for later!
Share the inspiration with your friends
It was 11:15 PM on a rainy Wednesday, and I had a sudden, almost desperate craving for a slice of fresh bread. Not the airy, hole-riddled artisan kind you see on Instagram, but a proper, soft-crumbed sandwich bread. The kind that holds a slice of turkey and doesn’t fall apart. The problem? I hadn’t planned ahead. My sourdough starter, “Barnaby,” was bubbling away in the fridge, but the thought of the traditional stretch-and-fold routine, the shaping, the proofing baskets—it all felt like too much for a Tuesday night that had already run long.
I didn’t have the energy for a complicated bake, but I had my starter, some flour, and a wild idea. What if I just… didn’t knead it? What if I treated it like my no-knead artisan loaf but baked it in a loaf pan? Honestly, I figured it would be a flop. A dense, gummy brick destined for the compost bin. But you know that feeling when you just have to try something? I mixed the dough in ten minutes, scraped it into a greased loaf pan, covered it with a shower cap (don’t judge, it’s what I had), and went to bed.
When I woke up, the dough had nearly doubled. It looked… hopeful. I slid it into the oven, holding my breath. Twenty-five minutes later, the most beautiful, golden-brown loaf of sandwich bread I had ever seen came out of the oven. The top was domed, the crust was soft, and when I cut into it an hour later (the hardest part of any bread recipe, right?), the crumb was tender, even, and perfect. This accidental, late-night experiment became my go-to recipe. It’s the one I make for school lunches, for lazy Sunday mornings, and for that moment when you just need a slice of real bread. This simple no-knead sourdough sandwich bread for beginners is proof that you don’t need a fancy technique or a ton of time to get incredible results.
Why You’ll Love This Recipe
I have tested this recipe more times than I can count, and I can honestly say it is the most forgiving, reliable sourdough sandwich bread I’ve ever made. It’s the one I recommend to friends who are terrified of baking with yeast, and it’s the one I turn to when my week has been chaotic. Here is why it works so well:
- No Kneading Required: I mean it. Not a single stretch, fold, or slap. You just mix, wait, and bake. It’s the ultimate hands-off bread.
- Simple Pantry Ingredients: You need flour, water, salt, and an active sourdough starter. No yeast packets, no special flours, no expensive equipment.
- Perfect for Beginners: This recipe was designed with the nervous baker in mind. The dough is forgiving, the timing is flexible, and the results are consistently beautiful.
- Makes the Best Toast: I am not exaggerating when I say this bread makes the most incredible avocado toast and grilled cheese. The crumb is tight enough to hold up to toppings but soft enough to melt in your mouth.
- Flexible Timing: The bulk fermentation can happen on the counter for 8-12 hours or even in the fridge for up to 24 hours. You work around your schedule, not the other way around.
This isn’t just another sourdough recipe. The secret is the high hydration and the long, slow fermentation, which does all the work of developing gluten for you. The result is a loaf that has the tangy flavor of traditional sourdough with the soft, sandwich-friendly texture of a classic white loaf. It’s the kind of bread that makes you close your eyes after the first bite. It’s comfort food, simplified.
What Ingredients You Will Need
This simple no-knead sourdough sandwich bread uses just four core ingredients. Each one plays a specific role in creating that perfect loaf. I’ve tested this with different brands and types, so I’ll share what works best.
- Bread Flour (450g / about 3 ½ cups): This is my top choice for the best structure. Bread flour has a higher protein content (around 12-14%) than all-purpose flour, which helps create a stronger gluten network. This gives the bread its soft, chewy crumb and helps it rise tall in the pan. I prefer King Arthur or Bob’s Red Mill. If you only have all-purpose flour, you can use it, but the loaf will be slightly shorter and a bit less chewy.
- Water (350g / about 1 ½ cups), lukewarm: Water hydrates the flour and activates the gluten. I use lukewarm water (around 90°F or 32°C) to help kick-start the fermentation, especially if my kitchen is cold. Tap water is fine, but if you have highly chlorinated water, let it sit out for an hour before using it, as chlorine can slow down your starter.
- Active Sourdough Starter (100g / about ½ cup), bubbly and doubled: This is your leavening agent. It needs to be active and happy. I feed my starter the night before I plan to mix the dough. You’ll know it’s ready when it’s doubled in size, full of bubbles, and smells fruity and tangy. A “discard” starter that hasn’t been fed won’t have enough power to lift this dough properly.
- Salt (10g / about 1 ½ teaspoons): Salt is crucial. It doesn’t just add flavor; it strengthens the gluten structure and controls the fermentation rate, preventing the dough from over-proofing too quickly. I use fine sea salt. If you use kosher salt, you might need a bit more by volume.
- Optional Add-in for Softness (12g / 1 tablespoon olive oil or melted butter): This is my secret for a truly soft, tender sandwich bread. It enriches the dough slightly, giving it a softer crust and a more plush crumb. It also helps the bread stay fresh for a day or two longer. I often use olive oil for a subtle flavor, but melted unsalted butter is fantastic too.
Ingredient Selection Tip: For the best results, use a kitchen scale. Measuring flour by volume (cups) can be inconsistent. A scale ensures you get the perfect hydration every single time. Trust me, it’s a game-changer.
Equipment Needed
The beauty of this recipe is that it doesn’t require a stand mixer or a Dutch oven. You probably already have everything you need.
- A Large Mixing Bowl: Any bowl will work, but a wide, shallow bowl makes it easier to mix the dough.
- A 9×5-inch Loaf Pan: This is essential for the sandwich bread shape. A metal pan is best for even browning. If you have a dark, non-stick pan, keep an eye on the crust, as it can brown faster. I use a standard light-colored metal pan.
- A Dough Scraper or Rubber Spatula: This is your best friend for mixing this sticky dough. A dough scraper makes it so much easier to get every bit of dough out of the bowl.
- Plastic Wrap or a Shower Cap: To cover the dough during its long rise. A reusable shower cap is my favorite hack—it fits perfectly over a mixing bowl and a loaf pan.
- Kitchen Scale (Highly Recommended): For accurate measurements. It makes the process faster and the results more consistent.
- Cooling Rack: Essential for cooling the bread properly. If you leave it in the pan, the bottom will get soggy.
Preparation Method
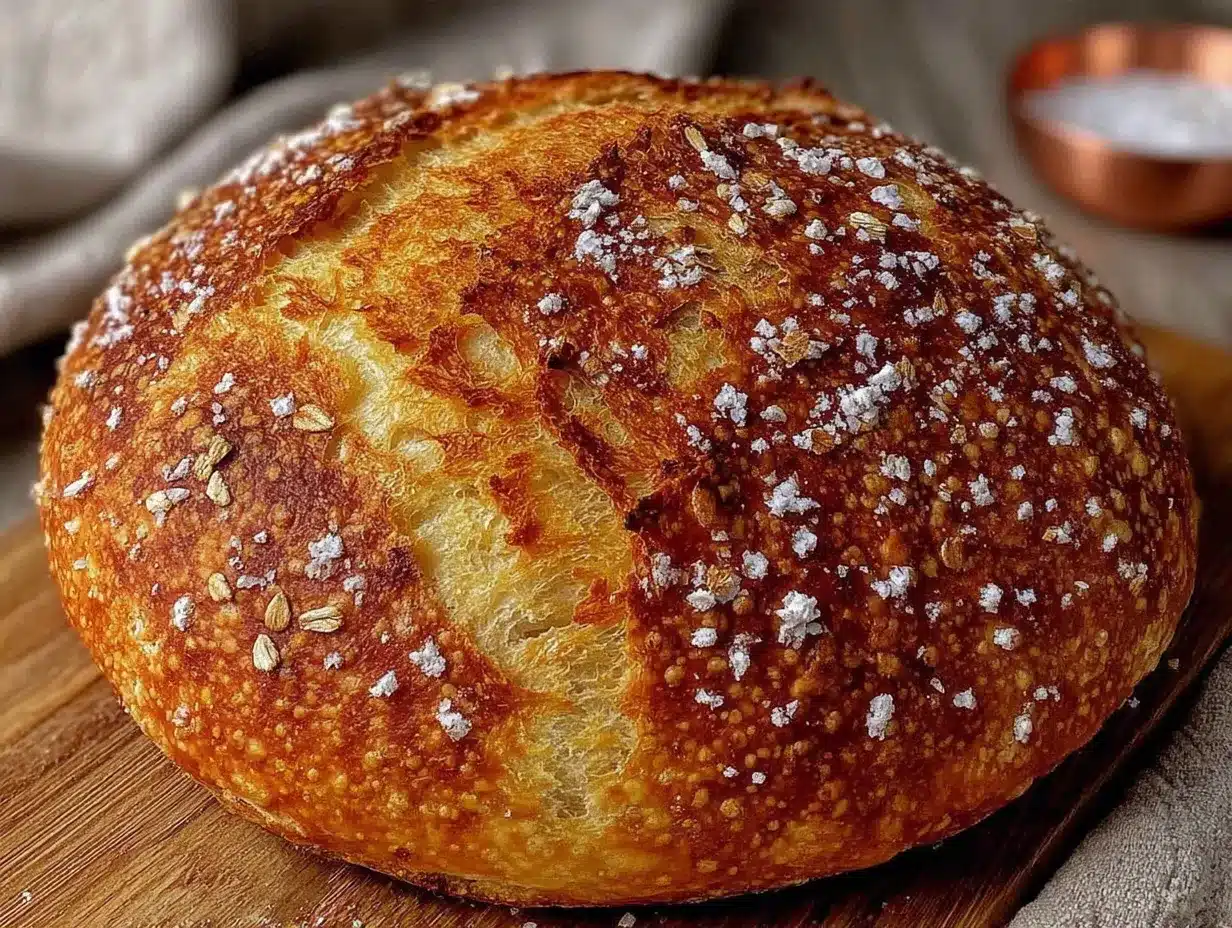
Let’s get to the fun part. This method is incredibly simple, but I’ll walk you through every step with the little cues I’ve learned to look for.
- Mix the Dough (5 minutes): In your large mixing bowl, combine the 450g of bread flour and 10g of salt. Whisk them together. Then, add your 100g of active, bubbly sourdough starter and 350g of lukewarm water. If you’re using the oil or butter, add it now. Using your dough scraper or a sturdy spatula, mix everything together until no dry bits of flour remain. The dough will look shaggy and wet—that’s exactly what we want. Don’t over-mix. Just get it combined. It will feel very sticky, like a thick batter. Cover the bowl tightly with plastic wrap or your shower cap.
- The Long, Lazy Rise (Bulk Fermentation – 8 to 12 hours): This is where the magic happens. Leave the covered bowl on your countertop at room temperature (around 70-75°F is ideal). You are waiting for the dough to double in size and become bubbly and jiggly. In a warm kitchen, it might be ready in 8 hours. In a cooler kitchen, it could take 12. The surface should be dotted with small bubbles. It will smell wonderfully sour and yeasty. Pro Tip: If you can’t bake it in 12 hours, you can put the covered bowl in the fridge for up to 24 hours. This slows the fermentation and can actually develop even more flavor.
- Shape and Pan (5 minutes): When the dough is ready, lightly flour your work surface. Don’t use too much flour—just enough to prevent sticking. Use your dough scraper to gently coax the dough out of the bowl onto the floured surface. It will be very soft and loose. This is okay. Gently pat the dough into a rough rectangle, about 8×6 inches. Now, perform a simple “letter fold.” Fold the top third down towards the center, then fold the bottom third up over it, like folding a letter. Then, gently roll the dough up from one short end to the other, creating a log. Place the log, seam-side down, into your greased 9×5-inch loaf pan.
- The Final Rise (Proofing – 2 to 4 hours): Cover the loaf pan with your plastic wrap or shower cap. Let it sit at room temperature. This second rise is crucial. You want the dough to rise until it is puffy and has crested about 1 inch above the rim of the pan. It should look pillowy and feel soft and airy when you gently poke it with a floured finger. This can take 2 hours in a warm kitchen or up to 4 hours in a cooler one. Be patient—a good proof is the key to a tall, fluffy loaf.
- Bake (45-50 minutes): About 30 minutes before you think the dough is ready, preheat your oven to 425°F (220°C). Place a rack in the middle position. When the dough has risen, place the pan in the oven. Bake for 25 minutes. Then, carefully rotate the pan 180 degrees for even browning. Bake for another 20-25 minutes. The loaf is done when it is deep golden brown on top and sounds hollow when you tap the bottom. For the most accurate test, use a digital thermometer: the internal temperature should be 200-205°F (93-96°C).
- Cool Completely (The Hardest Step – 1 hour): I know, I know. You want to slice it immediately. But please, I am begging you, let it cool completely on a wire rack. If you cut into it while it’s hot, the crumb will be gummy and sticky. The starches need time to set. Let it cool for at least 1 hour before slicing. The wait is worth it.
Cooking Tips & Techniques
I have made a lot of mistakes in the kitchen, and I’m happy to share them so you don’t have to. Here are the most important things I’ve learned about this simple no-knead sourdough sandwich bread.
- Don’t Skip the Scale: My biggest failure with this recipe was when I tried to use measuring cups. The loaf was dense and flat. Using a kitchen scale for the flour and water is the single most important tip for success. It’s not about being fancy; it’s about being accurate.
- Your Starter Needs to Be a Party Animal: I once used a sluggish, barely-bubbly starter because I was impatient. The dough barely rose after 12 hours. Make sure your starter is at its peak—doubled in size, full of bubbles, and passing the “float test” (a small dollop of starter floats in a glass of water).
- Temperature is a Variable, Not a Rule: The times I give (8-12 hours, 2-4 hours) are guidelines. Your kitchen’s temperature will change everything. In the winter, my dough takes forever. In the summer, it races along. Learn to read the dough, not the clock. Look for the visual cues: doubled in size, bubbly, jiggly.
- The Sticky Dough is Your Friend: Don’t be tempted to add a ton of flour when shaping. This is a wet dough, and that high hydration is what gives it its soft, tender crumb. Use a light dusting of flour on your hands and the counter, and work quickly. It will be sticky, but it will shape.
- A Darker Crust is a Better Crust: Don’t be afraid of a deep, dark golden-brown crust. That color is flavor. It’s caramelization. A pale loaf often has a doughy, less flavorful crumb. If you’re worried about it burning, tent it with foil for the last 10 minutes of baking.
Variations & Adaptations
Once you’ve mastered the basic loaf, the possibilities are endless. Here are a few of my favorite ways to change it up.
- Whole Wheat Sandwich Bread: Swap 150g of the bread flour for whole wheat flour. The loaf will be a bit denser and have a nuttier flavor. You may need to add an extra tablespoon of water, as whole wheat flour absorbs more liquid.
- Seeded Loaf: Just before the final proof is done, brush the top of the loaf with a little water or milk and sprinkle it with a generous amount of sesame seeds, poppy seeds, sunflower seeds, and rolled oats. It looks beautiful and adds a lovely crunch.
- Herb & Garlic Bread: Add 1 teaspoon of dried rosemary, 1 teaspoon of dried thyme, and ½ teaspoon of garlic powder to the flour before mixing the dough. This makes an incredible bread for sandwiches or for dipping in olive oil.
- Honey Oat Bread: Replace the water with 300g of water and 50g of milk. Add 2 tablespoons of honey and ½ cup of rolled oats to the dough. It creates a slightly sweet, soft, and hearty loaf that is perfect for breakfast toast.
Serving & Storage Suggestions
This bread is incredibly versatile. Here is how I like to enjoy it and keep it fresh.
Serving: This bread is best served at room temperature. It makes the most incredible toast—the crumb gets crispy on the outside and stays soft on the inside. It’s also perfect for sandwiches, from a simple BLT to a hearty grilled cheese. I love it with a generous slather of salted butter and a drizzle of honey.
Storage: Store the completely cooled loaf in a bread bag or wrapped tightly in beeswax wrap at room temperature. It will stay fresh for 3-4 days. Do not store it in the refrigerator, as the cold air will dry it out and make it stale faster.
Freezing: This bread freezes beautifully. Slice the entire loaf, then place the slices in a freezer-safe bag. You can pull out a slice or two as needed. Toast directly from frozen—no need to thaw.
Reheating: To refresh a day-old slice, pop it in the toaster. For a whole loaf, wrap it in foil and warm it in a 350°F (175°C) oven for 10 minutes. The flavors actually deepen a bit on the second day, making it perfect for French toast or bread pudding.
Nutritional Information & Benefits
This is real, homemade food. Knowing what’s in your bread is a powerful thing.
Per slice (based on 16 slices per loaf):
- Calories: ~150
- Fat: 1-2g (depending on added oil)
- Carbohydrates: 28g
- Fiber: 1g
- Protein: 5g
- Sodium: 180mg
The long fermentation process of sourdough has benefits beyond flavor. It breaks down phytic acid, making the minerals in the flour more bioavailable. This can make the bread easier to digest for some people compared to commercially yeasted bread. It also has a lower glycemic index, meaning it won’t spike your blood sugar as dramatically.
Dietary Considerations: This recipe is naturally vegan if you skip the butter and use olive oil. It is not gluten-free, but you can experiment with a high-quality gluten-free flour blend. It contains no dairy unless you add butter.
Conclusion
Honestly, this simple no-knead sourdough sandwich bread for beginners has changed the way I think about baking. It proved to me that you don’t need to be a professional baker or spend all day in the kitchen to make something truly wonderful. It’s a recipe that meets you where you are—whether you’re a busy parent, a nervous beginner, or just someone who wants a good slice of bread without the hassle.
I love this recipe because it feels like a small, attainable victory every single time. That moment you pull the golden loaf out of the pan? Pure magic. I encourage you to make it your own. Try the honey oat version, add some seeds, or just enjoy it plain. The best part of baking is making a recipe a part of your life.
I would absolutely love to hear how it goes for you! Did you try a variation? Did your kids love it? Drop a comment below and let me know. And if you found this helpful, please share it with a friend who thinks they can’t bake bread. They can. Happy baking!
Frequently Asked Questions
Can I use all-purpose flour instead of bread flour?
Yes, you can. The loaf will be slightly shorter and a bit less chewy, but it will still be delicious. Bread flour gives the best structure for a tall, soft sandwich loaf.
My dough didn’t rise at all. What went wrong?
This is almost always a problem with the starter. Your starter needs to be very active and bubbly before you use it. If it was sluggish, the dough won’t have enough power to rise. Also, check your kitchen temperature—a very cold kitchen can slow fermentation to a crawl.
Can I use sourdough discard for this recipe?
I do not recommend it. This recipe relies on the leavening power of an active starter to make the bread rise. Discard starter is not bubbly enough and will result in a dense, flat brick of bread. Save your discard for crackers or pancakes.
How do I get a softer crust?
For an even softer crust, brush the hot loaf with a little melted butter as soon as it comes out of the oven. You can also cover it with a clean kitchen towel while it cools, which traps steam and softens the crust.
Why is my bread gummy inside?
Gummy bread is usually a sign of under-baking or cutting into the loaf too soon. Make sure your internal temperature reaches 200-205°F. And please, let it cool completely for at least 1 hour before slicing. The starches need time to set.
Pin This Recipe!
Easy No-Knead Sourdough Sandwich Bread for Beginners

A simple, forgiving no-knead sourdough sandwich bread with a soft, tender crumb. Perfect for beginners, this recipe requires just four core ingredients and minimal effort for a beautiful, golden-brown loaf.
- Prep Time: 10 minutes
- Cook Time: 45 minutes
- Total Time: 10 hours 55 minutes (includes rising time)
- Yield: 16 servings 1x
- Category: Bread
- Cuisine: American
Ingredients
- 450g bread flour (about 3 ½ cups)
- 350g lukewarm water (about 1 ½ cups)
- 100g active sourdough starter (about ½ cup), bubbly and doubled
- 10g fine sea salt (about 1 ½ teaspoons)
- 12g olive oil or melted butter (1 tablespoon, optional for softness)
Instructions
- Mix the Dough (5 minutes): In a large mixing bowl, whisk together 450g bread flour and 10g salt. Add 100g active sourdough starter, 350g lukewarm water, and optional oil/butter. Mix with a dough scraper or spatula until no dry flour remains. The dough will be shaggy and wet. Cover tightly with plastic wrap or a shower cap.
- The Long, Lazy Rise (Bulk Fermentation – 8 to 12 hours): Leave the covered bowl at room temperature (70-75°F) until the dough doubles in size, becomes bubbly, and jiggly. In a warm kitchen, this may take 8 hours; in a cooler one, up to 12 hours. Alternatively, refrigerate for up to 24 hours for more flavor.
- Shape and Pan (5 minutes): Lightly flour a work surface. Gently coax the dough out of the bowl onto the floured surface. Pat into a rough 8×6-inch rectangle. Fold the top third down, then the bottom third up (letter fold). Roll the dough from one short end into a log. Place seam-side down in a greased 9×5-inch loaf pan.
- The Final Rise (Proofing – 2 to 4 hours): Cover the loaf pan with plastic wrap or a shower cap. Let it rise at room temperature until puffy and about 1 inch above the rim of the pan. It should feel soft and airy when gently poked.
- Bake (45-50 minutes): About 30 minutes before the dough is ready, preheat oven to 425°F (220°C) with a rack in the middle. Place the pan in the oven and bake for 25 minutes. Rotate the pan 180 degrees and bake for another 20-25 minutes, until deep golden brown and hollow-sounding when tapped. Internal temperature should reach 200-205°F (93-96°C).
- Cool Completely (1 hour): Let the loaf cool completely on a wire rack for at least 1 hour before slicing to avoid a gummy crumb.
Notes
Use a kitchen scale for accurate measurements. Ensure your starter is very active (doubled and bubbly) before using. The dough will be sticky; avoid adding too much flour. For a softer crust, brush with melted butter after baking. Let the bread cool completely before slicing to prevent gumminess.
Nutrition
- Serving Size: 1 slice
- Calories: 150
- Sodium: 180
- Fat: 12
- Carbohydrates: 28
- Fiber: 1
- Protein: 5
Keywords: sourdough, no-knead bread, sandwich bread, beginner bread, easy sourdough, homemade bread, soft bread


