Love this? Save it for later!
Share the inspiration with your friends
I was standing in my kitchen last November, staring at a butternut squash that had been sitting on my counter for two weeks. You know that feeling when you buy a vegetable with grand intentions, and then life happens? That squash was staring back at me, practically begging to be used before it turned into a science experiment. I had already planned to make mac and cheese for dinner—my go-to comfort meal after a long week—but something felt off about just making the regular version. That’s when the idea hit me, and honestly, I wasn’t sure if it was genius or desperation.
I grabbed the squash, peeled it (which is honestly the worst part of the whole process), and chopped it into chunks while my toddler was napping. The kitchen was quiet except for the sound of the knife hitting the cutting board. I roasted the squash until it was soft and caramelized, then blended it into the creamiest, most velvety puree I had ever made. The color was this gorgeous golden-orange that looked like autumn in a bowl. I stirred it into my cheese sauce, and let me tell you, I almost cried when I tasted it. Not because it was sad—because it was that good.
The funny thing is, I almost didn’t try it. I mean, butternut squash in mac and cheese? It sounded a little weird, even to me. But that first bite had this unexpected sweetness that balanced perfectly with the sharp cheddar. The texture was silky, not grainy or watery like I worried it might be. My husband walked in and asked what smelled so amazing, and I just handed him a spoon. He went back for three more spoonfuls before dinner was even ready. That’s when I knew this recipe was something special.
Maybe you’ve been there too—staring at a vegetable you bought with good intentions, wondering what to do with it. Or maybe you’re just looking for a way to make mac and cheese feel a little more grown-up without losing that cozy, comforting feeling. Either way, this creamy butternut squash mac and cheese is the answer. It’s the recipe I keep coming back to, and I think you will too.
Why You’ll Love This Recipe
Let me be honest with you—I’ve tested a lot of mac and cheese recipes over the years. Some were too dry, some were too complicated, and some just didn’t deliver on flavor. This one is different. It’s the kind of recipe that makes you close your eyes after the first bite and just savor the moment. Here’s why it works:
- One-Pot Wonder: Everything comes together in a single pot, which means less cleanup and more time enjoying your meal. Perfect for busy weeknights when you don’t want to face a mountain of dishes.
- Hidden Veggie Genius: The butternut squash blends right into the sauce, adding creaminess and nutrients without anyone guessing there’s a vegetable in there. Even picky eaters won’t notice—I promise.
- Simple Ingredients: No fancy grocery trips needed. You likely already have most of these ingredients in your kitchen, except maybe the squash itself.
- Quick & Easy: From start to finish, this recipe takes about 30 minutes. That’s faster than ordering takeout in some cases.
- Incredibly Creamy: The combination of roasted squash and melted cheese creates a sauce that’s silky smooth and clings perfectly to every piece of pasta.
- Perfect for Any Occasion: Weeknight dinner, holiday side dish, or comfort food craving—this recipe fits the bill every time.
What makes this version different from all the others? It’s the balance. The sweetness of the roasted squash doesn’t overpower the cheese—it enhances it. The sauce is thick enough to coat the pasta but not so heavy that it feels like a brick in your stomach. And the best part? You get that deep, savory flavor without needing to make a complicated roux or bake it in the oven. This is stovetop mac and cheese at its finest, and it’s honestly the best version I’ve ever made.
What Ingredients You Will Need
This recipe uses simple, wholesome ingredients that work together to create something truly special. The butternut squash is the star here, but every ingredient plays an important role in building flavor and texture.
- Butternut squash (1 medium, about 2 cups cubed): Look for a squash that feels heavy for its size with firm, unblemished skin. I prefer to roast mine before blending, which brings out the natural sweetness and gives the sauce a deeper flavor. You can use pre-cut squash from the store to save time, just make sure the pieces are fresh and not dried out.
- Elbow macaroni (8 ounces, about 2 cups dry): Classic macaroni works best here, but you can use any short pasta you have on hand. Shells, cavatappi, or rotini all work great. The key is to cook it al dente since it will continue cooking slightly in the sauce.
- Sharp cheddar cheese (1½ cups, shredded): I recommend shredding your own cheese from a block rather than using pre-shredded bags. Pre-shredded cheese contains anti-caking agents that prevent it from melting smoothly, and we want that silky sauce. Sharp cheddar gives the best flavor, but mild cheddar works too if you prefer a milder taste.
- Milk (1 cup, whole milk preferred): Whole milk creates the creamiest sauce, but 2% works in a pinch. Avoid skim milk—it can make the sauce thin and watery. For an extra indulgent version, swap half the milk for heavy cream.
- Chicken or vegetable broth (½ cup): This adds savory depth to the sauce that water just can’t provide. I use low-sodium broth so I can control the salt level myself. Vegetable broth keeps this recipe vegetarian-friendly.
- Butter (2 tablespoons, unsalted): Butter adds richness and helps create a smooth base for the sauce. Unsalted butter lets you control the seasoning.
- Garlic (2 cloves, minced): Fresh garlic adds a subtle savory note that complements the sweetness of the squash. Don’t skip it—it makes a difference.
- Onion powder (½ teaspoon): A little onion powder adds depth without the texture of real onions. It blends right into the sauce.
- Mustard powder (¼ teaspoon): This is my secret ingredient. Mustard powder doesn’t make the sauce taste like mustard—it enhances the cheese flavor and helps it pop. Trust me on this one.
- Salt and black pepper (to taste): Season carefully, especially if using salted broth or butter. I usually start with ½ teaspoon salt and adjust at the end.
- Optional toppings: Panko breadcrumbs toasted in butter, fresh parsley, or a sprinkle of paprika add a nice finishing touch. I love adding crispy breadcrumbs for texture contrast.
Equipment Needed
You don’t need a fancy kitchen to make this recipe, which is one of the things I love about it. Here’s what you’ll need:
- Large pot or Dutch oven: You’ll cook everything in one pot, so make sure it’s big enough to hold the pasta and sauce. A 5-quart pot works perfectly. I use my enameled Dutch oven because it distributes heat evenly and cleans up easily.
- Blender or immersion blender: You need something to puree the roasted squash into a smooth sauce. A regular blender works great—just be careful when blending hot liquids. Let the squash cool for a few minutes first, and always vent the lid to release steam. An immersion blender is even easier since you can blend right in the pot.
- Baking sheet: For roasting the squash. A rimmed baking sheet works best to catch any juices. Line it with parchment paper for easy cleanup.
- Cutting board and sharp knife: Peeling and chopping butternut squash requires a good knife. Be careful—squash can be tough to cut. A vegetable peeler also helps with removing the skin.
- Measuring cups and spoons: Accurate measurements matter for getting the sauce consistency right. I use dry measuring cups for the pasta and liquid measuring cups for the milk and broth.
- Wooden spoon or spatula: For stirring the sauce and pasta. A wooden spoon won’t scratch your pot and is sturdy enough to handle the thick sauce.
If you don’t have a blender, you can mash the roasted squash with a fork or potato masher until smooth. The texture won’t be as silky, but it still works. I’ve done it that way when my blender was in the dishwasher, and it turned out just fine.
Preparation Method
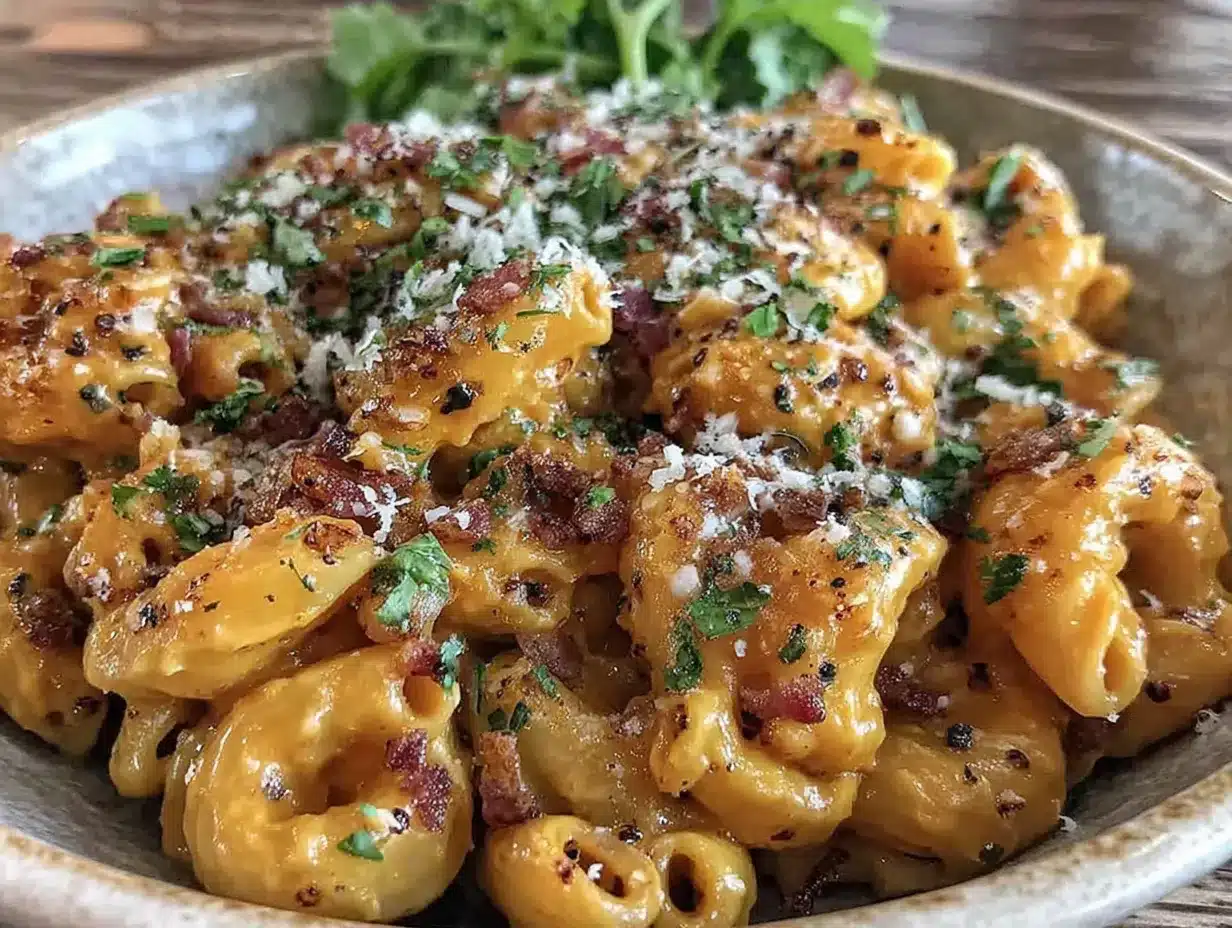
- Roast the squash: Preheat your oven to 400°F (200°C). Peel the butternut squash, cut it in half lengthwise, and scoop out the seeds. Cut the flesh into 1-inch cubes. Toss the cubes with 1 tablespoon of olive oil and a pinch of salt, then spread them in a single layer on a baking sheet. Roast for 20-25 minutes, flipping halfway through, until the squash is tender and lightly caramelized around the edges. You’ll know it’s done when a fork slides in easily. Let it cool for about 5 minutes.
- Cook the pasta: While the squash roasts, bring a large pot of salted water to a boil. Add the elbow macaroni and cook according to package directions until al dente—usually about 7-8 minutes. Drain the pasta in a colander, but don’t rinse it. The starch left on the pasta helps the sauce stick. Set the pasta aside while you make the sauce.
- Make the squash puree: Transfer the roasted squash to a blender. Add ½ cup of the milk and blend until completely smooth. You might need to scrape down the sides once or twice. The puree should be thick and velvety, like a thick soup. Set it aside.
- Start the cheese sauce: In the same pot you used for the pasta (see, one pot!), melt the butter over medium heat. Add the minced garlic and cook for about 30 seconds until fragrant—don’t let it brown or it will taste bitter. Whisk in the onion powder and mustard powder, then slowly pour in the remaining ½ cup of milk and the broth, whisking constantly to combine.
- Add the squash puree: Pour the squash puree into the pot and whisk until fully incorporated. The sauce will be a beautiful golden-orange color. Bring it to a gentle simmer over medium-low heat, stirring occasionally. Let it cook for 2-3 minutes to thicken slightly.
- Melt the cheese: Reduce the heat to low. Add the shredded cheddar cheese a handful at a time, stirring constantly until each addition is fully melted before adding more. This prevents the sauce from becoming grainy. Once all the cheese is added, the sauce should be smooth and creamy. Season with salt and pepper to taste. Remember, the cheese adds saltiness too, so taste before adding more salt.
- Combine and serve: Add the cooked pasta to the pot and stir until every piece is coated in that gorgeous sauce. If the sauce seems too thick, add a splash of warm milk or broth to loosen it up. Let it cook for another minute, stirring gently, until everything is heated through. Serve immediately while it’s hot and creamy.
- Add toppings if desired: For extra crunch, toast ¼ cup of panko breadcrumbs in a small skillet with 1 tablespoon of melted butter until golden brown. Sprinkle over the mac and cheese along with some fresh parsley or a pinch of paprika.
Cooking Tips & Techniques
After making this recipe more times than I can count, I’ve picked up a few tricks that make a real difference. Here’s what I’ve learned the hard way so you don’t have to:
- Don’t overcook the pasta: This is probably the most common mistake. Cook the pasta just until al dente—it should still have a little bite to it. It will continue cooking slightly when you add it to the hot sauce, so starting with slightly undercooked pasta prevents it from turning mushy.
- Grate your own cheese: I know it’s tempting to buy the pre-shredded bags, but they really don’t melt the same way. The anti-caking coating makes the sauce grainy instead of smooth. Take the extra 2 minutes to grate your own—it’s worth it.
- Low and slow for the cheese: When you add the cheese to the sauce, keep the heat low. High heat can cause the cheese to seize up and become clumpy. Patience is key here. Stir constantly and add the cheese in small batches.
- Season in layers: Don’t wait until the end to add all the salt. Season the squash when roasting, season the pasta water (it should taste like the sea), and season the sauce as you go. Building flavor in layers creates a more complex, balanced dish.
- Save some pasta water: Before you drain the pasta, scoop out about ½ cup of the starchy pasta water. If your sauce ends up too thick, adding a splash of this water can loosen it up without diluting the flavor like plain water would.
- Let it rest for a minute: After you combine the pasta and sauce, let it sit in the pot for about 60 seconds before serving. This gives the sauce a chance to cling to the pasta and thicken slightly, creating that perfect creamy coating.
I once made the mistake of using pre-shredded cheese and wondered why my sauce looked like it had little orange specks floating in it. Lesson learned! Also, don’t walk away while the cheese is melting—it can go from perfectly smooth to a clumpy mess faster than you’d think. Trust me, I’ve been there.
Variations & Adaptations
One of the best things about this recipe is how adaptable it is. Here are some of my favorite ways to change it up:
- Make it gluten-free: Simply swap the regular pasta for your favorite gluten-free pasta. Brown rice pasta or chickpea pasta work well. Just be careful not to overcook it—gluten-free pasta can get mushy quickly. The sauce itself is naturally gluten-free since we’re using a squash puree instead of a flour-based roux.
- Add some protein: Stir in cooked, crumbled bacon, diced ham, or shredded rotisserie chicken to make it a heartier meal. I love adding crispy bacon bits on top for that salty crunch. Leftover roasted chicken works beautifully too.
- Spice it up: Add a pinch of cayenne pepper, red pepper flakes, or a dash of hot sauce to the sauce for a little heat. The warmth pairs surprisingly well with the sweet squash. Start with ¼ teaspoon and adjust from there.
- Try different cheeses: While sharp cheddar is my go-to, you can experiment with other cheeses. Gruyere adds a nutty flavor, smoked gouda brings a smoky depth, or pepper jack gives it a kick. Just make sure at least half of your cheese is a good melting cheese like cheddar or mozzarella.
- Make it vegan: Use unsweetened almond or oat milk instead of regular milk, and swap the butter for vegan butter or olive oil. For the cheese, use a high-quality vegan cheddar shreds that melt well. Nutritional yeast can also add a cheesy flavor if needed.
- Add vegetables: Stir in steamed broccoli, roasted cauliflower, or sautéed spinach at the end for extra nutrients. The green veggies look beautiful against the orange sauce. I often add roasted broccoli florets for a complete meal in one bowl.
Serving & Storage Suggestions
This mac and cheese is best served immediately while it’s hot and creamy. The sauce tends to thicken as it sits, so don’t wait too long to dig in. Here’s how to make the most of it:
- Serving temperature: Serve it piping hot straight from the pot. I like to spoon it into warm bowls so it stays hot longer. A sprinkle of fresh parsley or a crack of black pepper on top adds a nice finishing touch.
- What to serve with it: This mac and cheese pairs beautifully with a simple green salad dressed with vinaigrette—the acidity cuts through the richness. It also works as a side dish for roasted chicken, grilled sausages, or a holiday turkey. For a cozy dinner, serve it alongside roasted Brussels sprouts or steamed green beans.
- Storing leftovers: Transfer any leftover mac and cheese to an airtight container and refrigerate for up to 4 days. The sauce will thicken significantly as it cools, so don’t worry—it will loosen up when reheated.
- Reheating: The best way to reheat this is on the stovetop over low heat. Add a splash of milk or broth and stir gently until heated through. You can also microwave individual portions in 30-second intervals, stirring between each, adding a little milk to restore creaminess. Avoid reheating at high power or the sauce can become grainy.
- Freezing: You can freeze this mac and cheese for up to 3 months. Let it cool completely, then transfer to a freezer-safe container. To thaw, place it in the refrigerator overnight. Reheat on the stovetop with a splash of milk, stirring frequently. The texture won’t be quite as creamy as fresh, but it’s still delicious.
One thing I’ve noticed is that the flavors actually deepen overnight. The squash and cheese meld together even more, making leftovers taste almost better than the first serving. Just add a little milk when reheating to bring back that creamy texture.
Nutritional Information & Benefits
This creamy butternut squash mac and cheese is comfort food that happens to have some nutritional perks. Here’s what you’re getting in each serving (based on 6 servings):
- Estimated calories per serving: Approximately 380 calories, which is reasonable for a hearty pasta dish. The squash adds volume and nutrients without adding many calories.
- Protein: About 15 grams per serving, thanks to the cheese and pasta. This makes it a satisfying meal that keeps you full longer.
- Vitamin A: Butternut squash is packed with vitamin A—one serving provides over 100% of your daily needs. This vitamin supports eye health and immune function.
- Fiber: About 4 grams per serving from the squash and pasta. Fiber aids digestion and helps maintain steady blood sugar levels.
- Calcium: The cheese provides a good amount of calcium for bone health. Each serving offers about 20% of your daily recommended intake.
- Dietary considerations: This recipe can be made gluten-free, vegetarian, or vegan with simple substitutions. It’s naturally nut-free if you use regular milk and cheese.
I’m not a nutritionist, but I love that this recipe lets me enjoy comfort food while sneaking in some veggies. It’s not health food by any stretch, but it’s a smarter choice than traditional mac and cheese. The squash adds color, nutrients, and a natural sweetness that lets you use less cheese without sacrificing flavor.
Conclusion
This creamy butternut squash mac and cheese has become a staple in my kitchen, and I have a feeling it will become one in yours too. It’s the kind of recipe that proves comfort food can be both indulgent and thoughtful—rich and creamy, but with a little something extra that makes it feel special. The sweetness of the roasted squash, the sharpness of the cheddar, the silky texture of the sauce—it all comes together in a way that just works.
I love that this recipe is forgiving enough for a busy weeknight but impressive enough to serve to guests. It’s the dish I bring to potlucks, the one I make when I need a hug in a bowl, and the one that finally solved my “what do I do with this butternut squash?” problem. Honestly, I think you’re going to love it.
If you try this recipe, I’d love to hear how it turned out for you. Did you add any fun variations? Did your family notice the hidden squash? Drop a comment below and let me know—I read every single one. And if you’re looking for more cozy pasta recipes, be sure to check out my creamy Tuscan chicken pasta or my one-pot broccoli cheddar soup for more one-pot comfort food inspiration. Happy cooking!
Frequently Asked Questions
Can I use frozen butternut squash instead of fresh?
Absolutely! Frozen butternut squash works great and saves you the hassle of peeling and chopping. Just thaw it first, pat it dry to remove excess moisture, and roast it as directed. You might need to roast it a few minutes longer since frozen squash tends to release more water.
Why is my sauce grainy instead of smooth?
Grainy sauce usually happens for one of two reasons: using pre-shredded cheese (which contains anti-caking agents) or overheating the cheese. Always shred your own cheese from a block and add it to the sauce over low heat, stirring constantly. If your sauce does get grainy, try whisking in a splash of cold milk to help smooth it out.
Can I make this recipe ahead of time?
Yes, you can make it up to 2 days ahead. Prepare the recipe as directed, but undercook the pasta by about 1 minute since it will continue cooking when reheated. Let it cool completely, then refrigerate in an airtight container. When ready to serve, reheat on the stovetop with a splash of milk, stirring gently until heated through.
How do I make this recipe dairy-free?
To make this dairy-free, use unsweetened oat milk or almond milk instead of regular milk, and swap the butter for vegan butter or olive oil. For the cheese, look for high-quality vegan cheddar shreds that melt well—some brands work much better than others. Nutritional yeast can also add a cheesy flavor if needed.
What other pasta shapes work well with this sauce?
Any short pasta shape works beautifully with this creamy sauce. Shells, cavatappi, rotini, fusilli, or penne are all great choices. The ridges and curves in these shapes catch the sauce, so every bite is full of flavor. Avoid long pasta like spaghetti or fettuccine, as the sauce doesn’t cling to them as well.
Pin This Recipe!
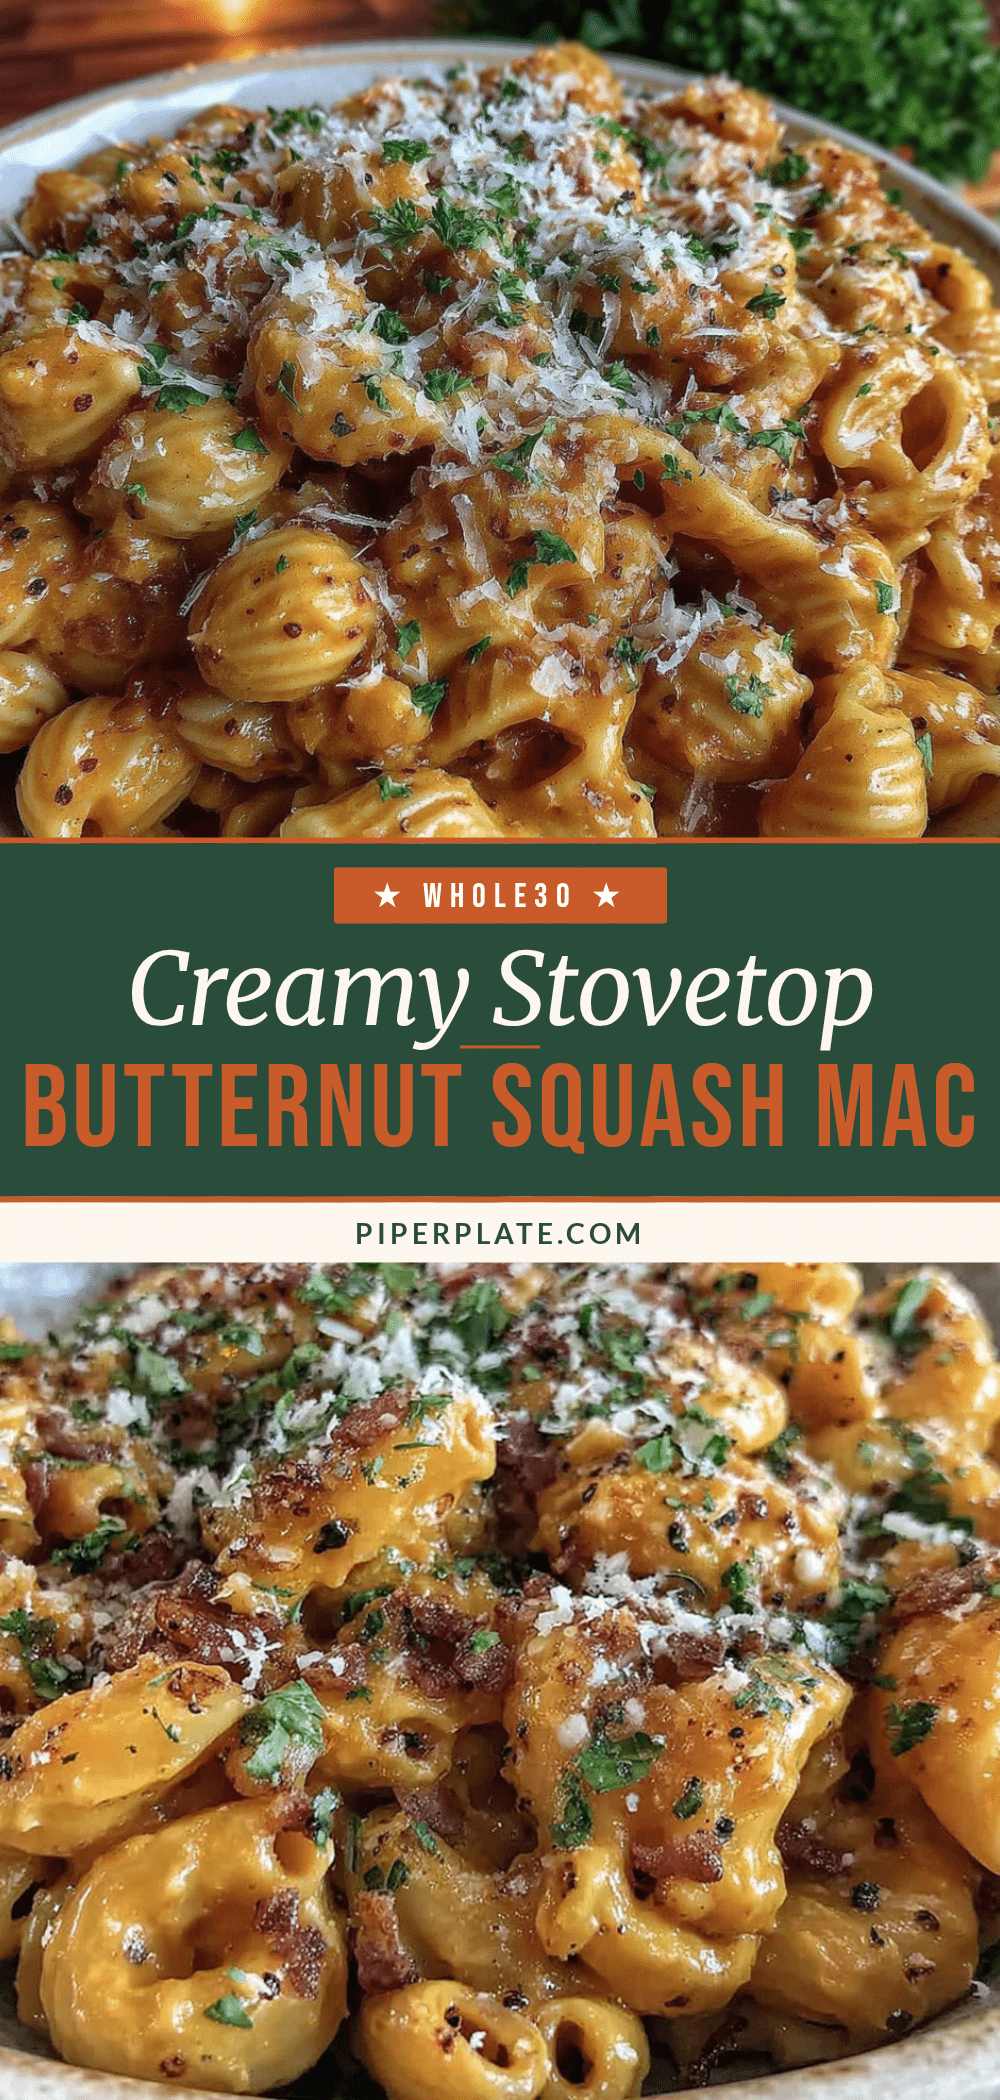
Easy One-Pot Creamy Butternut Squash Mac and Cheese
This creamy butternut squash mac and cheese is a one-pot wonder that combines roasted squash with sharp cheddar for a silky, comforting sauce. It’s quick, easy, and perfect for busy weeknights.
- Prep Time: 15 minutes
- Cook Time: 30 minutes
- Total Time: 45 minutes
- Yield: 6 servings 1x
- Category: Main Course
- Cuisine: American
Ingredients
- 1 medium butternut squash (about 2 cups cubed)
- 8 ounces elbow macaroni (about 2 cups dry)
- 1½ cups sharp cheddar cheese, shredded
- 1 cup whole milk
- ½ cup chicken or vegetable broth (low-sodium)
- 2 tablespoons unsalted butter
- 2 cloves garlic, minced
- ½ teaspoon onion powder
- ¼ teaspoon mustard powder
- Salt and black pepper to taste
- 1 tablespoon olive oil (for roasting squash)
- Optional: ¼ cup panko breadcrumbs, 1 tablespoon melted butter, fresh parsley, paprika
Instructions
- Preheat oven to 400°F (200°C). Peel butternut squash, cut in half lengthwise, scoop out seeds, and cut into 1-inch cubes. Toss with 1 tablespoon olive oil and a pinch of salt. Spread in a single layer on a baking sheet and roast for 20-25 minutes, flipping halfway, until tender and caramelized. Let cool 5 minutes.
- While squash roasts, bring a large pot of salted water to a boil. Cook elbow macaroni according to package directions until al dente (about 7-8 minutes). Drain in a colander (do not rinse) and set aside.
- Transfer roasted squash to a blender. Add ½ cup of the milk and blend until completely smooth. Set aside.
- In the same pot used for pasta, melt butter over medium heat. Add minced garlic and cook for 30 seconds until fragrant. Whisk in onion powder and mustard powder. Slowly pour in remaining ½ cup milk and broth, whisking constantly.
- Pour squash puree into the pot and whisk until fully incorporated. Bring to a gentle simmer over medium-low heat, stirring occasionally, and cook for 2-3 minutes to thicken slightly.
- Reduce heat to low. Add shredded cheddar cheese a handful at a time, stirring constantly until each addition is fully melted before adding more. Season with salt and pepper to taste.
- Add cooked pasta to the pot and stir until every piece is coated. If sauce is too thick, add a splash of warm milk or broth. Cook for another minute until heated through. Serve immediately.
- Optional: For extra crunch, toast ¼ cup panko breadcrumbs in a small skillet with 1 tablespoon melted butter until golden brown. Sprinkle over mac and cheese along with fresh parsley or paprika.
Notes
For best results, grate your own cheese from a block to avoid anti-caking agents. Cook pasta al dente to prevent mushiness. Save some pasta water to adjust sauce consistency if needed. Let the dish rest for 60 seconds after combining to allow sauce to cling to pasta.
Nutrition
- Serving Size: 1 serving (about 1.5
- Calories: 380
- Sugar: 8
- Sodium: 450
- Fat: 15
- Saturated Fat: 8
- Carbohydrates: 45
- Fiber: 4
- Protein: 15
Keywords: butternut squash mac and cheese, one-pot mac and cheese, creamy mac and cheese, hidden vegetable mac and cheese, easy mac and cheese


