Love this? Save it for later!
Share the inspiration with your friends
I was at the hardware store last Tuesday, of all places, trying to decide between two types of paint rollers—a decision I was clearly overthinking. The gentleman next to me, who looked like he hadn’t missed a meal in thirty years, glanced at my cart and said, “You know, those rollers are fine, but have you ever made pinwheel sandwiches for your kids’ lunches?” I blinked. I wasn’t expecting cooking advice from a stranger holding a plumbing snake, but there I was, in aisle seven, listening to him describe exactly how to make easy turkey cheddar pinwheel lunchbox roll-ups.
Honestly, I almost laughed it off. But there was something about the way he talked—like this was the most obvious, life-changing trick in the world. He told me his wife had been making them for thirty years, and that their grandkids still begged for them. I mean, who argues with that kind of testimony? So I grabbed my paint, thanked him, and headed home with a new mission. I tried his method that very afternoon, and let me tell you, I’ve never looked back.
This recipe is the kind of thing you’ll wonder why you didn’t think of sooner. It’s simple, it’s fast, and it solves the eternal lunchbox dilemma of “what do I pack that won’t come back half-eaten?” Maybe you’ve been there, staring at a sad sandwich an hour before school pickup. These roll-ups are the answer. They’re fun to eat, they hold together beautifully, and they taste like a little bit of effort without actually requiring any. That’s my favorite kind of recipe.
Why You’ll Love This Recipe
Let’s be honest—finding a lunchbox idea that actually gets eaten is like finding a unicorn. These turkey cheddar pinwheel roll-ups are that unicorn. I’ve tested them on picky kids, hungry adults, and even my neighbor who swears she doesn’t like cold cuts. Everyone loves them. Here’s why this recipe works so well:
- Quick & Easy: These come together in under 10 minutes. Seriously. No cooking, no complicated steps, just a few minutes of assembly and you’re done.
- Simple Ingredients: You need exactly four ingredients—flour tortillas, cream cheese, deli turkey, and cheddar cheese. That’s it. You probably have them in your fridge right now.
- Perfect for Lunchboxes: They’re compact, mess-free, and easy for little hands to hold. Plus, they look way more exciting than a regular sandwich.
- Crowd-Pleaser: I’ve brought these to potlucks, playdates, and even a book club meeting. They disappear every single time.
- Unbelievably Delicious: The combination of creamy, salty, and sharp flavors is just right. The texture is soft but sturdy—no sad, soggy bread here.
What makes these different from other roll-up recipes? It’s the technique. I’ve tried spreading the cream cheese all the way to the edges, but leaving a tiny border actually helps the tortilla roll tighter. That’s a lesson I learned after my first batch came out a little loose and messy. Also, using thinly sliced cheddar (not shredded) creates a more even bite. These small tweaks make a big difference.
This isn’t just another lunch idea—it’s the one that makes you feel like you’ve got it together. It’s the recipe you’ll text your friends about. And honestly, it’s the kind of food that makes you close your eyes after the first bite and think, “Why didn’t I start making these sooner?”
What Ingredients You Will Need
This recipe uses simple, everyday ingredients to deliver big flavor and satisfying texture without any fuss. You don’t need a special grocery trip or fancy tools—just four basic items that work together beautifully.
- Flour tortillas (8-inch): Look for soft, pliable tortillas. I prefer the brand Mission for their consistency, but any standard flour tortilla works. Avoid the “fajita size” which is too small—you want the burrito size for easy rolling.
- Cream cheese (4 ounces, softened): Full-fat cream cheese gives the best flavor and holds everything together. Let it sit at room temperature for 15 minutes so it spreads easily. If you’re in a rush, microwave it for 10 seconds. For a lighter option, use reduced-fat cream cheese—it works fine, just spread a little thicker.
- Deli turkey (4-6 slices per tortilla): I recommend oven-roasted turkey breast for its mild flavor and good texture. You can use smoked turkey for a bolder taste. Ask for it sliced thin—not paper thin, but not thick either. Just a nice, even slice that doesn’t tear when you roll it.
- Cheddar cheese (4 slices per tortilla): Sharp cheddar adds a punch of flavor. Use thinly sliced deli cheddar, not pre-shredded. The slices melt together better and create a more uniform roll. If you want a milder taste, use mild cheddar or even provolone.
Optional add-ins:
- Spread a thin layer of honey mustard or ranch dressing for extra flavor
- Add a few leaves of fresh spinach for color and crunch
- Sprinkle a little everything bagel seasoning on the cream cheese for a trendy twist
Substitution guidance:
- Use gluten-free tortillas for a gluten-free version—just handle them gently as they can crack
- Swap turkey with ham, roast beef, or even grilled chicken strips
- Use dairy-free cream cheese and vegan cheese slices for a dairy-free option
- Replace cheddar with pepper jack for a spicy kick
Equipment Needed
You don’t need much for this recipe, which is part of the beauty. Here’s what you’ll need:
- Cutting board: A large, flat surface for assembling and rolling. I use a wooden board, but plastic works just fine.
- Butter knife or offset spatula: For spreading the cream cheese evenly. An offset spatula makes it easier to get into the edges, but a regular butter knife does the job.
- Sharp chef’s knife: For slicing the rolls cleanly. A serrated knife can also work, but a straight blade gives neater cuts.
- Plastic wrap: For wrapping the rolled tortillas before chilling. This helps them hold their shape. Parchment paper works too.
- Refrigerator: You’ll need at least 30 minutes of chill time. No way around this one—it’s crucial for clean slices.
- Toothpicks (optional): For securing the rolls if you’re packing them for travel. Not necessary for home eating.
If you don’t have plastic wrap, you can use a damp paper towel to cover the rolled tortillas. It’s not as tight, but it works in a pinch. I’ve also used a beeswax wrap with good results.
Preparation Method
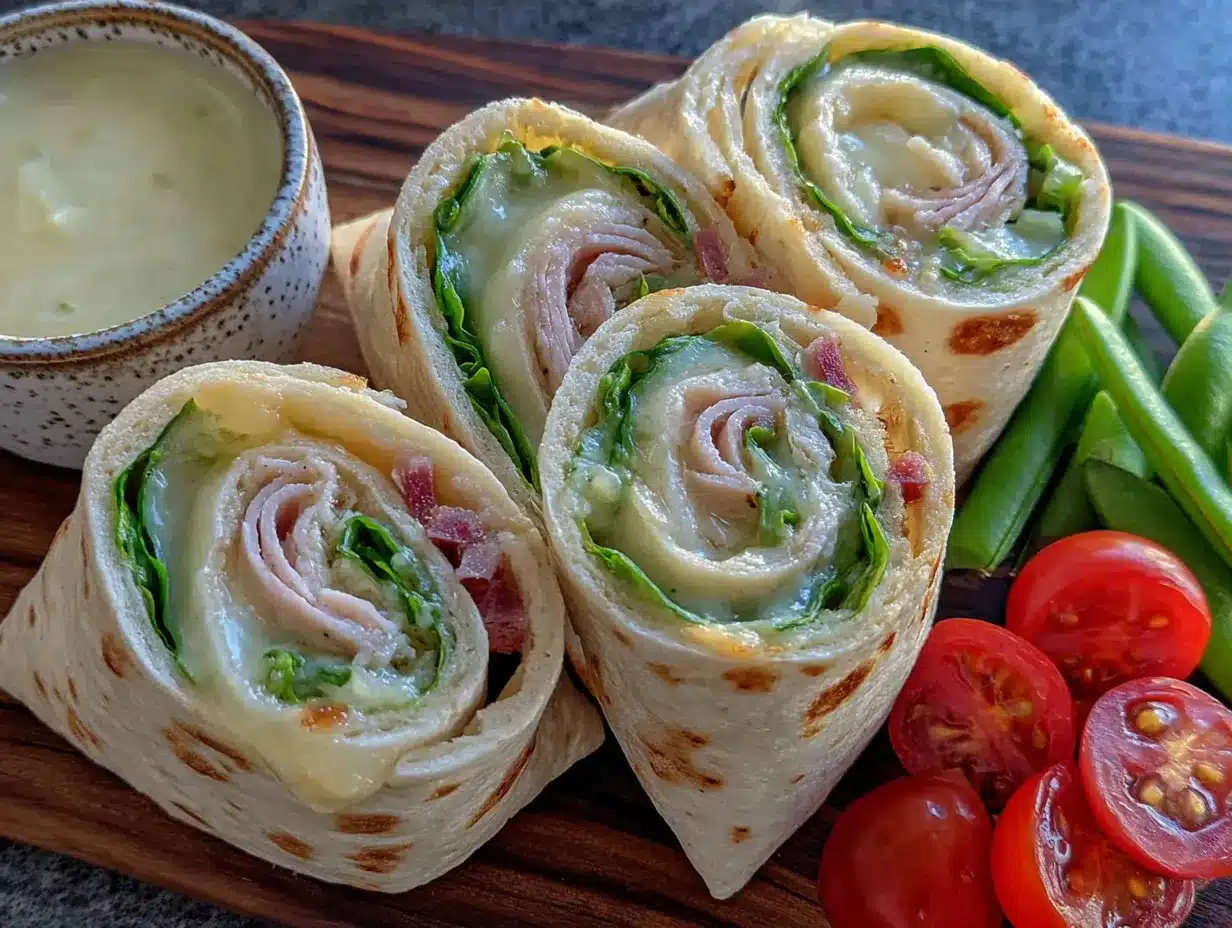
- Soften the cream cheese: Take your cream cheese out of the fridge about 15 minutes before you start. If you forgot, unwrap it and microwave on low power for 10-15 seconds. You want it soft enough to spread like butter, not melt.
- Lay out your tortilla: Place one flour tortilla flat on your cutting board. Make sure it’s at room temperature—cold tortillas can crack when you roll them. If they’re straight from the fridge, let them sit for a few minutes first.
- Spread the cream cheese: Using your butter knife or offset spatula, spread a thin, even layer of cream cheese over the entire surface of the tortilla. Leave about a 1-inch border around the edges—this helps the roll stay tight and prevents filling from squeezing out. Don’t go too thick, or the roll will be messy. Think of it like buttering toast: even and light.
- Layer the turkey: Place 4-6 slices of deli turkey flat on top of the cream cheese. Overlap them slightly so there are no gaps. You want every bite to have turkey, but don’t pile it on so thick that you can’t roll it.
- Add the cheese: Lay 4 slices of cheddar cheese over the turkey. Again, overlap them slightly. If your cheese slices are large, you might only need 3. The goal is full coverage without double layers.
- Roll it tightly: Starting from one edge, roll the tortilla as tightly as you can without tearing it. Use your fingers to keep the filling in place as you go. Think of it like rolling a sleeping bag—firm and even. Once it’s rolled, press gently to seal the seam.
- Wrap and chill: Wrap the rolled tortilla tightly in plastic wrap. Twist the ends like a candy wrapper to keep it snug. Place it in the refrigerator for at least 30 minutes. This step is non-negotiable—it firms up the cream cheese and makes slicing much easier. I’ve tried skipping it, and the rolls just fall apart.
- Slice into pinwheels: After chilling, unwrap the roll and place it on your cutting board. Using a sharp chef’s knife, slice the roll into 1-inch pieces. Use a gentle sawing motion—don’t press straight down, or you’ll squish them. You should get about 6-8 pinwheels per tortilla.
- Serve or pack: Arrange the pinwheels on a plate or pack them directly into lunchboxes. If you’re packing them for later, place them in a single layer in an airtight container with a paper towel on top to absorb any moisture.
Pro tip: If the cream cheese starts to stick to your knife while slicing, wipe the blade clean between cuts. This keeps the pinwheels looking neat and pretty.
Cooking Tips & Techniques
I’ve made these roll-ups more times than I can count, and I’ve definitely learned a few things the hard way. Here are my best tips for perfect pinwheels every time.
Don’t overfill. I know it’s tempting to pile on the turkey and cheese, but too much filling makes the roll hard to close and causes everything to squish out when you slice. Less is more here. A thin, even layer is your friend.
Chill time matters. I once tried to rush this step and sliced the roll after only 10 minutes in the fridge. Big mistake. The cream cheese was still soft, and the pinwheels came out lopsided and messy. Give it the full 30 minutes. If you’re prepping ahead, you can leave them wrapped overnight—they actually taste better the next day.
Use a sharp knife. A dull blade will crush the roll instead of slicing cleanly. I learned this after ruining a batch with my old, sad knife. A quick sharpen made all the difference. If your knife isn’t sharp, try using a serrated bread knife—it saws through without squishing.
Keep them cold. These roll-ups are best served cold or at room temperature. If you’re packing them for a lunchbox, include a small ice pack to keep them fresh. They don’t do well in heat—the cream cheese gets soft and the tortilla can get soggy.
Multitask like a pro. While the rolls are chilling, use that time to prep other lunchbox items—cut up some fruit, pack some veggie sticks, or make a quick dip. It makes the whole lunch-packing process feel efficient instead of chaotic.
Variations & Adaptations
One of the best things about this recipe is how easy it is to customize. Here are some of my favorite variations:
1. The Veggie Lover: Add a layer of fresh spinach leaves, thinly sliced cucumber, or shredded carrots before rolling. The crunch is amazing, and it adds some extra nutrition. Just pat the veggies dry first so they don’t make the tortilla soggy.
2. The Spicy Southwest: Swap the cheddar for pepper jack cheese and add a thin spread of chipotle mayo or salsa verde. Use smoked turkey or even rotisserie chicken for extra flavor. These are great for grown-up lunchboxes or game-day snacks.
3. The Breakfast Twist: Use the same technique but fill with scrambled eggs, crispy bacon, and shredded cheddar. Roll up tight, chill, and slice for an easy breakfast-on-the-go. My kids love these on busy school mornings.
4. The Gluten-Free Version: Use gluten-free tortillas (the kind that are soft and pliable, not the brittle ones). Heat them slightly in the microwave for 10 seconds to make them more flexible. Everything else stays the same.
5. The Low-Carb Option: Swap the flour tortilla for a large lettuce leaf or a low-carb wrap. The technique is the same, but you’ll want to roll gently so the lettuce doesn’t tear. These are perfect for keto or low-carb diets.
I personally love the veggie version with a little honey mustard. It’s fresh, crunchy, and feels like a treat even though it’s healthy. You can really play around with this recipe—it’s forgiving and fun.
Serving & Storage Suggestions
These turkey cheddar pinwheel roll-ups are best served cold or at room temperature. I like to arrange them on a platter with the cut sides facing up so you can see the pretty spiral pattern. They look so much fancier than they actually are.
What to serve with them:
- Fresh fruit like grapes, apple slices, or berries
- Veggie sticks with ranch dip or hummus
- A small side of pretzels or crackers
- A handful of cherry tomatoes
Storage instructions:
- Refrigerator: Store leftover pinwheels in an airtight container in the fridge for up to 3 days. Place a paper towel on top to absorb any moisture—this keeps them from getting soggy.
- Freezer: You can freeze the uncut rolls! Wrap them tightly in plastic wrap, then place in a freezer bag. They’ll keep for up to 2 months. Thaw in the fridge overnight, then slice and serve. I do this all the time for busy weeks.
Reheating: These are meant to be eaten cold, so no reheating needed. If you prefer them slightly warmer, let them sit at room temperature for 10 minutes before serving.
Flavor development: Honestly, these taste even better the next day. The flavors meld together, and the cream cheese sets up perfectly. So don’t be afraid to make them a day ahead—they’re actually better for it.
Nutritional Information & Benefits
Here’s an approximate nutritional breakdown for one pinwheel (based on 8 pinwheels per tortilla):
| Nutrient | Amount |
|---|---|
| Calories | 85 |
| Protein | 6g |
| Carbohydrates | 7g |
| Fat | 4g |
| Saturated Fat | 2g |
| Fiber | 0.5g |
| Sodium | 280mg |
Health benefits: Turkey is a lean protein that helps keep you full and satisfied. Cheddar cheese provides calcium for strong bones. Cream cheese adds a small amount of fat for energy. This is a balanced snack that fits into most diets.
Dietary considerations:
- Gluten-free: Use gluten-free tortillas
- Low-carb: Use a low-carb wrap or lettuce leaf
- Dairy-free: Use dairy-free cream cheese and vegan cheese
- Nut-free: Naturally nut-free, but check your tortilla ingredients
Potential allergens: Contains dairy (cream cheese, cheddar) and gluten (tortillas). Check your specific ingredients for any hidden allergens.
I personally love that these roll-ups are a guilt-free lunch option. They’re satisfying without being heavy, and I feel good about packing them for my family. It’s a win-win.
Conclusion
These easy turkey cheddar pinwheel lunchbox roll-ups are proof that the best recipes come from the most unexpected places—like a hardware store aisle with a stranger who just happens to know what he’s talking about. They’re simple, fast, and endlessly customizable. Whether you’re packing lunches for kids, preparing snacks for a party, or just looking for a quick bite that doesn’t require cooking, these pinwheels deliver every time.
I love this recipe because it makes me feel like I’ve got my act together, even on chaotic mornings. And honestly, that’s a rare feeling. I hope you’ll give them a try and make them your own—add your favorite fillings, experiment with different flavors, and don’t be afraid to get creative.
Have you tried these roll-ups? What’s your favorite filling combination? I’d love to hear about it in the comments below! Share your photos, your tweaks, and your stories. And if you loved this recipe, please share it with a friend who needs a new lunchbox idea. Happy rolling!
Frequently Asked Questions
Can I make these turkey cheddar pinwheel roll-ups ahead of time?
Absolutely! In fact, they’re better when made a day ahead. Just wrap the rolled tortillas tightly in plastic wrap and refrigerate overnight. Slice them right before serving for the freshest look.
How do I keep the pinwheels from falling apart?
The key is to chill the rolled tortillas for at least 30 minutes before slicing. This firms up the cream cheese and helps everything hold together. Also, use a sharp knife and a gentle sawing motion—don’t press straight down.
Can I use a different type of cheese?
Yes! Sharp cheddar is classic, but you can use provolone, Swiss, mozzarella, or pepper jack. Just make sure it’s thinly sliced so it rolls easily. Shredded cheese doesn’t work as well because it doesn’t create an even layer.
Are these roll-ups suitable for a gluten-free diet?
They can be! Simply swap the flour tortillas for a gluten-free variety. Look for soft, pliable gluten-free tortillas—some brands can be brittle, so warm them slightly before rolling to prevent cracking.
Can I freeze these pinwheel roll-ups?
Yes, you can freeze the uncut rolls. Wrap them tightly in plastic wrap, then place in a freezer bag. They’ll keep for up to 2 months. Thaw in the fridge overnight, then slice and serve. It’s a great meal prep strategy!
Pin This Recipe!
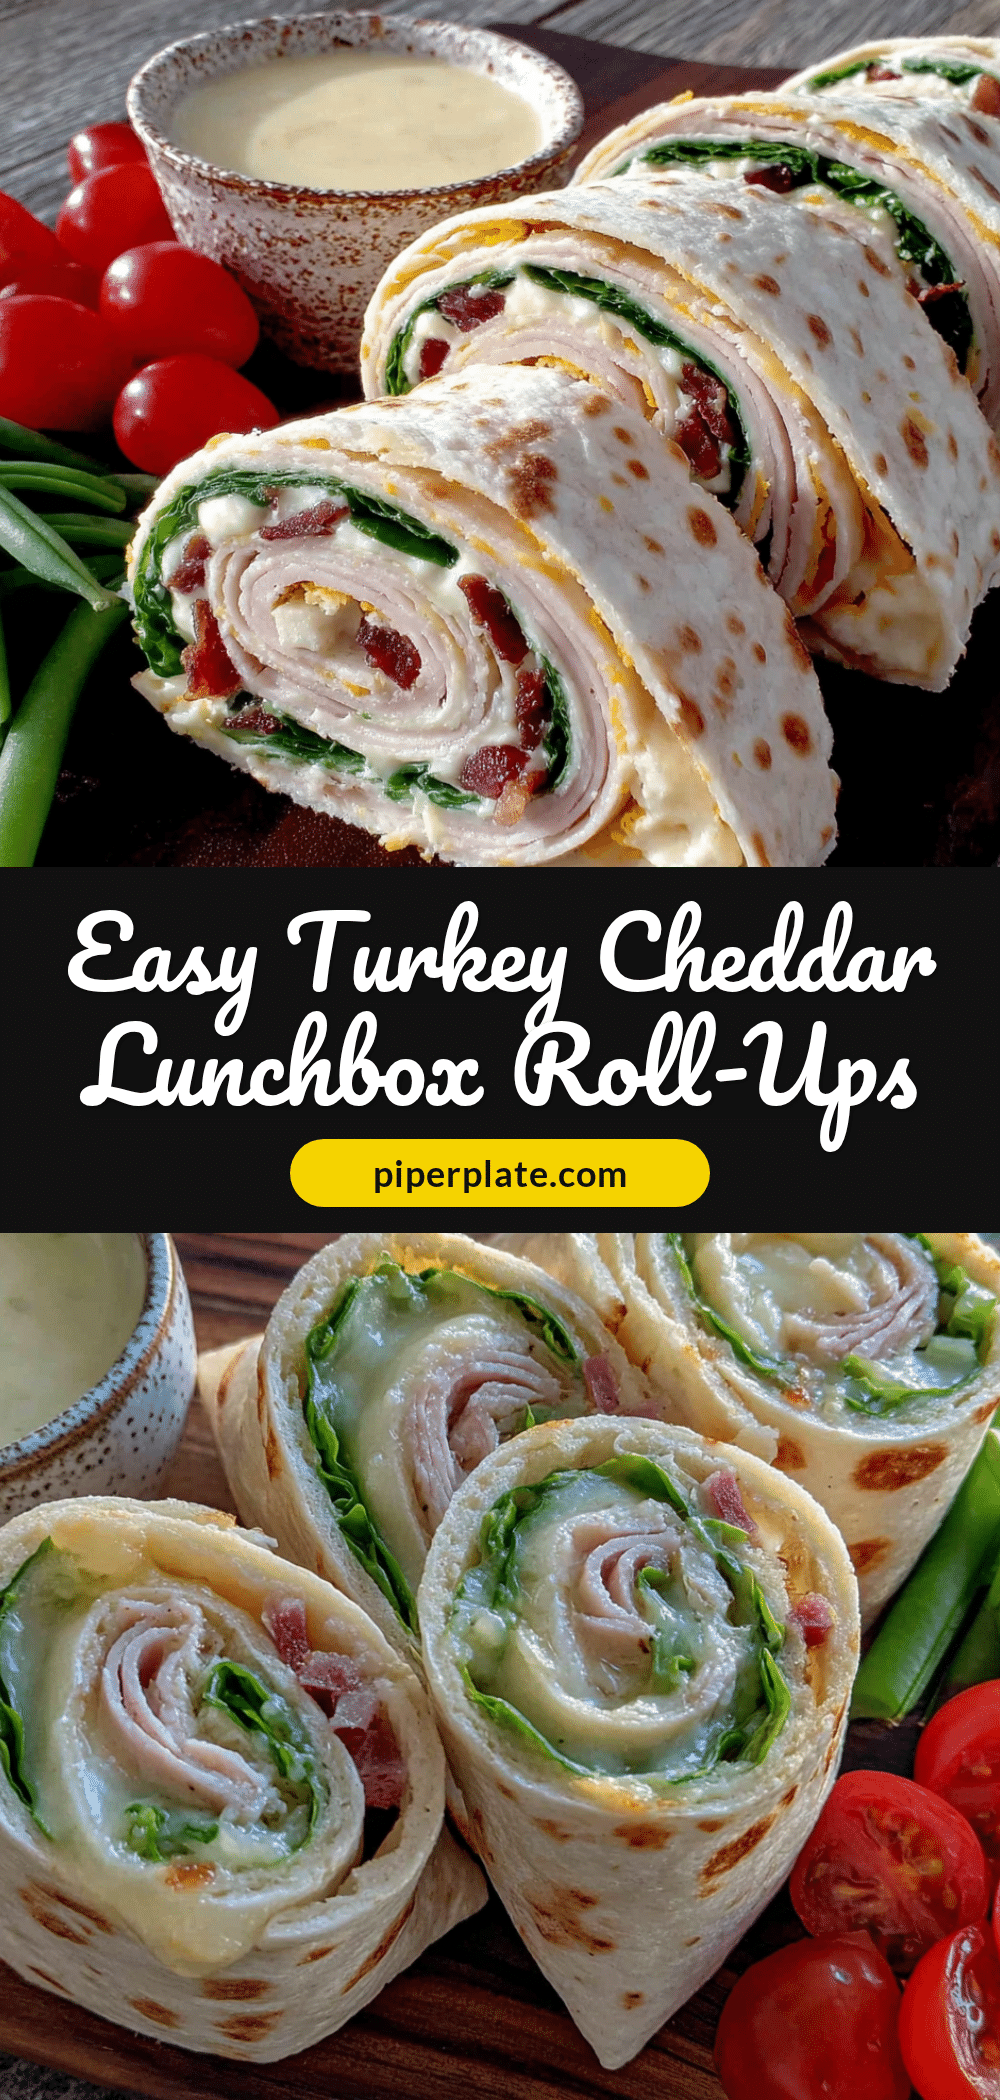
Easy Turkey Cheddar Pinwheel Roll-Ups: Best Lunchbox Idea

These easy turkey cheddar pinwheel roll-ups are the perfect lunchbox idea—quick to assemble, mess-free, and loved by kids and adults alike. Made with just four simple ingredients, they’re a fun, delicious twist on a classic sandwich.
- Prep Time: 10 minutes
- Cook Time: 0 minutes
- Total Time: 40 minutes (includes 30 minutes chilling)
- Yield: 4 servings (about 24-32 pinwheels) 1x
- Category: Lunch
- Cuisine: American
Ingredients
- 4 (8-inch) flour tortillas
- 4 ounces cream cheese, softened
- 16–24 slices deli turkey (4–6 per tortilla)
- 16 slices cheddar cheese (4 per tortilla)
Instructions
- Soften the cream cheese: Take cream cheese out of the fridge 15 minutes before starting. If forgotten, microwave on low for 10-15 seconds until spreadable.
- Lay out a tortilla: Place one flour tortilla flat on a cutting board. Ensure it’s at room temperature to prevent cracking.
- Spread the cream cheese: Using a butter knife or offset spatula, spread a thin, even layer of cream cheese over the entire tortilla, leaving a 1-inch border around the edges.
- Layer the turkey: Place 4-6 slices of deli turkey flat on top of the cream cheese, overlapping slightly to cover without gaps.
- Add the cheese: Lay 4 slices of cheddar cheese over the turkey, overlapping slightly for full coverage.
- Roll it tightly: Starting from one edge, roll the tortilla as tightly as possible without tearing, using fingers to keep filling in place. Press gently to seal the seam.
- Wrap and chill: Wrap the rolled tortilla tightly in plastic wrap, twisting the ends. Refrigerate for at least 30 minutes (or up to overnight).
- Slice into pinwheels: After chilling, unwrap and place on a cutting board. Using a sharp chef’s knife, slice into 1-inch pieces using a gentle sawing motion. You should get 6-8 pinwheels per tortilla.
- Serve or pack: Arrange on a plate or pack in lunchboxes. For later storage, place in a single layer in an airtight container with a paper towel on top.
Notes
Chilling is crucial for clean slices. Use a sharp knife and gentle sawing motion to avoid squishing. For best results, make a day ahead—flavors meld and texture improves. If freezing, freeze uncut rolls wrapped tightly in plastic wrap for up to 2 months; thaw overnight in fridge before slicing.
Nutrition
- Serving Size: 1 pinwheel
- Calories: 85
- Sugar: 1
- Sodium: 280
- Fat: 4
- Saturated Fat: 2
- Carbohydrates: 7
- Fiber: 0.5
- Protein: 6
Keywords: turkey cheddar pinwheel roll-ups, lunchbox ideas, easy lunch, no-cook recipe, kid-friendly lunch, pinwheel sandwiches


