Love this? Save it for later!
Share the inspiration with your friends
I was standing in my kitchen last Tuesday, staring at a container of ground turkey I’d defrosted on a whim, when the smell of oregano from a jar I’d just opened hit me — and suddenly I was twenty-three, living in that tiny apartment with the cracked linoleum floor, watching my neighbor Rosa through her always-open kitchen door. She’d wave me over with a wooden spoon whenever she was testing a new recipe, and I’d sit on her rickety stool, learning more about cooking than any cookbook ever taught me. Rosa had this way of making everything feel like an accident that turned out perfect. She’d spill something, laugh it off, and somehow the dish would be even better for it.
That night, I was trying to recreate the energy of her kitchen, not her actual recipes. I wanted something I could grab without thinking — a snack that actually kept me full, not one of those sad little things that leaves you hunting through the fridge twenty minutes later. I mean, let’s be honest, we’ve all been there. You eat a “healthy” snack and then immediately start looking for something else. These turkey meatball snack cups were born from that frustration and that memory of Rosa’s chaotic, wonderful cooking.
The first batch was a mess. I forgot the egg, and the meatballs crumbled into what can only be described as turkey gravel. But the second batch? That was the one. Mini muffin tins, perfectly seasoned, baked until just golden on the edges. I grabbed one on my way out the door the next morning, and I didn’t think about food again until lunch. That’s when I knew I had something worth sharing. Maybe you’ve been there too — standing in your own kitchen, wanting something that actually works with your life, not against it.
Why You’ll Love This Recipe
These Healthy High-Protein Turkey Meatball Snack Cups are the kind of recipe that makes you wonder why you didn’t think of it sooner. I’ve tested this about six times now, tweaking the seasoning, adjusting the bake time, and even trying different binders. This version is the one that finally clicked. Here is why I think you’ll feel the same way:
- High Protein, Low Fuss : Each cup packs around 12 grams of protein, making them a legit snack that actually keeps hunger away. No more grazing on air-popped popcorn and wondering why you’re still hungry.
- Perfect for Meal Prep : You can make a batch on Sunday and grab them all week. They reheat in about 30 seconds in the microwave, or you can eat them cold straight from the fridge. I won’t judge.
- Simple Ingredients : Ground turkey, breadcrumbs, an egg, some Parmesan, and basic pantry spices. You probably have most of this already. No weird health food store trips required.
- Kid-Approved : I fed these to my friend’s picky seven-year-old, and he asked for seconds. That never happens. The mini size makes them fun to eat, and they don’t taste “healthy” in that sad, cardboard way.
- Incredibly Versatile : Eat them as a snack, toss them on a salad for lunch, or serve them with marinara for an easy appetizer. They work for almost any situation.
What makes these different from every other turkey meatball recipe out there is the texture. Most turkey meatballs end up dry or dense, but baking them in a mini muffin tin creates these perfectly portioned cups with crispy edges and a tender, juicy center. The Parmesan adds a salty, umami punch that makes up for turkey’s naturally lower fat content. Honestly, I’ve had people ask if these are made with beef. That’s how good the texture is.
This isn’t just another healthy snack recipe. It’s the one that makes you feel organized, prepared, and like you actually have your life together — even if the rest of your kitchen is a disaster. And honestly, isn’t that what we’re all really after?
What Ingredients You Will Need
This recipe uses simple, wholesome ingredients that come together to create something way more satisfying than the sum of their parts. Most of these are probably already in your kitchen, which is exactly how I like to cook.
- Ground turkey (93/7 or 99/1) : I prefer 93/7 for juicier meatballs. The 99/1 works, but you’ll want to add a tablespoon of olive oil to keep things from drying out. I usually grab whatever is on sale at my local grocery store.
- Panko breadcrumbs : These give a lighter texture than regular breadcrumbs. About 1/3 cup works perfectly. If you’re gluten-free, use gluten-free panko or almond flour.
- Egg : One large egg, lightly beaten. This is your binder. Don’t skip it unless you want turkey gravel, which I learned the hard way.
- Grated Parmesan cheese : The kind in the green can works fine, but freshly grated adds more flavor. About 1/4 cup. It adds saltiness and helps with browning.
- Garlic powder : One teaspoon. Not garlic salt — we’re controlling our own salt here. Garlic powder distributes more evenly than fresh garlic in this application.
- Onion powder : One teaspoon. Same reasoning as the garlic powder. It adds savory depth without any textural issues.
- Dried oregano : One teaspoon. This is the herb that makes these taste like actual Italian meatballs, not just random turkey blobs.
- Dried basil : Half a teaspoon. Adds a subtle sweetness that balances the savory elements.
- Salt : Half a teaspoon. I use fine sea salt. Adjust based on your Parmesan’s saltiness.
- Black pepper : Quarter teaspoon. Freshly ground is always better, but pre-ground works in a pinch.
- Red pepper flakes (optional) : Half a teaspoon if you like a little heat. I add these about half the time, depending on my mood.
- Olive oil spray : For greasing the mini muffin tin. A non-stick spray works too, but olive oil adds a tiny bit of flavor.
For the dipping sauce (optional but recommended):
- Marinara sauce : About 1/2 cup for dipping. I use Rao’s when I’m being fancy, but any good-quality jarred sauce works.
- Greek yogurt ranch : Mix 1/4 cup plain Greek yogurt with 1 teaspoon ranch seasoning. It’s a protein-packed alternative that tastes surprisingly close to the real thing.
I want to mention that I’ve tried this recipe with ground chicken, and it works well too. The flavor is slightly milder, so you might want to bump up the herbs a bit. Ground pork would be amazing if you’re not worried about keeping it lean, but then we’re getting into regular meatball territory, which kind of defeats the purpose.
Equipment Needed
You don’t need much for this recipe, which is part of why I make it so often. Here’s what you’ll want to have on hand:
- Mini muffin tin : This is non-negotiable. A standard 24-cup mini muffin tin is perfect. I use a non-stick one from Wilton that cost me about twelve dollars and has held up for years.
- Large mixing bowl : Any bowl big enough to get your hands in. I use a stainless steel one because it doesn’t absorb odors.
- Cookie scoop : A 1-tablespoon scoop makes portioning so much faster and more consistent. If you don’t have one, use two spoons — one to scoop, one to scrape.
- Baking sheet : To set the filled mini muffin tin on, just in case anything drips. It also makes it easier to get the hot tin in and out of the oven.
- Measuring spoons : For the spices. I’m usually a “by feel” cook, but for this recipe, the ratios matter.
- Spray oil : For greasing the tin. A silicone brush with oil works too, but spray is faster and more even.
If you don’t have a mini muffin tin, you can absolutely make these as regular meatballs on a baking sheet. Just shape them into 1-inch balls and bake at 400°F for about 15 minutes. The texture will be slightly different — you won’t get those crispy edges — but they’ll still taste great. I’ve done it when my mini muffin tin was buried in the back of a cabinet somewhere.
Preparation Method
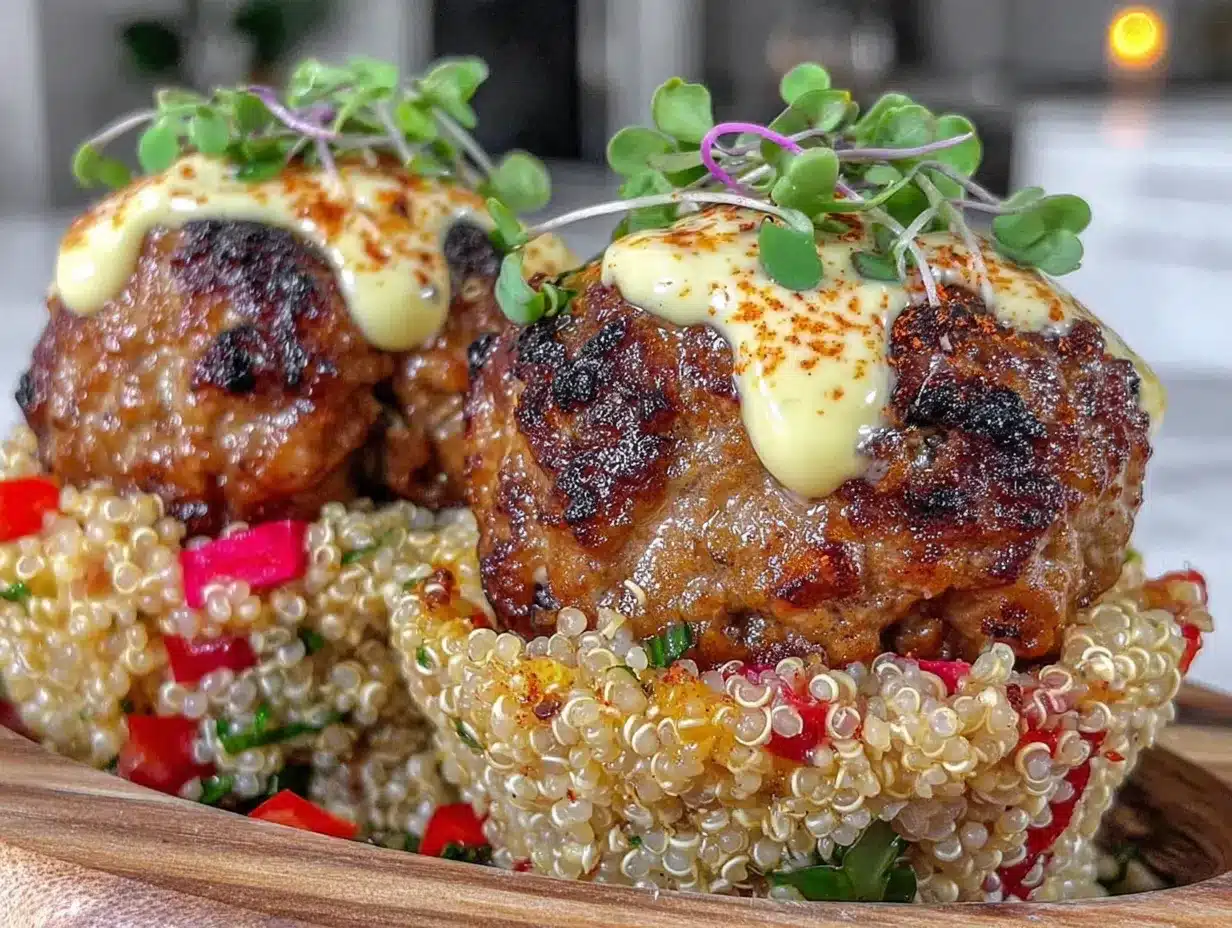
Let me walk you through this. I’ve made these so many times that I could do it in my sleep, but I’ll slow down and share all the little details that make the difference between good and great.
- Preheat your oven to 400°F (200°C) . Position the rack in the middle of the oven. Give it a full 15 minutes to come to temperature. A properly preheated oven is crucial for getting those crispy edges without drying out the centers.
- Spray your mini muffin tin generously with olive oil spray . Don’t be shy here. I learned the hard way that insufficient greasing means you’ll be prying meatball cups out with a fork, and they’ll fall apart. Get into all the nooks and crannies. If you’re using a silicone mini muffin tin, you can skip the spray, but I still give it a light mist.
- In your large mixing bowl, combine the ground turkey, panko breadcrumbs, beaten egg, grated Parmesan, garlic powder, onion powder, dried oregano, dried basil, salt, black pepper, and red pepper flakes if using . Use your hands to mix everything together. I know using your hands is messy, but it’s the only way to ensure everything is evenly distributed without overmixing. Overmixing makes meatballs tough. Mix just until you can’t see any more streaks of raw turkey. This should take about 30 seconds of gentle squishing.
- Let the mixture rest for 5 minutes . This is a step I added after my third batch. Giving the breadcrumbs time to absorb some moisture from the egg and turkey results in a more tender final texture. Use this time to clear your sink or put away the spices.
- Using your 1-tablespoon cookie scoop or two spoons, portion the mixture into the prepared mini muffin cups . Each cup should be filled almost to the top, slightly mounded. Don’t press the mixture down — let it sit naturally. You should get about 24 cups from this recipe. If you have extra, you can bake them in a second batch or shape them into a regular meatball and bake it alongside.
- Place the mini muffin tin on a baking sheet and put it in the preheated oven . Bake for 12 to 15 minutes. At the 12-minute mark, check them. They should be golden brown on top and the edges should be pulling away from the sides of the cups slightly. A meat thermometer inserted into the center of a cup should read 165°F (74°C). If they’re not there yet, give them 2 more minutes and check again.
- Remove from the oven and let them cool in the tin for 5 minutes . This resting time is important. The meatballs will continue cooking slightly from residual heat, and they’ll firm up enough to hold their shape when you remove them. After 5 minutes, use a small spoon or offset spatula to gently loosen each cup and transfer them to a wire rack or plate.
- Let them cool completely if you’re storing them, or serve them warm . I like to let them sit for about 10 minutes before serving, just so they’re not scorching hot. The flavor actually improves as they cool slightly.
One thing I want to mention: your oven might run hot or cold. The first time I made these in my friend’s apartment, they were done in 10 minutes. At my house, it’s always 13 minutes. Get to know your oven, and trust your eyes and a meat thermometer over the timer.
Cooking Tips & Techniques
I’ve made enough mistakes with these meatball cups to fill a small notebook. Here are the lessons that actually stuck:
Don’t overmix the meat mixture. This is the number one mistake I see people make. You mix until everything is just combined, and then you stop. Overmixing develops the proteins in the turkey too much, and you end up with dense, rubbery meatballs. I speak from experience — my first batch was basically turkey hockey pucks.
Let the mixture rest before scooping. I mentioned this in the method, but it bears repeating. That five-minute rest allows the breadcrumbs to absorb moisture, which makes the meatballs more tender. It also gives the flavors a chance to meld. I noticed a real difference when I started doing this.
Use a cookie scoop for consistent sizing. This isn’t just about aesthetics, though uniform meatball cups do look better. Consistent sizing means they all cook at the same rate. No more some being overdone while others are undercooked. A 1-tablespoon scoop is perfect for mini muffin cups.
Don’t crowd the pan. If you have a mini muffin tin with 24 cups, fill all of them. If you only have a 12-cup tin, bake in batches. Don’t try to cram extra mixture into each cup — they need room to expand and develop those crispy edges.
Check temperature, not just time. Turkey needs to reach 165°F to be safe. A meat thermometer is your best friend here. I’ve had batches that looked done on the outside but were still slightly undercooked in the center. Better to check than to guess.
Let them rest in the tin. I know it’s tempting to pop them out immediately, but those five minutes of resting in the tin are crucial. The meatballs firm up as they cool slightly, and they release from the pan much more easily. I rushed this step once and ended up with a pile of crumbled turkey. Never again.
Double the batch if you can. These freeze beautifully, so I always make a double batch when I have the time. One batch for the week, one batch for the freezer. Future me is always grateful.
Variations & Adaptations
This recipe is incredibly forgiving, and I’ve tried quite a few variations over the months. Here are some that worked really well:
Cheesy Italian version : Add 1/4 cup of finely shredded mozzarella to the mixture and use Italian seasoning instead of the individual herbs. The mozzarella melts into the meatballs and makes them extra tender. I did this for a party, and they disappeared in minutes.
Spicy buffalo style : Omit the oregano and basil. Add 2 tablespoons of buffalo sauce and 1 tablespoon of crumbled blue cheese to the mixture. Serve with extra buffalo sauce and ranch dressing for dipping. These are dangerous — I ate eight of them in one sitting.
Greek-inspired version : Swap the oregano and basil for 1 teaspoon of dried mint and 1/2 teaspoon of dried dill. Add 2 tablespoons of crumbled feta cheese. Serve with tzatziki sauce. The mint and feta combination is surprisingly fresh and bright.
Gluten-free adaptation : Use gluten-free panko breadcrumbs or almond flour instead of regular breadcrumbs. I’ve tested both, and almond flour gives a slightly denser texture that I actually really like. Just be aware that almond flour adds some healthy fats and calories.
Dairy-free version : Skip the Parmesan and add an extra tablespoon of nutritional yeast for that cheesy flavor. Use dairy-free breadcrumbs. The texture will be slightly different, but the flavor is still solid.
Air fryer method : Instead of using the mini muffin tin, shape the mixture into 1-inch balls. Spray the air fryer basket with oil and arrange the meatballs in a single layer. Cook at 375°F for 8-10 minutes, shaking the basket halfway through. They get incredibly crispy on the outside. I actually prefer this method when I’m not going for the cup shape.
I tried a version with chopped spinach mixed in once, and it was okay. The spinach added moisture, which was nice, but it also made the meatballs a little loose. If you want to add vegetables, I’d recommend finely grated zucchini that’s been squeezed dry instead. That worked much better.
Serving & Storage Suggestions
These turkey meatball snack cups are incredibly versatile when it comes to serving. Here’s how I usually handle them:
Serving temperature : They’re delicious warm, at room temperature, or even cold straight from the fridge. I actually prefer them at room temperature for snacks — the flavor seems more pronounced. For a meal, I’ll pop them in the microwave for 20-30 seconds to warm them through.
Presentation ideas : For a snack board, arrange them on a platter with toothpicks stuck in each one. Add small bowls of marinara, ranch, and honey mustard for dipping. For lunch, toss them on a bed of greens with cherry tomatoes, cucumber, and a light vinaigrette. For a quick dinner, serve them with roasted vegetables and quinoa.
What to serve with them : These pair beautifully with a simple side salad, roasted broccoli, or sweet potato wedges. For a more substantial meal, try them with whole wheat pasta and marinara. They also work great in a wrap with lettuce, tomato, and a smear of hummus.
Storage instructions : Store cooled meatball cups in an airtight container in the refrigerator for up to 5 days. I layer them between sheets of paper towel to absorb any excess moisture. They actually get better on day two — the flavors have more time to meld.
Freezing instructions : Arrange cooled meatball cups in a single layer on a baking sheet and freeze for 1-2 hours, until solid. Transfer to a freezer-safe bag or container. They’ll keep for up to 3 months. To reheat, microwave frozen cups for 60-90 seconds, or bake at 350°F for 10-12 minutes. I usually grab a handful from the freezer and microwave them for a quick lunch.
Reheating tips : The microwave is fastest, but the oven or air fryer gives you back some of that crispy texture. For the air fryer, reheat at 350°F for 3-4 minutes. For the oven, 350°F for 5-7 minutes. Avoid the microwave if you’re reheating more than a few at a time — they steam and lose their crispiness.
One thing I’ve noticed: the flavors develop and deepen over the first couple of days. By day three, these are at their peak. So don’t worry if you make them a few days ahead of when you need them. They’ll only get better.
Nutritional Information & Benefits
Here’s the approximate nutritional breakdown for one meatball cup (based on 93/7 ground turkey and using the recipe as written):
| Nutrient | Amount per cup |
|---|---|
| Calories | 65 |
| Protein | 12g |
| Fat | 2.5g |
| Saturated Fat | 1g |
| Carbohydrates | 3g |
| Fiber | 0.5g |
| Sugar | 0.5g |
| Sodium | 180mg |
Health benefits : Ground turkey is a lean protein source that’s lower in saturated fat than beef or pork. Protein helps with muscle repair, keeps you feeling full longer, and supports a healthy metabolism. The Parmesan adds calcium and a small amount of protein. The herbs provide antioxidants and anti-inflammatory compounds. These are genuinely a balanced, nutrient-dense snack option.
Dietary considerations : This recipe is naturally low-carb and keto-friendly if you use almond flour instead of breadcrumbs. It’s also gluten-free with the right breadcrumb substitution. It’s not dairy-free as written, but that’s an easy adaptation. The main allergen to be aware of is dairy from the Parmesan, and eggs, obviously.
Personal perspective : I’m not someone who counts every calorie, but I do pay attention to protein. These meatball cups help me hit my protein goals without feeling like I’m forcing down another chicken breast. They’re proof that healthy eating doesn’t have to be boring or complicated. Sometimes the simplest things are the most effective.
Conclusion
These Healthy High-Protein Turkey Meatball Snack Cups have become a staple in my kitchen for good reason. They’re simple to make, incredibly versatile, and actually keep you full — which is more than I can say for most snacks I’ve tried. Whether you’re meal-prepping for a busy week, looking for a high-protein snack that doesn’t taste like cardboard, or just want something fun to make on a Sunday afternoon, these little cups deliver.
I love that I can customize them based on what I’m craving or what I have in the fridge. They’ve bailed me out of countless “I have nothing to eat” moments, and they’ve impressed people who thought healthy food couldn’t taste good. That’s a win in my book.
I’d love to hear how these turn out for you. Did you try a variation I haven’t thought of? Did your kids actually eat them without complaining? Drop a comment below and let me know. And if you share them on social media, tag me — I always love seeing your creations. Happy cooking, and here’s to snacks that actually work for us!
Frequently Asked Questions
Can I use ground chicken instead of ground turkey?
Absolutely. Ground chicken works perfectly in this recipe. The flavor is slightly milder, so you might want to add an extra pinch of herbs. The cooking time remains the same. I’ve made this swap many times with great results.
Why are my turkey meatballs dry?
Turkey is leaner than beef, so it dries out more easily. The most common causes are overmixing the meat mixture, overbaking, or not using enough binder. Make sure you’re using the full egg and breadcrumb amount, mix gently, and check the internal temperature at 12 minutes. They’re done at 165°F — don’t leave them in longer than necessary.
Can I make these ahead of time for a party?
Yes, and I actually recommend it. Make them a day ahead, store them in the fridge, and reheat them in a 350°F oven for 5-7 minutes just before serving. The flavors develop overnight, and they’ll be even better than fresh. Serve with toothpicks and dipping sauces for an easy appetizer.
How do I prevent the meatballs from sticking to the mini muffin tin?
Generous greasing is key. Use olive oil spray and make sure you get into every cup. Let the meatballs rest in the tin for 5 minutes after baking before trying to remove them. If you’re still having trouble, a silicone mini muffin tin is a worthwhile investment — nothing sticks to it.
Can I freeze these with the dipping sauce?
I wouldn’t recommend it. The sauce will change texture when frozen and thawed. Instead, freeze the meatball cups on their own, and make fresh dipping sauce when you’re ready to serve. The meatballs freeze perfectly for up to 3 months, and the sauce only takes a minute to prepare.
Pin This Recipe!
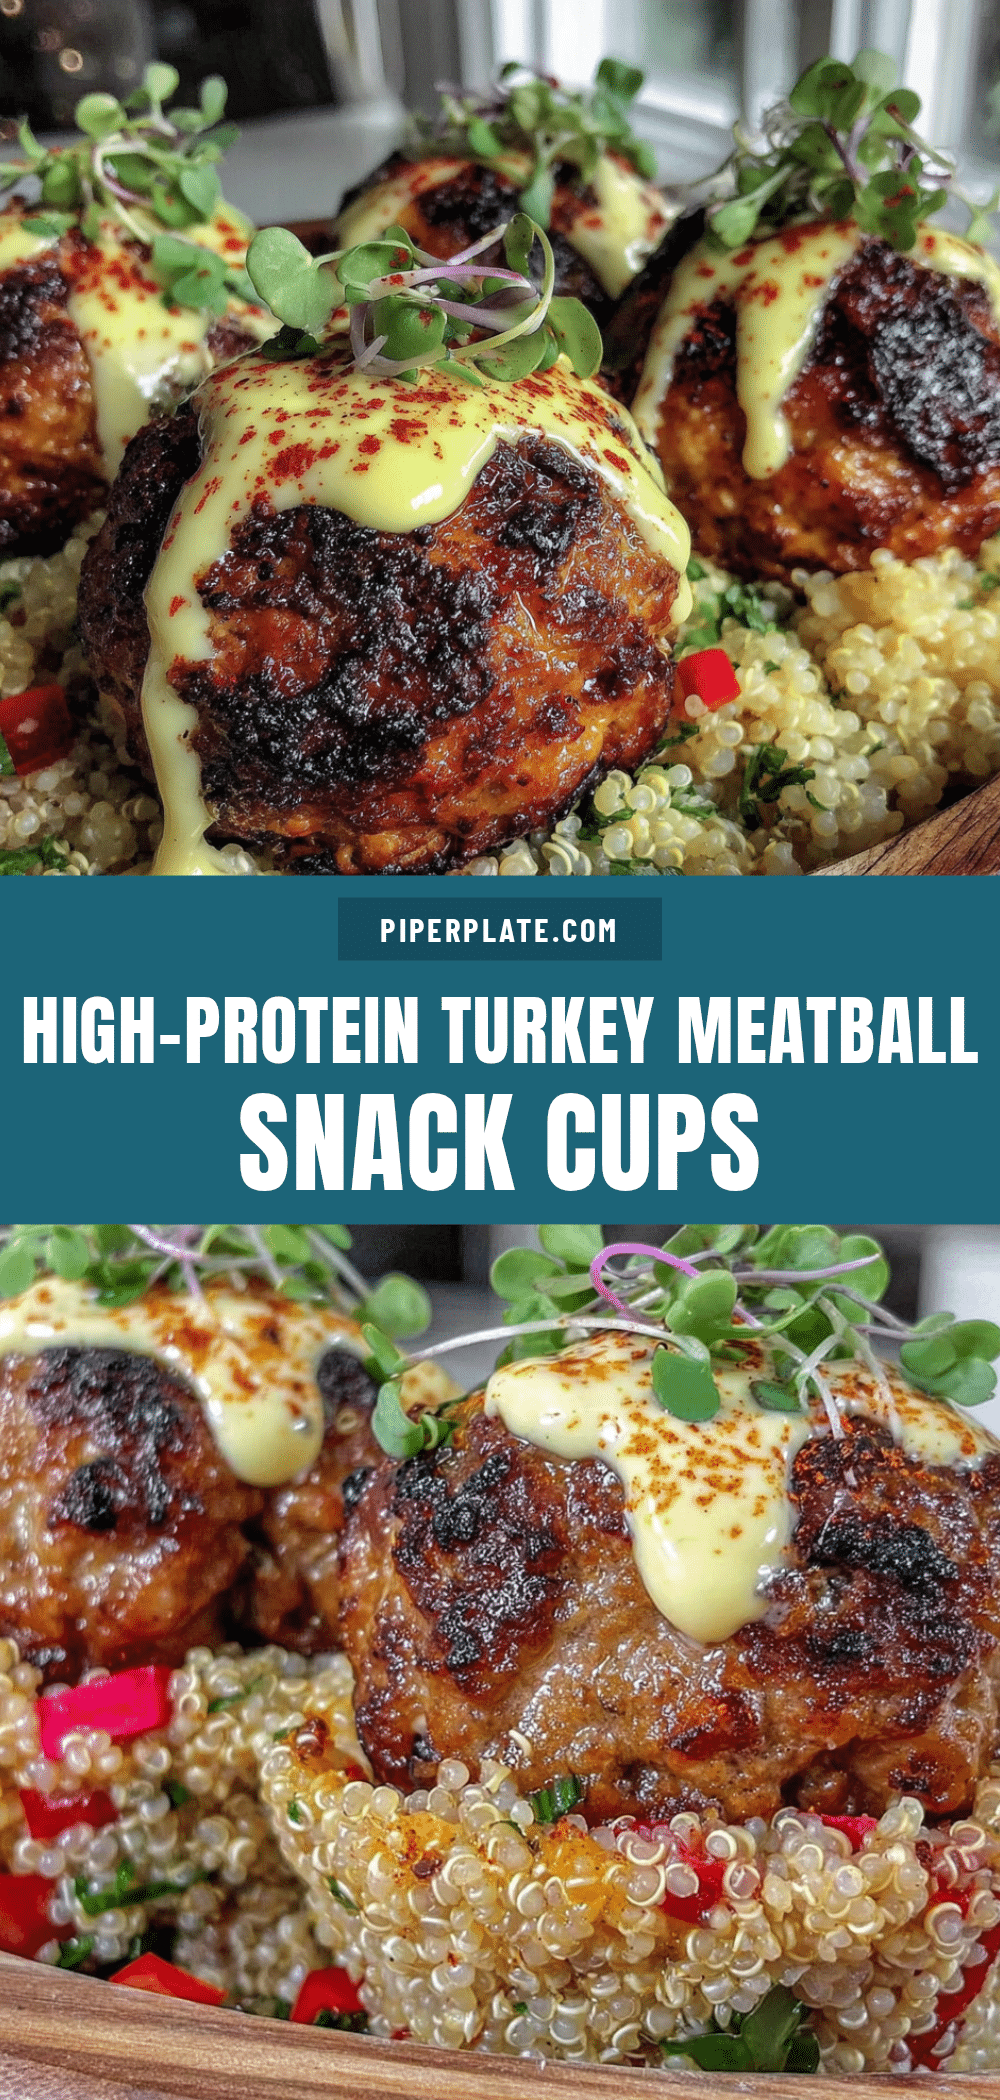
Healthy High-Protein Turkey Meatball Snack Cups Easy Baked

These Healthy High-Protein Turkey Meatball Snack Cups are baked in a mini muffin tin for perfectly portioned, crispy-edged cups with a tender, juicy center. Each cup packs around 12 grams of protein, making them a satisfying snack or meal prep staple.
- Prep Time: 15 minutes
- Cook Time: 15 minutes
- Total Time: 30 minutes
- Yield: 24 servings 1x
- Category: Snack
- Cuisine: Italian-American
Ingredients
- 1 lb ground turkey (93/7 or 99/1)
- 1/3 cup panko breadcrumbs
- 1 large egg, lightly beaten
- 1/4 cup grated Parmesan cheese
- 1 teaspoon garlic powder
- 1 teaspoon onion powder
- 1 teaspoon dried oregano
- 1/2 teaspoon dried basil
- 1/2 teaspoon salt
- 1/4 teaspoon black pepper
- 1/2 teaspoon red pepper flakes (optional)
- Olive oil spray (for greasing)
- 1/2 cup marinara sauce (for dipping, optional)
- 1/4 cup plain Greek yogurt (for ranch dip, optional)
- 1 teaspoon ranch seasoning (for ranch dip, optional)
Instructions
- Preheat your oven to 400°F (200°C). Position the rack in the middle of the oven and allow it to fully preheat for about 15 minutes.
- Spray a 24-cup mini muffin tin generously with olive oil spray, ensuring all cups are well coated.
- In a large mixing bowl, combine the ground turkey, panko breadcrumbs, beaten egg, grated Parmesan, garlic powder, onion powder, dried oregano, dried basil, salt, black pepper, and red pepper flakes (if using). Use your hands to mix gently until just combined, about 30 seconds. Do not overmix.
- Let the mixture rest for 5 minutes to allow the breadcrumbs to absorb moisture.
- Using a 1-tablespoon cookie scoop or two spoons, portion the mixture into the prepared mini muffin cups, filling each cup almost to the top with a slight mound. Do not press down.
- Place the mini muffin tin on a baking sheet and bake for 12 to 15 minutes, until golden brown on top and the edges pull away from the cups. The internal temperature should reach 165°F (74°C).
- Remove from the oven and let the meatball cups cool in the tin for 5 minutes. Then, gently loosen each cup with a small spoon or offset spatula and transfer to a wire rack or plate.
- Serve warm or at room temperature. For storage, let cool completely before refrigerating or freezing.
Notes
For juicier meatballs, use 93/7 ground turkey. If using 99/1, add 1 tablespoon olive oil. Do not overmix the meat mixture to avoid dense meatballs. Let the mixture rest for 5 minutes before scooping for better texture. For consistent cooking, use a cookie scoop. Check internal temperature with a meat thermometer; turkey must reach 165°F. Let meatballs rest in the tin for 5 minutes after baking to firm up and release easily. These freeze well for up to 3 months.
Nutrition
- Serving Size: 1 meatball cup
- Calories: 65
- Sugar: 0.5
- Sodium: 180
- Fat: 2.5
- Saturated Fat: 1
- Carbohydrates: 3
- Fiber: 0.5
- Protein: 12
Keywords: turkey meatball snack cups, high protein snack, healthy snack, meal prep, mini meatballs, baked turkey meatballs


