Love this? Save it for later!
Share the inspiration with your friends
I’m not supposed to play favorites with recipes, but this spiderweb cheese ball has earned a permanent spot in our Halloween rotation. It happened on a random Tuesday afternoon last October, right in the middle of a chaotic week where I was already juggling school projects, costume planning, and the never-ending question of what to feed everyone before trick-or-treating.
My neighbor Dave—the quiet guy who keeps to himself and spends more time with his lawn than people—caught me wrestling a grocery bag through my front door. “You look like you need a party in a bowl,” he said, and handed me a crumpled index card. I wasn’t expecting cooking advice from the man who once asked me if ketchup counted as a vegetable, but there I was, standing in my doorway, listening to him describe exactly how to make this spiderweb cheese ball.
Honestly, I almost laughed. Dave? The guy who burns toast? But he was serious, and the recipe on that card looked simple enough. I made it that weekend for a small gathering, and let me tell you—it disappeared faster than the candy bowl. The kids loved the creepy spiderweb design, and the adults kept sneaking back for “just one more cracker.” I forgot to buy pretzel sticks for the spider legs and had to use broken spaghetti instead (which actually looked better, honestly).
Maybe you’ve been there—staring at Pinterest-perfect Halloween recipes that require sixteen ingredients and a culinary degree. This one isn’t like that. It’s the kind of recipe that makes you look like a rockstar without the stress. The spiderweb cheese ball is creamy, savory, and ridiculously fun to make with little hands helping in the kitchen. It’s become our go-to for Halloween parties, and I keep making it because it’s the one thing everyone—from picky eaters to foodie friends—agrees on.
Why You’ll Love This Recipe
This spiderweb cheese ball isn’t just another Halloween appetizer—it’s the one that gets talked about long after the party ends. I’ve tested this recipe at least eight times (yes, eight), tweaking the seasoning and the technique until it was absolutely foolproof. Here’s why it works for busy families like yours:
- Quick & Easy: Comes together in under 20 minutes of active prep time. No baking, no complicated steps—just mix, shape, and decorate.
- Simple Ingredients: You probably already have cream cheese, cheddar, and a few pantry staples in your fridge. No special trips to fancy grocery stores.
- Perfect for Halloween Parties: It’s a showstopper that doubles as a centerpiece. Kids go wild for the spiderweb design, and it sparks conversations.
- Crowd-Pleaser: I’ve served this at four different Halloween gatherings, and it’s always the first bowl to empty. Even the adults who “don’t like cheese balls” ask for the recipe.
- Unbelievably Delicious: The combination of cream cheese, sharp cheddar, and a hint of garlic and onion creates this savory, creamy texture that’s absolutely addictive. The black olive “spiders” on top add a salty pop that balances everything perfectly.
What makes this recipe different from the dozens of other cheese balls out there? It’s the technique of creating the spiderweb pattern using a toothpick and a simple sour cream mixture—no artistic skills required. I’ve tried piping, stenciling, and even freehand drawing, and this method gives you perfect webs every single time. It’s not just another version—it’s the best version.
This recipe is the kind that makes you close your eyes after the first bite. It’s comfort food reimagined for Halloween—creamy, savory, and full of that nostalgic cheese ball flavor we all grew up loving. Perfect for impressing party guests without stress, or turning a simple family snack into something memorable.
What Ingredients You Will Need
This spiderweb cheese ball uses simple, wholesome ingredients to deliver bold flavor and satisfying texture without the fuss. Most of these are pantry staples you likely already have, especially if you’ve hosted a party recently. Here’s what you’ll need:
For the Cheese Ball Base
- 16 ounces cream cheese, softened (two 8-ounce blocks) — I recommend Philadelphia for the creamiest texture. Let it sit on the counter for 30 minutes before starting.
- 2 cups sharp cheddar cheese, shredded — Freshly shredded melts better than pre-shredded (which has anti-caking agents). Look for block cheddar and grate it yourself.
- 1/2 cup sour cream (adds richness and helps the cheese ball hold its shape) — Daisy or any full-fat brand works well.
- 1 packet ranch seasoning mix (about 1 ounce) — Hidden Valley is my go-to for consistent flavor. You can also use homemade ranch seasoning if you prefer.
- 1/4 teaspoon garlic powder — Adds depth without overpowering. I use McCormick.
- 1/4 teaspoon onion powder — Balances the savory notes beautifully.
- 1/4 teaspoon black pepper — Freshly ground is best.
- 1/4 teaspoon salt — Only if your cheese and ranch mix aren’t already salty enough. Taste first!
For the Spiderweb Decoration

- 1/4 cup sour cream (for the web pattern) — Use full-fat for the best consistency. It should be thick but spreadable.
- 1 tablespoon milk (to thin the sour cream slightly) — Whole milk works best, but 2% is fine too.
- Black olives, sliced (for the spider bodies) — About 8-10 olives. I use canned black olives, drained and patted dry.
- Pretzel sticks or black licorice strings (for spider legs) — Pretzel sticks give a nice salty crunch. Break them into 1-inch pieces.
- Fresh parsley or chives, chopped (optional, for garnish) — Adds a pop of color and freshness.
For Serving
- Assorted crackers — I love buttery Ritz crackers, but wheat thins or baguette slices work wonderfully too.
- Fresh vegetable sticks (carrots, celery, bell peppers) — Great for a healthier option and adds color to the platter.
Substitution Guidance: If you’re feeding a crowd with dietary needs, you can swap the cream cheese for a dairy-free version (I like Kite Hill for its creamy texture). Use a vegan cheddar shred and dairy-free sour cream for a fully plant-based option. For a gluten-free version, just serve with gluten-free crackers or veggie sticks—the cheese ball itself is naturally gluten-free. If you’re watching sodium, use low-sodium ranch seasoning and skip the added salt.
Equipment Needed
You don’t need a fancy kitchen to pull off this spiderweb cheese ball. Here’s what I use every time:
- Large mixing bowl — Any medium-to-large bowl works. I use a glass one because it doesn’t hold onto smells.
- Hand mixer or stand mixer — Makes combining the cream cheese and cheddar effortless. A sturdy wooden spoon works too, but your arm will get a workout.
- Plastic wrap — Essential for shaping the cheese ball and keeping it tidy in the fridge. I use the press-and-seal kind for extra hold.
- Spatula — A rubber spatula helps scrape every last bit of cheesy goodness from the bowl.
- Toothpick or skewer — For creating the spiderweb pattern. A bamboo skewer works beautifully.
- Serving platter — A flat, round plate or wooden board shows off the spiderweb design best.
- Small bowl — For mixing the sour cream web mixture.
- Piping bag or zip-top bag — For drizzling the sour cream web. A zip-top bag with a tiny corner snipped off works perfectly.
If you don’t have a hand mixer, no worries—just soften the cream cheese completely (leave it out for an hour) and mix by hand with a strong fork. I’ve done it both ways, and honestly, the hand-mixed version has a slightly more rustic texture that some people prefer. For the piping bag, a plastic sandwich bag with a tiny cut in the corner is my budget-friendly go-to. Cleanup is a breeze—just toss it when you’re done.
Preparation Method
Let’s make this spiderweb cheese ball! I’ve broken it down into clear steps so even beginner cooks can nail it. Take your time, and don’t stress—it’s supposed to be fun.
- Soften the cream cheese: Take your cream cheese out of the fridge about 30-40 minutes before you start. It should be room temperature—soft enough that a finger pressed into it leaves an indent. If you’re in a hurry, microwave it in 10-second bursts, but be careful not to melt it. I’ve accidentally turned cream cheese into soup before, and it’s not pretty.
- Mix the base: In your large mixing bowl, combine the softened cream cheese, shredded cheddar, 1/2 cup sour cream, ranch seasoning mix, garlic powder, onion powder, black pepper, and salt (if using). Using your hand mixer on medium speed, beat everything together until smooth and well combined. Scrape down the sides of the bowl with your spatula halfway through. The mixture should be thick, creamy, and slightly sticky. Taste it—yes, I always taste raw cheese mixture (it’s safe, I promise). Adjust seasoning if needed.
- Shape the cheese ball: Lay a large piece of plastic wrap on your counter. Scoop the cheese mixture onto the center of the plastic wrap. Gather the edges of the plastic wrap and twist them together, forming the mixture into a tight ball. Use your hands (through the plastic) to shape it into a smooth, round sphere. Don’t worry if it’s not perfect—you can reshape it later. Twist the plastic wrap tightly to secure the shape. Refrigerate for at least 2 hours, or overnight. This chilling step is crucial—it firms up the cheese ball so it holds its shape and makes the spiderweb pattern much easier to create.
- Prepare the web mixture: About 15 minutes before you’re ready to decorate, make the spiderweb topping. In a small bowl, whisk together the 1/4 cup sour cream and 1 tablespoon milk until smooth. The consistency should be thick but drizzle-able—think thick pancake batter. If it’s too thick, add another teaspoon of milk. If it’s too thin, add a tiny bit more sour cream. Set aside.
- Create the spiderweb pattern: Remove the chilled cheese ball from the fridge and unwrap it carefully. Place it in the center of your serving platter. Spoon the sour cream mixture into your piping bag (or zip-top bag) and snip off a tiny corner—smaller than you think you need. You can always cut more, but you can’t undo a big hole. Pipe a small circle of sour cream on top of the cheese ball, right in the center. Then pipe concentric circles around it, spacing them about 1 inch apart. You should have 4-5 circles total, depending on the size of your cheese ball.
- Create the web lines: Here’s the fun part. Using a toothpick or skewer, start at the center circle and gently drag the toothpick outward through all the circles, like pulling a line from the center to the edge. Repeat this every 1-2 inches around the entire cheese ball, creating a sunburst pattern. As you drag the toothpick through the circles, the sour cream will pull into little V-shapes, forming a perfect spiderweb. Wipe the toothpick clean between each line for the best effect. I’ve done this dozens of times, and it never fails to impress. The kids love watching this step—it feels like magic.
- Add the spiders: Now for the creepy-crawly detail. Take your sliced black olives and arrange them on top of the cheese ball, near the edge or clustered in one spot. For each “spider,” take 4 pretzel stick pieces (or licorice strings) and gently press them into the cheese ball on either side of an olive slice, creating legs. You can make as many spiders as you like—I usually do 2-3 for a cute effect. If the pretzels don’t stick well, dab a tiny bit of sour cream on the ends before pressing them in.
- Garnish and serve: Sprinkle the chopped parsley or chives around the base of the cheese ball for a pop of green (optional, but pretty). Arrange your crackers and vegetable sticks around the cheese ball on the platter. Serve immediately, or refrigerate until party time. I like to let it sit at room temperature for 15-20 minutes before serving so it softens slightly and spreads more easily.
Sensory cues: At step 2, the mixture should smell savory and slightly tangy from the sour cream and ranch. It should feel smooth and creamy, with no lumps of unmixed cream cheese. At step 6, when you drag the toothpick through the sour cream circles, you should see the V-shapes forming clearly—if they don’t, your sour cream mixture might be too thick (add a drop more milk) or too thin (add more sour cream). The finished cheese ball should look like a glossy, creamy web with dark olive spiders crawling across it.
Cooking Tips & Techniques
After making this spiderweb cheese ball more times than I can count, I’ve learned a few tricks that make the process smoother and the results more impressive. Here are my hard-earned lessons:
Room temperature ingredients are non-negotiable. I learned this the hard way when I tried to mix cold cream cheese with cold sour cream. The result was a lumpy, frustrating mess that took forever to smooth out. Let your cream cheese, sour cream, and even the shredded cheddar sit out for 30 minutes before mixing. Your hand mixer will thank you, and the texture will be silky smooth.
Chill the cheese ball thoroughly. I know it’s tempting to skip the chilling time when you’re in a rush, but trust me—don’t. A well-chilled cheese ball (at least 2 hours, preferably overnight) holds its shape beautifully when you pipe the web. If it’s too soft, the sour cream will just sink into the cheese instead of sitting on top. I once tried to rush it after only 45 minutes in the fridge, and the web looked like a sad, blurry mess. Patience pays off here.
Use a light hand with the toothpick. When you’re dragging the toothpick through the sour cream circles, you don’t need to press hard. A gentle, steady motion creates the cleanest V-shapes. If you press too hard, you’ll drag the sour cream into the cheese ball and lose the web effect entirely. I’ve done this more times than I’d like to admit. Slow and steady wins the race.
Make the spiders ahead of time. If you’re prepping for a party, you can assemble the spiders on a small plate and refrigerate them separately. Just press the olive slices and pretzel legs together gently—they’ll stick slightly. Then place them on the cheese ball right before serving. This keeps the pretzels from getting soggy from the cheese moisture.
Double the recipe for a crowd. This cheese ball serves about 8-10 people as an appetizer. For bigger parties, I make two and place them on opposite ends of the snack table. They look adorable together, and nobody fights over the last cracker.
Variations & Adaptations
One of the best things about this spiderweb cheese ball is how customizable it is. I’ve experimented with several variations, and here are my favorites:
Spicy Southwest Version: Add 1/4 cup finely chopped pickled jalapeños (drained well) and 1/2 teaspoon cumin to the cheese mixture. Replace the ranch seasoning with a taco seasoning packet. The heat pairs surprisingly well with the creamy base, and the green jalapeño flecks look festive against the white web. My husband, who claims he doesn’t like spicy food, devoured this version at a Halloween party last year.
Herb & Garlic Version: Omit the ranch seasoning and instead mix in 2 cloves of minced fresh garlic, 1 tablespoon chopped fresh dill, 1 tablespoon chopped fresh chives, and 1 teaspoon dried parsley. This version tastes brighter and more sophisticated—perfect for adult gatherings where kids aren’t the main audience. I served this at a Halloween dinner party, and guests kept asking if it was from a fancy catering company. Nope, just my kitchen!
Bacon Cheddar Version: Cook 6 slices of bacon until crispy, crumble them, and fold into the cheese mixture along with an extra 1/2 cup of shredded cheddar. The smoky, salty bacon adds incredible depth. For the spiderweb, use the same sour cream mixture, but sprinkle a few bacon bits on top before serving. This version is dangerously addictive—I’ve seen people stand by the snack table and eat half the cheese ball in one go.
Dairy-Free Adaptation: Use dairy-free cream cheese (Kite Hill or Violife work best), dairy-free cheddar shreds, and dairy-free sour cream. The texture will be slightly softer, so chill it for at least 3 hours before decorating. I made this for a friend with lactose intolerance, and she said it was the best cheese ball she’d had in years. The dairy-free sour cream for the web might be a bit thinner, so add an extra tablespoon of dairy-free cream cheese to thicken it.
Pumpkin-Shaped Variation: Instead of a round cheese ball, shape the mixture into a pumpkin form using your hands (make it slightly flattened on top and bottom). Use the sour cream web pattern on top, and add a small pretzel stick or rosemary sprig as the stem. This is perfect for Halloween parties that lean more toward fall vibes than spooky ones. I did this for a “Harvest Halloween” party, and it was a huge hit with both kids and adults.
Serving & Storage Suggestions
This spiderweb cheese ball is designed to be the star of your Halloween snack table, but how you serve and store it makes all the difference. Here’s what I’ve learned from trial and error:
Serving Temperature: Serve the cheese ball slightly chilled but not ice-cold. Take it out of the refrigerator about 20-30 minutes before guests arrive. This softens it just enough to spread easily on crackers without losing its shape. If it’s too cold, the crackers will break when you try to spread. If it’s too warm, the web pattern might start to blur. Room temperature for 20 minutes is the sweet spot.
Presentation Tips: Place the cheese ball on a large, flat platter—a wooden board or slate tile looks especially nice. Arrange crackers and veggie sticks around it in a circular pattern, like rays of the sun. I like to use a mix of shapes and colors: buttery Ritz rounds, wheat thins, and carrot sticks create visual interest. For a spooky touch, add some plastic spider rings or small fake cobwebs around the platter (just keep them away from the food).
Complementary Dishes: This cheese ball pairs beautifully with other Halloween appetizers. I often serve it alongside a bowl of spicy pumpkin soup shots in small cups, or a platter of mummy pigs in a blanket for a full spread. For drinks, apple cider (warm or cold) is a fantastic match, as is a crisp white wine like Sauvignon Blanc for the adults.
Storage Instructions: If you have leftovers (unlikely, but possible), wrap the cheese ball tightly in plastic wrap or place it in an airtight container. It will keep in the refrigerator for up to 5 days. The sour cream web might blur slightly over time, but the flavor remains delicious. I’ve snacked on leftover cheese ball with crackers for days after a party, and it only gets better as the flavors meld.
Freezing Instructions: Yes, you can freeze this cheese ball! Wrap it tightly in plastic wrap, then in a layer of aluminum foil. Freeze for up to 3 months. When you’re ready to use it, thaw it in the refrigerator overnight. Note: The texture will be slightly softer after freezing, so it’s best to add the spiderweb decoration after thawing, not before. I’ve frozen these for Halloween parties months in advance, and they’ve always turned out perfectly.
Reheating (if needed): This is a cold appetizer, so no reheating is necessary. But if you’ve frozen it, just let it thaw completely in the fridge and then let it sit at room temperature for 20 minutes before serving. The flavor is just as good as fresh.
Flavor Development: Here’s a little secret—this cheese ball actually tastes better the next day. The flavors of the ranch seasoning, garlic, and onion powder meld together overnight, creating a more complex, savory profile. If you’re planning ahead, make it a day before your party and refrigerate it (without the web decoration). Add the web and spiders just before serving for the best visual effect. I always make mine 24 hours in advance, and guests consistently rave about the flavor.
Nutritional Information & Benefits
While this spiderweb cheese ball is definitely a treat, it does offer some nutritional perks worth noting. Here’s a rough estimate per serving (based on 10 servings, with crackers not included):
| Nutrient | Amount Per Serving |
|---|---|
| Calories | 245 |
| Total Fat | 21g |
| Saturated Fat | 13g |
| Cholesterol | 65mg |
| Sodium | 480mg |
| Total Carbohydrates | 4g |
| Dietary Fiber | 0g |
| Sugars | 2g |
| Protein | 9g |
| Calcium | 180mg (14% DV) |
| Vitamin A | 400 IU (8% DV) |
Health Benefits of Key Ingredients: Cream cheese provides a good amount of calcium and vitamin A, which support bone health and immune function. Sharp cheddar cheese adds protein and more calcium, plus a satisfying savory flavor that can help curb cravings for less nutritious snacks. The sour cream contains probiotics (if using live cultures), which support gut health. The black olives offer healthy monounsaturated fats and antioxidants like vitamin E. If you serve it with vegetable sticks, you’re adding fiber, vitamins, and crunch—a win-win for a party appetizer.
Dietary Considerations: This recipe is naturally gluten-free (just be sure to serve with gluten-free crackers). It’s also low-carb and keto-friendly, with only 4 grams of carbs per serving. For a lower-fat version, you can use reduced-fat cream cheese and sour cream, though the texture will be slightly less creamy. As mentioned earlier, it can be made dairy-free with appropriate substitutions. Potential allergens include dairy (milk, cream cheese, sour cream) and gluten (if served with wheat crackers). Always check labels if serving guests with specific allergies.
My Personal Wellness Perspective: I believe in balance—Halloween is a time for fun and indulgence, and this cheese ball fits that perfectly. It’s a protein-rich appetizer that keeps you full longer than a bowl of candy, which means your kids (and you) might eat fewer sugary treats. I love that I can serve something that feels special and indulgent but also has real nutritional value. It’s not health food, but it’s a smarter choice than most party snacks, and that makes me feel good about putting it on the table.
Conclusion
This spiderweb cheese ball has become a Halloween tradition in our house, and I honestly can’t imagine the season without it. It’s the recipe that proves you don’t need fancy skills or expensive ingredients to create something that looks and tastes amazing. The creamy, savory cheese ball paired with the fun spiderweb design is pure magic—especially when you see the kids’ faces light up as they recognize the web pattern.
I love that this recipe is flexible enough to adapt to whatever you have on hand. Swap the ranch for taco seasoning, add bacon, or shape it like a pumpkin—it’s your cheese ball, and you should make it your own. The best recipes are the ones that evolve with the cook, and this one has plenty of room for creativity.
So go ahead—make this for your Halloween party, your family movie night, or just because it’s October and you deserve something fun. Trust me, once you taste it, you’ll understand why Dave the neighbor was so insistent I try his recipe. Sometimes the best things come from the most unexpected places.
I’d love to hear how yours turns out! Drop a comment below and let me know if your kids helped with the spiderweb pattern, or if you tried a fun variation. Share a photo on Pinterest and tag me—I’m always looking for new ideas. And if you loved this recipe, don’t forget to pin it for later! Happy Halloween, and happy snacking!
Frequently Asked Questions
Can I make this spiderweb cheese ball ahead of time?
Absolutely! You can prepare the cheese ball base (without the web decoration) up to 3 days in advance. Wrap it tightly in plastic wrap and refrigerate. Add the sour cream web and spider decorations on the day of your party for the best visual effect. The flavor actually improves after a day or two in the fridge.
How do I get the spiderweb pattern to look perfect?
The key is using the right consistency for the sour cream mixture—it should be thick but drizzle-able. If it’s too thin, the circles will blur together. If it’s too thick, the toothpick won’t drag smoothly. Also, make sure your cheese ball is well-chilled (at least 2 hours) so the sour cream sits on top rather than sinking in. Practice on a piece of wax paper first if you’re nervous!
Can I use a different type of cheese?
Yes! While sharp cheddar gives the best flavor and color contrast with the white web, you can experiment with other cheeses. Monterey Jack melts beautifully and is milder, pepper jack adds a spicy kick, or smoked gouda gives a rich, smoky flavor. Just keep the total amount of shredded cheese at 2 cups for the right texture.
How do I store leftovers?
Wrap any leftover cheese ball tightly in plastic wrap or place it in an airtight container. It will keep in the refrigerator for up to 5 days. The sour cream web might blur slightly, but the flavor remains delicious. You can also freeze the undecorated cheese ball for up to 3 months—just thaw overnight in the fridge before adding the web.
Is this recipe kid-friendly to make?
Absolutely! Kids can help with mixing the cheese ball (with supervision), shaping it into a ball, and especially creating the spiderweb pattern with the toothpick. Placing the olive “spiders” is also a fun task for little hands. Just be careful with the toothpick—older kids can handle it, but younger ones might need help. It’s a great way to get the whole family involved in Halloween prep!
Pin This Recipe!
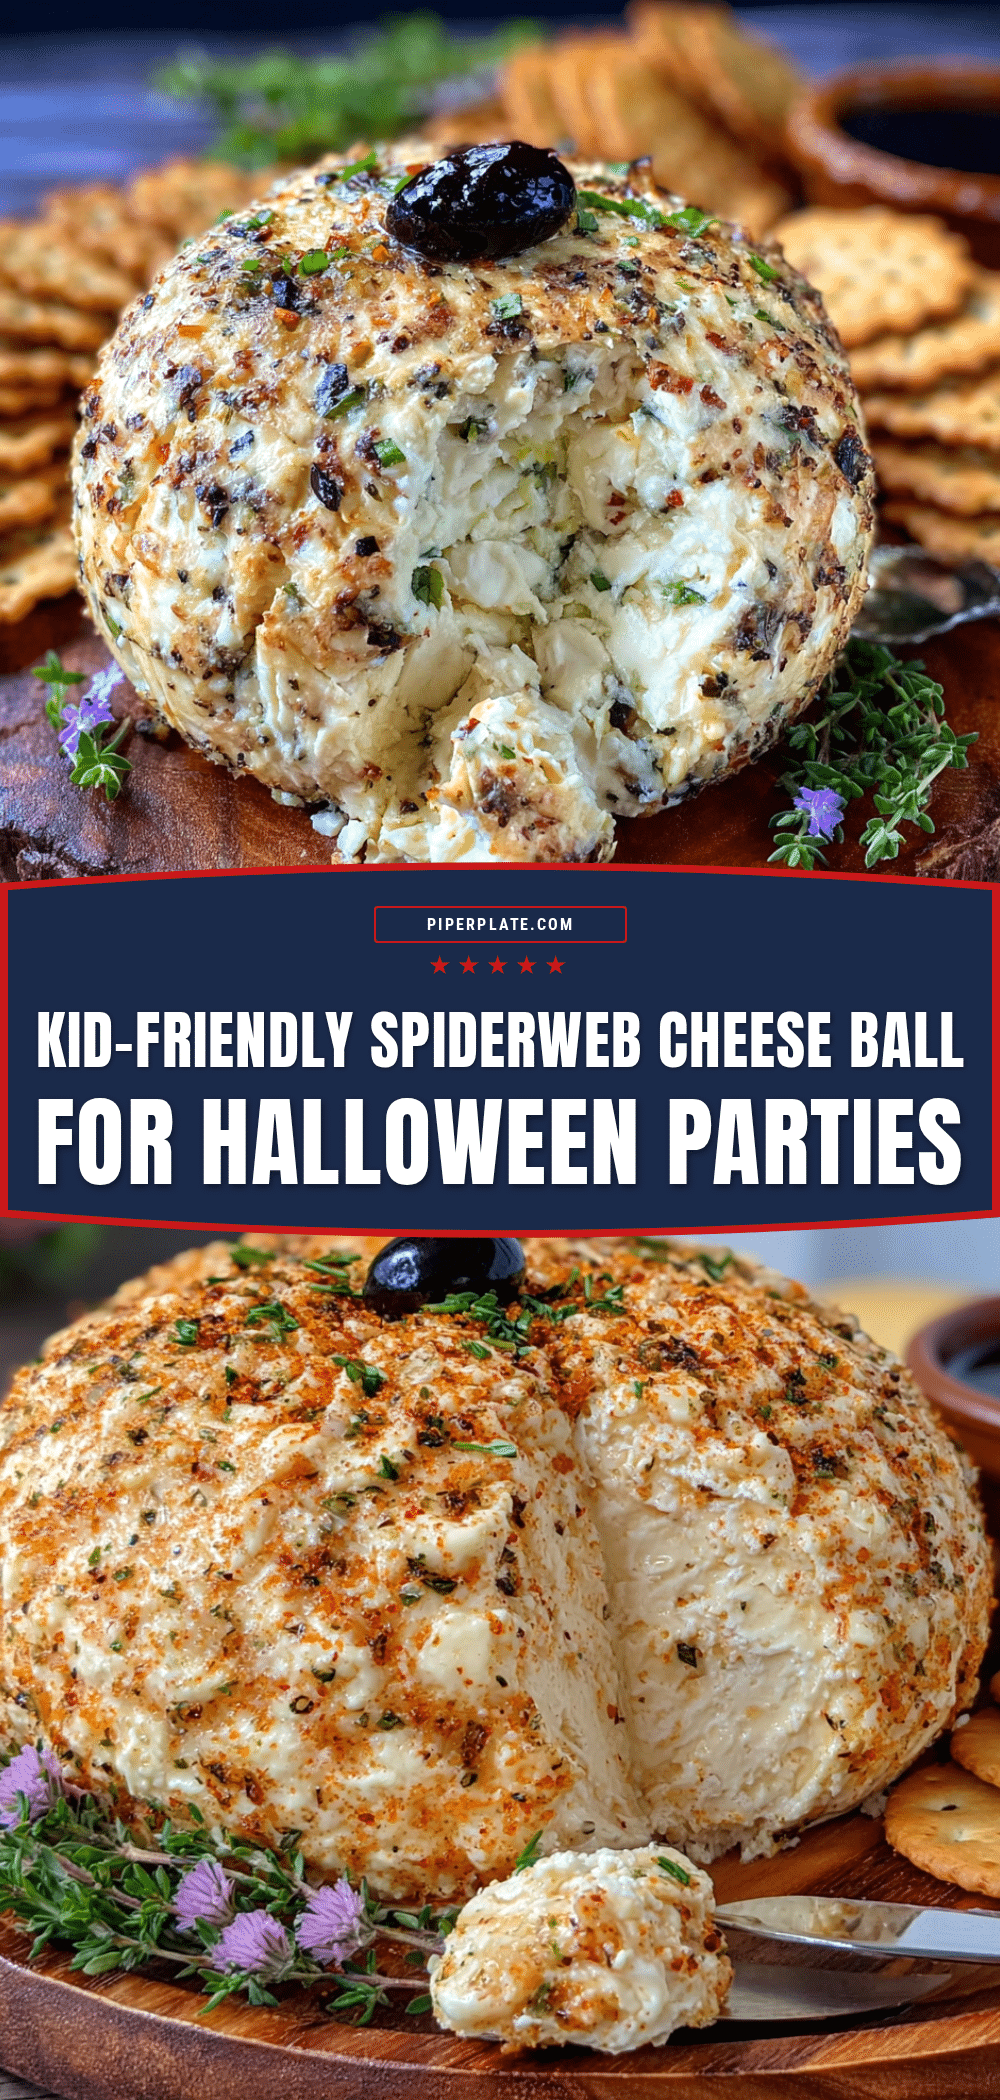
Kid-Friendly Spiderweb Cheese Ball for Halloween Parties – Easy Best Recipe

A creamy, savory cheese ball decorated with a spiderweb pattern, perfect for Halloween parties. Quick to make with simple ingredients, it’s a crowd-pleaser that kids and adults love.
- Prep Time: 20 minutes
- Cook Time: 0 minutes
- Total Time: 2 hours 20 minutes (includes chilling)
- Yield: 10 servings 1x
- Category: Appetizer
- Cuisine: American
Ingredients
- 16 ounces cream cheese, softened
- 2 cups sharp cheddar cheese, shredded
- 1/2 cup sour cream
- 1 packet ranch seasoning mix (about 1 ounce)
- 1/4 teaspoon garlic powder
- 1/4 teaspoon onion powder
- 1/4 teaspoon black pepper
- 1/4 teaspoon salt (optional)
- 1/4 cup sour cream (for web)
- 1 tablespoon milk
- Black olives, sliced (for spider bodies)
- Pretzel sticks or black licorice strings (for spider legs)
- Fresh parsley or chives, chopped (optional, for garnish)
- Assorted crackers (for serving)
- Fresh vegetable sticks (carrots, celery, bell peppers) (for serving)
Instructions
- Soften the cream cheese: Take cream cheese out of fridge 30-40 minutes before starting. It should be room temperature.
- Mix the base: In a large mixing bowl, combine softened cream cheese, shredded cheddar, 1/2 cup sour cream, ranch seasoning mix, garlic powder, onion powder, black pepper, and salt (if using). Beat with a hand mixer on medium speed until smooth and well combined.
- Shape the cheese ball: Lay a large piece of plastic wrap on counter. Scoop cheese mixture onto center. Gather edges of plastic wrap and twist to form a tight ball. Refrigerate for at least 2 hours or overnight.
- Prepare the web mixture: In a small bowl, whisk together 1/4 cup sour cream and 1 tablespoon milk until smooth. Consistency should be thick but drizzle-able.
- Create the spiderweb pattern: Remove chilled cheese ball from fridge and unwrap. Place on serving platter. Spoon sour cream mixture into a piping bag (or zip-top bag) and snip off a tiny corner. Pipe a small circle in center, then concentric circles around it, spacing about 1 inch apart.
- Create the web lines: Using a toothpick or skewer, start at center circle and gently drag outward through all circles, repeating every 1-2 inches around the cheese ball. Wipe toothpick clean between each line.
- Add the spiders: Arrange sliced black olives on top of cheese ball. For each spider, press 4 pretzel stick pieces into cheese ball on either side of an olive slice to create legs.
- Garnish and serve: Sprinkle chopped parsley or chives around base. Arrange crackers and vegetable sticks around cheese ball. Serve immediately or refrigerate until party time. Let sit at room temperature 15-20 minutes before serving.
Notes
Room temperature ingredients are key for smooth texture. Chill cheese ball thoroughly before decorating. Use a light hand with toothpick for clean web lines. Can be made ahead and stored in fridge for up to 5 days. Freezes well for up to 3 months (add web after thawing).
Nutrition
- Serving Size: 1 serving (about 1/1
- Calories: 245
- Sugar: 2
- Sodium: 480
- Fat: 21
- Saturated Fat: 13
- Carbohydrates: 4
- Protein: 9
Keywords: Halloween, cheese ball, spiderweb, appetizer, party, kid-friendly, easy


