Love this? Save it for later!
Share the inspiration with your friends
My nephew asked me why I couldn’t just stuff the squash and roast it all together instead of pre-cooking the halves. I started to explain why that wouldn’t work — then stopped. He was eight, and he had a point. I mean, I’d been making stuffed squash for years the “proper” way, but watching him stare at me with that patient, waiting-for-a-better-answer look made me realize I didn’t actually have a good reason. So I shrugged and said, “Alright, let’s try it your way.”
Honestly, I expected a soggy mess. The filling would be watery, the squash would be mushy, and I’d have to explain that sometimes recipes exist for a reason. But Tuesday night was already a mess — I’d forgotten to thaw the ground beef, the acorn squash was rolling around the counter like it was trying to escape, and my nephew had already claimed the kitchen stool as his command center. I figured we had nothing to lose.
What came out of the oven was honestly humbling. The squash was perfectly tender but still held its shape. The sausage filling had caramelized on top, and the whole thing looked like something you’d pay too much for at a farm-to-table restaurant. He looked at me, I looked at him, and we both grabbed a fork. Maybe you’ve been there — that moment when someone who doesn’t know the “rules” accidentally shows you a better way to do something. That’s this recipe. It’s the one that taught me to listen more and lecture less, and it happens to be the only stuffed squash I’ve made since.
Why You’ll Love This Recipe
Let me tell you why this Kid-Friendly Stuffed Acorn Squash with Sausage has become our go-to fall dinner. I’ve tested this method at least a dozen times now, and I can say with confidence that it solves every problem you usually run into with stuffed squash recipes.
- One-Pan Wonder: You stuff the squash raw and roast it all together. No pre-cooking the squash, no extra dishes, no timing gymnastics. It goes from counter to oven in about 15 minutes of active work.
- Simple Ingredients: You likely already have most of this in your kitchen. Sweet Italian sausage, acorn squash, some pantry seasonings, and a little cheese. No trips to specialty stores required.
- Picky Eater Approved: My nephew isn’t the only kid who went back for seconds. The sausage adds familiar flavor, and the squash turns sweet and soft — it’s basically a built-in vegetable delivery system that kids actually enjoy.
- Budget-Friendly: Acorn squash is usually cheap in season, and one pound of sausage stretches to fill four squash halves. You’re getting a hearty, satisfying meal for well under fifteen dollars.
- Leftovers That Reheat Beautifully: This is one of those rare recipes that tastes even better the next day. The flavors meld together overnight, and the squash reheats without turning to mush.
What makes this recipe different from the dozens of stuffed squash recipes out there is the technique. Most recipes have you roast the squash halves first, then stuff them, then bake again. That’s twice the work and twice the dishes. By stuffing the squash raw and roasting everything together, you get perfectly tender squash with a caramelized, slightly crispy sausage topping. The squash steams from the inside while the sausage fat bastes the flesh — it’s a beautiful little system that works because you’re not fighting against the ingredients.
This isn’t just good — it’s the kind of dinner that makes you close your eyes after the first bite. It’s comfort food that feels special enough for a Sunday supper but comes together easily on a Wednesday night. And honestly, knowing that my eight-year-old nephew figured out the method makes me smile every single time I make it.
What Ingredients You Will Need
This recipe uses simple, wholesome ingredients to deliver bold flavor and satisfying texture without the fuss. Most of these are pantry staples or easy to find at any grocery store, and I’ve included notes on substitutions where they work well.
- 2 medium acorn squash — Look for squash that feels heavy for its size and has a deep green color with orange patches. Avoid any with soft spots or cracks. Each squash will yield two halves, giving you four servings.
- 1 pound sweet Italian sausage — I prefer Johnsonville or your local butcher’s fresh sausage. Casings removed, so you’re working with loose sausage meat. You can use mild or hot Italian sausage depending on your family’s heat preference.
- 1 medium yellow onion, finely diced — About one cup once chopped. The onion adds sweetness and texture to the filling. You can substitute with one cup of frozen diced onion if you’re in a hurry — just thaw and pat dry first.
- 2 cloves garlic, minced — Fresh garlic is best here for flavor. Use one teaspoon of jarred minced garlic if that’s what you have on hand.
- 1/2 cup cooked rice — Leftover white or brown rice works perfectly. You can also use quinoa or cauliflower rice for a lower-carb option. The rice helps absorb moisture and gives the filling a better texture.
- 1/4 cup grated Parmesan cheese — The kind in the green can works fine here since it’s getting baked into the filling. Freshly grated is lovely but not necessary.
- 1/4 cup dried cranberries or chopped apple — This adds a little sweetness that kids love and balances the savory sausage. I’ve used both, and the apple version is especially good in early fall when apples are in season.
- 1 teaspoon dried sage — Sage and squash are a classic pairing. You can substitute with 1 tablespoon fresh sage, finely chopped.
- 1/2 teaspoon salt — I use fine sea salt. Adjust based on how salty your sausage is — some brands are quite salty on their own.
- 1/4 teaspoon black pepper — Freshly ground is best, but pre-ground works fine.
- 2 tablespoons olive oil — For rubbing on the squash before roasting. This helps the edges caramelize and keeps the skin from drying out.
- Optional garnish: fresh parsley or thyme — Not necessary, but a sprinkle of fresh herbs makes it look pretty if you’re serving company.
Equipment Needed
You don’t need much fancy equipment for this recipe, which is part of why I love it. Here’s what you’ll need:
- Large baking sheet or roasting pan — A rimmed baking sheet works perfectly. I use a half-sheet pan that measures 18×13 inches. If you don’t have one, a 9×13 baking dish will work, though the squash will be closer together.
- Sharp chef’s knife — Acorn squash is tough to cut, so a sharp knife is essential. I learned this the hard way after nearly losing a finger to a dull blade. A 8-inch chef’s knife works great.
- Large skillet — For cooking the sausage and onion mixture. A 12-inch skillet gives you plenty of room to brown the meat properly.
- Mixing bowl — For combining the filling ingredients. Any medium-sized bowl will do.
- Measuring cups and spoons — Standard set for measuring ingredients accurately.
- Wooden spoon or spatula — For breaking up the sausage as it cooks.
- Parchment paper or aluminum foil — Optional but recommended for easy cleanup. The sausage fat can stick to the pan, and parchment makes washing up a breeze.
- Ice cream scoop or large spoon — For scooping out the squash seeds. A grapefruit spoon with serrated edges works even better if you have one.
If you don’t have a rimmed baking sheet, you can use a large cast iron skillet or even a Dutch oven. The key is having a surface that can catch any drips while allowing the squash to sit flat. I’ve used a 12-inch cast iron skillet before, and it worked beautifully — the squash fit snugly, and the edges got extra crispy.
Preparation Method
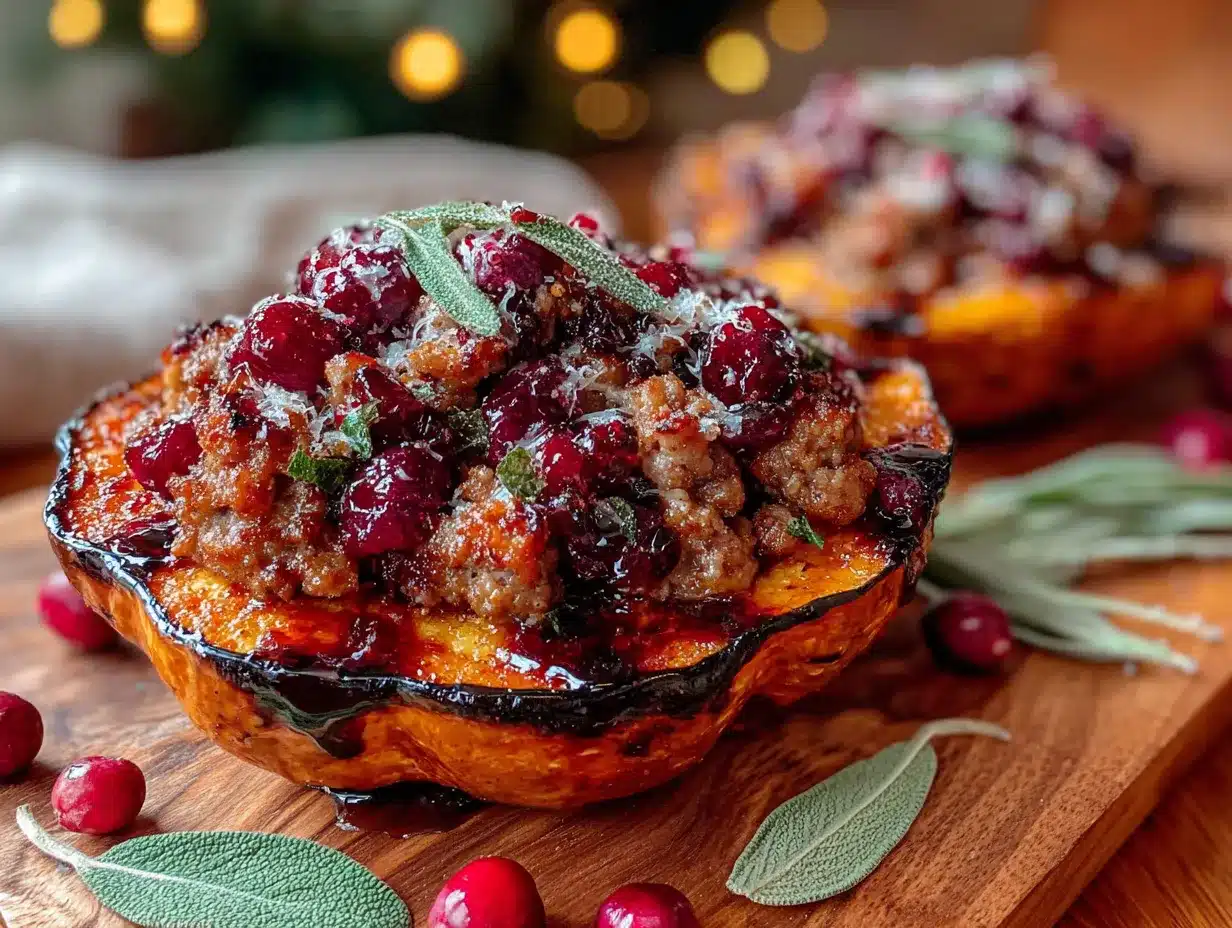
This Kid-Friendly Stuffed Acorn Squash with Sausage comes together in about an hour, with only 15 minutes of active work. Here’s how to do it:
- Preheat your oven to 400°F (200°C). Position the rack in the middle of the oven. While the oven heats, prepare your squash.
- Cut the acorn squash in half. Place each squash on a stable cutting board. Using your sharp chef’s knife, carefully cut from the stem end down through the tip. Be careful — acorn squash is dense and can be slippery. If it’s rolling around, cut a thin slice off the bottom to create a flat surface first. Scoop out the seeds and stringy pulp using your ice cream scoop or a sturdy spoon. Don’t rinse the squash — just scrape out the seeds and discard them (or save them for roasting later!).
- Rub the squash with olive oil. Drizzle about 1/2 tablespoon of olive oil over the cut surface and inside cavity of each squash half. Use your hands or a pastry brush to coat evenly. Season the cut surfaces with a pinch of salt and pepper. Place the squash halves cut-side up on your parchment-lined baking sheet.
- Cook the sausage filling. Heat your large skillet over medium-high heat. Add the sausage meat, breaking it up with your wooden spoon as it cooks. Cook for 5-7 minutes, until the sausage is browned and cooked through. Use a slotted spoon to transfer the cooked sausage to a mixing bowl, leaving about 1 tablespoon of rendered fat in the skillet.
- Sauté the onion and garlic. Reduce the heat to medium. Add the diced onion to the skillet with the reserved sausage fat. Cook for 3-4 minutes, stirring occasionally, until the onion is softened and translucent. Add the minced garlic and cook for 30 seconds until fragrant. Transfer the onion mixture to the bowl with the sausage.
- Combine the filling. Add the cooked rice, grated Parmesan, dried cranberries or chopped apple, dried sage, salt, and pepper to the bowl with the sausage and onions. Stir everything together until well combined. Taste the filling and adjust seasoning if needed — keep in mind the squash will mellow the flavors slightly as it roasts.
- Stuff the squash halves. Divide the filling evenly among the four squash halves. Pack it in gently — you want it mounded on top, not crammed in. Each half should get about 1/2 to 3/4 cup of filling, depending on the size of your squash. Don’t worry if some filling falls onto the baking sheet — it will caramelize and become delicious crispy bits.
- Roast the stuffed squash. Place the baking sheet in the preheated oven. Roast for 35-45 minutes, until the squash is fork-tender and the filling is golden brown on top. The squash should be easy to pierce with a fork — if it resists, give it another 5-10 minutes. The filling should be bubbling around the edges.
- Rest and serve. Remove the baking sheet from the oven and let the squash rest for 5 minutes. This allows the filling to set slightly and makes the squash easier to handle. Sprinkle with fresh parsley or thyme if using, and serve warm.
A few things to watch for: If the filling starts browning too quickly before the squash is tender, loosely tent a piece of aluminum foil over the baking sheet for the last 10-15 minutes of cooking. Every oven runs a little differently, so start checking at the 35-minute mark. The squash should offer no resistance when pierced with a fork — that’s your cue that it’s done.
Cooking Tips & Techniques
I’ve made this recipe enough times to have a few tricks up my sleeve. Here’s what I’ve learned the hard way so you don’t have to:
Don’t overcook the sausage in the skillet. I used to cook it until it was completely dry, thinking I was being thorough. But the sausage continues cooking in the oven, and if you dry it out on the stovetop, the filling ends up crumbly instead of moist. Cook it just until there’s no pink left, then get it out of the pan.
Use a fork to test doneness, not a knife. A knife can slide through squash that’s still slightly undercooked in the center. A fork will catch on any resistance. When the fork slides in like warm butter, you’re good to go.
Let the squash rest before cutting. I know it’s tempting to dig in right away, especially when the kitchen smells amazing. But letting it rest for those 5 minutes makes a real difference. The filling firms up, the squash sets, and you won’t burn your mouth on the first bite. Trust me on this one — I’ve made that mistake more times than I’d like to admit.
If your squash won’t sit flat, slice a tiny bit off the bottom. This is one of those small tricks that makes a huge difference. A wobbly squash half will spill its filling and cook unevenly. Taking off a thin slice creates a stable base and helps the squash cook more evenly.
Multitask smartly. While the squash is roasting, you can clean up the kitchen, set the table, or prep a simple side salad. The active work is all front-loaded, so once it’s in the oven, you’re essentially done. I like to use that time to make a quick vinaigrette for a green salad — the acidity pairs beautifully with the rich squash.
Don’t skip the rice. I tried this recipe without rice once, thinking I’d save a few carbs. The filling was greasy and loose, and it didn’t hold together well. The rice absorbs excess moisture and fat from the sausage, giving the filling a better texture. Even a small amount makes a big difference.
Variations & Adaptations
One of the best things about this recipe is how easy it is to adapt. Here are some variations I’ve tried and loved:
Turkey or Chicken Sausage Version: Swap the pork sausage for ground turkey or chicken sausage. The filling will be leaner, so add 1 tablespoon of olive oil to the skillet when cooking the onion to compensate for the missing fat. This version is still delicious and a bit lighter if that’s what you’re after.
Vegetarian Stuffed Squash: Replace the sausage with 1 can of drained and rinsed chickpeas, roughly mashed, plus 1/2 cup of finely chopped mushrooms. Cook the mushrooms until they release their liquid and start browning, then add the chickpeas and proceed with the recipe. The texture is different but satisfying, and it’s a great way to use up mushrooms that are getting close to their expiration date.
Cheesy Top Variation: About 5 minutes before the squash is done, sprinkle an additional 1/4 cup of shredded mozzarella or provolone over the filling. Return to the oven and let it melt and bubble. This is especially popular with kids who love anything with melted cheese on top.
Apple & Sage Version: In the fall, I love adding 1/2 cup of finely diced apple (Honeycrisp or Fuji work well) to the filling along with an extra teaspoon of fresh sage. The apple softens as it roasts and adds pockets of sweetness that contrast beautifully with the savory sausage. This version feels extra special for Thanksgiving or holiday dinners.
Gluten-Free Adaptation: Use cooked quinoa or gluten-free breadcrumbs instead of rice. Both work well and absorb moisture similarly. If using breadcrumbs, start with 1/3 cup and add more if the filling seems too wet.
Spicy Version for Adults: Use hot Italian sausage and add 1/4 teaspoon of red pepper flakes to the filling. The heat is subtle enough that kids can still eat it, but it adds a nice warmth that adults appreciate. I’ve also added a drizzle of honey over the top before roasting — the sweet-spicy combination is fantastic.
Serving & Storage Suggestions
Serving: Serve the stuffed squash warm, right from the oven. I like to place each half on a plate and sprinkle a little fresh parsley or thyme on top for color. A simple green salad with a lemon vinaigrette is the perfect side — the acidity cuts through the richness of the sausage and squash. For a heartier meal, serve with crusty bread to soak up any juices that pool on the plate.
Temperature: This dish is best served hot, but it’s also surprisingly good at room temperature. If you’re making it for a potluck or buffet, it holds well for about an hour after coming out of the oven.
Storage: Leftover stuffed squash keeps beautifully in the refrigerator for up to 4 days. Store it in an airtight container — I use glass containers with tight-fitting lids. The flavors actually meld and deepen overnight, so leftovers often taste even better than the first serving.
Reheating: The best way to reheat is in the oven at 350°F (175°C) for 10-15 minutes, until warmed through. The microwave works in a pinch but can make the squash slightly watery. If using the microwave, cover the squash with a damp paper towel and heat in 30-second intervals. For crispy leftovers, I sometimes scoop the filling out and reheat it in a skillet while warming the squash separately.
Freezing: You can freeze the fully cooked stuffed squash for up to 3 months. Let it cool completely, then wrap each half tightly in plastic wrap and place in a freezer bag. To reheat, thaw overnight in the refrigerator, then bake at 350°F (175°C) for 20-25 minutes until hot. The texture of the squash will be slightly softer after freezing, but the flavor is still excellent.
Make-Ahead Tip: You can prepare the filling up to 2 days in advance and store it in the refrigerator. When you’re ready to cook, cut and oil the squash, stuff them, and roast. This makes it an excellent option for busy weeknights or holiday meal prep.
Nutritional Information & Benefits
This Kid-Friendly Stuffed Acorn Squash with Sausage is a balanced meal that delivers protein, complex carbohydrates, and vegetables all in one dish. Here’s the approximate nutritional breakdown per serving (one stuffed squash half):
- Calories: 385
- Protein: 22g
- Fat: 18g
- Carbohydrates: 38g
- Fiber: 6g
- Sugar: 8g (naturally occurring from squash and cranberries)
- Sodium: 680mg (varies based on sausage brand)
Acorn squash is a nutritional powerhouse. It’s rich in vitamin A (beta-carotene), vitamin C, and potassium — all important for immune function and heart health. The orange flesh is also packed with antioxidants that support healthy skin and vision.
The sausage provides high-quality protein and iron, while the rice adds energy-sustaining complex carbohydrates. The dried cranberries or apple contribute fiber and natural sweetness without refined sugar. This is a meal that keeps you full and satisfied without feeling heavy.
Dietary Considerations: This recipe is naturally gluten-free if you use gluten-free sausage and rice. It’s also nut-free and egg-free. To make it dairy-free, simply omit the Parmesan cheese or use a dairy-free alternative. The recipe is relatively low in added sugar — the sweetness comes primarily from the squash and fruit.
Allergen Note: Check your sausage labels for potential allergens. Some sausages contain breadcrumbs or other fillers that may contain gluten or dairy. When in doubt, buy sausage from a butcher who can confirm the ingredients.
Conclusion
This Kid-Friendly Stuffed Acorn Squash with Sausage has become a staple in my fall rotation for good reason. It’s the recipe that taught me to trust a kid’s instinct over my own stubborn habits, and it delivers every single time. The squash turns sweet and tender, the sausage filling is savory and satisfying, and the whole thing comes together with minimal fuss and dishes.
What I love most about this recipe is how adaptable it is. You can swap in whatever you have on hand — different protein, different grains, different add-ins — and it still works. It’s forgiving enough for a beginner cook but impressive enough to serve to company. And honestly, watching a kid take that first bite and realize they actually love squash? That’s the kind of win that makes all the meal prep worth it.
I’d love to hear how this recipe turns out for you. Did your kids have any suggestions that surprised you? Did you try a variation that worked especially well? Drop a comment below and let me know — your ideas might just inspire someone else’s dinner tonight. And if you make this recipe, tag me in your photos. There’s nothing better than seeing stuffed squash making its way onto dinner tables everywhere.
Happy cooking, friends. Here’s to the meals that bring us together, one forkful at a time.
Frequently Asked Questions
Can I use butternut squash instead of acorn squash?
Yes, absolutely! Butternut squash works beautifully in this recipe. Cut it in half lengthwise, scoop out the seeds, and proceed with the same method. Butternut squash is slightly denser, so you may need to add 5-10 minutes to the roasting time. The flavor is a bit sweeter and nuttier than acorn squash, which kids tend to love.
Do I have to remove the sausage casings?
Yes, for this recipe you want loose sausage meat, not whole links. The casings make it difficult to mix the filling evenly and create an uneven texture. Simply slit the casing lengthwise with a sharp knife and squeeze the meat out. It takes about 30 seconds per link and makes a big difference in the final dish.
Can I make this recipe ahead of time for a party?
Definitely! You can assemble the stuffed squash up to 24 hours in advance. Prepare the filling, cut and oil the squash, stuff them, and cover the baking sheet with plastic wrap. Refrigerate until you’re ready to bake. Add about 10 minutes to the roasting time since you’re starting from cold. This is my go-to strategy for holiday dinners when oven space is at a premium.
My kids are picky about textures. Will they like this?
I’ve found that kids who don’t like “squash” often love this recipe because the sausage flavor dominates. The squash becomes very soft and almost sweet, more like a baked potato in texture than a vegetable. If your kids are especially texture-sensitive, try mashing the cooked squash slightly before serving — it becomes almost like a sweet potato mash mixed with the savory filling.
What can I use instead of rice in the filling?
Cooked quinoa, couscous, or even leftover mashed potatoes work well as substitutes. For a lower-carb option, try cauliflower rice — just make sure to squeeze out as much moisture as possible before adding it to the filling. I’ve also used cooked lentils successfully, which adds extra protein and fiber. The key is having something to absorb the moisture from the sausage and squash as they cook.
Pin This Recipe!
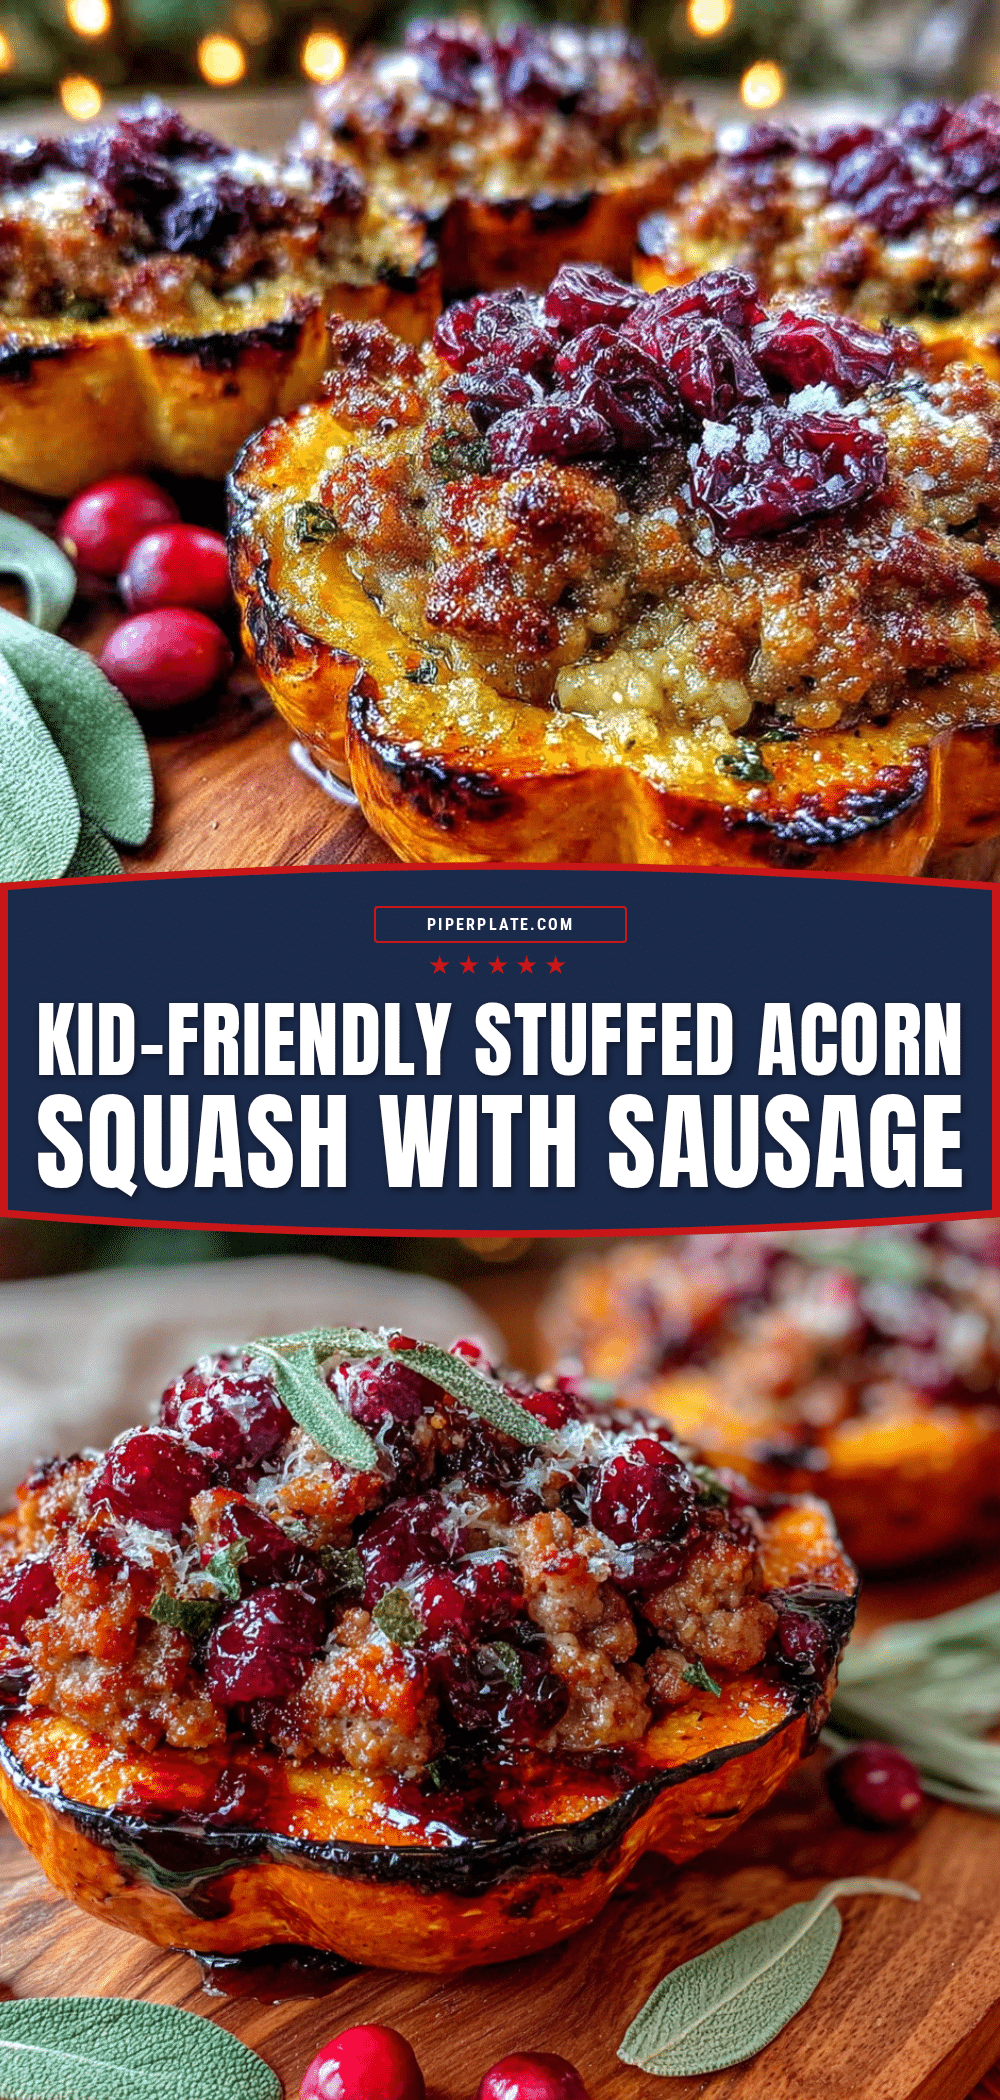
Kid-Friendly Stuffed Acorn Squash with Sausage

This one-pan wonder stuffs raw acorn squash with sweet Italian sausage, rice, and Parmesan, then roasts everything together for perfectly tender squash with a caramelized topping. It’s a budget-friendly, picky eater-approved fall dinner that comes together in about an hour with minimal dishes.
- Prep Time: 15 minutes
- Cook Time: 45 minutes
- Total Time: 1 hour
- Yield: 4 servings 1x
- Category: Main Course
- Cuisine: American
Ingredients
- 2 medium acorn squash
- 1 pound sweet Italian sausage, casings removed
- 1 medium yellow onion, finely diced
- 2 cloves garlic, minced
- 1/2 cup cooked rice
- 1/4 cup grated Parmesan cheese
- 1/4 cup dried cranberries or chopped apple
- 1 teaspoon dried sage
- 1/2 teaspoon salt
- 1/4 teaspoon black pepper
- 2 tablespoons olive oil
- Optional garnish: fresh parsley or thyme
Instructions
- Preheat your oven to 400°F (200°C). Position the rack in the middle of the oven.
- Cut the acorn squash in half. Place each squash on a stable cutting board. Using your sharp chef’s knife, carefully cut from the stem end down through the tip. Scoop out the seeds and stringy pulp using an ice cream scoop or a sturdy spoon.
- Rub the squash with olive oil. Drizzle about 1/2 tablespoon of olive oil over the cut surface and inside cavity of each squash half. Use your hands or a pastry brush to coat evenly. Season the cut surfaces with a pinch of salt and pepper. Place the squash halves cut-side up on your parchment-lined baking sheet.
- Cook the sausage filling. Heat your large skillet over medium-high heat. Add the sausage meat, breaking it up with your wooden spoon as it cooks. Cook for 5-7 minutes, until the sausage is browned and cooked through. Use a slotted spoon to transfer the cooked sausage to a mixing bowl, leaving about 1 tablespoon of rendered fat in the skillet.
- Sauté the onion and garlic. Reduce the heat to medium. Add the diced onion to the skillet with the reserved sausage fat. Cook for 3-4 minutes, stirring occasionally, until the onion is softened and translucent. Add the minced garlic and cook for 30 seconds until fragrant. Transfer the onion mixture to the bowl with the sausage.
- Combine the filling. Add the cooked rice, grated Parmesan, dried cranberries or chopped apple, dried sage, salt, and pepper to the bowl with the sausage and onions. Stir everything together until well combined. Taste the filling and adjust seasoning if needed.
- Stuff the squash halves. Divide the filling evenly among the four squash halves. Pack it in gently — you want it mounded on top, not crammed in. Each half should get about 1/2 to 3/4 cup of filling, depending on the size of your squash.
- Roast the stuffed squash. Place the baking sheet in the preheated oven. Roast for 35-45 minutes, until the squash is fork-tender and the filling is golden brown on top. The squash should be easy to pierce with a fork — if it resists, give it another 5-10 minutes. The filling should be bubbling around the edges.
- Rest and serve. Remove the baking sheet from the oven and let the squash rest for 5 minutes. This allows the filling to set slightly and makes the squash easier to handle. Sprinkle with fresh parsley or thyme if using, and serve warm.
Notes
If the filling starts browning too quickly before the squash is tender, loosely tent a piece of aluminum foil over the baking sheet for the last 10-15 minutes of cooking. Every oven runs a little differently, so start checking at the 35-minute mark. The squash should offer no resistance when pierced with a fork. Let the squash rest for 5 minutes before serving to allow the filling to set.
Nutrition
- Serving Size: 1 stuffed squash hal
- Calories: 385
- Sugar: 8
- Sodium: 680
- Fat: 18
- Saturated Fat: 6
- Carbohydrates: 38
- Fiber: 6
- Protein: 22
Keywords: stuffed acorn squash, sausage stuffed squash, kid-friendly squash, fall dinner, one-pan meal, acorn squash recipe


